Recently, I was asked to cut down the cost of hosting an ASP .NET Core website on Azure. The website is originally hosted on Azure Web App so there is a fixed cost to it that we need to pay per month. Hence, the first solution that comes to my mind is to move it from Web App to Function because the website is a static website and it is not expecting large group of visitors in any given point of time.
So why do I choose to use Azure Function? Unlike the Web Apps, Functions provide the Consumption Plan where instances of the Functions host are dynamically added and removed based on the number of incoming events. This serverless plan scales automatically, and we are billed only when the Functions are running. Hence, when we switch to use Azure Function to serve the static website with the Consumption Plan, we will be able to save significantly.
Serve Static Content with Azure Function
How do we serve static website with Azure Functions?
There are many online tutorials about this but none of them that I found are based on the latest Azure Portal GUI in 2020. So hopefully my article here will help people out there who are using the latest Azure Portal.
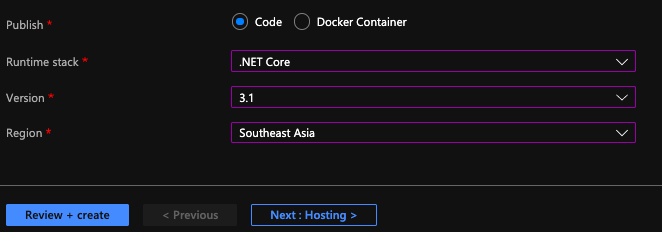
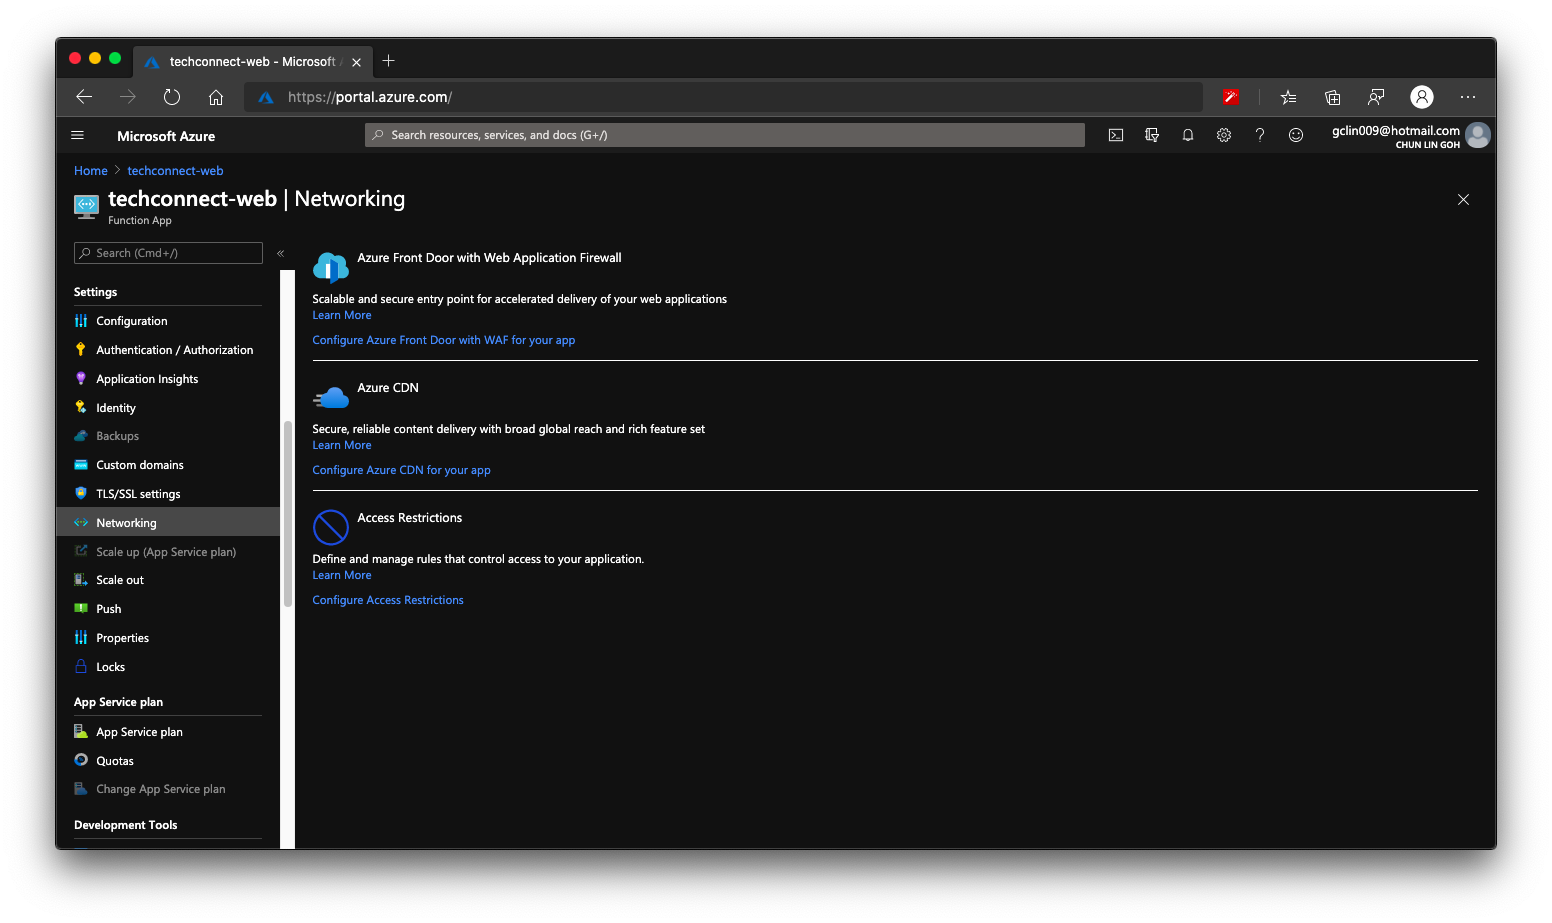
The following screenshot shows the setup of my Azure Function.
After that, we will create a HTTP triggered function in the Azure Function.
Then for the Function itself, we can add the following code in run.csx.
using Microsoft.AspNetCore.Mvc;

public static async Task<IActionResult> Run(HttpRequest req, ILogger log){

    string pathValue = req.Path.Value;

    ...

    return new FileStreamResult(
        File.OpenRead(
            @"d:\home\site\wwwroot\web-itself\website\index.html"),
            "text/html; charset=UTF-8");
}
The pathValue helps the Function to be able to serve different web pages based on different value in the URL path. For example, /page1 will load page1.html and /page2 will load page2.html.
If the Function you build is only to serve a single HTML file, then you can just directly return the FileStreamResult without relying on the pathValue.
Configure the Route Template
To have the pathValue working as expected, we first need to configure the route template of the Function. To do so, we can head to the Integration tab of the Function, as shown in the screenshot below.

For the Route Template, we set it to be “web-itself/{page?}” because web-itself is the name of our Function in this case. The question mark in the “{page?}” means that the page is an optional argument in the URL.
So why do we have to include the Function name “web-itself” in the Route Template? The values, according to the documentation, should be a relative path. Since, by default, the Function URL is “xxx.azurewebsites.net/api/web-itself”, so the relative path needs to start from “web-itself”.
Also, since this is going to be an URL of our website, we can change the authorisation level to be “Anonymous” and set GET as the only accepted HTTP method.
Upload the Static Files
So where do we upload the static files to? As the code above shows, the file actually sit in the d:\home\site\wwwroot. How do we upload the static files to this directory?
We need to head to the Kudu console of the Azure Function, and click on the CMD menu item, as shown below. By the way, Kudu console can be found under Development Tools > Advanced Tools > Go of the Azure Function on the Portal.
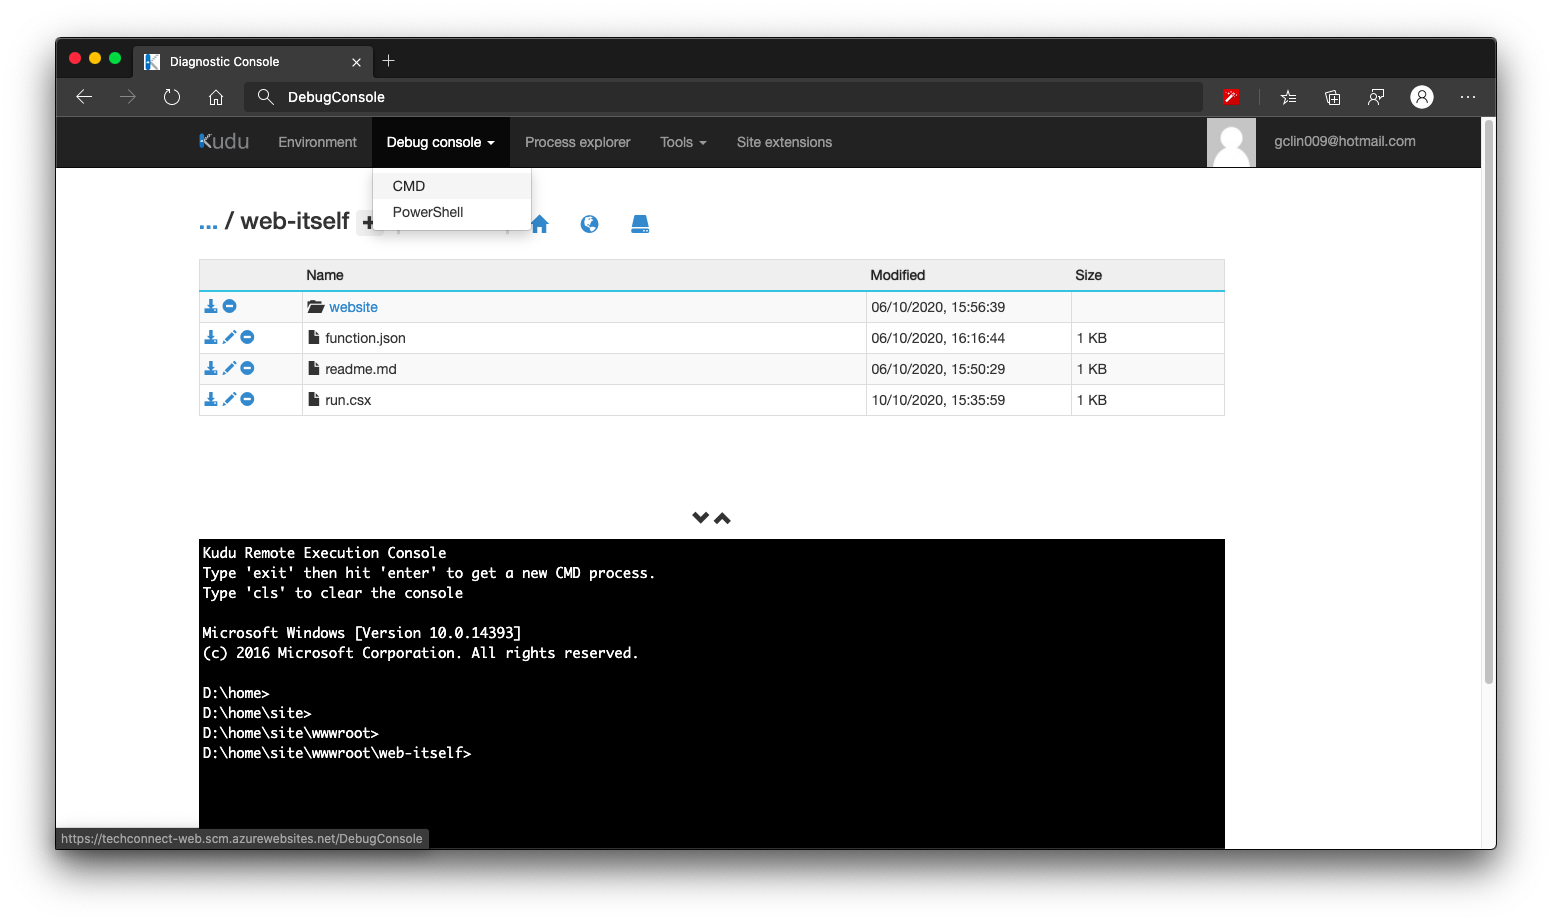
We then navigate to the folder which keeps the run.csx of the Function (which is web-itself in my case here). Then we can create a folder called website, for example, to host our static content. What we need to do after this is just uploading the HTML files to this website folder.
Handle JavaScript, CSS, and Other Static Files
How about other static files such as JavaScript, CSS, and images?
Yes, we can use the same way above to serve these files. However, that might be too troublesome because each of them has different MIME Type we need to specify.
So another way of doing that is to store all these files on Azure Storage. So the links in the HTML will be absolute URLs to the files on the Azure Storage.
There is one cool thing on Azure Storage is that starting from 2013, the Azure storage services support Cross-Origin Resource Sharing (CORS) for the Blob, Table, and Queue services. So we can set CORS rules individually for each of the Azure Storage services.
Enable Azure CDN for Azure Function
Finally we can enable Azure CDN for our Azure Function. So that if next time we need to move back to host our web pages on Azure Web App or even Azure Storage, we don’t have to change our CNAME again.
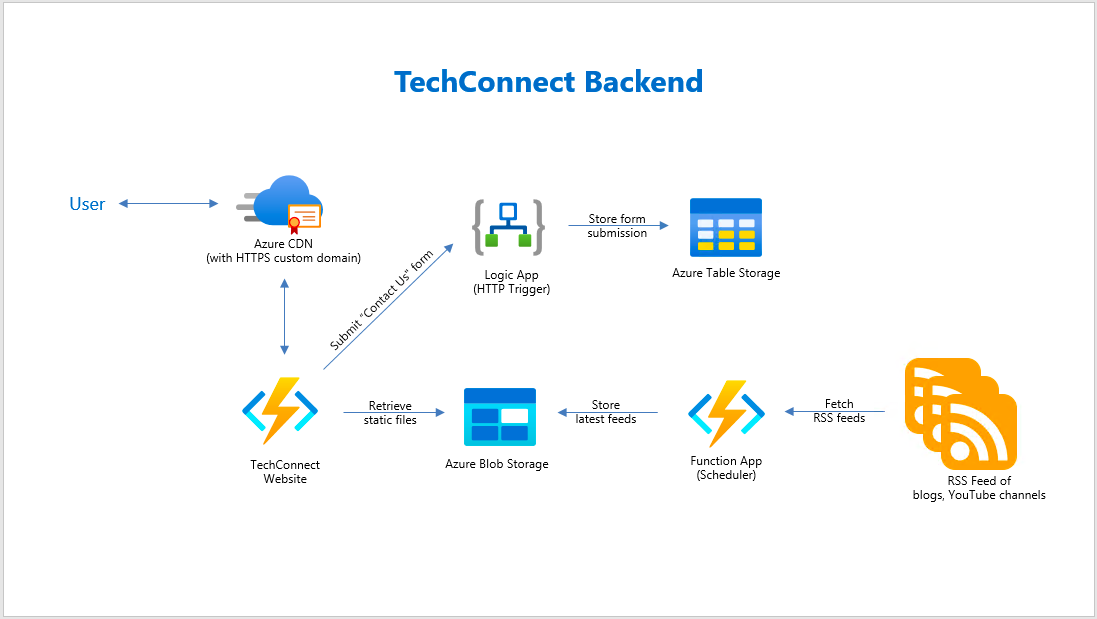
Overall
Previously, I wrote about how I structured the TechConnect website backend. So with this new approach, now it looks as follows, which is much simpler.