I was recently asked about how to unit test stored procedures before deploying to servers. Unfortunately, there are not much discussions about unit testing stored procedures, especially with tools like SSDT and Azure DevOps. Hence, I decide to write this walkthrough to share my approach to this issue.
PROJECT GITHUB REPOSITORY
The complete source code of this project can be found at https://github.com/goh-chunlin/Lunar.Spending.
Unit Testing
According to The Art of Unit Testing, a unit test is an automated piece of code that invokes the unit of work being tested, and then checks some assumptions about a single end result of that unit.
Without unit testing, one has no choice but to rely on system and integration tests which are normally performed in the later stage of the SDLC. Some teams may even resort to the troublesome way, i.e. manually testing the end product they’re developing to invoke their codes.
Unit testing of stored procedures is also very crucial. If the bugs in stored procedures are not caught in the early stage of development, it is very challenging to rollback the data changes that have been made to the database.
Setup SSDT (SQL Server Data Tools)
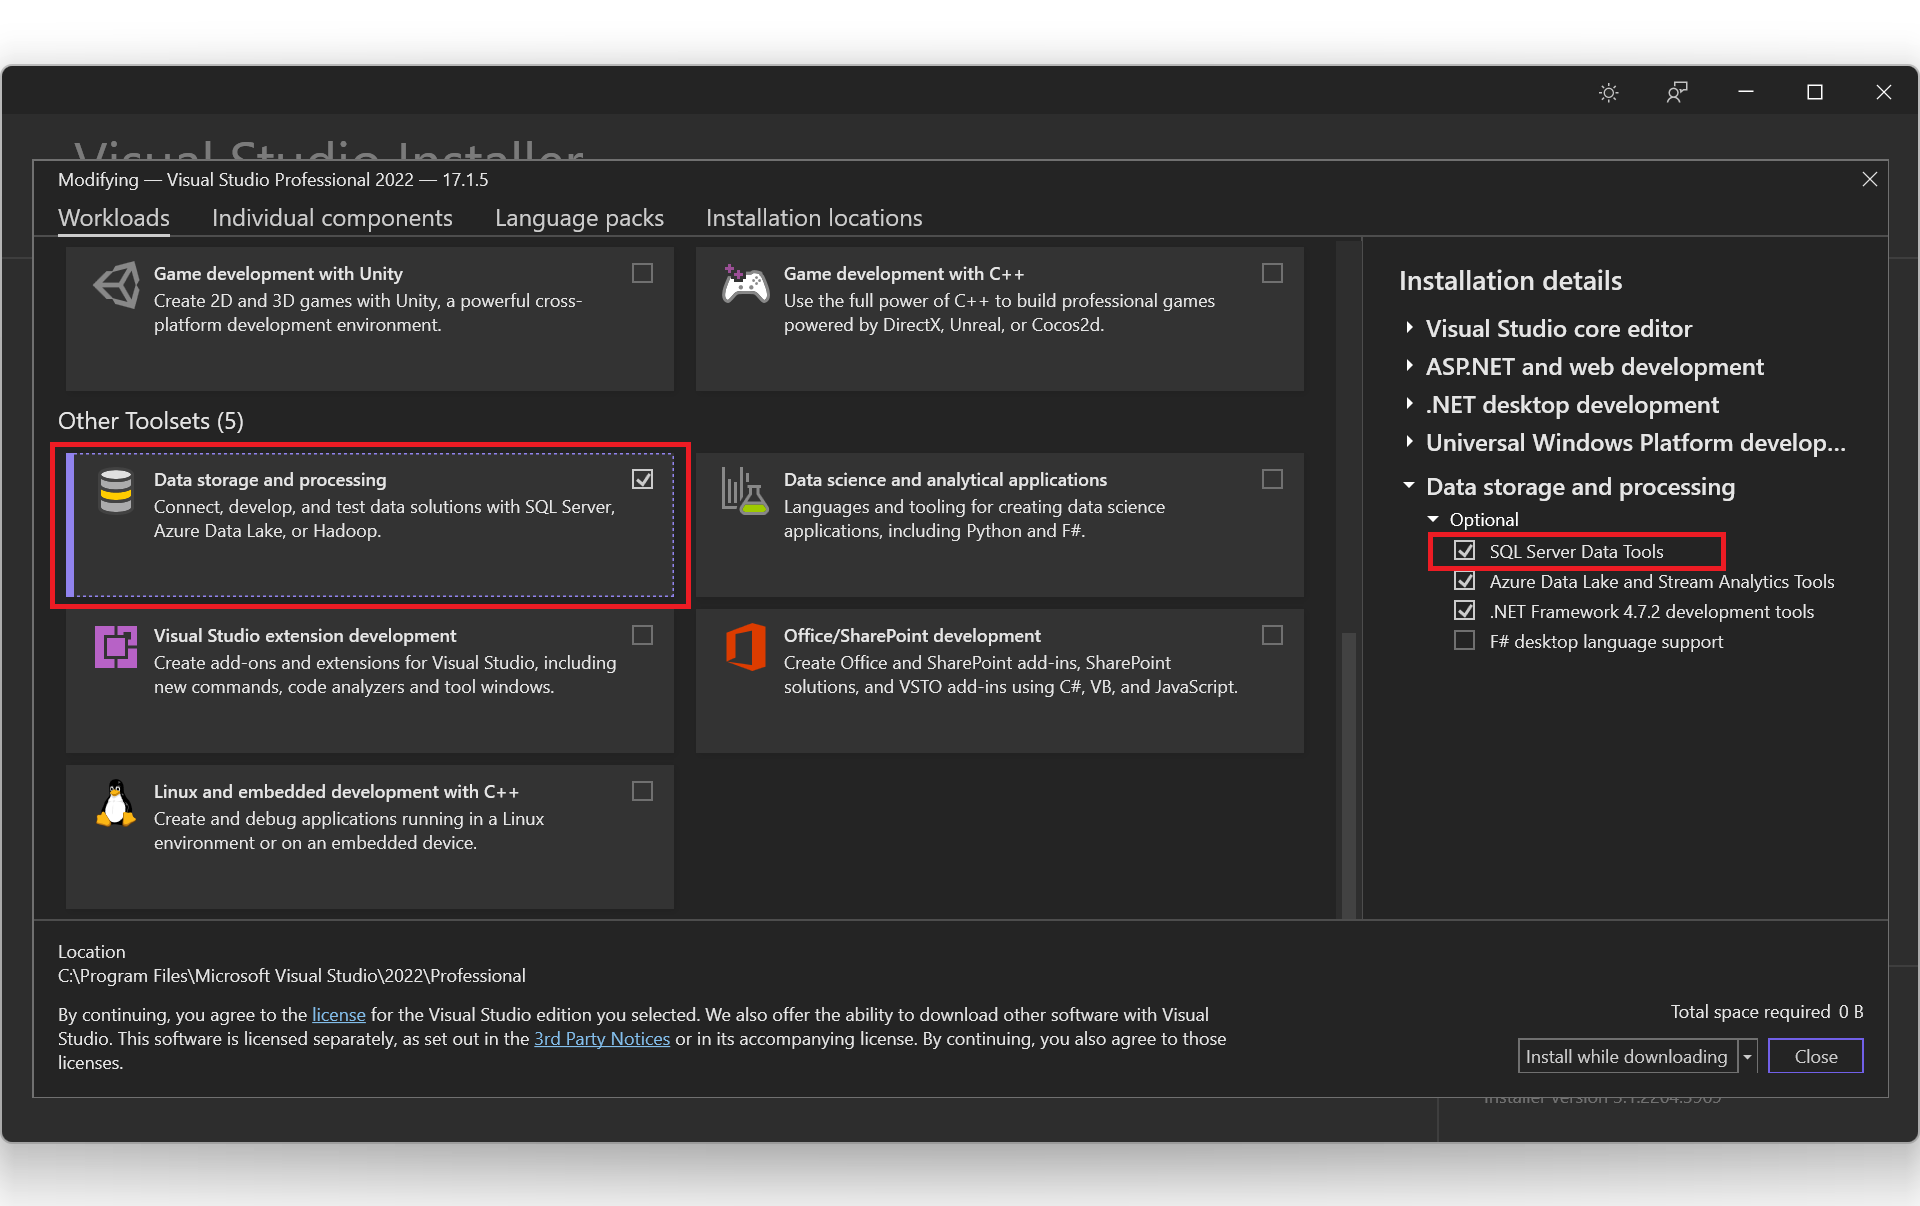
SSDT is a development tool for building SQL Server relational databases, including databases in Azure SQL. The core SSDT functionality to create database projects has remained integral to Visual Studio 2022. Thus, we can easily include SSDT by selecting the “Data storage and processing” workload in the Visual Studio Installer, as shown below.
With SSDT, we can work directly with a connected database instance on/off-premise. We can use SSDT Transact-SQL design capabilities to build, debug, maintain, and refactor databases. In this article, we will be using SSDT to create unit tests that verify the behavior of several stored procedures.
Create a New Database Project
In this article, we will assume that we have an existing database hosted on Azure SQL server.
Firstly, as shown in the screenshot below, we need to create a new database project in order to import database schema and stored procedures from the database on Azure.

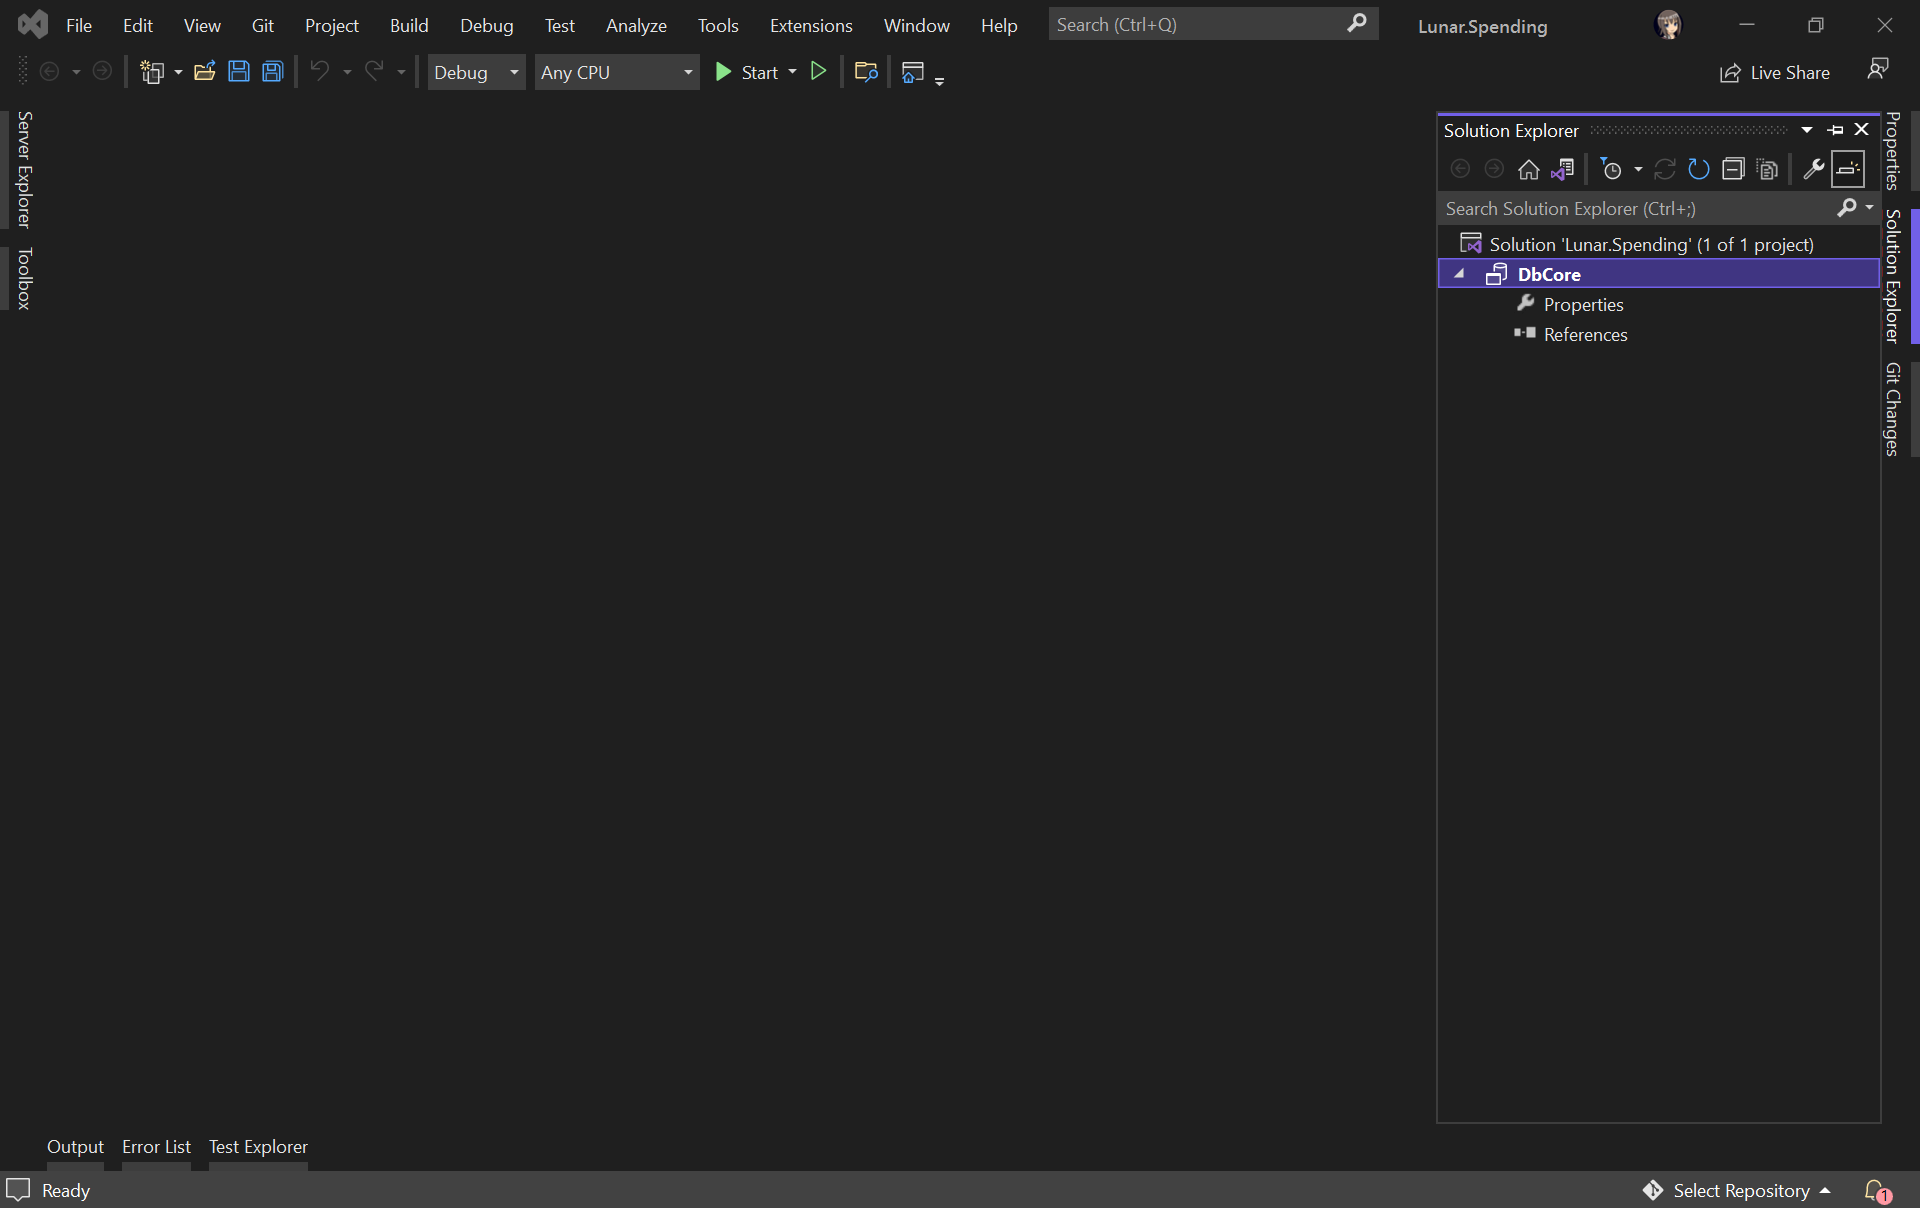
Let’s name our project DbCore. We will then see a simple DbCore project shown in our Solution Explorer, as demonstrated in the screenshot below.
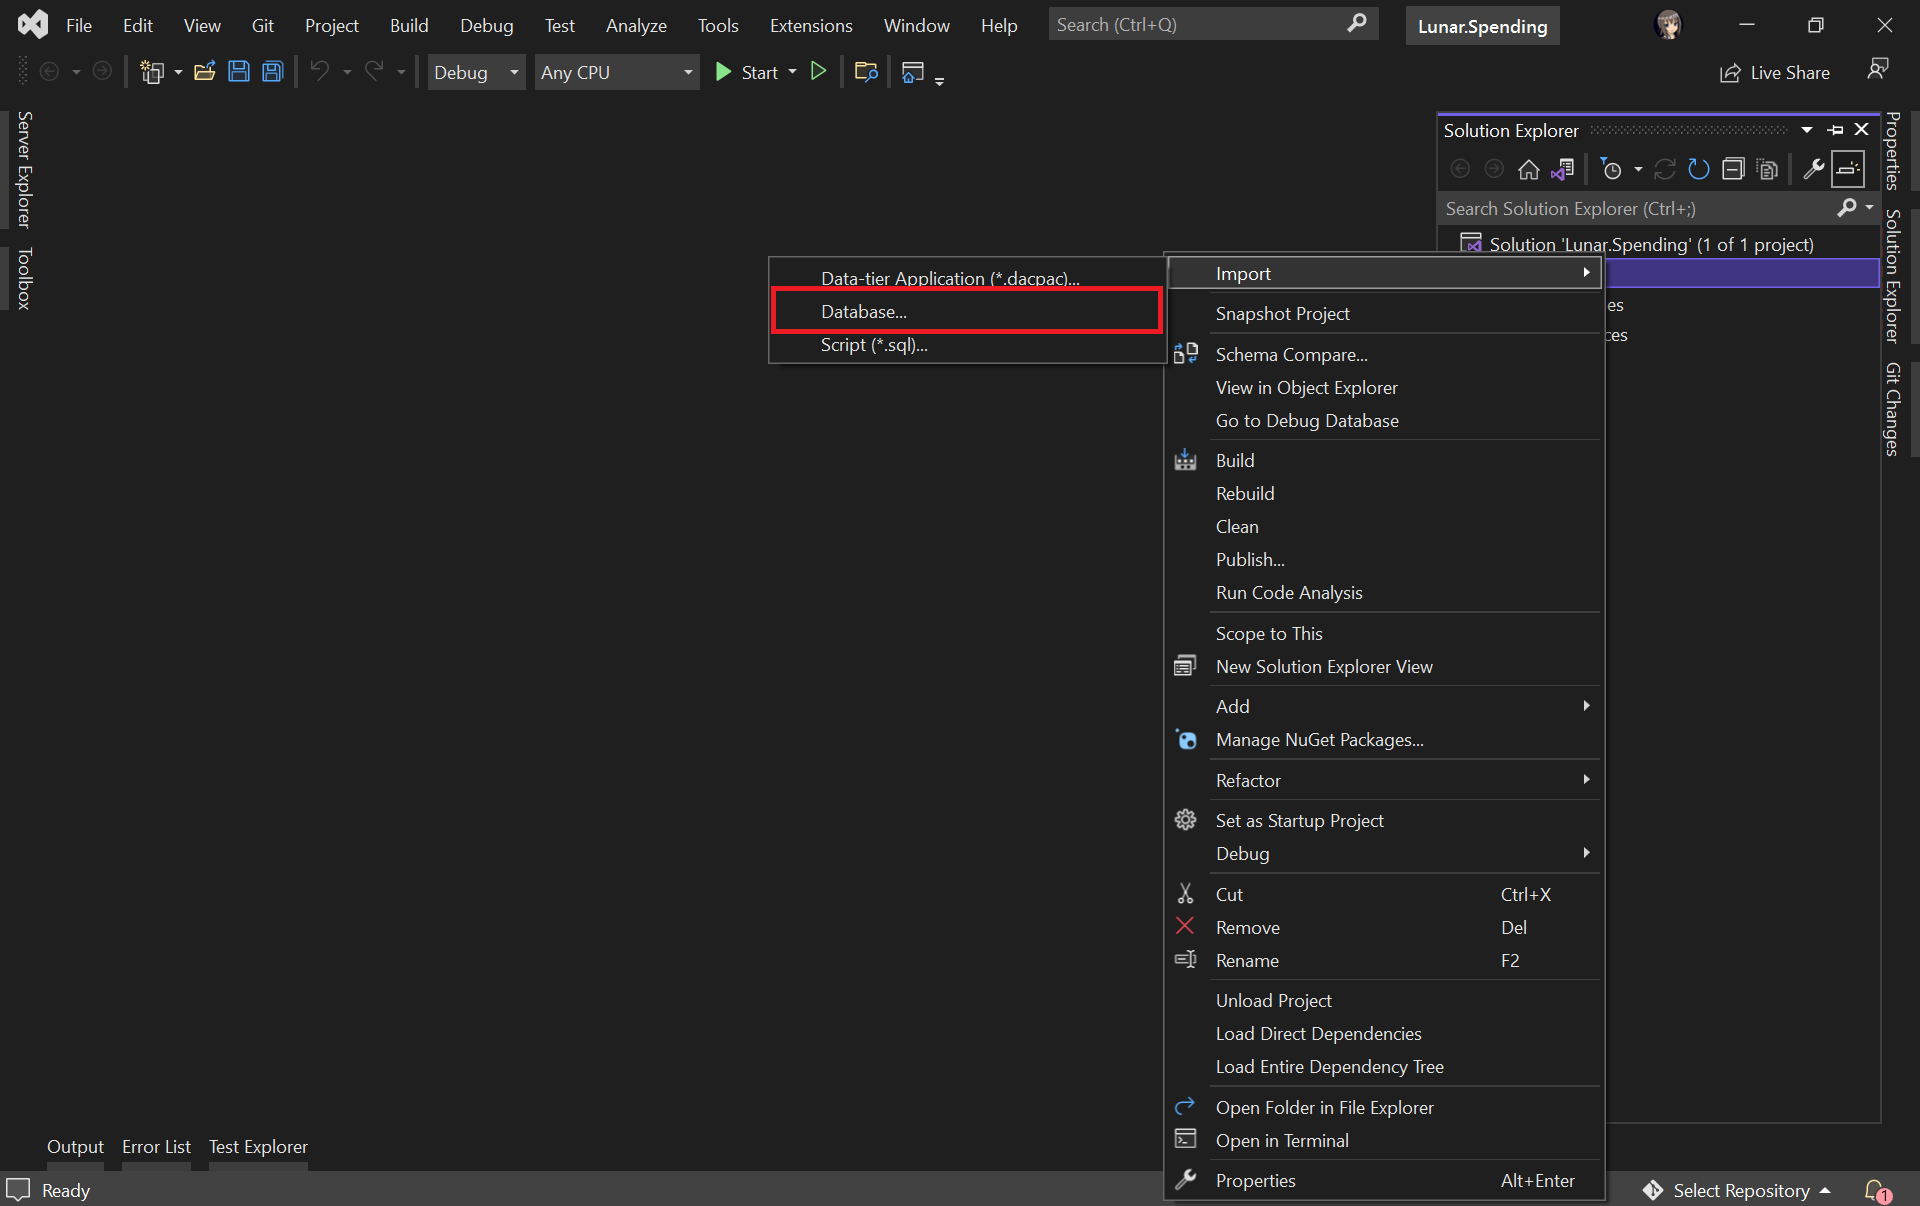
Next, we will import our Azure database into the database project by right-clicking on it in the Solution Explorer.
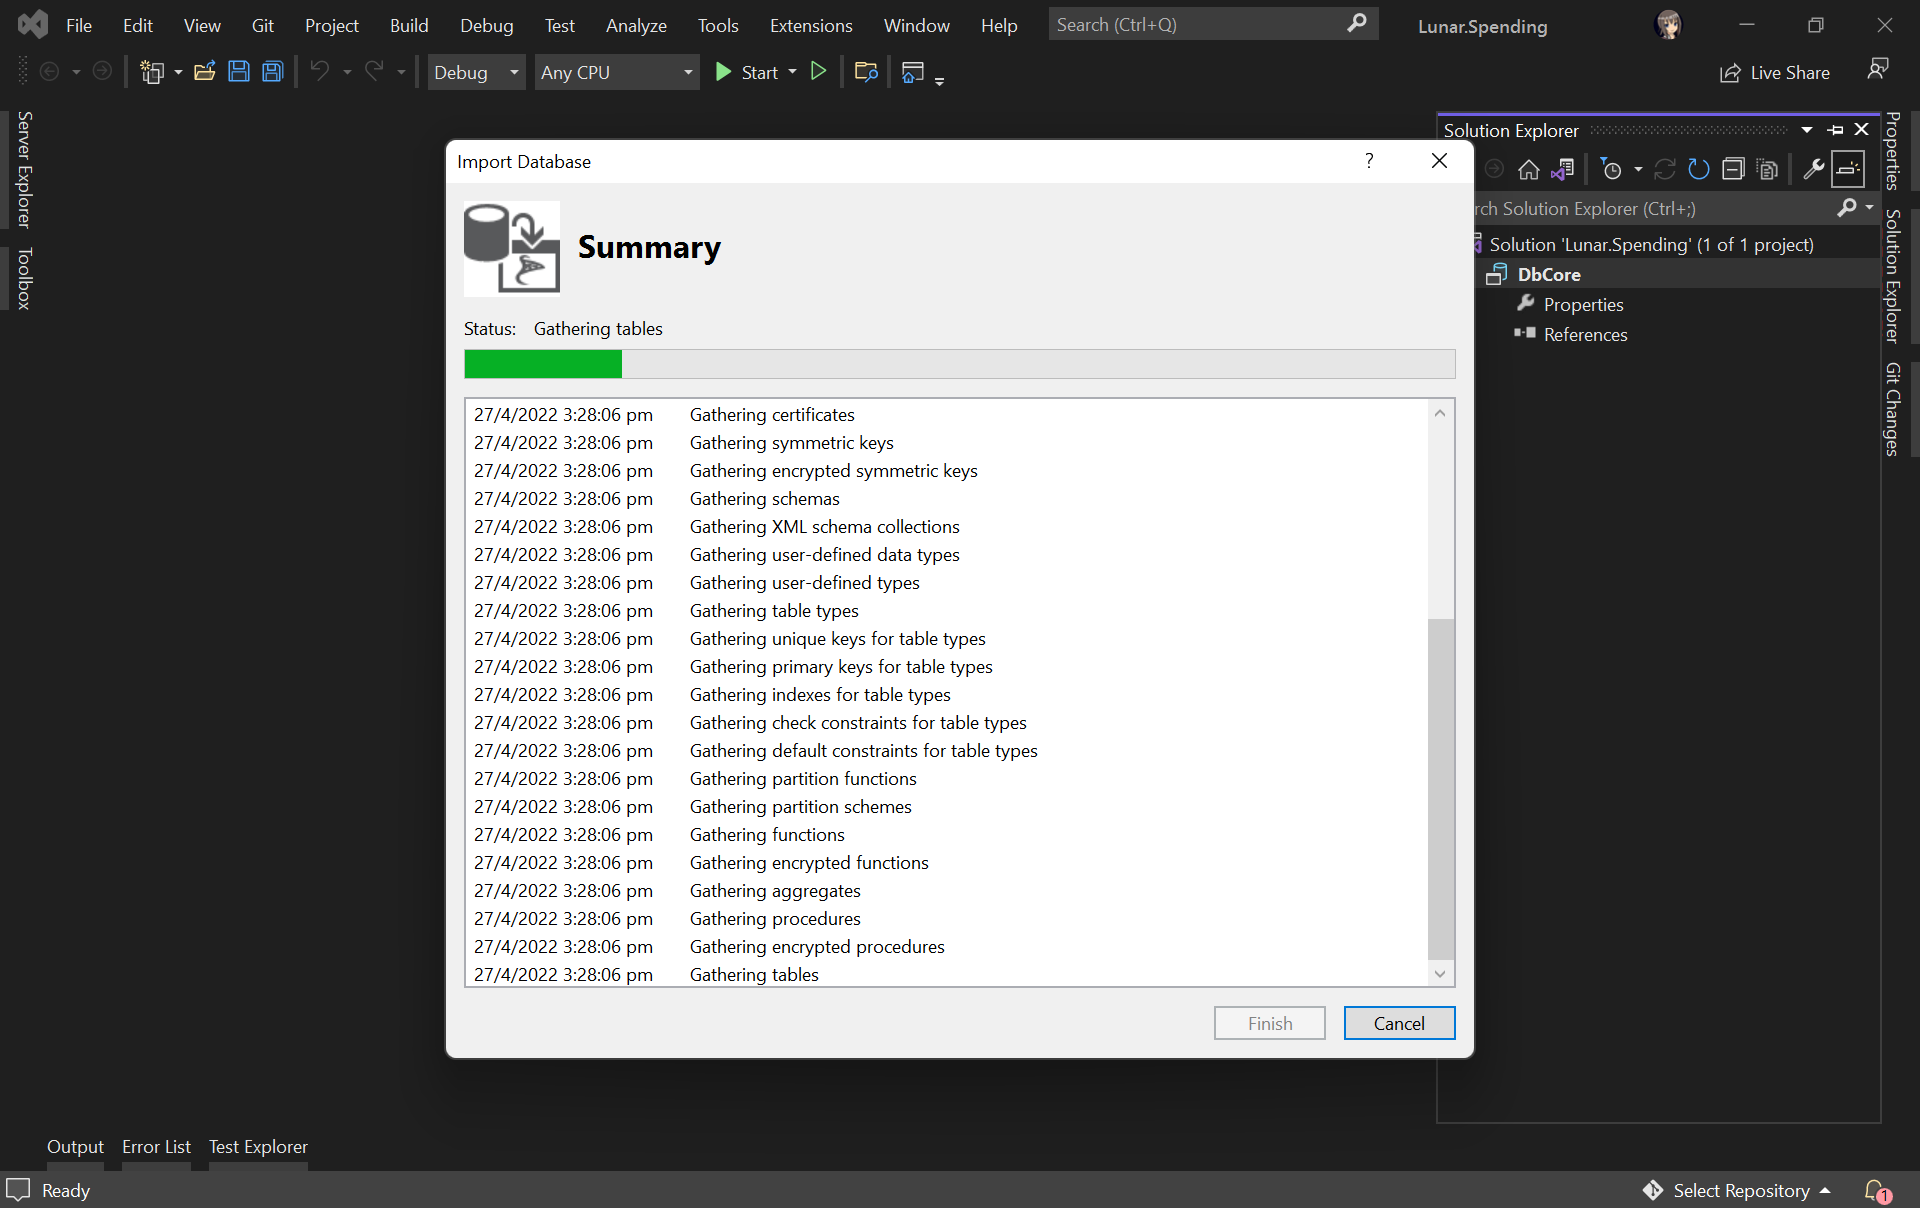
The widget will then import the data from the Azure database based on the given connection string, as shown below.
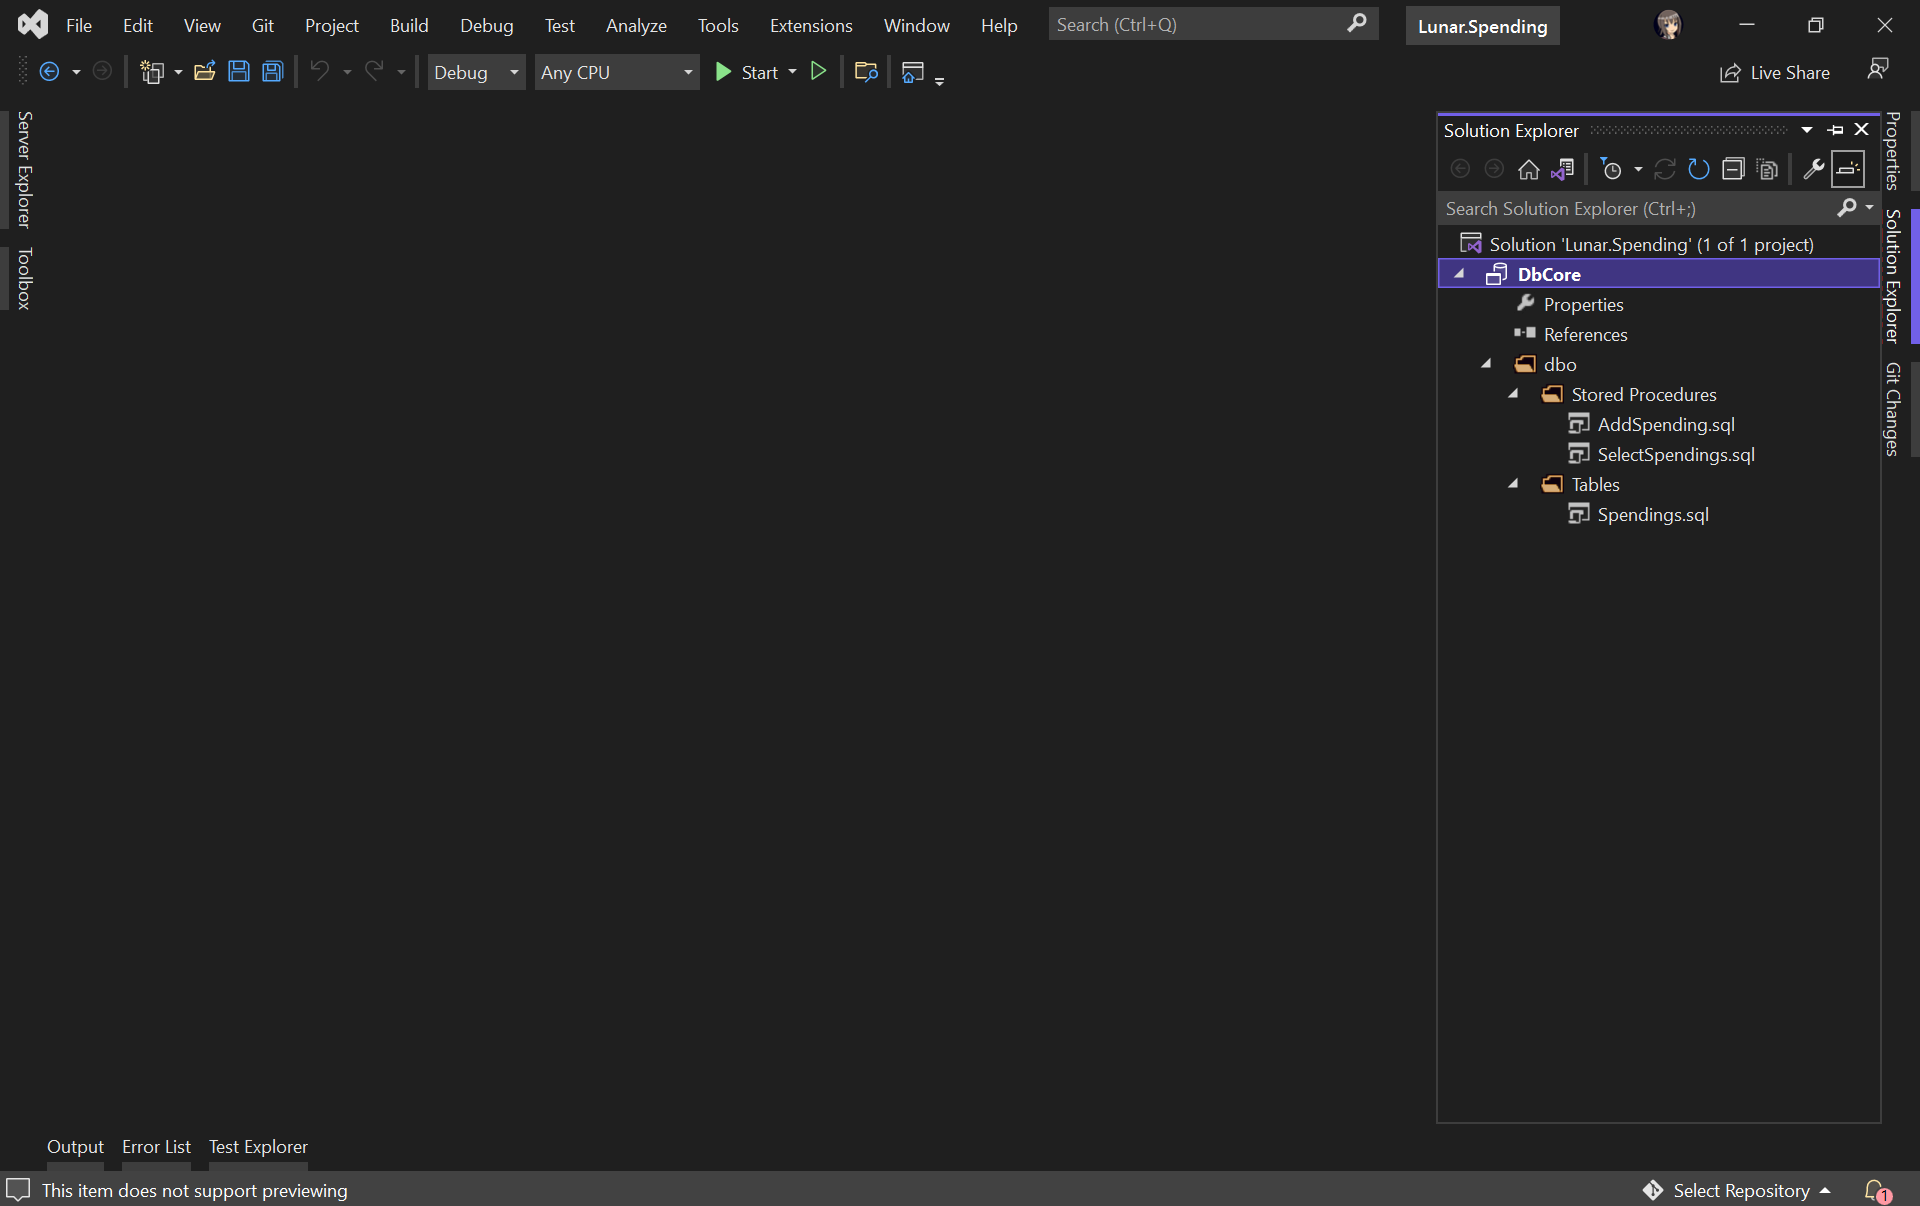
Once the import is done, we shall see our tables and stored procedures listed under the dbo directory in Solution Explorer, as shown below.
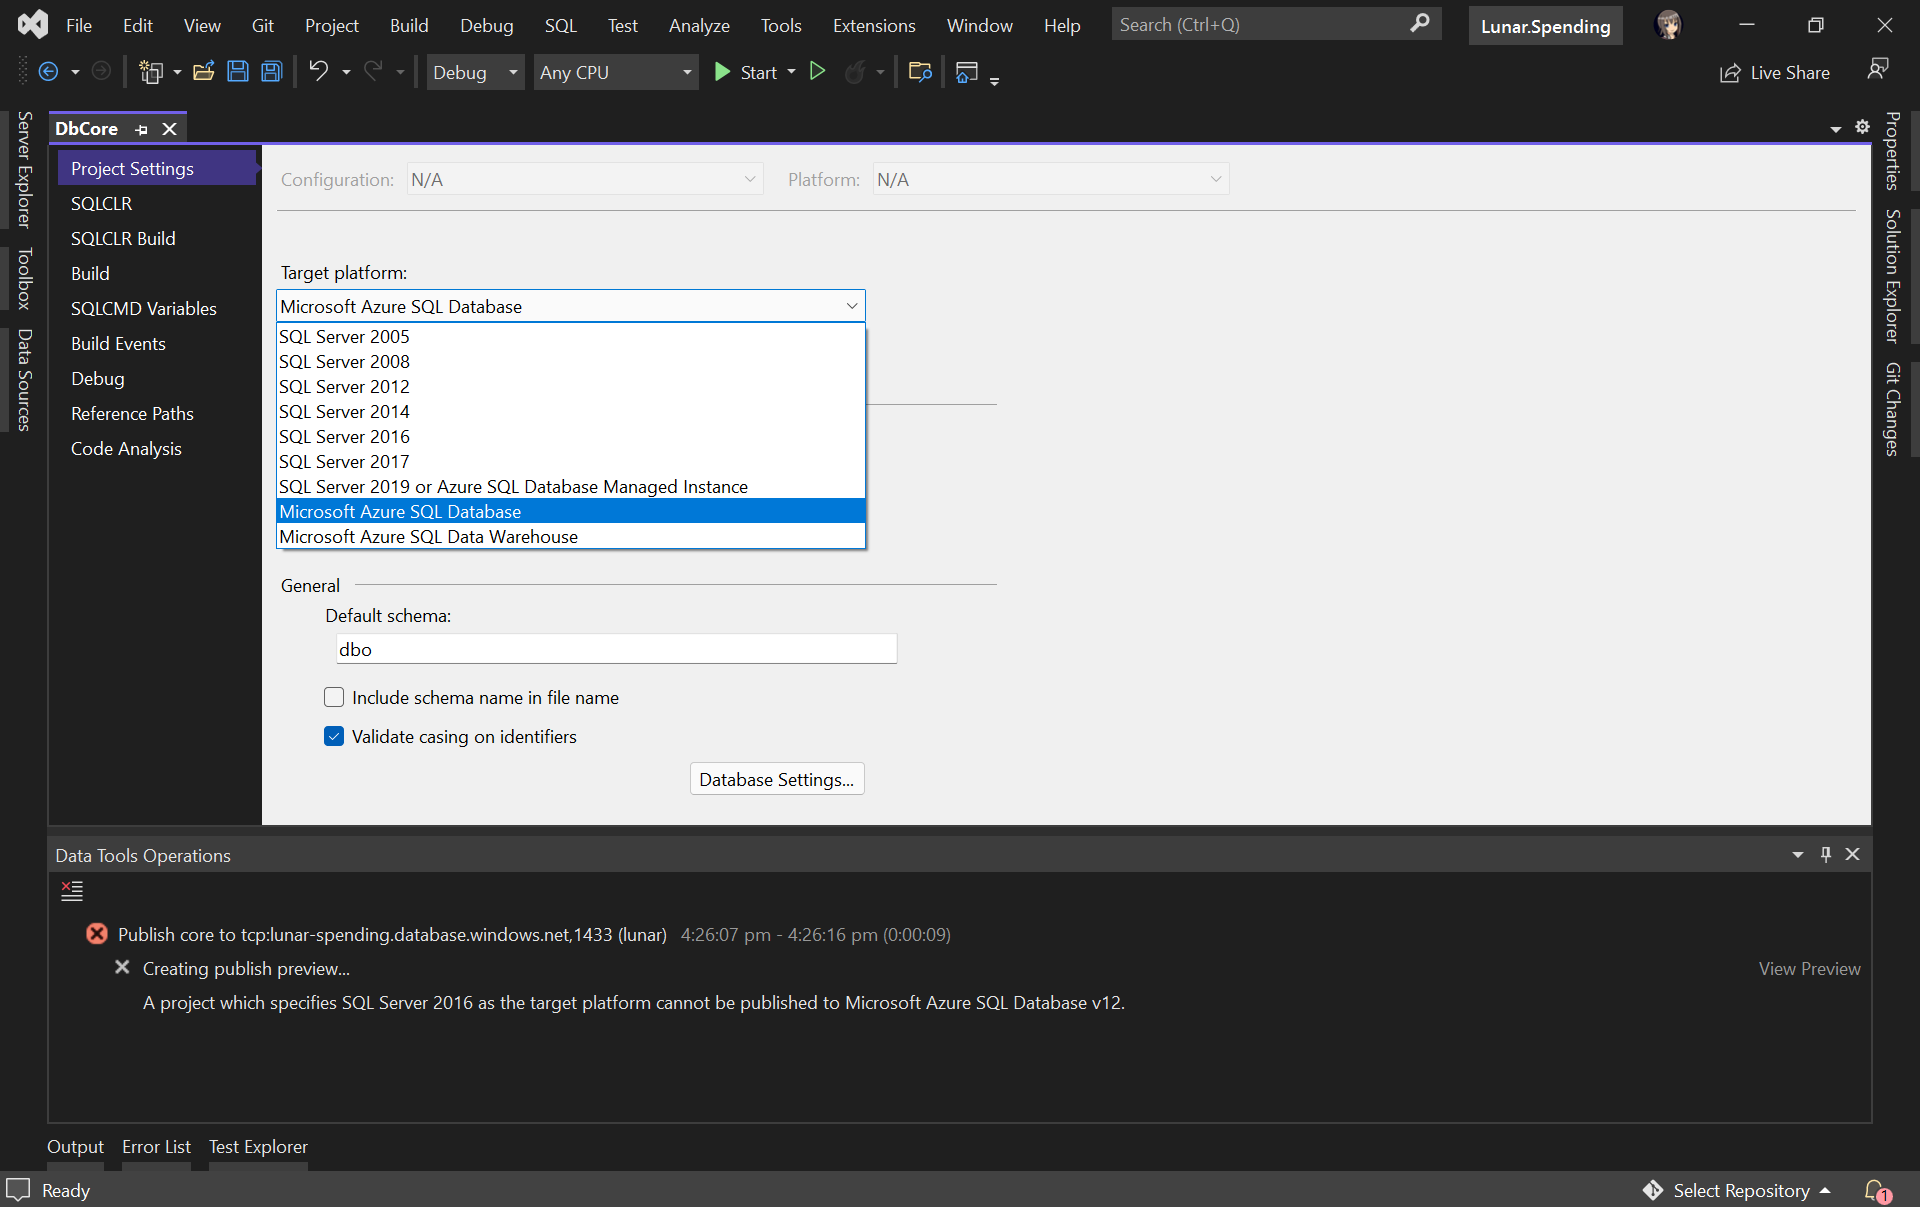
Before we continue, we need to edit the Target Platform of our database project accordingly, as shown in the following screenshot, otherwise we will not be able to publish the database later.
Create Unit Test for Stored Procedure
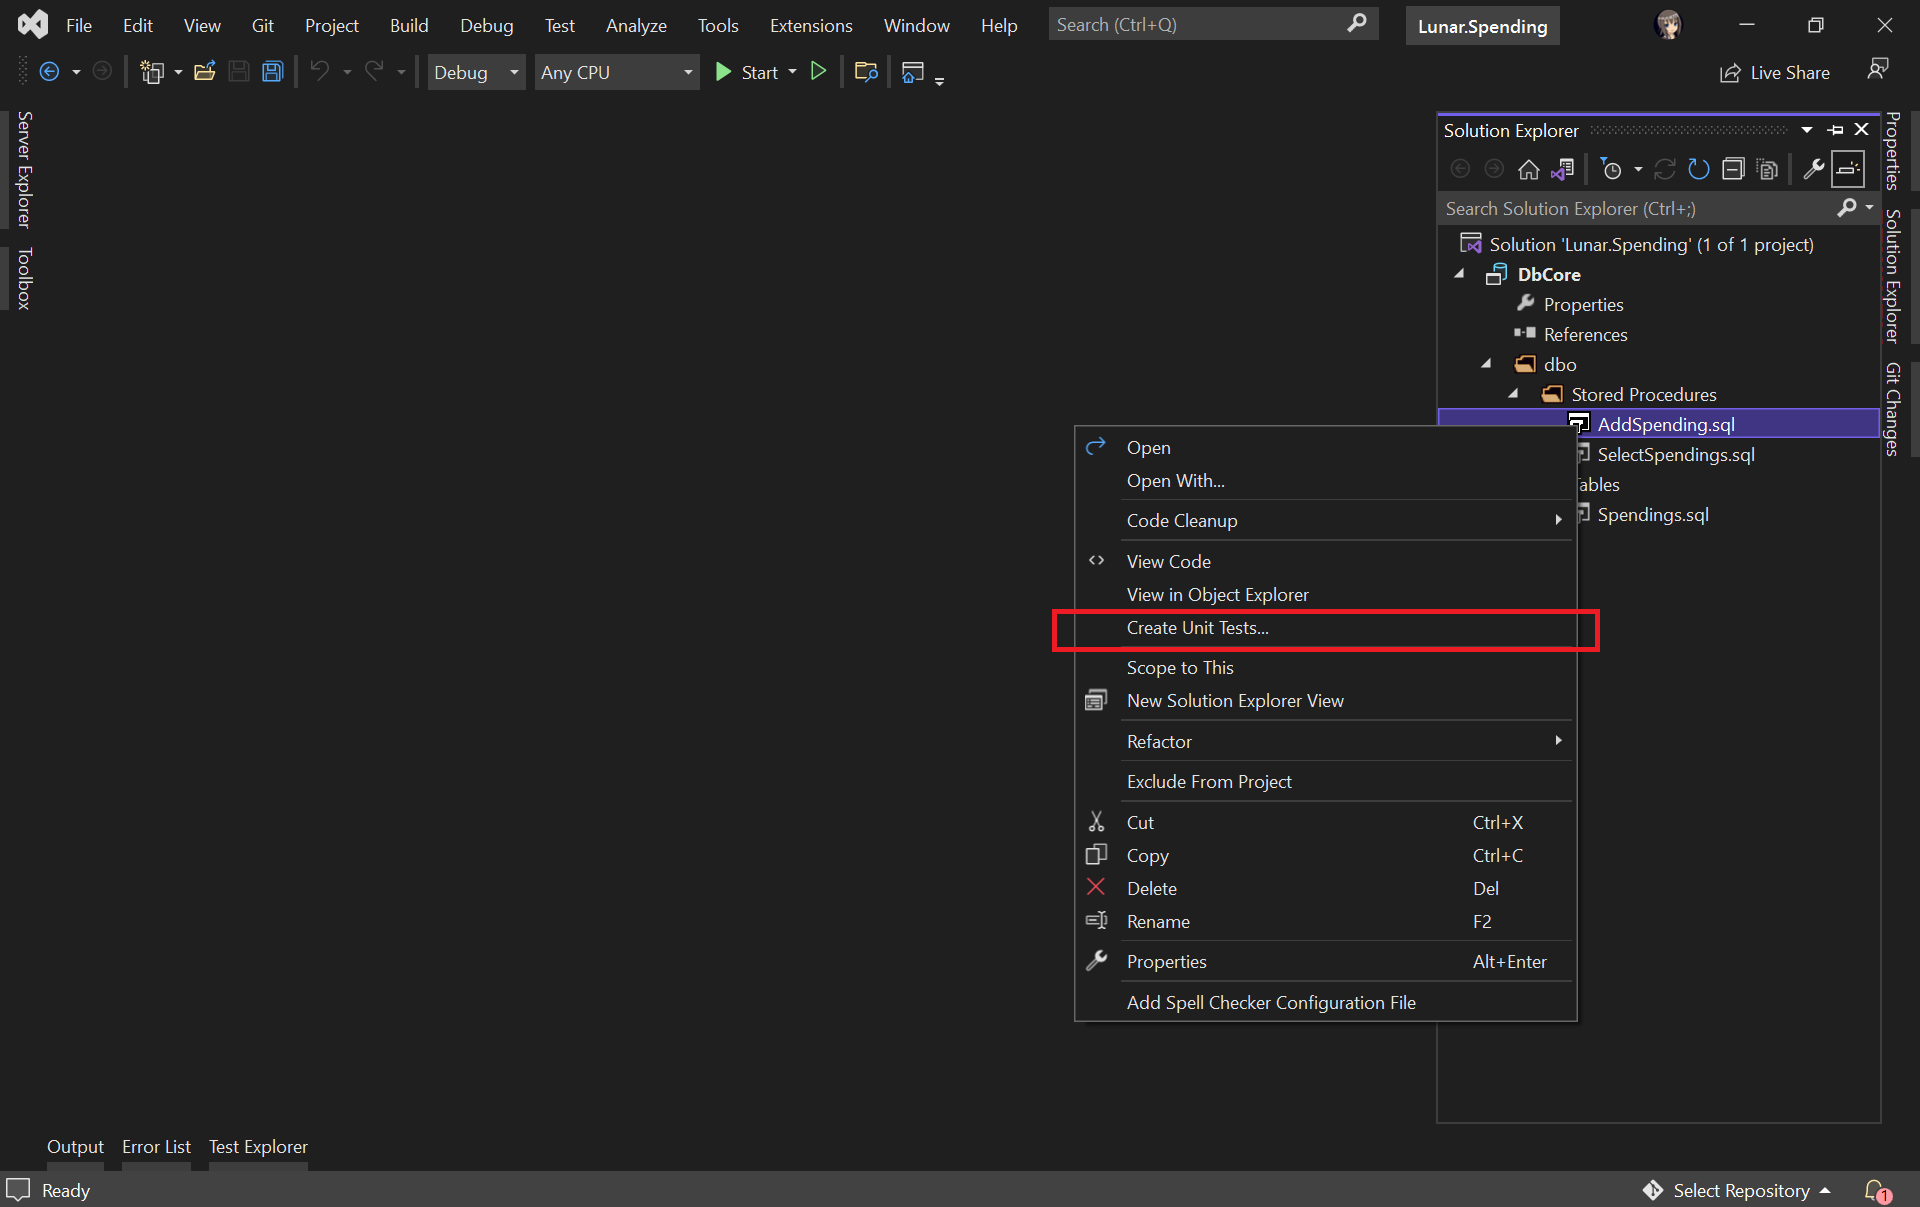
Let’s say we would like to unit test the AddSpending stored procedure. What we need to do is simply right-clicking the AddSpending stored procedure and then click on the “Create Unit Tests…” option, as demonstrated below.
We will then be asked for the connection string of the database that the unit test project will be connecting to. Once the project has been successfully created, we will be given a template unit test as follows.
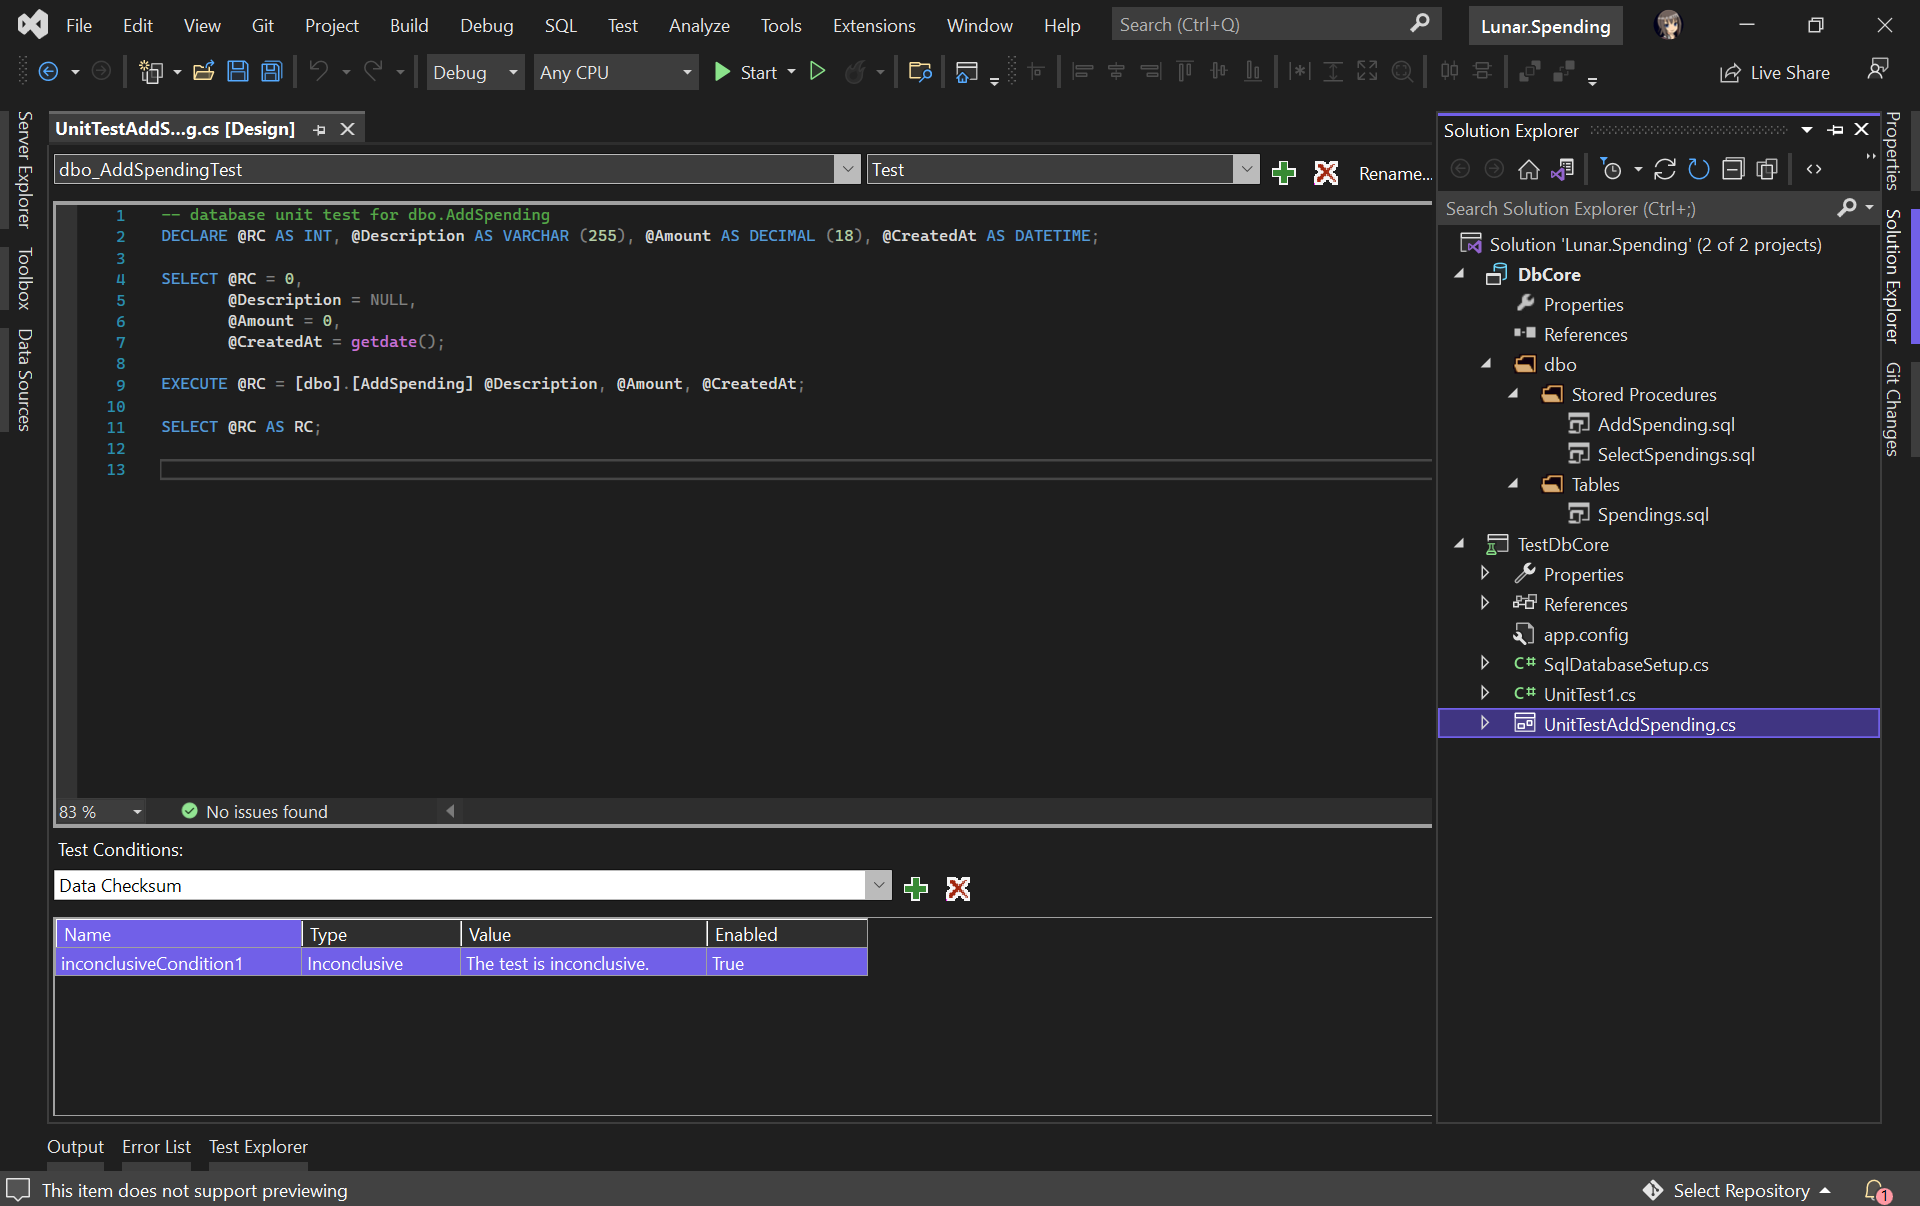
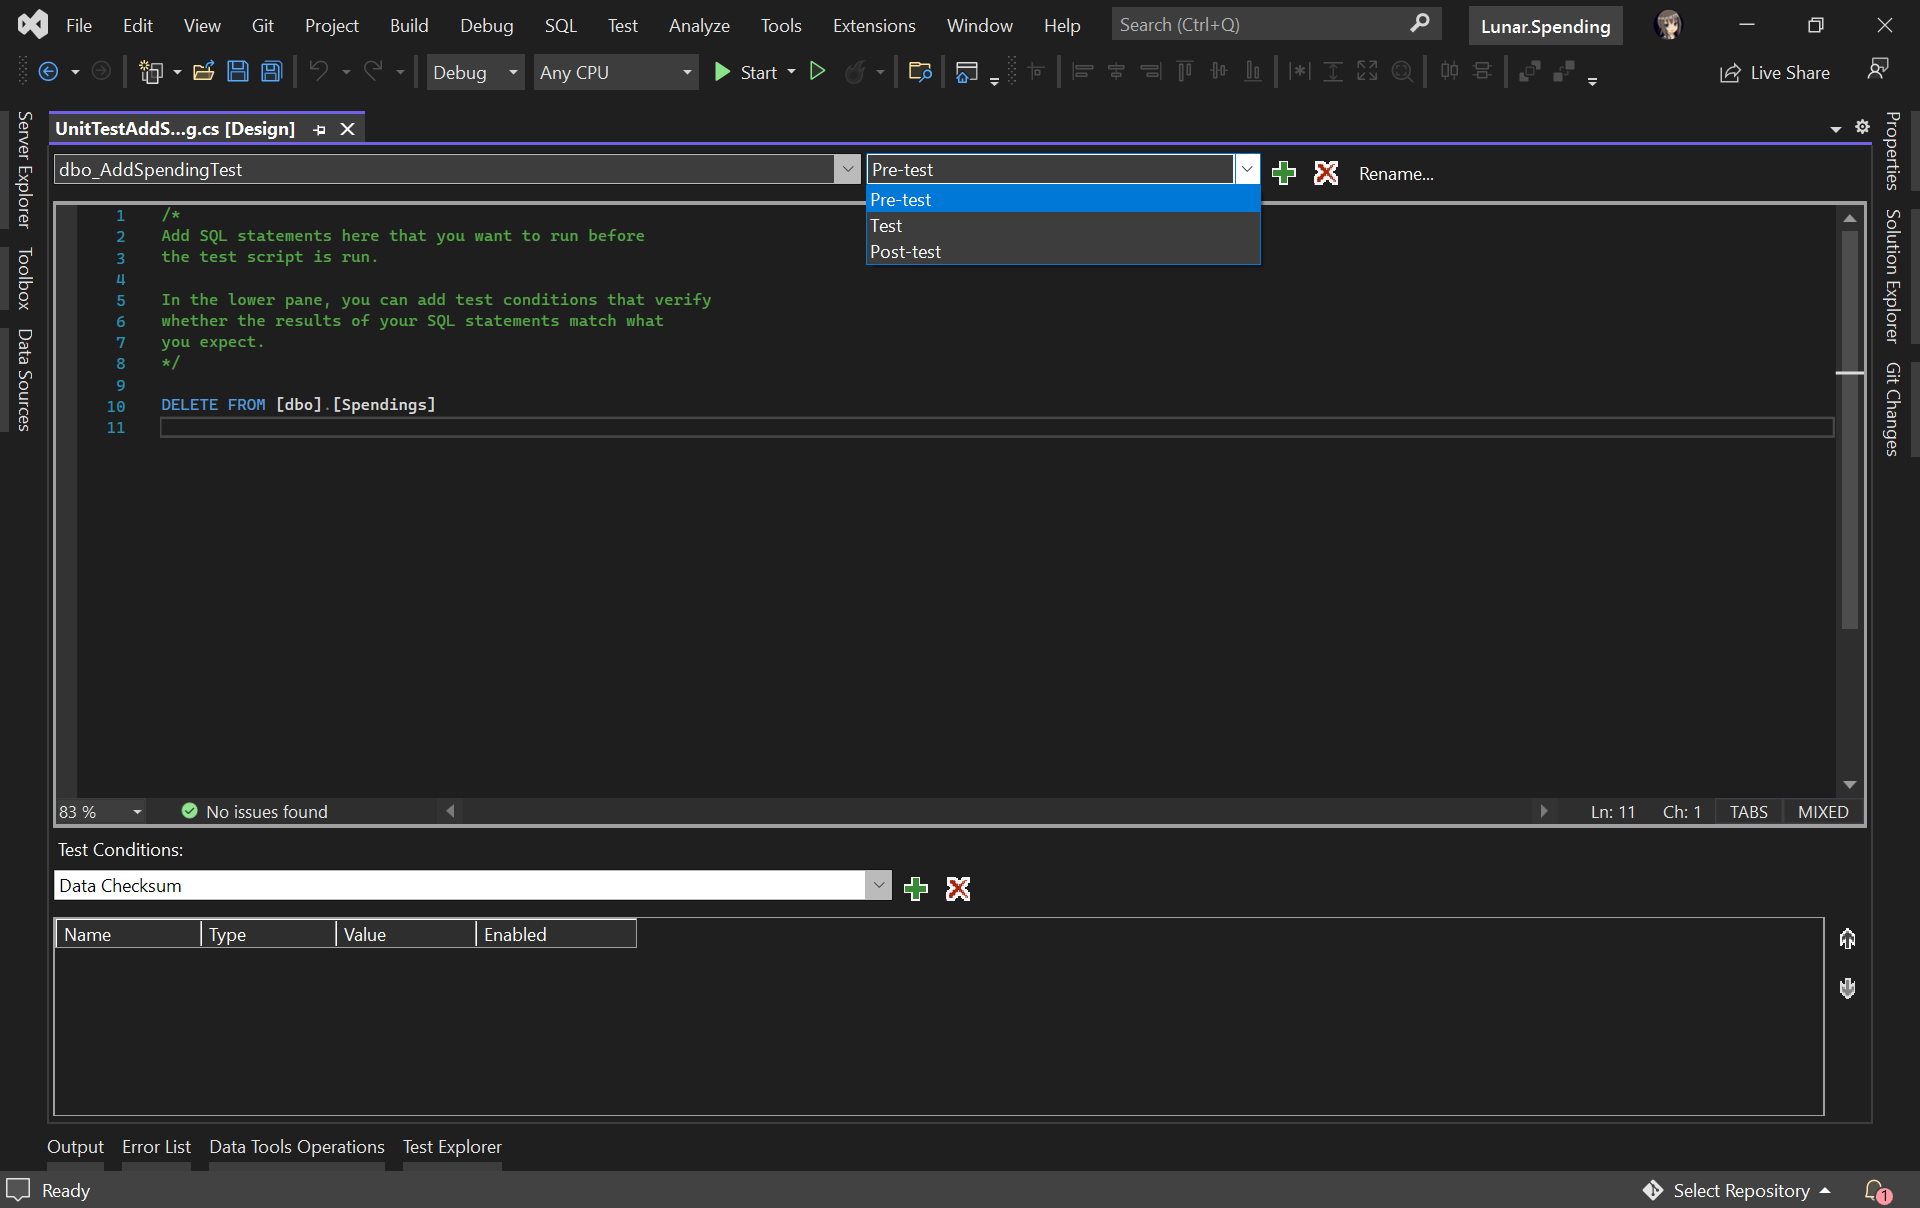
We can include pre and post test SQL statements which will be run before and after the test script is executed, respectively.
For example, we would like to have a clean Spendings table before the unit test runs, we can have the following SQL script to delete all rows in the table.
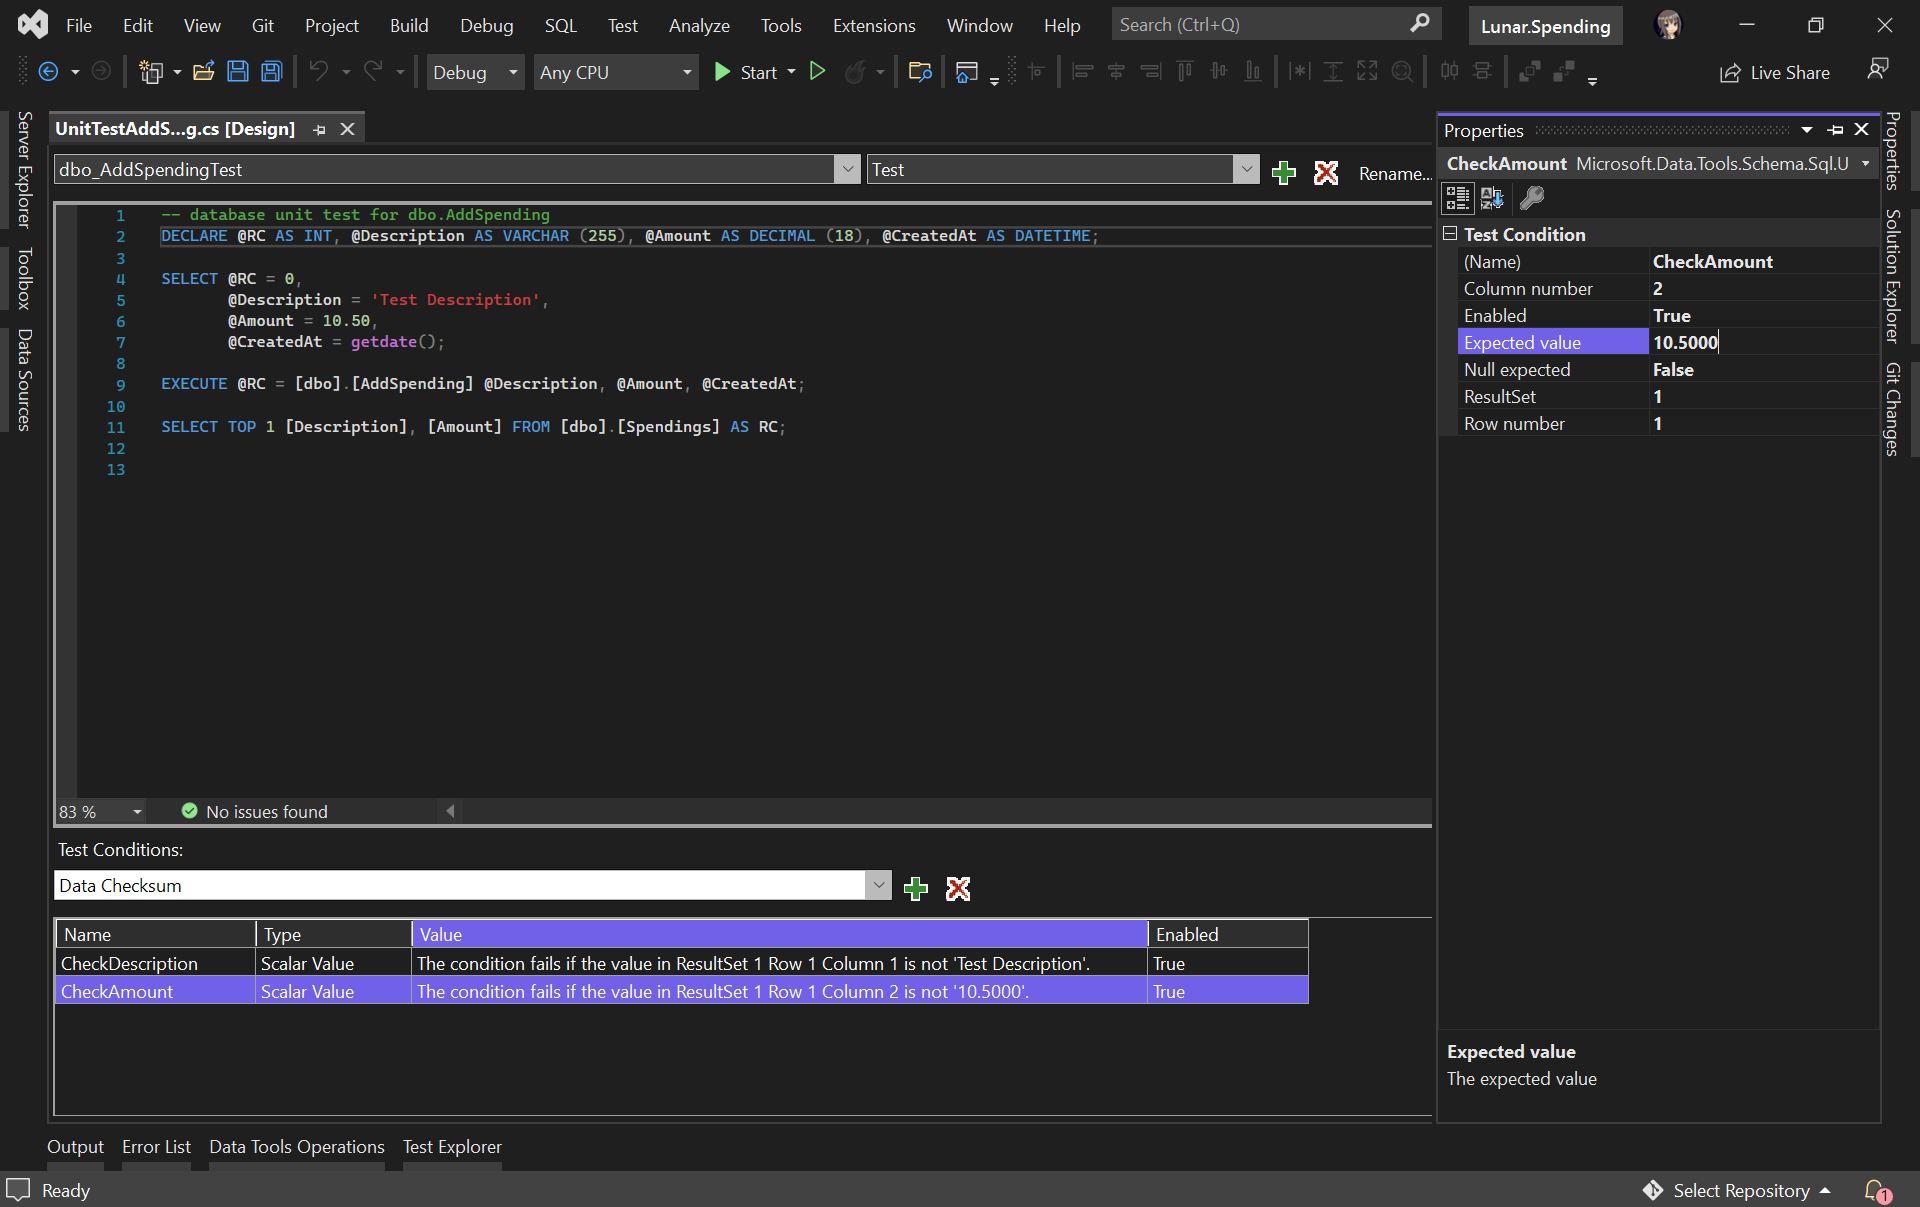
In our test script, we will test to see if the description and amount can be stored correctly in the database. Hence, we need to specify two Test Conditions to verify the two columns, as shown in the following screenshot.
Now, we can run our very first unit test with the Test Explorer to see if our stored procedure has any issue or not.
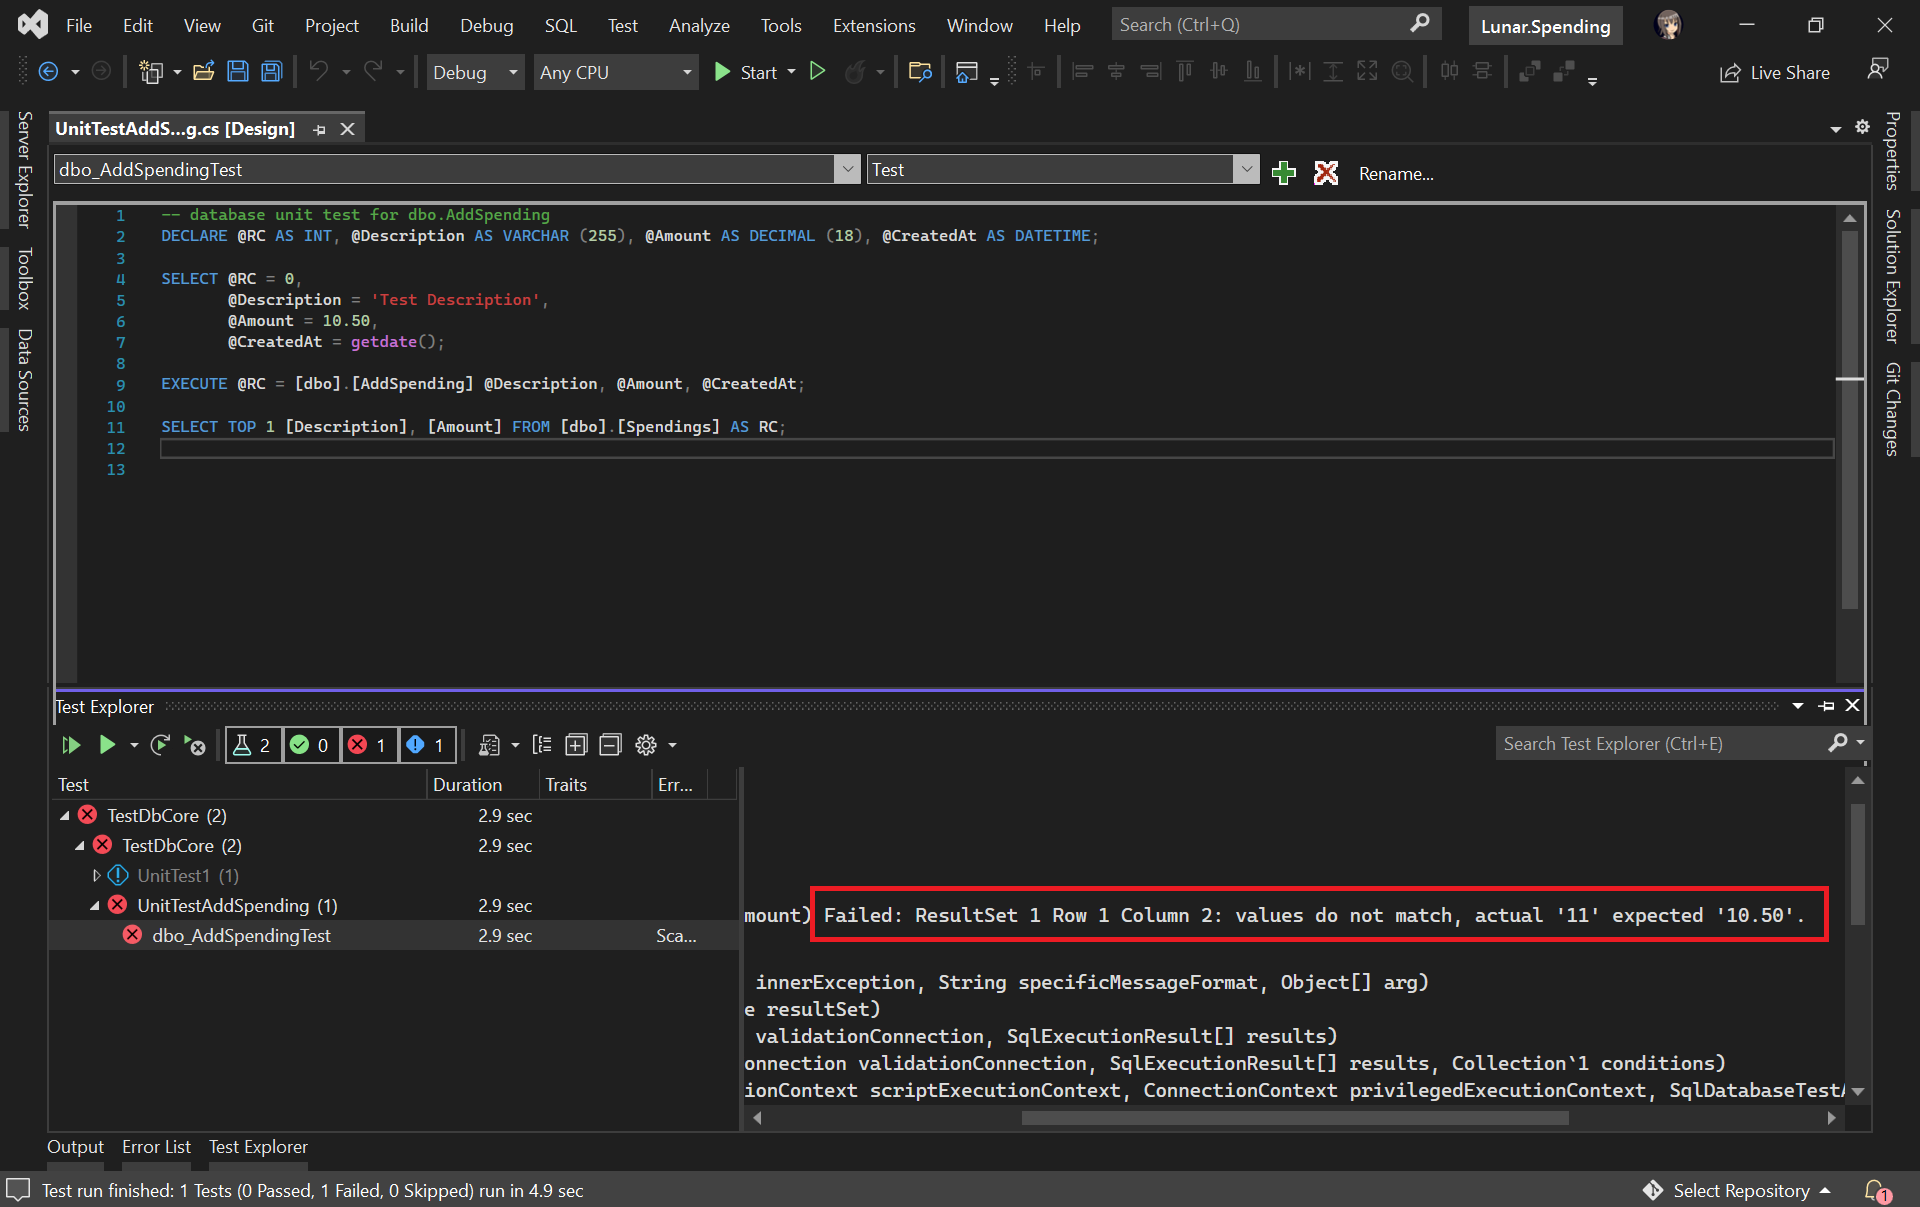
It turns out that this bug is caused by wrong data type used for the Amount column. Now we can proceed to fix it.

Getting Ready for Publishing Database
As we discussed earlier, unit testing is not only about writing a piece of code to test our unit of work, but also making it to be automatically testable.
Hence, our next move is to automate the build, test, and release of our database.
Firstly, we shall make sure the source code of our projects is on GitHub (or any source control supported in Azure DevOps).
Secondly, we need to create the Publish Profile of our database. To do so, we simply right click on database project and choose the “Publish…” option. There will be a window popped out, as shown below.
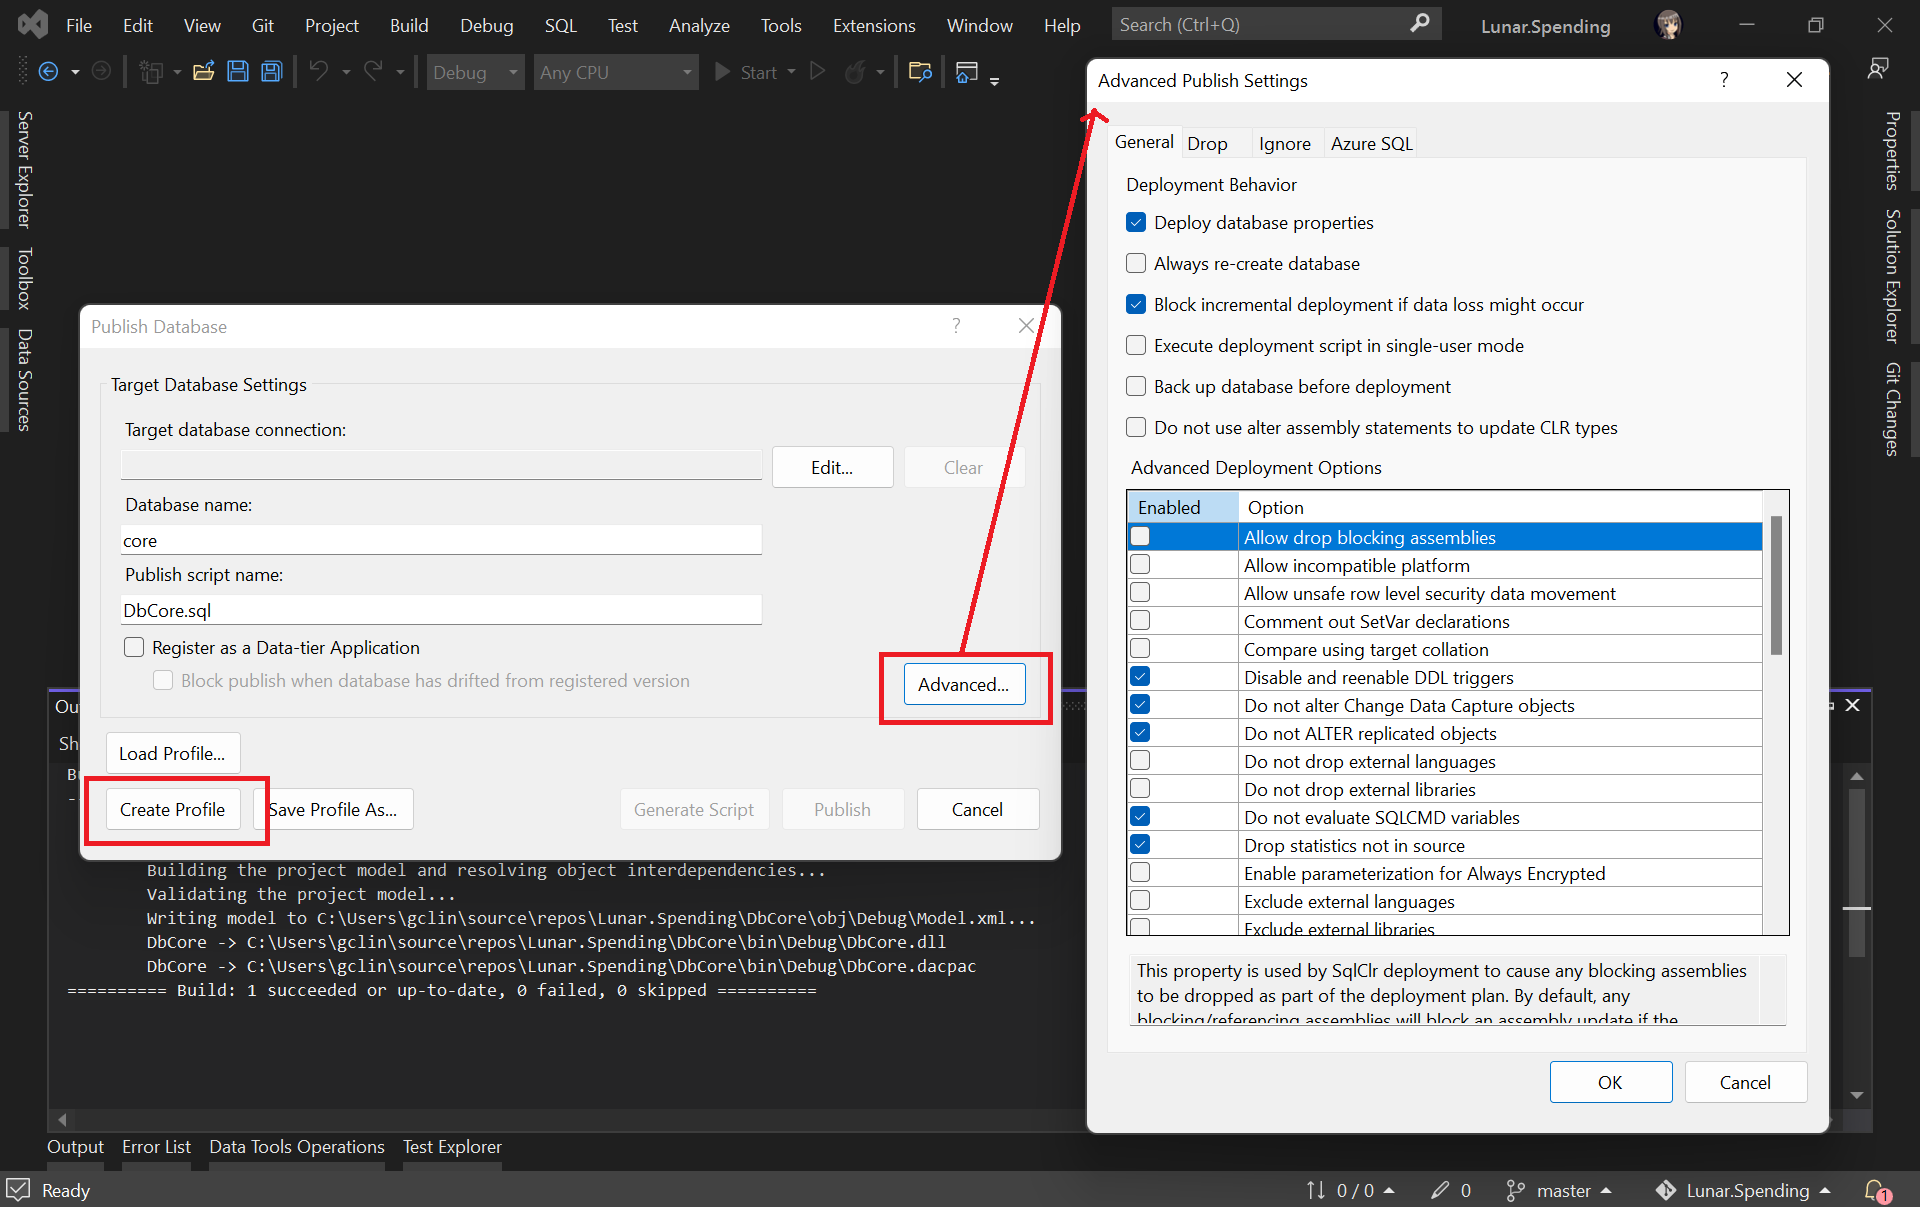
As shown in the screenshot above, there are many settings that can be configured, including Azure SQL related settings. After configuring them accordingly, please click on the “Create Profile” button. Once it is grayed out, it means that the profile has been generated successfully. We can then proceed to close the popped-out window.
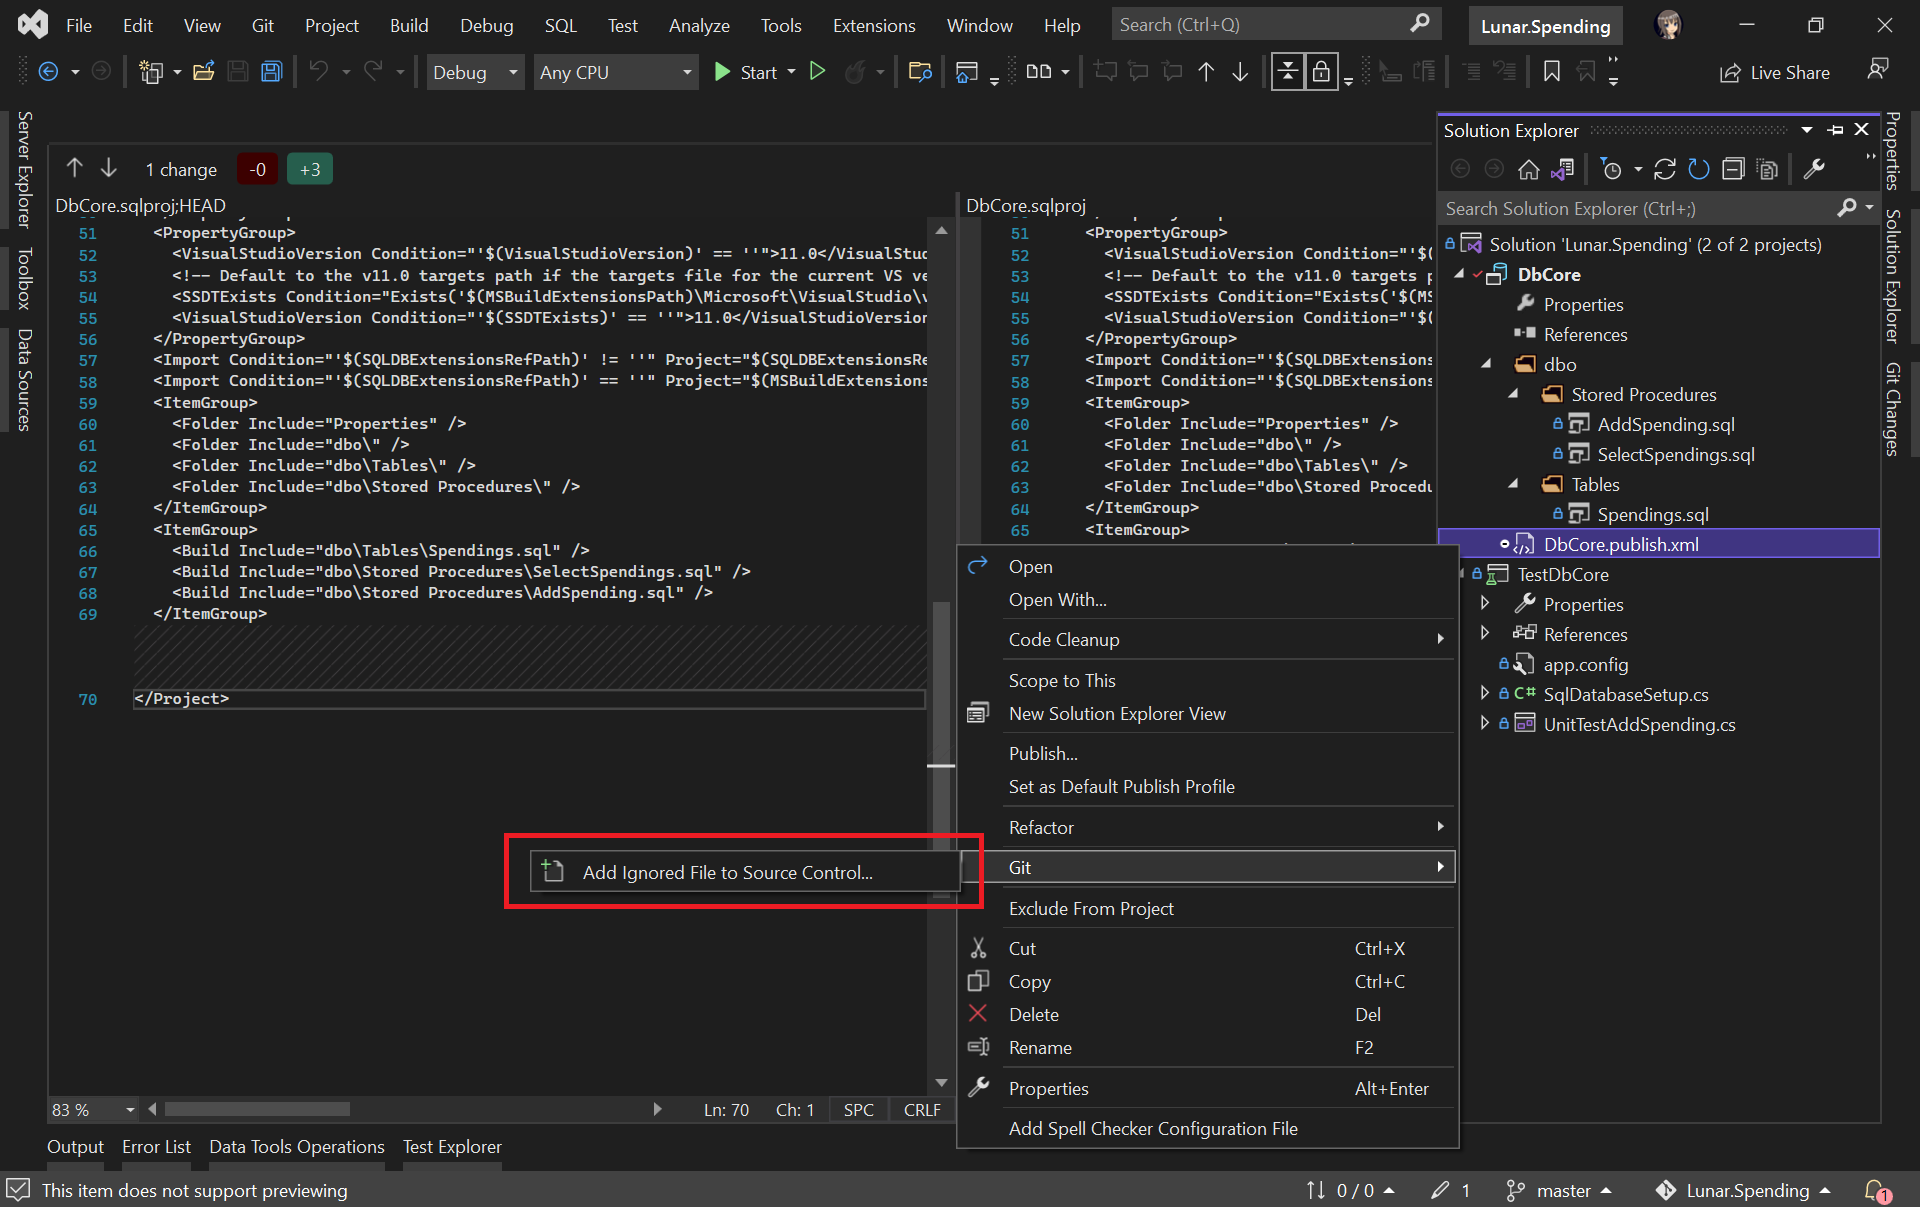
Please make sure the generated Database Profile file is included in the source control. Kindly add it to Git if it is not, as shown in the screenshot below. This is because this file is needed in our Azure DevOps build pipeline later.
Finally, let’s create a project on Azure DevOps which will host the build and release pipelines for our automatic database deployment.
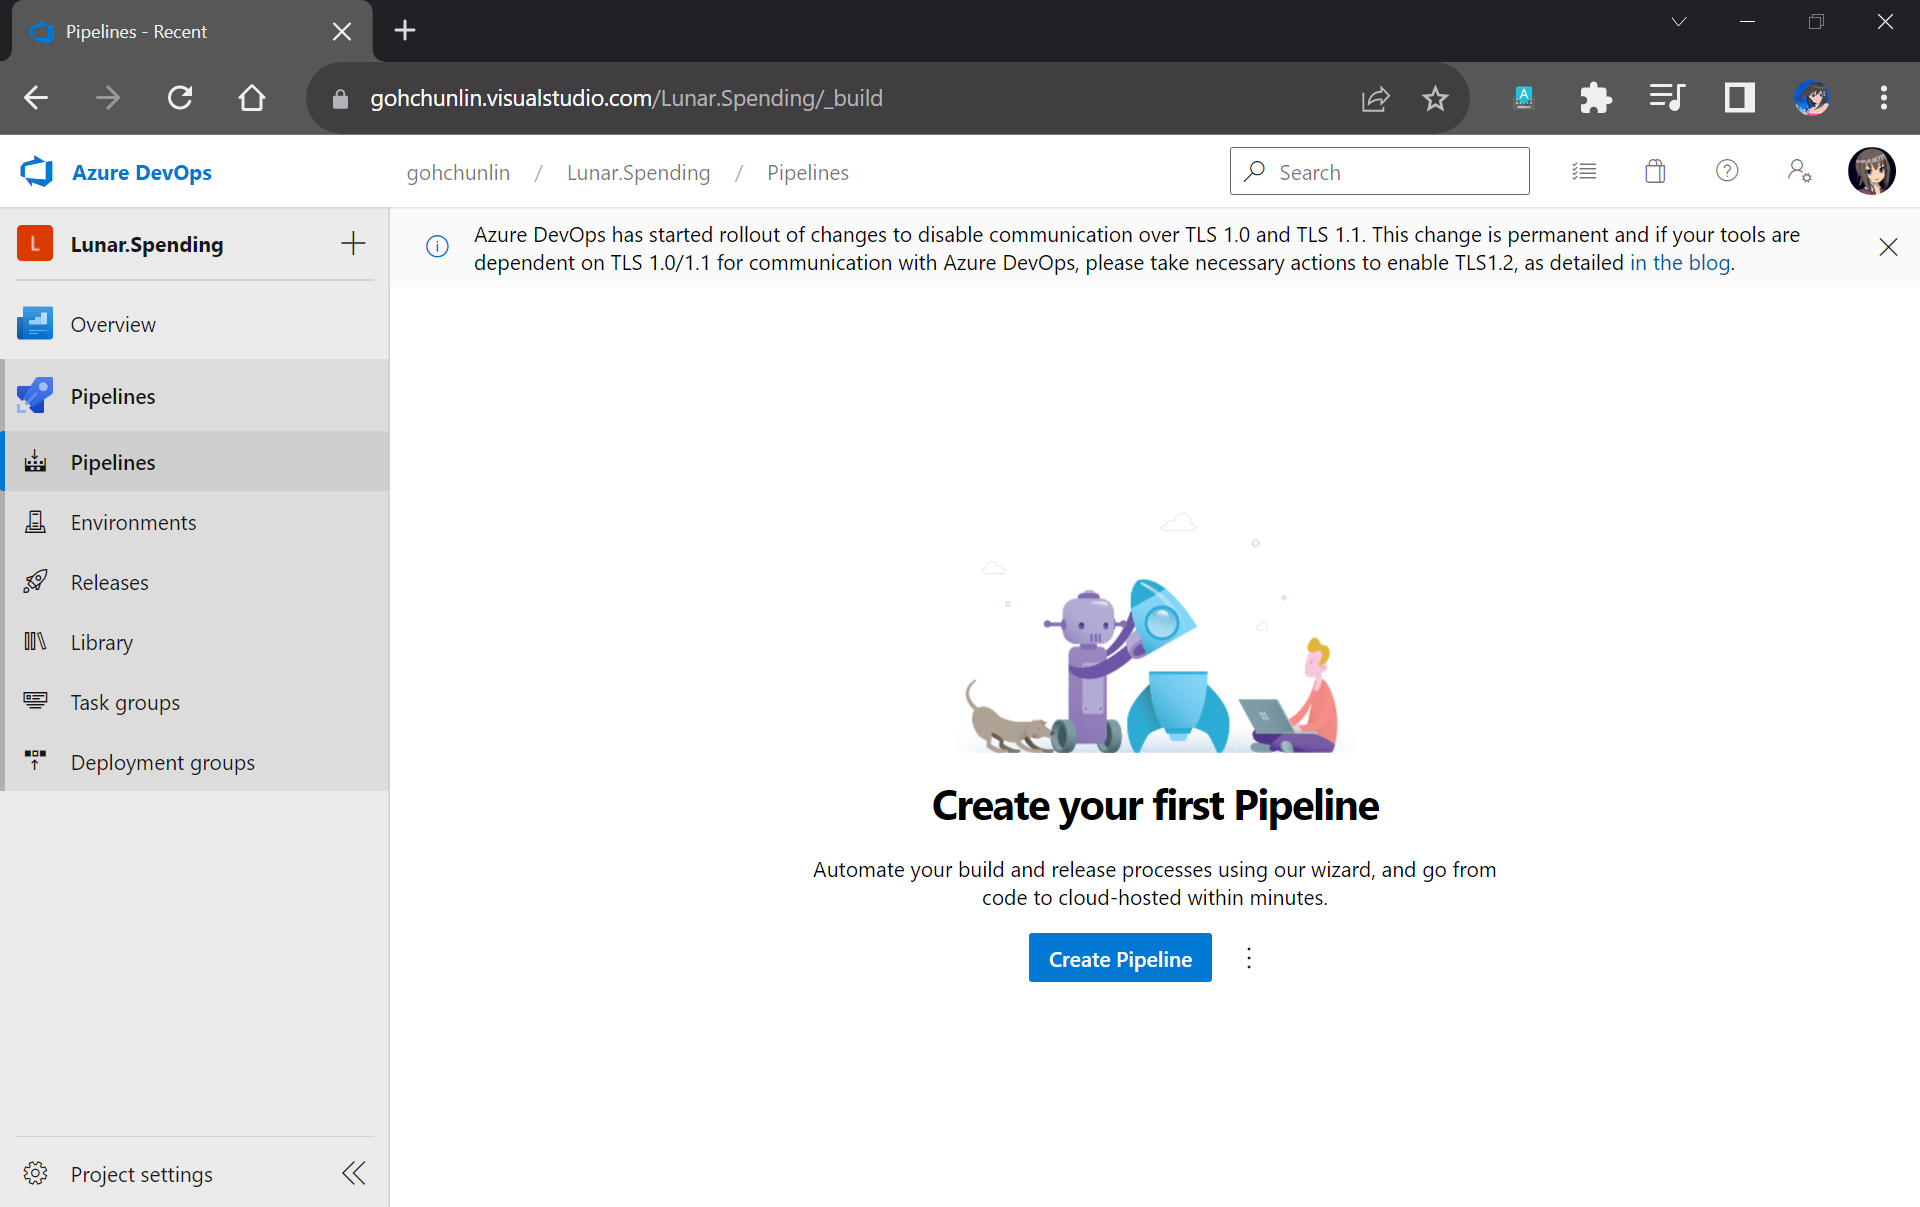
Setup Build Pipeline
Once we have created our project on Azure DevOps, we can proceed to create our Build Pipeline.
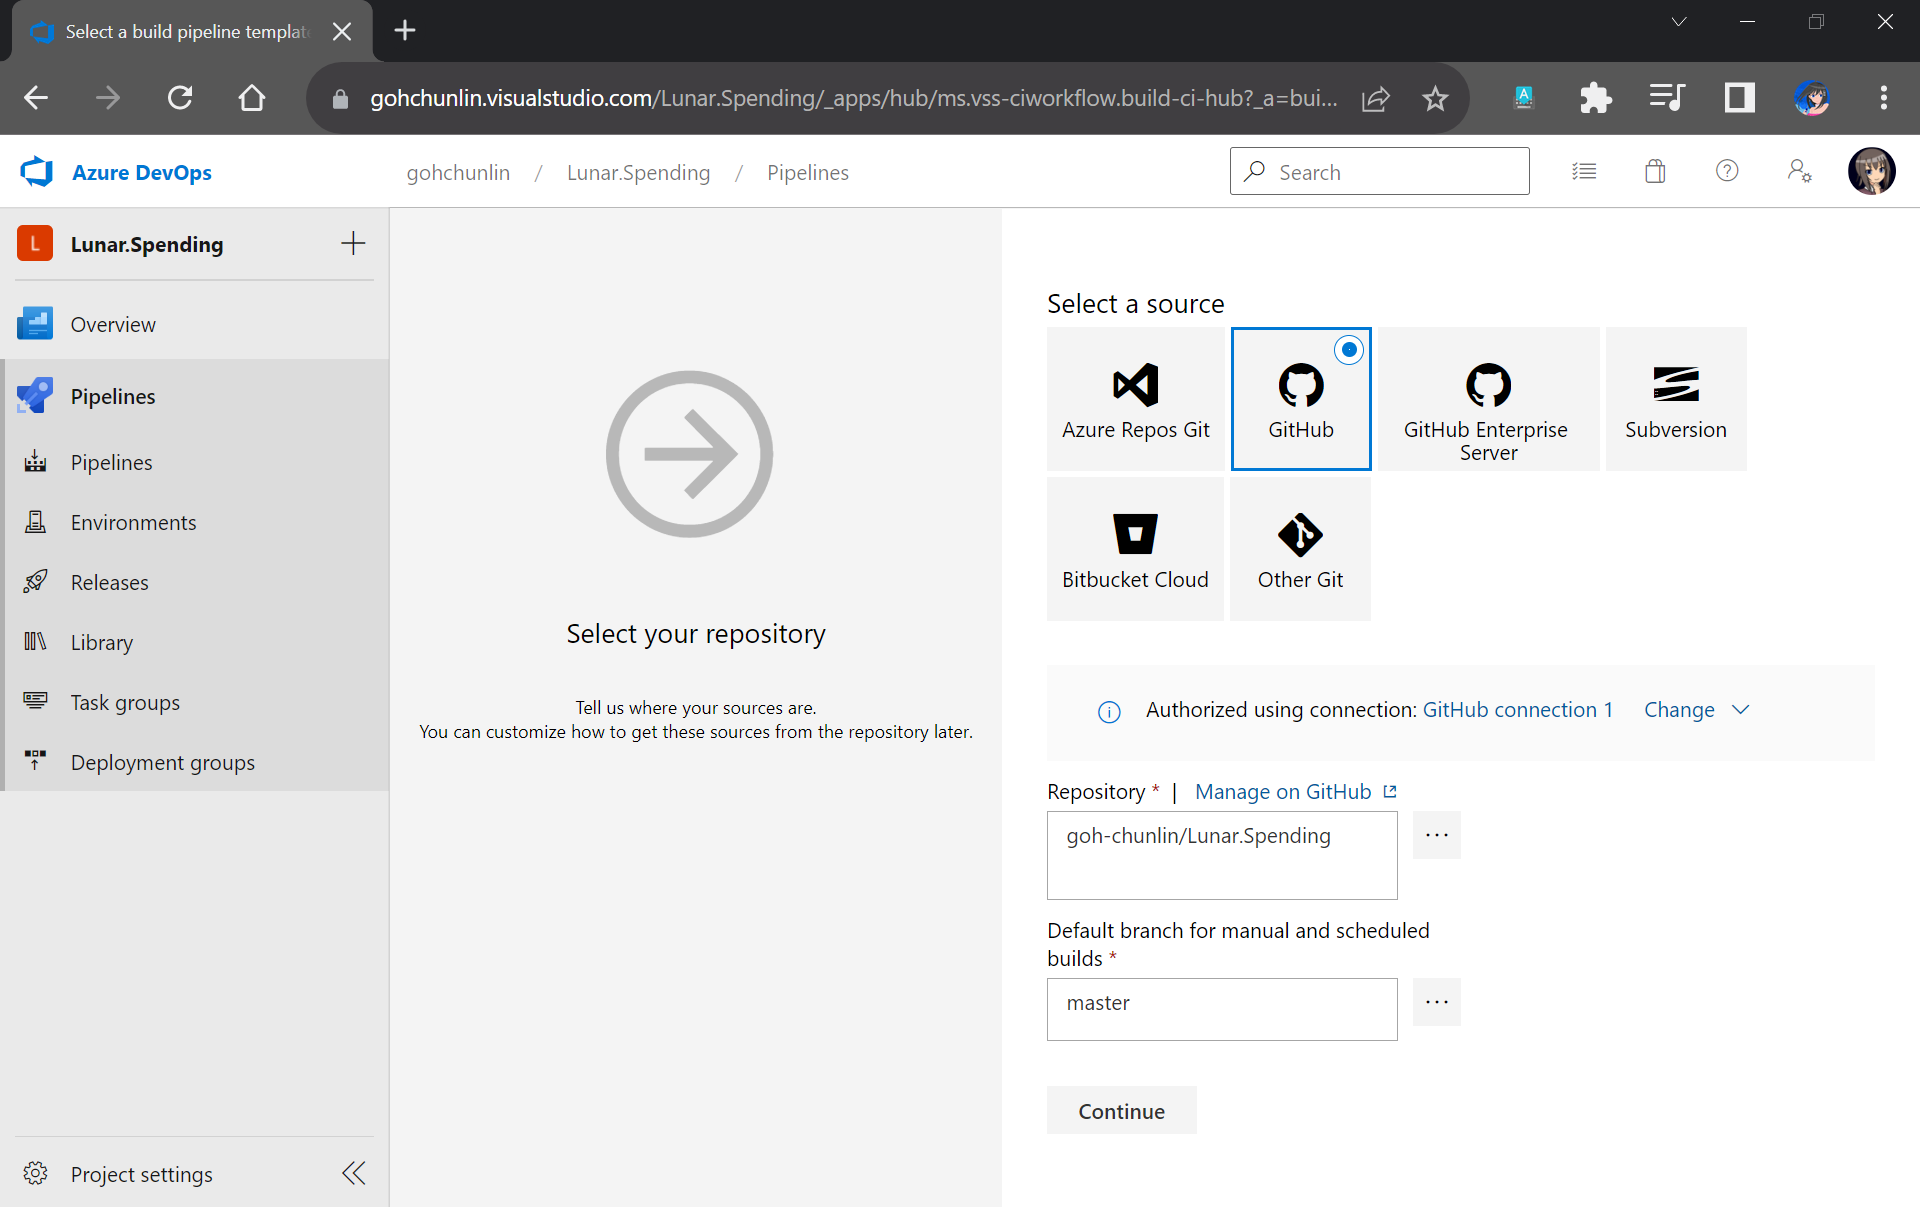
Firstly, we need to specify the code repository we are using. Since our code sists on GitHub, we will connect Azure DevOps with our project on GitHub as shown in the screenshot below.
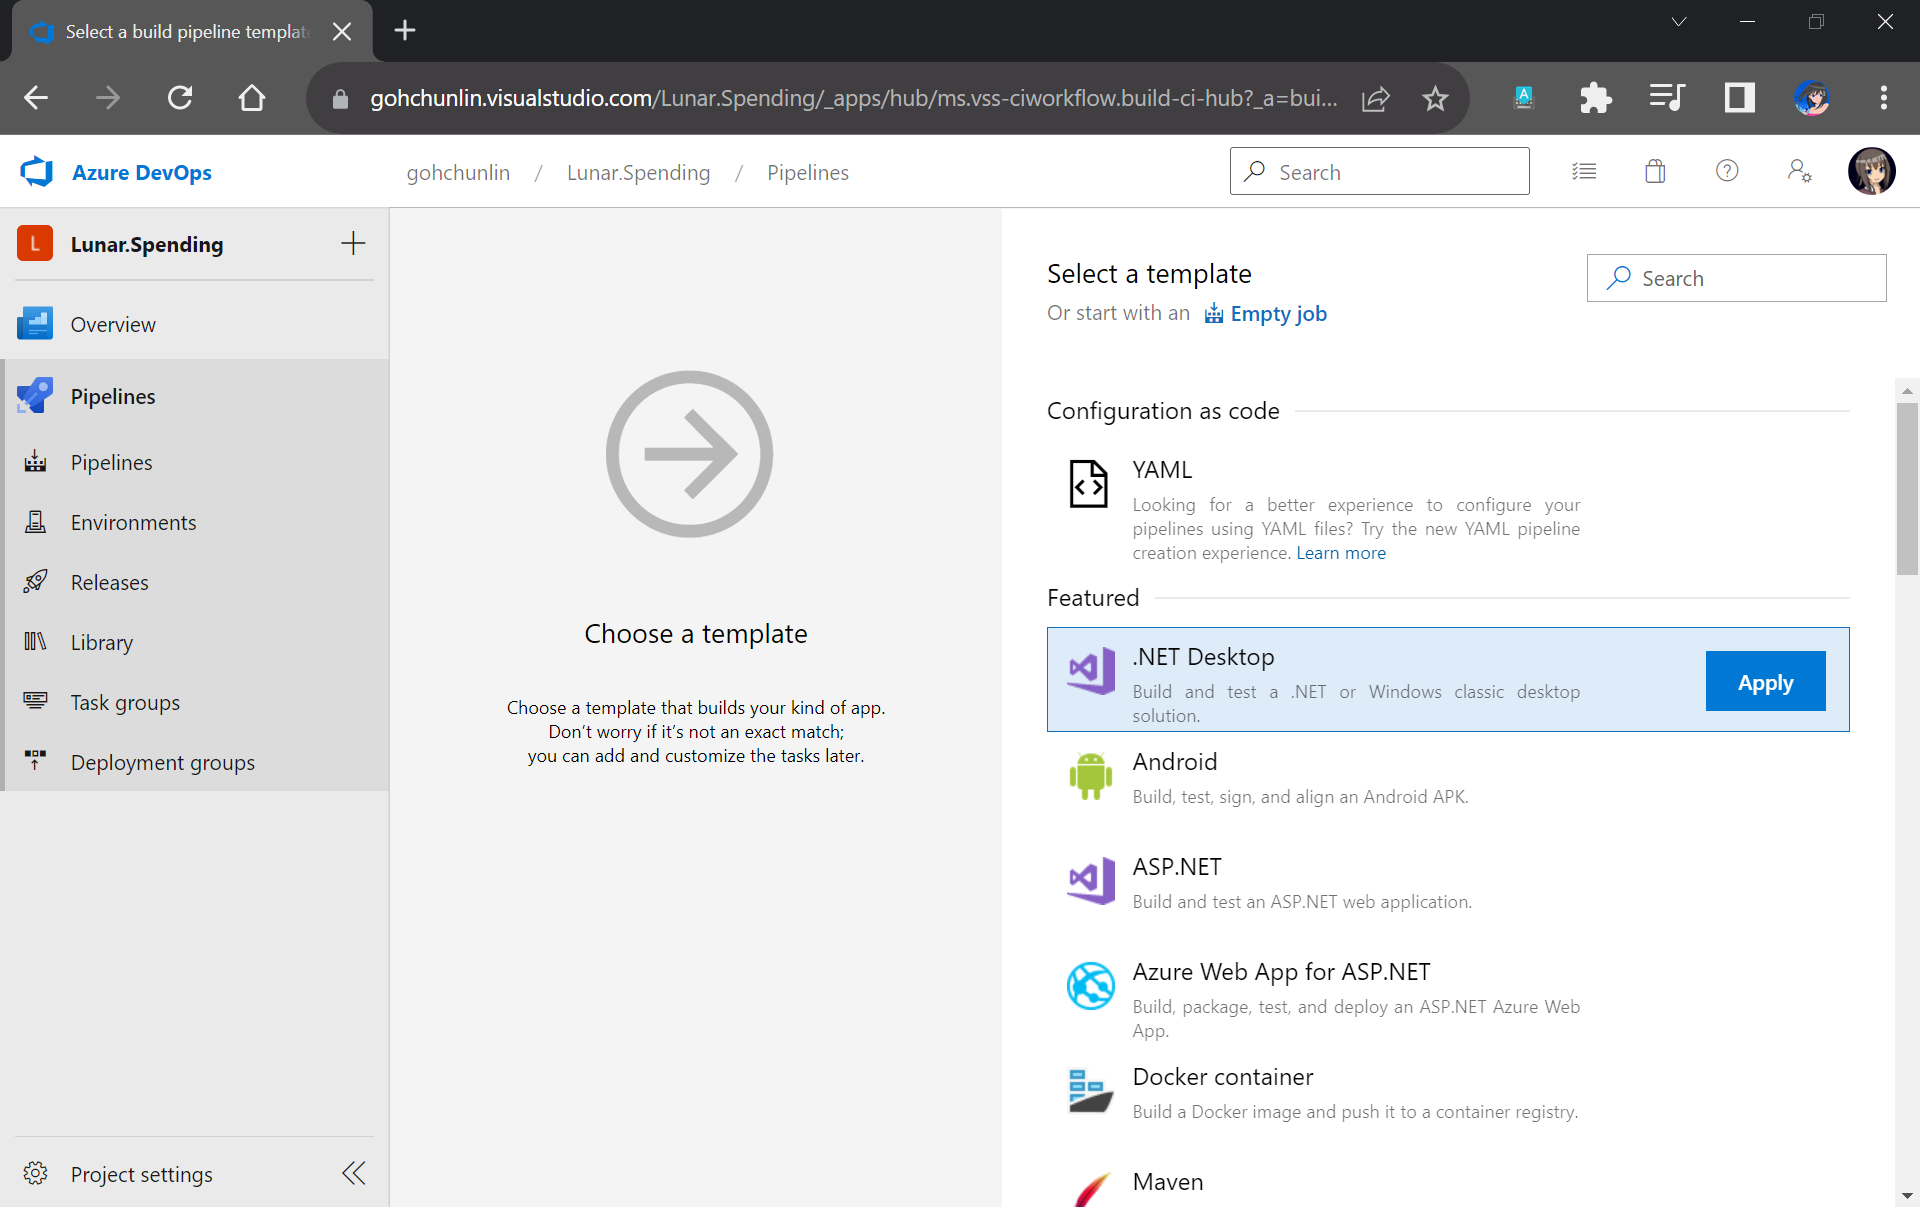
Next, we will start off from the .NET Desktop template. The reason why we choose this template is because it contains many tasks that we can use in our database build pipeline.
Here we will be using the Microsoft-hosted agent in our build pipeline. With Microsoft-hosted agents, maintenance and upgrades are taken care of for us. Each time we run a pipeline, we will get a fresh virtual machine for each job in the pipeline.
We need to make sure that “windows-2022” (Windows Sever 2022 with VS2022 installed), which is the latest version as of now, is chosen in the Agent Specification field. I have tried with the default “windows-2019” option before and there would be an error message “Error CS0234: The type or namespace name ‘Schema’ does not exist in the namespace ‘Microsoft.Data.Tools’ (are you missing an assembly reference?)”.

Next, we need to update the version of NuGet to be the latest, which is now 6.1.0.
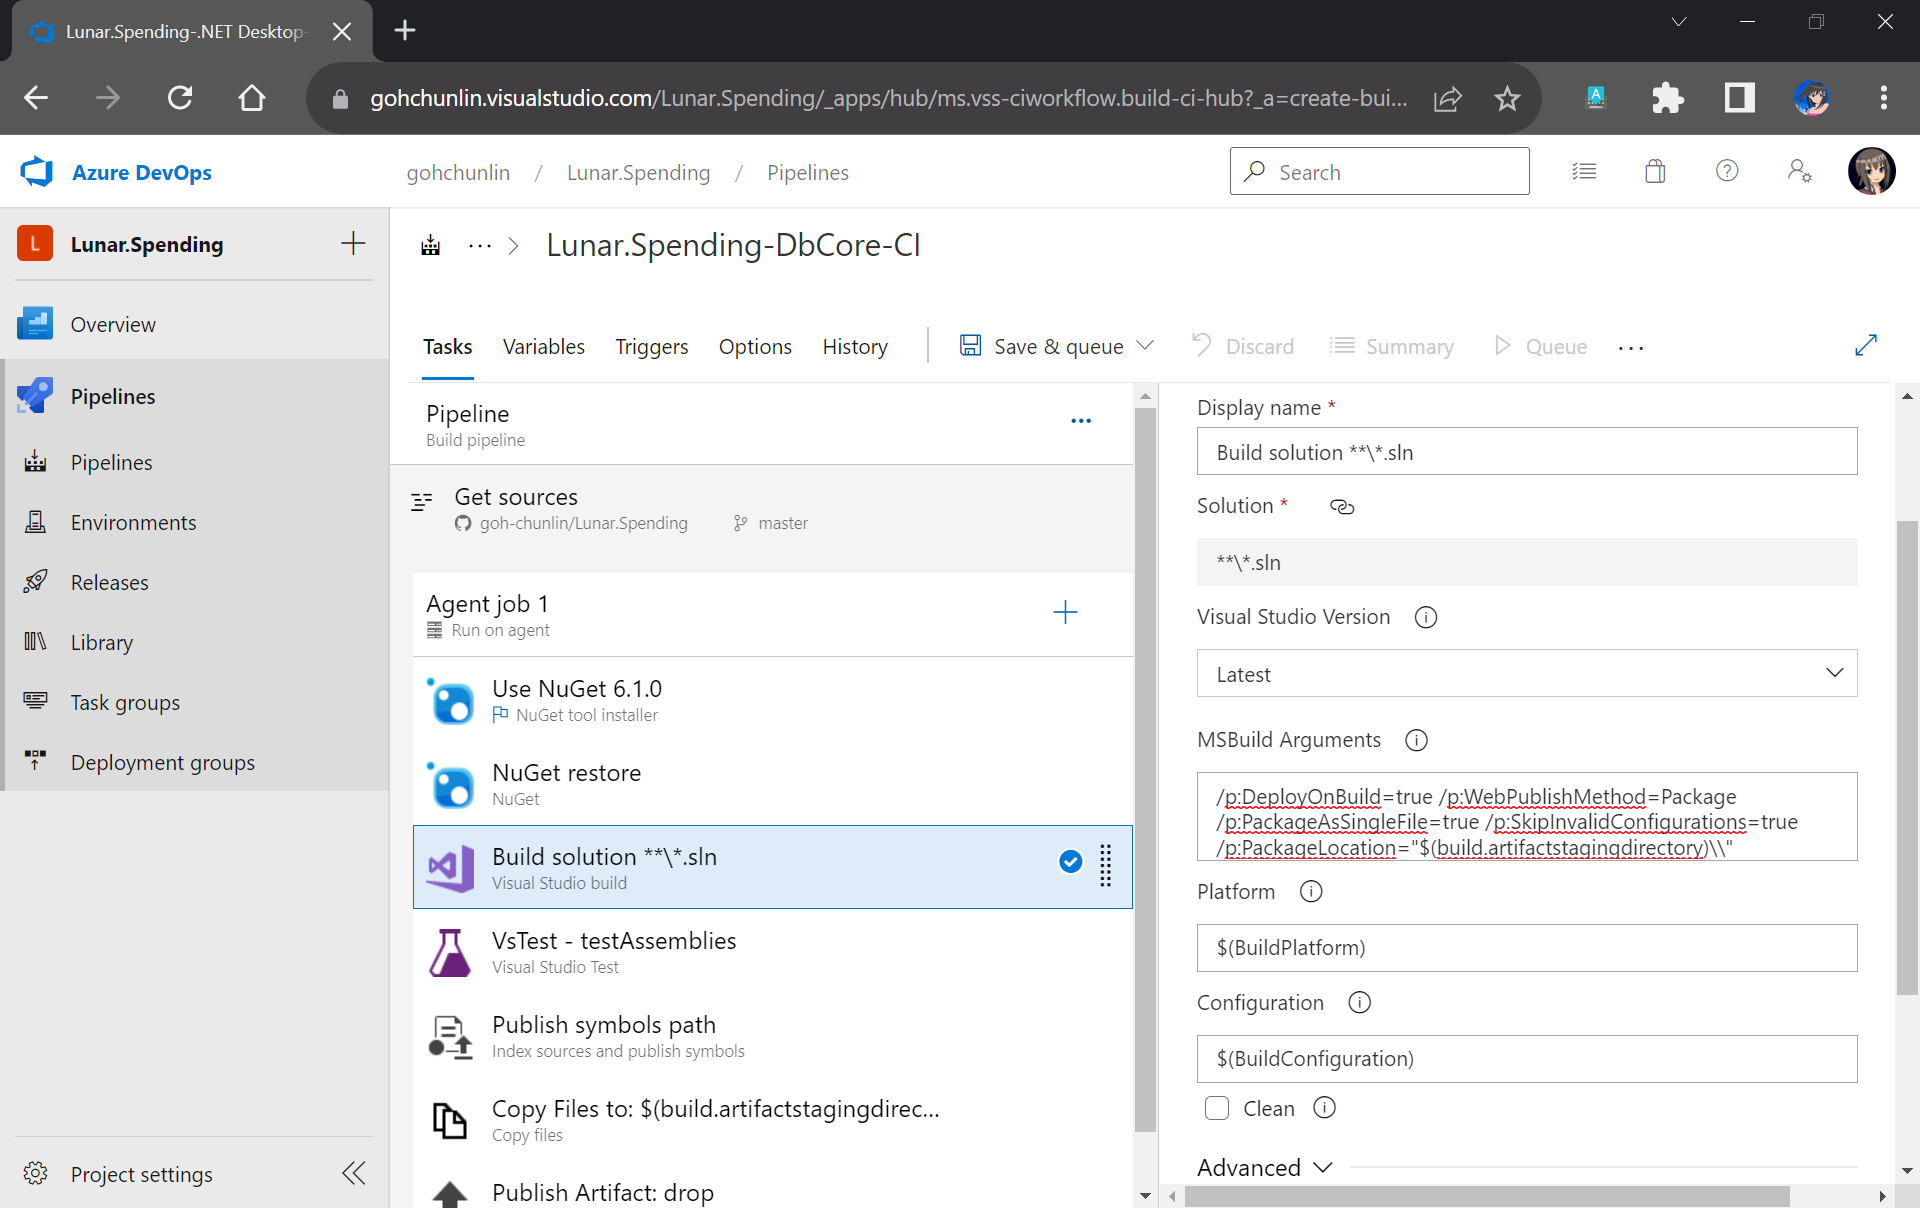
After that, we move on to the third task in the pipeline which is building our Solution in Release mode with the following MSBuild Arguments on Any CPU.
/p:DeployOnBuild=true /p:WebPublishMethod=Package /p:PackageAsSingleFile=true /p:SkipInvalidConfigurations=true /p:PackageLocation="$(build.artifactstagingdirectory)\\"
We will remove the VsTest from the Build Pipeline because it will be proper to run the unit tests after changes have been deployed to the database. Otherwise, we will still be testing against the old schema and old stored procedures. Hence, we will add the testing task in the Release pipeline instead.
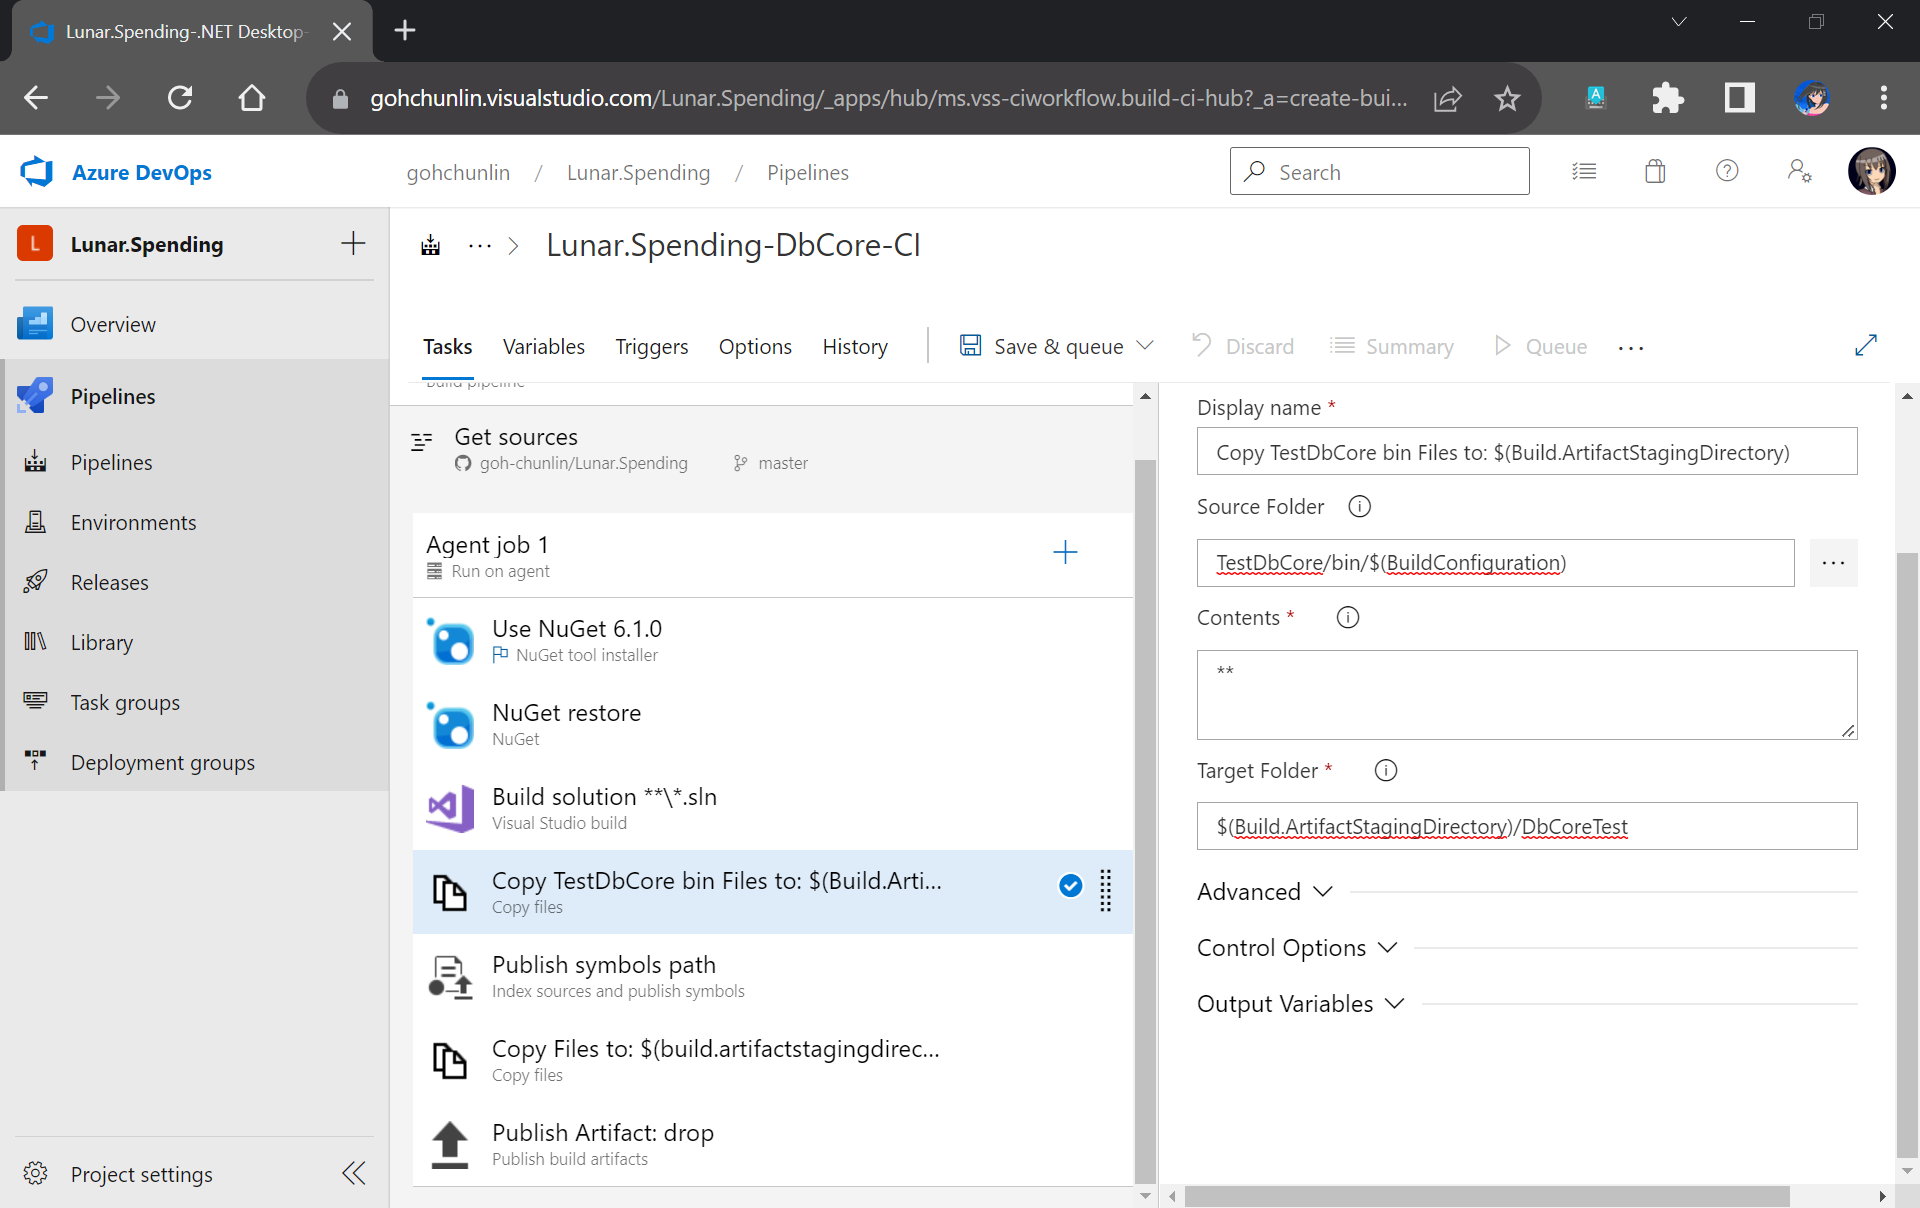
Now, since the testing will be done in the Release Pipeline instead, we shall create a task to copy the assemblies of TestDbCore project to the Build Artifact so that the assemblies can be used in the Release Pipeline later. Thus, we will add a new task “Copy Files” as shown in the screenshot below.
We will also remove the next task, which is publishing symbols because it is not necessary.
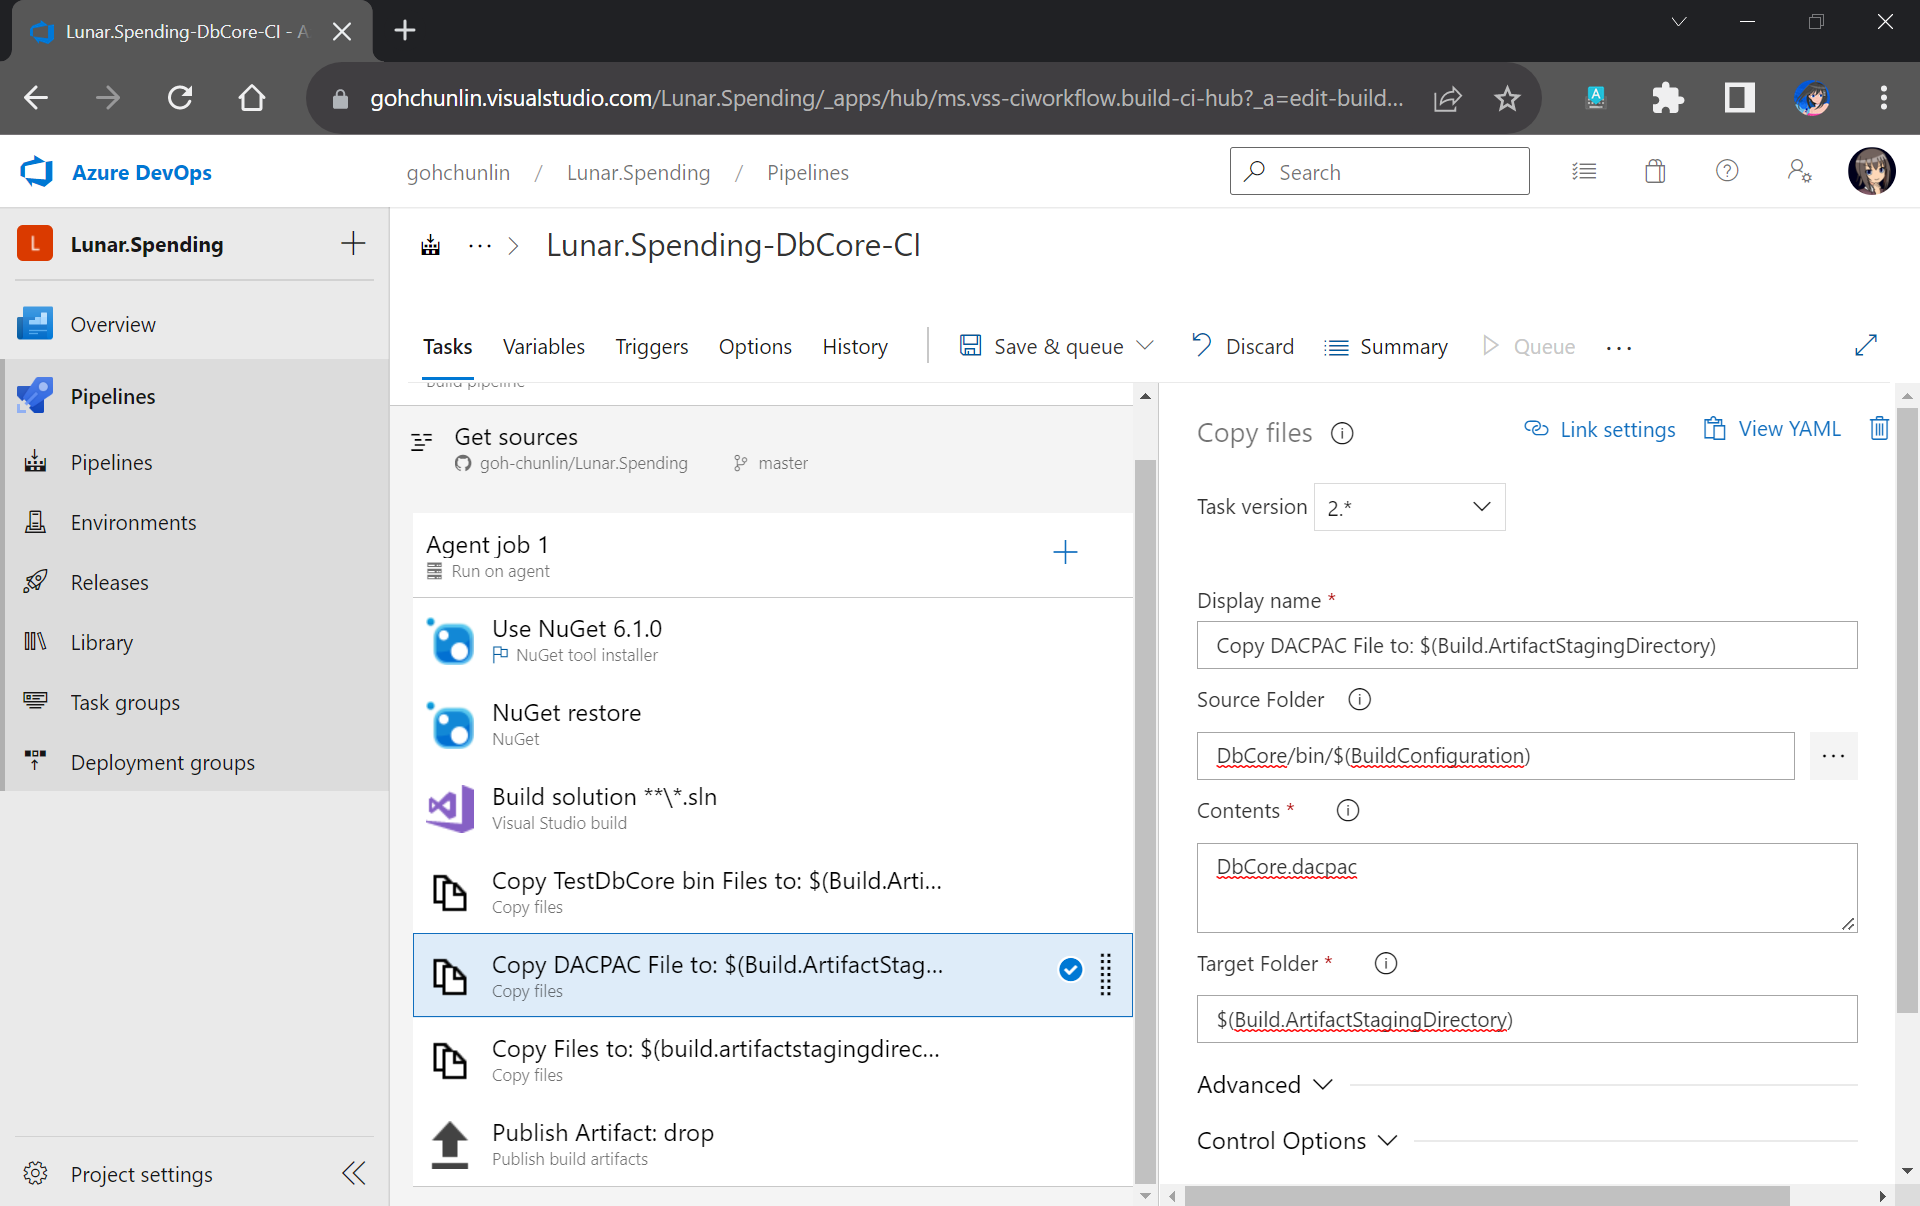
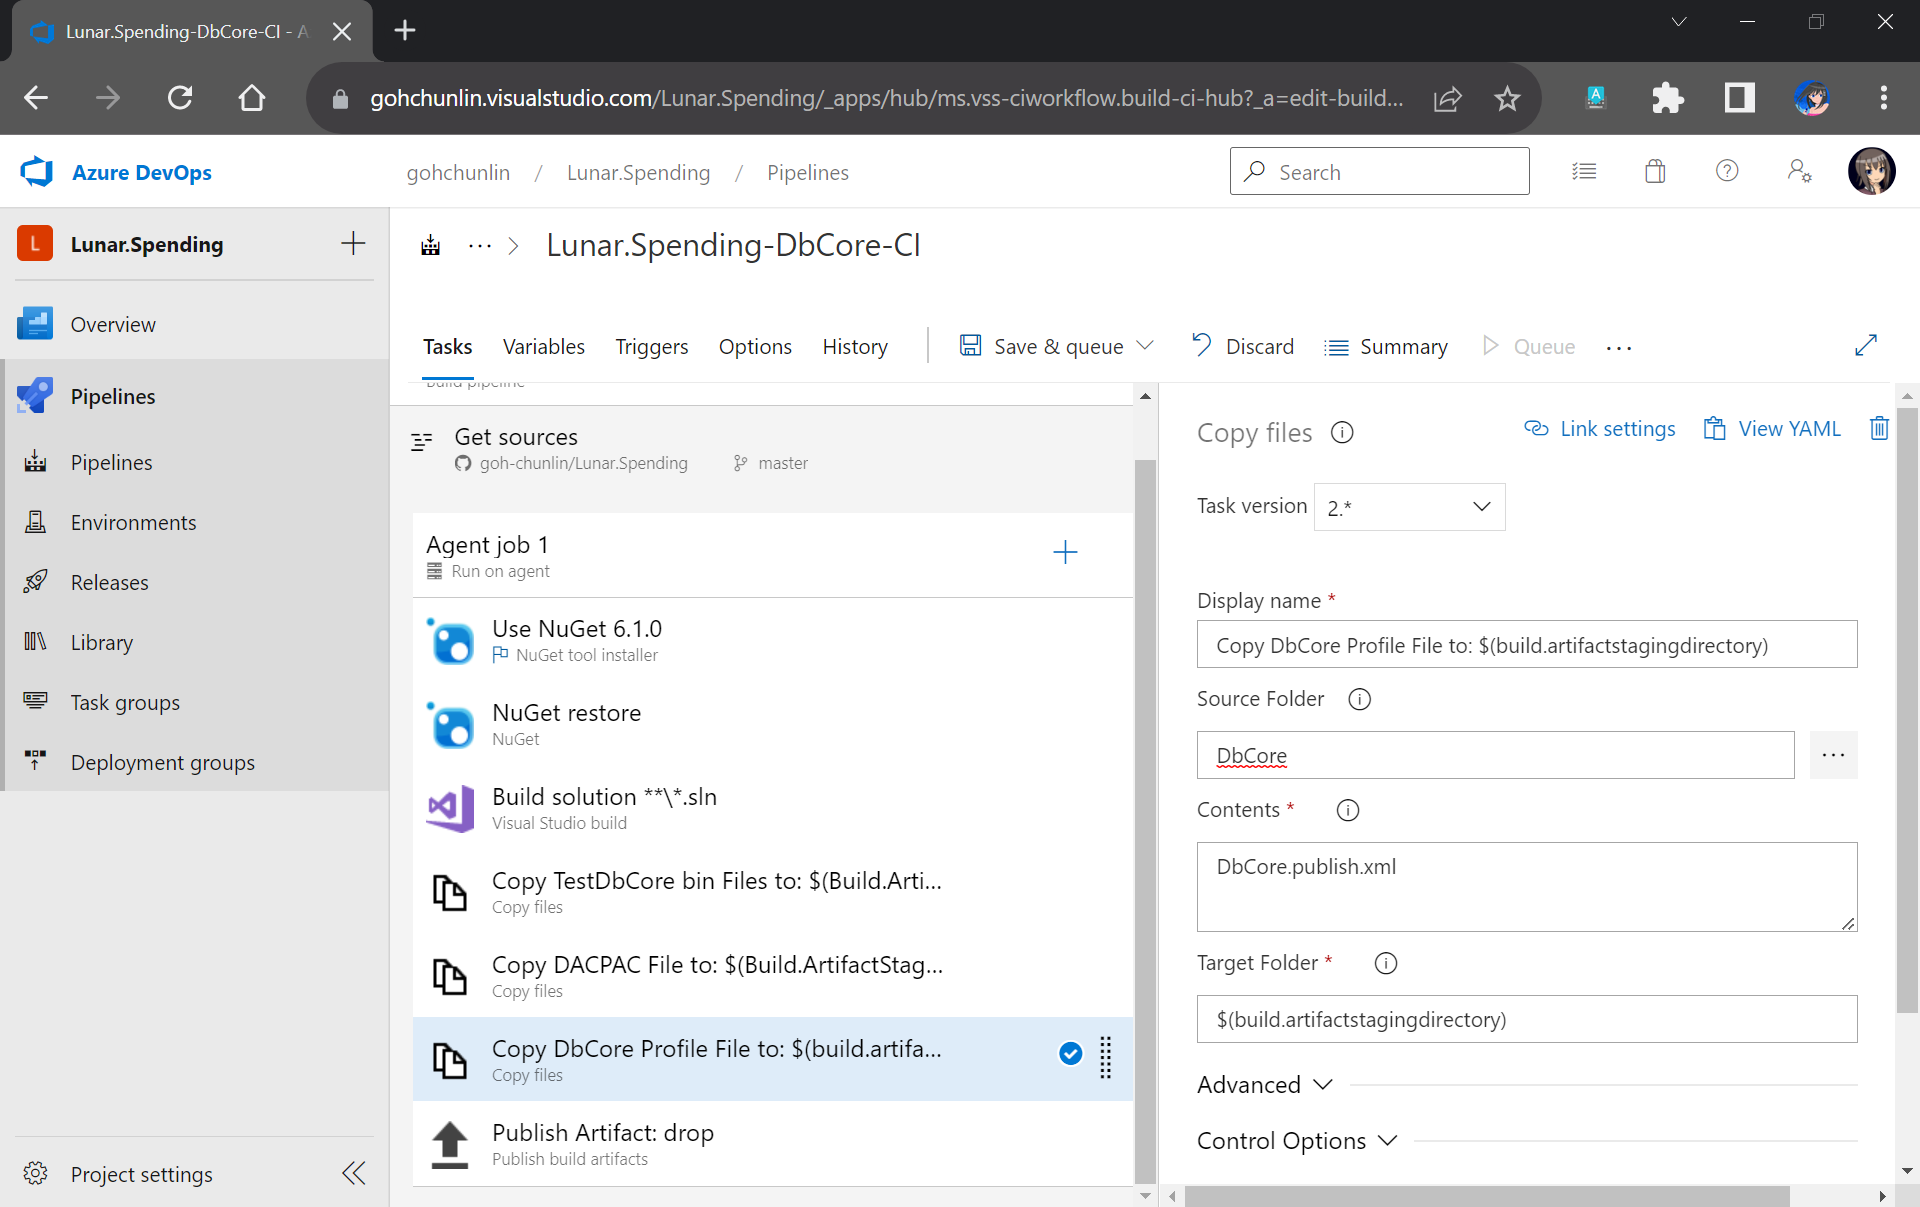
After that, we will add a new task to copy DACPAC file, which is generated during Build, to the Build Artifact, as shown in the following screenshot.
Another file we need to copy is our Database Profile. This is the reason why earlier we have to make sure the profile file needs to be in the source control.
There is nothing to change for the Publish Artifact task. So, we can now move on to enable the Continuous Integration for the Build Pipeline, as shown in the screenshot below.

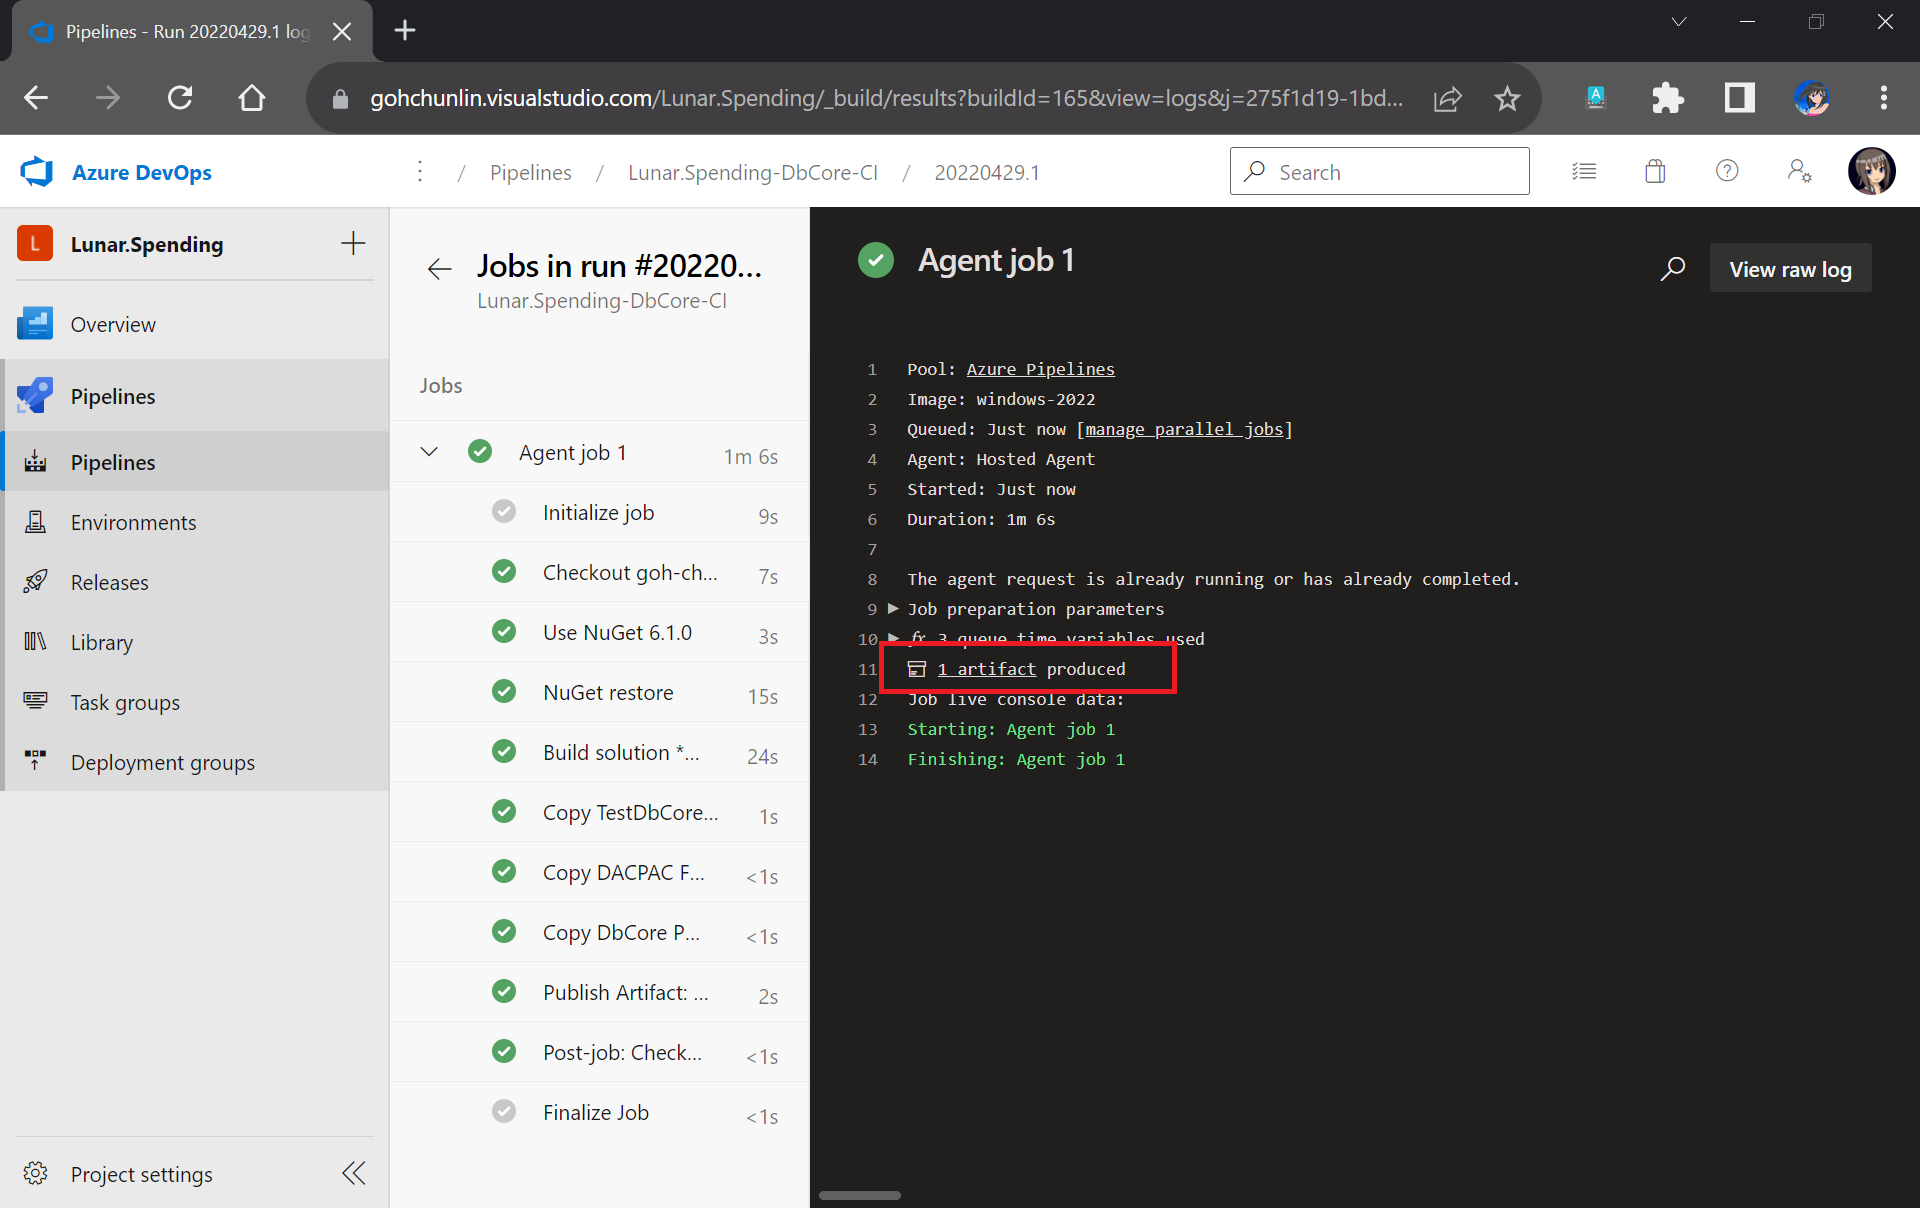
Finally, we can save and queue our Build Pipeline. If the build is successful, we will be able to see a Build Artifact produced, as shown in the screenshot below.
Setup Release Pipeline
In order to automatically deploy our database changes after the database project and unit test project are built successfully, we need to configure the Release Pipeline.
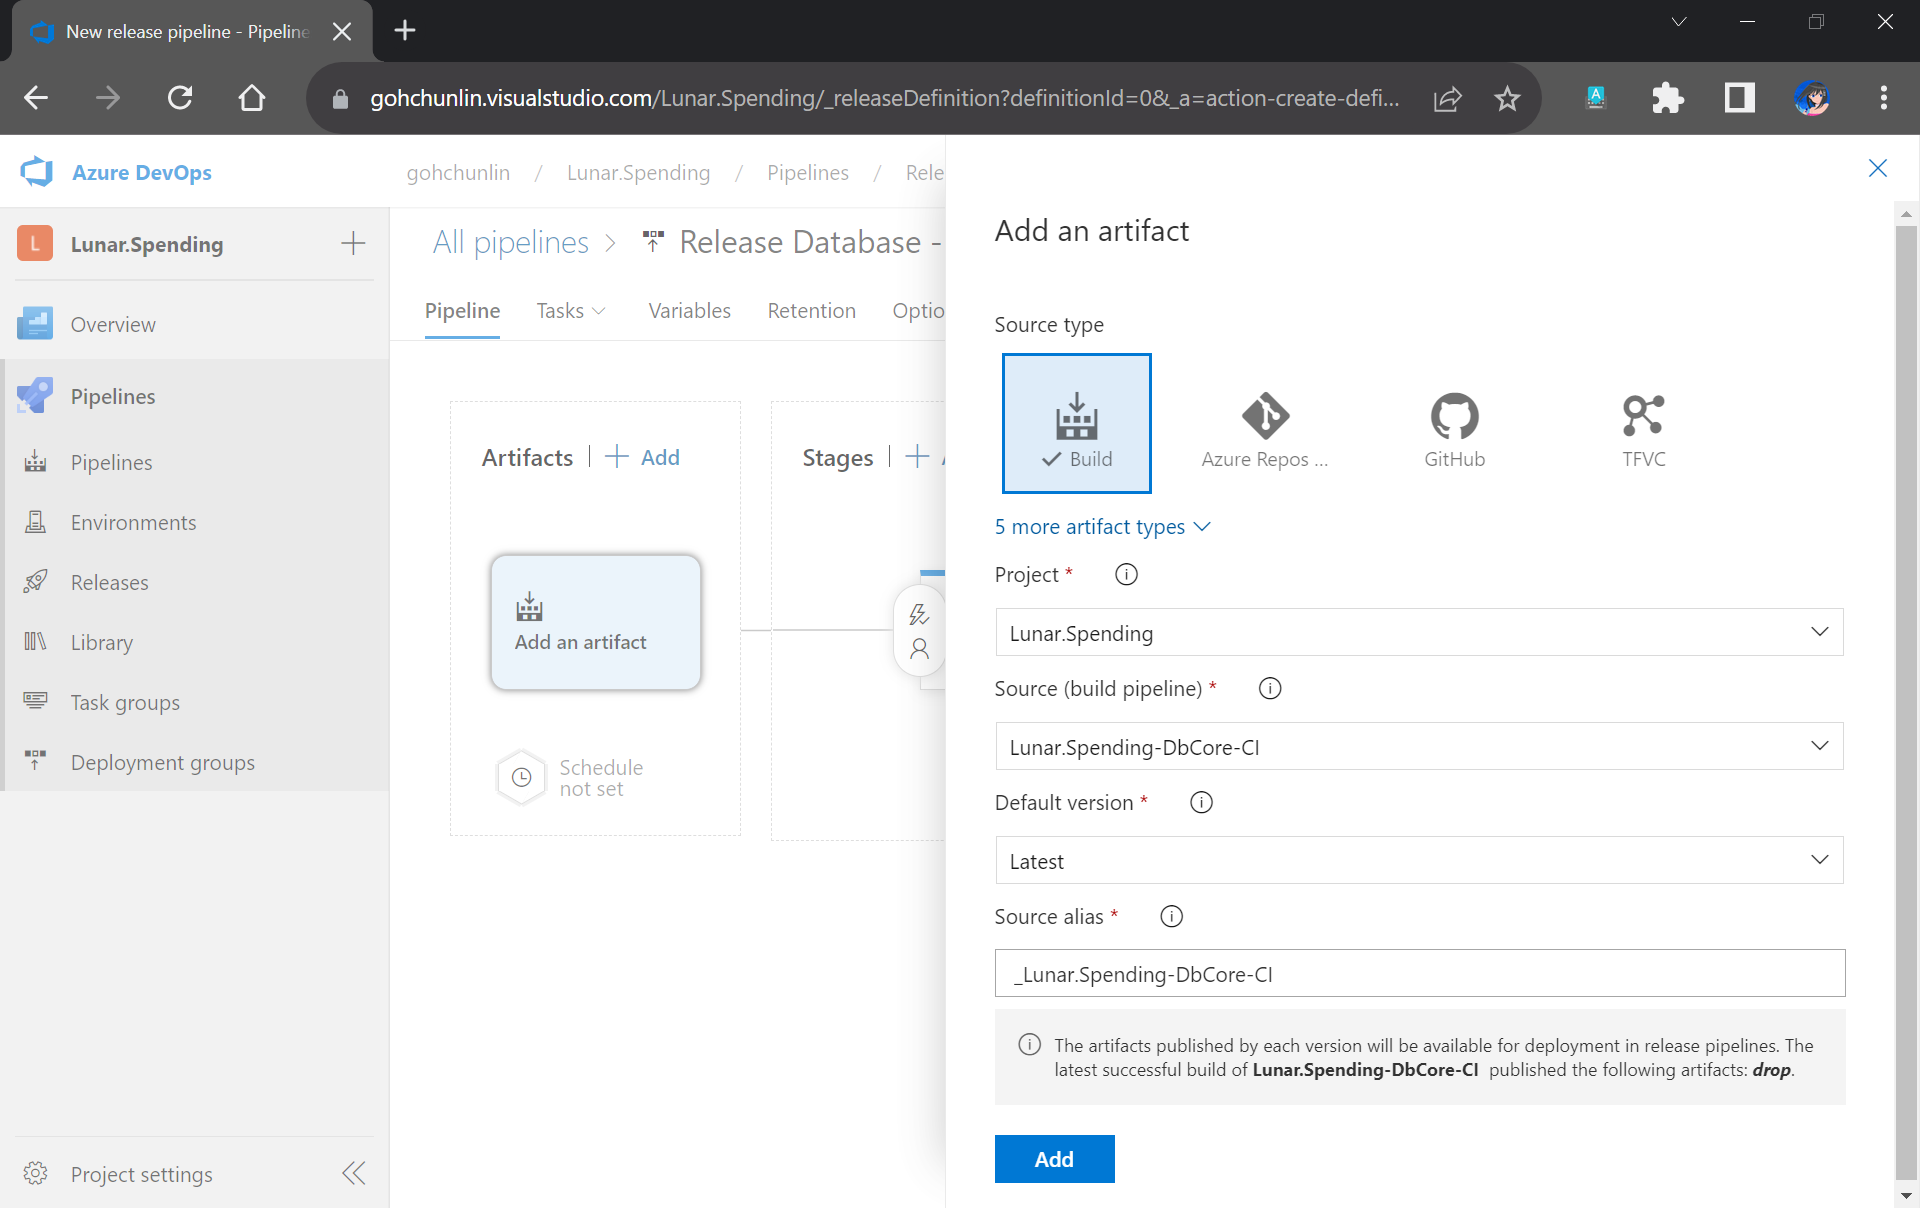
First of all, we need to integrate our Build Pipeline with this new Release Pipeline, as demonstrated in the following screenshot.
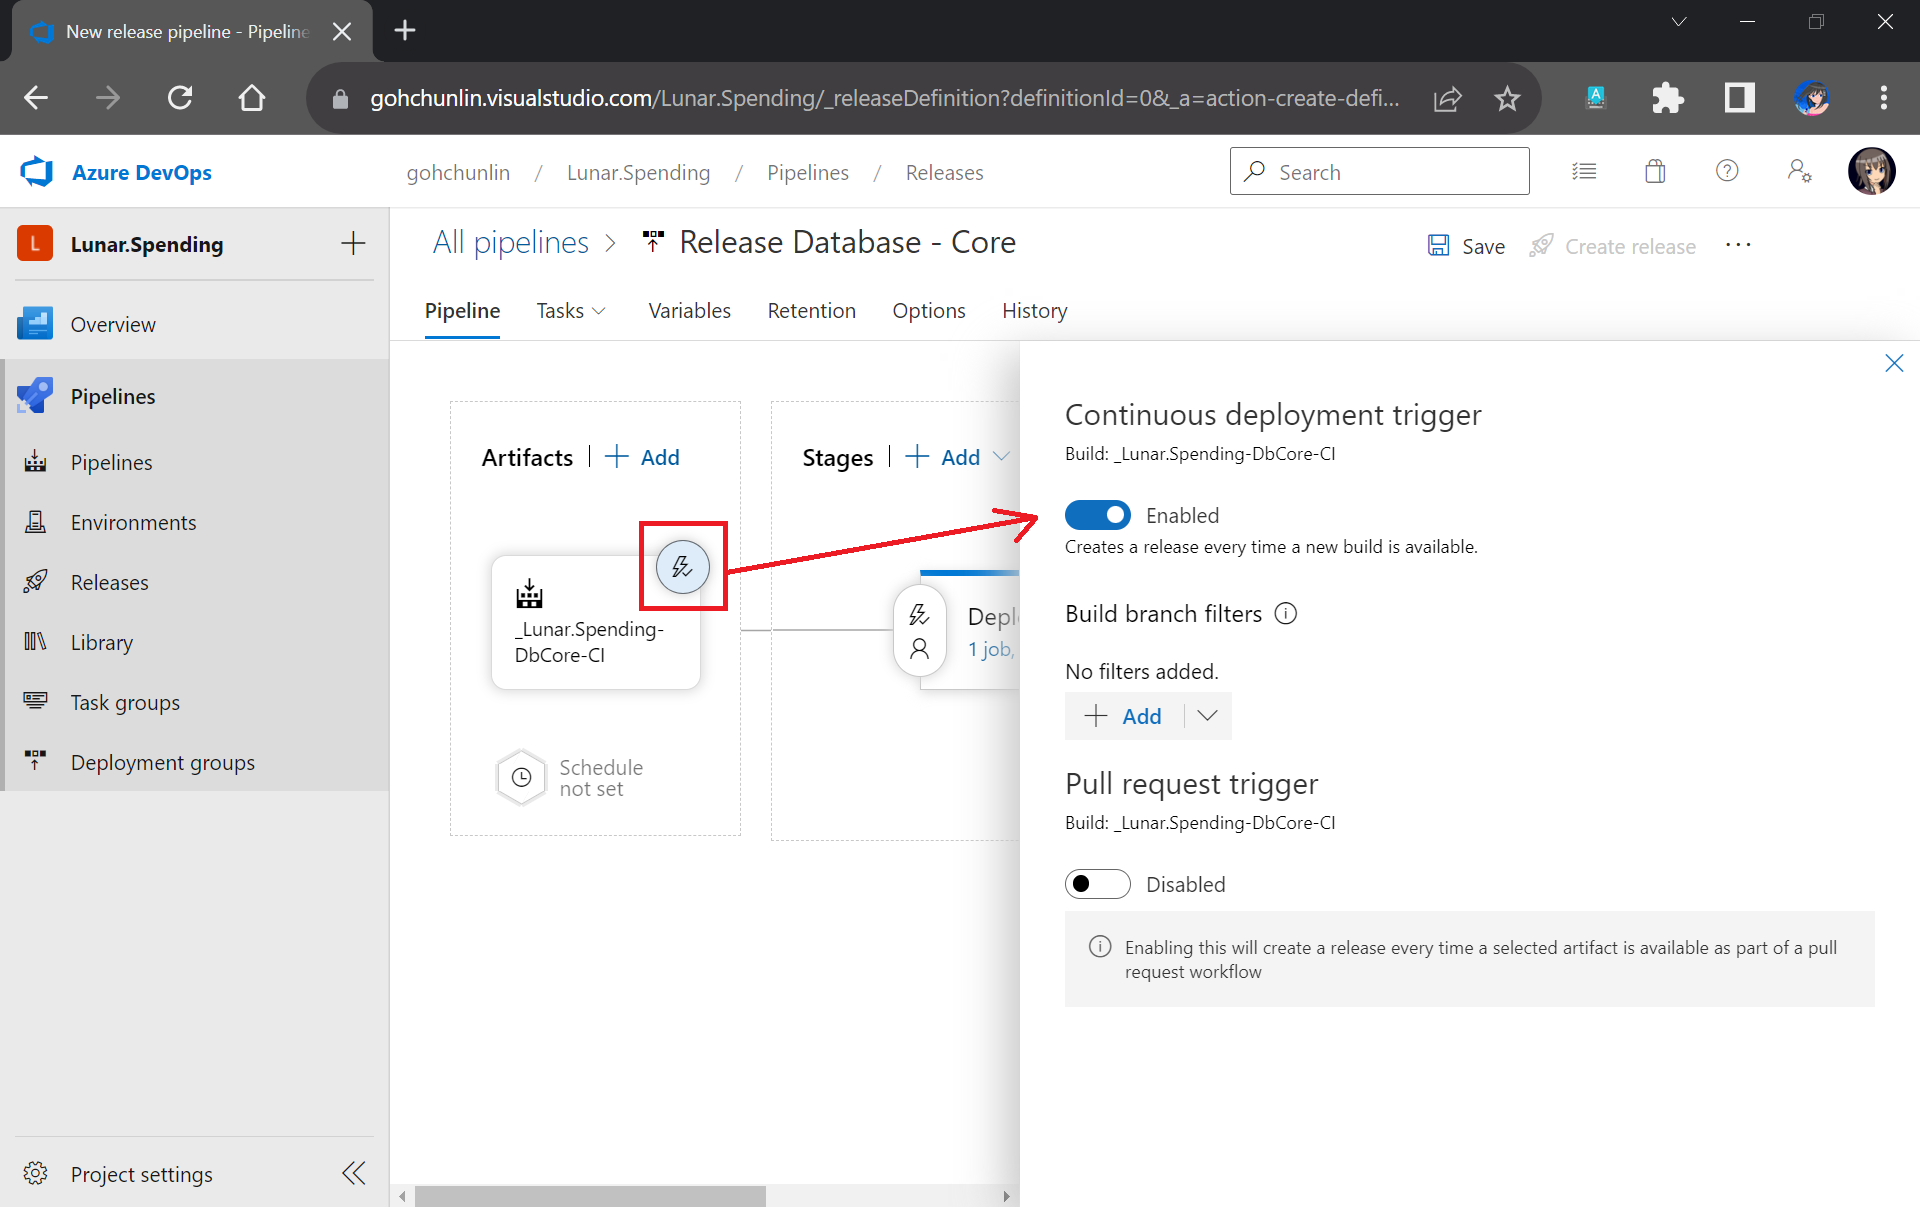
Next, we can enable the Continuous Deployment, as shown in the screenshot below. This is to make sure that we can deploy the database changes and test them automatically right after the build is completed successfully.
Now, we can move on to configure the tasks in the stage. Here, I have renamed the stage as “Deploy DbCore”. To be consistent with the Build Pipeline, here we will be using “windows-2022” as the agent in our Release Pipeline too.

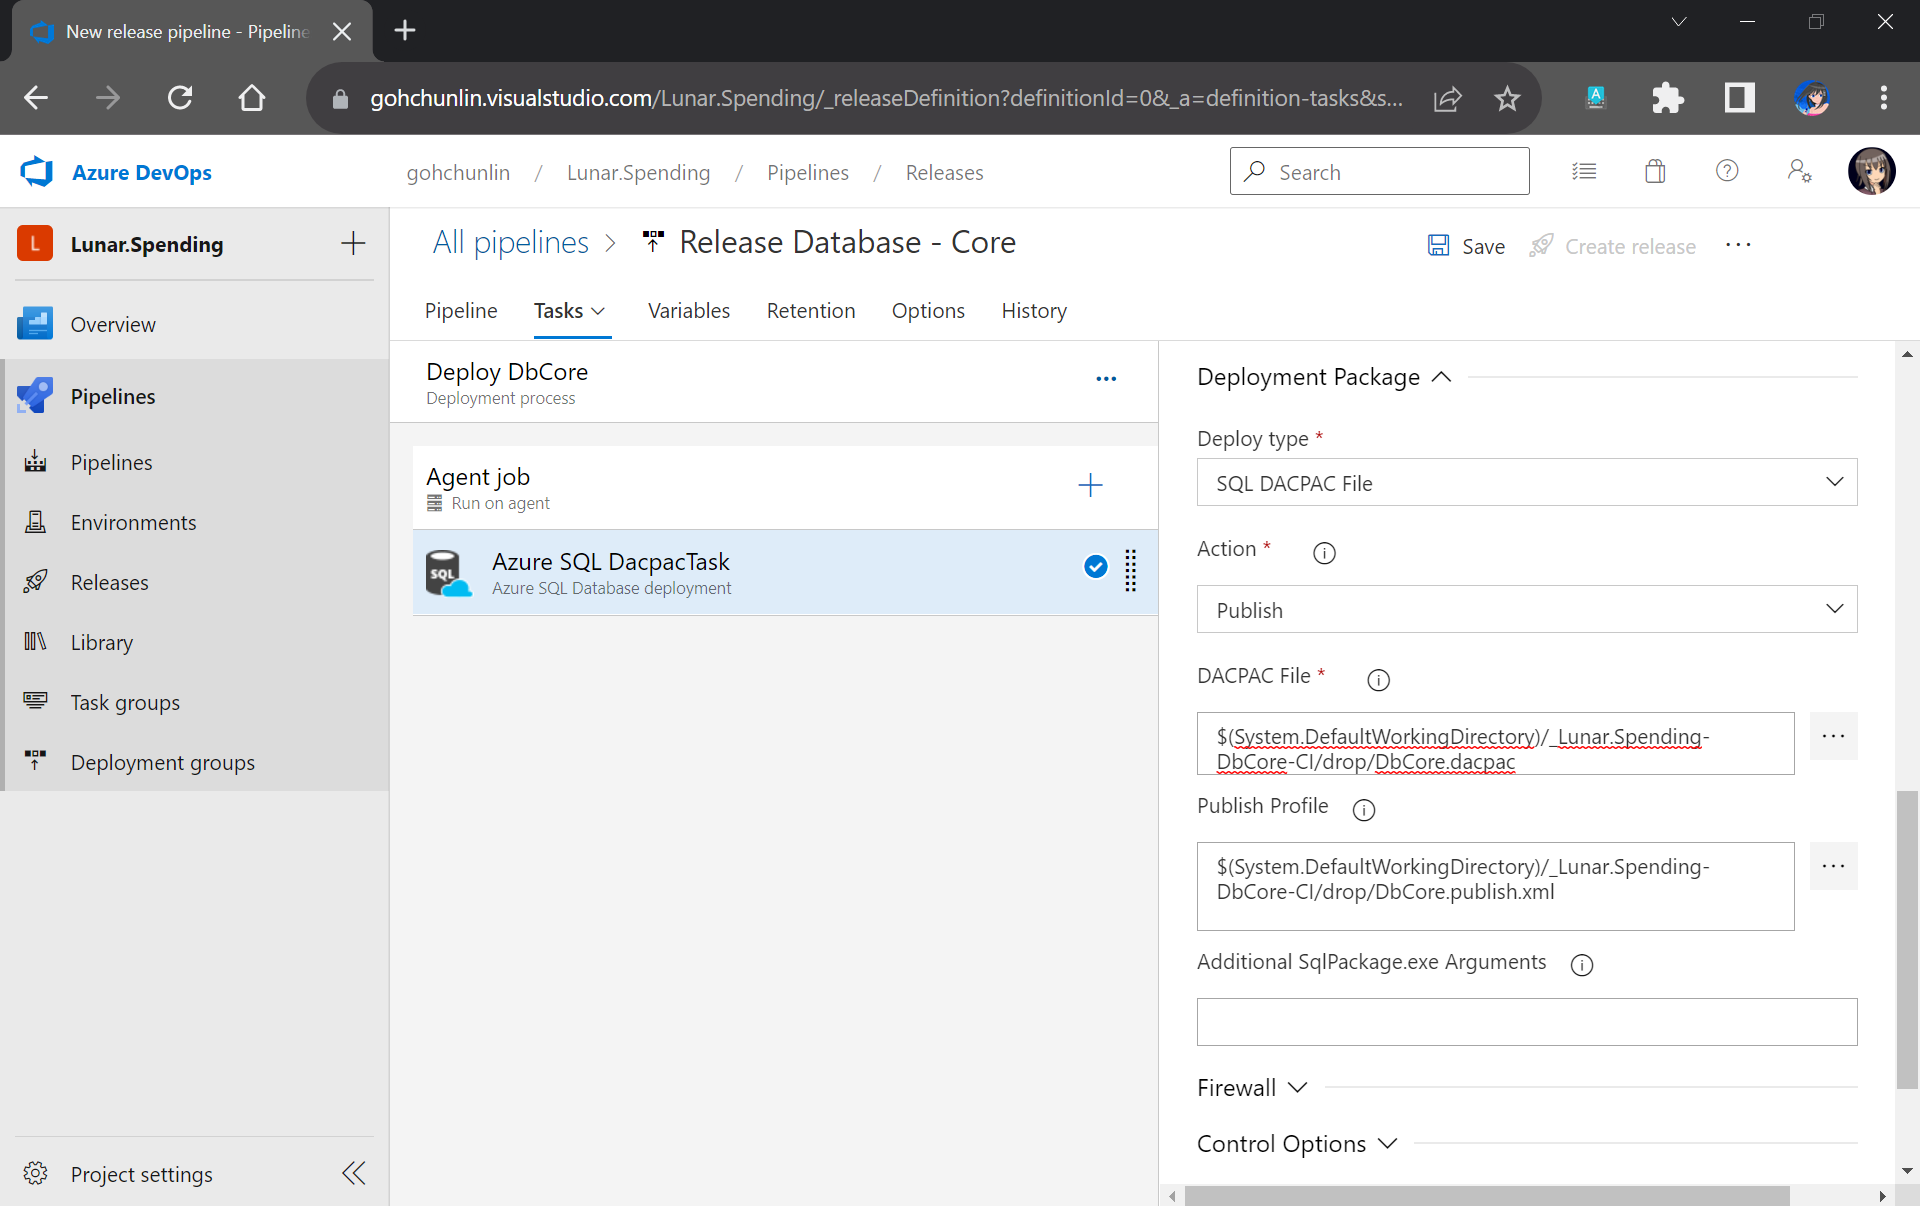
The first task will be deploying database changes to Azure SQL with the task “Azure SQL Database deployment”. In the task, we need to select our Azure subscription and provide our Azure SQL database admin login credential so that the database changes can be deployed to Azure SQL on our behalf.
In the same task, under the Deployment Package section, we need to state that we will be deploy with a DACPAC file. This is also where we will use the DACPAC file and publish profile file in the Build Artifact.
Next, we will run into a problem. We are supposed to add the testing task next. However, connection strings to the database are needed. So how could we securely store the connection strings in our pipeline?
Shanmugam Chinnappa proposed three ways to solve this problem. I will demostrate how I use his method of using user-defined secret variables. This is the most straightforward way among the three.
Firstly, we need to edit the app.config file in the TestDbCore project. In this file, two connection strings can be found. The connection string in ExecutionContext is used to execute the test script in our unit test. The PrivilegedContext connection is used to test interactions with the database outside the test script in our unit test.
To keep things simple, we will use the same connection string for both contexts. We thus can replace the connection string in those two contexts with a token #{TestDbCoreConnection}#.
<ExecutionContext Provider="System.Data.SqlClient"
    ConnectionString="#{TestDbCoreConnection}#" CommandTimeout="30" />

<PrivilegedContext Provider="System.Data.SqlClient"
    ConnectionString="#{TestDbCoreConnection}#" CommandTimeout="30" />
After committing this change to our GitHub repo, we will specify the actual connection string in the Pipeline Variables section under the same name as the token. Since we use TestDbCoreConnection as our token label, the variable is thus called TestDbCoreConnection as well, as shown in the screenshot below.

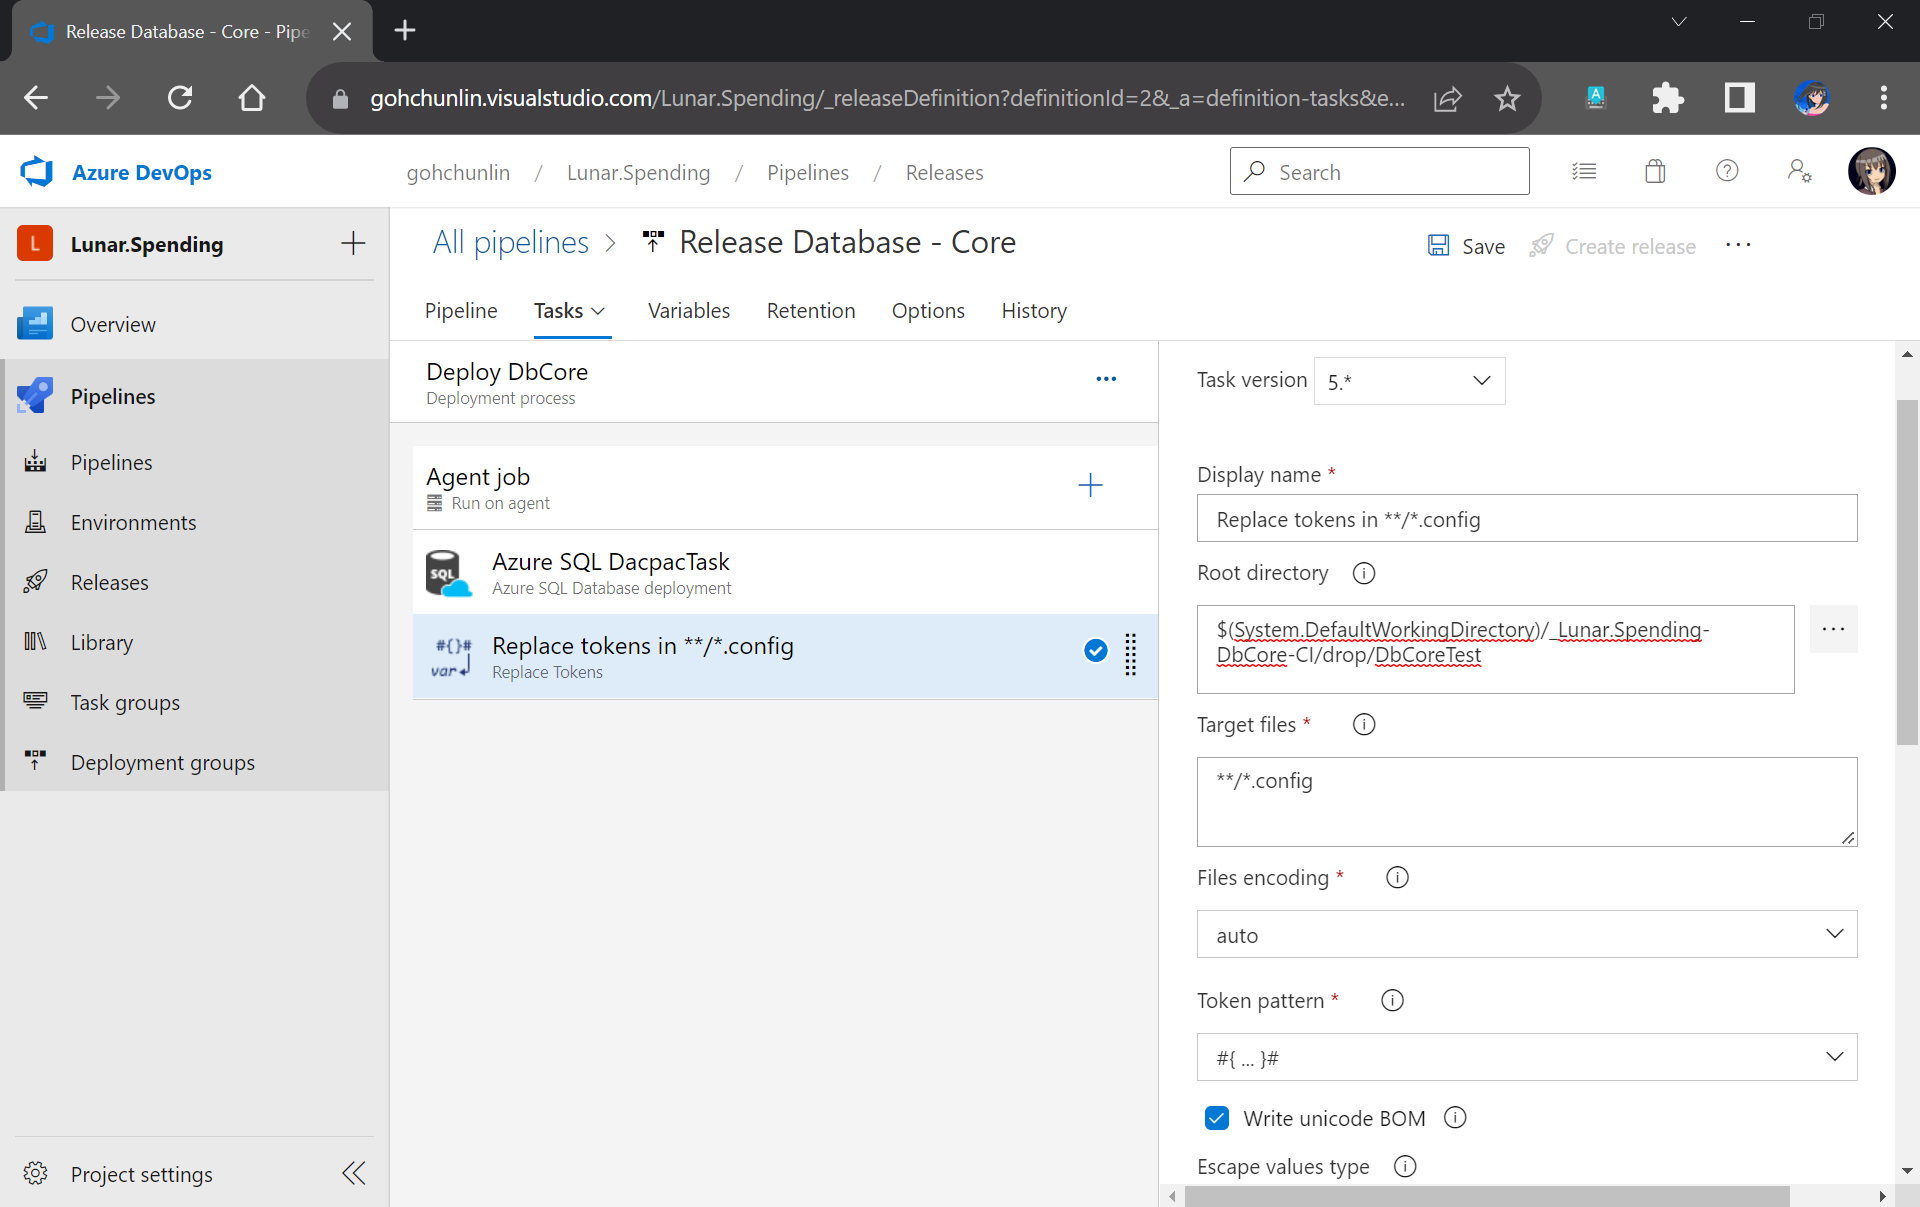
Now we will need a task which would replace the tokens in the app.config file with the actual value. The task we will be using here is the “Replace Tokens” done by Guillaume Rouchon.
Previously we have moved the TestDbCore bin/Release folder to the Build Artifact. In fact, app.config, which is renamed to TestDbCore.dll.config, is in the folder as well. Hence, we can locate the config file easily by pointing the task to the Build Artifact accordingly, as demonstrated in the screenshot below.
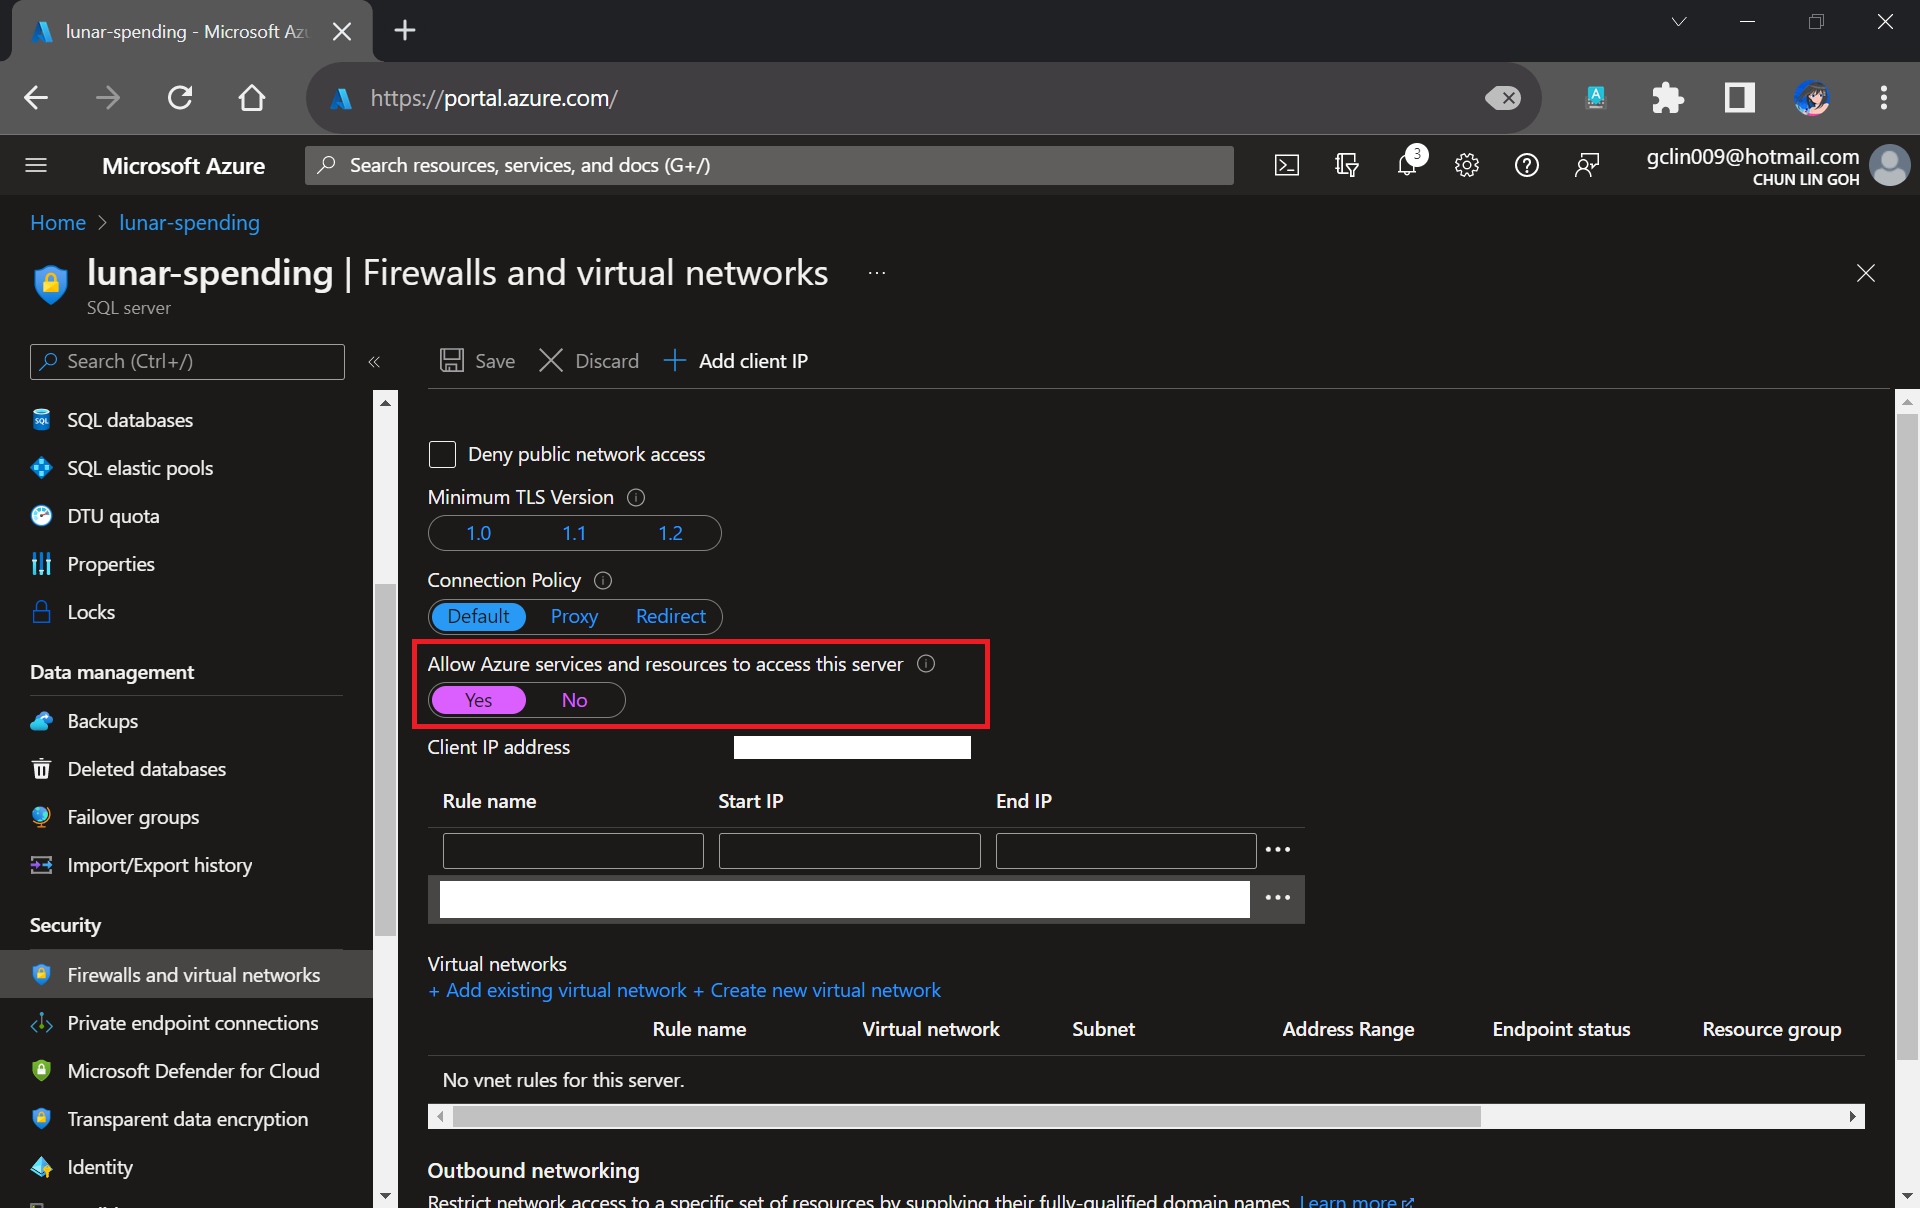
Please take note that since our unit tests need to test the Azure SQL database specified in the connection string, we need to allow Azure services and resources to access our Azure SQL server by configuring its firewall, as shown in the following screenshot. Otherwise, all our unit tests will fail because the Azure SQL server cannot be reached.
Interestingly, the Azure AQL Database deployment task will still be executed successfully even though we do not allow the access mentioned above.
With the actual connection string in place, we can now add our Visual Studio Test (2.*) task back to execute our unit test.
We have our test files in the folder DbCoreTest in the Build Artifact as we designed earlier in the Build Pipeline. Hence, we simply need to point the Search Folder of the Visual Studio Test task to the folder accordingly.

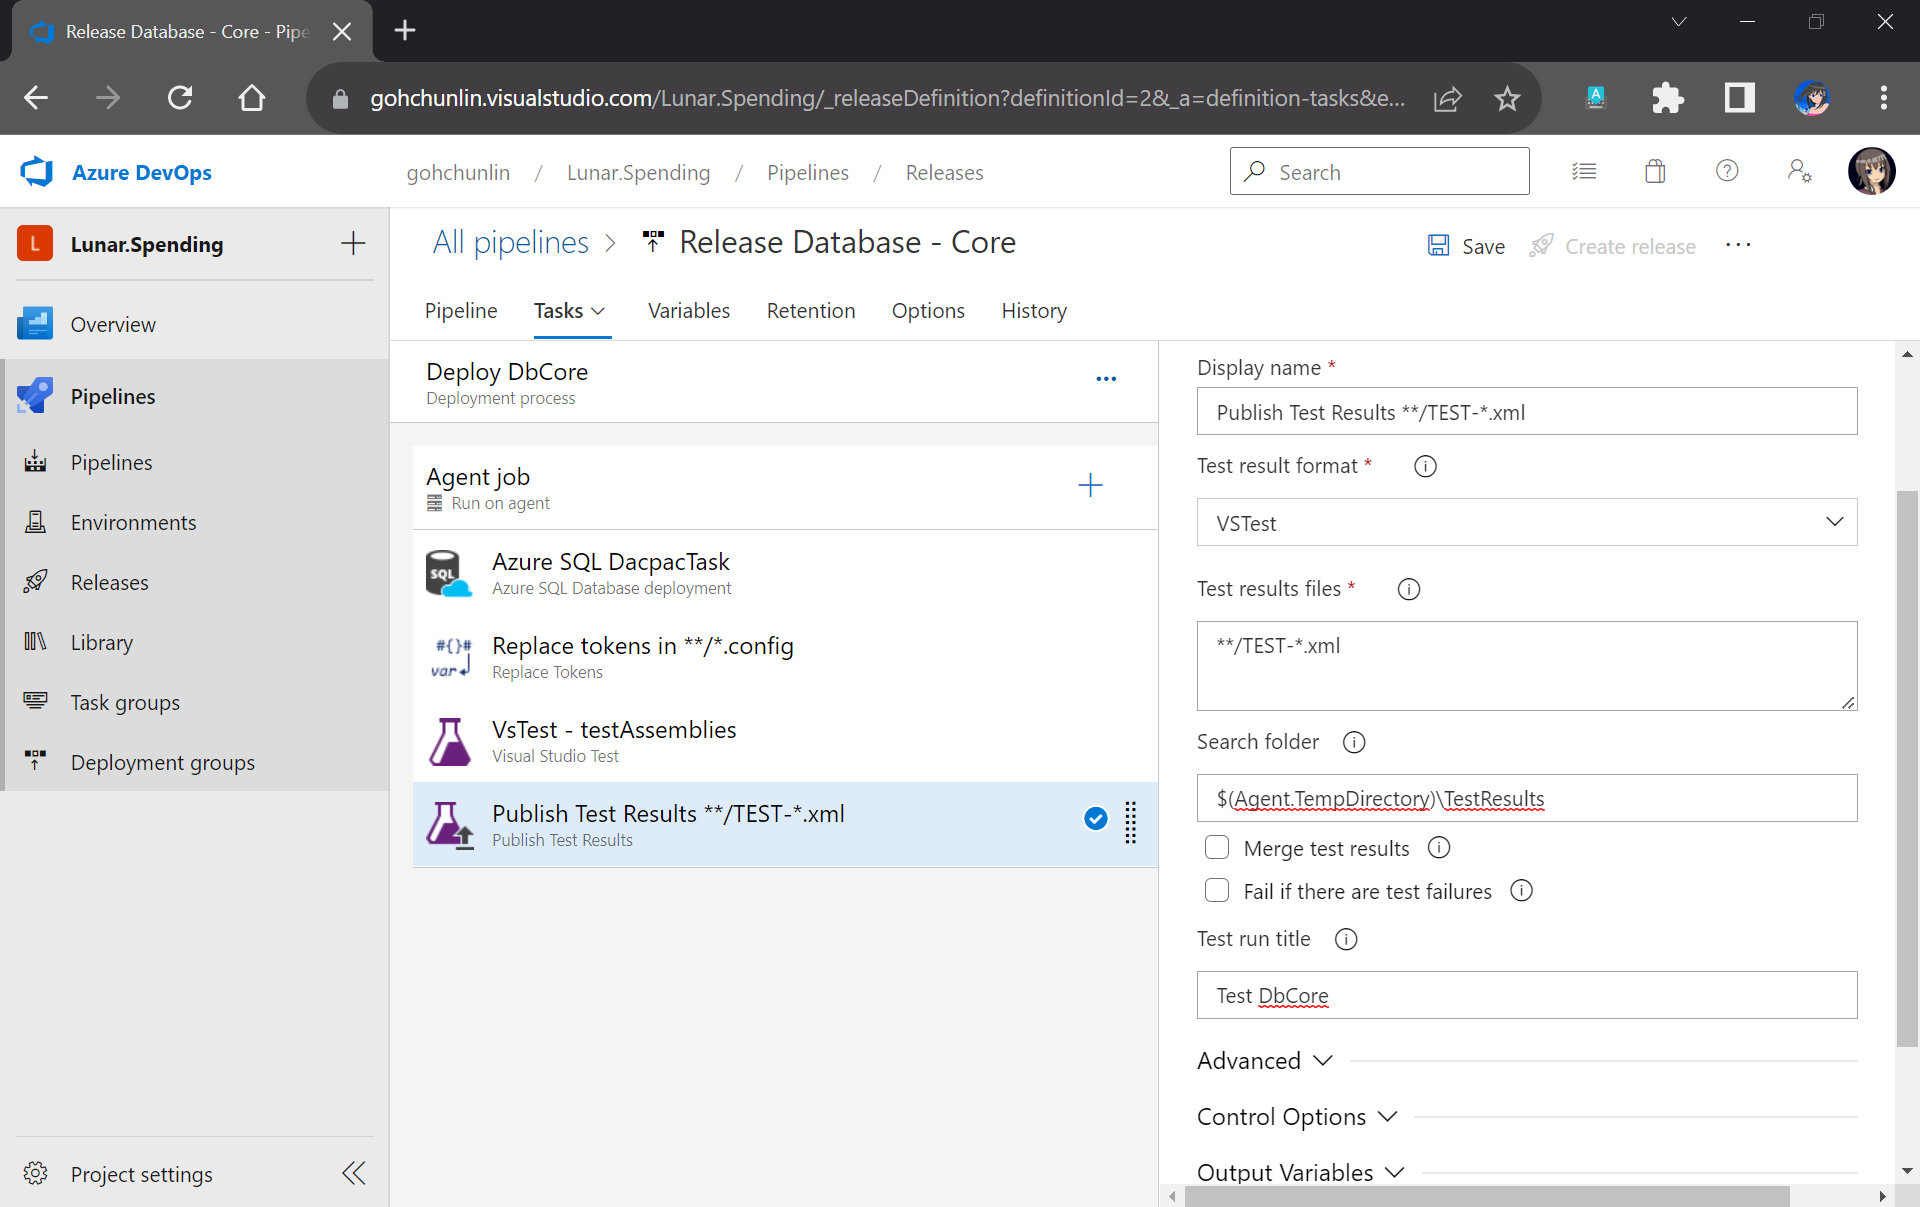
You may have noticed that the test results will be stored in a folder called $(Agent.TempDirectory)\TestResults. So, let’s add our last task of the stage which is to publish the test results.
We will need to specify that our test results are generated by VSTest. Aftervthat, we point the task to look for test results in the $(Agent.TempDirectory)\TestResults folder. Finally, we name our test run.
That’s all! Please remember to save the Release Pipeline changes.
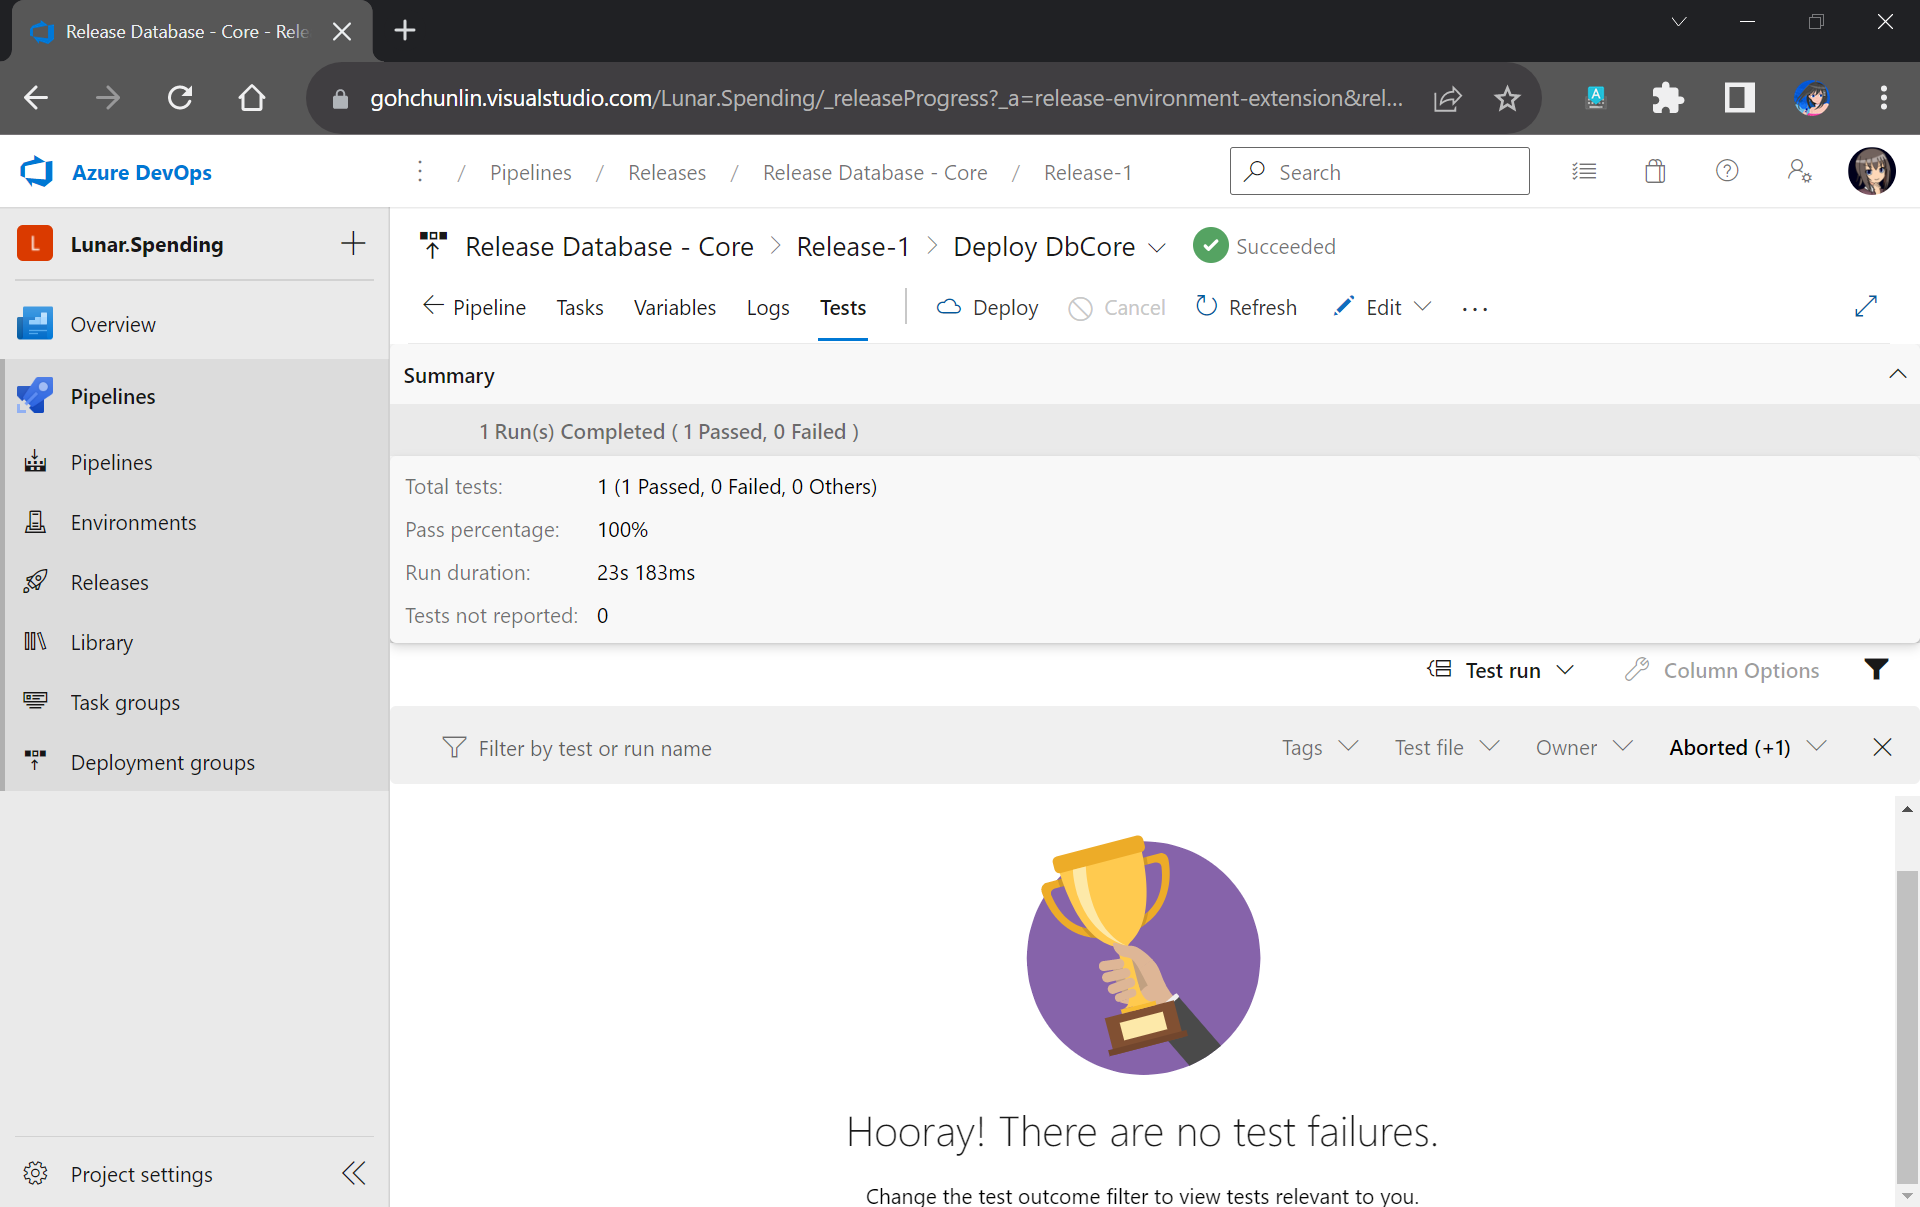
Now when there is a new build completed, the Release Pipeline will be automatically triggered. Once it is completed, not only our database on Azure SQL will be updated accordingly, but also we will have a detailed test result. For example, when all of our unit tests have passed, we will get a test result as shown below.
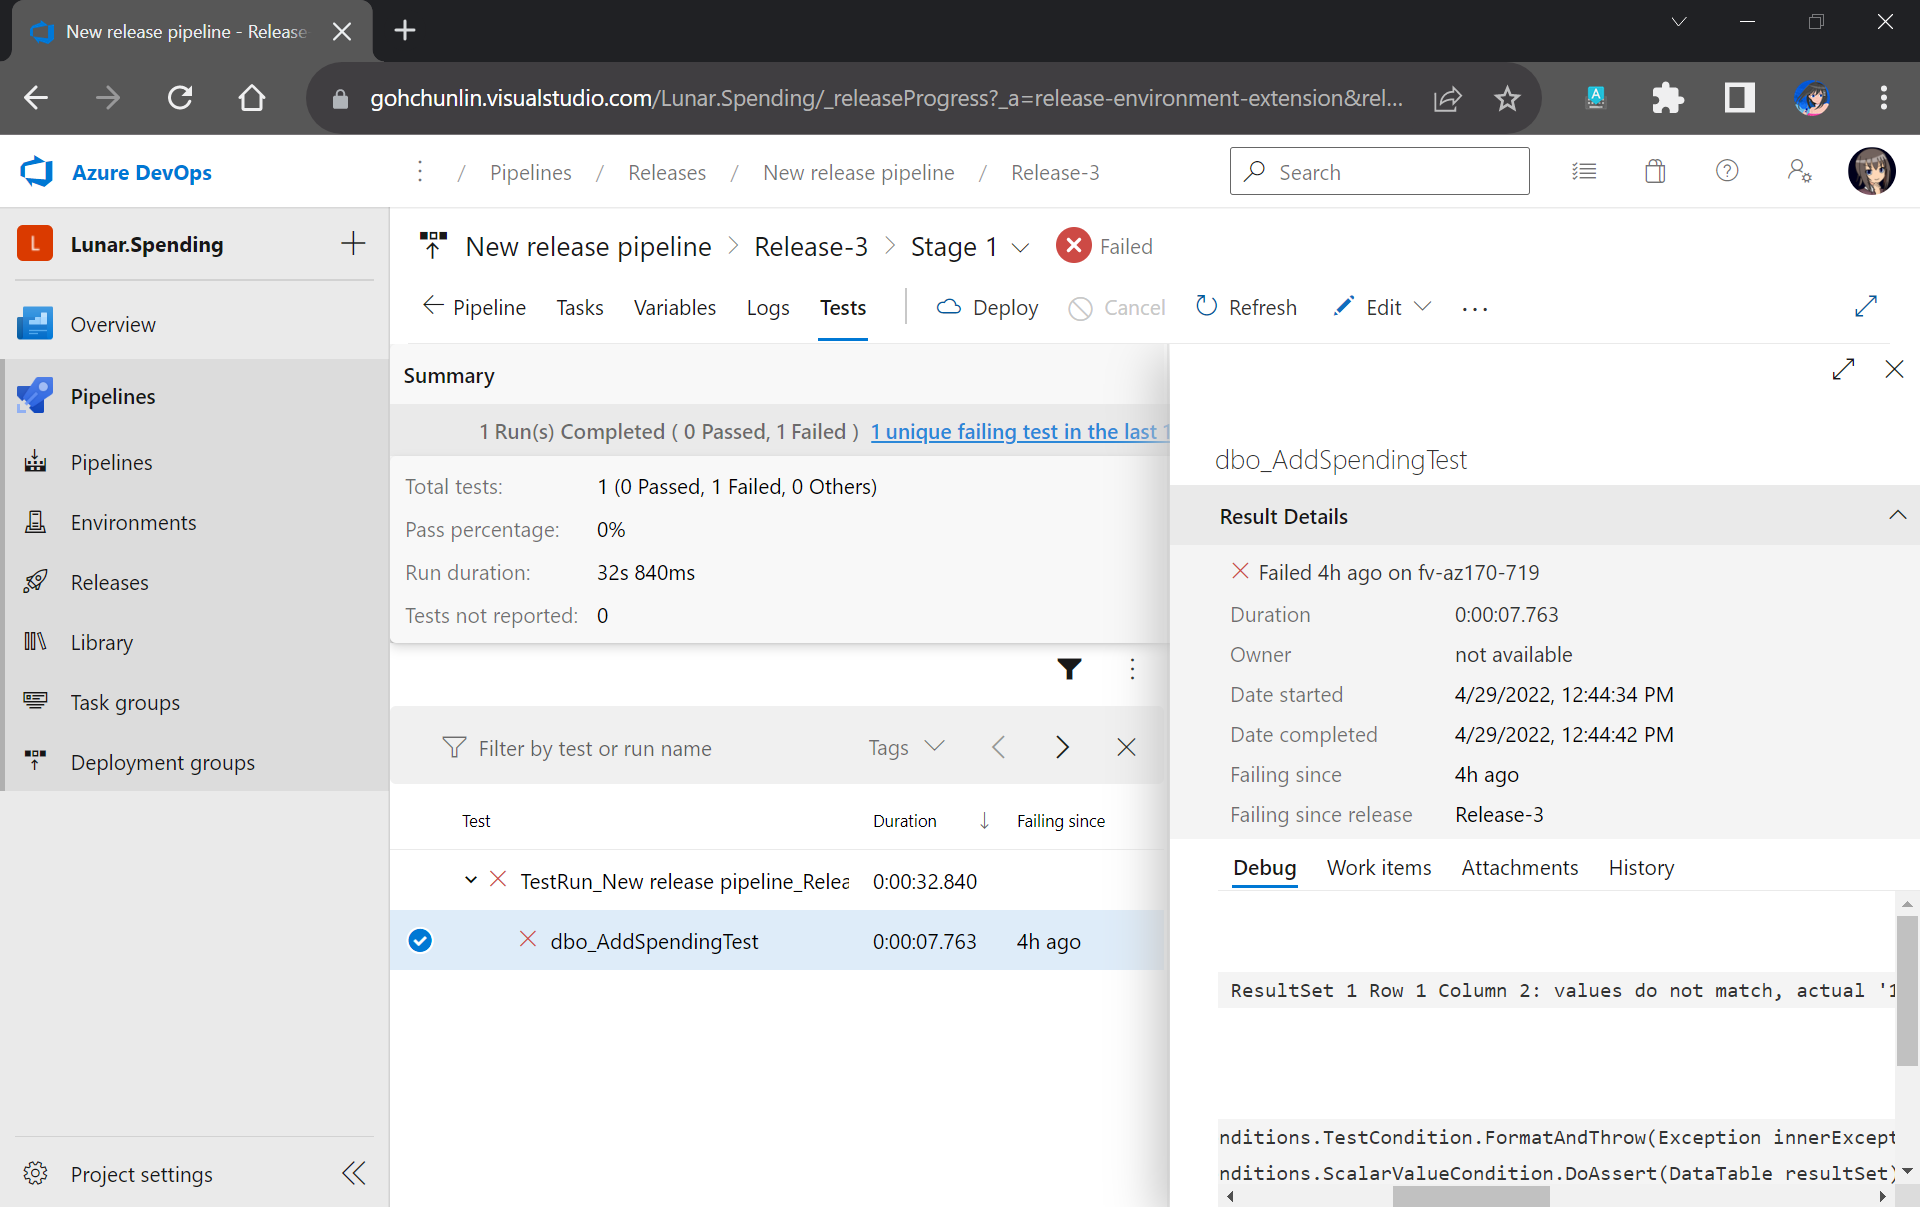
However, if there is one or many tests fail, we can easily locate the failed tests easily in the report.
That’s all for a simple walkthrough from writing unit tests for stored procedures to automatically deploying and testing them with Azure DevOps CI/CD pipelines.
I actually started learning all these after watching Hamish Watson’s sharing on DevOps Lab show which was released four years ago in 2018. In the video, he also shared about how DBA could do unit testing of their database changes tSQLt. Please watch the full YouTube video if you would like to find out more about unit testing our stored procedures.
References
- Verifying Database Code by Using SQL Server Unit Tests;
- [YouTube] Unit Testing your Database Changes | DevOps Lab;
- ASP.NET Core, Web API – Entity Framework Call Stored Procedure Implementation;
- Install SSDT with Visual Studio 2022;
- What does @RC Mean in SSDT SQL Server Unit Testing?
- Automate Build and Deployment of Azure SQL Database using Azure DevOps with Azure Pipelines;
- Securely Configuring Azure DevOps Pipeline for SQL Unit Testing.
