
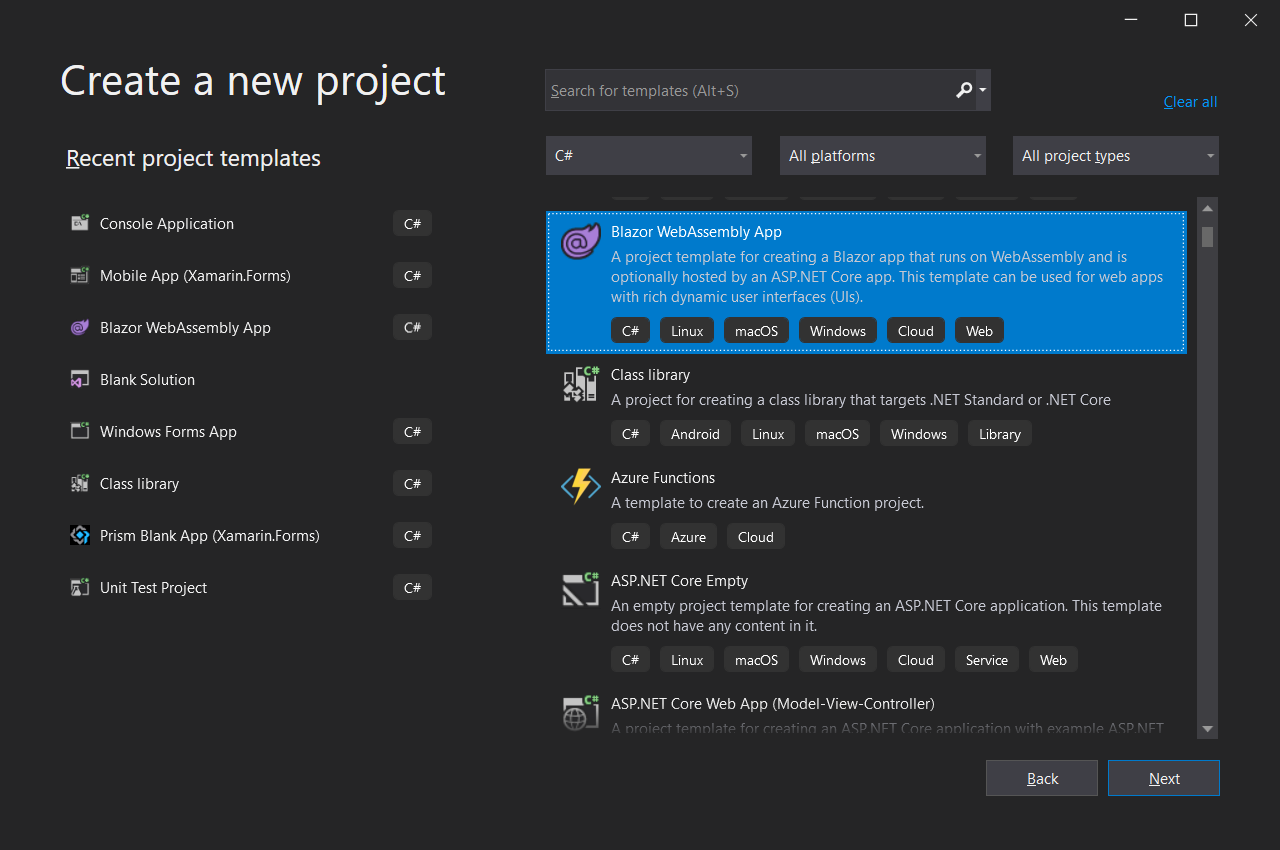
In 2018, the web framework, Blazor, was introduced. With Blazor, we can work on web UI with C# instead of JavaScript. Blazor can run the client-side C# code directly in the browser, using WebAssembly.
When server-side rendering is not required, we can then deploy our web app on platforms such as Azure Static Web App, a service that automatically builds and deploys full stack web apps to Azure from a code repository, such as GitHub.
In this article, I will share how the website for Singapore .NET Developers Community and Azure Community is re-built as a Blazor web app and deployed to Azure.
PROJECT GITHUB REPOSITORY
The complete source code of this project can be found at https://github.com/sg-dotnet/website.
Blazor Web UI
The community website is very simple. It is merely a single-page website with some descriptions and photos about the community. Then it also has a section showing list of meetup videos from the community YouTube channels.
Firstly, we will have the index.html defined as follows. Please take note that the code snippet below uses CSS file which is not shown in this post. The complete and updated project can be viewed on the GitHub repo.
<!DOCTYPE html>
<html>

<head>
    <title>Singapore .NET Developers Community + Azure Community</title>
    <meta charset="utf-8" />
    <meta name="viewport" content="width=device-width, initial-scale=1.0, maximum-scale=1.0, user-scalable=no" />

    ...

    <link rel="icon" href="images/favicon.png" type="image/png">
    <link rel="stylesheet" href="css/main.css" />

    <base href="/" />
    http://_framework/blazor.webassembly.js
</head>

<body>
    <div id="app">
        <div style="position:absolute; top:30vh; width:100%; text-align:center">
            <h2>Welcome to dotnet.sg</h2>
            <div style="width: 50%; display: inline-block; height: 20px;">
                <div class="progress-line"></div>
            </div>

            <p>
                The website is loading...
            </p>
        </div>
    </div>

    <div id="blazor-error-ui">
        An unhandled error has occurred.
        <a href="" class="reload">Reload</a>
        <a class="dismiss">🗙</a>
    </div>

    <!-- Scripts -->
    http://javascript/jquery.min.js
</body>

</html>
Secondly, if we hope to have a similar UI template across all the web pages in the website, then we can define the HTML template under, for example, MainLayout.razor, as shown below. This template means that the header and footer sections can be shared across different web pages.
@inherits LayoutComponentBase
<!-- Header -->
<header id="header" class="alt">
<div class="logo"><a href="/">SG <span>.NET + Azure Dev</span></a></div>
</header>
@Body
<!-- Footer -->
<footer id="footer">
<div class="container">
<ul class="icons">
...
</ul>
</div>
<div class="copyright">
© ...
</div>
</footer>
Finally, we simply need to define the @Body of each web page in their own Razor file, for example the Index.razor for the homepage.
In the Index.razor, we will fetch the data from a JSON file hosted on Azure Storage. The JSON file is periodically updated by Azure Function to fetch the latest video list from the YouTube channel of the community. Instead of using JavaScript, here we can simply write a C# code to do that directly on the Razor file of the homepage.
@code {
    private List<VideoFeed> videoFeeds = new List<VideoFeed>();

    protected override async Task OnInitializedAsync()
    {
        var allVideoFeeds = await Http.GetFromJsonAsync<VideoFeed[]>("...");

        videoFeeds = allVideoFeeds.ToList();
    }

    public class VideoFeed
    {
        public string VideoId { get; set; }

        public Channel Channel { get; set; }

        public string Title { get; set; }

        public string Description { get; set; }

        public DateTimeOffset PublishedAt { get; set; }
    }

    public class Channel
    {
        public string Name { get; set; }
    }
}
Publish to Azure Static Web App from GitHub
We will have our codes ready in a GitHub repo with the following structure.
- .github/workflows
- DotNetCommunity.Singapore
- Client
- (Blazor client project here)
- Client
Next, we can proceed to create a new Azure Static Web App where we will host our website at. In the first step, we can easily link it up with our GitHub account.

After that, we will need to provide the Build details so that a GitHub workflow will be automatically generated. That is a GitHub Actions workflow that builds and publishes our Blazor web app. Hence, we must specify the corresponding folder paths within our GitHub repo, as shown in the screenshot below.
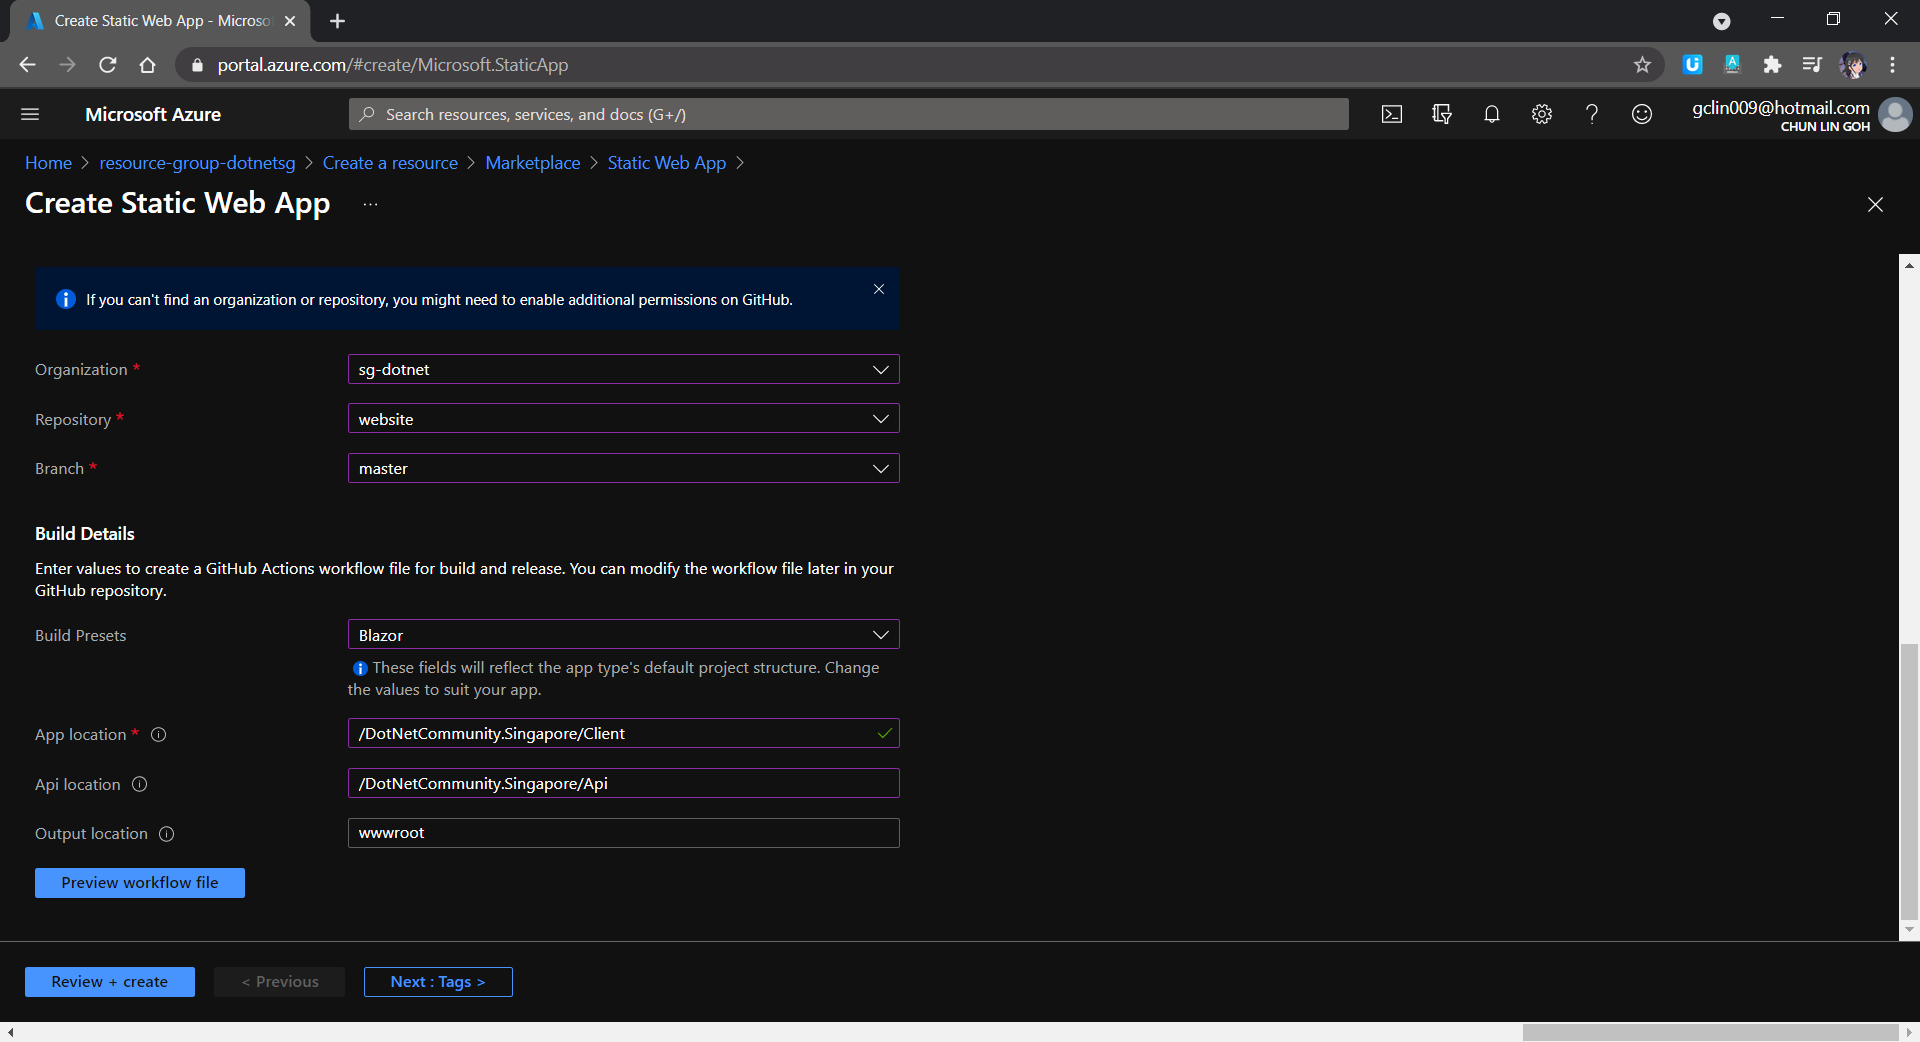
The “App location” is to point to the location of the source code for our Blazor web app. For the “Api location”, although we are not using it in our Blazor project now, we can still set it as follows so that in the future when we can easily setup the Api folder.
With this setup ready, whenever we update the codes in our GitHub repo via commits or pull requests, our Blazor web app will be built and deployed.

Custom Domains
For the free version of the Azure Static web app, we are only allowed to have 2 custom domains per app. Another good news is that Azure Static Web Apps automatically provides a free SSL/TLS certificate for the auto-generated domain name and any custom domains we add.
CNAME record validation is the recommended way to add a custom domain, however, it only works for subdomains, such as “www.dotnet.sg” in our case.
For root domain, which is “dotnet.sg” in our case, by right we can do it in Azure Static Web App by using TXT record validation and an ALIAS record.

However, since there is currently no support of ALIAS or ANAME records in the domain provider that I am using, I have no choice but to have another Azure Function for binding “dotnet.sg”. This is because currently there is no IP address given in Azure Static Web App but there are IP address and Custom Domain Verification ID available in Azure Function. With these two information, we can easily map an A Record to our root domain, i.e. “dotnet.sg”.
Please take note that A Records are not supported for Consumption-based Function Apps. We must pay for the “App Service Plan” instead.

After having the Azure Function ready, we need to perform URL redirect from “dotnet.sg” to “www.dotnet.sg”. With just a Proxy, we can create a Response Override with Status Code=302 and add a Header of Location=https://www.dotnet.sg, as shown in the following screenshot.

With all these ready, we can finally get our community website up and running at dotnet.sg.

Export SSL Certificate For Azure Function
This step is optional. I need to go through this step because I have a Azure App Service managed certificate in one subscription but Azure Function in another subscription. Hence, I need to export the SSL certificate out and then import it back to another subscription.

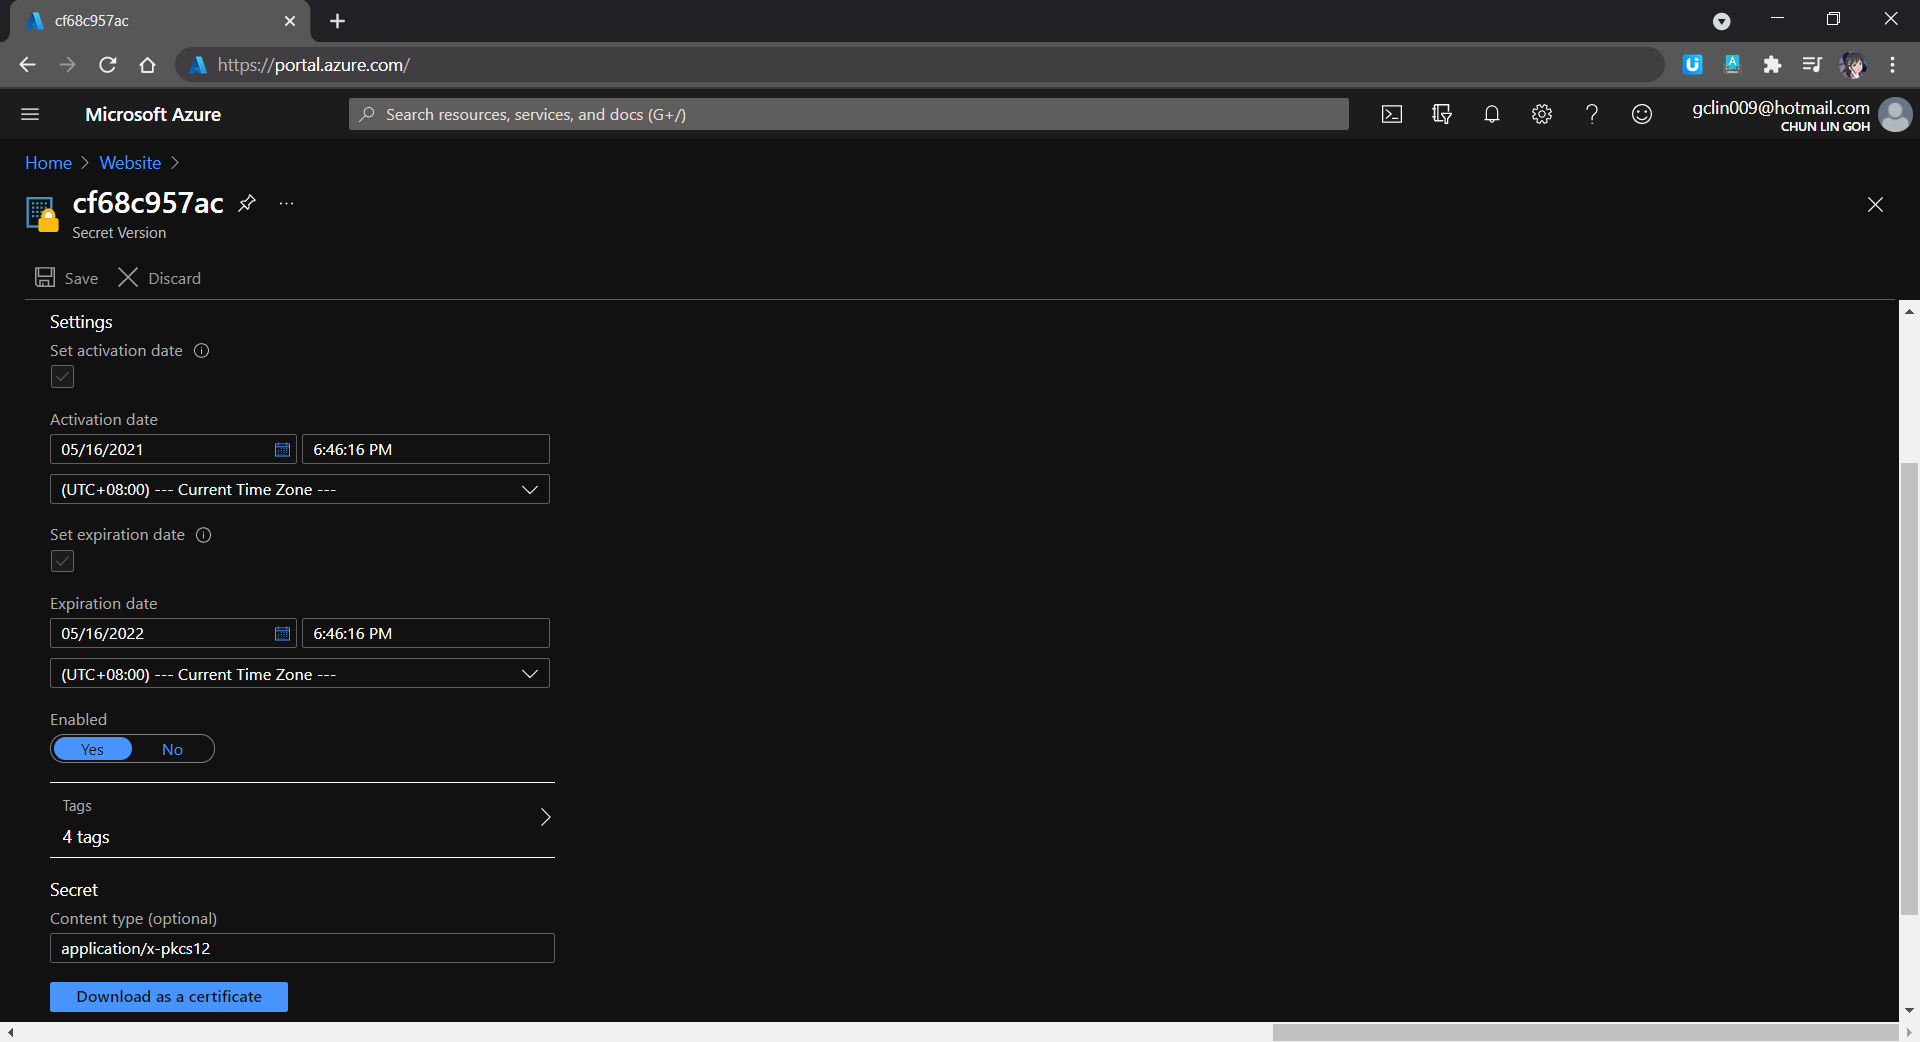
In the Key Vault Secret screen, we then need to choose the correct secret version and download the certificate, as shown in the following screenshot.
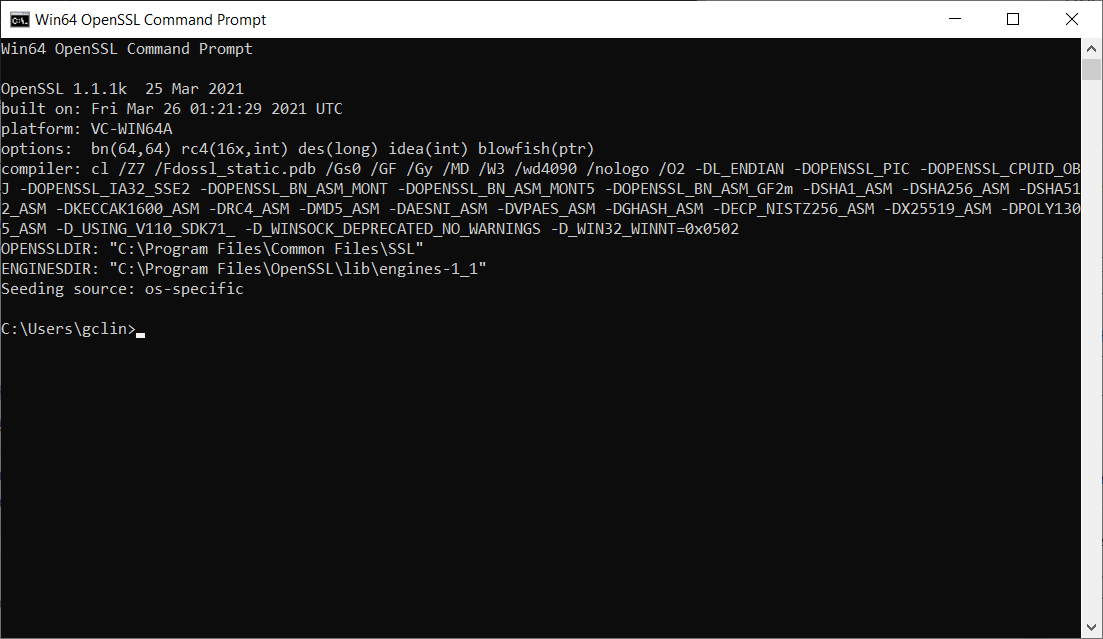
After that, as mentioned in an online discussion about exporting and importing Azure App Service Certificate which has no password, we shall use tool such as OpenSSL to regenerate a pfx certificate with password that Azure Function can accept with the following commands.
> openssl pkcs12 -in .\old.pfx -out old.pem -nodes

> openssl pkcs12 -export -out .\new.pfx -in old.pem
We will be prompted for a password after executing the first command. We simply press enter to proceed because the certificate, as mentioned above, has no password.
With this step done, I finally can import the cert to the Azure Function in another subscription.
Yup, that’s all for hosting our community website as a Blazor web app on Azure Static Web App!
References
- [YouTube] Publish a Blazor WebAssembly app with Azure Static Web Apps;
- Publish a Blazor WebAssembly app and .NET API with Azure Static Web Apps;
- Use an Azure Function to Redirect URL: Use an Azure Function v2 with a proxy to redirect legacy domains to a new domain;
- Tutorial: Map an existing custom DNS name to Azure App Service;
- What Password does an Azure App Service Certificate have when Exported as PFX?
- Add a TLS/SSL certificate in Azure App Service;
- Handle Errors in ASP.NET Core Blazor Apps.
The code of this Blazor project described in this article can be found in our community GitHub repository: https://github.com/sg-dotnet/website.


