Recently, we are working on a project which needs a long-running service for processing CPU-intensive data. We choose to build a .NET worker service because with .NET, we are now able to make our service cross-platform and run it on Amazon ECS, for example.
Setup
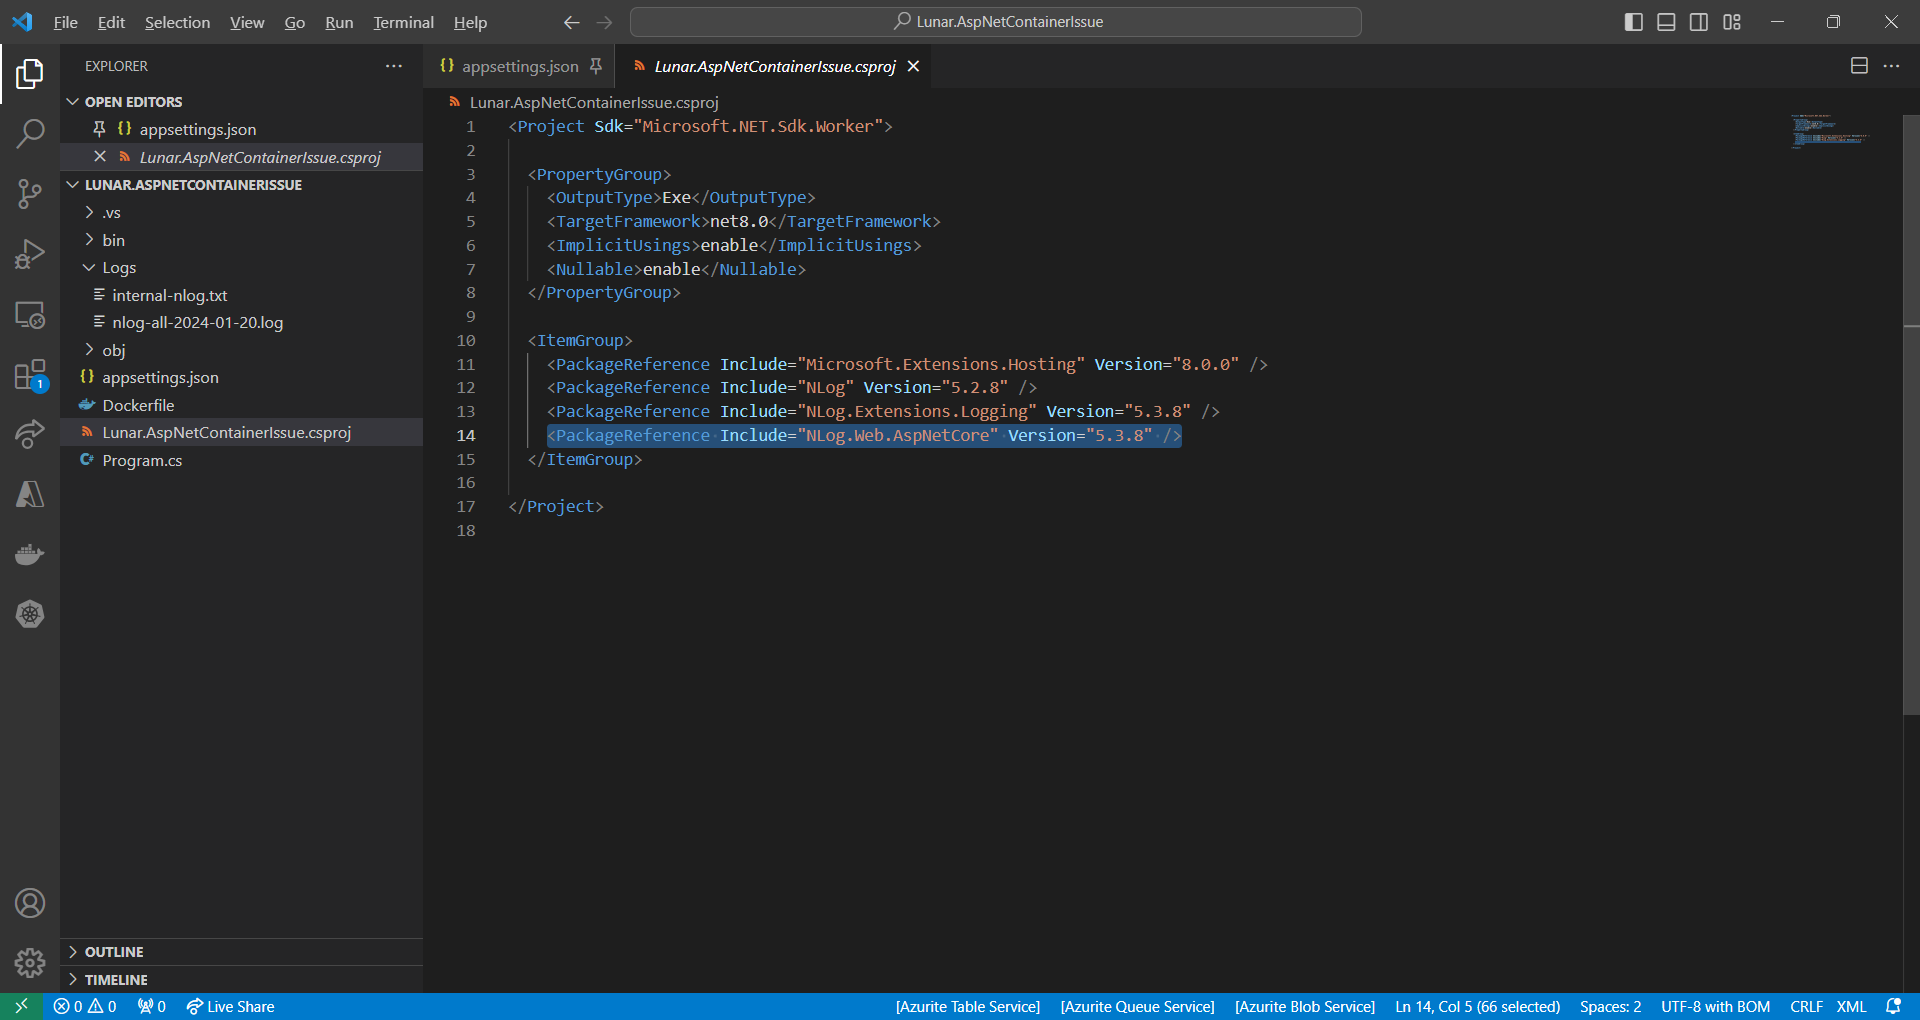
To simplify, in this article, we will be running the following code as a worker service.
using Microsoft.Extensions.Hosting;

using NLog;

using NLog.Extensions.Logging;


Console.WriteLine("Hello, World!");


var builder = Host.CreateApplicationBuilder(args);


var logger = LogManager.Setup()

    .GetCurrentClassLogger();


try

{

    builder.Logging.AddNLog();


    logger.Info("Starting");


    using var host = builder.Build();

    await host.RunAsync();

}

catch (Exception e)

{

    logger.Error(e, "Fatal error to start");

    throw;

}

finally

{

    // Ensure to flush and stop internal timers/threads before application-exit (Avoid segmentation fault on Linux)

    LogManager.Shutdown();

}
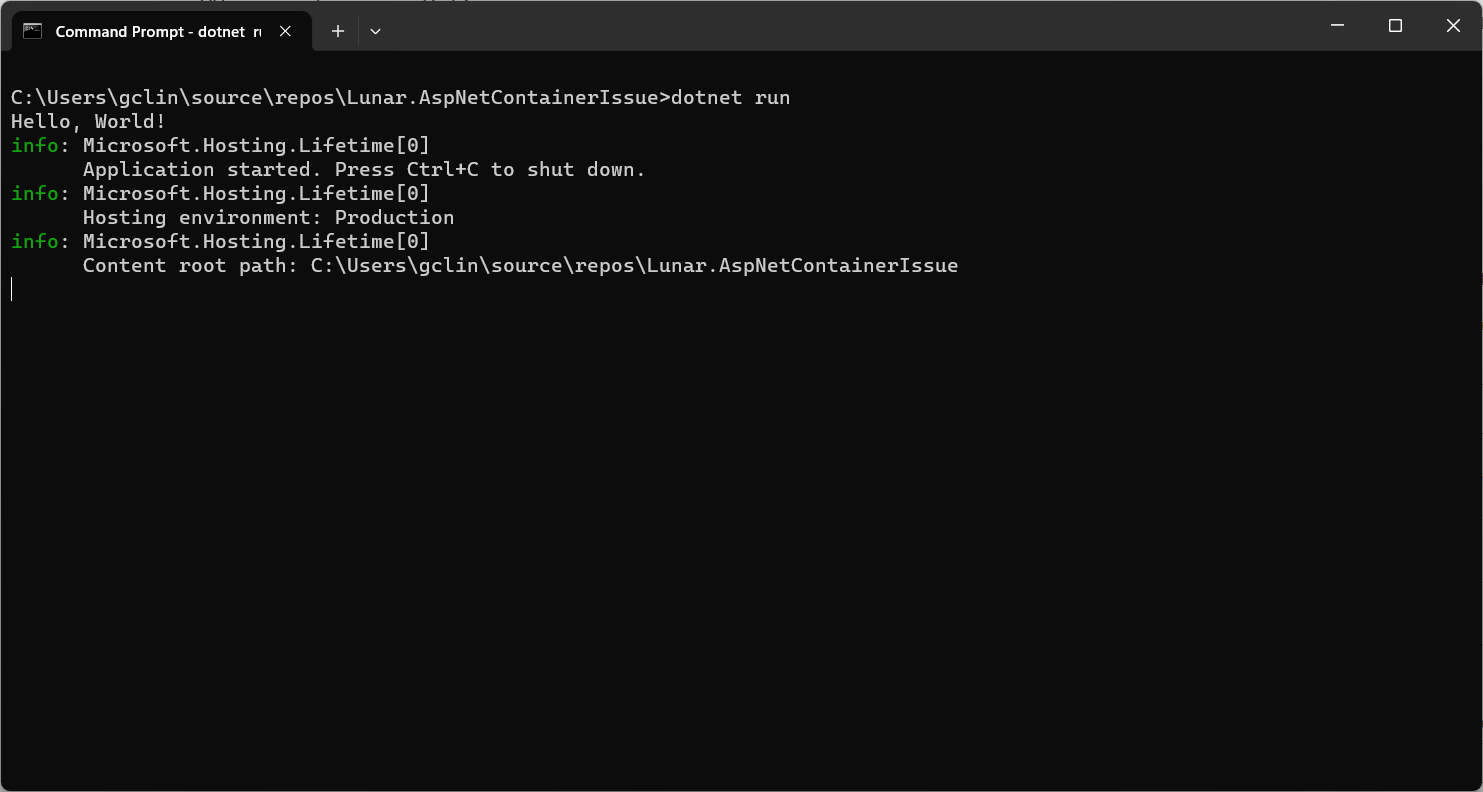
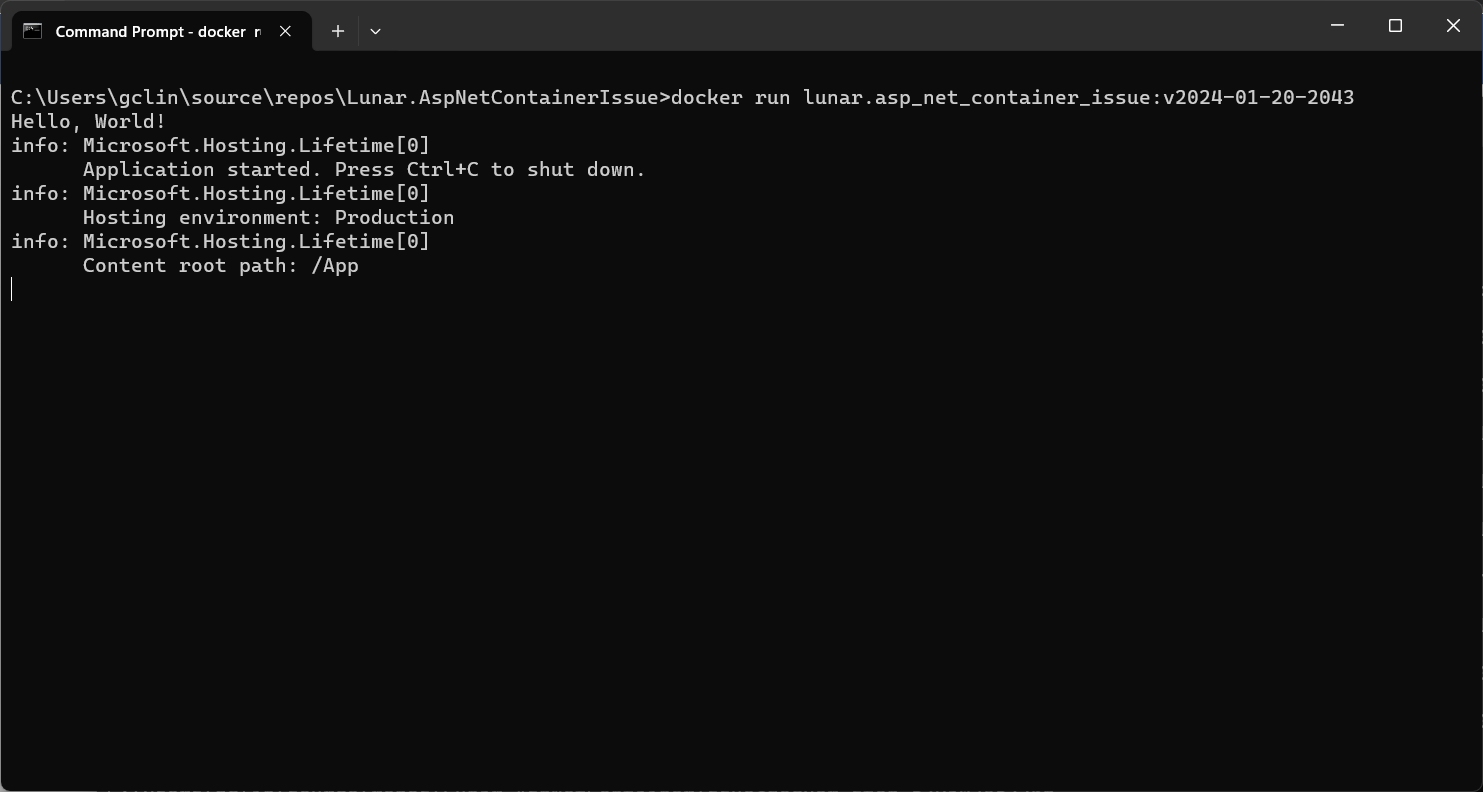
So, if we run the code above locally, we should be seeing the following output.
The output of our simplified .NET worker service.
In this project, we are using the NuGet library NLog.Extensions.Logging, thus the NLog configuration is by default read from appsettings.json, which is provided below.
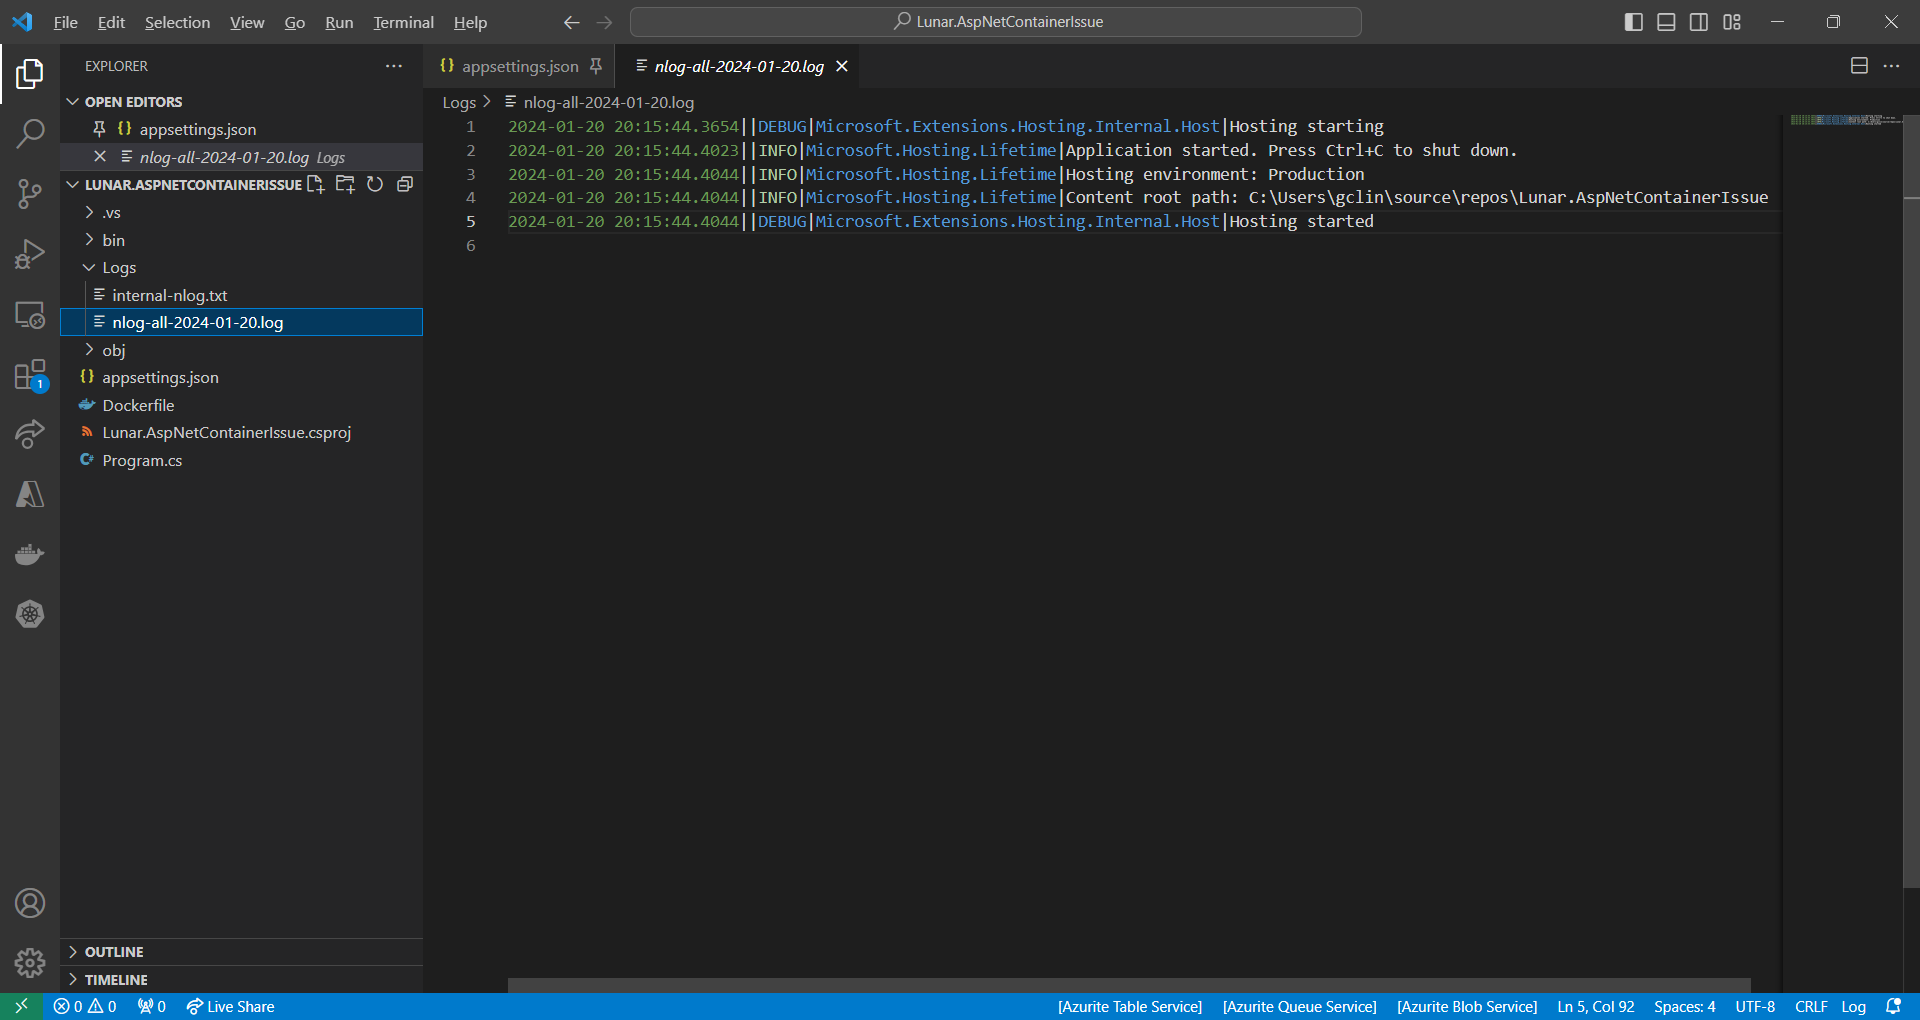
So, we should be having two log files generated with one showing something similar to the output on the console earlier.
The log file generated by NLog.
Containerisation and the Issue
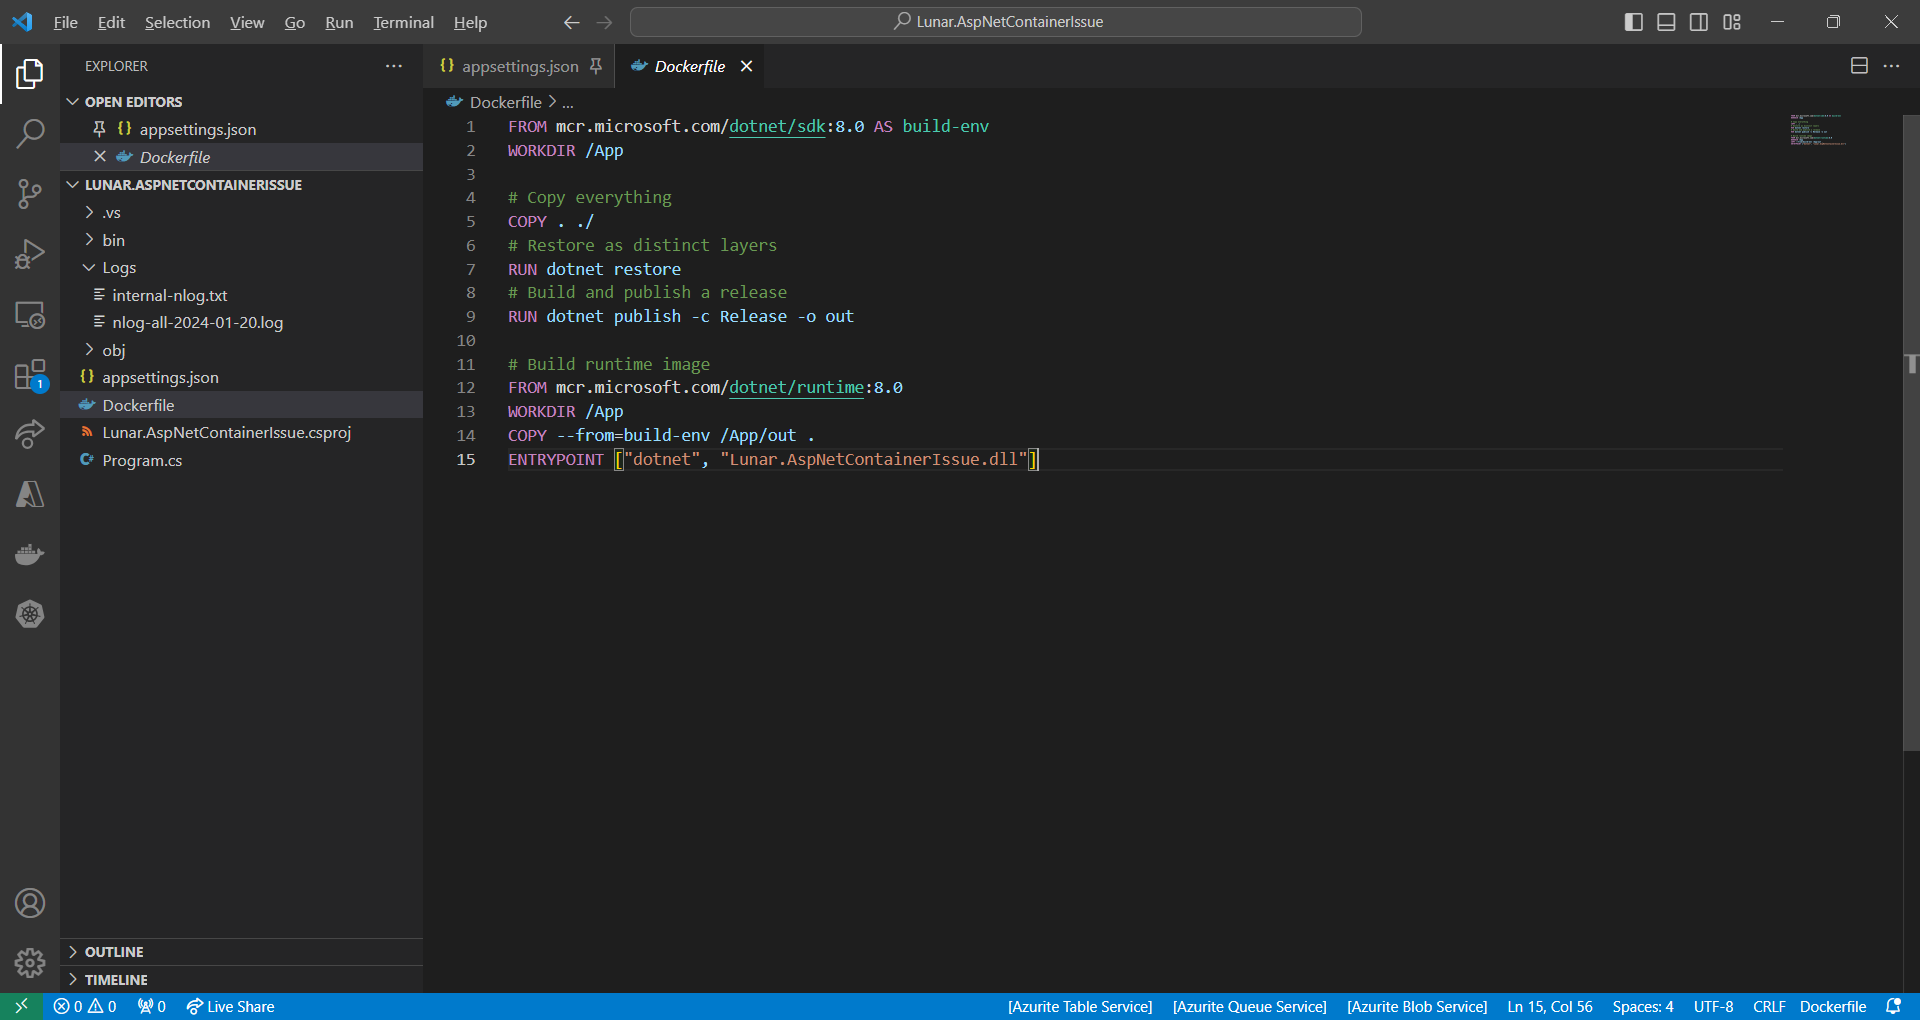
Since we will be running this worker service on Amazon ECS, we need to containerise it first. The Dockerfile we use is simplified as follows.
Simplified version of the Dockerfile we use.
However, when we run the Docker image locally, we receive an error, as shown in the screenshot below, saying “You must install or update .NET to run this application.” However, aren’t we already using .NET runtime as stated in our Dockerfile?
No framework is found.
In fact, if we read the error message clearly, it is the ASP .NET Core that it could not find. This confused us for a moment because it is a worker service project, not a ASP .NET project. So why does it complain about ASP .NET Core?
We accidentally include the NLog.Web.AspNetCore NuGet package which supports only ASP .NET Core platform. This library is not used in our worker service at all.
NLog.Web.AspNetCore supports only ASP .NET platform.
So, after we remove the reference, we can now run the Docker image successfully.
WRAP-UP
That’s all for how we solve the issue we encounter when developing our .NET worker service.
KOSD, or Kopi-O Siew Dai, is a type of Singapore coffee that I enjoy. It is basically a cup of coffee with a little bit of sugar. This series is meant to blog about technical knowledge that I gained while having a small cup of Kopi-O Siew Dai.
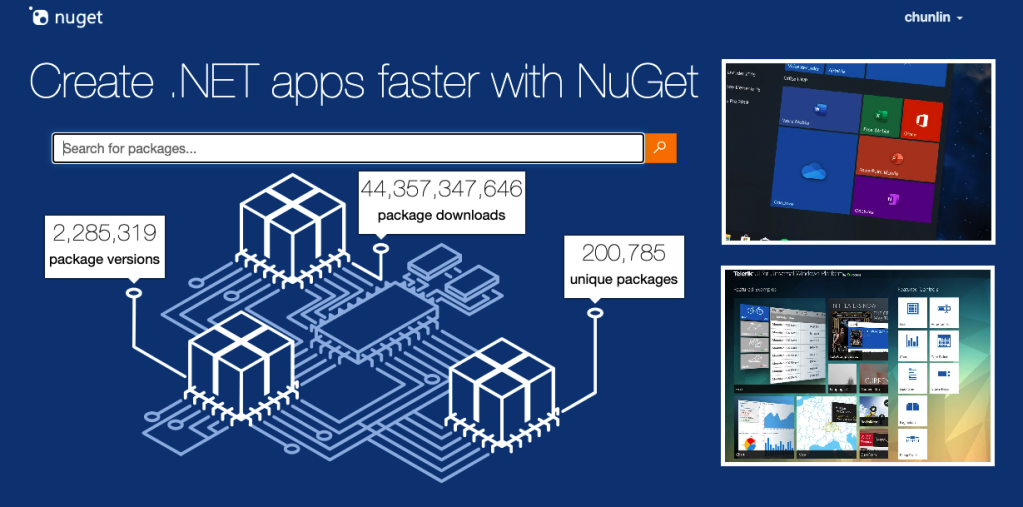
Besides the public nuget.org host, which acts as the central repository of over 100,000 unique packages, NuGet also supports private hosts. Private host is useful for example it allows developers working in a team to produce NuGet packages and share them with other teams in the same organisation.
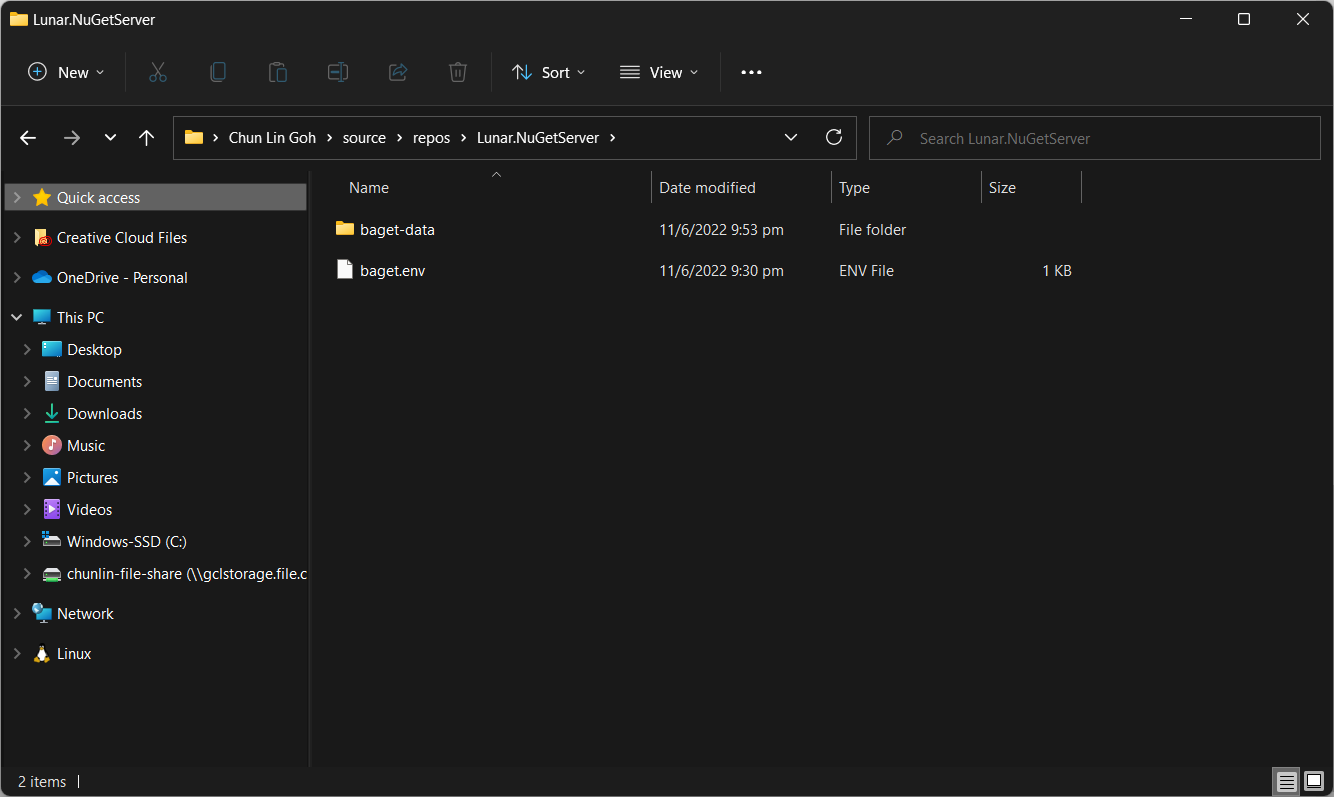
Before we run a new container from the image, we need to create a file named baget.env to store BaGet’s configurations, as shown below.
# The following config is the API Key used to publish packages.
# We should change this to a secret value to secure our own server.
ApiKey=NUGET-SERVER-API-KEY

Storage__Type=FileSystem
Storage__Path=/var/baget/packages
Database__Type=Sqlite
Database__ConnectionString=Data Source=/var/baget/baget.db
Search__Type=Database
Then we also need to have a new folder named baget-data in the same directory as the baget.env file. This folder will be used by BaGet to persist its state.
The folder structure.
As shown in the screenshot above, we have the configuration file and baget-data at the C:\Users\gclin\source\repos\Lunar.NuGetServer directory. So, let’s execute the docker run command from there.
In the command, we also mount the baget-data folder on our host machine into the container. This is necessary so that data generated by and used by the container, such as package information, can be persisted.
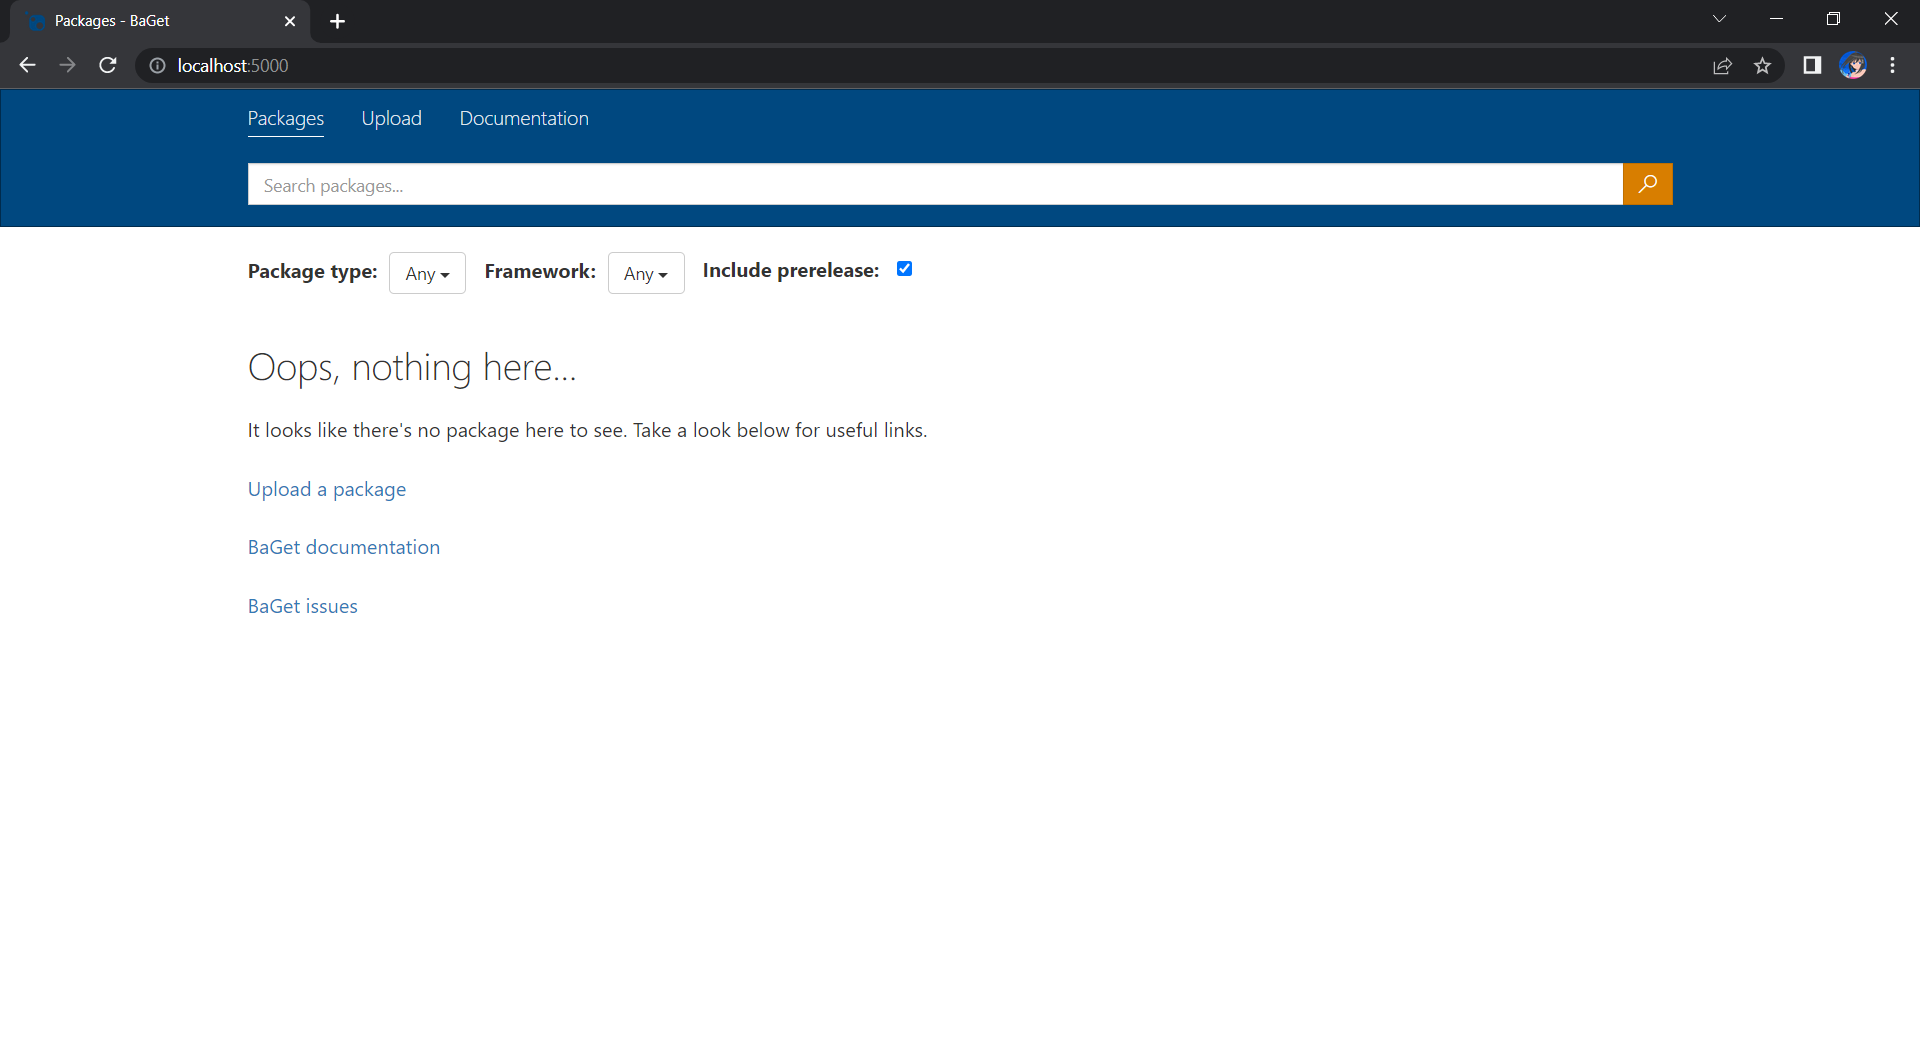
We can browse our own local NuGet server by visiting the URL http://localhost:5000.
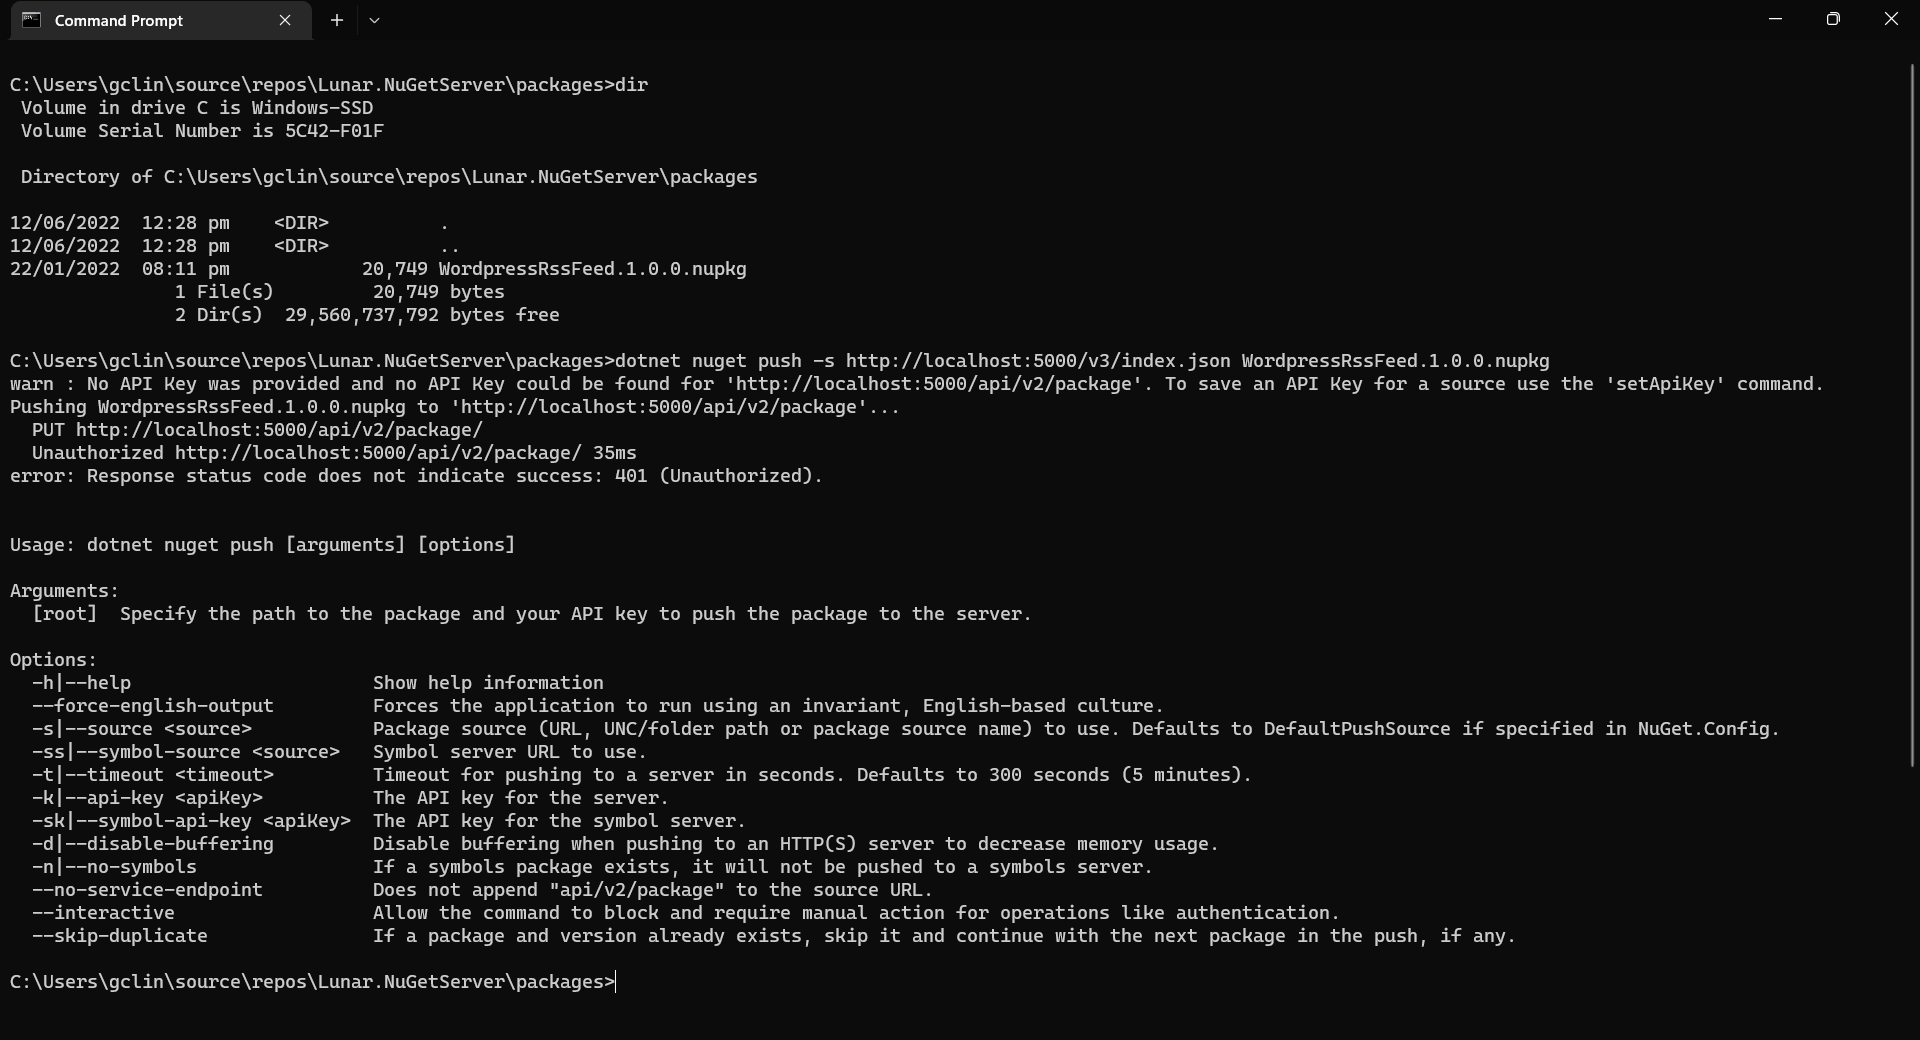
Now, let’s assume that we have our packages to publish in the folder named packages. We can publish it easily with dotnet nuget push command, as shown in the screenshot below.
Oops, we are not authorised to publish the package to own own NuGet server.
We will be rejected to do the publish, as shown in the screenshot above, if we do not provide the NUGET-SERVER-API-KEY that we defined earlier. Hence, the complete command is as follows.
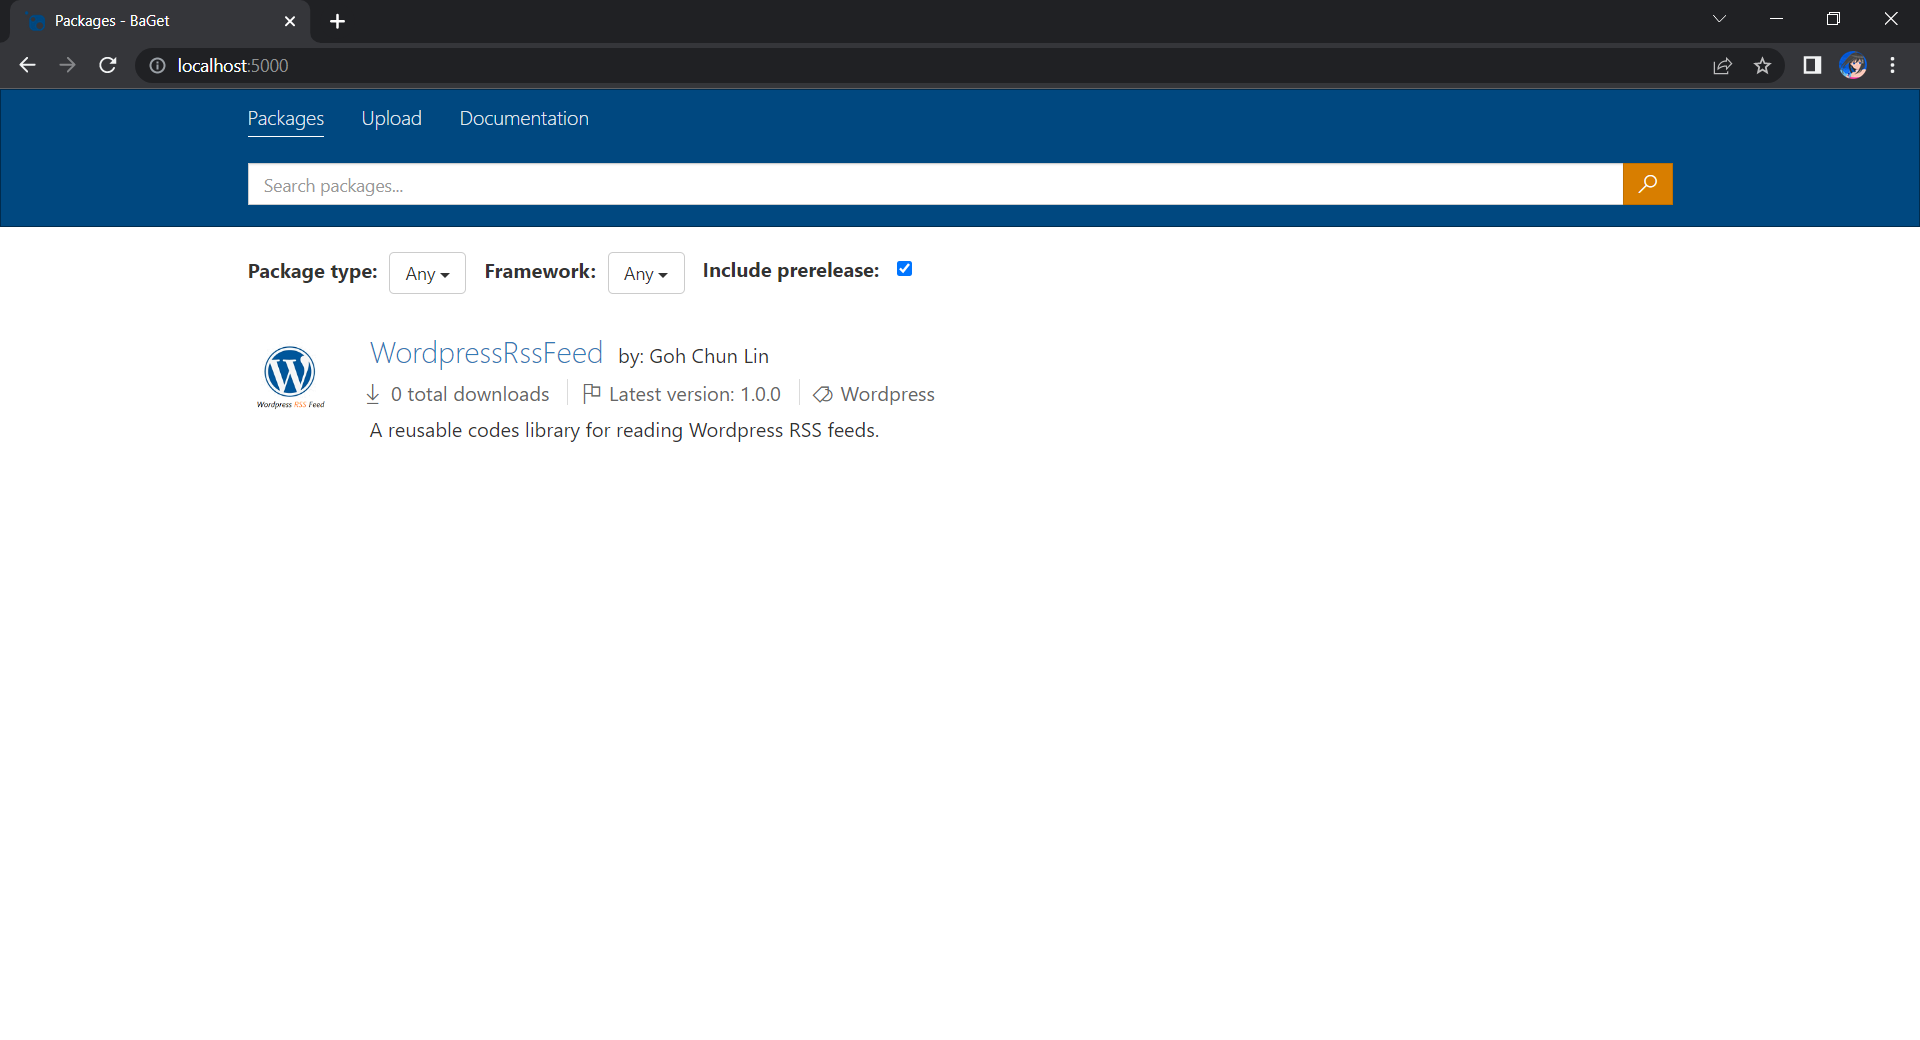
Once we have done that, we should be able to see the first package on our own NuGet server, as shown below.
Yay, we have our first package in our own local NuGet server!
Moving on to the Cloud
Instead of hosting the NuGet server locally, we can also host it on the cloud so that other developers can access too. Here, we will be using Azure Cloud Instance (ACI).
The first thing we need to have is to create a resource group (in this demo, we will be using a new resource group named resource-group-lunar-nuget) which will contain ACI, File Share, etc. for this project.
Secondly, we need to have a way to retrieve and persist state with ACI because by default, ACI is stateless. Hence, when the container is restarted all of its state will be lost and the packages we’ve uploaded to our NuGet server on the container will also be lost. Fortunately, we can make use of the Azure services, such as Azure SQL and Azure Blob Storage to store the metadata and packages.
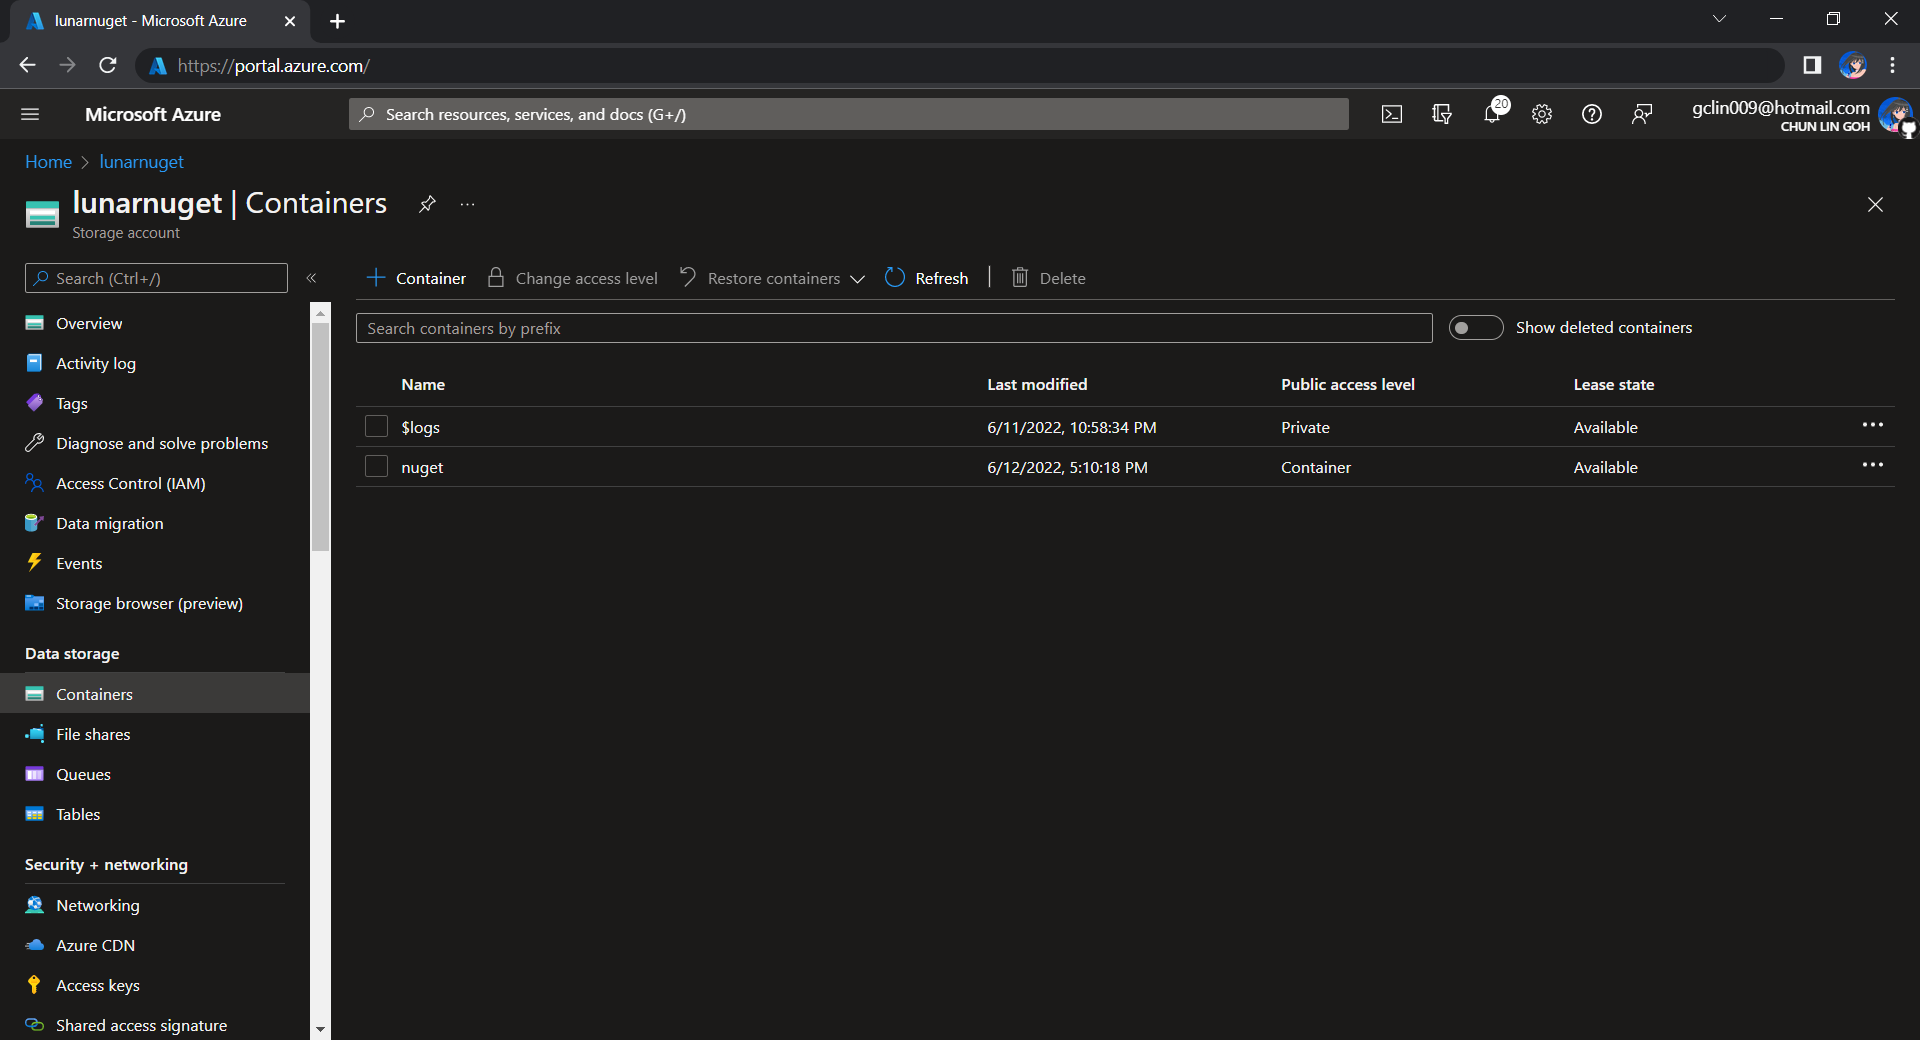
For example, we can create a new Azure SQL database called lunar-nuget-db. Then we create an empty Container named nuget under the Storage Account lunar-nuget.
Created a new Container nuget under lunarnuget Storage Account.
Thirdly, we need to deploy our Docker container above on ACI using docker run. To do so, we first need to log into Azure with the following command.
docker login azure
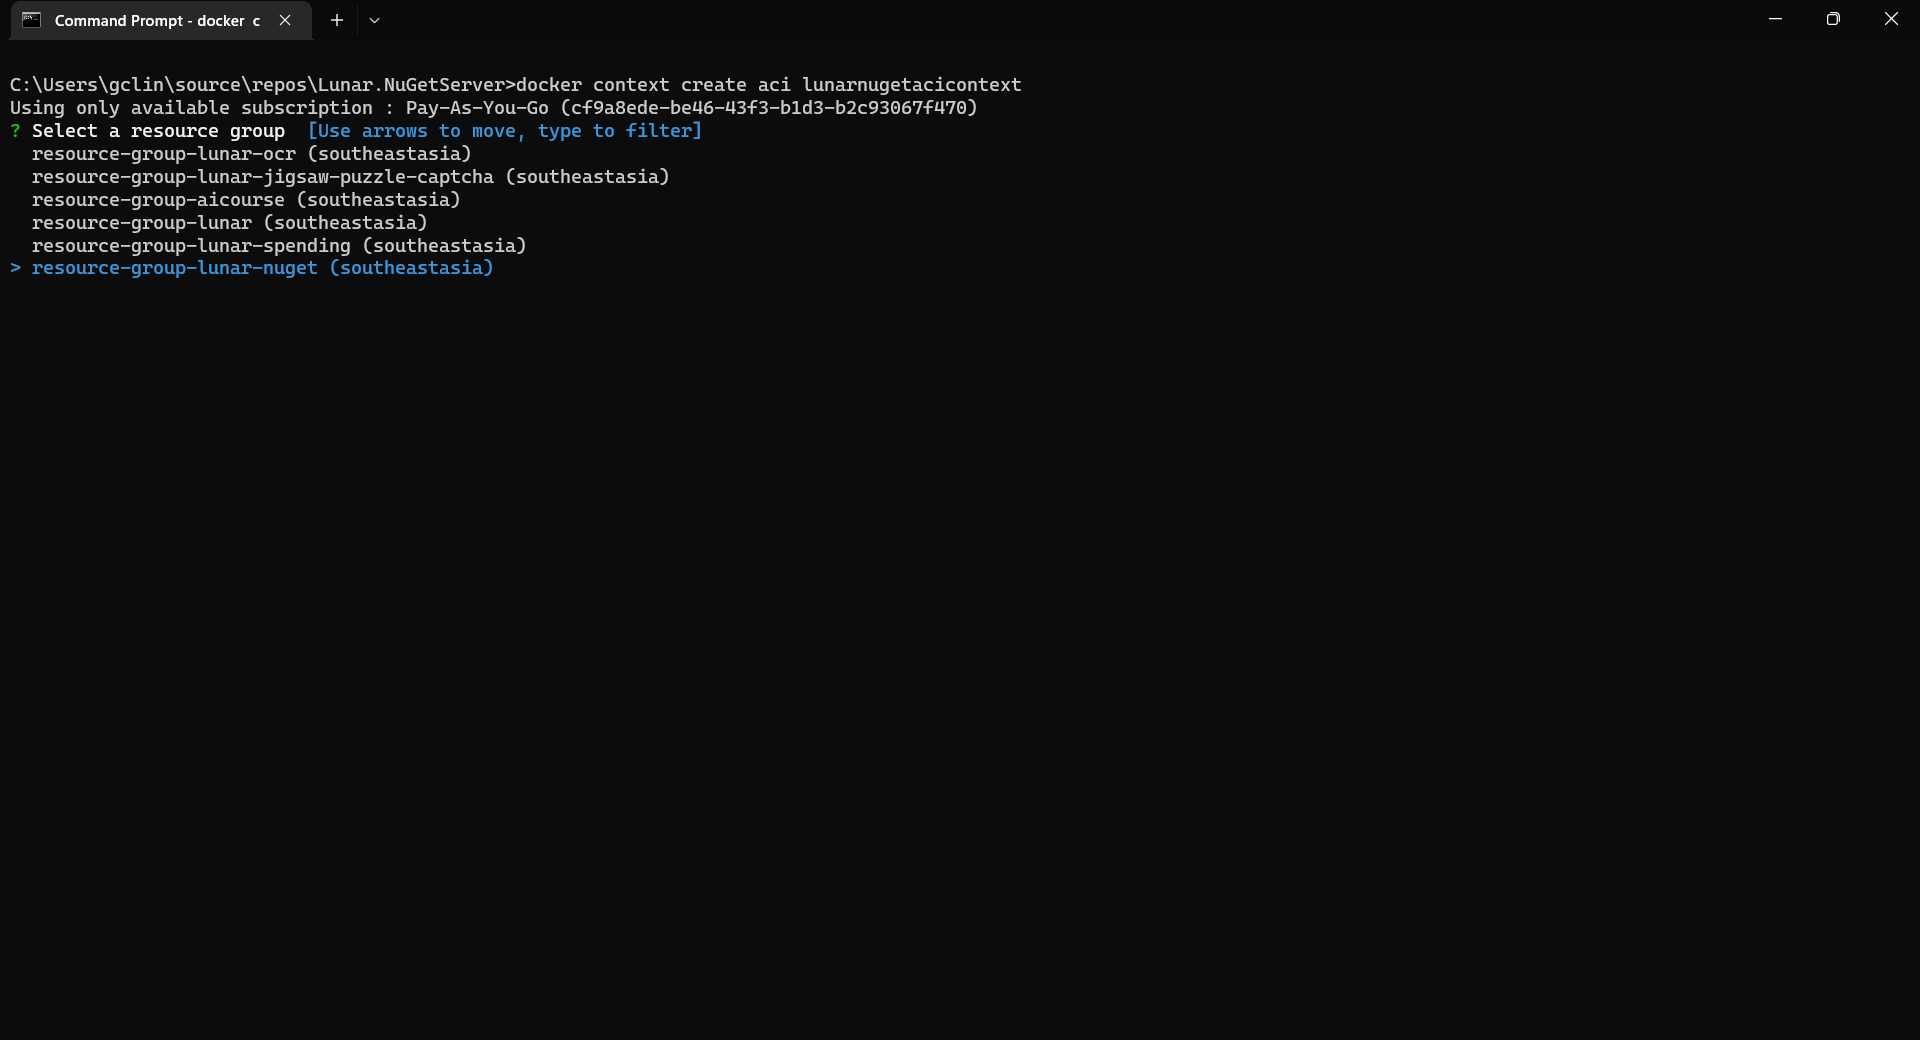
Once we have logged in, we proceed to create a Docker context associated with ACI to deploy containers in ACI of our resource group, resource-group-lunar-nuget.
Creating a new ACI context called lunarnugetacicontext.
After the context is created, we can use the following command to see the current available contexts.
docker context ls
We should be able to see the context we just created in the list.
Next, we need to swich to use the new context with the following command because currently, as shown in the screenshot above, the context being used is default (the one with an asterisk).
docker context use lunarnugetacicontext
Fourthly, we can now proceed to create our ACI which connect to the Azure SQL and Azure Blob Storage above.
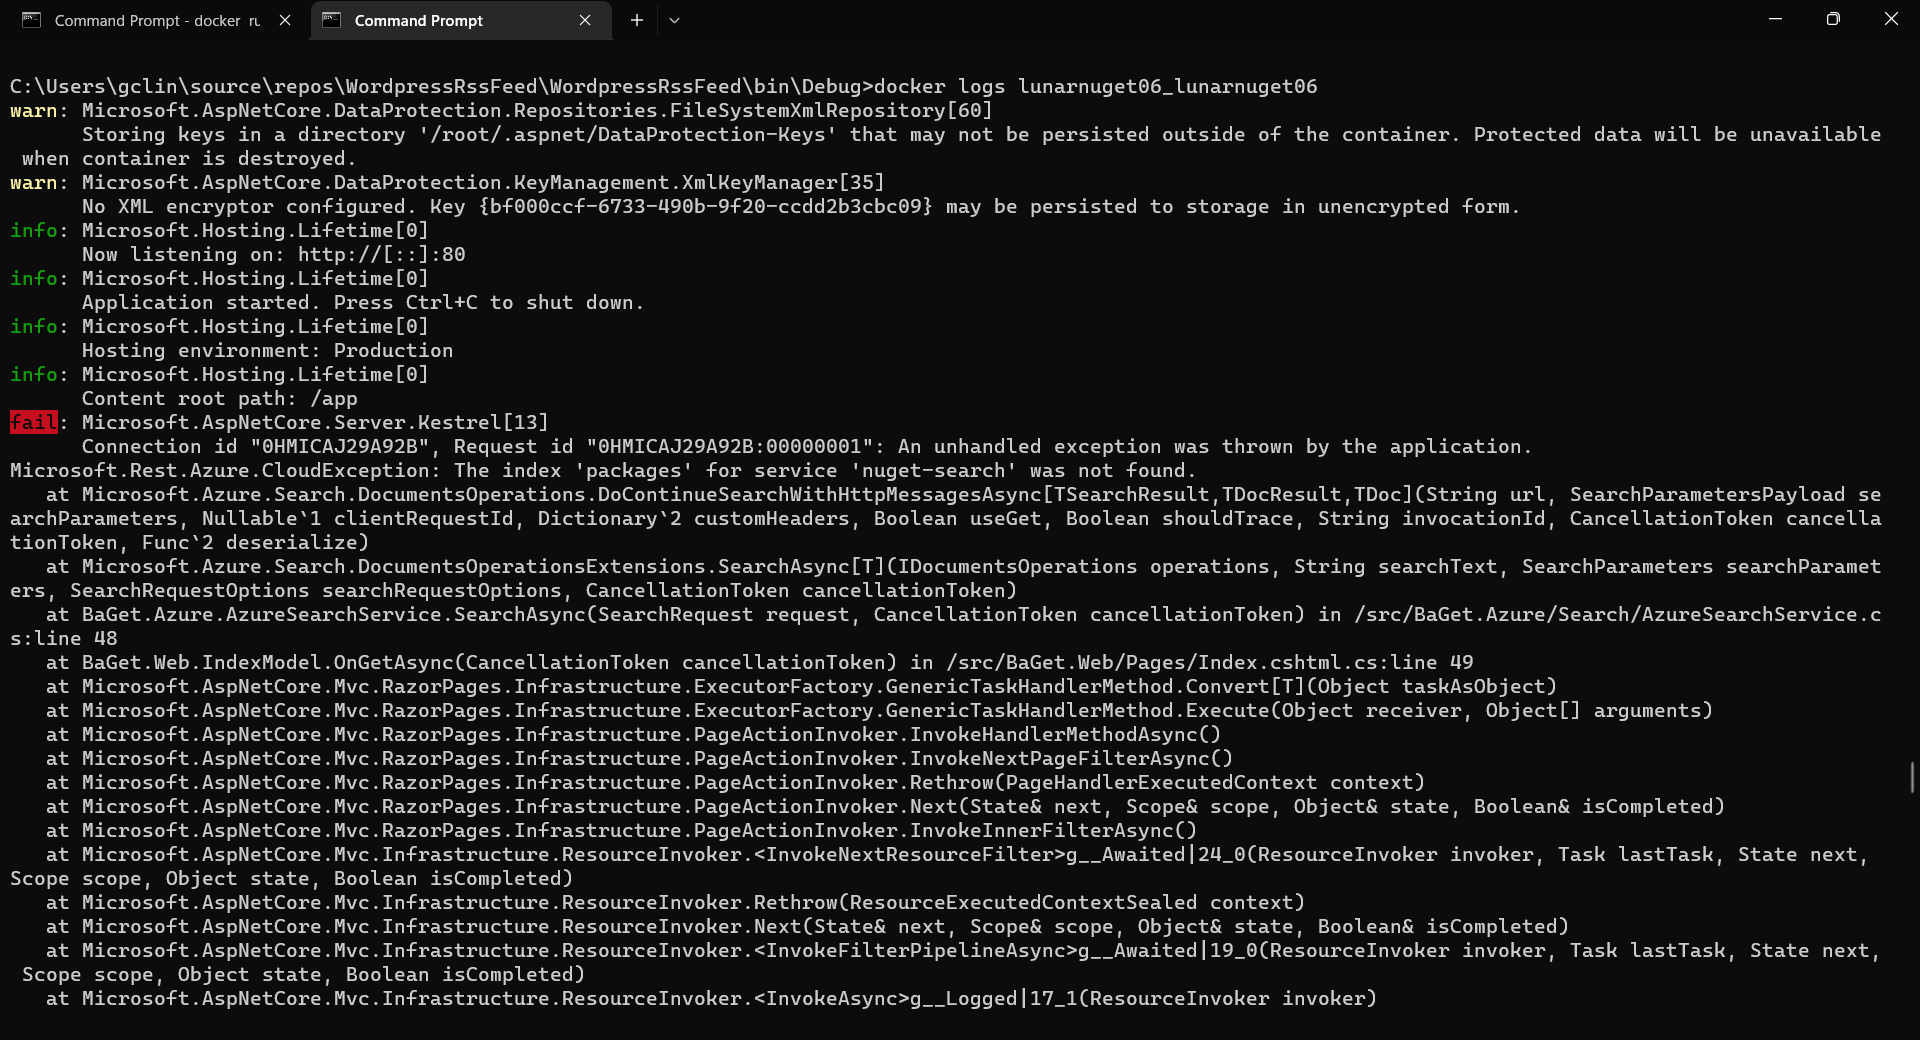
If there is no issue, after 1 to 2 minutes, the ACI named lunarnuget will be created. Otherwise, we can always use docker ps to get the container ID first and then use the following command to find out the issues if any.
docker logs <Container ID here>
Printing the logs from one of our containers with docker logs.
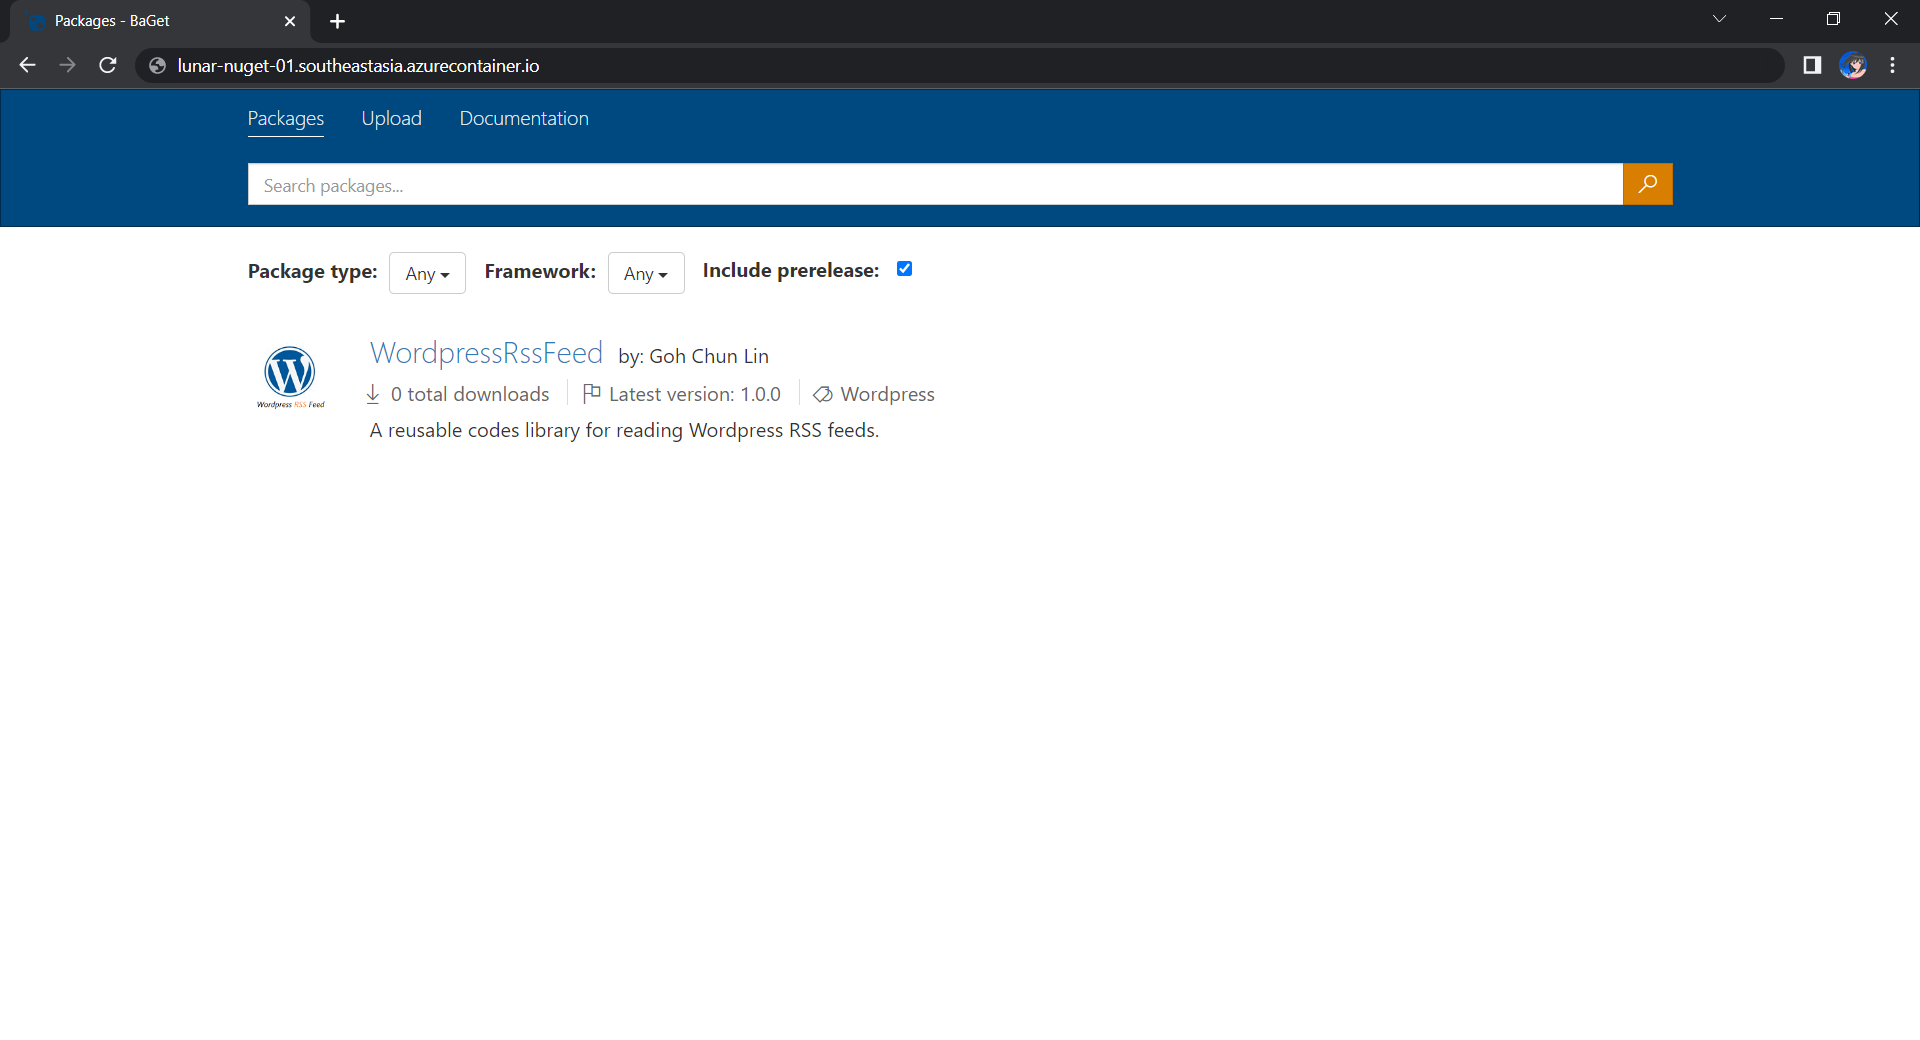
Now, if we visit the given FQDN of the ACI, we shall be able to browse the packages on our NuGet server.
That’s all for a quick setup of our own NuGet server on Microsoft Azure. =)
It’s always a good idea to not only make our libraries open-source, but also publish them as a package for public to use if our libraries can make the life of other developers better.
In this article, I’d like to share how we can use the pipeline in Azure DevOps to auto build and publish a C# library that has its source code on GitHub to the NuGet Gallery, the .NET package repository.
As you can see in the csproj file of the library project, we have the following properties are required to create a package.
<Project Sdk="Microsoft.NET.Sdk">

    <PropertyGroup>
	<TargetFramework>netstandard2.0</TargetFramework>
        ...
	<PackageId>WordpressRssFeed</PackageId>
	<GeneratePackageOnBuild>true</GeneratePackageOnBuild>
	<Description>A reusable codes library for reading WordPress RSS feeds.</Description>
	<Authors>Goh Chun Lin</Authors>
	<Copyright>Copyright 2022, Goh Chun Lin</Copyright>
	<PackageTags>Wordpress</PackageTags>
	<Company>Goh Chun Lin</Company>
	<RepositoryType>git</RepositoryType>
        <RepositoryUrl>https://github.com/goh-chunlin/WordpressRssFeed</RepositoryUrl>
	<PackageReleaseNotes>Please refer to README.</PackageReleaseNotes>
    </PropertyGroup>

    ...

</Project>
Azure DevOps Project
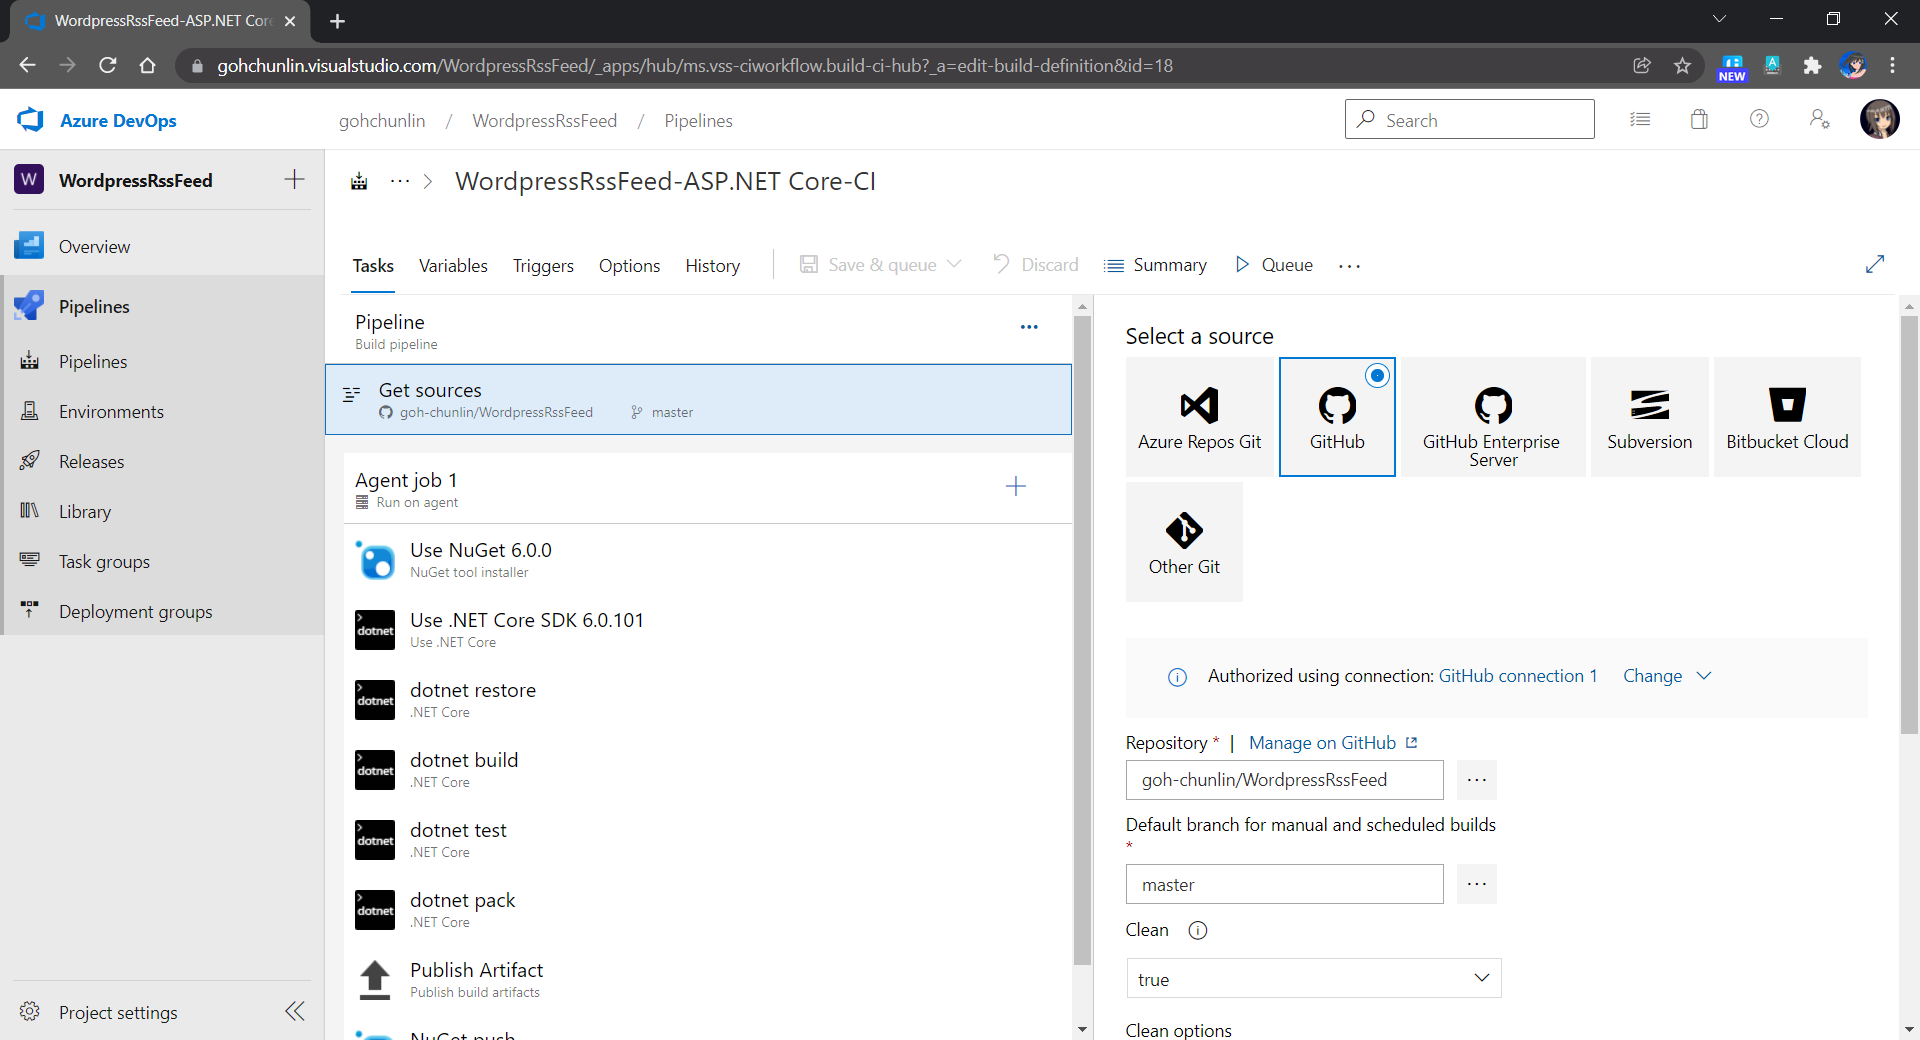
On Azure DevOps, we can create a pipeline which has source code sitting in a GitHub repository. We simply select “GitHub” as the source and then choose the correct repository and branch which contains the code that the pipeline should build.
Selecting a repository and branch on the GitHub as the pipeline source.
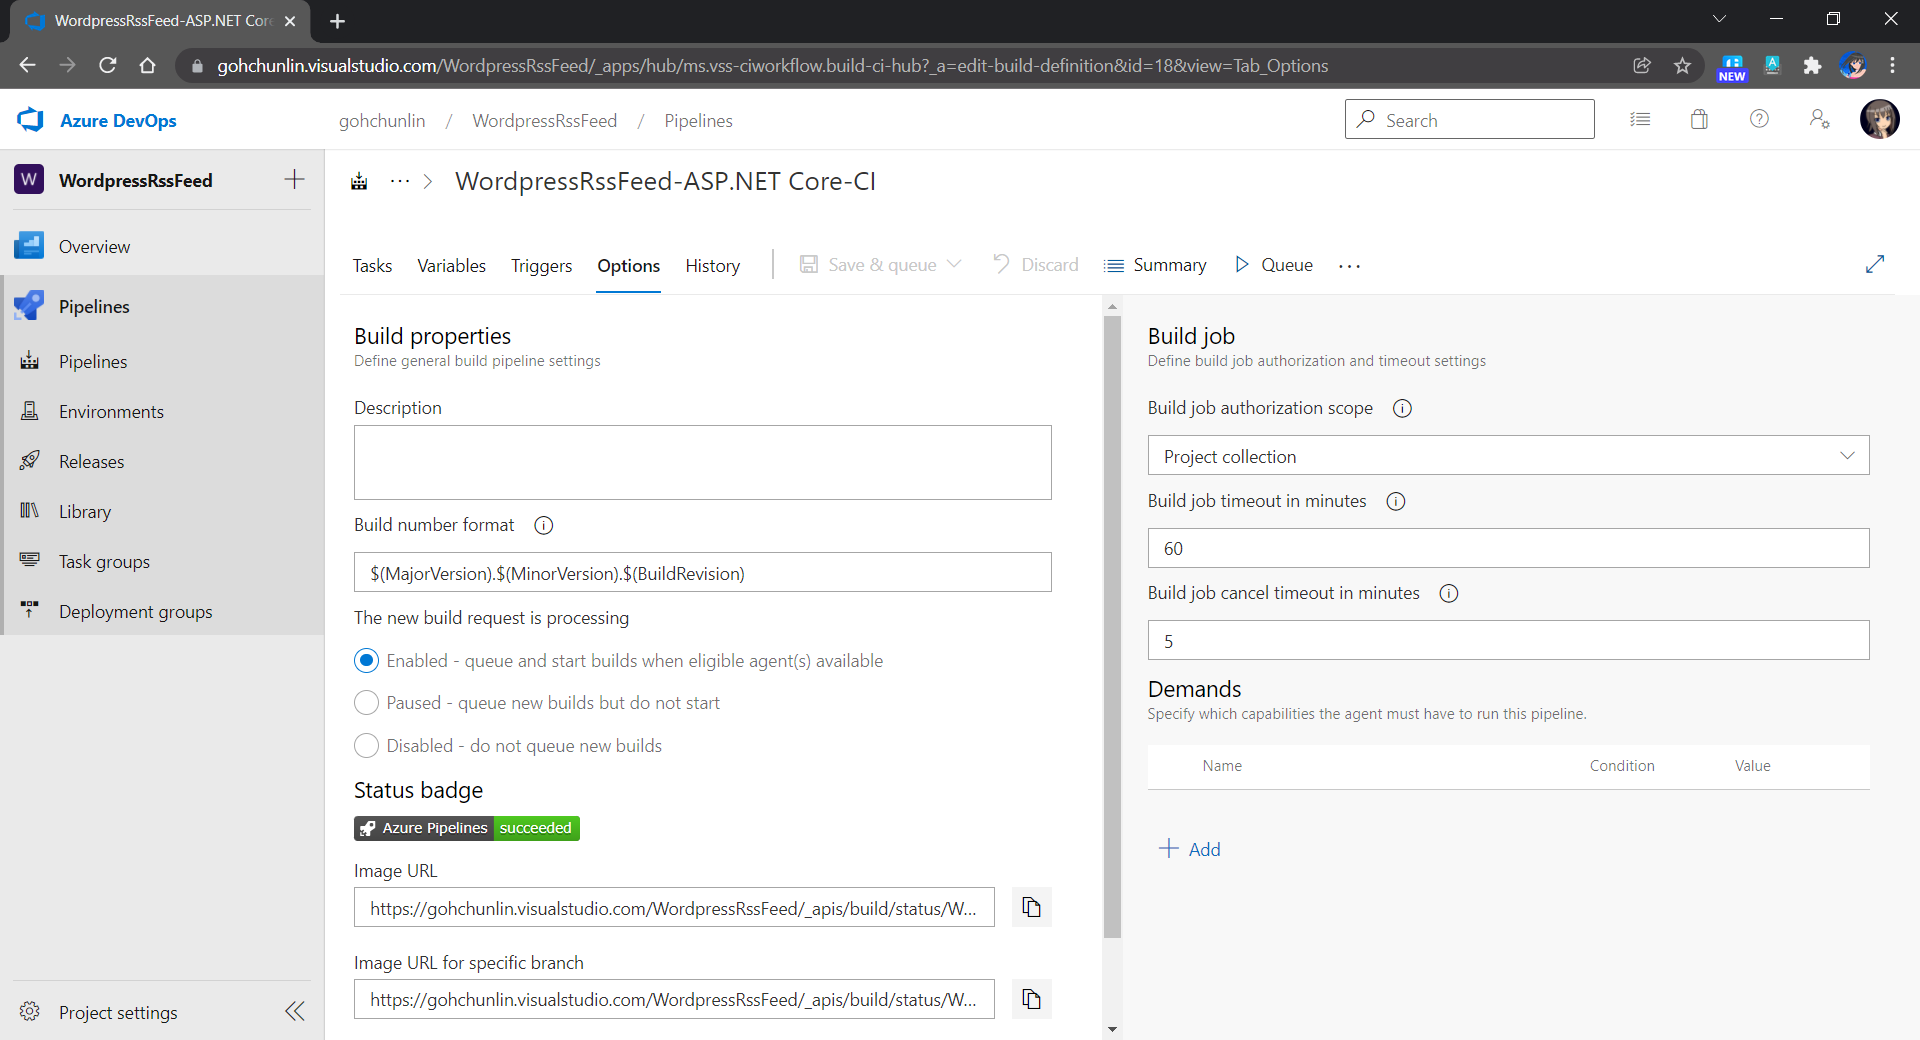
Before we begin to look at the pipeline tasks, we need to setup the build number properly because we will later use it to version our package.
Firstly, we will setup BuildConfiguration, MajorVersion, MinorVersion, and BuildRevision as shown in the following screenshot.
We will start our first stable build from 1.0.0.
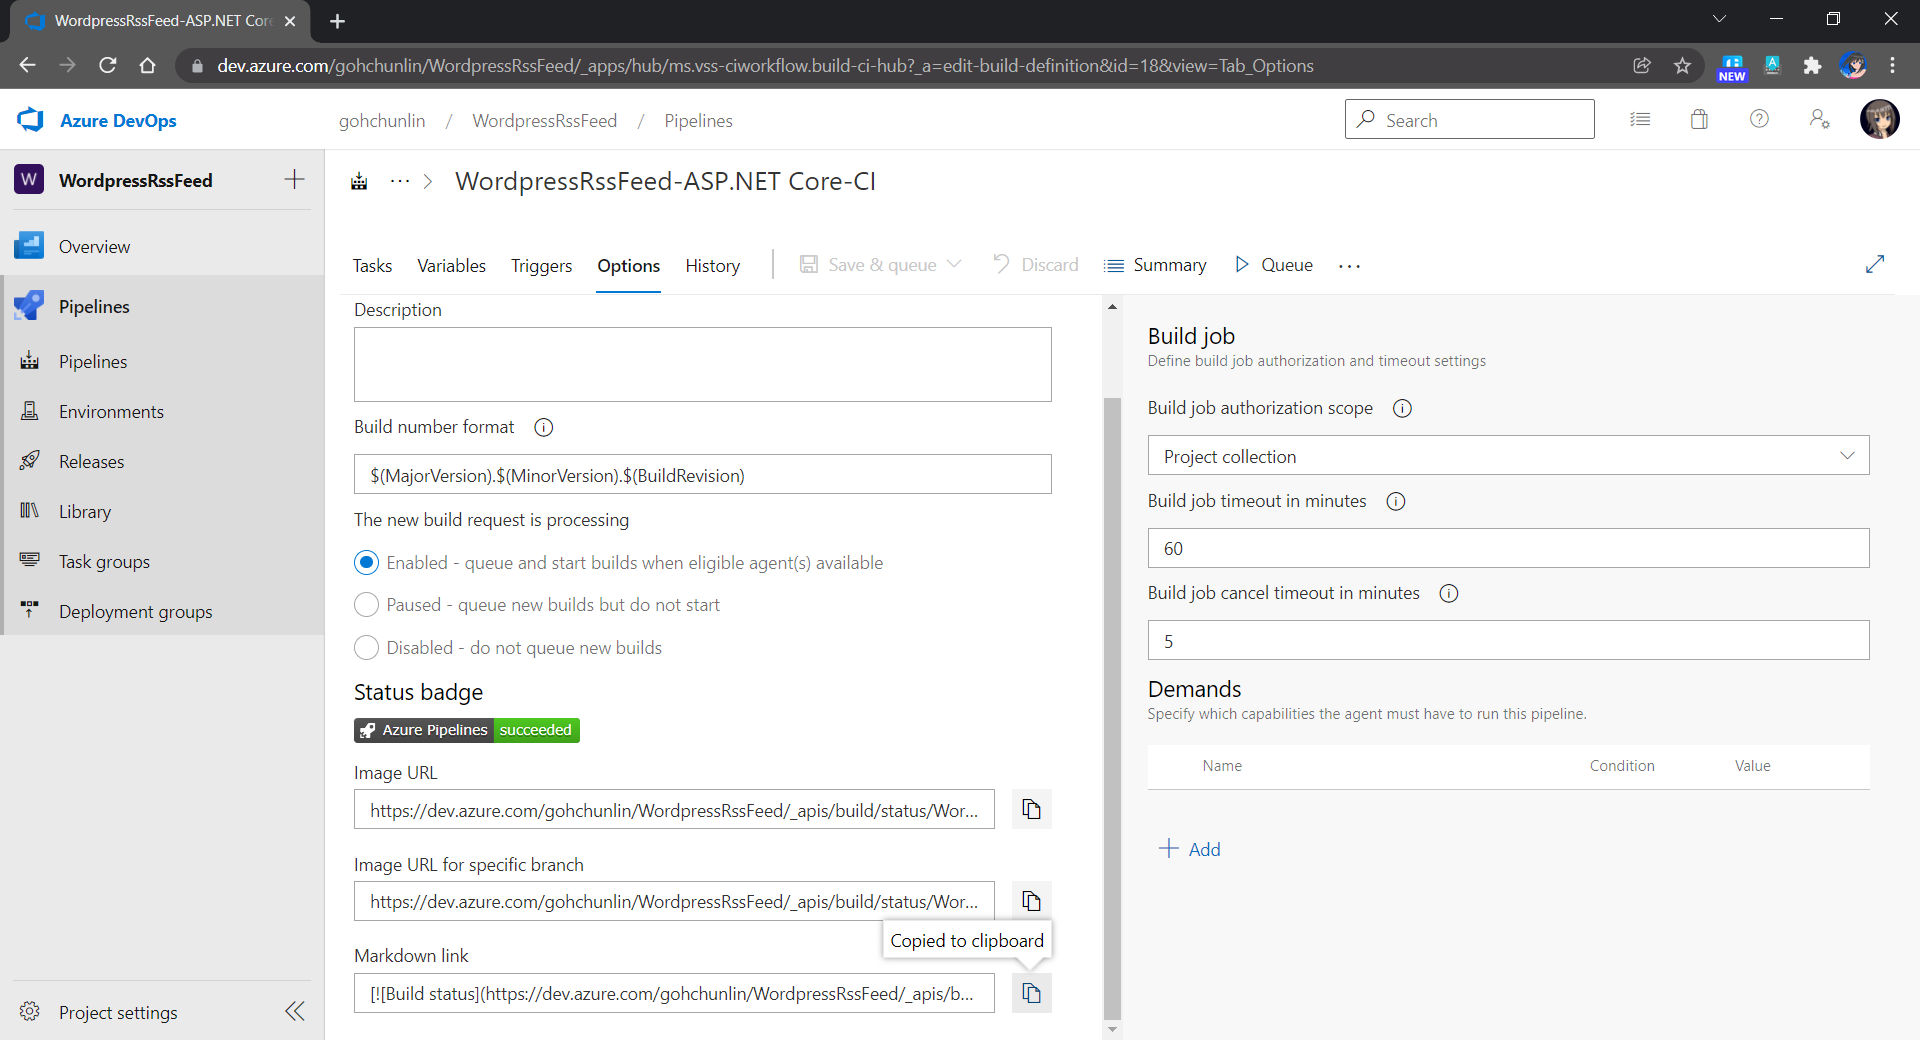
Next, we need to format the build number with MajorVersion, MinorVersion, and BuildRevision as shown below.
We will use the standard format $(MajorVersion).$(MinorVersion).$(BuildRevision) for build number.
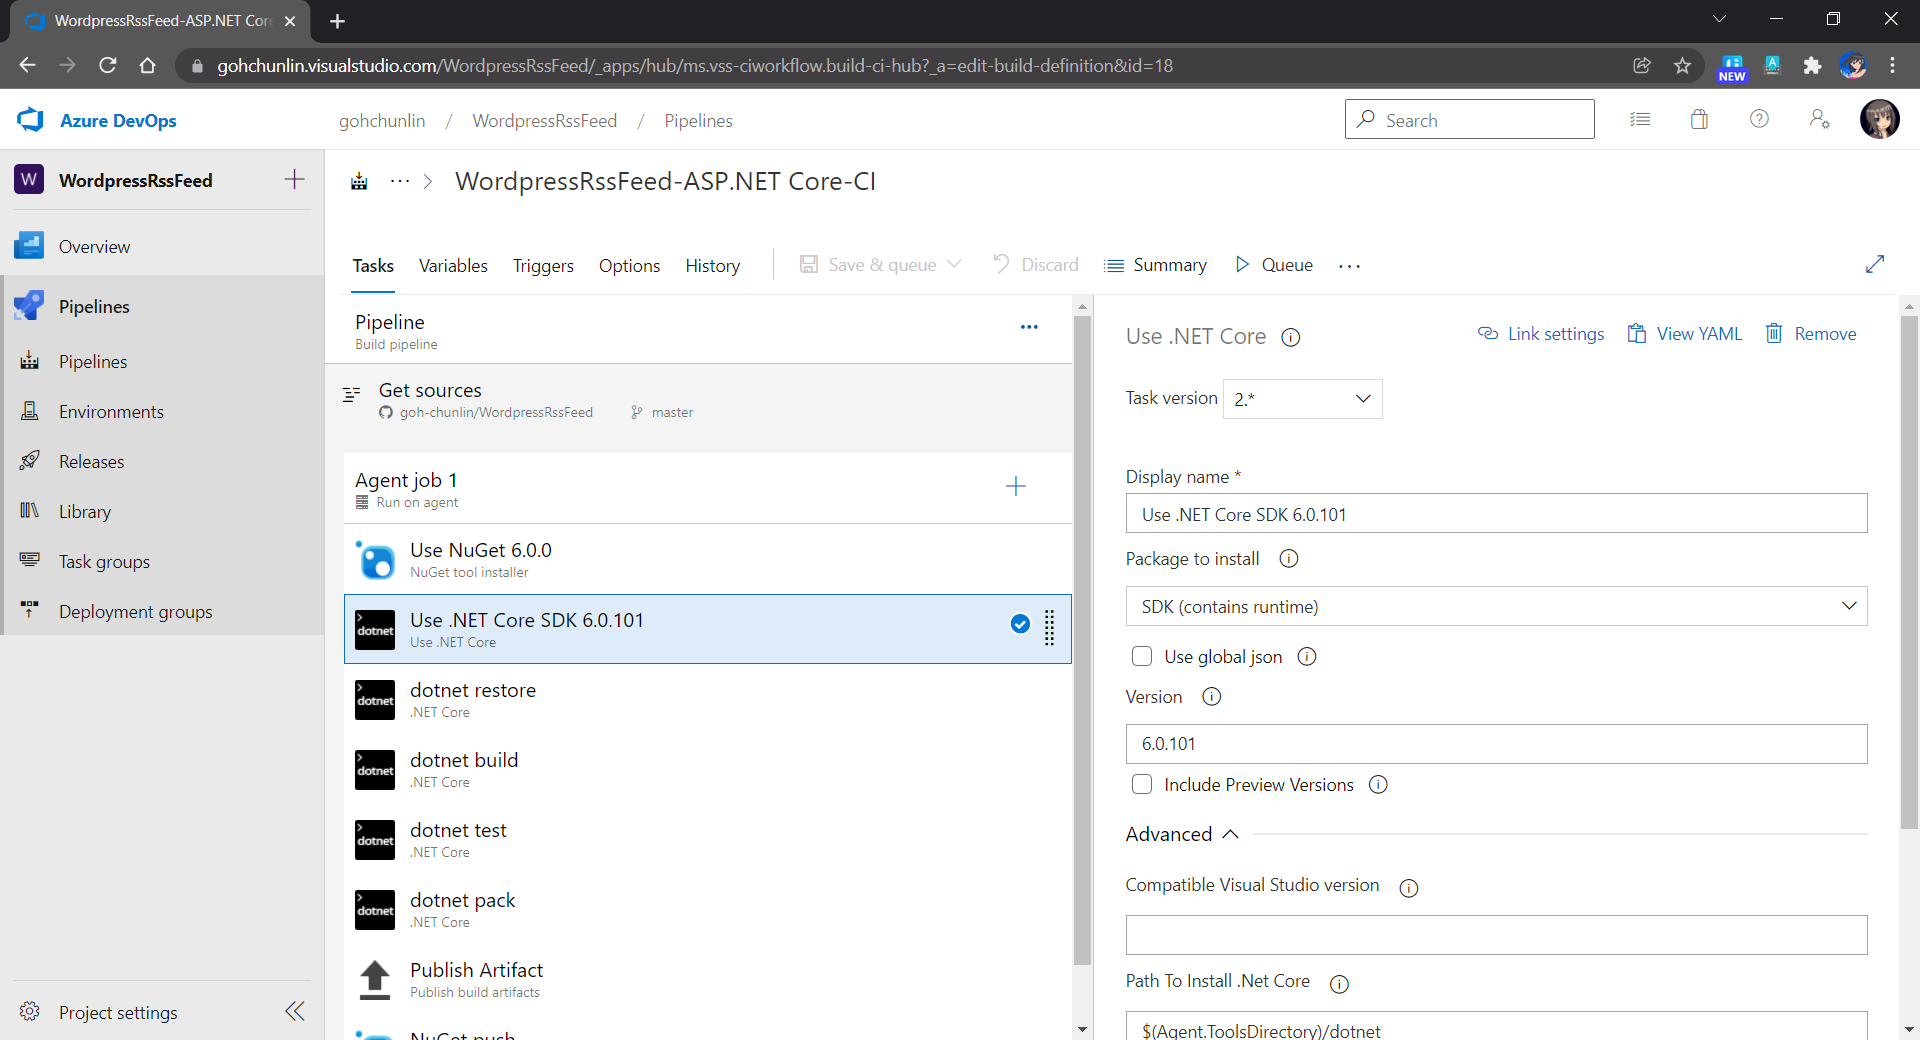
NuGet 6 and .NET 6
Currently (Jan 2022), the latest version of NuGet.exe is 6.0.0 and the latest .NET SDK is 6.0.1. The main reason why we choose to use the latest versions is because we’d like to use the latest feature where we can pack a README.md file in our NuGet package and have it fully rendered on NuGet.org! This feature was newly introduced in May 2021 and was still in preview back then with NuGet 5.10 Preview 2 and .NET SDK 5.0.300 Preview.
Using .NET SDK 6.0.101.
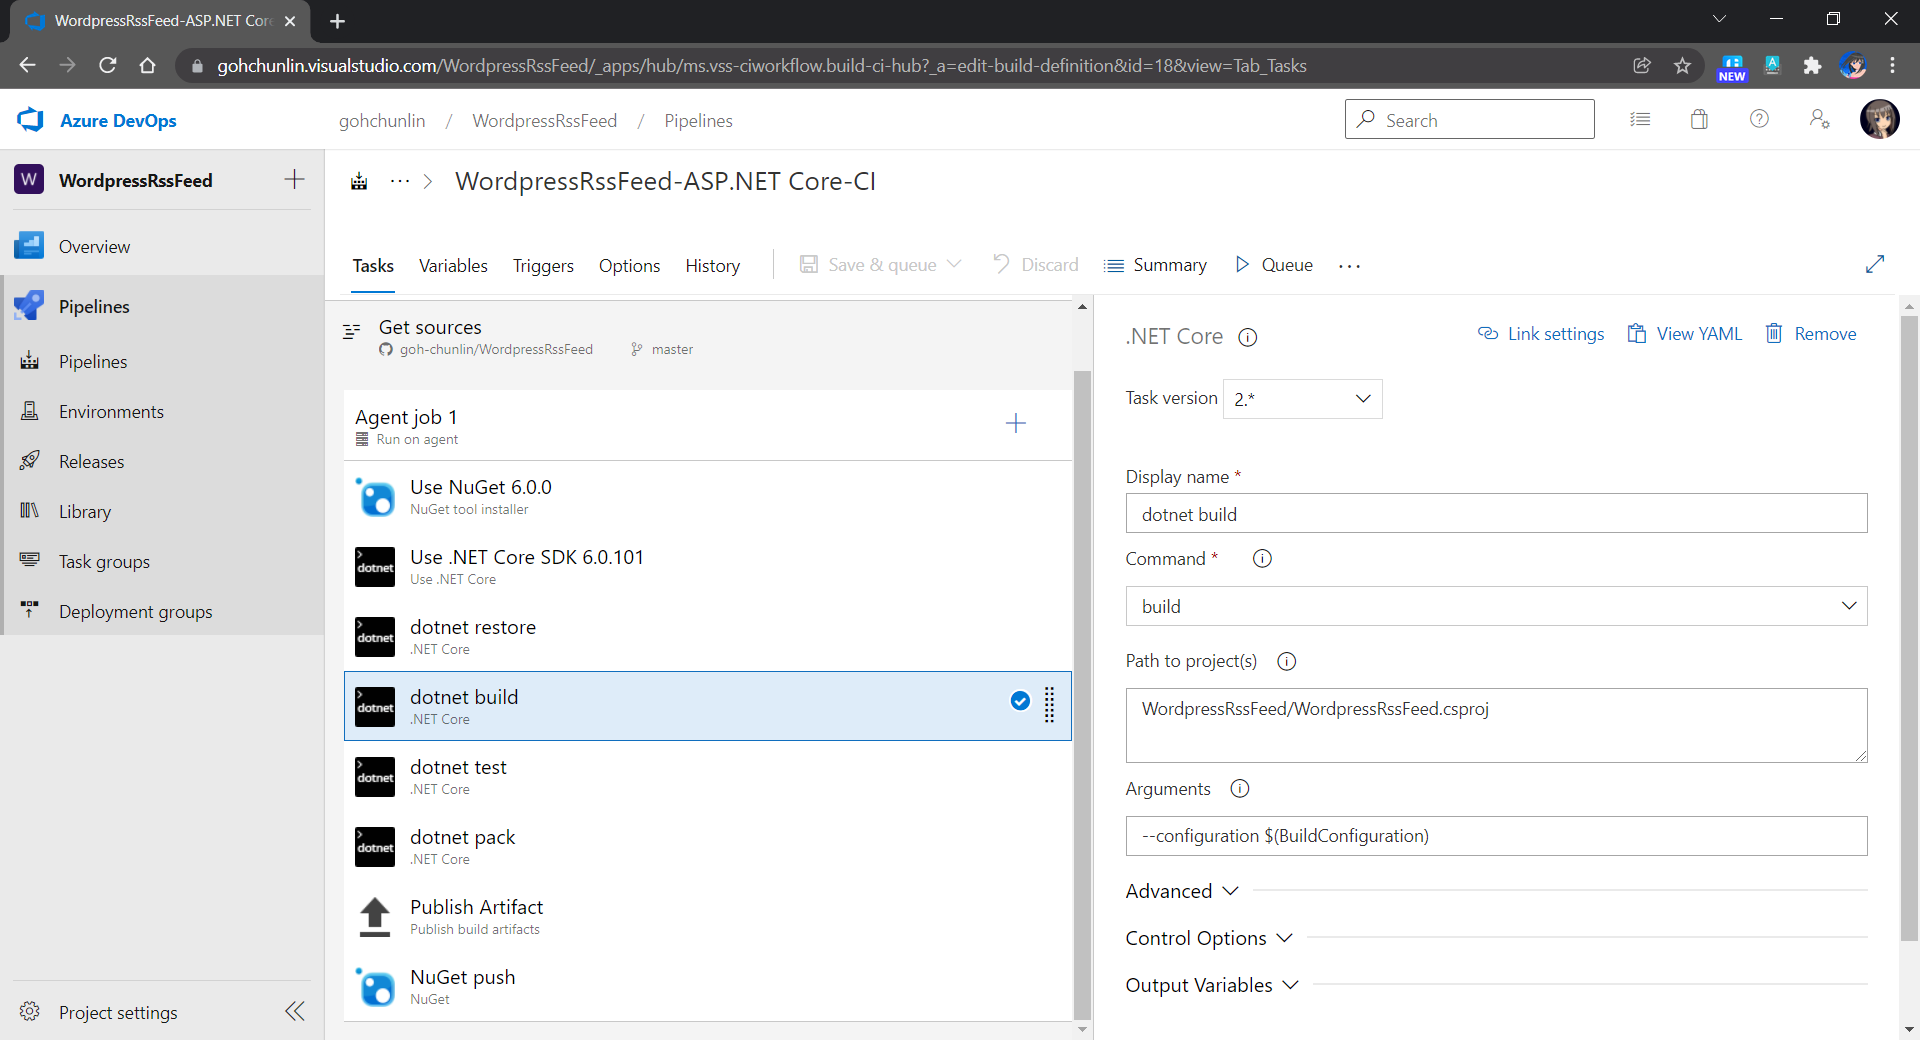
Restore, Build, Test, Pack
We then need to point the restore and build tasks to our library csproj, as shown below.
The library project is built in release mode, which is specified in BuildConfiguration variable.
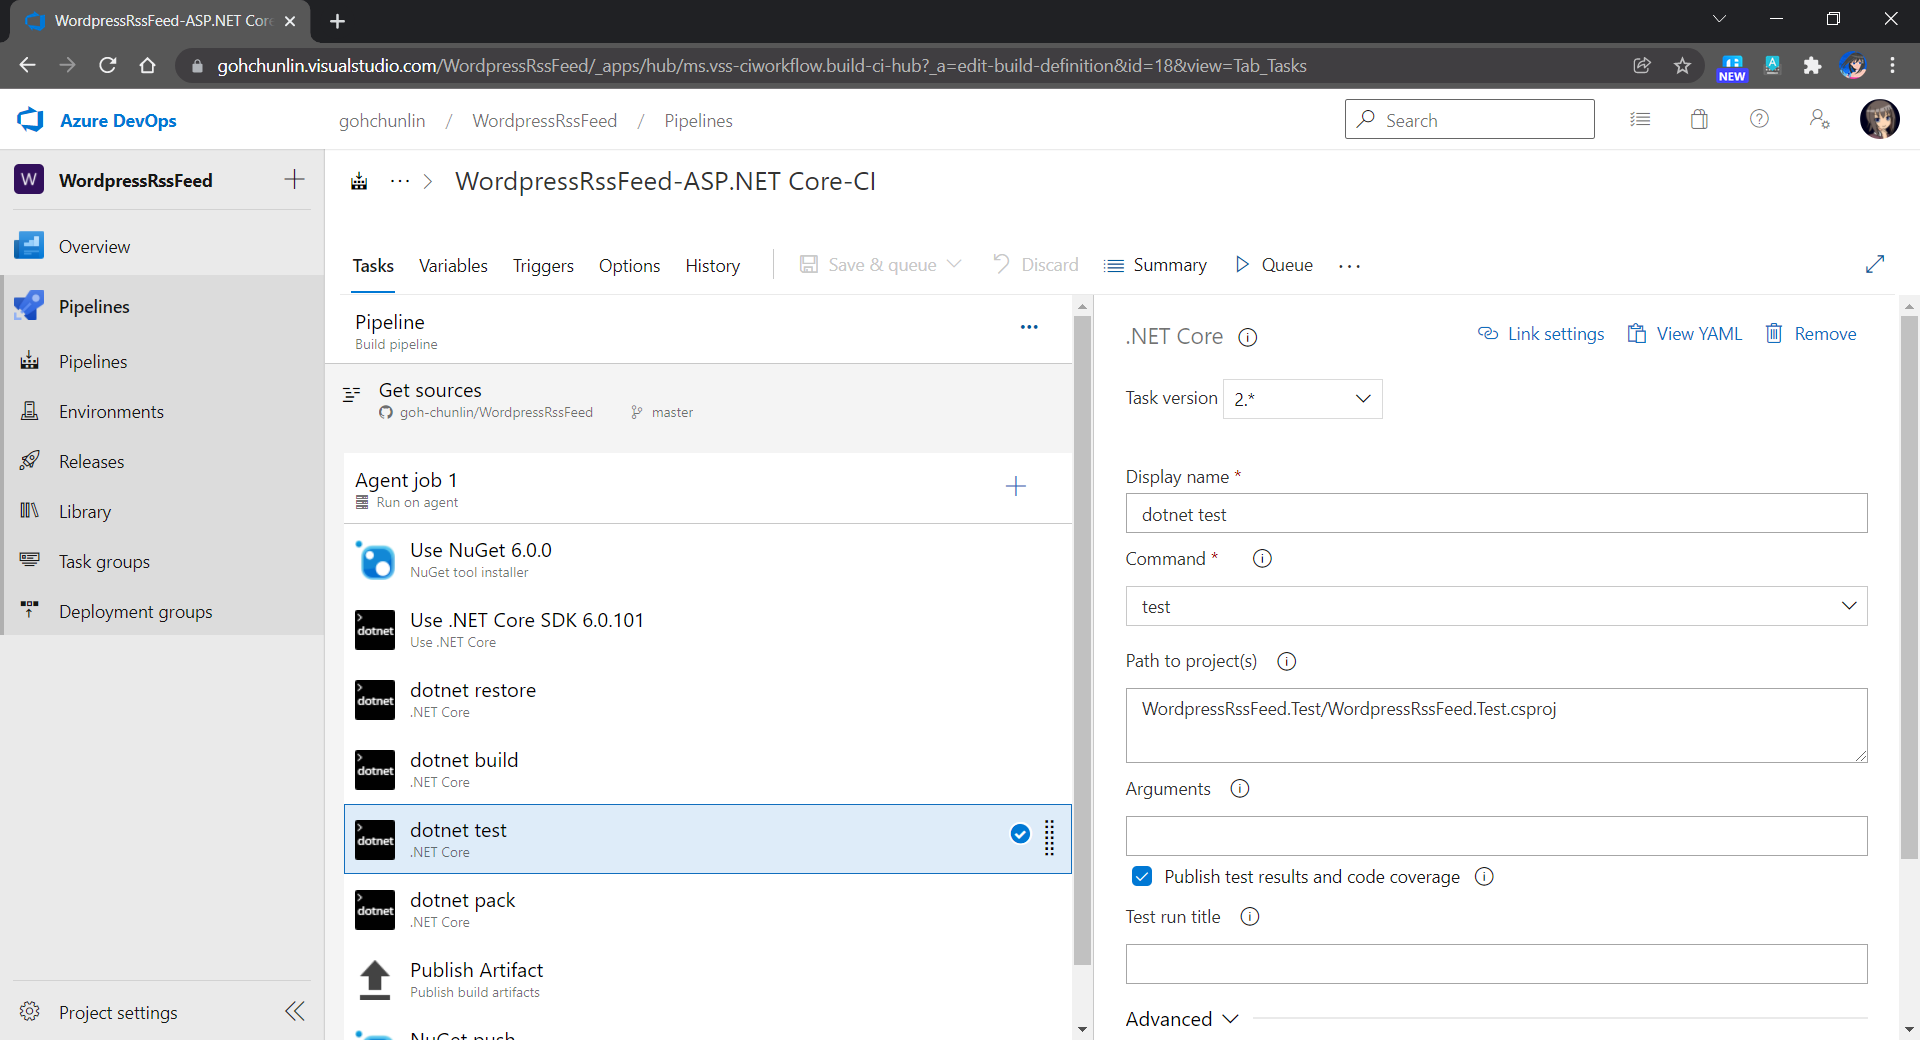
After the build succeeds, we can proceed to run our test cases in the test project, as shown in the following screenshot.
It’s important to test the library first before publishing it to the public.
We can pack our library once the test cases are all green. The package will be created in the $(Build.ArtifactStagingDirectory) directory, as shown below. Here, we need to make sure that we setup the package versioning properly. In order to make things easier, we will simply use the build number as our package version.
Using the build number as the package version.
If you are interested about the output of the pack task, you can also publish it to the drop as shown in the “Publish Artifact” as shown in the screenshot below. Otherwise, you can skip this task.
This task is optional. It is only for you to download the output of the “dotnet pack” task.
Publish Package to NuGet.org
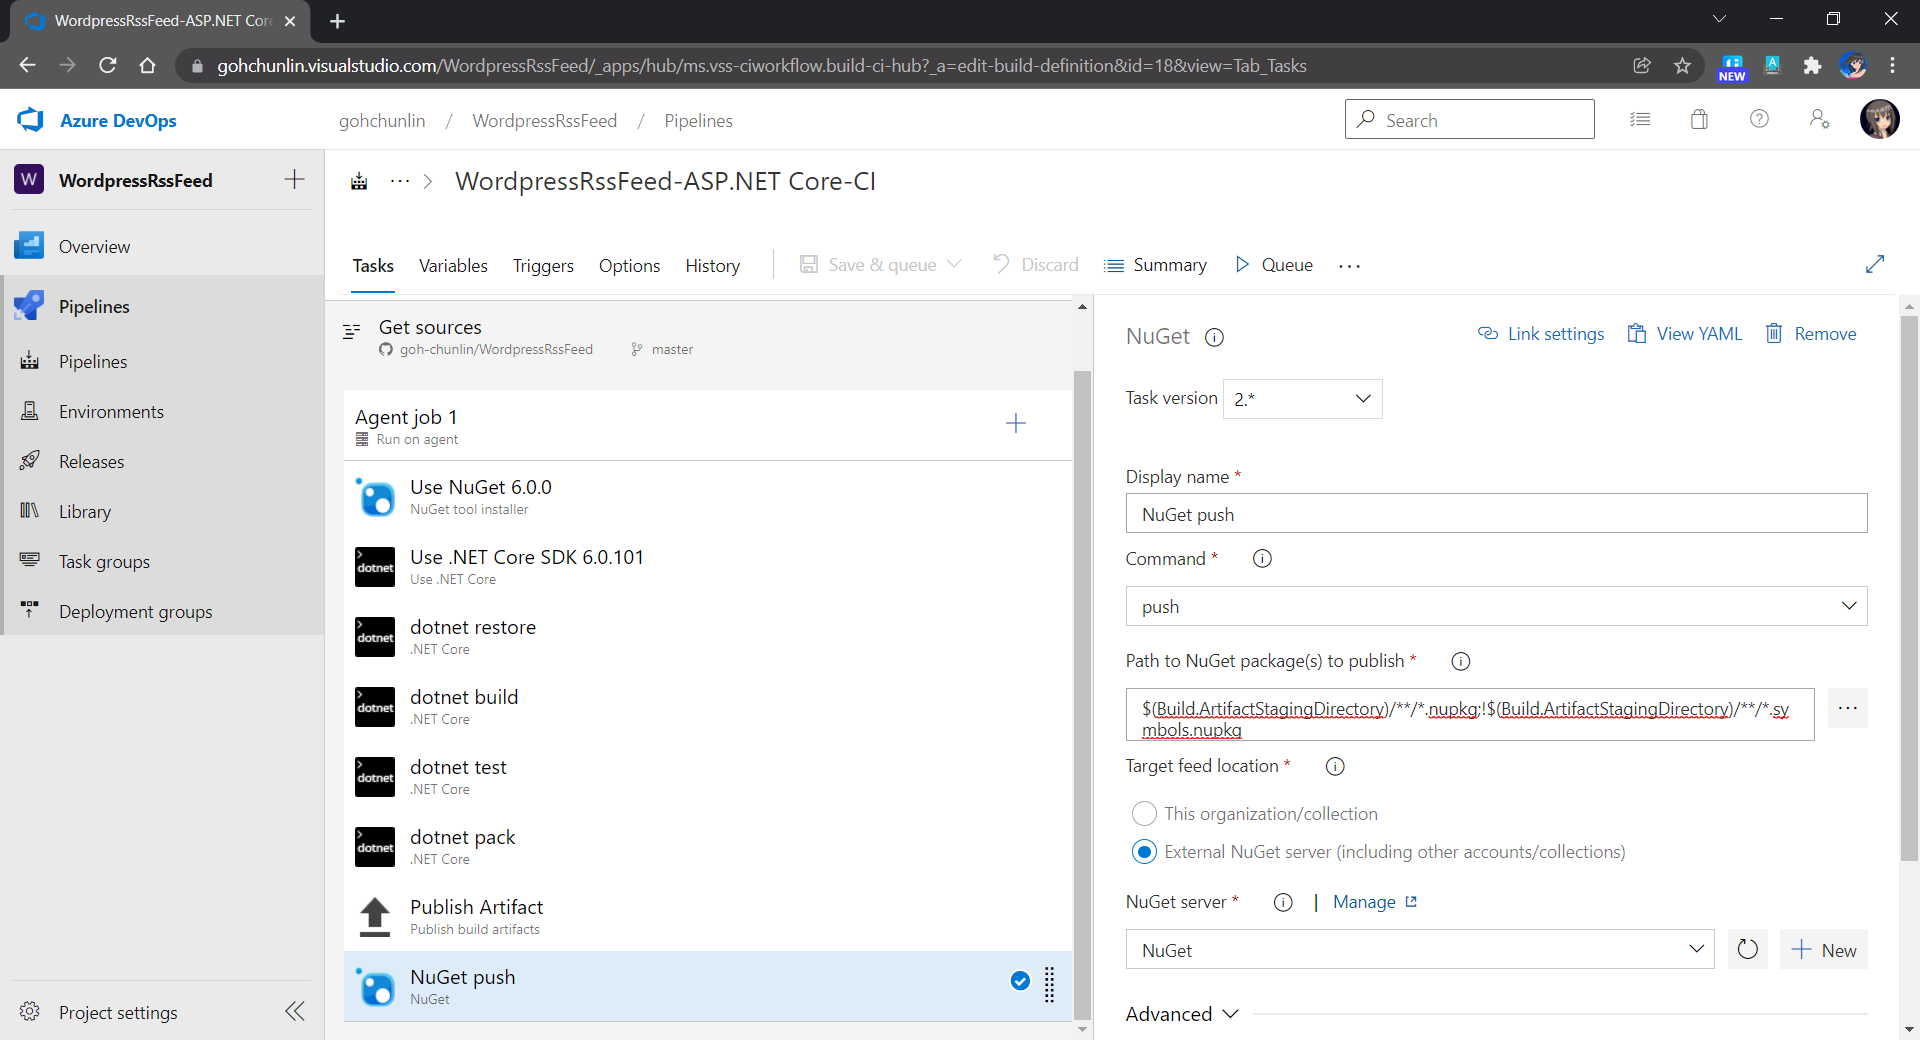
Since our package is created in $(Build.ArtifactStagingDirectory), so we can specify the path to publish as shown in the screenshot below.
This pipeline has been linked with NuGet.org through an API key. So package will be uploaded directly to NuGet.org.
Add Readme File
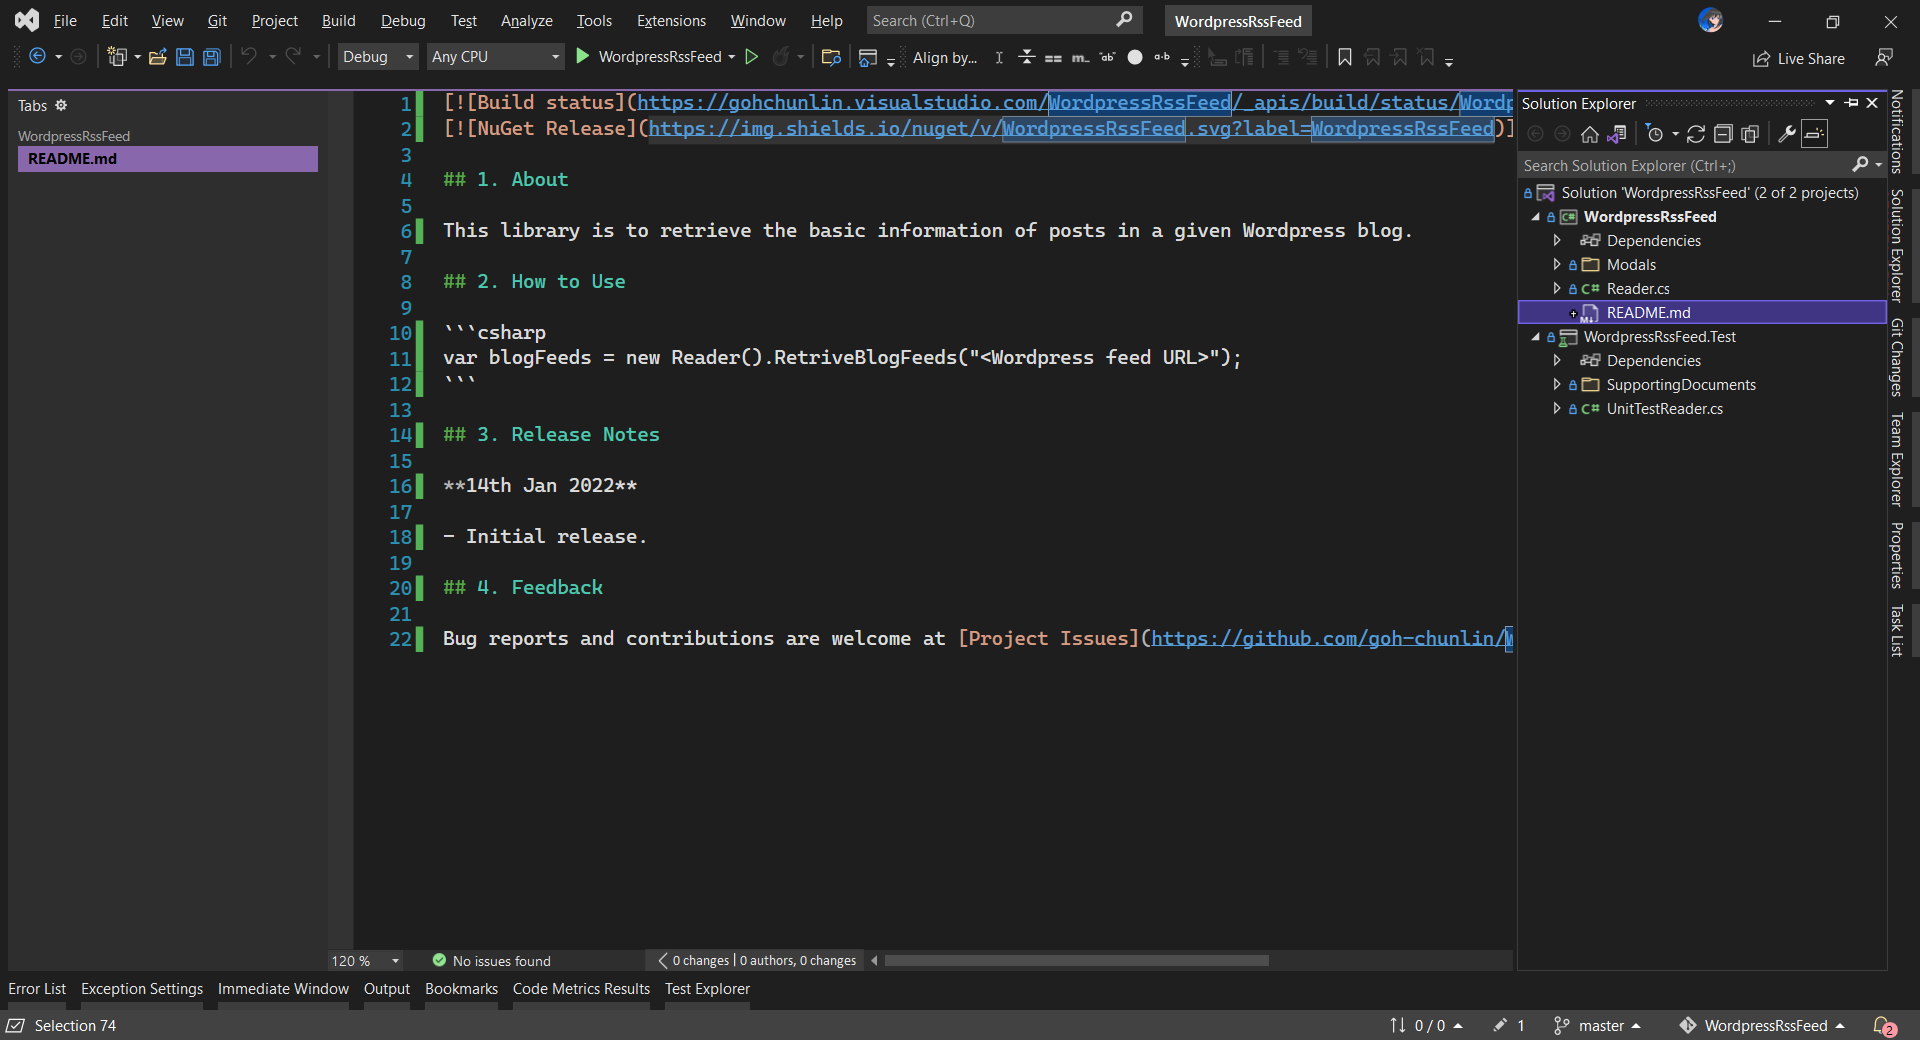
Firstly, we will have a README.md file in the root of our library project, as demonstrated below.
Then we need to reference the README.md in the project file as follows.
Now, we shall use the <PackageIcon> property to specify the icon file path, relative to the root of the library project. In addition, we also need to make sure that the file is included in the package.
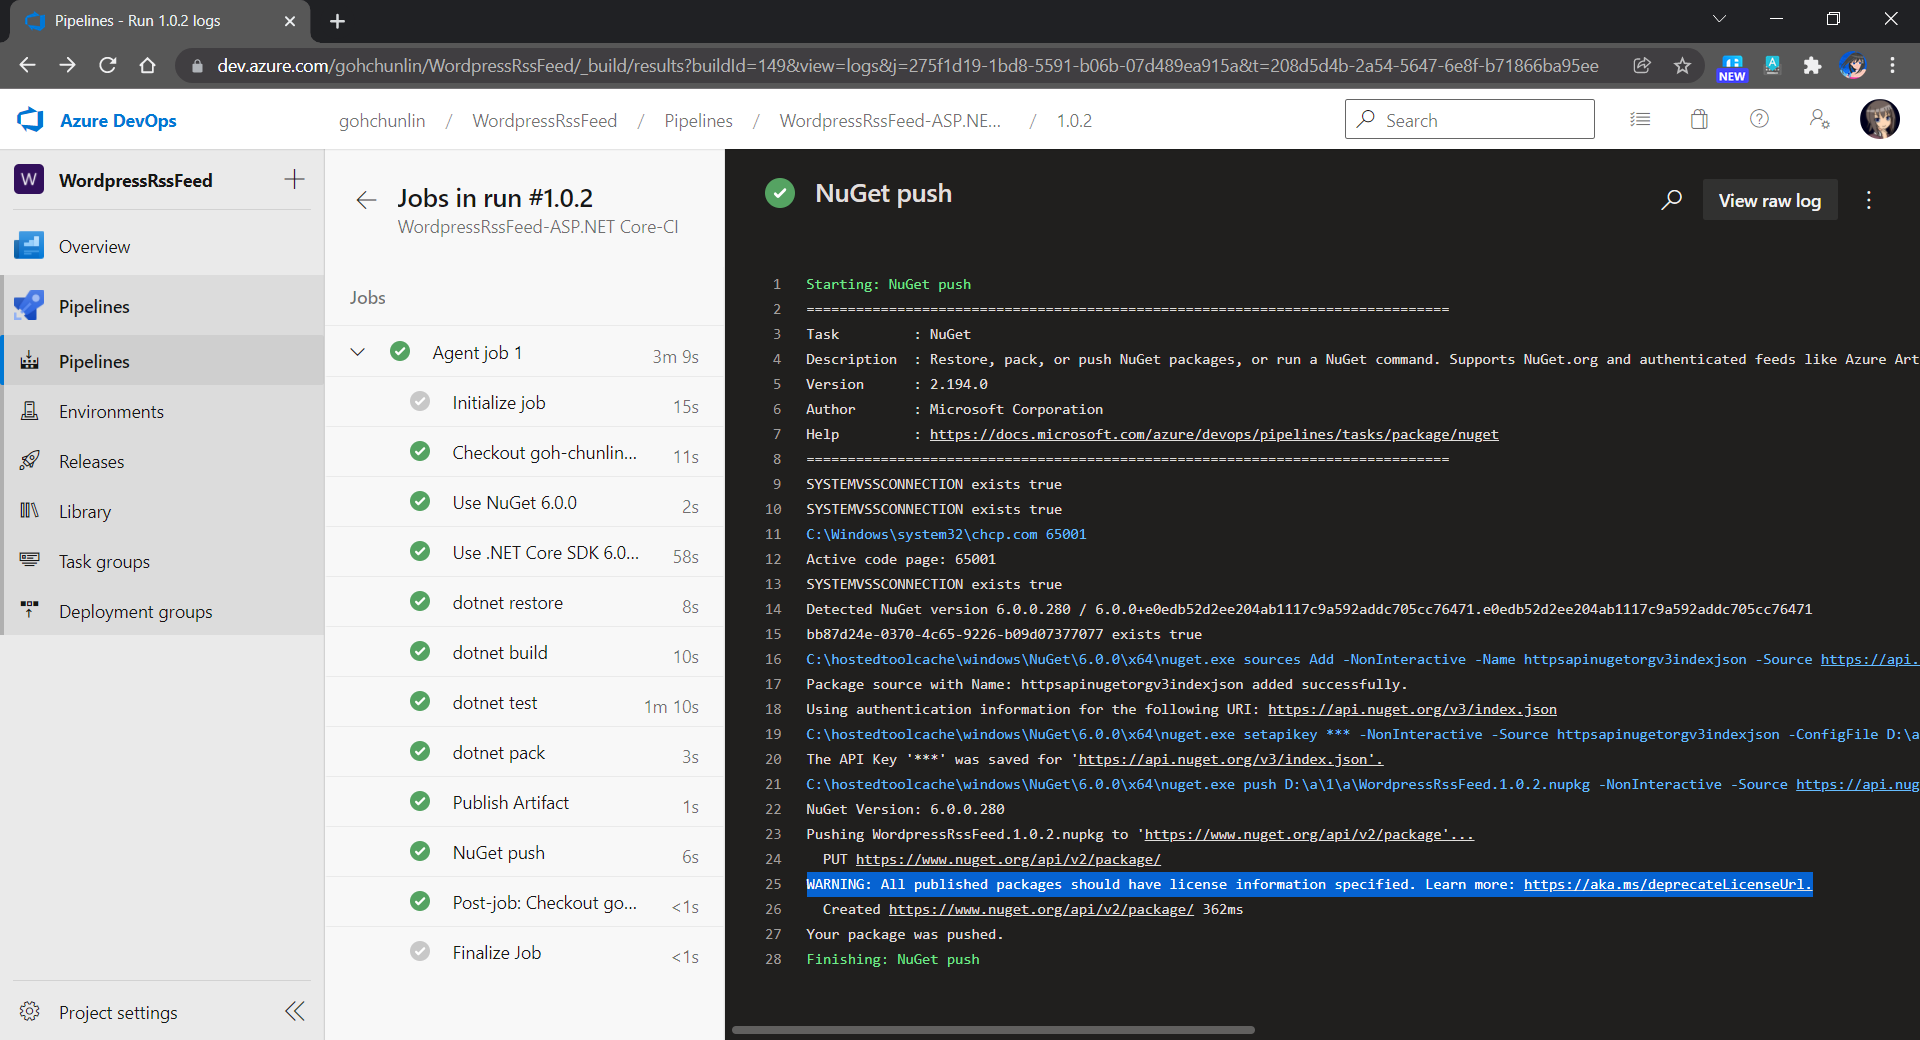
If you pay attention to the log of the “NuGet Push” task, you will notice that there is a warning about the license information, as shown below.
There is a warning saying that all published packages should have license information specified.
To solve this issue, we can use the <PackageLicenseExpression> property to specify the license of our package. If we’re licensing the package under a common license, like MIT or GPL 3.0, we can use the associated SPDX license identifier.
After specifying the license, the warning above will go away.
Alternatively, you can also choose to package a license file by using the <PackageLicenseFile> property to specify the package path, relative to the root of the package. This is similar to how we add an icon to the package, so I won’t repeat the steps of doing that here.
Please take note that only one of PackageLicenseExpression and PackageLicenseFile can be specified at a time. Also, PackageLicenseUrl is deprecated.
Conclusion
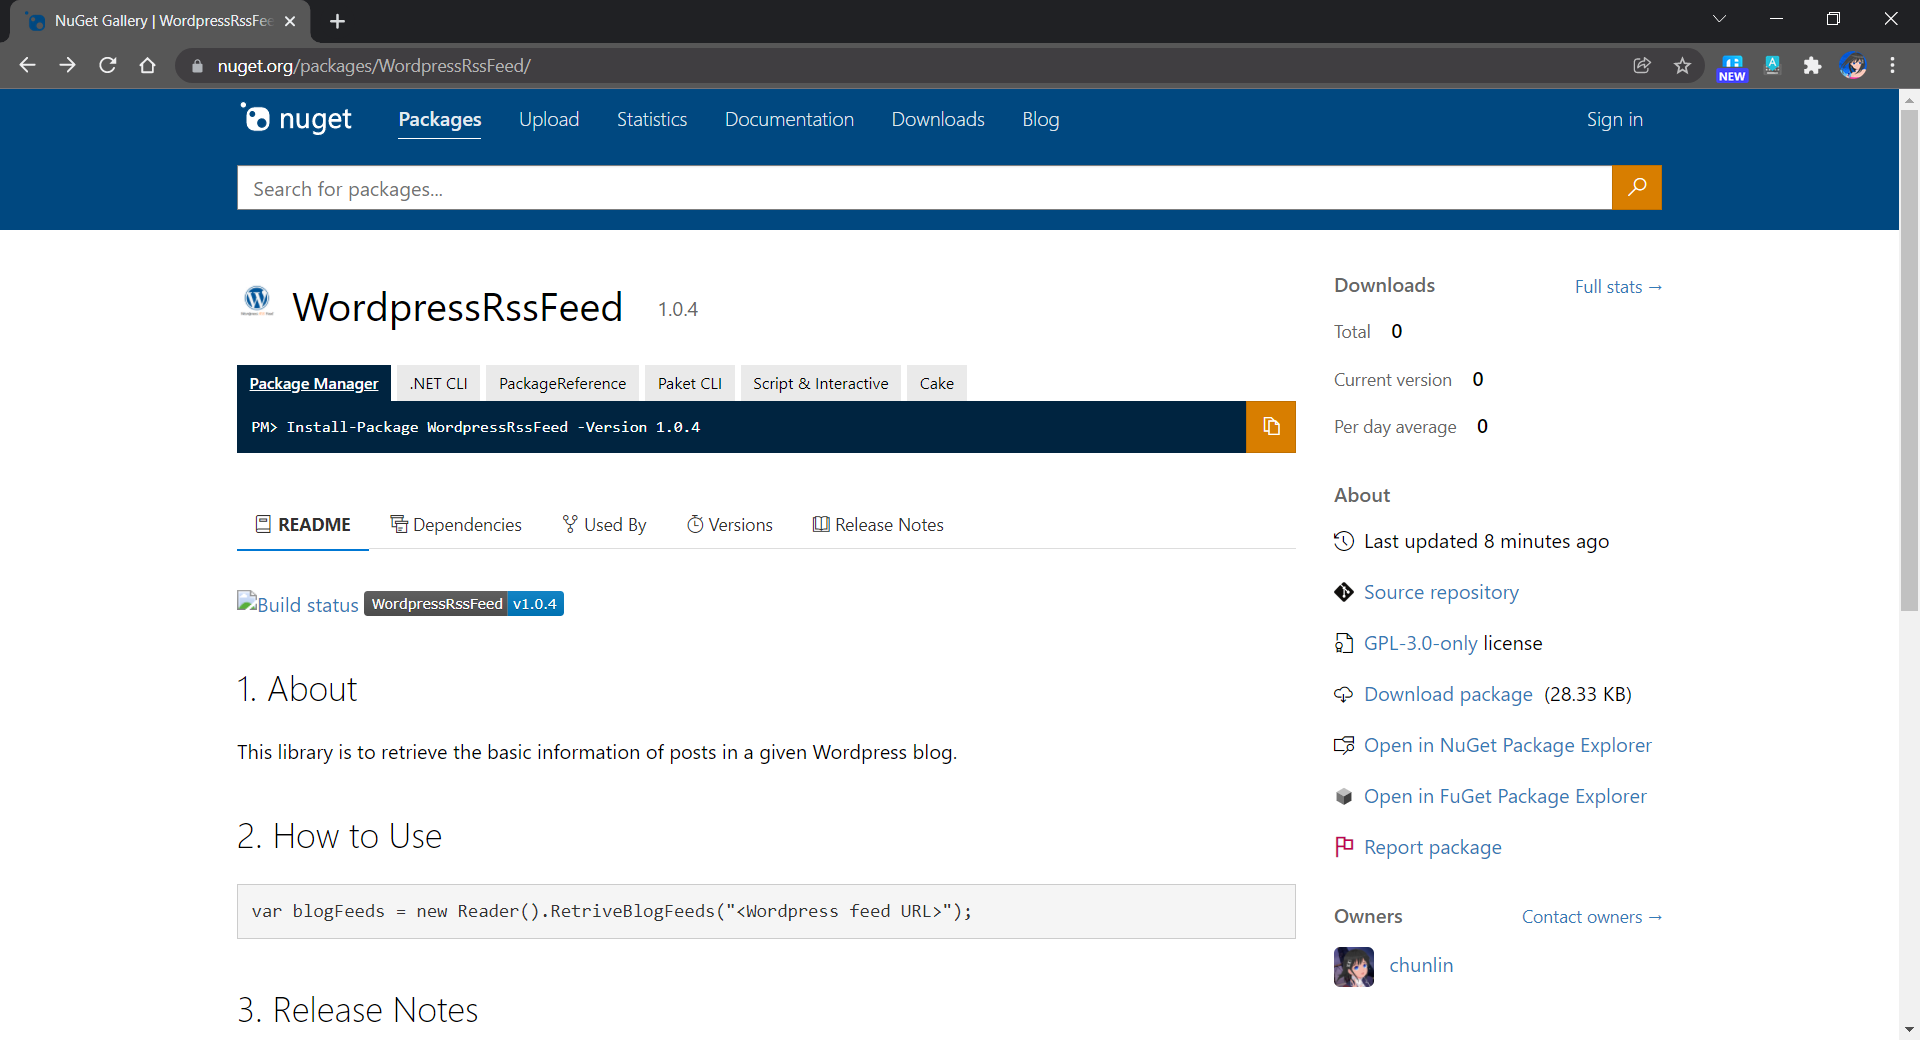
It takes a while for our package to be published on NuGet.org. We have to wait a bit longer if it’s the first release of our package.
Once the package is searchable on the NuGet Gallery, we shall be able to see our beautiful package page as shown below.
Hence, you may notice that the badge of “Build status” in the screenshot above cannot be loaded. This is because my Azure DevOps is on the old domain, i.e. *.visualstudio.com. The visualstudio.com unfortunately is not one of the trusted domains.
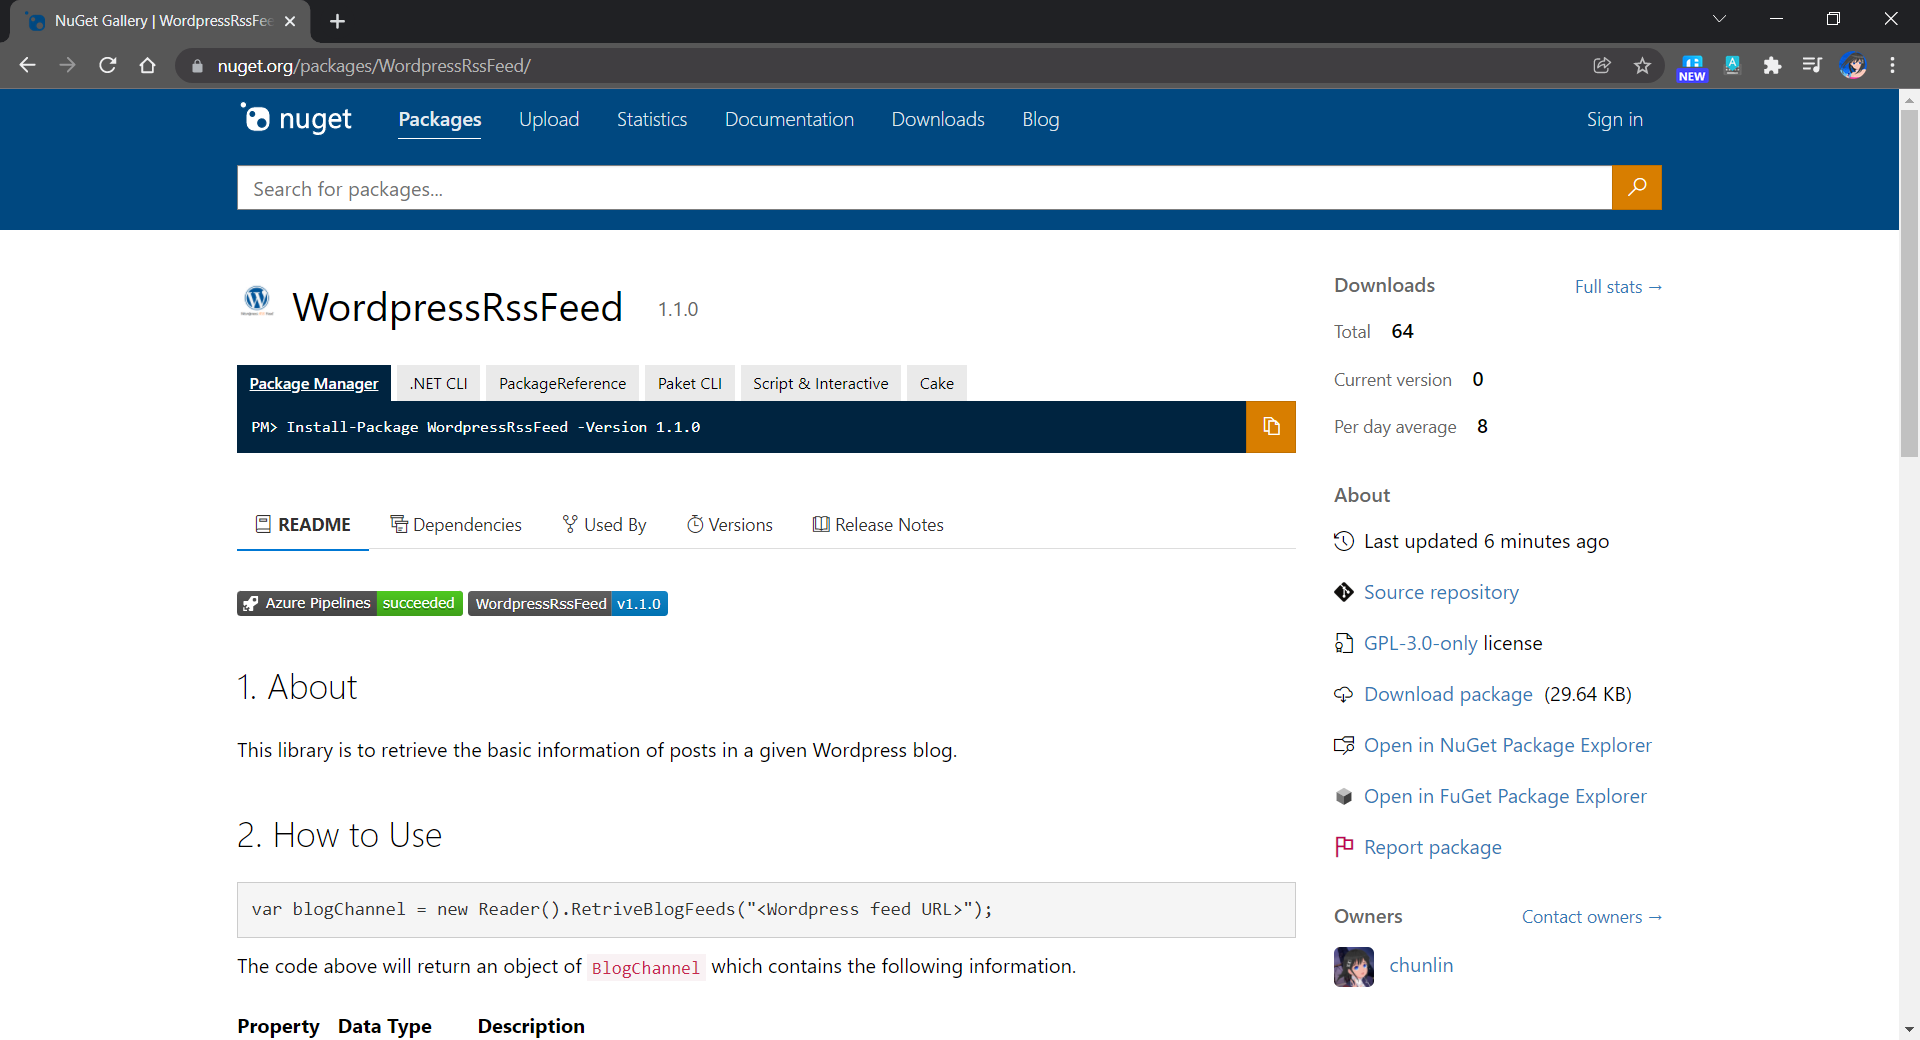
To solve that issue, we should get the badge from the new domain of Azure DevOps, i.e. dev.azure.com, instead.
We can get our status badge from Azure DevOps.
After the update is done, we should be able to see a complete homepage of our NuGet package as shown in the following screenshot.
I thus decided to document down the steps on how I approach this problem to help the developers out there who are facing the same issue.
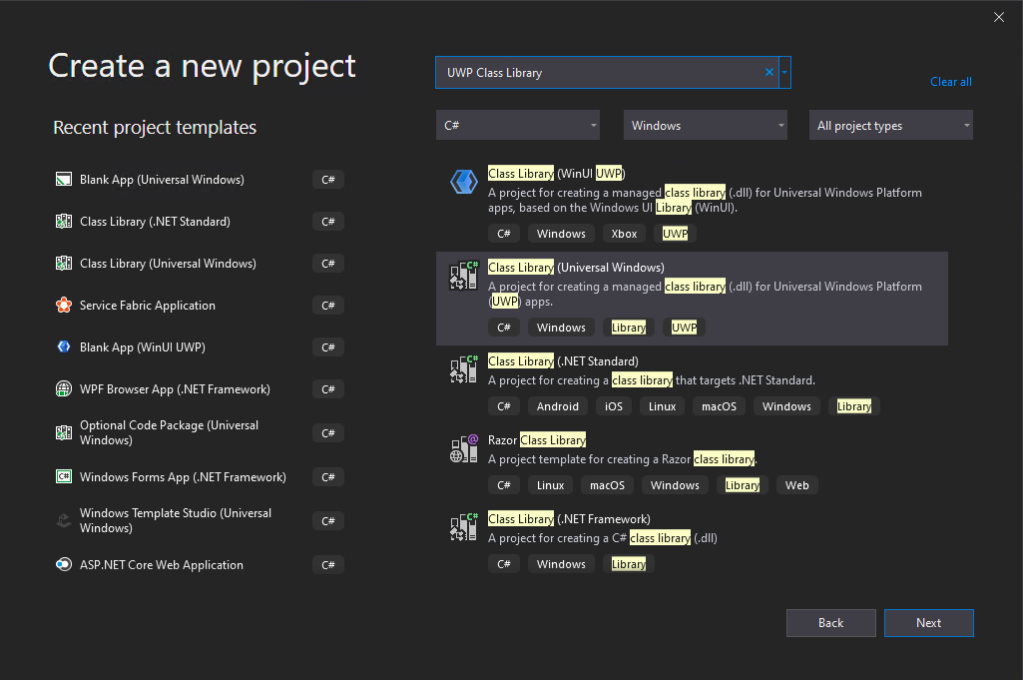
Step 1: Setup the UWP Class Library Project
🎨 We will be using “Class Library (Universal Windows) in this post. 🎨
In this post, the new project we create is called “RedButton” which is meant to provide red button in different style. Yup, it’s important to make our demo as simple as possible so that we can focus on the key thing, i.e. generating the NuGet package.
Before we proceed with the new project, we need to configure the project Build properties, as shown in the following screenshot, to enable the XML Documentation file. This will make a XML file generated in the output folder which we need to use later.
🎨 Enable the XML documentation file by checking the checkbox. 🎨
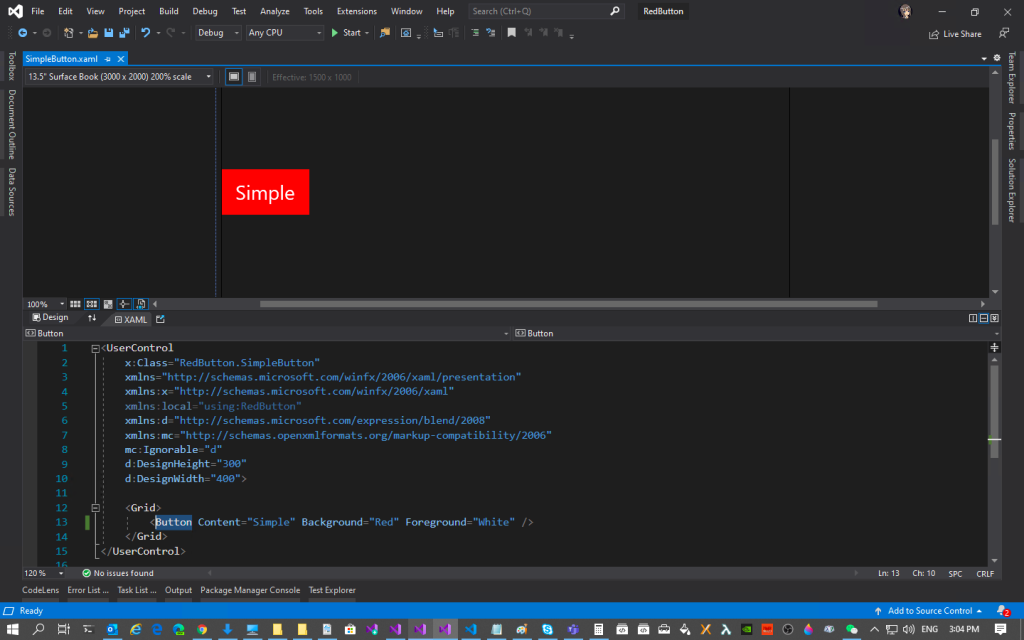
Now, we can proceed to add a new user control, called SimpleButton.xaml.
🎨 Yay, we have simple red button here. 🎨
So this marks the end of the steps where we create an UWP user control where we need to package it with NuGet.
Step 2: Install NuGet.exe
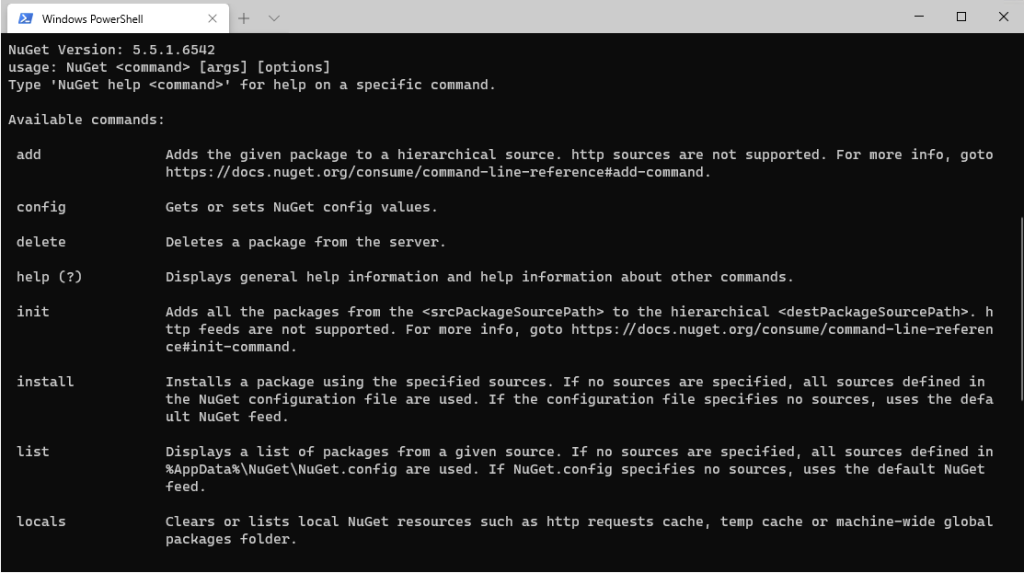
Before we proceed, please make sure we have nuget installed. To verify that, just run the following command in the PowerShell.
> nuget
If it is installed, it will show something as follows.
🎨 Yay, nuget is installed. 🎨
If it is not installed, please download the latest recommended nuget.exe from the NuGet website. After that, add the path the the folder containing the nuget.exe file in the PATH environment variable.
Now we need to navigate in PowerShell to the project root folder, i.e. the folder containing RedButton.csproj. Then, we need to key in the following command to run it.
nuget spec
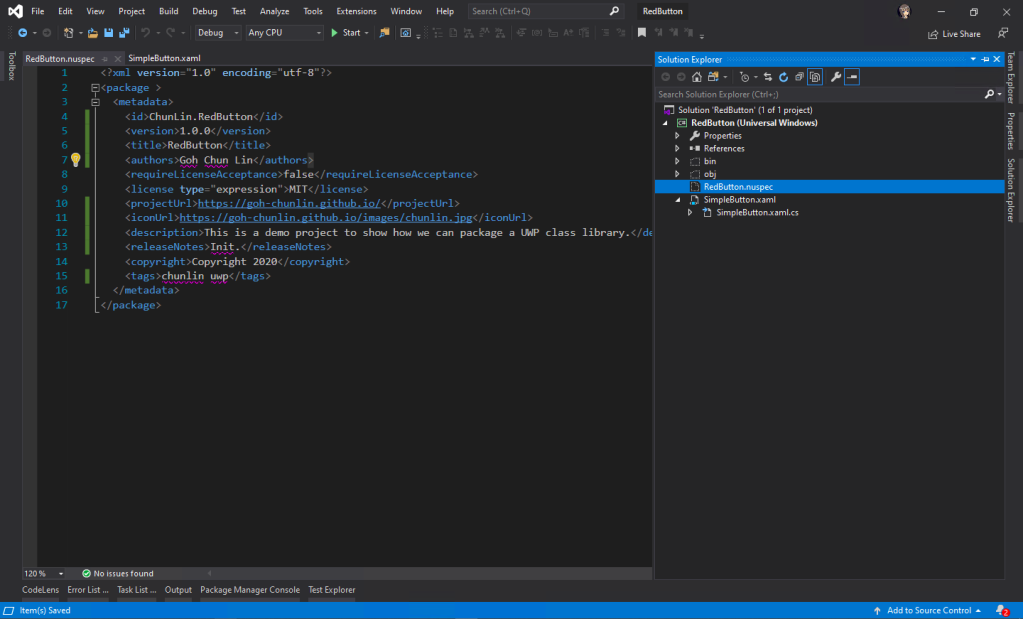
If the command is successfully executed, there will be a message saying “Created ‘RedButton.nuspec’ successfully.”
Now, we can open the RedButton.nuspec in Visual Studio. Take note that the file itself is not yet included in the solution. So we need to make sure we have enabled the “Show All Files” in the Solution Explorer to see the NuSpec file.
In order to automate the publish of our package to the NuGet, we will need to implement Continuous Integration. Here, the tools that we will be using are GitHub and Azure DevOps.
After committing our codes to GitHub, we will proceed to setup the Azure DevOps pipeline.
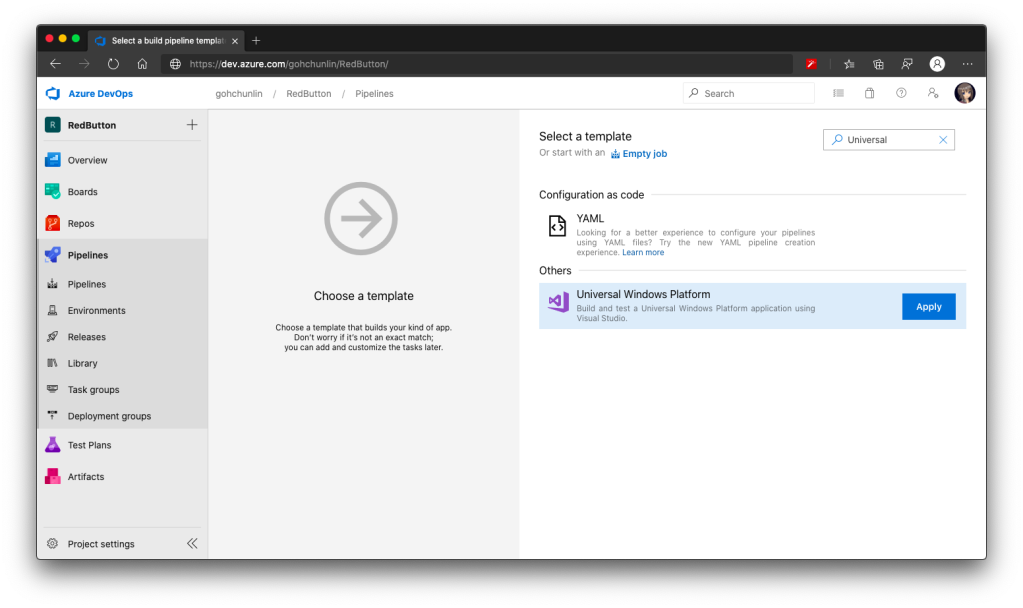
Firstly, we can make use of the UWP build template available on the Azure DevOps.
🎨 Yes, we can build UWP app on Azure DevOps. 🎨
At the time I am writing this port, there are 5 tasks in the agent job:
Use NuGet 4.4.1;
NuGet restore **\*.sln;
Build solution **\*.sln;
Publish artifact: drop;
Deploy to Visual Studio App Center.
Take note that the NuGet version by default is 4.4.1, which is rather old and new things like <license> element in our NuSpec file will not be accepted. Hence, to solve this problem, we can refer to the list of available NuGet version at https://dist.nuget.org/tools.json.
At the time this post is written in April 2020, the latest released and blessed NuGet version is 5.5.1. So we will change it to 5.5.1. Please update it to any other latest number according to your needs and the time you read this post.
After that, for the second task, we need to update its “Path to solution, packages.config, or project.json” to be pointing at “RedButton\RedButton.csproj”.
Similarly, for the “Solution” field in the third task, we also need to point it to the “RedButton\RedButton.csproj”. Previously I pointed it to the RedButton folder which contains the .sln file, it will not work even though it is asking for “Solution”.
On the third task, we also need to update the “Visual Studio Version” to be “Visual Studio 2019” (or any other suitable VS for our UWP app). It seems to be not working when I was using VS2017. After that, I also updated the field “Configuration” to Release because by default it’s set to Debug and publishing Debug mode to public is not a good idea. I have also enabled “Clean” build to avoid incremental build which is not useful in my case. Finally, I changed the MSBuild Architecture to use MSBuild x64. The update of the third task is reflected on the screenshot below.
🎨 Third task configuration. 🎨
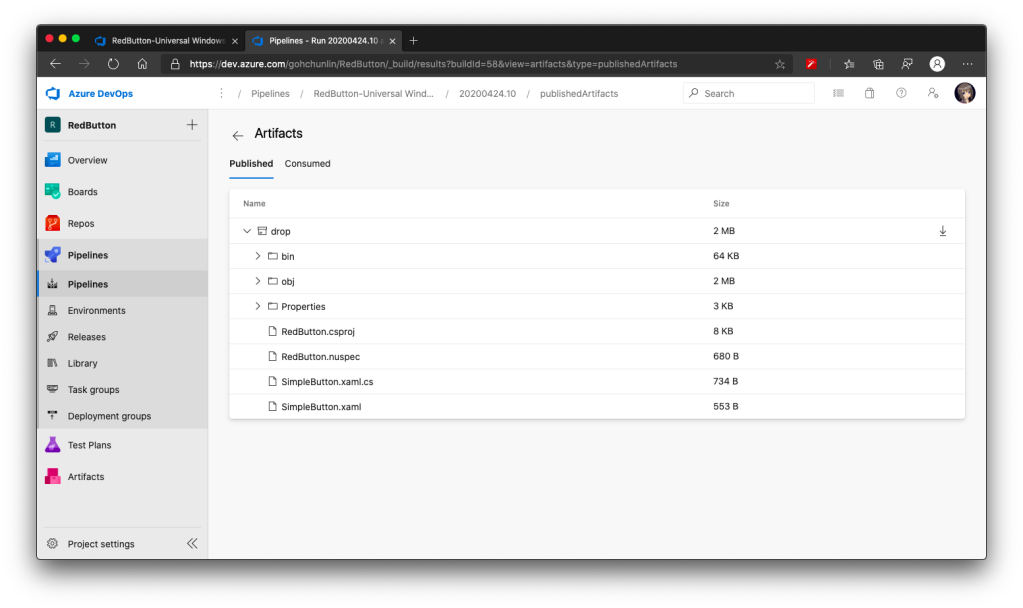
For the forth task, similarly, we also set its “Path to publish” to “RedButton”. Ah-ha, this time we are using the solution folder itself. By right, this fourth task is not relevant if we just publish our UWP class library to a NuGet server. I still keep it and set its path to publish to be the solution so that later I can view the build results of previous tasks by downloading it from the Artifact of the build.
I’d recommend to have this step because sometimes your built output folder structure may not be the same as what I have here depends on how you structure your project. Hence, based on the output folder, you many need to make some adjustments to the paths used in the Azure DevOps.
🎨 The fourth task helps to show build results from previous tasks. 🎨
By default, the fifth task is disabled. Since we are also not going to upload our UWP app to VS App Center, so we will not work on that fifth task. Instead, we are going to add three new tasks.
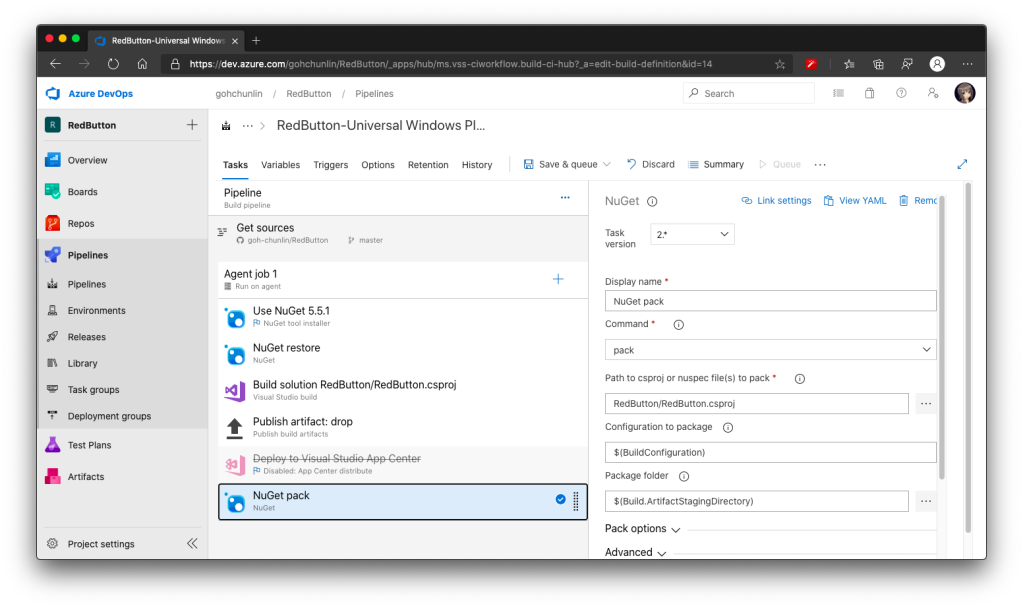
Firstly, we will introduce the NuGet pack task as the sixth task. The task in the template is by default called “NuGet restore” but we can change the command from “restore” to “pack” after adding the task, as shown in the following screenshot.
🎨 Remember to point the “Path to csproj” to the directory having the RedButton.csproj. 🎨
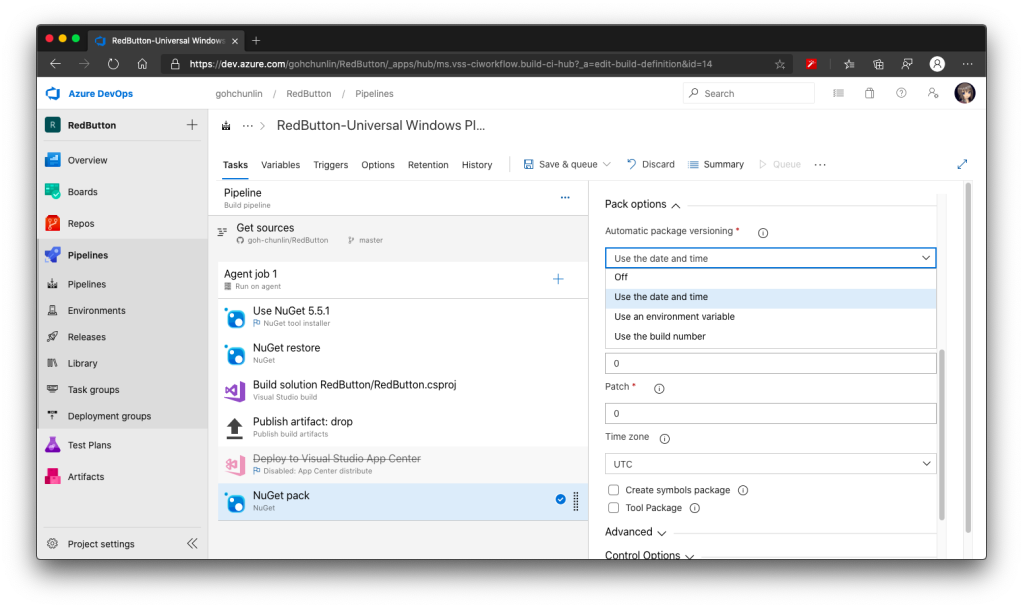
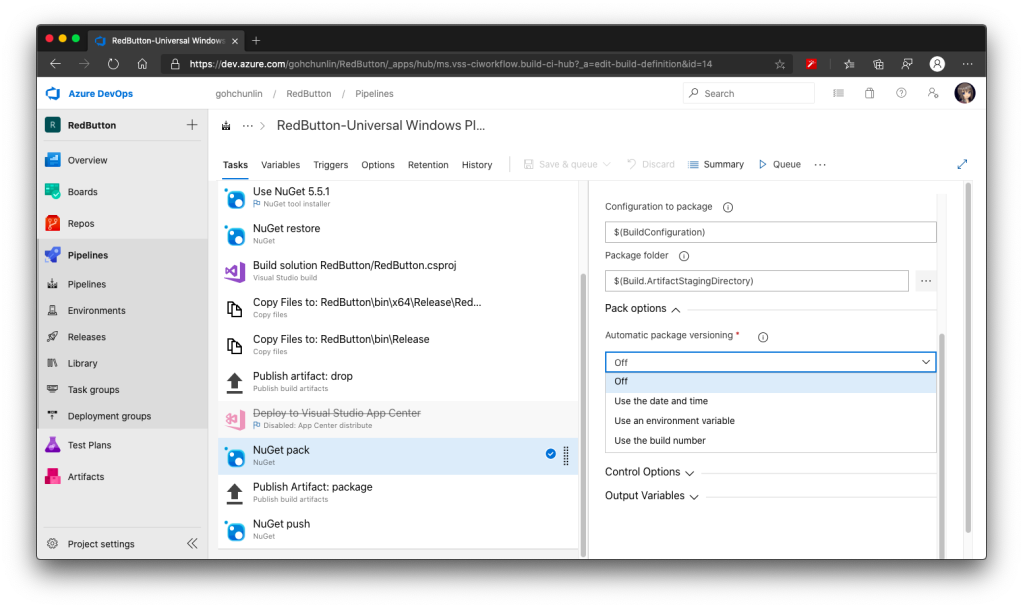
There is one more important information that we need to provide for NuGet packaging. It’s the version of our package. We can either do it manually or automatically. It’s better to automate the versioning else we may screw it up anytime down the road.
There are several ways to do auto versioning. Here, we will go with the “Date and Time” method, as shown in the screenshot below.
🎨 Choose “Use the date and time”. 🎨
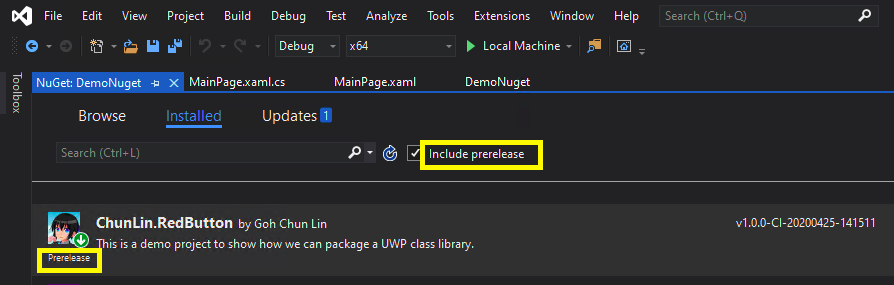
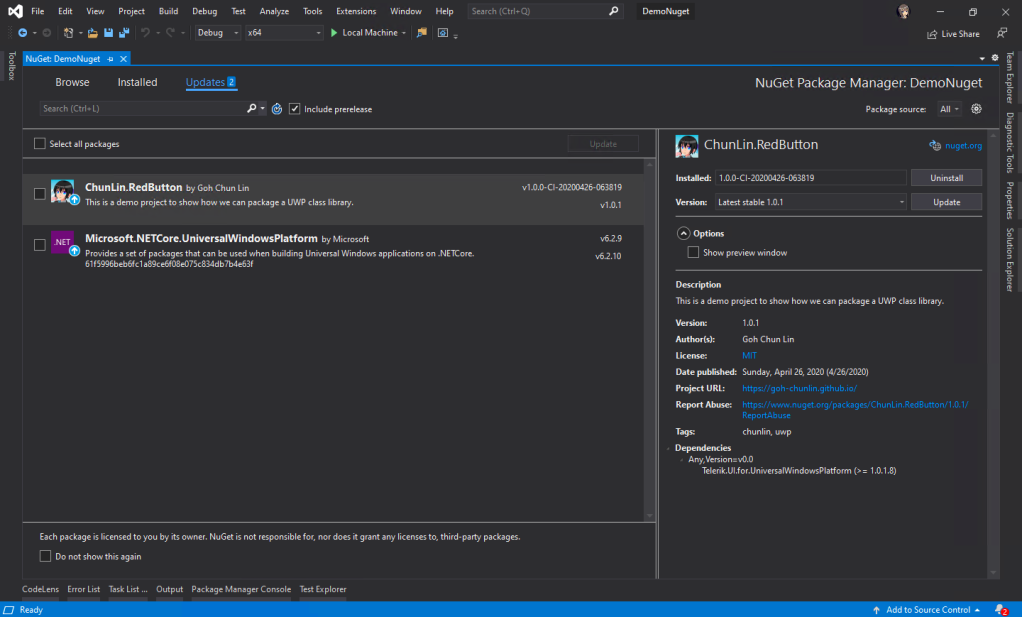
This way of versioning will append datetime at the end of our version automatically. Doing so allows us to quickly test the release on the NuGet server instead of spending additional time on updating the version number. Of course, doing so means that the releases will be categorized as pre-released which users cannot see on Visual Studio unless they check the “Include prerelease” checkbox.
🎨 The prerelease checkbox on Visual Studio 2019. 🎨
Secondly, if you are also curious about the package generated by the sixth task above, you can add a task similar to the fourth task, i.e. publish the package as artifact for download later. Here, the “Path to publish” will be “$(Build.ArtifactStagingDirectory)”.
🎨 Publishing NuGet package for verifying manually later. 🎨
Since a NuGet package is just a zipped file, we can change its extension from .nupkg to .zip to view its content on Windows. I did the similar on MacOS but it didn’t work, so I guess it is possible on Windows only.
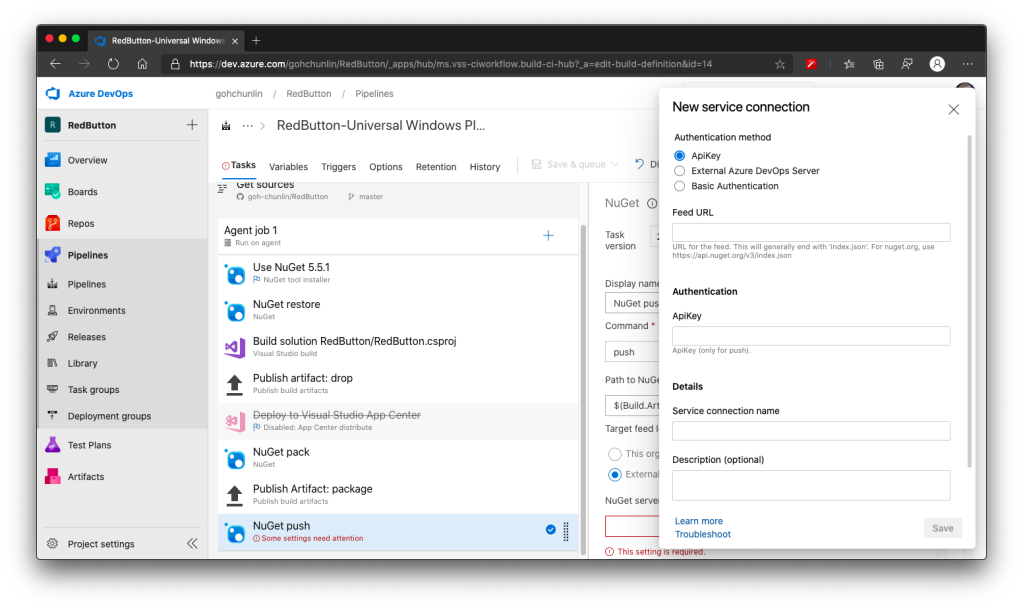
Thirdly, we need to introduce the NuGet push task after the task above to be the eighth task. Here, we need to set its “Path to NuGet package(s) to publish” to “$(Build.ArtifactStagingDirectory)/*.nupkg”.
Then, we need to specify that we will publish our package to the nuget.org server which is an external NuGet server. By clicking on the “+ New” button, we can then see the following popup.
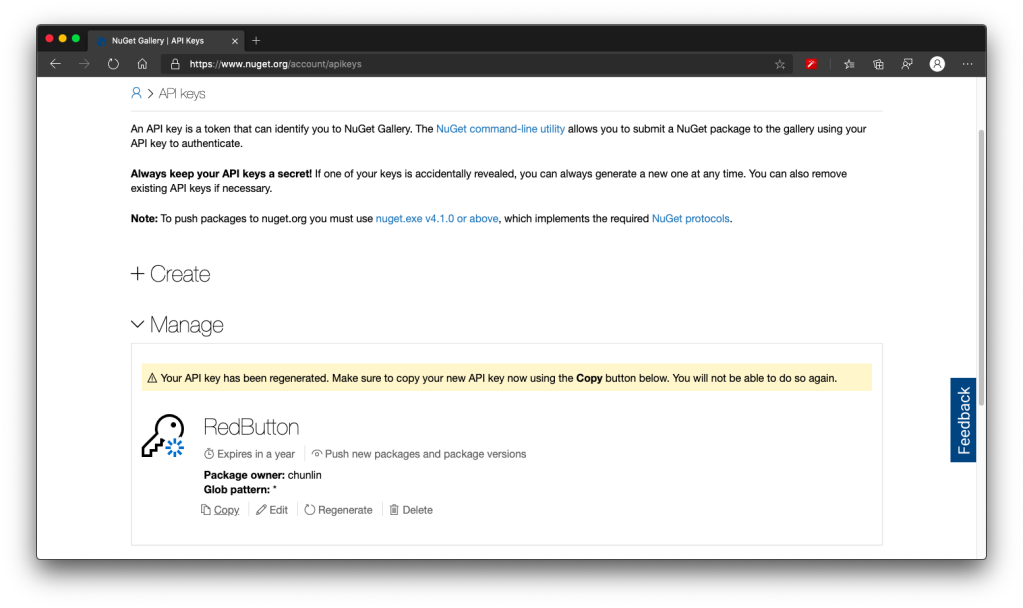
🎨 We will be using the API key that we generate in nuget.org for the NuGet push task. 🎨
With this NuGet push task setup successfully, we can proceed to save and run this pipeline.
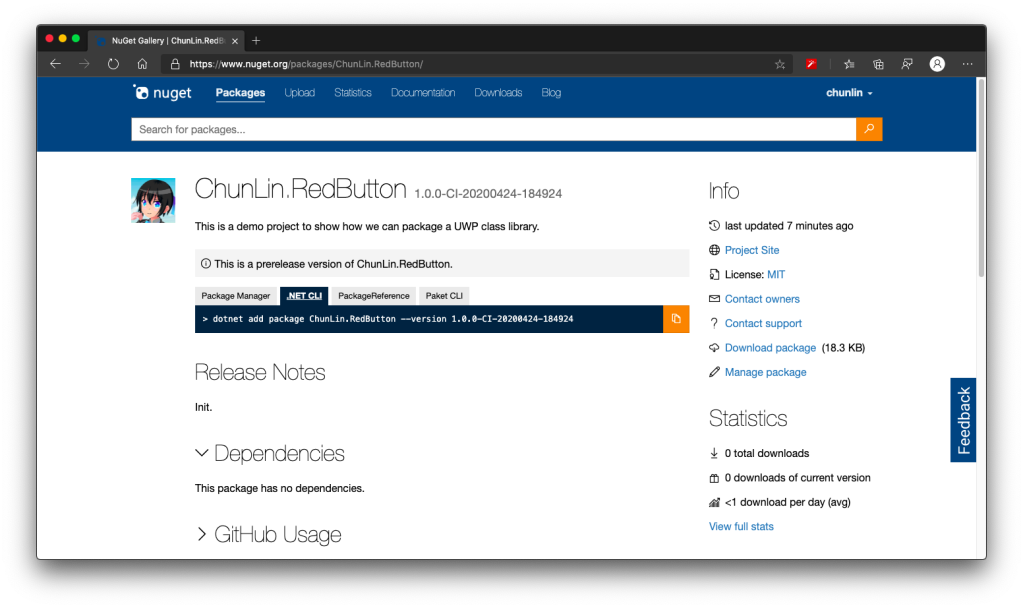
After the tasks are all executed smoothly and successfully, we shall see our pre-released NuGet package available on the nuget.org website. Note that it requires an amount of time to do package validating before public can use the new package.
🎨 Yay, this is our first NuGet package. 🎨
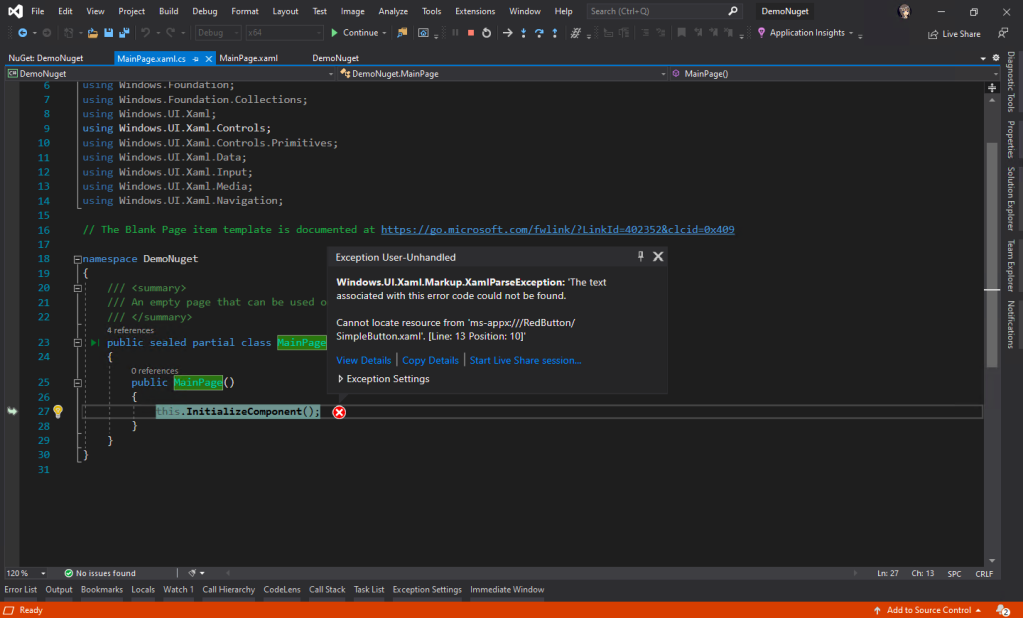
This is not a happy ending yet. In fact, if we try this NuGet package, we will see the following error which states that it “cannot locate resource from ‘ms-appx:///RedButton/SimpleButton.xaml’.”
🎨 Windows.UI.Xaml.Markup.XamlParseException: ‘The text associated with this error code could not be found. 🎨
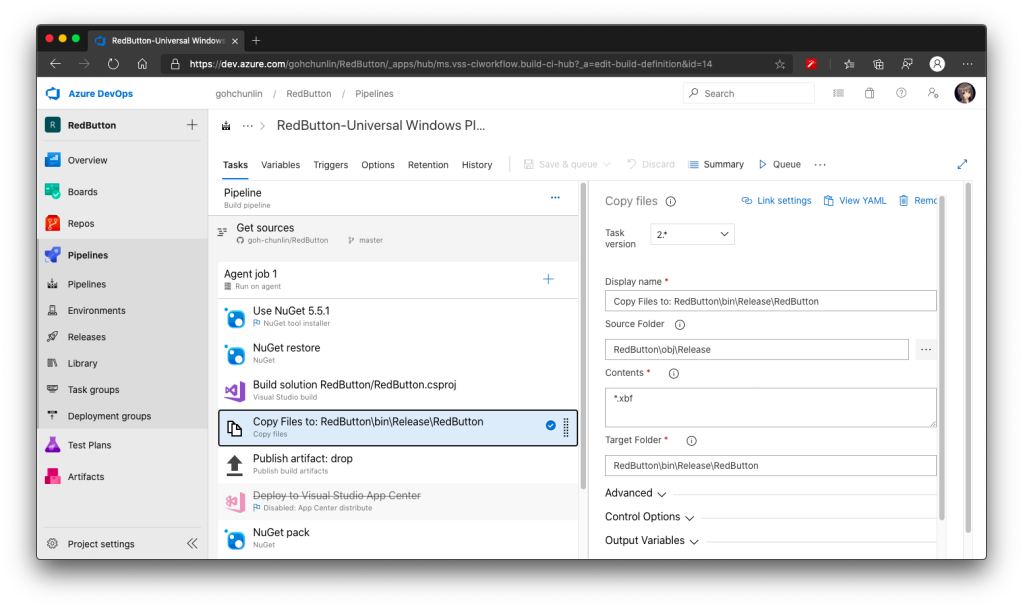
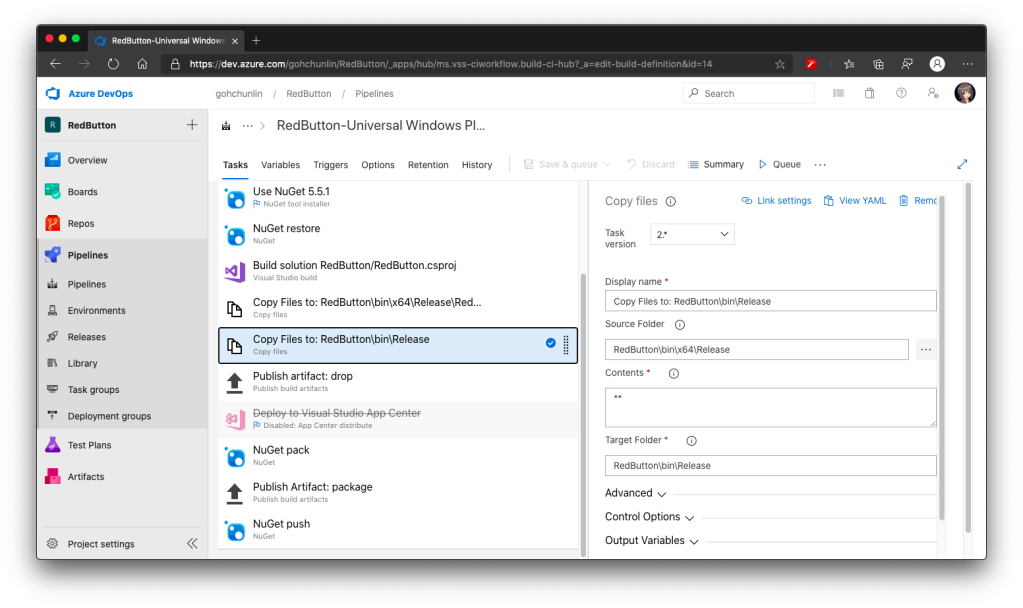
To do so, we have to introduce a new task right after the third task, which is to copy the XBF file from obj folder to the Release folder in the bin folder, as shown in the following screenshot.
🎨 We need to add “Copy Files” task here. 🎨
Step 5: Targeting Framework
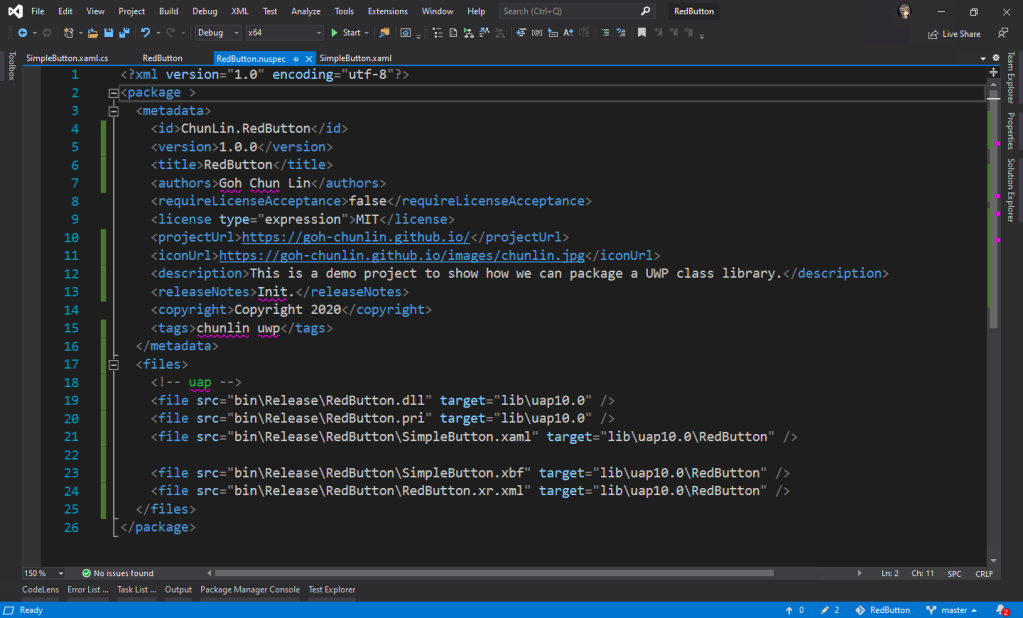
Before we make our NuGet package to work, we need to specify the framework it is targeting at. To do so, we need to introduce the <files> to our NuSpec.
So, the NuSpec should look something as follows now.
🎨 Finalised NuSpec. 🎨
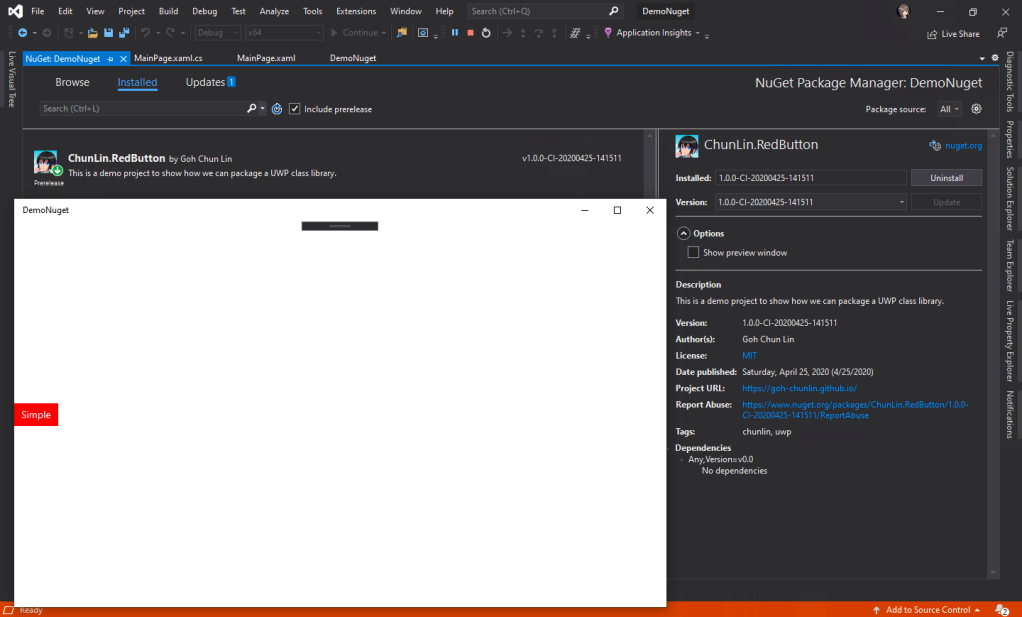
Now with this, we can use our prerelease version of our UWP control in another UWP project through NuGet.
🎨 Yay, it works finally! 🎨
Step 6: Platform Release Issues
There will be time which requires us to specify the Platform to be, for example, x64 in the third task of the Azure DevOps pipeline above. That will result in putting the Release folder in both obj and bin to be moved to obj\x64 and bin\x64, respectively. This will undoubtedly make the entire build pipeline fails.
Hence we need to update the paths in the Copy File task (the fourth task) and add another Copy File task to move the Release folder back to be directly under the bin directory. Without doing this, the nuget pack task will fail as well.
🎨 The new task to correct the position of the Release folder in bin. 🎨
Step 7: Dependencies
If our control relies on the other NuGet packages, for example Telerik.UI.for.UniversalWindowsPlatform, then we have to include them too inside the <metadata> in the NuSpec, as shown below.
Okay, after we are happy with the prerelease of our NuGet package, we can officially release our package on the NuGet server. To do so, simply turn off the automatic package versioning on Azure DevOps, as shown in the screenshot below.
🎨 Turning off the automatic package versioning. 🎨
With this step, now when we run the pipeline again, it will generate a new release of the package without the prerelease label. The version number will follow the version we provide in the NuSpec file.
🎨 Now Visual Studio will say our package is “Latest stable” instead of prerelease. 🎨
Journey: 3 Days 3 Nights
The motivation of this project comes from a problem I encounter at workplace because our UWP class library could not be used whenever we consumed it as a NuGet package. This was also the time when Google and StackOverflow didn’t have proper answers on this.
Hence, it took me 1 working day and 2 days during weekend to research and come up with the steps above. Hopefully with my post, people around the world can easily pickup this skill without wasting too much effort and time.
Finally, I’d like to thank my senior Riza Marhaban for encouraging me in this tough period. Step 7 above is actually his idea as well. In addition, I have friend encouraging me online too in this tough Covid-19 lockdown. Thanks to all of them, I manage to learn something new in this weekend.