[KOSD Series] Running MS SQL Server 2019 on macOS

Few days ago, my teammate would like to learn how to use MS SQL Server. However, he only has a Macbook and MS SQL Server doesn’t run on macOS. Hence, I decided to write him a quick setup guide on how to do that with the help of container.

Starting from March 2016, besides Windows, SQL Sever 2019 also runs on Linux. So, we can easily spin up a Linux container and host SQL Server on it.

🎨 Microsoft introduced SQL Server on Linux in 2016. 🎨

Docker

We need to run Docker on our Mac machine. Since my teammate is new to Docker, he can simply choose a rather straight-forward path for this, which is to use Docker Desktop on Mac. Kindly take note of the system requirement before proceed to install it.

Once the Docker is up and running, we can proceed to pull the image of SQL Server 2019 from the Docker Hub.

SQL Server 2019 Developer Edition

In 2019, continuing with the approach to delivering a consistent and trustworthy acquisition experience for Microsoft container images, Microsoft Container Registry (MCR) is announced.

We can run the following command in Terminal window to start the database server. Here we are using 1501 as the port. Take note that, we need to replace the password with our password which meets the following guideline:

  • at least 8 characters;
  • including uppercase, lowercase letters, base-10 digits and/or non-alphanumeric symbols.
$ docker run -e 'ACCEPT_EULA=Y' -e 'SA_PASSWORD=yourStrong(!)Password' -p 1501:1433 -d mcr.microsoft.com/mssql/server:2019-latest

In the command above, there are two environment variables.

Firstly, it is the environment variable “ACCEPT_EULA”. Setting it to Y means that we accept the End-User Licensing Agreement of the product. So far I still couldn’t find the EULA of the Microsoft SQL Server 2019. If you know, please drop me a message in the comment section. Thanks!

Secondly, it is the “SA_PASSWORD” which is used to set the password that we will later use to connect to the SQL server later as the database admin (userid = “sa”).

Actually, there is another environment variable which is not set here. It is the MSSQL_PID, i.e. the product ID of the SQL Server. By default, it is the Developer edition. If we would like to use Express or Enterprise edition, we can specify it here.

The reason we chose the Developer edition is because it is the edition that it is licensed for use as a development and test system, not as a production server. In addition, despite being Developer edition, it includes all the functionality of Enterprise edition. Hence, SQL Server Developer is an ideal choice for developers like us to build and test applications.

🎨 Docker Hub page of Microsoft SQL Server. 🎨

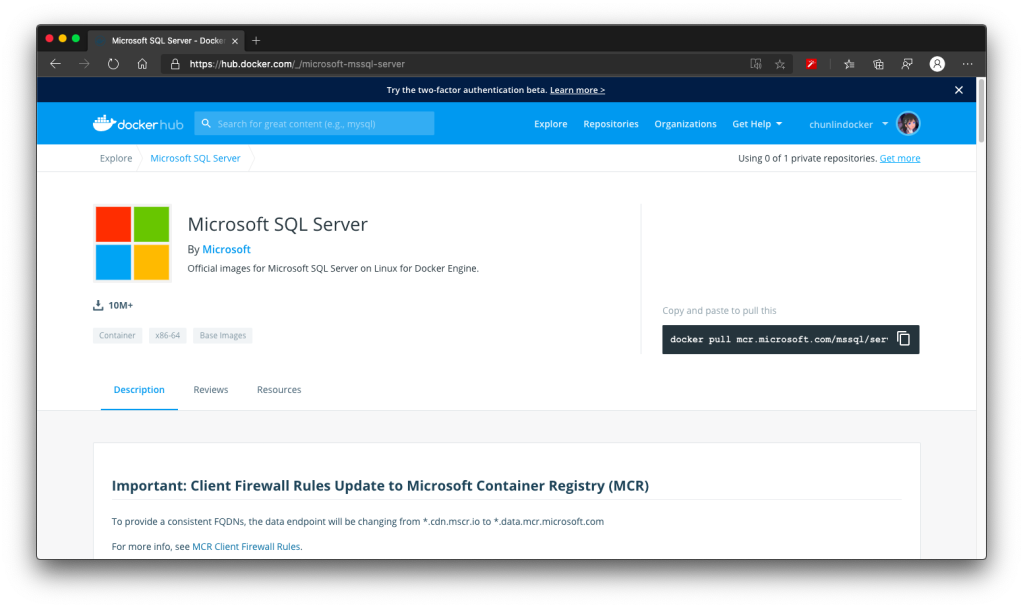
There are more information about the MS SQL Server image on the Docker Hub page. Hence I will not repeat them here.

Azure Data Studio

To visualise and manage our data in the databases, we need to use tools such as SQL Server Management Studio (SSMS). However, SSMS is only for Windows (AMD or Intel). So, on macOS, we have to choose another cross-platform alternative, which is Azure Data Studio. Azure Data Studio is usable on Windows and Linux too.

Interestingly, Azure Data Studio was previously called SQL Operations Studio. Hence, please only use the latest one, which is the Azure Data Studio.

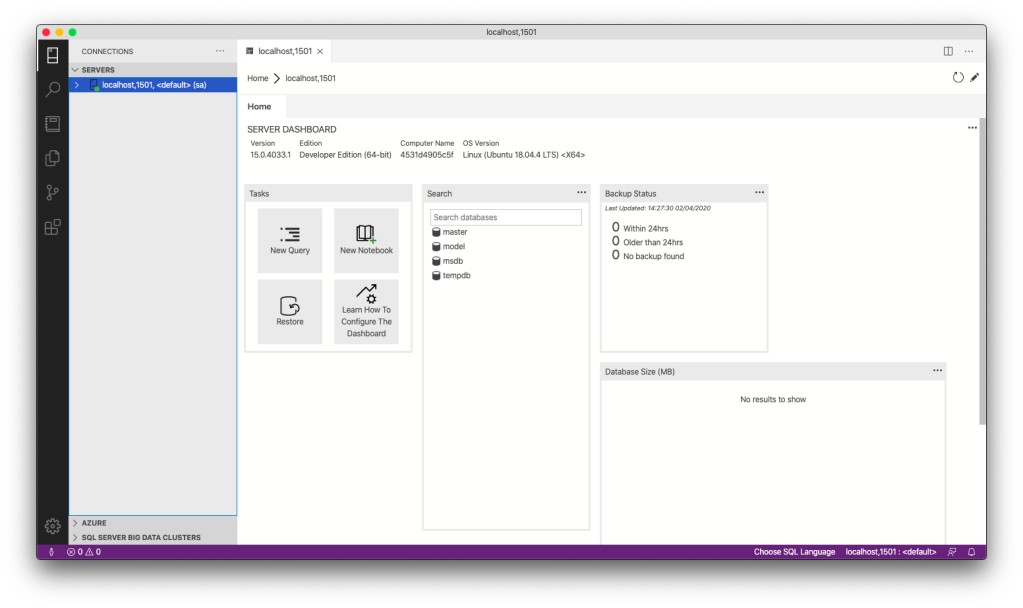
Now we can connect to the SQL Server from Azure Data Studio as shown below. Take note that the Server is “localhost,1501” and it is using comma, not dot, between the word localhost and the port number.

🎨 Connecting to the Microsoft SQL Server from Azure Data Studio. 🎨

If the connection is successful, we shall be able to see the Server Dashboard as shown below.

🎨 Server Dashboard in Azure Data Studio. 🎨

That’s all. Now we can have MS SQL Server running on our Mac machine for local testing and development.

References

KOSD, or Kopi-O Siew Dai, is a type of Singapore coffee that I enjoy. It is basically a cup of coffee with a little bit of sugar. This series is meant to blog about technical knowledge that I gained while having a small cup of Kopi-O Siew Dai.

Protecting Web API with User Password

identity-server

In my previous post, I shared about the way to connect Android app with IdentityServer4 using AppAuth for Android. However, that way will popup a login page on a web browser on phone when users are trying to login to our app. This may not be what the business people want. Sometimes, they are looking for a customized native login page on the app itself.

To do so, we can continue to make use of IdentityServer4.

IdentityServer4 has a grant which is called Resource Owner Password Grant. It allows a client to send username and password to the token service and get an access token back that represents that user. Generally speaking, it is not really recommended to use the AppAuth way. However, since the mobile app is built by our own team, so using the resource owner password grant is okay.

Identity Server Setup: Adding New API Resource

In this setup, I will be using in-memory configuration.

As a start, I need to introduce a new ApiResource with the following codes in the Startup.cs of our IdentityServer project.

var availableResources = new List<ApiResource>();
...
availableResources.Add(new ApiResource("mobile-app-api", "Mobile App API Main Scope"));
...
services.AddIdentityServer()
    ...
    .AddInMemoryApiResources(availableResources)
    .AddInMemoryClients(new ClientStore(Configuration).GetClients())
    .AddAspNetIdentity<ApplicationUser>();

Identity Server Setup: Defining New Client

As the code above shows, there is a ClientStore that we need to add a new client to with the following codes.

public class ClientStore : IClientStore
{
    ...

    public IEnumerable<Client> GetClients()
    {
        var availableClients = new List<Client>();
        
        ...
        
        availableClients.Add(new Client
        {
            ClientId = "mobile-app-api",
            ClientName = "Mobile App APIs",
            AllowedGrantTypes = GrantTypes.ResourceOwnerPassword,
            ClientSecrets = { new Secret(Configuration["MobileAppApi:ClientSecret"].Sha256()) },
            AllowedScopes = { "mobile-app-api" }
        });

        return availableClients;
    }
}

Configuring Services in Web API

In the Startup.cs of our Web API project, we need to update it as follows.

public void ConfigureServices(IServiceCollection services)
{
    services.AddMvc();

    services.AddAuthorization();

    services.AddAuthentication("Bearer")
    .AddIdentityServerAuthentication(options =>
    {
        options.Authority = "<URL of the identity server>";
        options.RequireHttpsMetadata = true;
        options.ApiName = "mobile-app-api";
    });

    services.Configure<MvcOptions>(options =>
    {
        options.Filters.Add(new RequireHttpsAttribute());
    });
}

Configuring HTTP Request Pipeline in Web API

Besides the step above, we also need to make sure the following one line “app.UseAuthentication()” in the Startup.cs. Without this, we cannot make the authentication and authorization to work in our Web API project.

public void Configure(IApplicationBuilder app, IHostingEnvironment env)
{
    ...
    app.UseAuthentication();
    app.UseMvc();
}

Receiving Username and Password to Return Access Token

We also need to add a new controller to receive username and password which will in return tell the mobile app whether the login of the user is successful or not. If the user is logged in successfully, then an access token will be returned.

[Route("api/[controller]")]
public class AuthenticateController : Controller
{
    ...
    [HttpPost]
    [Route("login")]
    public async Task<ActionResult> Login([FromBody] string userName, string password)
    {
        var disco = await DiscoveryClient.GetAsync("<URL of the identity server>");
        var tokenClient = new TokenClient(disco.TokenEndpoint, "mobile-app-api", Configuration["MobileAppApi:ClientSecret"]);
        var tokenResponse = await tokenClient.RequestResourceOwnerPasswordAsync(userName, password, "mobile-app-api");

        if (tokenResponse.IsError)
        {
            return Unauthorized();
        }

        return new JsonResult(tokenResponse.Json);
    }
    ...
}

Securing our APIs

We can now proceed to protect our Web APIs with [Authorize] attribute. In the code below, I also try to return the available claims via the API. The claims will tell the Web API who is logging in and calling the API now via the mobile app.

[HttpGet]
[Authorize]
public IEnumerable<string> Get()
{
    var claimTypesAndValues = new List<string>();

    foreach (var claim in User.Claims)
    {
        claimTypesAndValues.Add($"{ claim.Type }: { claim.Value }");
    }

    return claimTypesAndValues.ToArray();
}

Conclusion

This project took me two days to find out how to make the authentication works because I misunderstand how IdentityServer4 works in this case. Hence, it is always important to fully understand the things on your hands before working on them.

do-not-give-up.png
Do not give up! (Source: A Good Librarian Like a Good Shepherd)

Reference

Connecting Android App with IdentityServer4

android-identity-server-appauth.png

For those ASP .NET web developers, Identity Server should be quite familiar to them especially they are looking for SSO solution.

After successfully integrating Identity Server in our ASP .NET Core MVC web applications, it is now time for us to research about how our mobile app can be integrating with IdentityServer4 too.

Background

We have two types of users. The admin will be logging in to the system via our web application. The normal staff will log in to the system via mobile app. Different sets of features are provided for both web and mobile apps.

Setting up Client on Identity Server

To begin, we need to add new client to the MemoryClients of Identity Server.

According to the sample code done by Hadi Dbouk, we setup the new client as shown in the following code.

using IdentityServer4.Models;
...
public class ClientStore : IClientStore {
    ...
    var availableClients = new List();
    ...
    availableClients.Add(new Client 
    {
        ClientId = "my-awesome-app",
        ClientName = "My Awesome App",
        AllowedGrantTypes = GrantTypes.Code,
        RequirePkce = true,
        RequireConsent = false,
        ClientSecrets = 
        {
            new Secret("my-secret".Sha256())
        },
        RefreshTokenUsage = TokenUsage.ReUse,
        RedirectUris = { "gclprojects.chunlin.myapp:/oauth2callback" },
        AllowedScopes = 
        {
            StandardScopes.OpenId,
            StandardScopes.Profile,
            StandardScopes.Email,
            StandardScopes.OfflineAccess
        },
        AllowOfflineAccess = true
    }
    );
}

For mobile apps, there are two grant types recommended, i.e. Authorization Code and Hybrid. However, as when this post is written, the support of Hybrid is still not mature in AppAuth for Android, so we decided to use GrantTypes.Code instead.

However, OAuth2.0 clients using authorization codes can be attacked. In the attack, the authorization code returned from an authorization endpoint is intercepted within a communication path that is not protected by TLS. To mitigate the attack, PKCE (Proof Key for Code Exchange) is required.

We don’t have consent screen for our apps, so we set RequireConsent to false.

For the RefreshTokenUsage, there are two possible values, i.e. ReUse and OneTime. The only difference is that ReUse will make the refresh token handle to stay the same when refreshing tokens. OneTime will update the refresh token handle once the tokens are refreshed.

Once the authorization flow is completed, users will be redirected to a URI. As documented in AppAuth for Android Readme, custom scheme based redirect URI (i.e. those of form “my.scheme:/path”) should be used for the authorization redirect because it is the most widely supported across many Android versions.

By setting AllowOfflineAccess to be true and give the client access to the offline_access scope, we allow requesting refresh tokens for long lived API access.

Android Setup: Installation of AppAuth

The version of AppAuth for Android is v0.7.0 at the point of time this post is written. To install it for our app, we first need to set it in build.gradle (Module: app).

apply plugin: 'com.android.application'

android {
    ...    defaultConfig {
        ...
        minSdkVersion 21
        targetSdkVersion 26
        ...
        manifestPlaceholders = [
            'appAuthRedirectScheme': 'gclprojects.chunlin.myapp'
        ]
    }
    ...
}

dependencies {
    ...
    compile 'com.android.support:appcompat-v7:26.+'
    compile 'com.android.support:design:26.+'
    compile "com.android.support:customtabs:26.0.0-alpha1"
    compile 'net.openid:appauth:0.7.0'
    ...
}


appauth-code-flow.png
AppAuth for Android authorization code flow. (Reference: The proper way to use OAuth in a native app.)

Android Setup: Updating Manifest

In the AndroidManifest.xml, we need to add the redirect URI to the RedirectUriReceiverActivity, as shown in the following code.

<?xml version="1.0" encoding="utf-8"?>
<manifest xmlns:android="http://schemas.android.com/apk/res/android"
    package="gclprojects.chunlin.myapp">
    ...
    <application...>
        <activity
            android:name="net.openid.appauth.RedirectUriReceiverActivity"
            android:theme="@style/Theme.AppCompact.NoActionBar">
        <intent-filter>
            <action android:name="android.intent.action.VIEW"/>

            <category android:name="android.intent.category.DEFAULT"/>
            <category android:name="android.intent.category.BROWSABLE"/>

            <data android:scheme="gclprojects.chunlin.myapp"/>
        </intent-filter>
    </application>
    ...
</manifest>

Android Setup: Authorizing Users

On the Android app, we will have one “Login” button.

<Button
    android:onClick="Login"
    android:layout_width="wrap_content"
    android:layout_height="wrap_content"
    android:text="Login"
    android:layout_centerInParent="true"/>

By clicking on it, the authorization steps will begin.

public void Login(View view) {
    AuthManager authManager = AuthManager.getInstance(this);
    AuthorizationService authService = authManager.getAuthService();

    AuthorizationRequest.Builder authRequestBuilder = new AuthorizationRequest
            .Builder(
            authManager.getAuthConfig(),
            "my-awesome-app",
            "code",
            Uri.parse("gclprojects.chunlin.myapp:/oauth2callback"))
            .setScope("openid profile email offline_access");

    String codeVerifier = CodeVerifierUtil.generateRandomCodeVerifier();
    SharedPreferencesRepository sharedPreferencesRepository = new SharedPreferencesRepository(this);
    sharedPreferencesRepository.saveCodeVerifier(codeVerifier);

    authRequestBuilder.setCodeVerifier(codeVerifier);

    AuthorizationRequest authRequest = authRequestBuilder.build();

    Intent authIntent = new Intent(this, LoginAuthActivity.class);
    PendingIntent pendingIntent = PendingIntent.getActivity(this, authRequest.hashCode(), authIntent, 0);

    authService.performAuthorizationRequest(
            authRequest,
            pendingIntent);
}

The code above uses some other classes and interact with other activity. I won’t talk about them here because the codes can be found on my Github repository which is forked from Hadi Dbouk’s.

Android Setup: Post Authorization and Refresh Token

According to the code in the LoginAuthActivity.java, if the login fails, the user will be brought back to the Login Activity. However, if it succeeds, the user can then reach to another activities in the app which require user to login first. We can also then get Access Token, Refresh Token, and ID Token from authManager. With the Access Token, we then can access our backend APIs.

Since access tokens have finite lifetimes, refresh tokens allow requesting new access tokens without user interaction. In order to have the client to request Refresh Token, we need to authorize it by setting AllowOfflineAccess to true. When we make a request to our APIs, we need to check if the Access Token is expired, if it is so, we need to make a new request with the Refresh Token to the IdentityServer to have a new Access Token.

The way how we can retrieve new Access Token with a Refresh Token in AppAuth is shown in the TokenTimer class in TokenService.java using createTokenRefreshRequest.

private class TokenTimer extends TimerTask {
    ...

    @Override
    public void run() {

        if(MyApp.Token == null)
            return;

        final AuthManager authManager = AuthManager.getInstance(TokenService.this);

        final AuthState authState = authManager.getAuthState();


        if(authState.getNeedsTokenRefresh()) {
            //Get New Token

            ClientSecretPost clientSecretPost = new ClientSecretPost("driver008!");
            final TokenRequest request = authState.createTokenRefreshRequest();
            final AuthorizationService authService = authManager.getAuthService();

            authService.performTokenRequest(request, clientSecretPost, new AuthorizationService.TokenResponseCallback() {
                @Override
                public void onTokenRequestCompleted(@Nullable TokenResponse response, @Nullable AuthorizationException ex) {
                    if(ex != null){
                        ex.printStackTrace();
                        return;
                    }
                    authManager.updateAuthState(response,ex);
                    MyApp.Token = authState.getIdToken();
                }
            });

        }

    }
}

Conclusion

Yup, that’s all for integrating the Identity Server in an Android App to provide a seamless login experience to our users. If you find any mistake in this article, kindly let me know in the comment section. Thanks in advance!

References


[KOSD Series] Ready ML Tutorial One

kosd-azure-machine-learning.png

During the Labour Day holiday, I had a great evening chat with Marvin, my friend who had researched a lot about Artificial Intelligence and Machine Learning (ML). He guided me through steps setting up a simple ML experiment. Hence, I decided to note down what I had learned on that day.

The tool that we’re using is Azure Machine Learning Studio. What I had learned from Marvin is basically creating a ML experiment through drag-and-dropping modules and connecting them together. It may sound simple but for a beginner like me, it is still important to understand some key concepts and steps before continuing further in the ML field.

Azure ML Studio

Azure ML Studio is a tool for us to build, test, and deploy predictive analytics on our data. There is a detailed diagram about the capability of the tool, which can be downloaded here.

ml_studio_overview_v1.1.png
Capability of Azure ML Studio (Credits: Microsoft Azure Docs)

Step 0: Defining Problem

Before we began, we need to understand why we are using ML for?

Here, I’m helping a watermelon stall to predict how many watermelon they can sell this year based on last year sales data.

Step 1: Preparing Data

As shown in the diagram above, the first step is to import the data into the experiment. So, before we can even start, we need to make sure that we have at least a handful of data points.

data.png
Daily sales of the watermelon stall and the weather of the day.

Step 2: Importing Data to ML Studio

With the data points we now have, we then can import them to ML Studio as a Dataset.

datasets.png
Datasets available in Azure ML Studio.

Step 3: Preprocessing Data

Firstly, we need to perform a cleaning operation so that missing data can be handled properly without affecting our results later.

Secondly, we need to “Select Columns in Dataset” so that only selected columns will be used in the subsequent operations.

Step 4: Splitting Data

This step is to help us to separate data into training and testing sets.

Step 5: Choosing Learning Algorithm

Since we are now using the model to predict number of watermelons the stall can sell, which is a number, we’ll use Linear Regression algorithm, as recommended. There is a cheat sheet from Microsoft telling us which algorithm we need to choose based on different scenarios. You can also download it here.

machine-learning-algorithm-cheat-sheet-small_v_0_6-01.png
Learning algorithm cheat sheet. (Image Credits: Microsoft Docs)

Step 6: Partitioning and Sampling

Sampling is an important tool in machine learning because it reduces the size of a dataset while maintaining the same ratio of values. If we have a lot of data, we might want to use only the first n rows while setting up the experiment, and then switch to using the full dataset when you build our model.

Step 7: Training

After choosing the learning algorithm, it’s time for us to train the data.

Since we are going to predict the number of watermelons sold, we will select the column, as shown in the following screenshot.

train.png
Select the one column that we need to predict in Train Model module.

Step 8: Scoring

Do you still remember that we split our data into two sets in Step 4 above? Now, we need to connect output from Split Data module and output from Train Data module to the Score module as inputs. Doing this step is to score prediction for our regression model.

Step 9: Evaluating

We finally have to generate scores over our training data, and evaluate the model based on the scores.

Step 10: Deploying

Now that we’ve completed the experiment set up, we can deploy it as a predictive web service.

predictive-experiment.png
Generated predictive experiment.

With that deployed, we then can easily predict how many watermelons can be sold on a future date, as shown in the screenshot below.

testing.png
Yes, we can sell 25 watermelons on 7th May if the temperature is 32 degrees!

Conclusion


This is just the very beginning of setting up a ML experiment on Azure ML Studio. I am still very new to this AI and ML stuff. If you spot any problem in my notes above, please let me know. Thanks in advance!

References:


KOSD, or Kopi-O Siew Dai, is a type of Singapore coffee that I enjoy. It is basically a cup of coffee with a little bit of sugar. This series is meant to blog about technical knowledge that I gained while having a small cup of Kopi-O Siew Dai.