Firstly, I need to equip Visual Studio Code with the Go language support by installing Go extension in the IDE. Installing the extension helps us to do day-to-day job, such as, code navigating, code editing, code testing and debugging in an easy and efficient manner.
Installed and enabled the Go extension from Microsoft.
There are many cool features I like in the extension.
Firstly, it’s the convenience of F12 Code Navigation. With Go extension, in Go code I can easily view the source code of the type definition with just F12 or Alt+F12 on it. This is similar to my C# coding experience on Visual Studio too. To show all references of the type, I can simply use Shift+F12.
We can update go.lintTool to other linter, for example the more advanced Go Meta Linter. Take note of the warnings (and errors) shown under the Problems tab below.
After I have installed the Go extension, I proceed to start coding. The app that I am going to build in this learning journey is a YouTube video player app. So, let’s get started!
Storing Connection String in Environment
I will start with building a console application connecting to Azure PostgreSQL. To do that, I will connect to the database as follows.
function main() { var connectionString = fmt.Sprintf("host=%s port=5432 user=%s password=%s dbname=%s sslmode=require", HOST, USER, PASSWORD, DATABASE) ... }
The code above is quite straight-forward. However, it does have a problem. The configuration to connect to database is hard-coded in the code. This will thus reduce the code maintainability. Also, it is extremely bad to have password appearing in the code in plain text. To store such sensitive data, we need to store them as Environment variables, as recommended by the article Best Practice for Configuration File in Your Code.
err = db.Ping() checkError(err) fmt.Println("Successfully created connection to database")
... }
The Ping() function verifies a connection to the database is alive and it will establish a connection if necessary. After that, we can use the database handler db to do CRUD operations, as demonstrated below.
Remember to allow the PostgreSQL access to Azure service and also your local IP if you need to access the database from your local machine.
Insert Data into Table
sqlStatement := "INSERT INTO table (column1) VALUES ($1);"
_, err = db.Exec(sqlStatement, "New Value")
checkError(err)
Learning a new language other than C#, especially a language which is not in .NET, gives me a new perspective on understanding web development. With powerful framework like ASP .NET Core, it’s easy for developers who build their web applications do not understand why the frameworks do things in certain ways and trade-offs in the frameworks.
ASP .NET Core makes developers’ life easier with Convention over Configuration concept. As long as we know the conventions of where everything is located and you place each component into its correct location, we can easily build a web application. However, this also hide too much details from us and eventually makes us hard to master web development. Hence, learning Golang helps me to gain a new perspective in understanding web development.
When I am working with ASP .NET Core, I normally deal with MS SQL Server or Azure SQL (which is cloud-based MS SQL Server). In the Golang web development, I switch to use PostgreSQL, which is also available on Microsoft Azure.
Contents
During the long holiday in Chinese New Year, I spent my time in reading the book and online resources regarding Golang web programming. With the new opening of library beside my workplace, I also get to spend time there after work to do some Golang coding.
After one to two months of self-learning, I managed to compile some notes about what I’ve learnt in this Spring. The following is a list of nine topics that I learned in the early-stage of my Golang journey.
I’m working in Haulio, a startup incubated by PSA. Since it’s a startup and I am the CTO, I have no choice but to stay late in office most of the time, especially the period when we rushed for the launch of our mobile application in end of February.
Hence, whenever I have time, I will spend it on doing some Golang research and coding. Sometimes, however, I am just too tired and I would not write anything even though it’s weekend. Hence, I end up finishing all the nine topics only in mid of March.
I’m also very fortunate to have to share what I have learned with engineers in Azure Community Singapore. It turns out that many of them are using Golang too. Hence, that also gives me a great opportunity to learn from those experienced Golang developers. =)
Again, I am not that hardworking to work on personal projects every day. Sometimes, I will accompany my Mom at home. Sometimes I will have dinner with friends. Sometimes, I will travel to overseas (I am writing this in Japan). Sometimes, I will also play computer games or simply just sleep at home. So ya, this self-learning project takes a longer time to complete.
Working on personal projects after work is stressful also. Yup, so the project involved in this self-learning is about creating a YouTube Re-Player to loop my favourite YouTube music to calm myself down. =P
KOSD, or Kopi-O Siew Dai, is a type of Singapore coffee that I enjoy. It is basically a cup of coffee with a little bit of sugar. This series is meant to blog about technical knowledge that I gained while having a small cup of Kopi-O Siew Dai.
Code reviews are a best practice for software development projects but it’s normally ignored in startups and SMEs because
the top management doesn’t understand the value of doing so;
the developers have no time to do code reviews and even unit testing.
So, in order to improve our code quality and management standards, we decided to introduce the idea of code reviewing by enforcing pull requests creating in our deployment procedure, even though our team is very small and we are working in a startup environment.
Firstly, we set up two websites on Azure App Service, one for UAT and another for the Production. We enabled Continuous Deployment feature for two of them by configuring Azure App Service integration with our Git repository on Visual Studio Team Services (VSTS).
Secondly, we have two branches in the Git repository of the project, i.e. master and development-deployment. Changes pushed to the branches will automatically be deployed to the Production and the UAT websites, respectively.
In order to prevent that our codes are being deployed to even the UAT site without code reviews, we created a new branch known as the development branch. The development branch allows all the relevant developers (in the example below, we call them Alvin and Bryan) to pull/push their local changes freely from/to it.
Once any of the developers is confident with his/her changes, he/she can create a new pull request on VSTS.
Creating a new pull request on VSTS.
We then proceed to make use of the new capability on VSTS, which is to set policies for the branches. In the policy setting, we checked the option “Require a minimum number of reviewers” to prevent direct pushes to both master and development-deployment branches.
Enabled the code review requirement in each pull request to protect the branch.
So for every deployment to our UAT and Production websites, the checking step is in place to make sure that the deployments are all properly reviewed and approved. This is not just to protect the system but also to protect the developers by having a standardized quality checking across the development team.
This is the end of this episode of KOSD series. If you have any comment or suggestion about this article, please shout out. Hope you enjoy this cup of electronic Kopi-O Siew Dai. =)
During my first job after finishing my undergraduate degree in NUS, I worked in a local startup which was then the largest bus ticketing portal in Southeast Asia. In 2014, I worked with a senior to successfully migrate the whole system from on-premise to Microsoft Azure Virtual Machines, which is the IaaS option. Maintaining the virtual machines is a painful experience because we need to setup the load balancing with Traffic Manager, database mirroring, database failover, availability set, etc.
In 2015, when I first worked in Singapore Changi Airport, with the support of the team, we made use of PaaS technologies such as Azure Cloud Services, Azure Web Apps, and Azure SQL, we successfully expanded our online businesses to 7 countries in a short time. With the help of PaaS option in Microsoft Azure, we can finally have a more enjoyable working life.
Azure Functions
Now, in 2017, I decided to explore Azure Functions.
Azure Functions allows developers to focus on the code for only the problem they want to solve without worrying about the infrastructure like we do in Azure Virtual Machines or even the entire applications as we do in Azure Cloud Services.
There are two important benefits that I like in this new option. Firstly, our development can be more productive. Secondly, Azure Functions has two pricing models: Consumption Plan and App Service Plan, as shown in the screenshot below. The Consumption Plan lets us pay per execution and the first 1,000,000 executions are free!
Two hosting plans in Azure Functions: Consumption Plan vs. App Service Plan
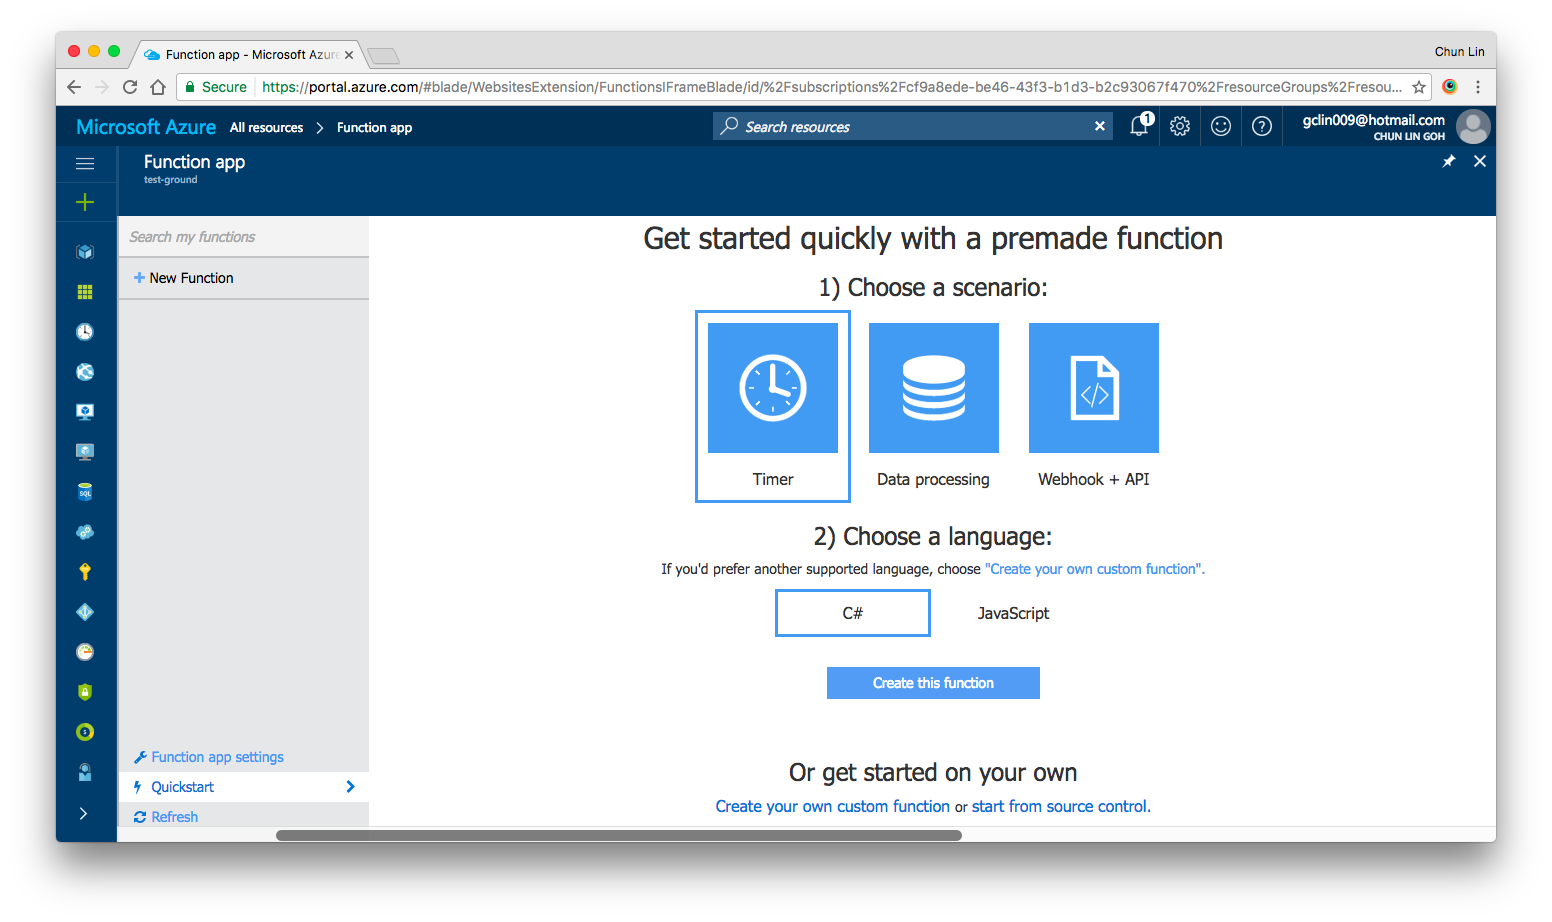
After setting up the Function App, we can choose “Quick Start” to have a simpler user interface to get started with Azure Function.
Under “Quick Start” section, there are three triggers available for us to choose, i.e. Timer, Data Processing, and Webhook + API. Today, I’ll only talk about Timer. We will see how we can achieve the scheduler functionality on Microsoft Azure.
Quick Start page in Azure Function.
Timer Trigger
Timer Trigger will execute the function according to a schedule. The schedule is defined using CRON expression. Let’s say if we want our function to be executed every four hours, we can write the schedule as follows.
Similar to the usual Azure Web App, the default time zone used in Azure Functions is also UTC. Hence, if we would like to change it to use another timezone, what we need to do is just add the WEBSITE_TIME_ZONE application setting in the Function App.
Companion File: function.json
So, where do we set the schedule? The answer is in a special file called function.json.
The name attribute is to specify the name of the parameter used in the C# function later. It is used for the bound data in the function.
The type attribute specifies the binding time. Our case here will be timerTrigger.
The direction attribute indicates whether the binding is for receiving data into the function (in) or sending data from the function (out). For scheduler, the direction will be “in” because later in our C# function, we can actually retrieve info from the myTimer parameter.
Finally, the schedule attribute will be where we put our schedule CRON expression at.
#r "Newtonsoft.Json"

using System;
using Newtonsoft.Json;
...

public static async Task Run(TimerInfo myTimer, TraceWriter log)
{
    ...
}
Assemblies in .csx File
Same as how we always did in C# project, when we need to import the namespaces, we just need to use the using clause. For example, in our case, we need to process the Json file, so we need to make use of the library Newtonsoft.Json.
using Newtonsoft.Json;
To reference external assemblies, for example in our case, Newtonsoft.Json, we just need to use the #r directive as follows.
For other assemblies, we need to upload the assembly file, for example MyAssembly.dll, into a bin folder relative to the function first. Only then we can reference is as follows.
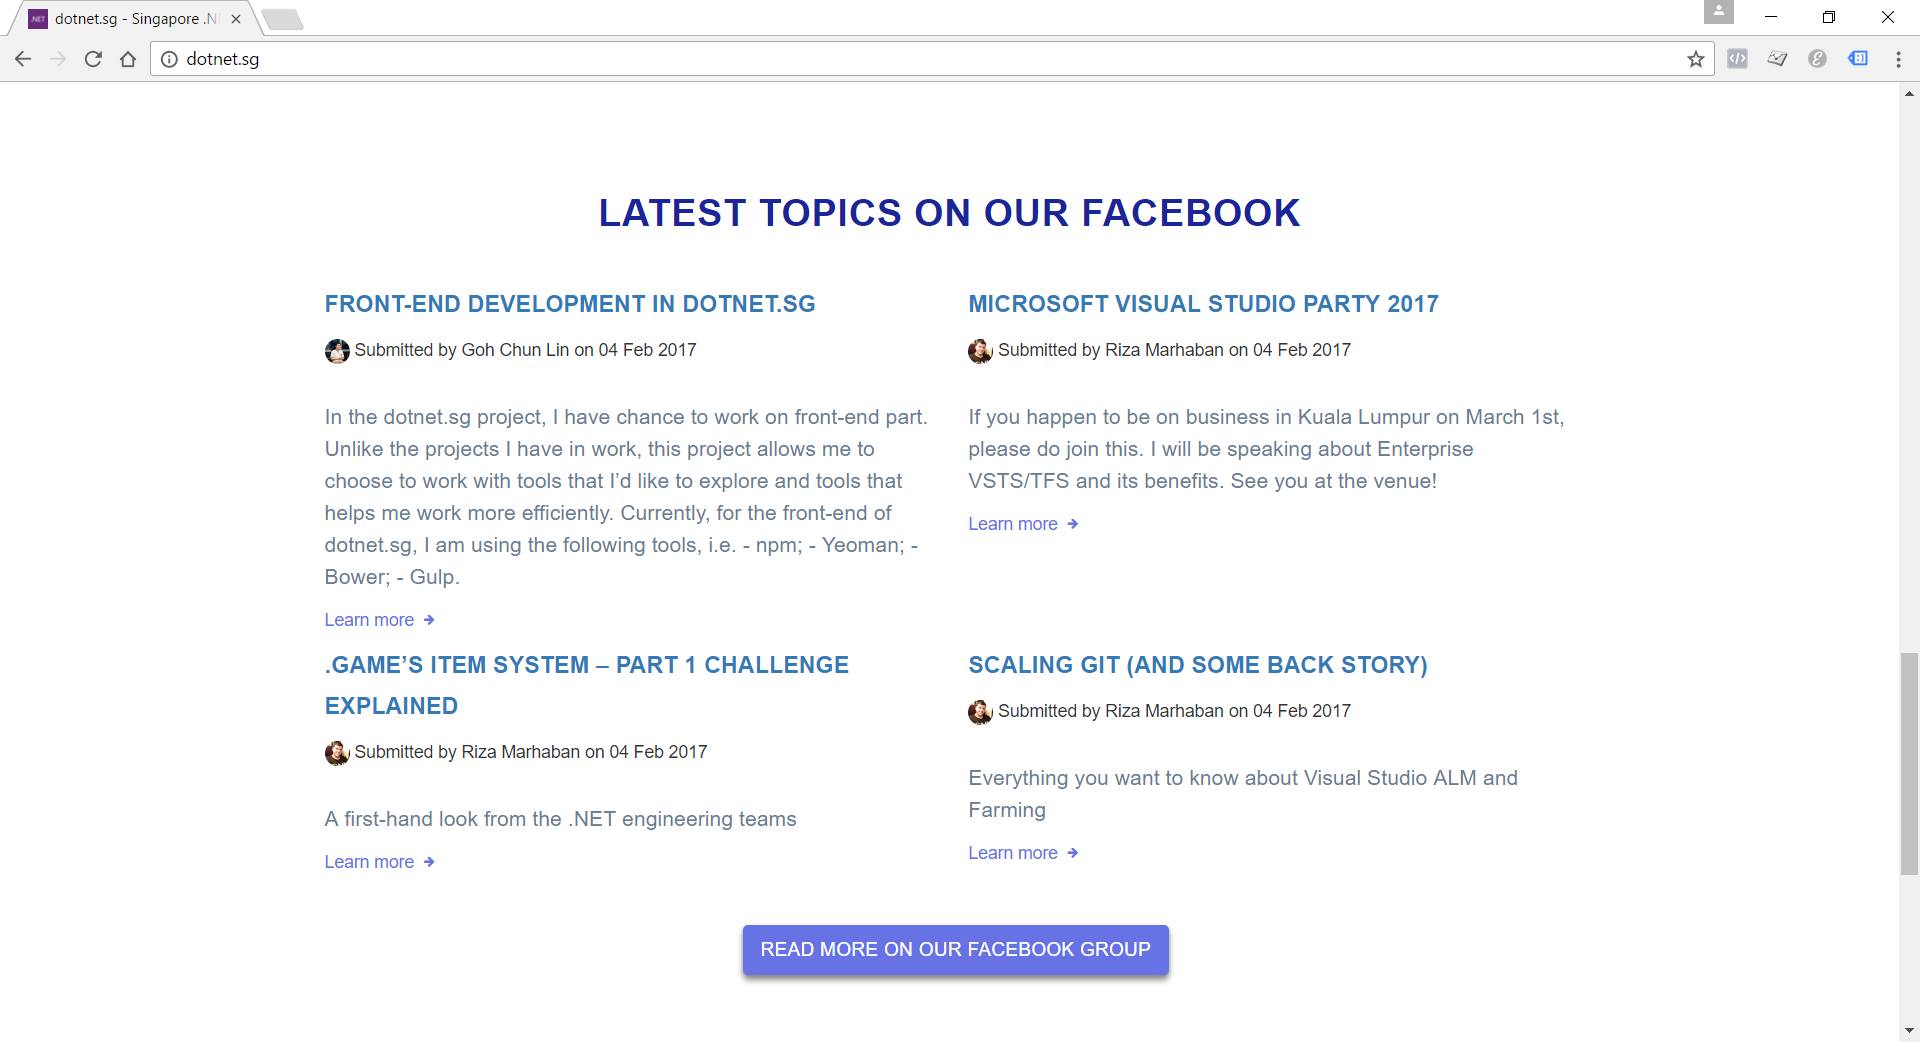
This section will display the top four latest Facebook posts pulled by Azure Function.
For our case, the purpose of Azure Function is to process the Facebook Group feeds and then store the feeds somewhere for later use. The “somewhere” here is DocumentDB.
To gets the inputs from DocumentDB, we first need to have 2nd binding specified in the functions.json as follows.
In the DocumentDB input binding above, the name attribute is, same as previous example, used to specify the name of the parameter in the C# function.
The databaseName and collectionName attributes correspond to the names of the database and collection in our DocumentDB, respectively. The id attribute is the Document Id of the document that we want to retrieve. In our case, we store all the Facebook feeds in one document, so we specify the Document Id in the binding directly.
The connection attribute is the name of the Azure Function Application Setting storing the connection string of the DocumentDB account endpoint. Yes, Azure Function also has Application Settings available. =)
Finally, the direction attribute must be “in”.
We can then now enhance our Run method to include inputs from DocumentDB as follows. What it does is basically just reading existing feeds from the document and then update it with new feeds found in the Singapore .NET Facebook Group
#r "Newtonsoft.Json"

using System;
using Newtonsoft.Json;
...

private const string SG_DOT_NET_COMMUNITY_FB_GROUP_ID = "1504549153159226";

public static async Task Run(TimerInfo myTimer, dynamic inputDocument, TraceWriter log)
{
    string sgDotNetCommunityFacebookGroupFeedsJson =
        await GetFacebookGroupFeedsAsJsonAsync(SG_DOT_NET_COMMUNITY_FB_GROUP_ID);

    ...

    var existingFeeds = JsonConvert.DeserializeObject(inputDocument.ToString());

    // Processing the Facebook Group feeds here...
    // Updating existingFeeds here...

    inputDocument.data = existingFeeds.Feeds;
}
Besides getting input from DocumentDB, we can also have DocumentDB output binding as follows to, for example, write a new document to DocumentDB database.
We don’t really use this in our dotnet.sg case. However, as we can see, there are only two major differences between DocumentDB input and output bindings.
Firstly, we have a new createIfNotExists attribute which specify whether to create the DocumentDB database and collection if they don’t exist or not.
Secondly, we will have to set the direction attribute to be “out”.
Then in our function code, we just need to have a new parameter with “out object outputDocument” instead of “in dynamic inputDocument”.
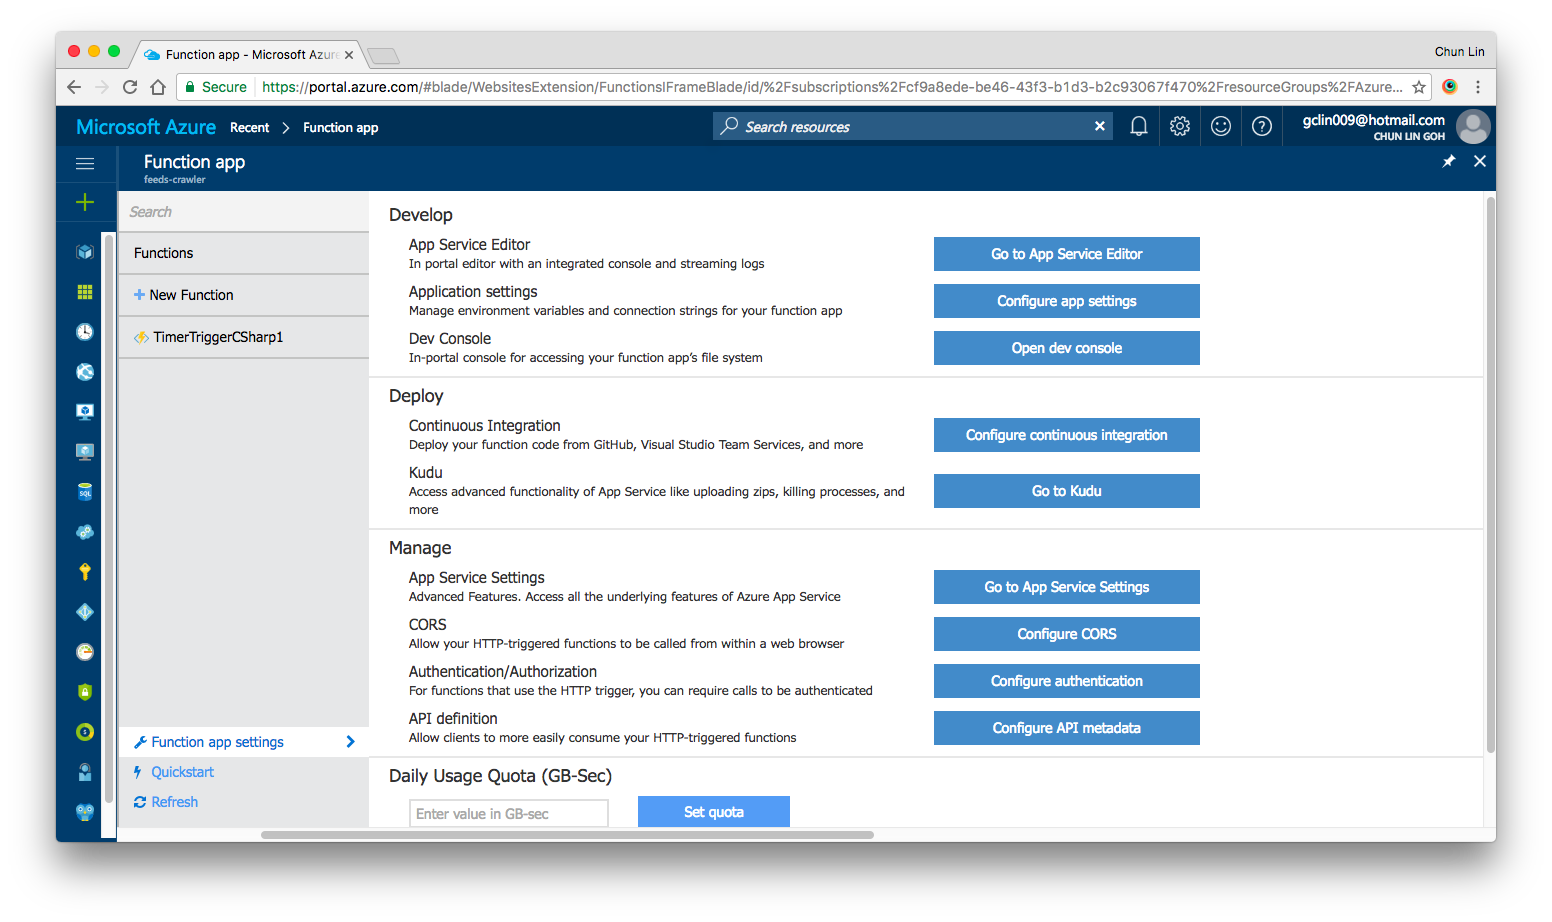
Yes, there are our familiar features such as Application Settings, Continuous Integration, Kudu, etc. in Azure Functions as well. All of them can be found under “Function App Settings” section.
Azure Function App Settings
As what we have been doing in Azure Web Apps, we can also set the timezone, store the App Secrets in the Function App Settings.
Deployment of Azure Functions with Github
We are allowed to link the Azure Function with variety of Deployment Options, such as Github, to enable the continuous deployment option too.
There is one thing that I’d like to highlight here is that if you are also starting from setting up your new Azure Function via Azure Portal, then when in the future you setup the continuous deployment for the function, please make sure that you first create a folder having the same name as the name of your Azure Function. Then all the files related to the function needs to be put in the folder.
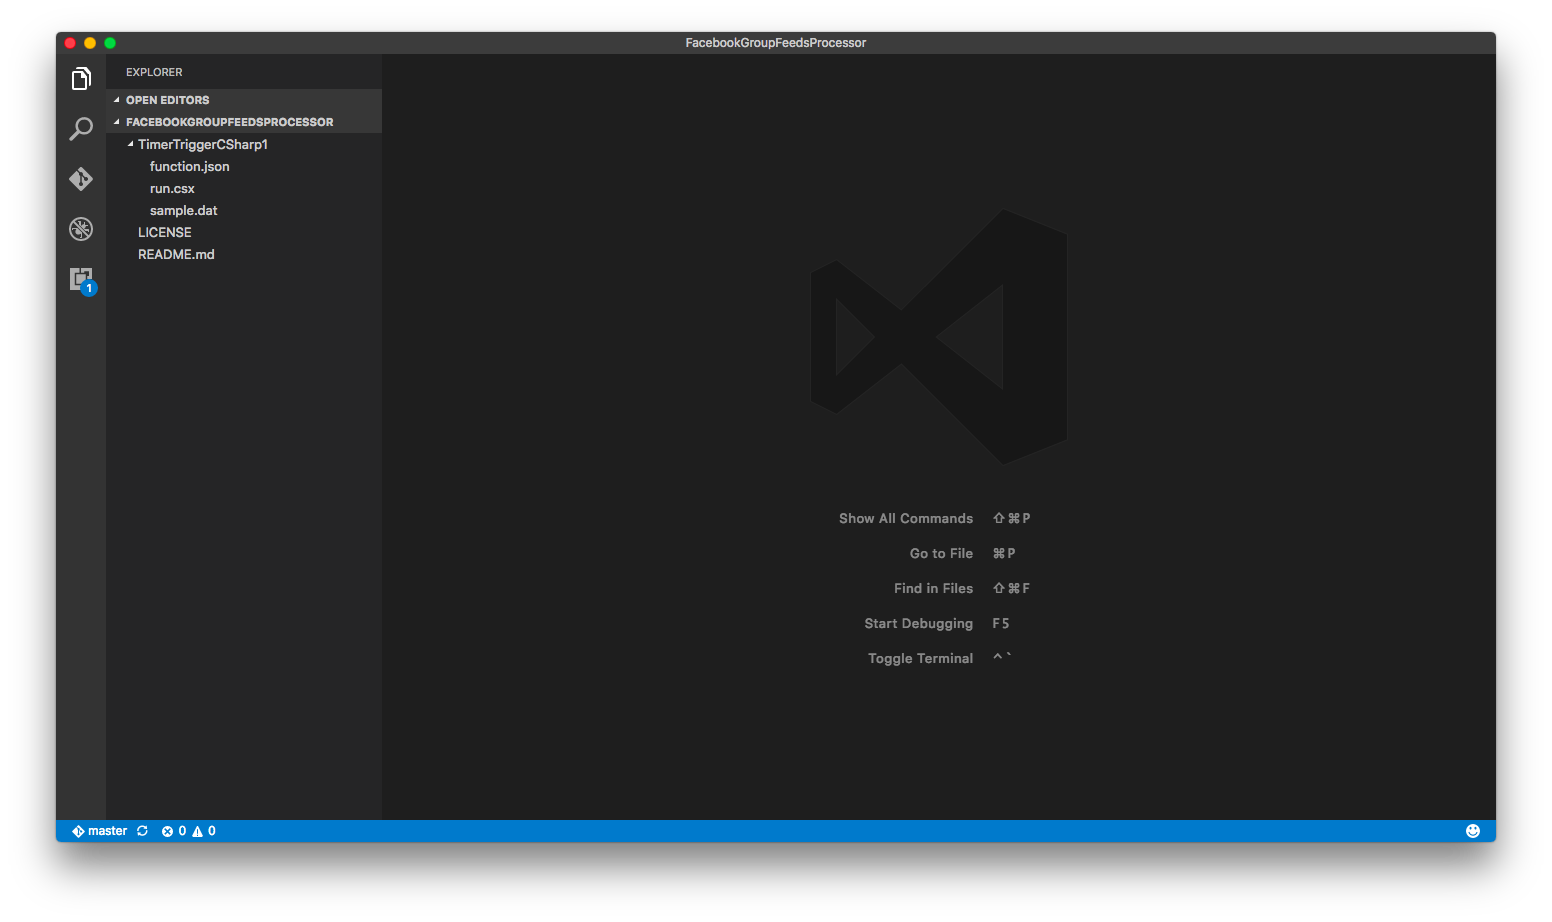
For example, in dotnet.sg case, we have the Azure Function called “TimerTriggerCSharp1”. we will have the following folder structure.
Folder structure of the TimerTriggerCsharp1.
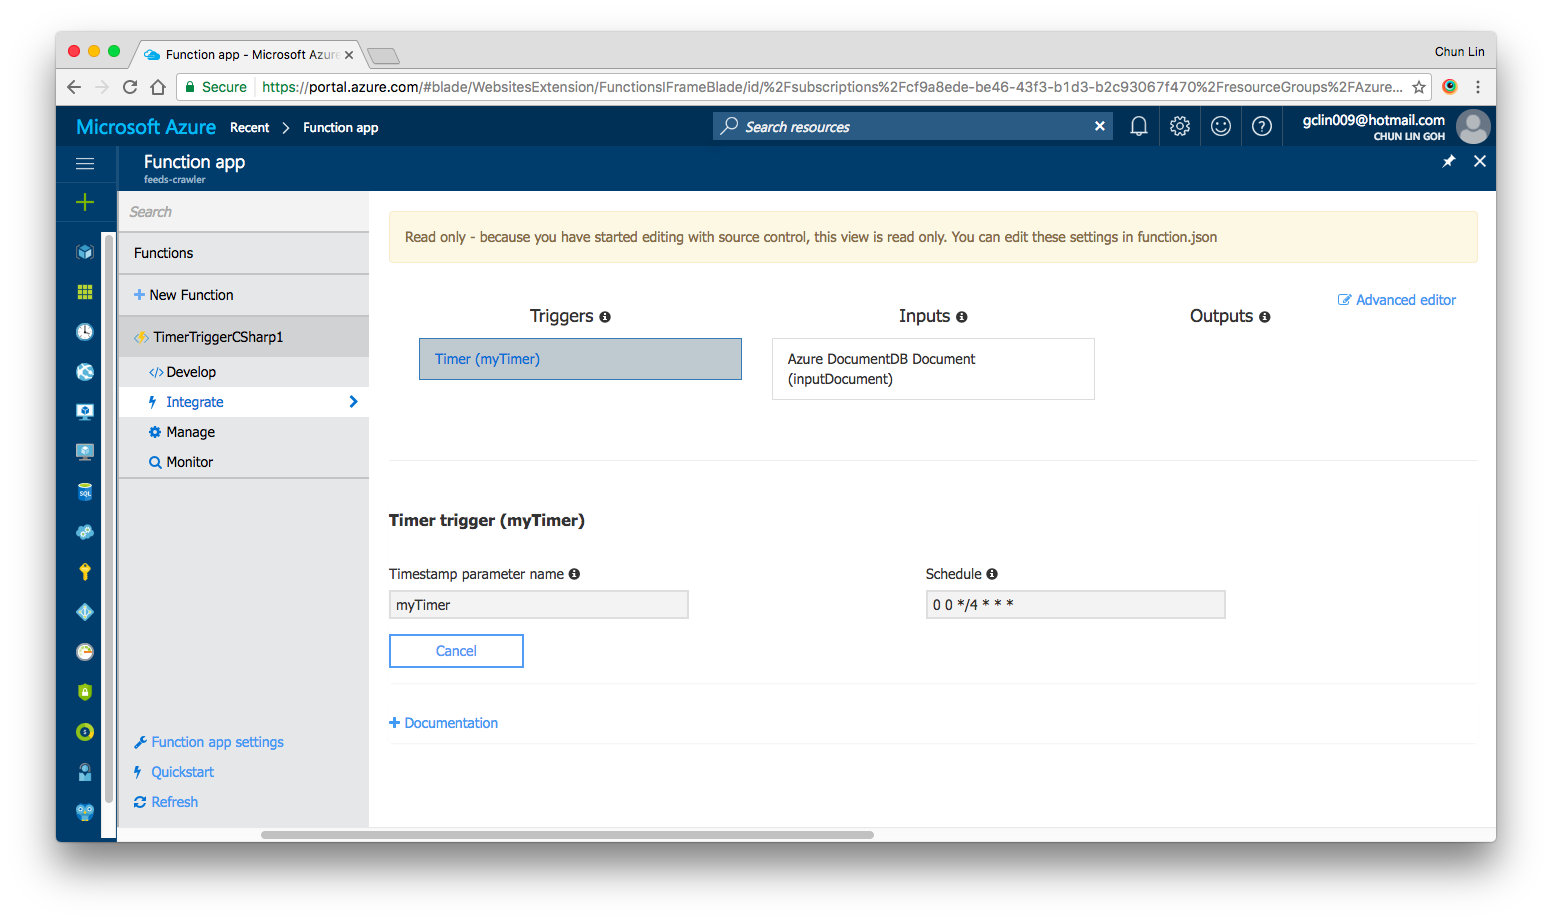
When I first started, I made a mistake when I linked Github with Azure Function. I didn’t create the folder with the name “TimerTriggerCSharp1”, which is the name of my Azure Function. So, when I deploy the code via Github, the code in the Azure Function on the Azure Portal is not updated at all.
In fact, once the Continuous Deployment is setup, we are no longer able to edit the code directly on the Azure Portal. Hence, setting up the correct folder structure is important.
Read only once we setup the Continuous Deployment in Azure Function.
If you would like to add in more functions, simply create new folders at the same level.
Conclusion
Azure Function and the whole concept of Serverless Architecture are still very new to me. However, what I like about it is the fact that Azure Function allows us to care about the codes to solve a problem without worrying about the whole application and infrastructure.
In addition, we are also allowed to solve the different problems using the programming language that best suits the problem.
Finally, Azure Function is cost-saving because we can choose to pay only for the time our code is being executed.
If you would like to learn more about Azure Functions, here is the list of references I use in this learning journey.