The exam consists of 10 sections to measure different Azure skills, and I have passed 8 of them, which are:
Explore Azure Functions;
Develop Azure Functions;
Implement Azure Key Vault (full score!);
Implement Azure App Configuration;
Monitor App Performance;
Manage Container Images in Azure Container Registry (full score!);
Work with Azure Cosmos DB;
Consume an Azure Cosmos DB for NoSQL change feed using the SDK.
I didn’t pass the section “Implement Azure Container Apps” and scored 0 in “Run Container Images in Azure Container Instances” section. These areas remind me that there is always room for improvement and growth.
The certificate is signed by Microsoft CEO!
The Kaizen Journey
Since 2019, I have not been actively using Azure at my work. I now work with AWS at work, but I still learn Azure on my own. Even though I’m not using Azure at work, I keep learning and growing my cloud computing skills. I share my AWS knowledge with the community, but my heart is still with Azure too. I want to be good at both AWS and Azure!
As a developer working primarily with AWS, taking the Azure certification may seem unconventional, but it’s a wise move. Not only Azure certification allows me to demonstrate my commitment to continuous learning and adaptability, but also having expertise in multiple cloud platforms makes a developer a more attractive candidate in the current job market.
I hope my journey inspires you to pursue your own path of learning and growth. As Riza Marhaban, my senior who is also Senior Associate Director (IT) at NUS told me, certifications are not just about achieving a credential, but about the journey of self-improvement and the positive impact it can have on those around us.
Riza shared with me the Kaizen philosophy. The Kaisan philosophy teaches us to embrace challenges, learn from failures, and strive for excellence. Hence, I apply this philosophy to my own journeys, embracing each step as an opportunity to learn and grow.
Wrap-Up
Renewing my certification has reminded me of the importance of continuous learning. I hope my story inspires you to stay humble, stay hungry, and always strive for excellence.
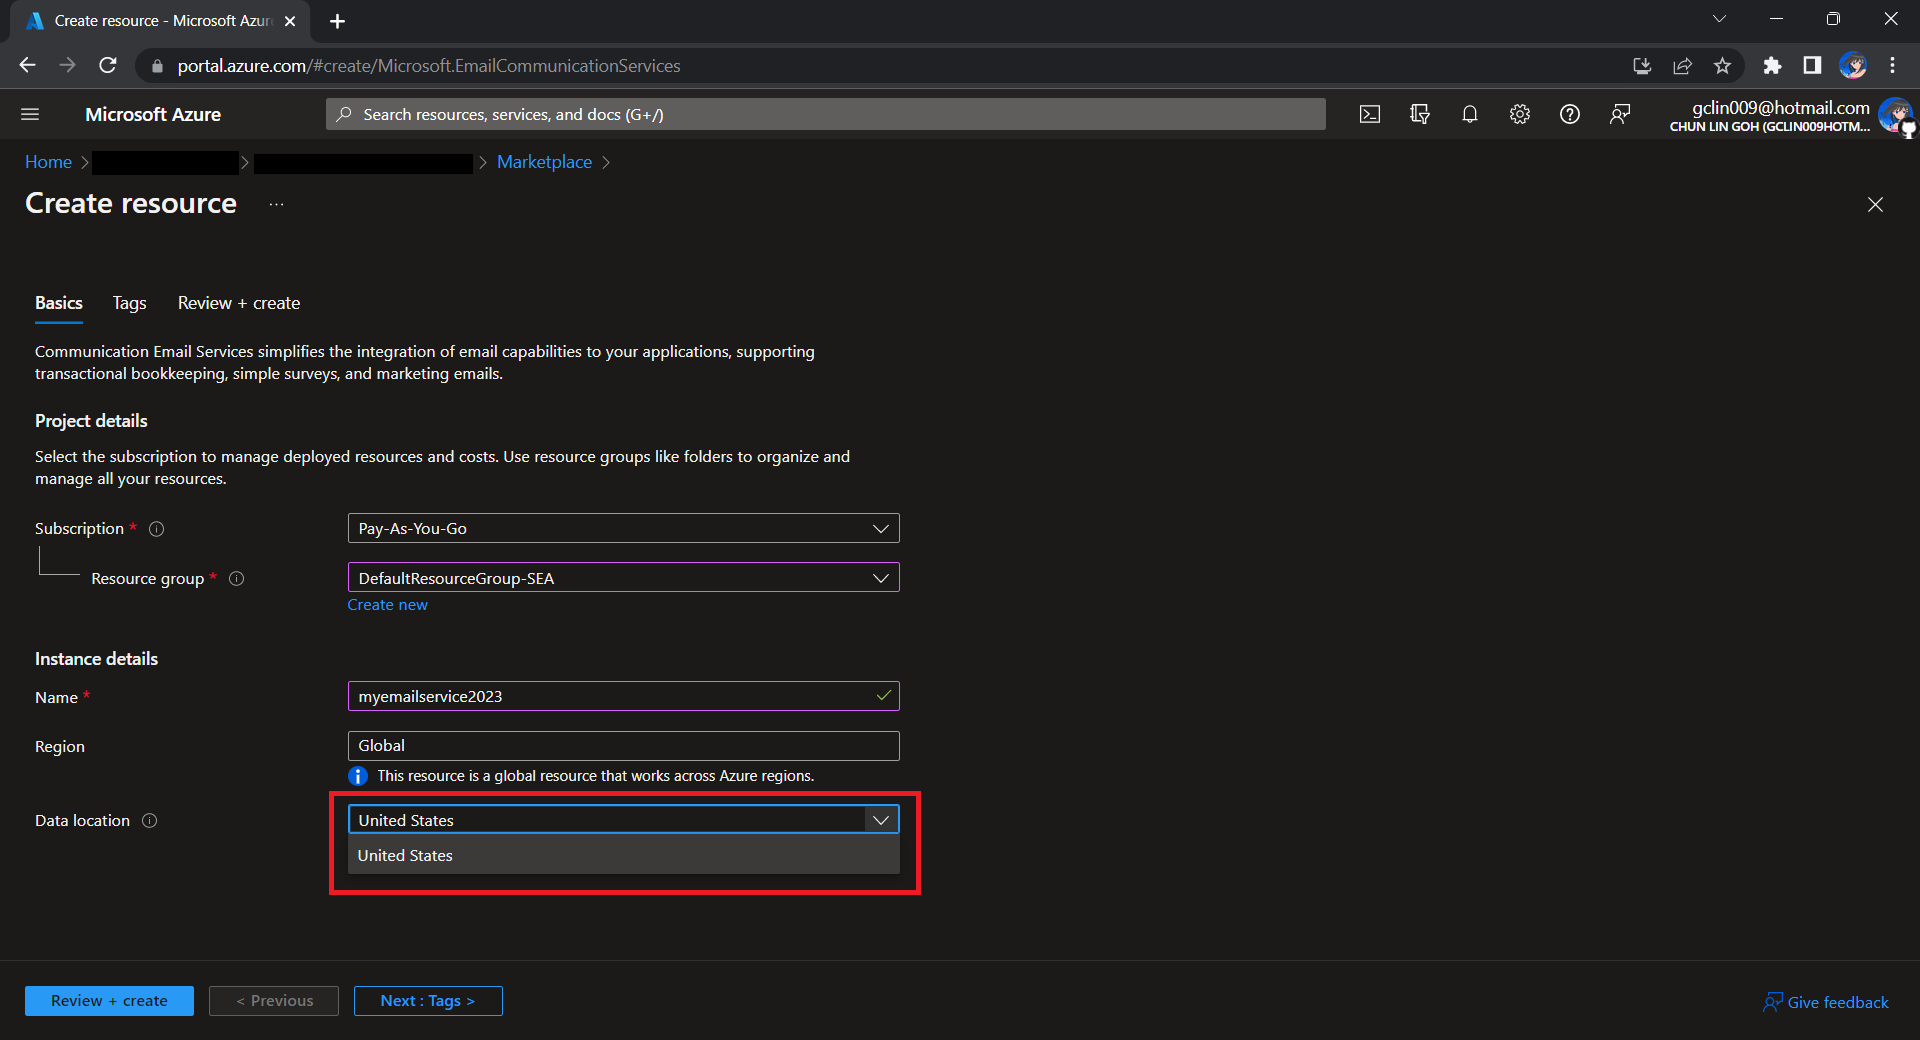
To begin, we need to createa a new Email Communication Services resource from the marketplace, as shown in the screenshot below.
US is the only option for the Data Location now in Email Communication Services.
Take note that currently we can only choose United States as the Data Location, which determines where the data will be stored at rest. This cannot be changed after the resource has been created. This thus make our Azure Communication Services which we need to configure next to store the data in United States as well. We will talk about this later.
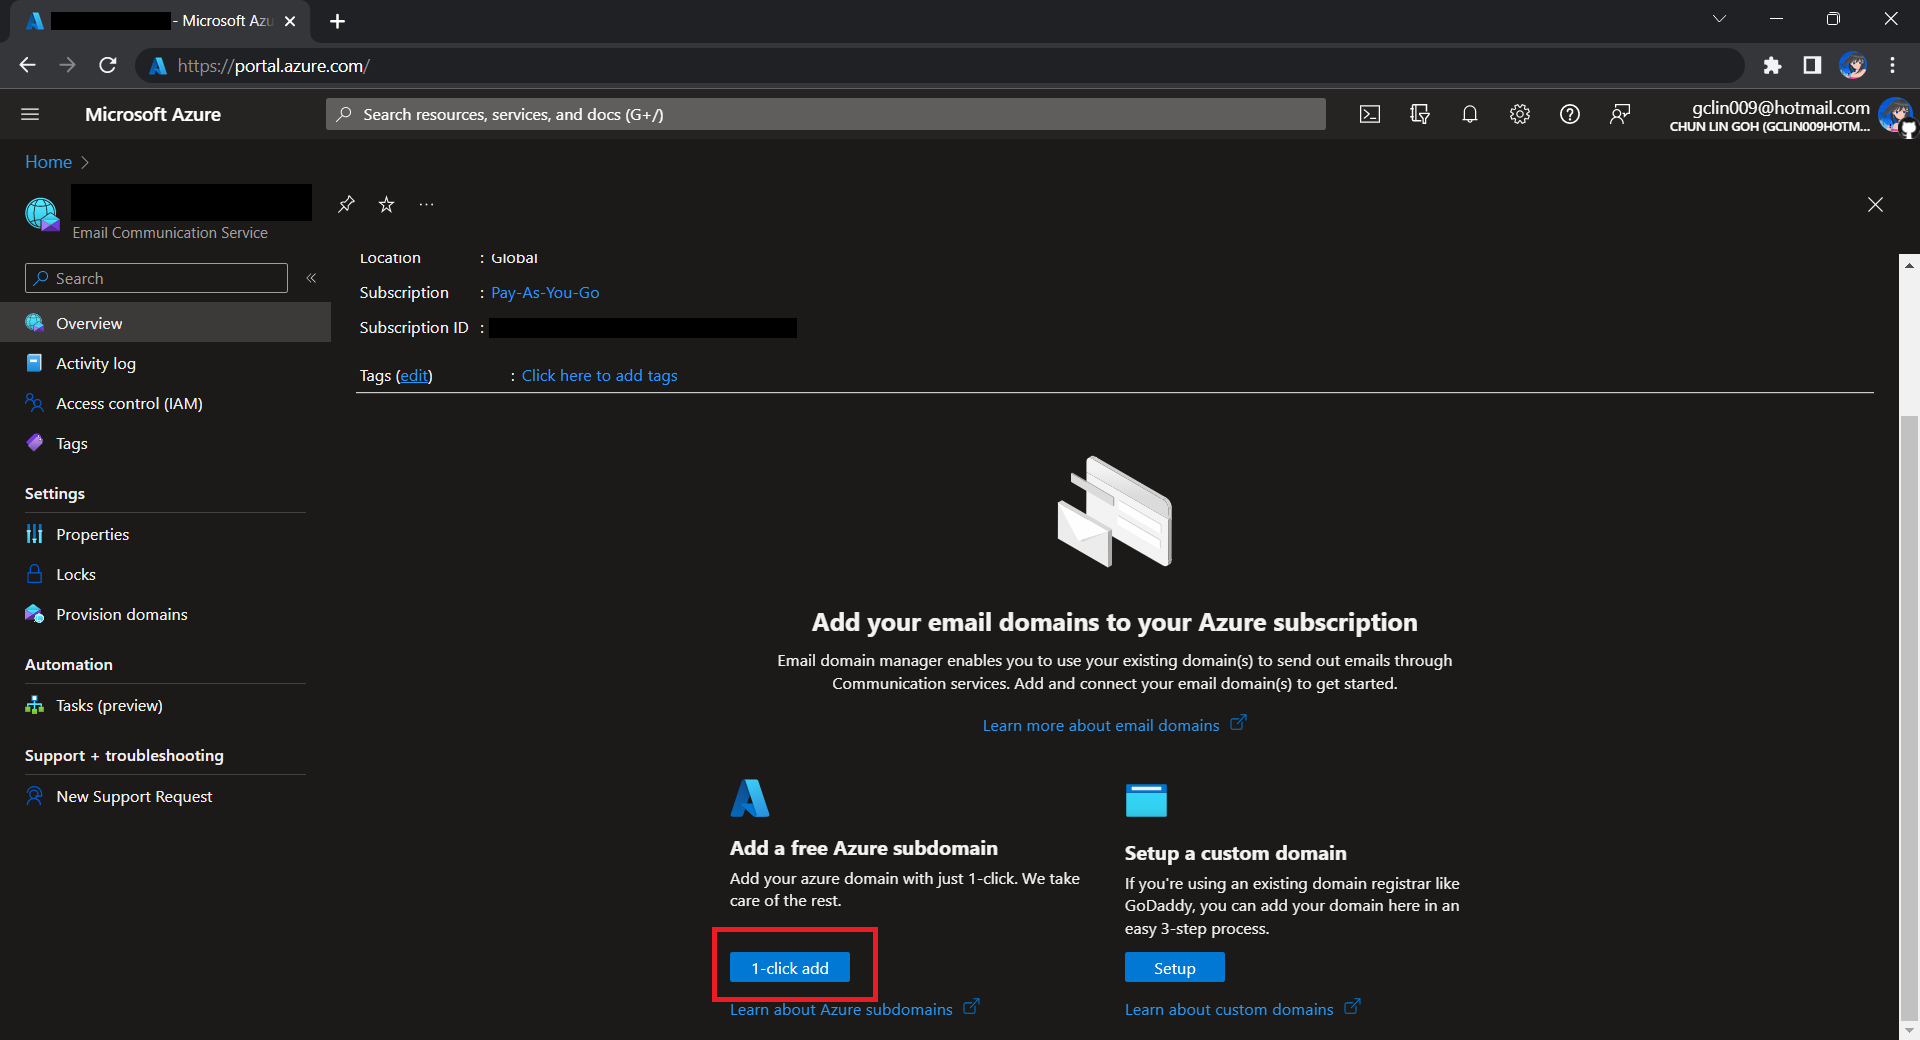
After getting the domain, we need to connect Azure Communication Services to it to send emails.
As we talked earlier, we need to make sure that the Azure Communication Services to have United States as its Data Location as well. Otherwise, we will not be able to link the email domain for email sending.
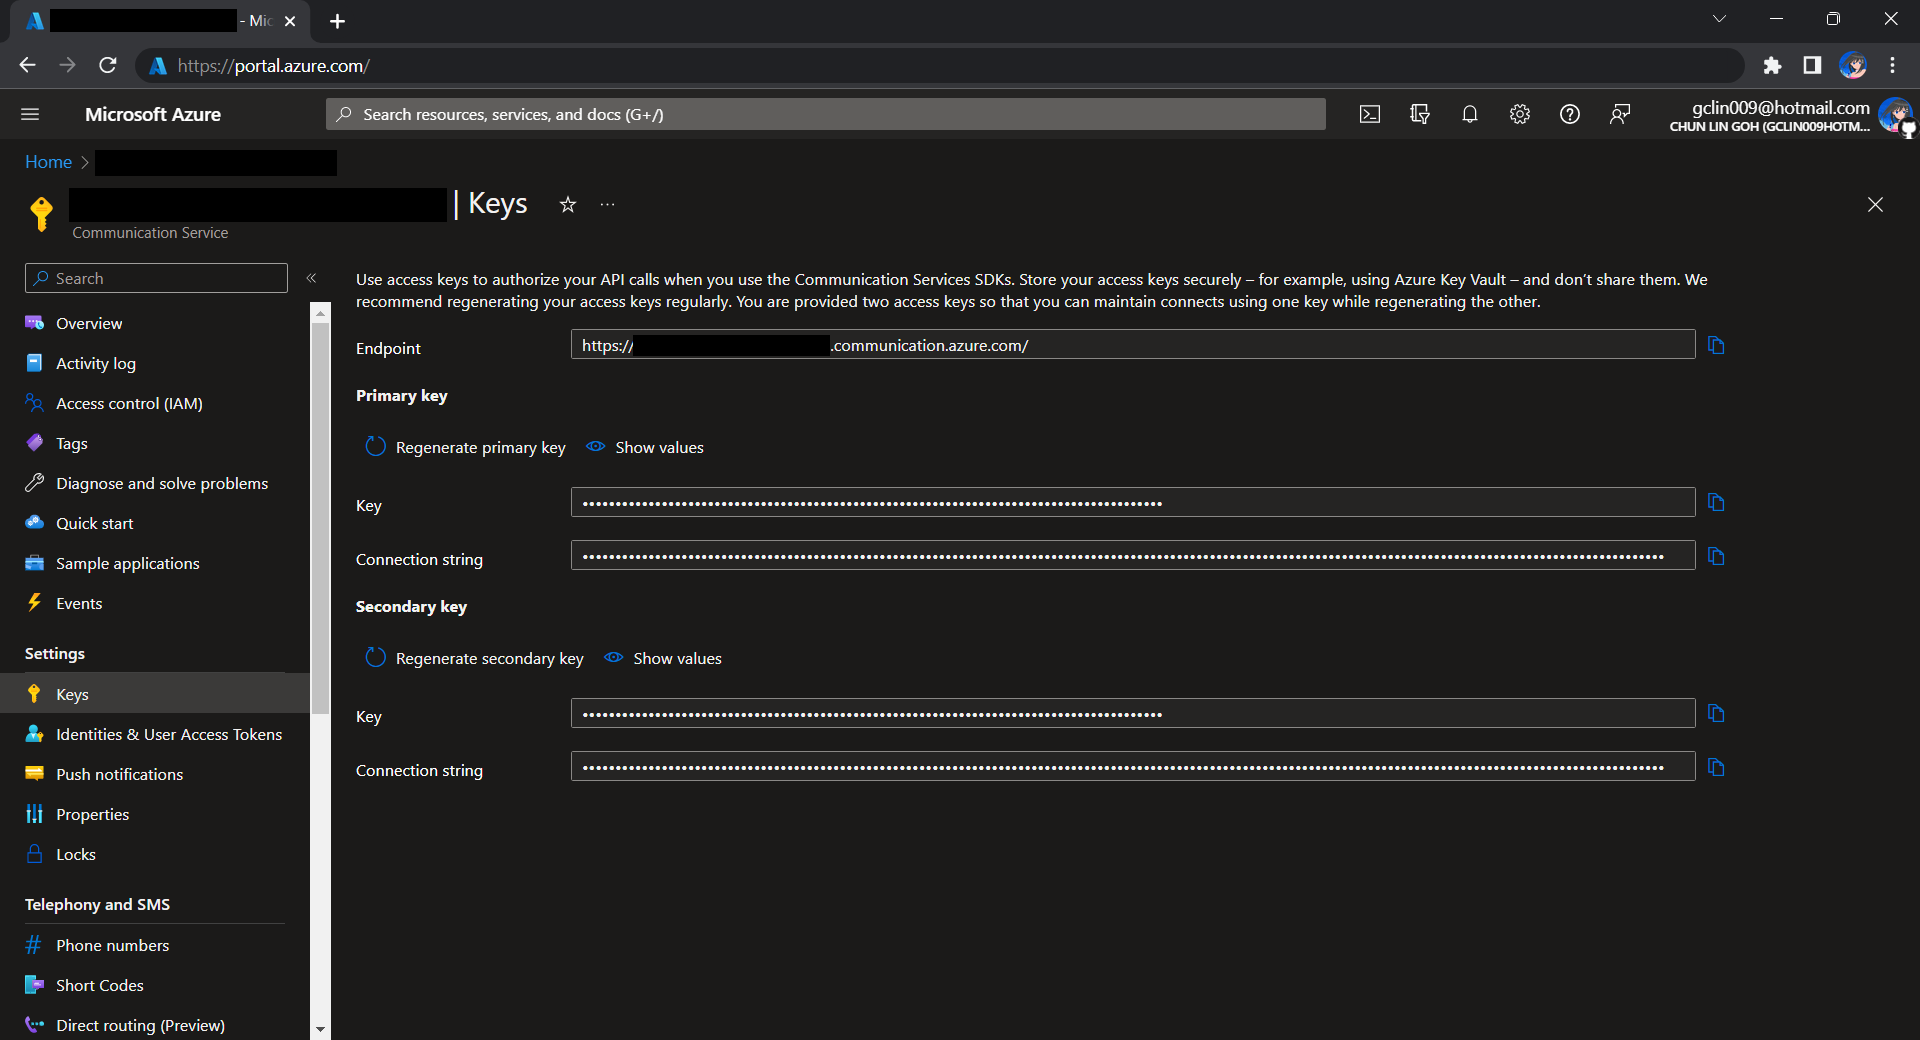
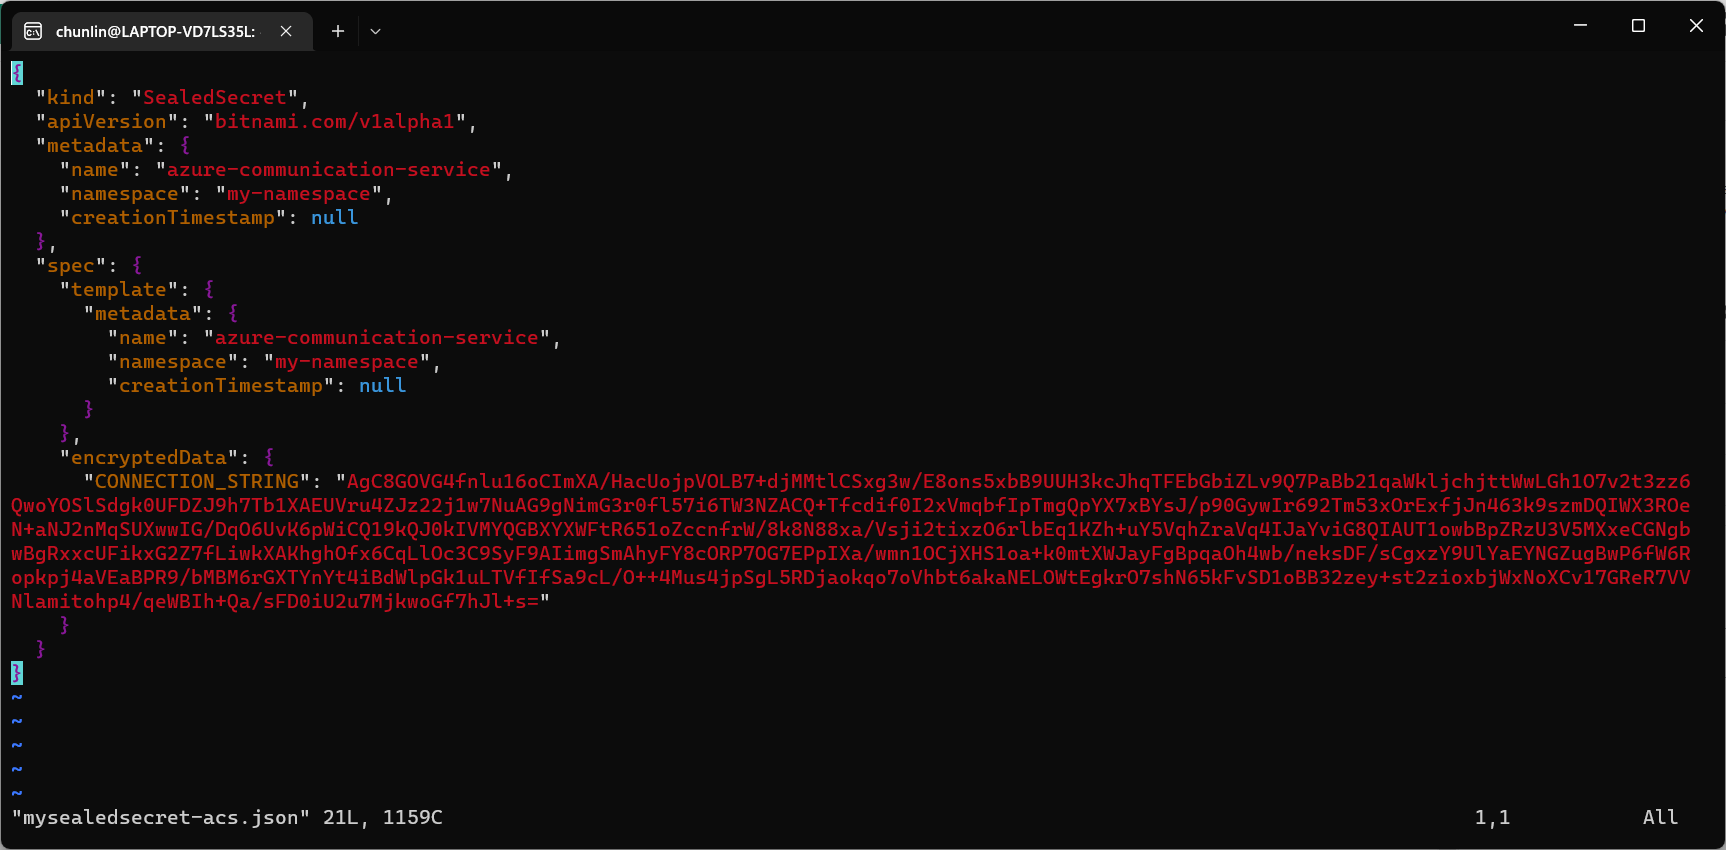
Before we begin, we have to get the connection string for the Azure Communication Service resource.
Getting connection string of the Azure Communication Service.
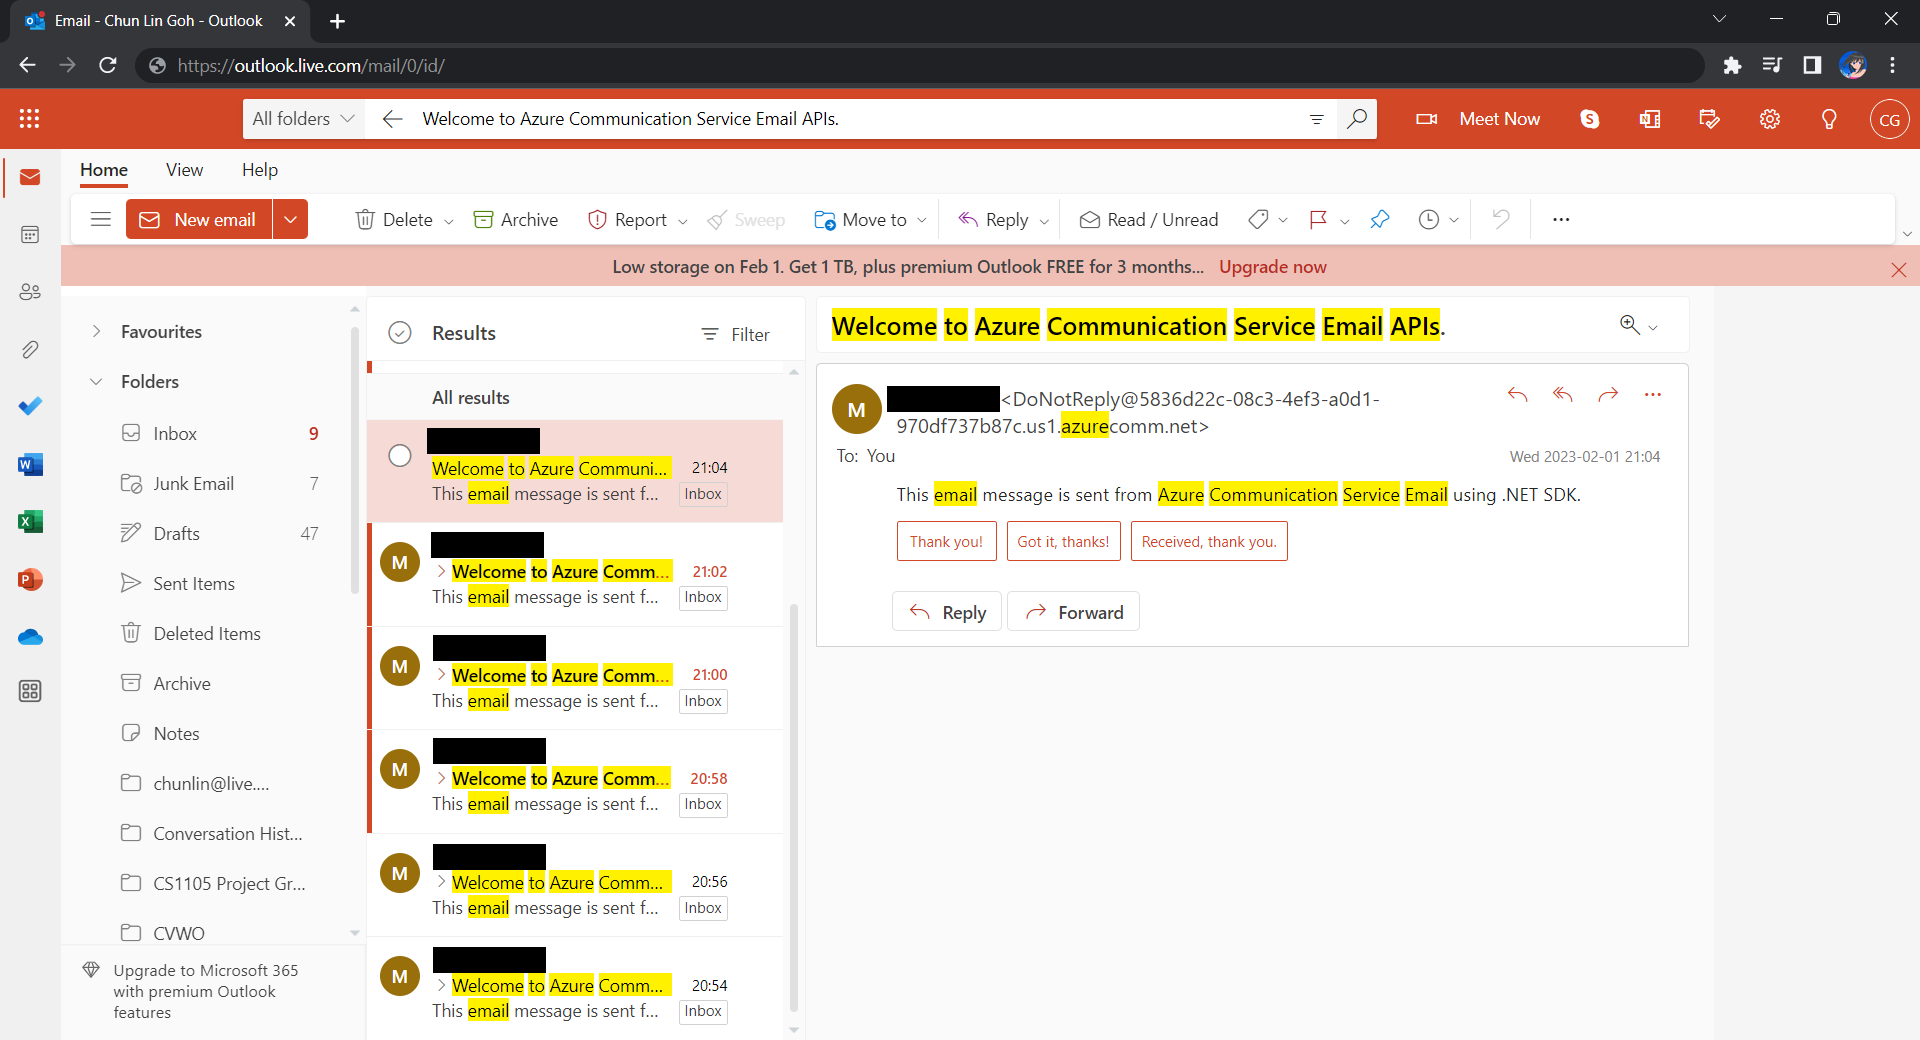
Here I have the following code to send a sample email to myself.
using Azure.Communication.Email.Models;
using Azure.Communication.Email;
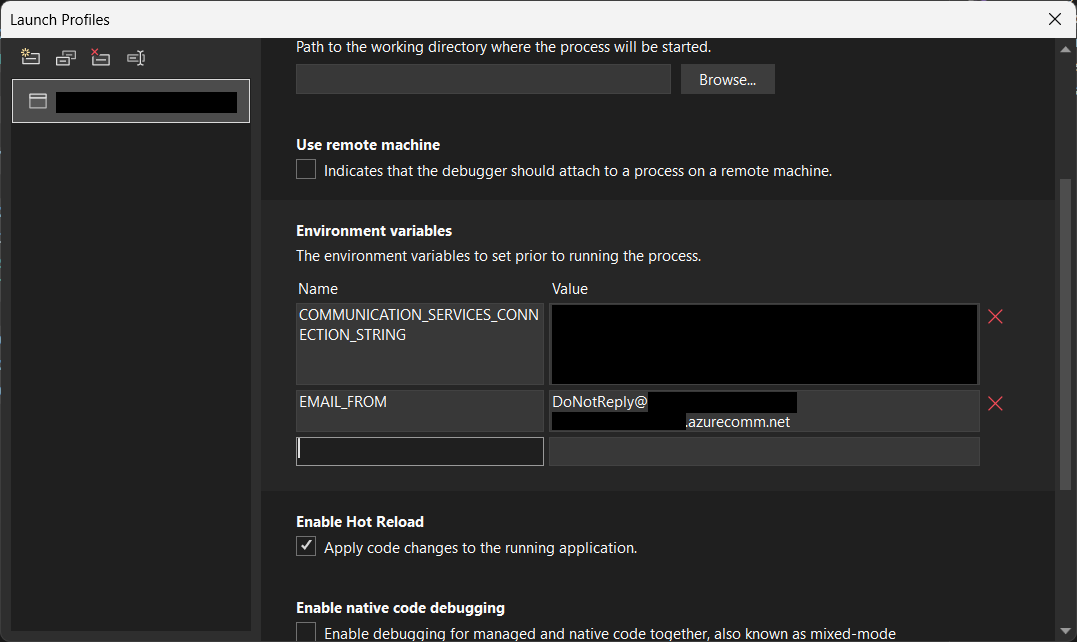
string connectionString = Environment.GetEnvironmentVariable("COMMUNICATION_SERVICES_CONNECTION_STRING") ?? string.Empty;
string emailFrom = Environment.GetEnvironmentVariable("EMAIL_FROM") ?? string.Empty;
if (connectionString != string.Empty)
{
EmailClient emailClient = new EmailClient(connectionString);
EmailContent emailContent = new EmailContent("Welcome to Azure Communication Service Email APIs.");
emailContent.PlainText = "This email message is sent from Azure Communication Service Email using .NET SDK.";
List<EmailAddress> emailAddresses = new List<EmailAddress> {
new EmailAddress("gclin009@hotmail.com") { DisplayName = "Goh Chun Lin" }
};
EmailRecipients emailRecipients = new EmailRecipients(emailAddresses);
EmailMessage emailMessage = new EmailMessage(emailFrom, emailContent, emailRecipients);
SendEmailResult emailResult = emailClient.Send(emailMessage, CancellationToken.None);
}
Setting environment variables for local debugging purpose.
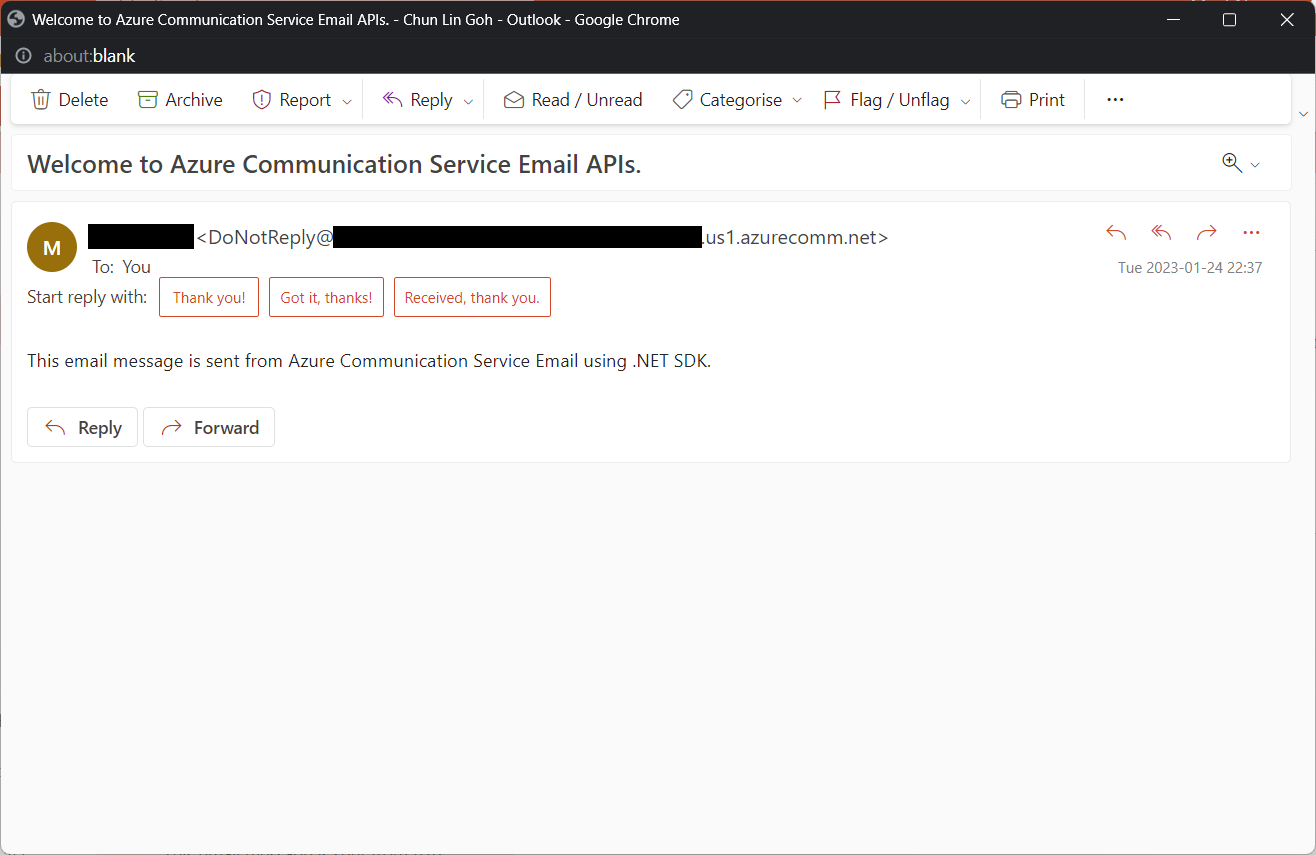
Tada, there should be an email successfully sent out as instructed.
Email is successfully sent and received. =)
Containerise the Console App
Next what we need to do is containerising our console app above.
Assume that our console app is called MyConsoleApp, then we will prepare a Dockerfile as follows.
FROM mcr.microsoft.com/dotnet/runtime:6.0 AS base
WORKDIR /app

FROM mcr.microsoft.com/dotnet/sdk:6.0 AS build
WORKDIR /src
COPY ["MyMedicalEmailSending.csproj", "."]
RUN dotnet restore "./MyConsoleApp.csproj"
COPY . .
WORKDIR "/src/."
RUN dotnet build "MyConsoleApp.csproj" -c Release -o /app/build

FROM build AS publish
RUN dotnet publish "MyConsoleApp.csproj" -c Release -o /app/publish /p:UseAppHost=false

FROM base AS final
WORKDIR /app
COPY --from=publish /app/publish .
ENTRYPOINT ["dotnet", "MyConsoleApp.dll"]
We then can publish it to Docker Hub for consumption later.
In Kubernetes, pods are the smallest deployable units of computing we can create and manage. A pod can have one or more relevant containers, with shared storage and network resources. Here, we will be scheduling a job so that it creates pods containing our container with the image we created above to operate the execution of the pods, which is in our case, to send emails.
Hence, if we would like to have the email scheduler to be triggered at 8am of every Friday, we can create a CronJob in the namespace my-namespace with the following YAML file.
After the CronJob is created, we can proceed to annotate it with the command below.
kubectl annotate cj email-scheduler jobtype=scheduler frequency=weekly
This helps us to query the cron jobs with jsonpath easily in the future. For example, we can list all cronjobs which are scheduled weekly, we can do it with the following command.
kubectl get cj -A -o=jsonpath="{range .items[?(@.metadata.annotations.jobtype)]}{.metadata.namespace},{.metadata.name},{.metadata.annotations.jobtype},{.metadata.annotations.frequency}{'\n'}{end}"
Create ConfigMap
In our email sending programme, we have two environment variables. Hence, we can create ConfigMap to store the data as key-value pair.
Then, the Pods created by the CronJob can thus consume the ConfigMap and Secret above as environment variables. So, we need to update the CronJob YAML file to be as follows.
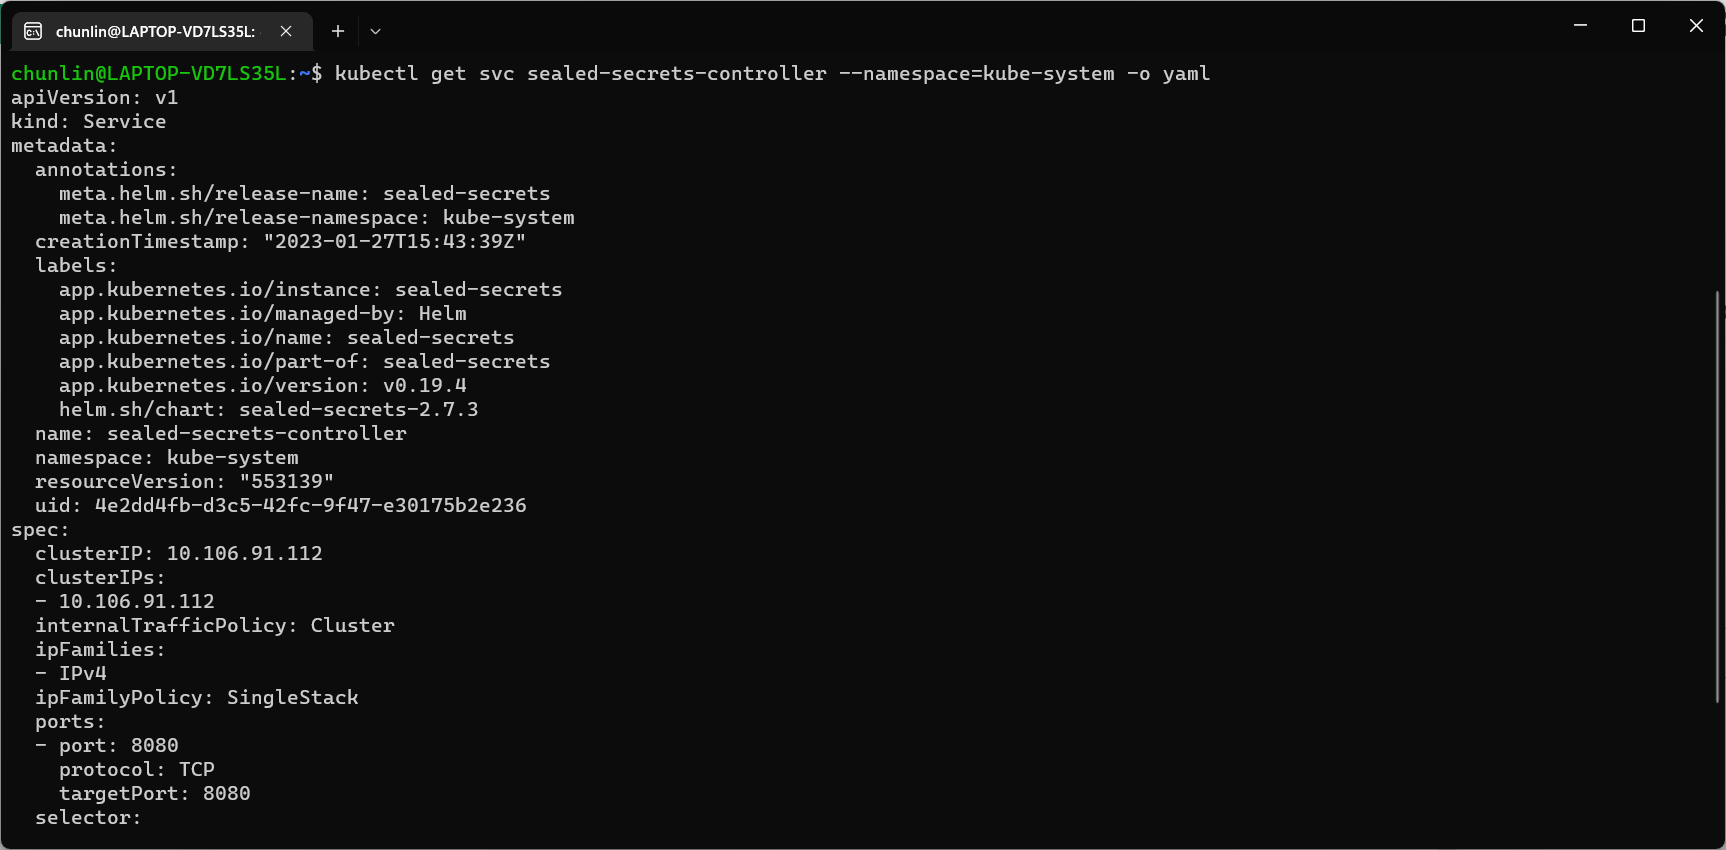
Problem with using Secrets is that we can’t really commit them to our code repository because the data are only encoded but not encrypted. Hence, in order to store our Secrets safely, we need to use SealedSecret which helps us to encrypt our Secret. The SealedSecret can only be decrypted by the controller running in the targer cluster.
Unpack it: tar -zxvf helm-v3.2.0-linux-amd64.tar.gz
Move the Helm binary to desired location: sudo mv linux-amd64/helm /usr/local/bin/helm
Once we have successfully downloaded Helm and have it ready, we can add a Chart repository. In our case, we need to add the repo of SealedSecret Helm Chart.
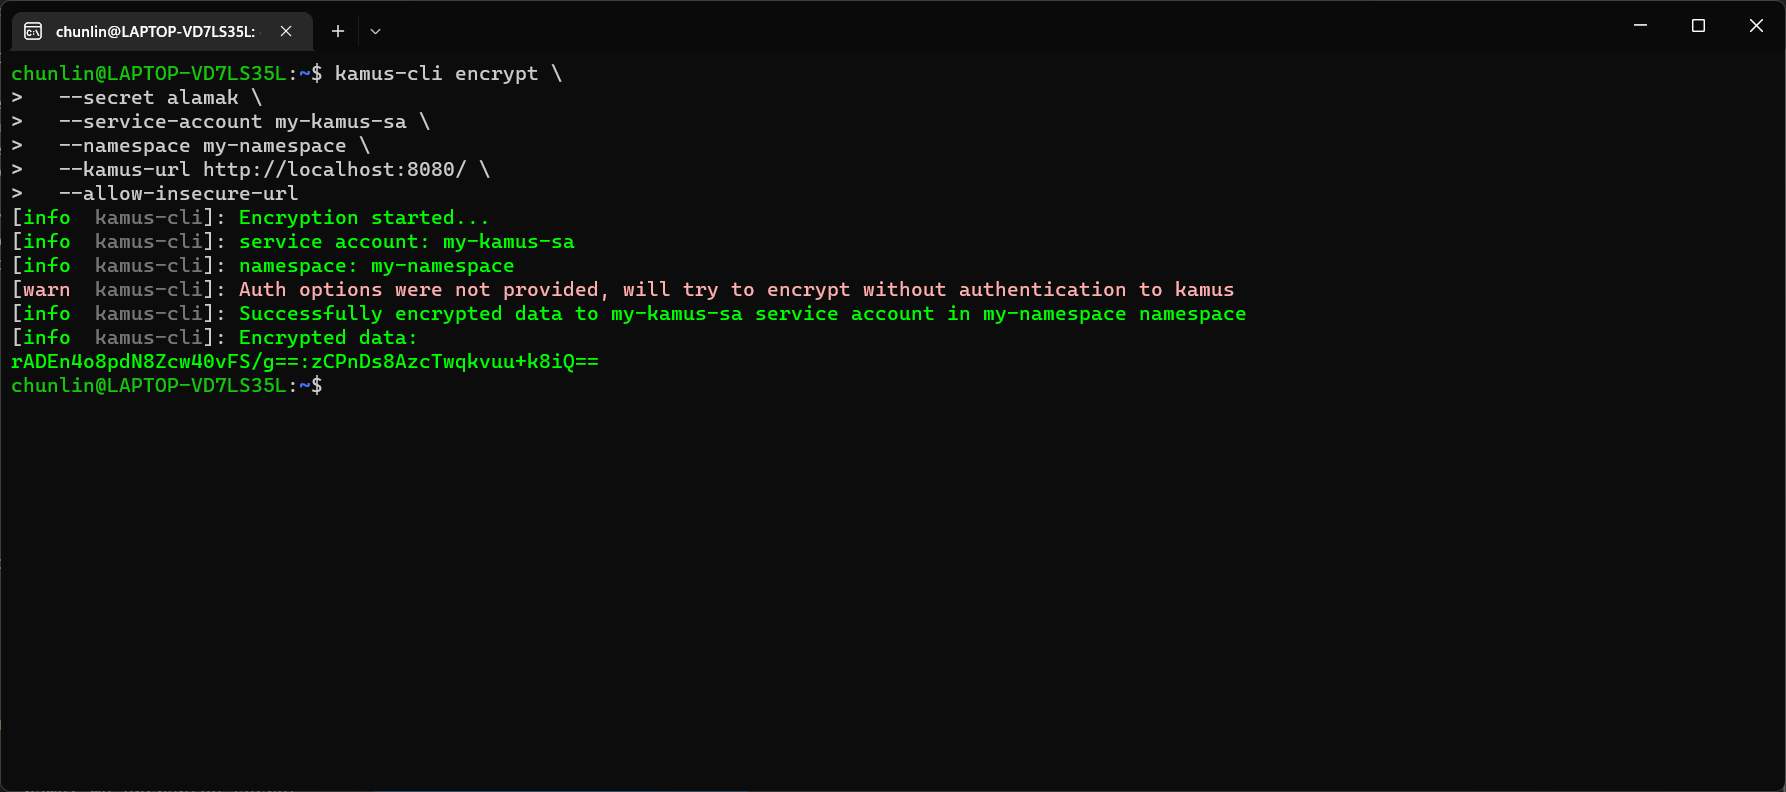
The Kamus URL could be found after we installed Kamus as shown in the screenshot below.
Kamus URL in localhost
We need to follow the instruction printed on the screen to get the Kamus URL. To do so, we need to forward local port to the pod, as shown in the following screenshot.
Successfully forward the port and thus can use the URL as the Kamus URL.
Hence, let’s say we want to encrypt a secret “alamak”, we can do so as follows.
Since our localhost Kamus URL is using HTTP, so we have to specify “–allow-insecure-url”.
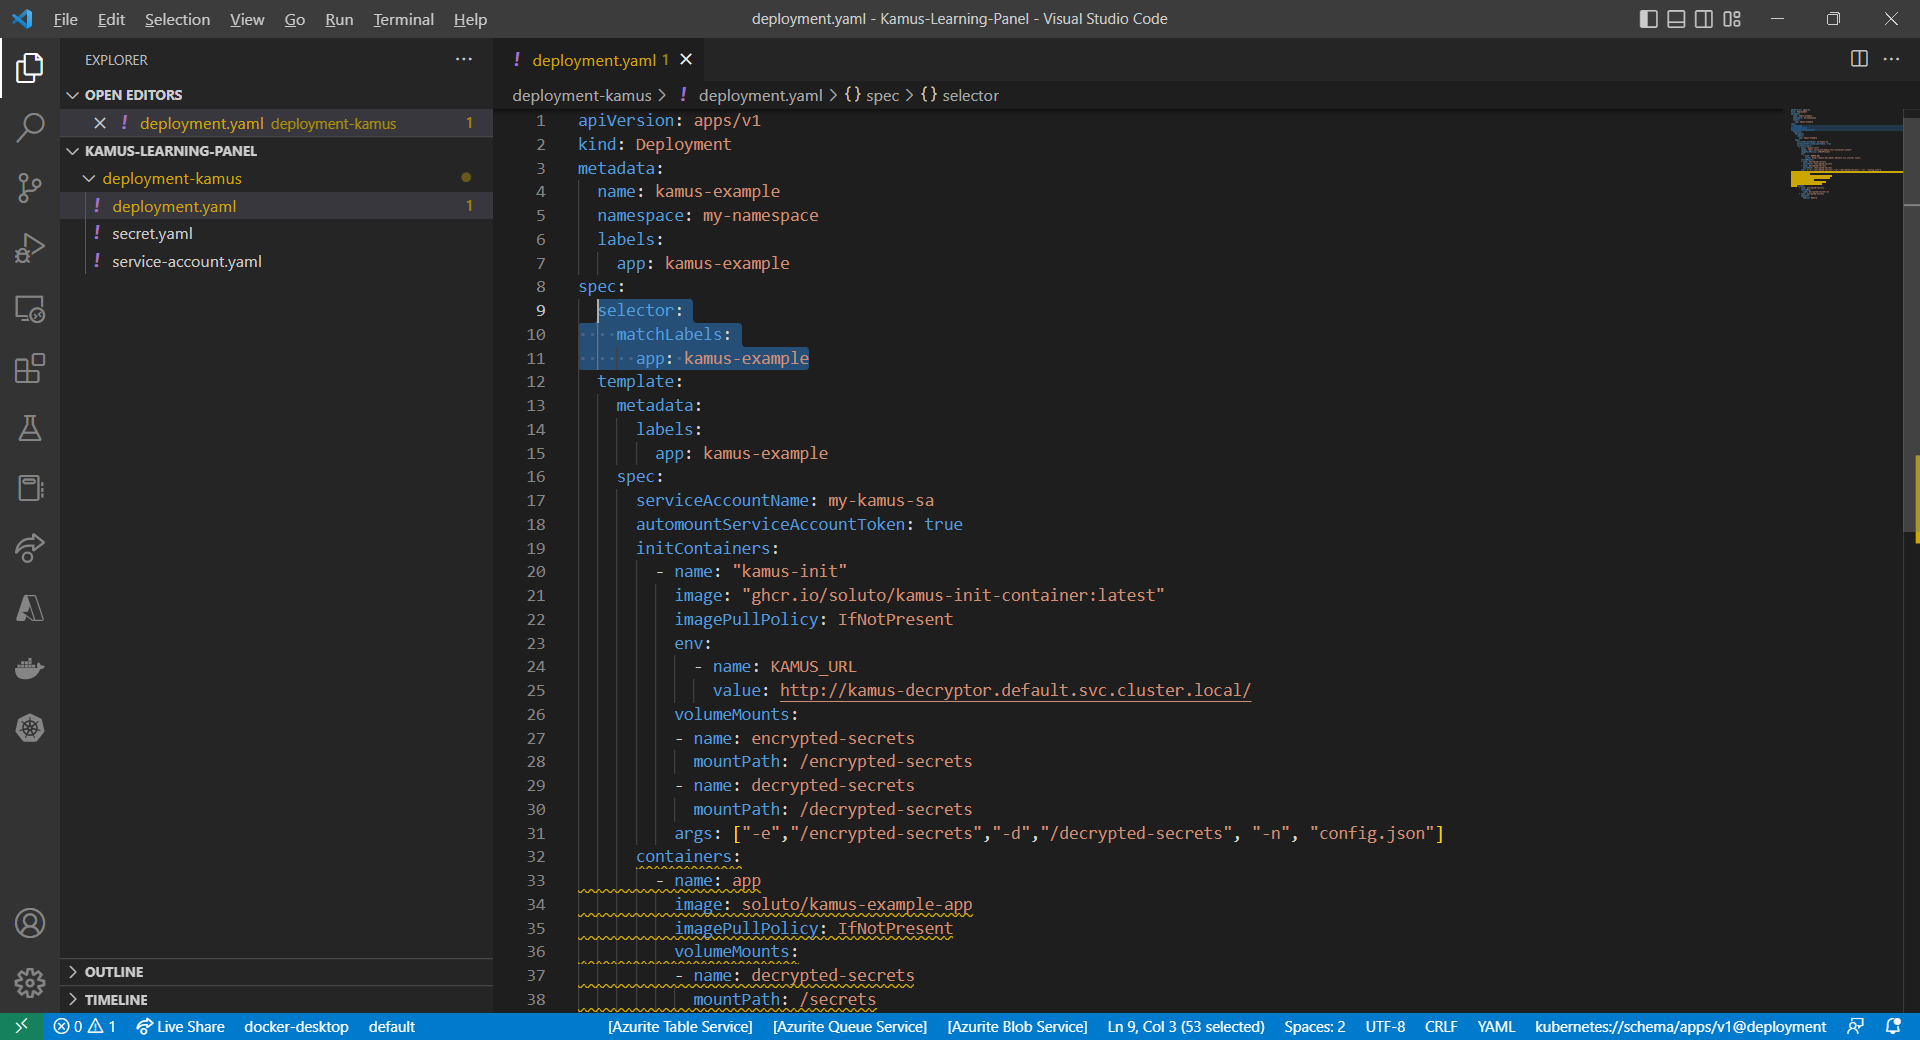
After we have encrypted our secret successfully, we need to configure our pod accordingly so that it can decrypt the value with Kamus Decrypt API. The simplest way will be storing our secret in a ConfigMap because it is already encrypted, so it’s safe to store it in ConfigMap.
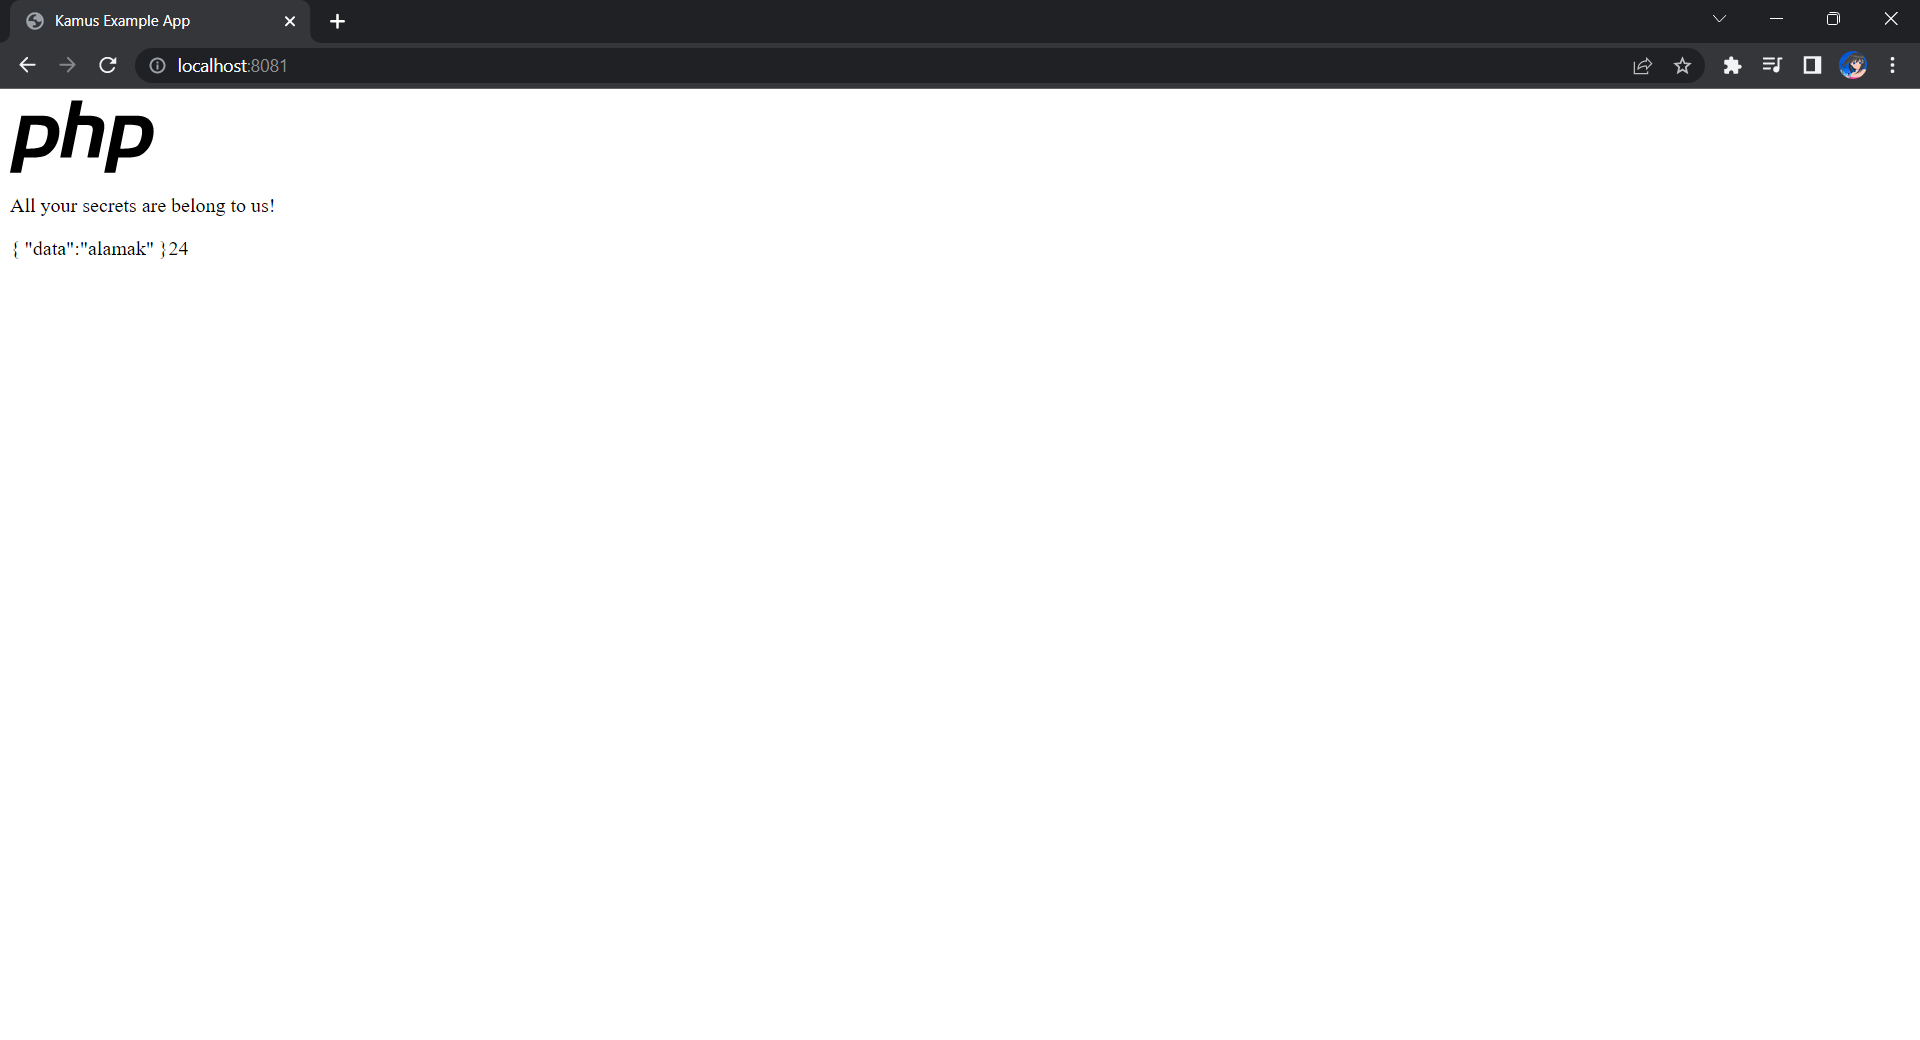
If the deployment is successful, we should be able to see the following when we visit localhost:8081 on our Internet browser, as shown in the following screenshot.
Yay, the original text “alamak” is successfully decrypted and displayed.
Deploy Our CronJob
Now, since we have everything setup, we can create our Kubernetes CronJob with the YAML file we have earlier. For local testing, I have edited the schedule to be “*/2 * * * *”. This means that an email will be sent to me every 2 minutes.
After waiting for a couple of minutes, I have received a few emails sent via the Azure Communication Services, as shown below.
Now the emails are received every 2 minutes. =)
Hoorey, this is how we build a simple Kubernetes CronJob and how we can send emails with the Azure Email Communication Services.
Besides the public nuget.org host, which acts as the central repository of over 100,000 unique packages, NuGet also supports private hosts. Private host is useful for example it allows developers working in a team to produce NuGet packages and share them with other teams in the same organisation.
Before we run a new container from the image, we need to create a file named baget.env to store BaGet’s configurations, as shown below.
# The following config is the API Key used to publish packages.
# We should change this to a secret value to secure our own server.
ApiKey=NUGET-SERVER-API-KEY

Storage__Type=FileSystem
Storage__Path=/var/baget/packages
Database__Type=Sqlite
Database__ConnectionString=Data Source=/var/baget/baget.db
Search__Type=Database
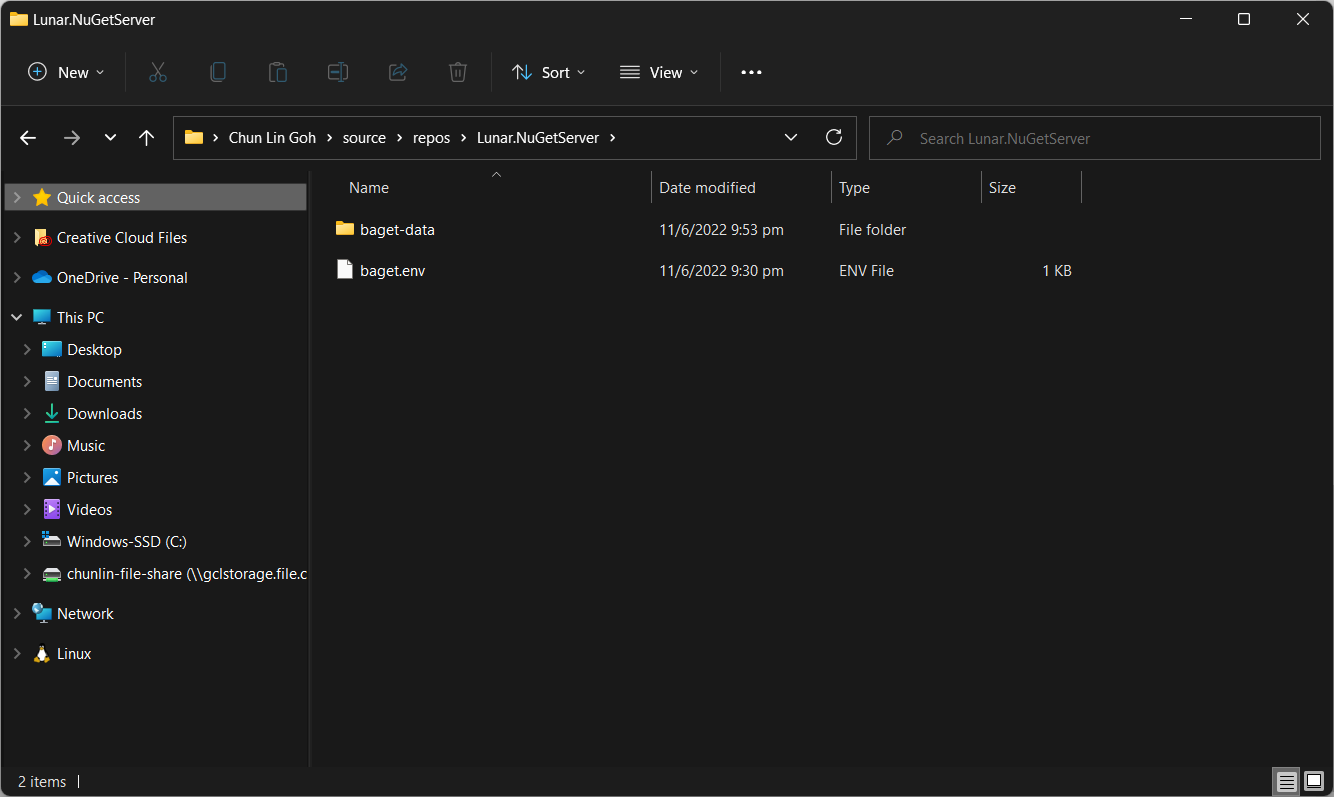
Then we also need to have a new folder named baget-data in the same directory as the baget.env file. This folder will be used by BaGet to persist its state.
The folder structure.
As shown in the screenshot above, we have the configuration file and baget-data at the C:\Users\gclin\source\repos\Lunar.NuGetServer directory. So, let’s execute the docker run command from there.
In the command, we also mount the baget-data folder on our host machine into the container. This is necessary so that data generated by and used by the container, such as package information, can be persisted.
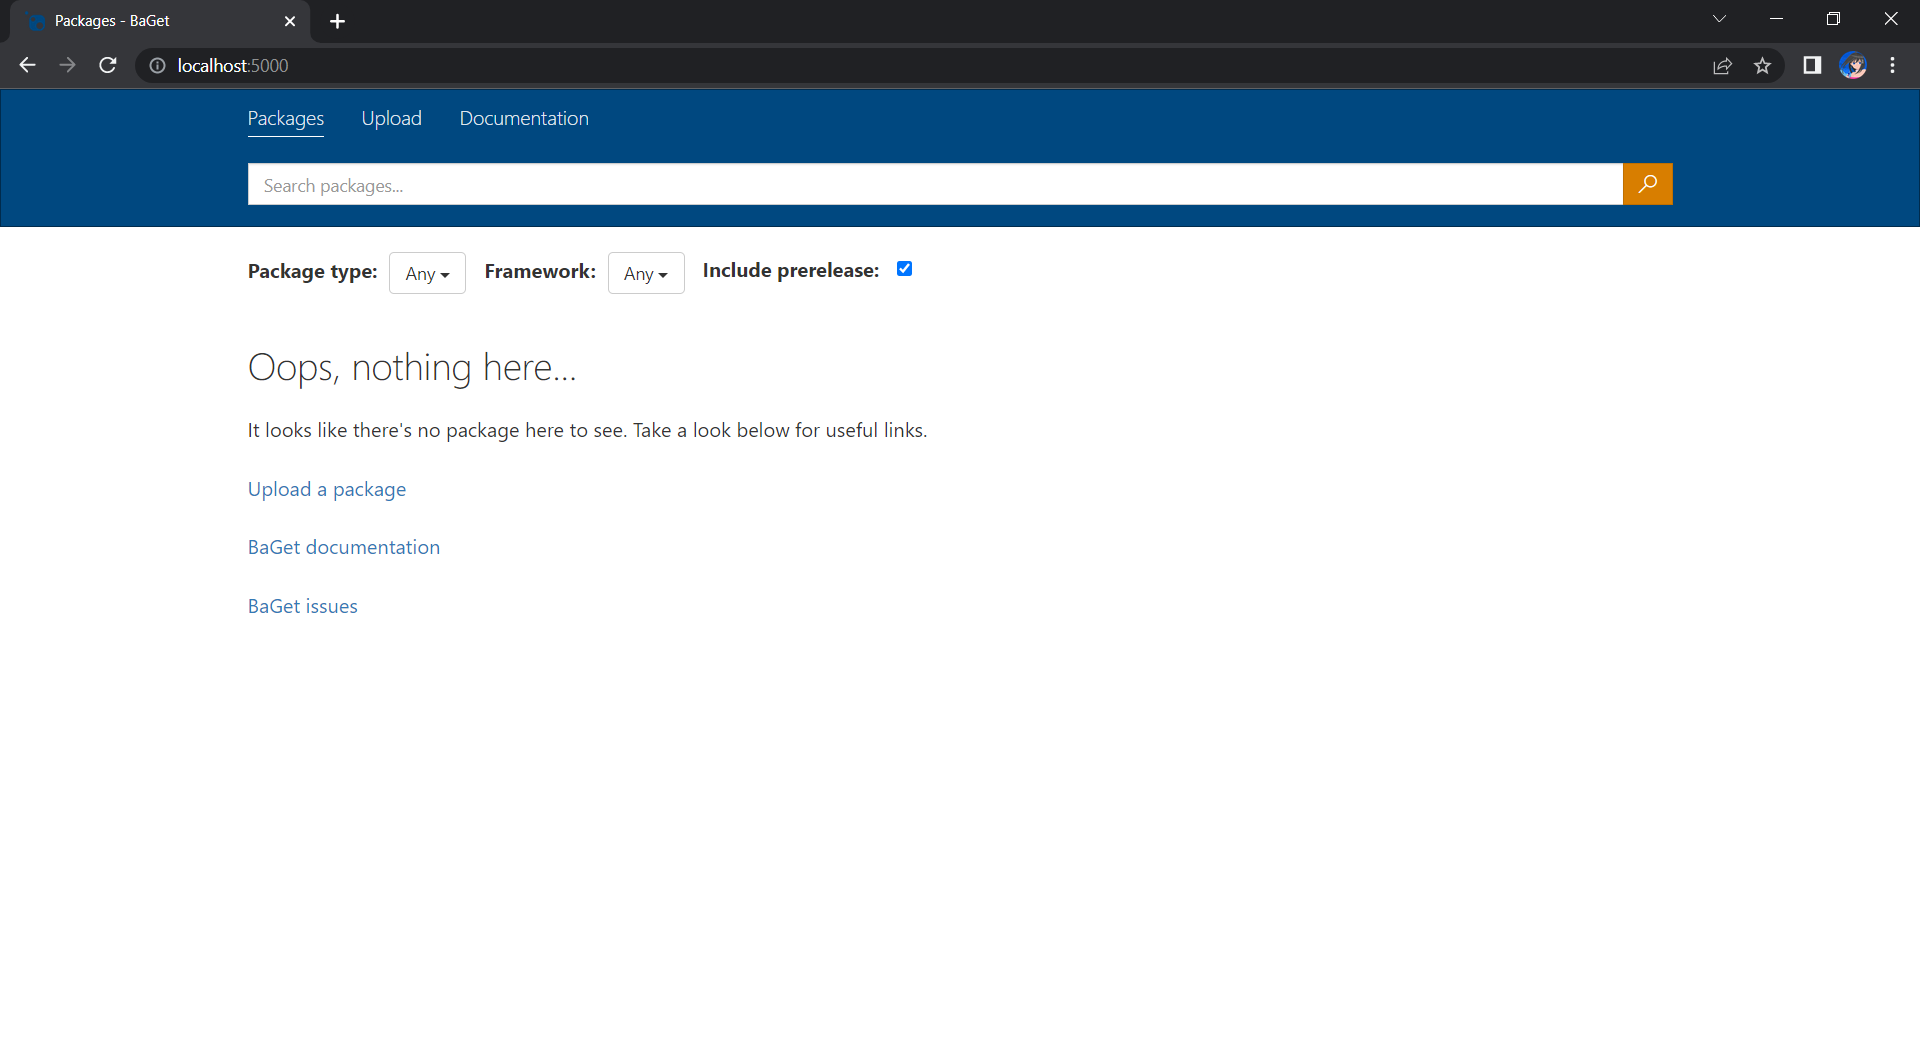
We can browse our own local NuGet server by visiting the URL http://localhost:5000.
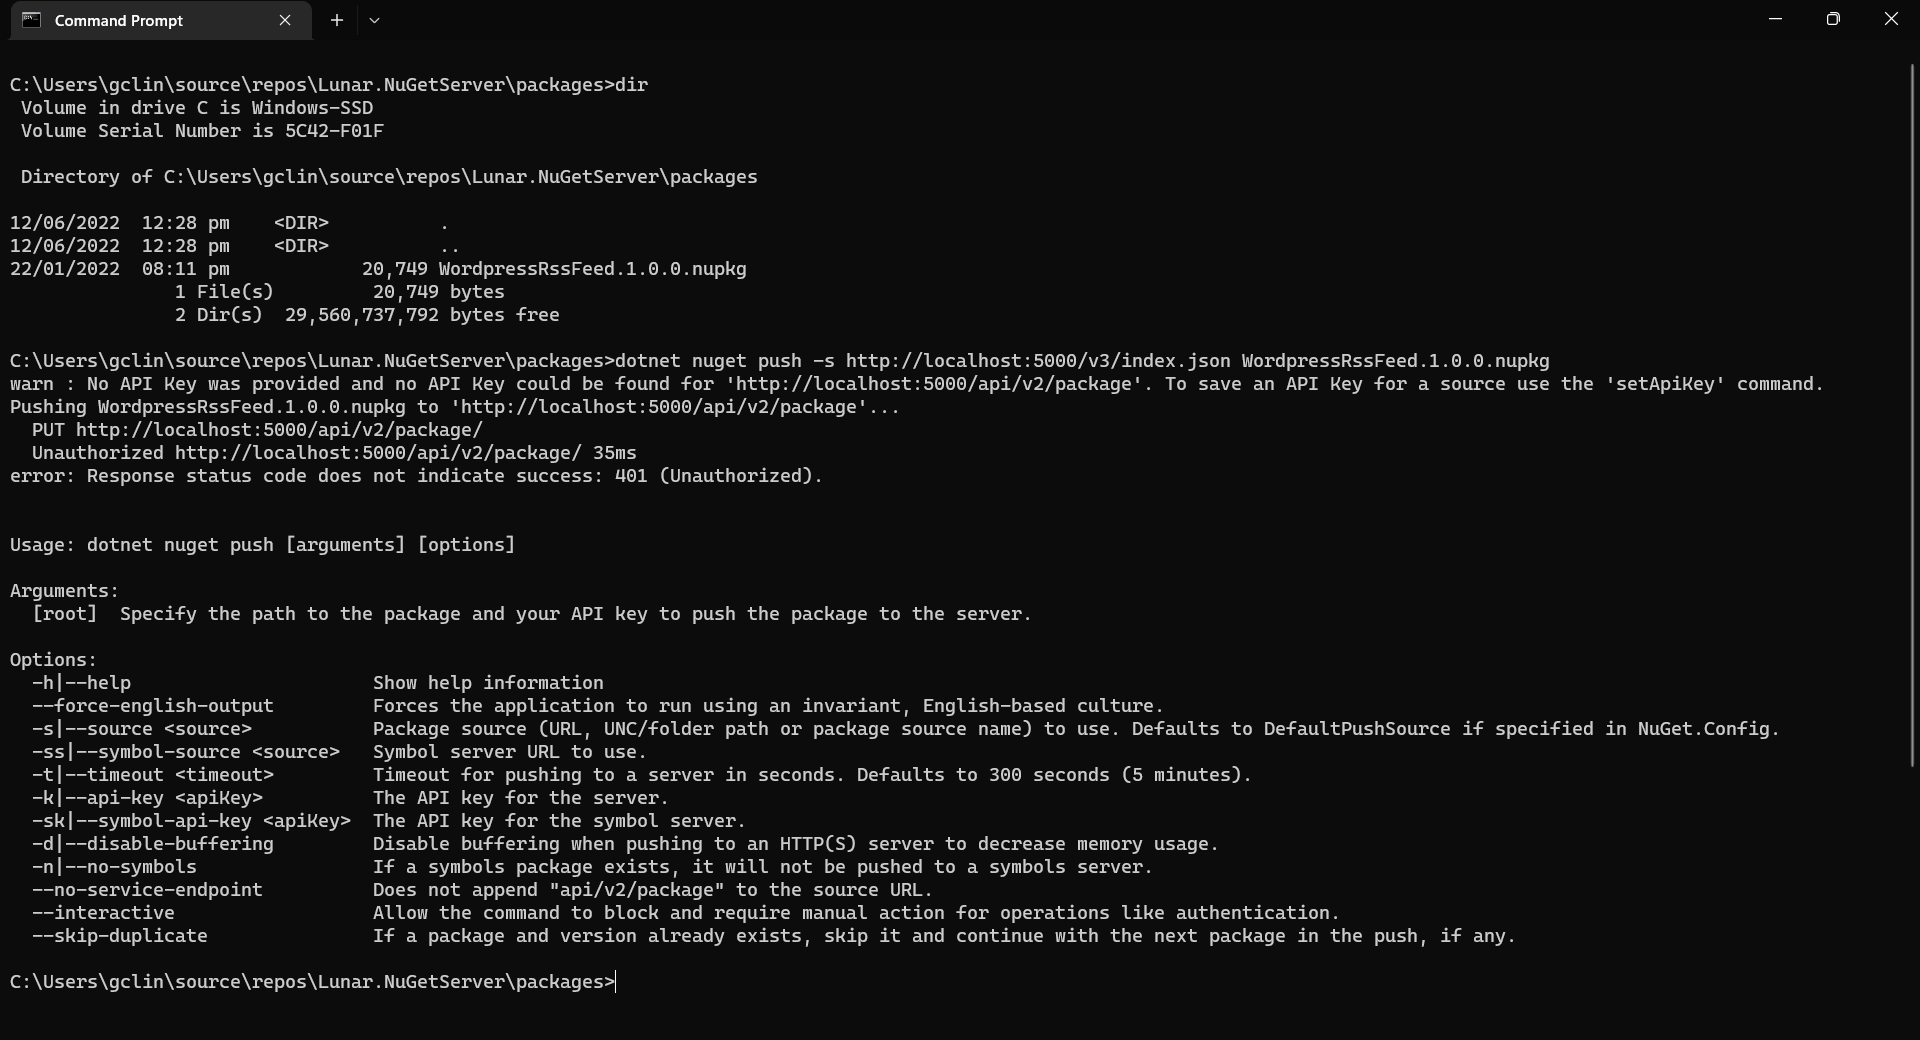
Now, let’s assume that we have our packages to publish in the folder named packages. We can publish it easily with dotnet nuget push command, as shown in the screenshot below.
Oops, we are not authorised to publish the package to own own NuGet server.
We will be rejected to do the publish, as shown in the screenshot above, if we do not provide the NUGET-SERVER-API-KEY that we defined earlier. Hence, the complete command is as follows.
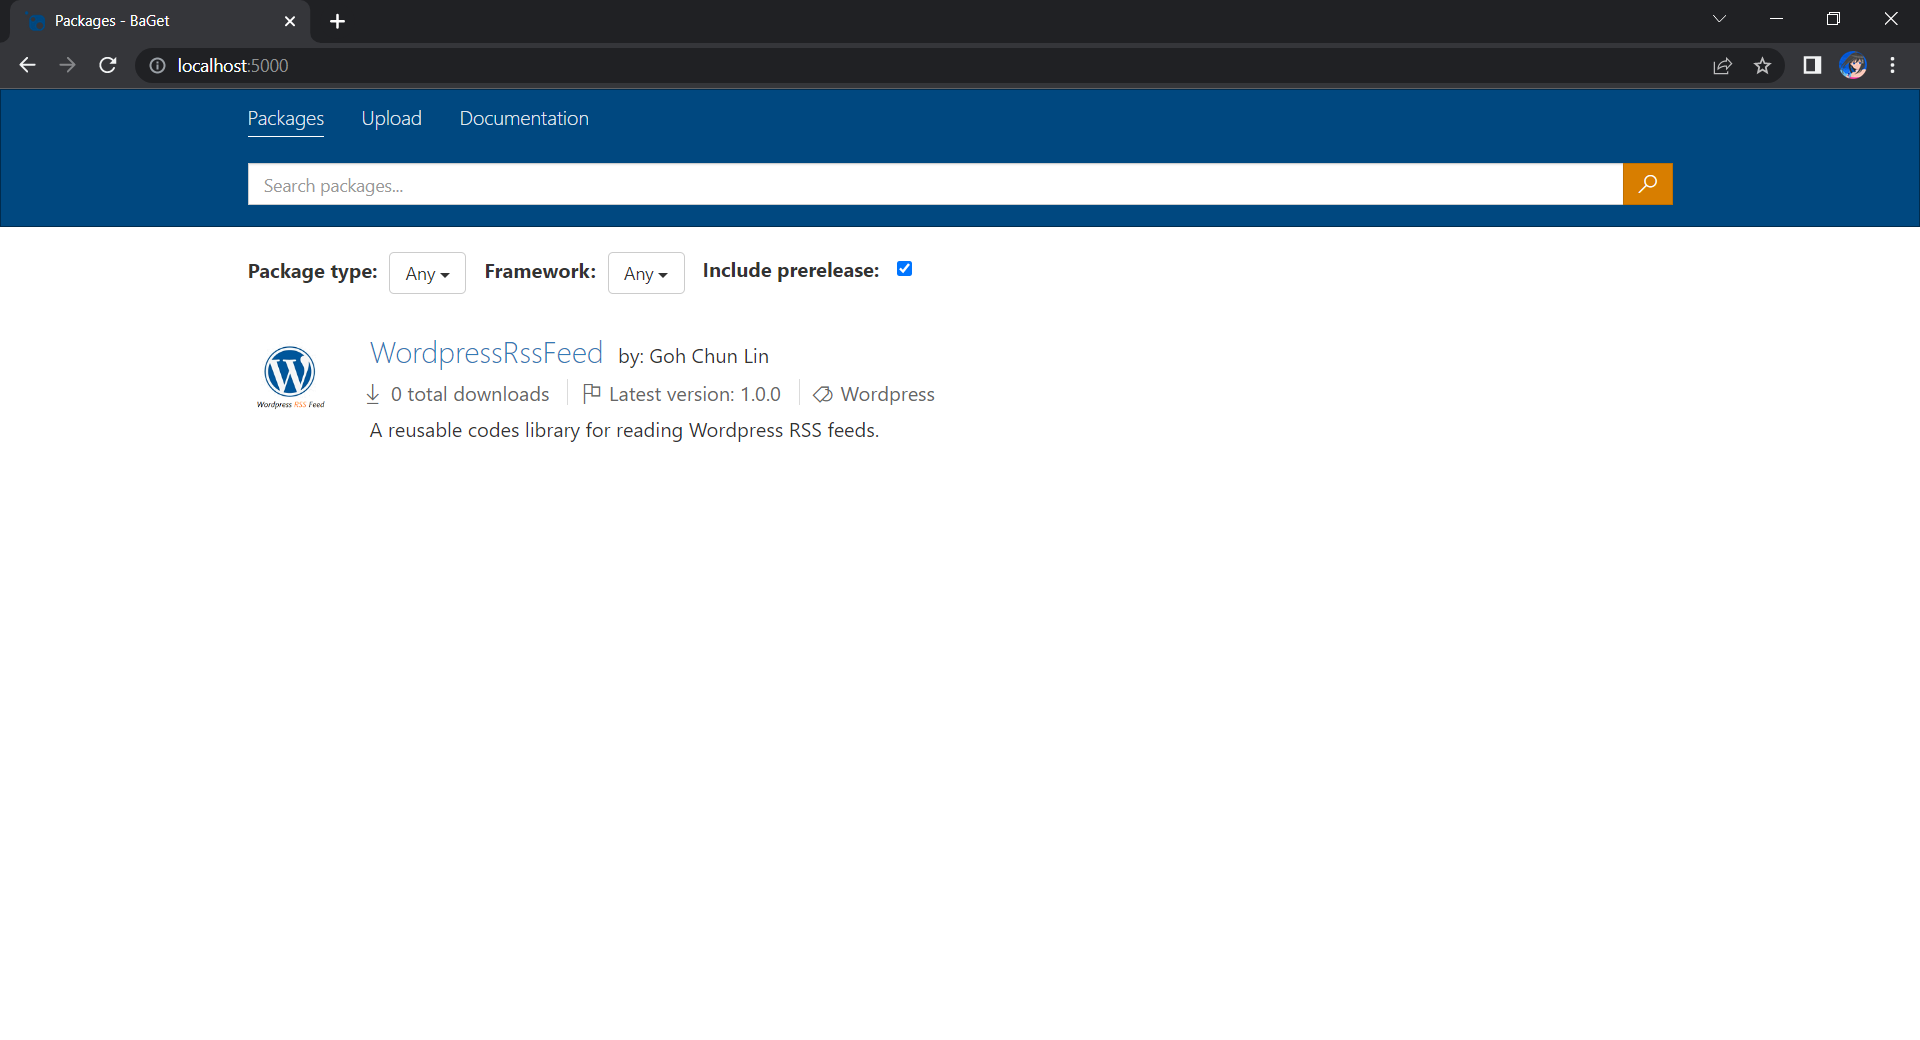
Once we have done that, we should be able to see the first package on our own NuGet server, as shown below.
Yay, we have our first package in our own local NuGet server!
Moving on to the Cloud
Instead of hosting the NuGet server locally, we can also host it on the cloud so that other developers can access too. Here, we will be using Azure Cloud Instance (ACI).
The first thing we need to have is to create a resource group (in this demo, we will be using a new resource group named resource-group-lunar-nuget) which will contain ACI, File Share, etc. for this project.
Secondly, we need to have a way to retrieve and persist state with ACI because by default, ACI is stateless. Hence, when the container is restarted all of its state will be lost and the packages we’ve uploaded to our NuGet server on the container will also be lost. Fortunately, we can make use of the Azure services, such as Azure SQL and Azure Blob Storage to store the metadata and packages.
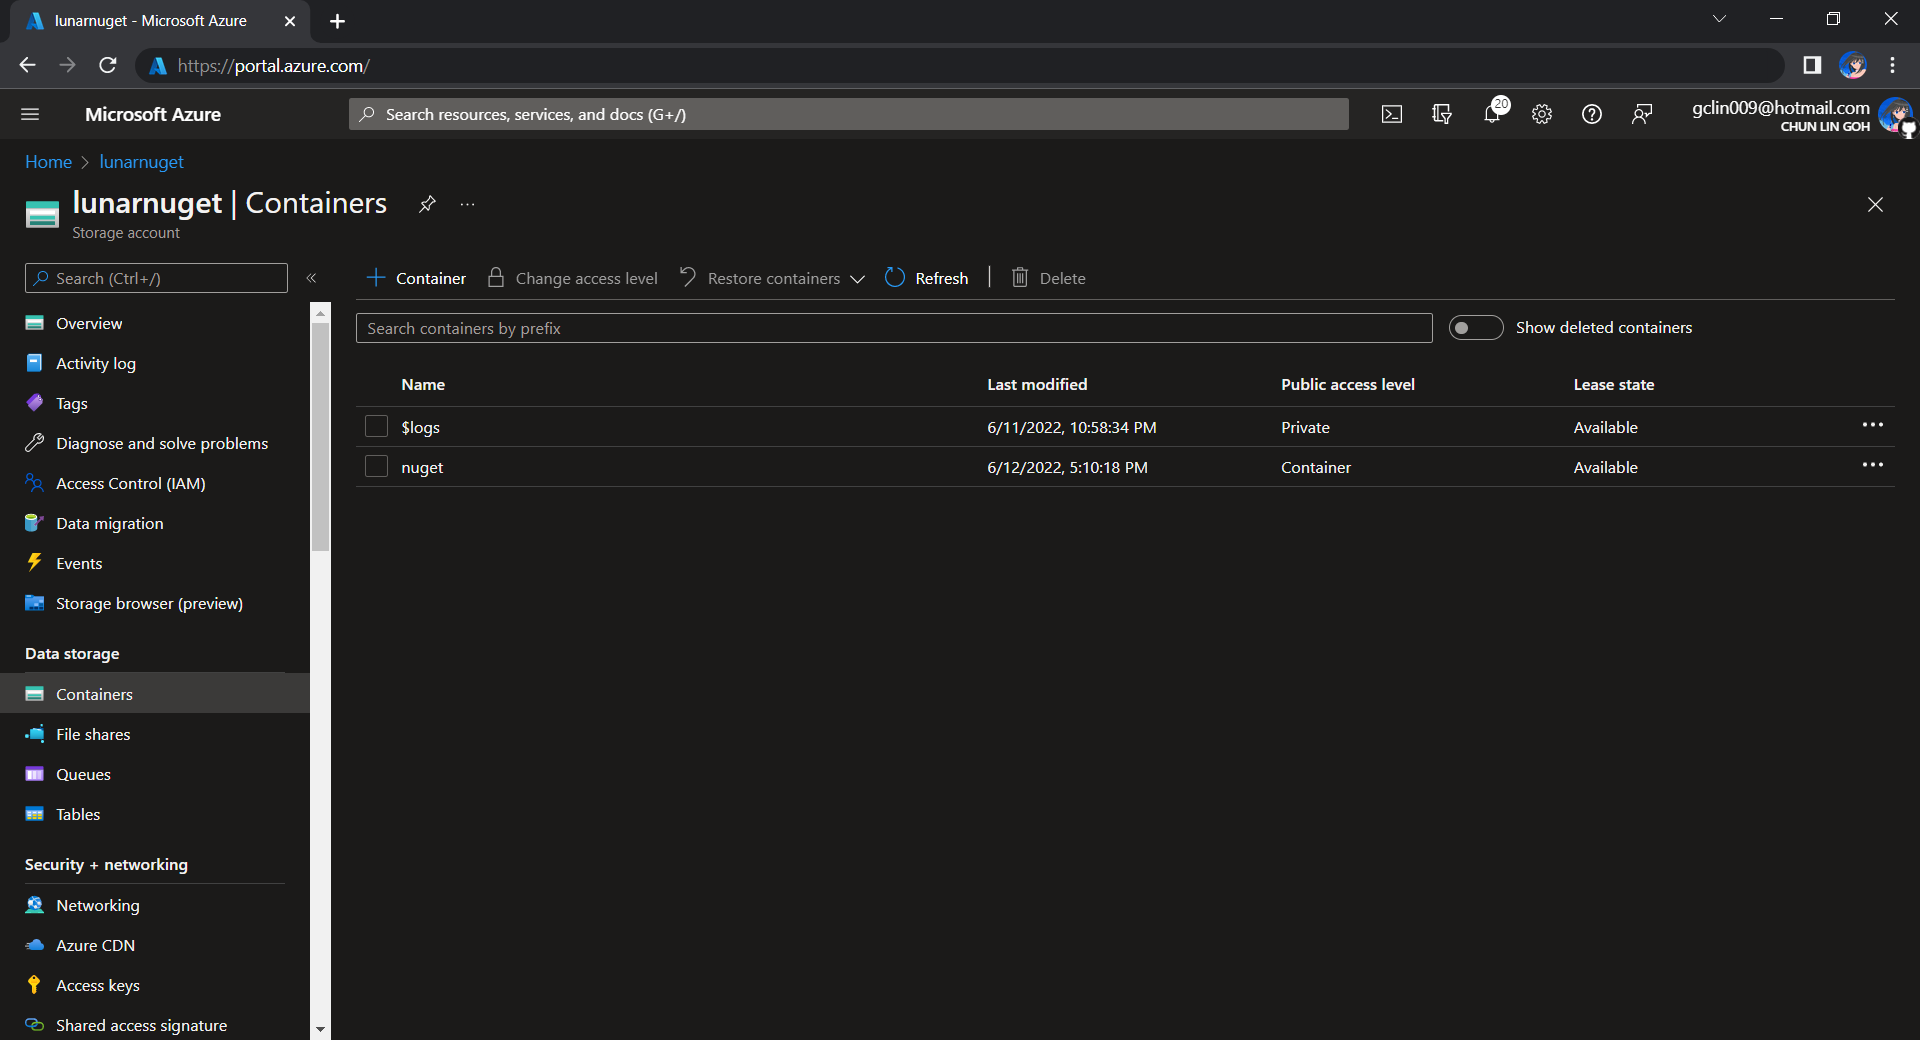
For example, we can create a new Azure SQL database called lunar-nuget-db. Then we create an empty Container named nuget under the Storage Account lunar-nuget.
Created a new Container nuget under lunarnuget Storage Account.
Thirdly, we need to deploy our Docker container above on ACI using docker run. To do so, we first need to log into Azure with the following command.
docker login azure
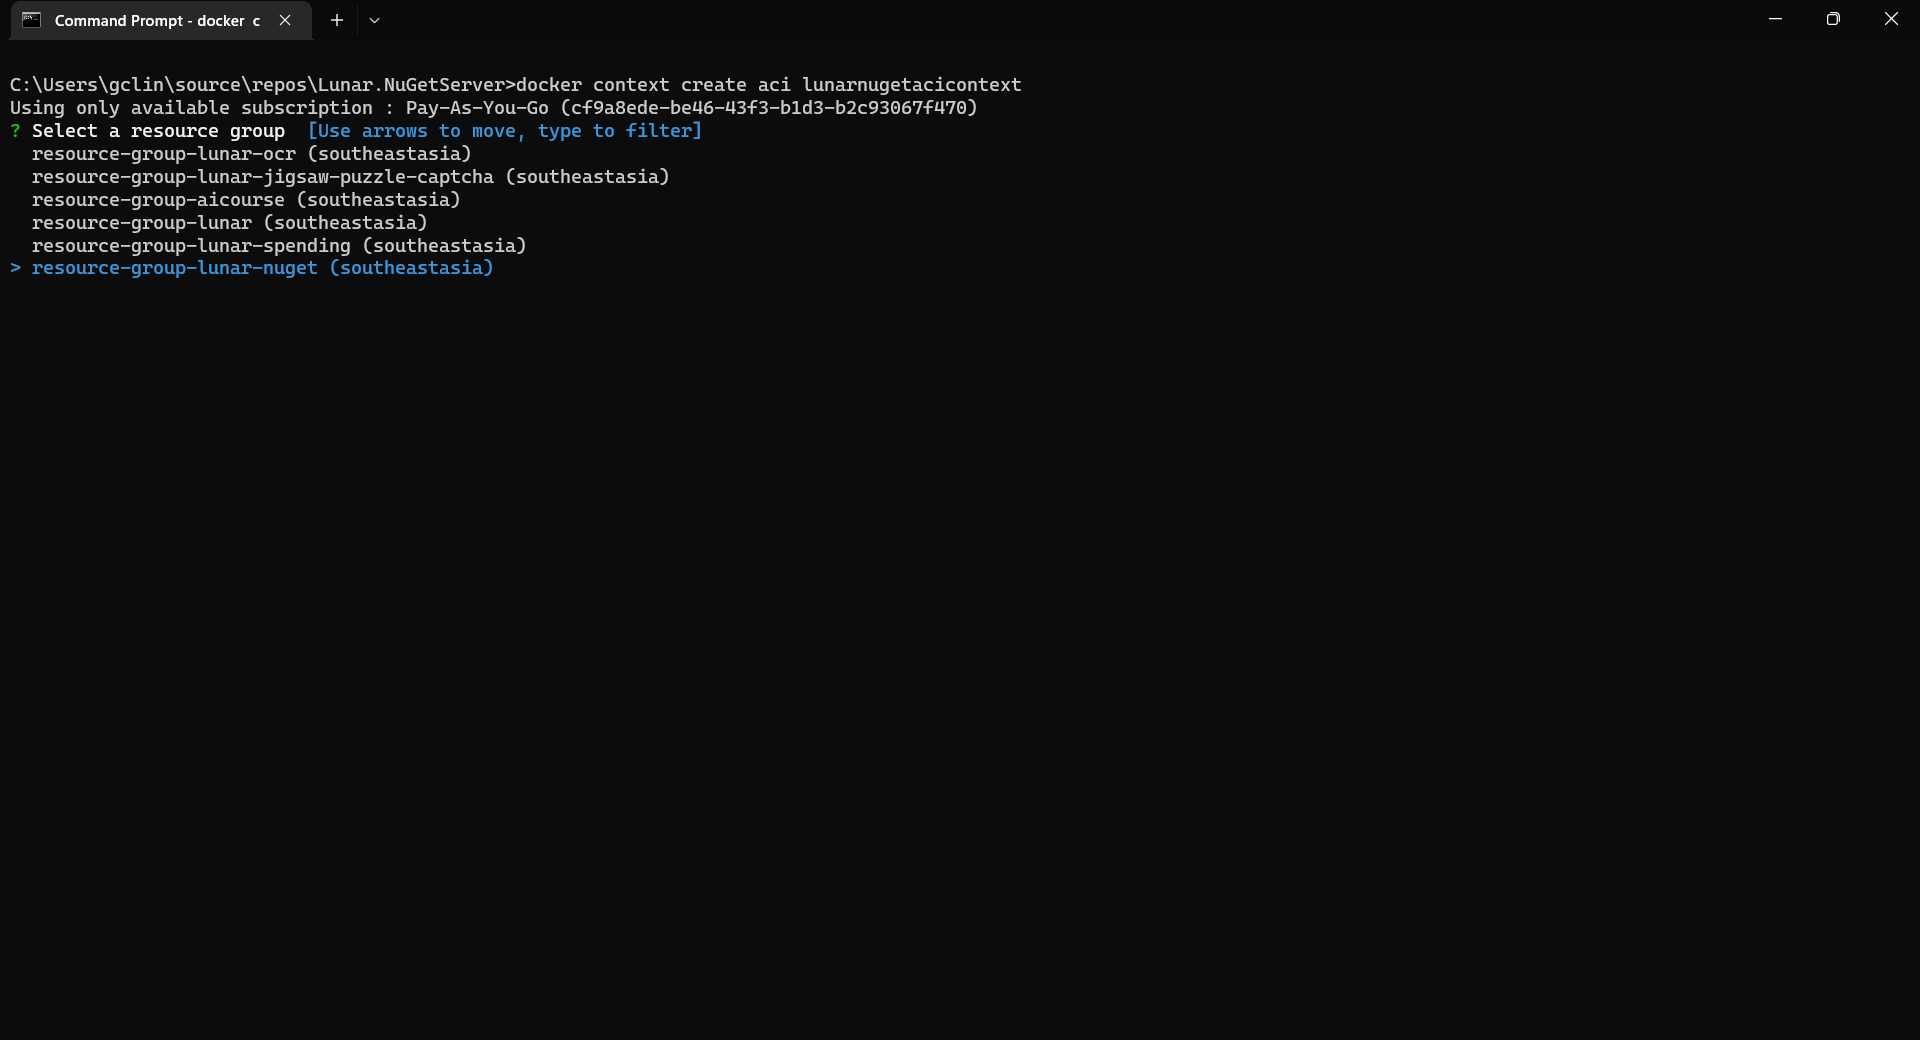
Once we have logged in, we proceed to create a Docker context associated with ACI to deploy containers in ACI of our resource group, resource-group-lunar-nuget.
Creating a new ACI context called lunarnugetacicontext.
After the context is created, we can use the following command to see the current available contexts.
docker context ls
We should be able to see the context we just created in the list.
Next, we need to swich to use the new context with the following command because currently, as shown in the screenshot above, the context being used is default (the one with an asterisk).
docker context use lunarnugetacicontext
Fourthly, we can now proceed to create our ACI which connect to the Azure SQL and Azure Blob Storage above.
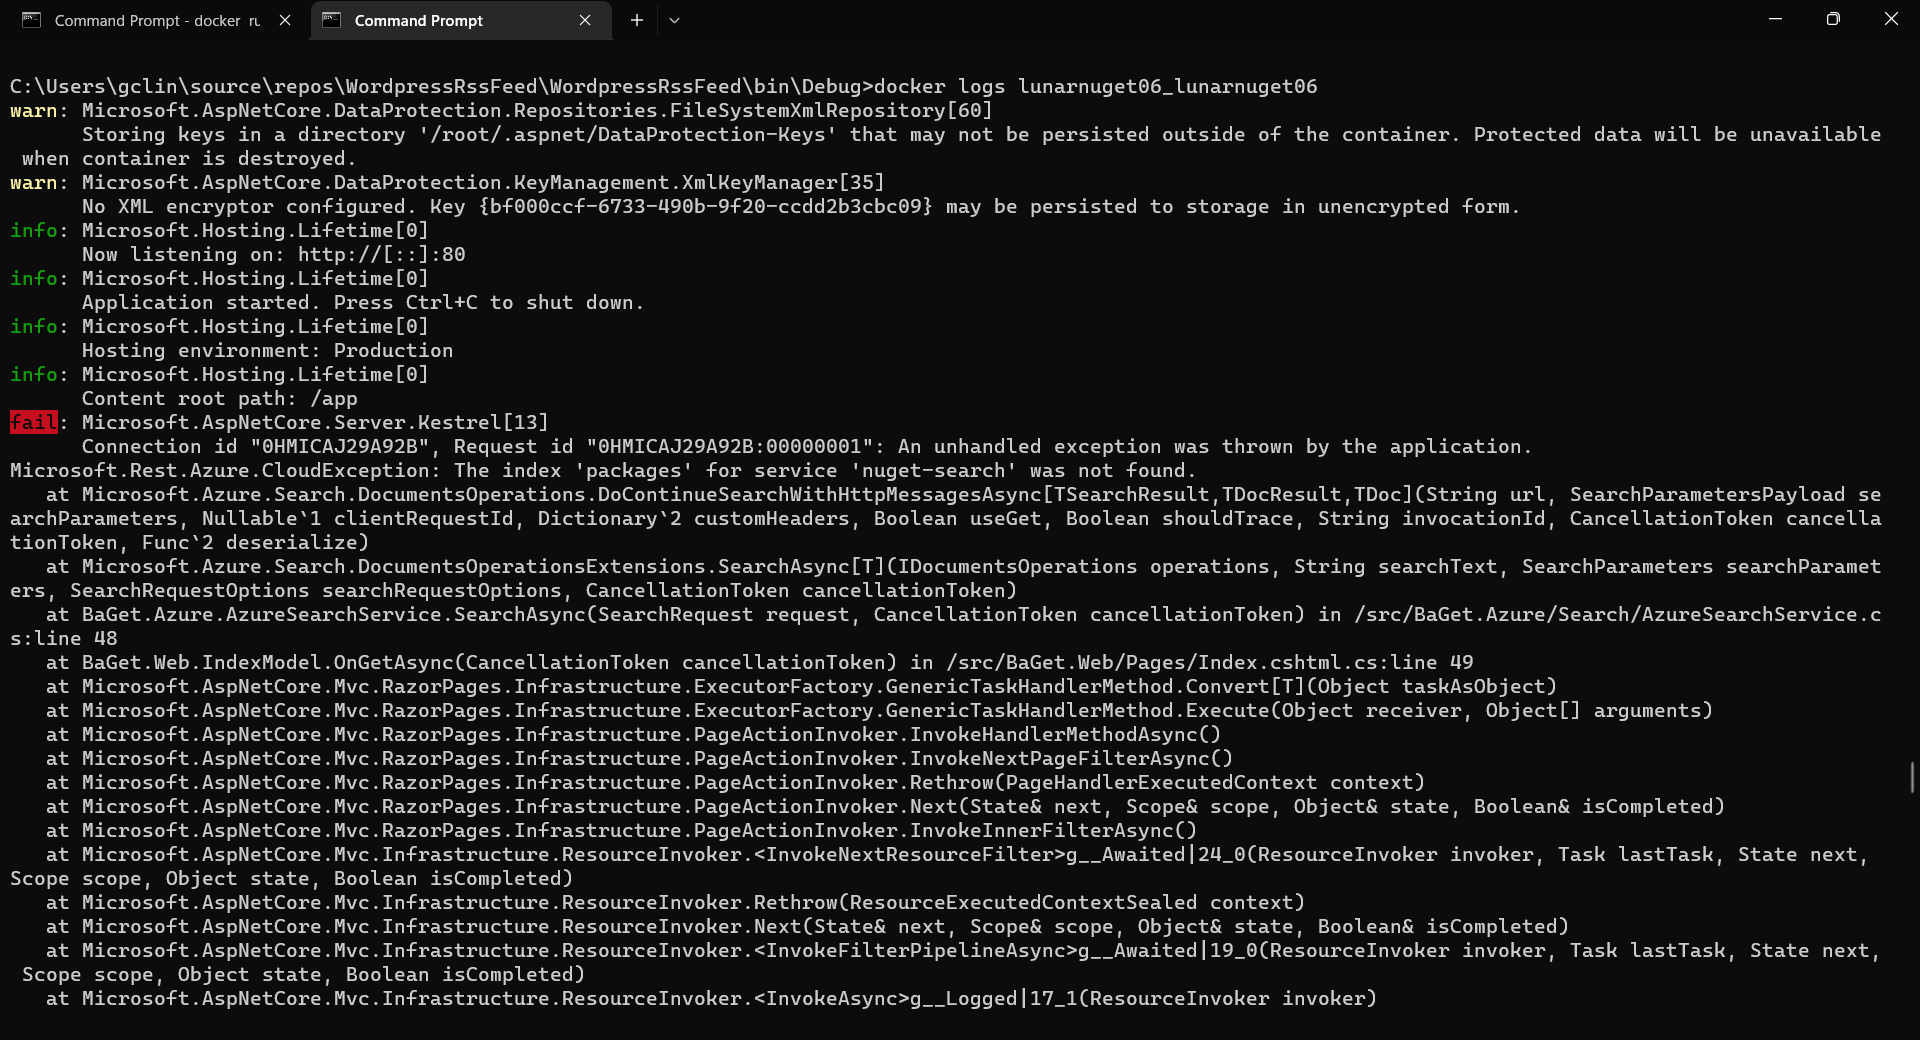
If there is no issue, after 1 to 2 minutes, the ACI named lunarnuget will be created. Otherwise, we can always use docker ps to get the container ID first and then use the following command to find out the issues if any.
docker logs <Container ID here>
Printing the logs from one of our containers with docker logs.
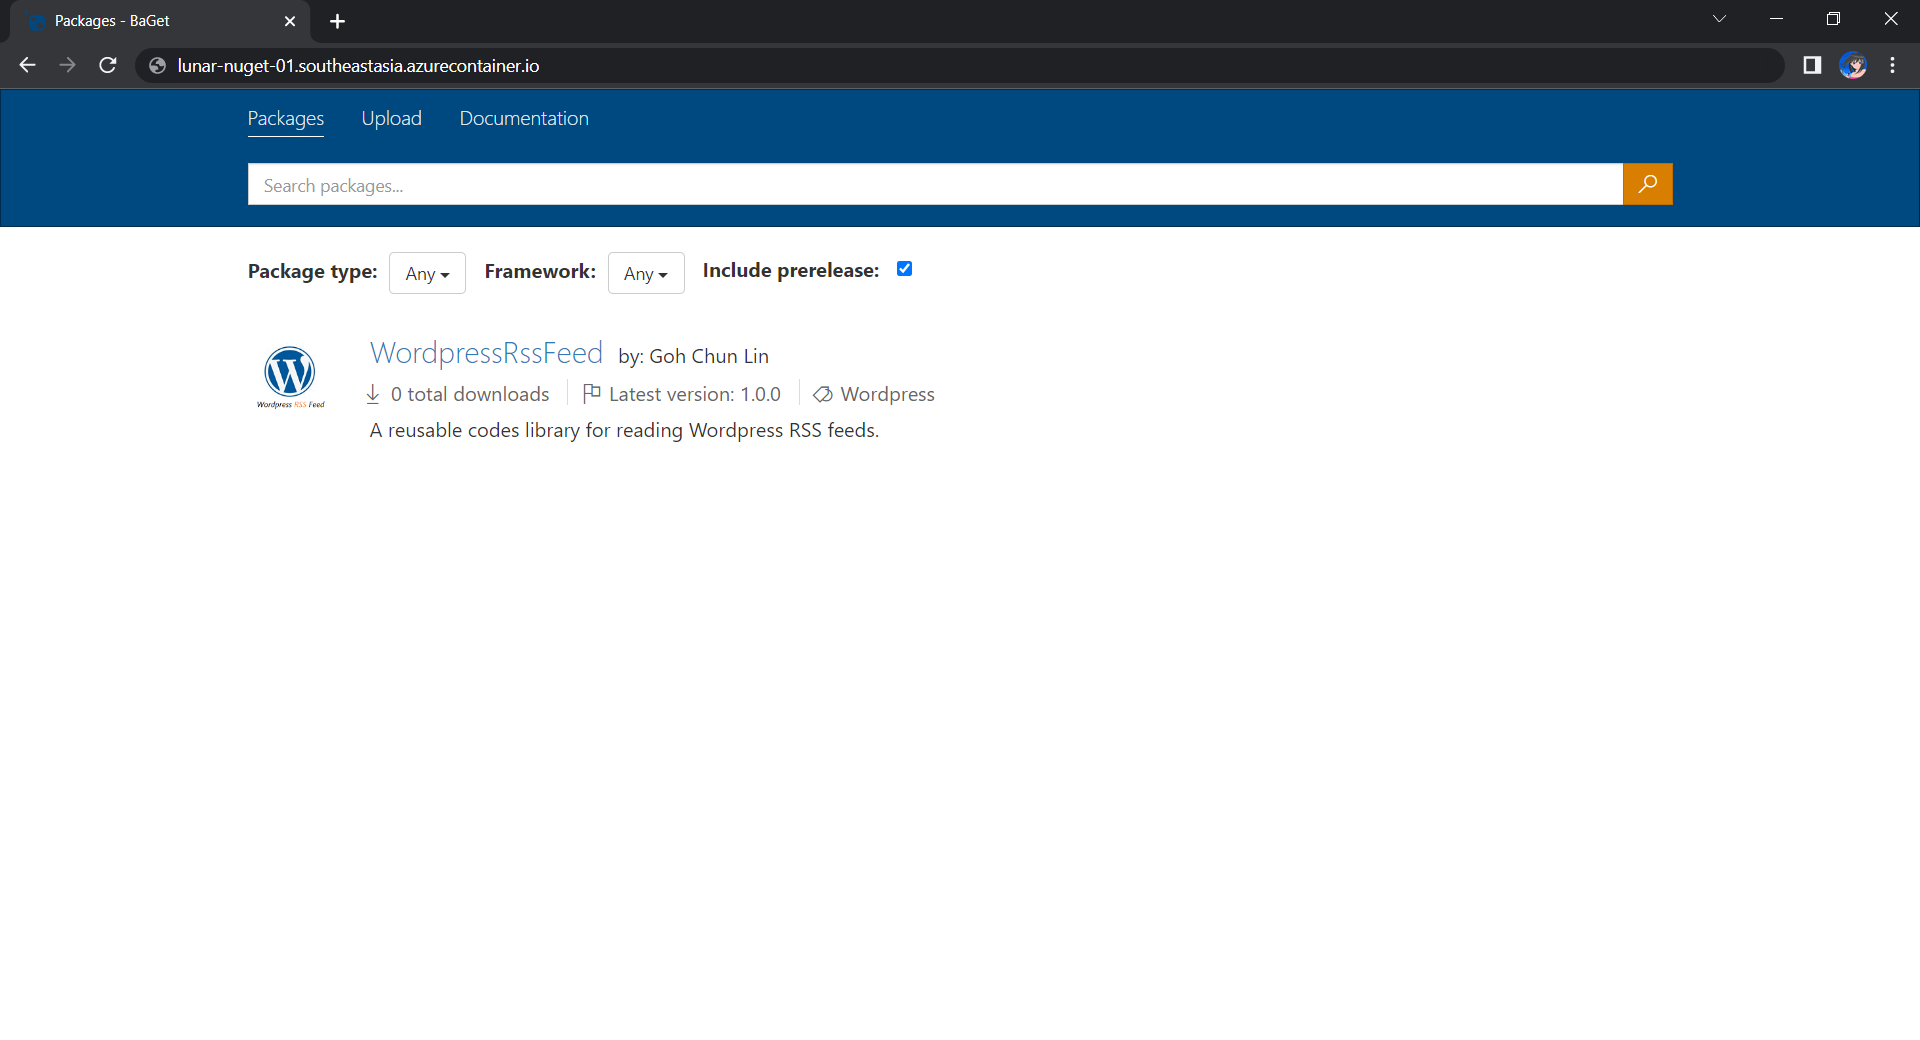
Now, if we visit the given FQDN of the ACI, we shall be able to browse the packages on our NuGet server.
That’s all for a quick setup of our own NuGet server on Microsoft Azure. =)
The fast pace of change in today’s world means we must understand and quickly respond to changes. Hence, in order to survive and be successful in today’s VUCA world, we need to constantly scan for growth opportunities and be willing to learn new skills.
Working in software industry helps me to realise that with all the disruptions in the modern world, especially technology, ongoing skill acquisition is critical to persistent professional relevance. We shall always look for ways to stretch ourselves to get ahead.
Even though I have been dealing with cloud computing, especially Microsoft Azure, for more than 10 years in my career and study, I still would like to find out how well I compare with my peers instead of thinking that I’m already fine at this area. Hence, with that in mind, I focus on learning Microsoft Azure development related skills on Microsoft Learn during the holiday.
Make the Most of Our Limited Learning Time
So much to learn, so little time.
We all have very little time for learning outside of our work. Combine time we have for learning and the importance of the skills, we can get a simple 2×2 matrix with four quadrants.
2×2 matrix to help prioritizing skills to learn (Reference: Marc Zao-Sanders)
I don’t have much time to keep my cloud computing knowledge relevant because nowadays I focus more on desktop application development. Hence, I decided to give myself a one-week break from work and schedule 6-7 hours each day for learning in the holiday.
In order to make sure we’re investing our time wisely, we shall focus on learning what is needed. Unless we need the skill for our job or a future position, it’s better not to spend time and money for training on that skill because learning is an investment and we shall figure out what the return will be. This is why I choose to learn more about developing cloud apps on Microsoft Azure because that has been what I’m doing at work in the past decade.
To better achieve my goals in self learning, I’ve also identified the right learning materials before I get started. Since I already have the experience of developing modern cloud applications early in my career, I choose to focus only on going through all the 43 relevant modules available on the Microsoft Learn.
Make Learning a Lifelong Habit
No matter which technology era we are in, the world will always belong to people who are always keeping themselves up to date. Hence, lifelong learning is a habit many of us would like to emulate.
Before we start our learning journey, we need to set realistic goals, i.e. goals that are attainable, because there are limits to what we can learn. In addition, as we discussed earlier, we need to ask ourselves how much time and energy we can give to our self learning. We have to understand that learning a skill takes extreme commitment, so we can’t get very far on the journey of self learning if we don’t plan it properly.
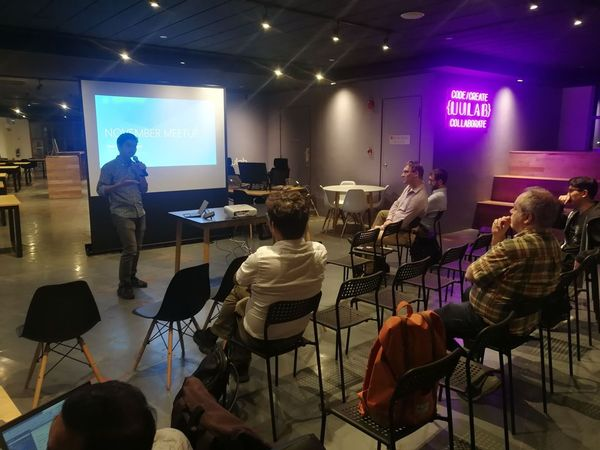
Learning is hard work but it also can be fun, especially when we are learning together with like-minded people. Don’t try to learn alone, otherwise self learning can feel over-whelming. For example, besides learning from online tutorials, I also join local software development groups where members are mostly developers who love to share and learn from each other.
Finally, to improve our ability to learn, we also have to unlearn, i.e. choose an alternative mental model or paradigm. We should acknowledge that old mental model is not always relevant or effective. When we fail, we also should avoid defending ourselves and capture the lessons we’ve learned.
Certification and Exam
I’m now a Microsoft certified Azure Developer Associate after I passed their exam AZ-204 in November 2021.
The exam is not difficult but it’s definitely not easy as well.
The exam tests not only our knowledge in developing cloud solutions with Azure services such as Azure Compute and Storage Account, but also our understanding of cloud security and Azure services troubleshooting.
Clearing all the relevant modules on Microsoft Learn does not guarantee that one will pass the exam easily. In fact, it’s the skills and knowledge I gain from work and personal projects help me a lot in the exam, for example the service bus implementation that I learnt last year when I was building a POC for a container trailer tracking system.
How Microsoft Learn helps in my self learning is that it provides an opportunity for me to learn in a free sandbox environment. In addition, the learning materials on the platform are normally best practices to follow. Hence, by learning on Microsoft Learn, I find out some of the mistakes I’ve made in the past and things that I can improve, for example resource management with tags, RBAC, VNet setup, etc.
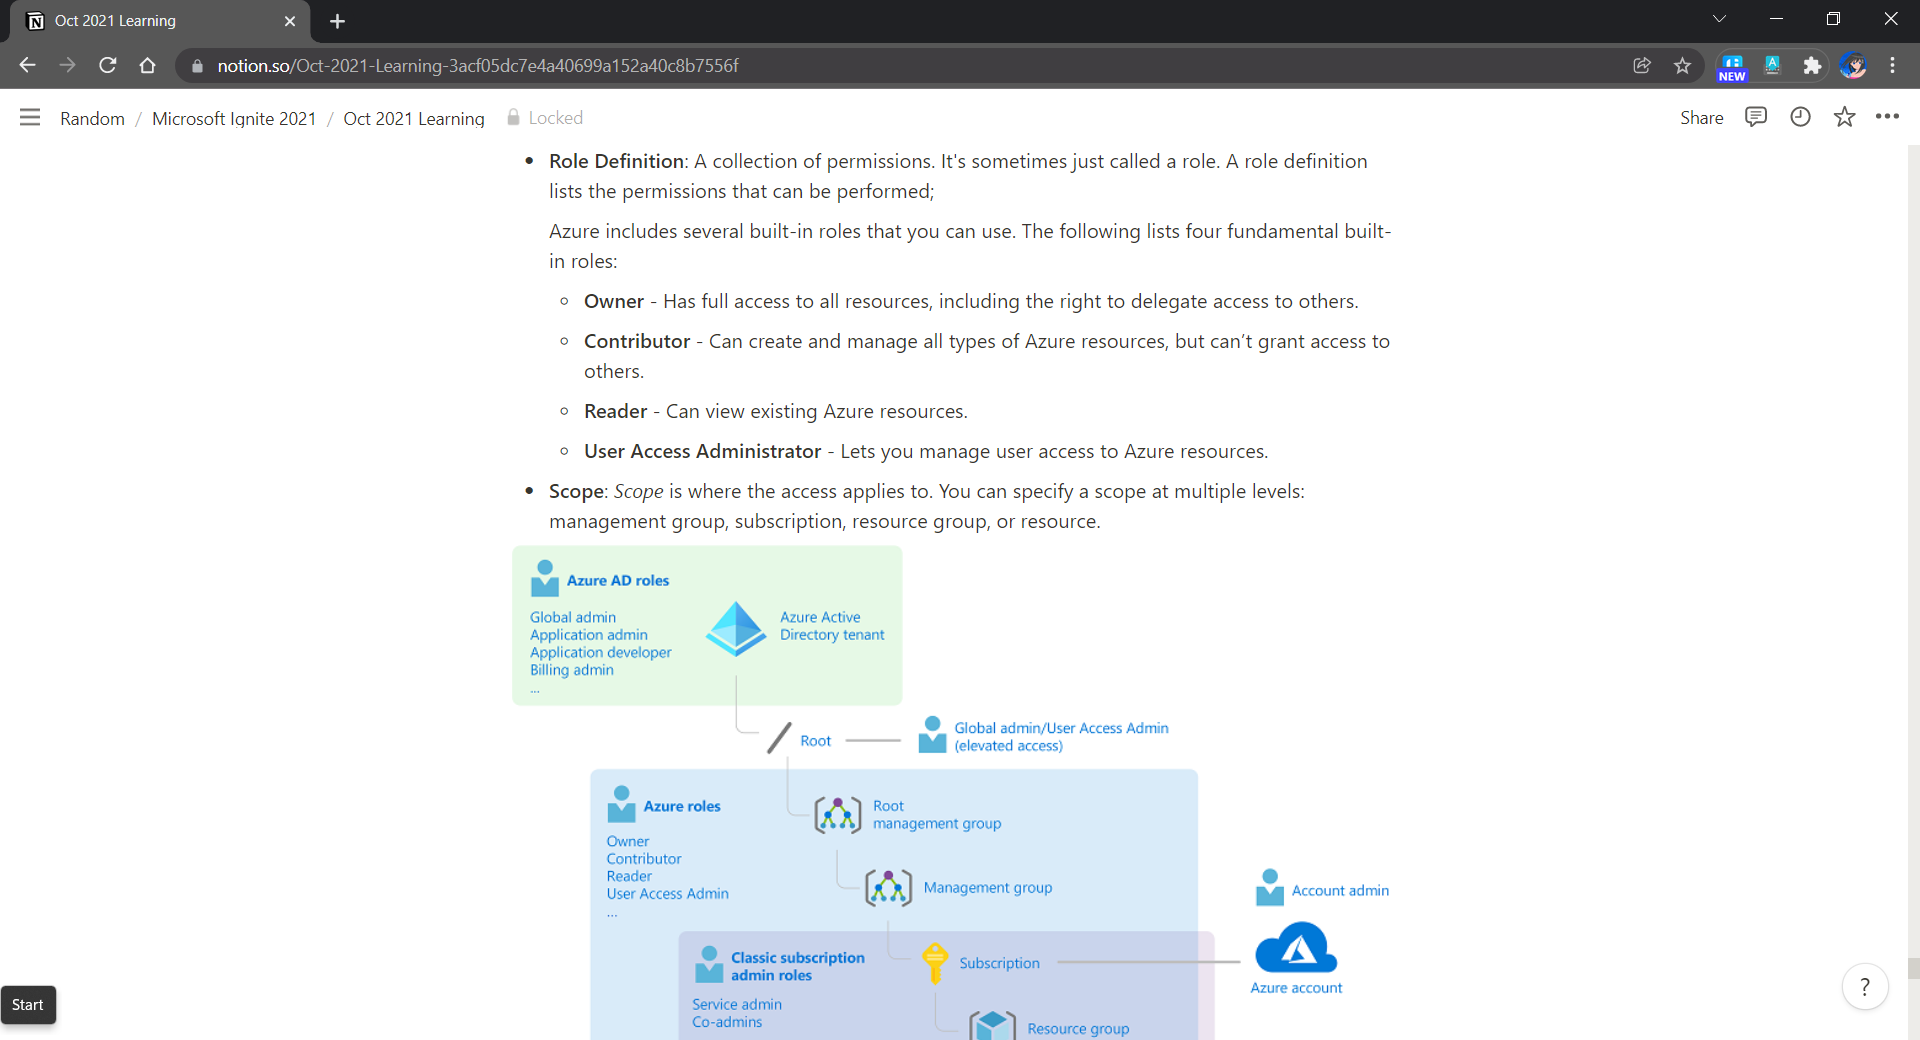
Notes taken when I was going through the learning materials on Microsoft Learn.
I use Notion to take notes. Notion is a great tool to keep our notes clean and organised. Taking notes helps me to do a last-minute quick revision.
Conclusion
In a fast-moving world, being able to learn new skills helps in our life. There are many ways to learn continuously in our life. Earning certificates by going through challenging exams is just one of the methods. You know what works for yourself, do more of it.