In our earlier post about setting up AWS Lambda, we understood that for Lambda which will be invoked by HTTP requests, we normally need API Gateway to handle incoming HTTP requests and route them to the appropriate Lambda function. Hence, the API Gateway is often used as a complementary service to manage and expose our Lambda functions to the outside world.
By default, AWS provides a custom domain name in the form of api-id.execute-api.region.amazonaws.com, as shown in the screnshot below.
This Lambda is deployed in Singapore and thus it is ap-southeast-1 for the region.
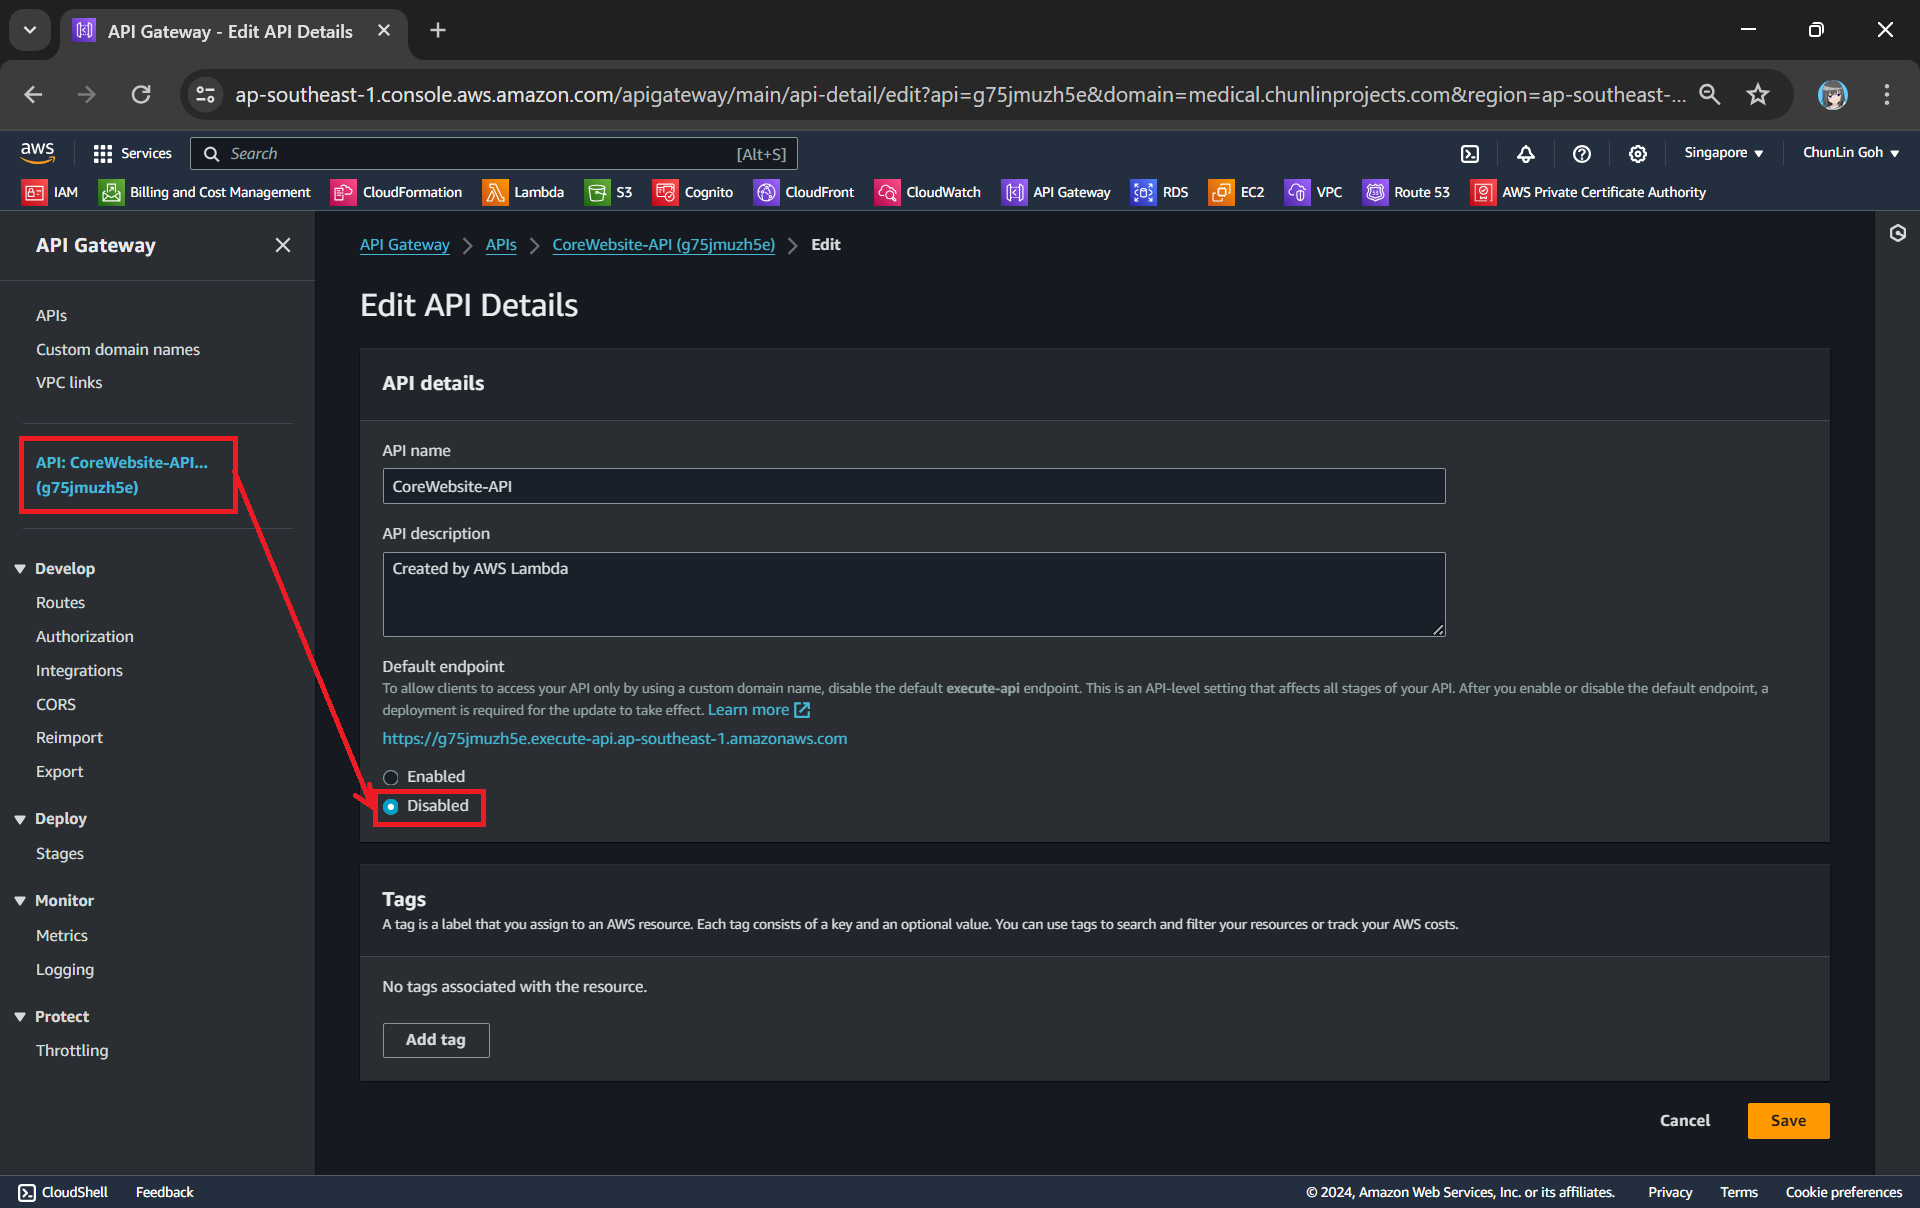
Usually, we would like to expose our API Gateway through a domain name that we own, rather than using the default domain provided, in order to enhance the visibility, security, and professionalism of our API, while also providing greater flexibility and control over its configuration and branding. In this article, we will show one of the available approaches.
Domain Registrar
We must have a registered Internet domain name before we can set up custom domain names for our API Gateway.
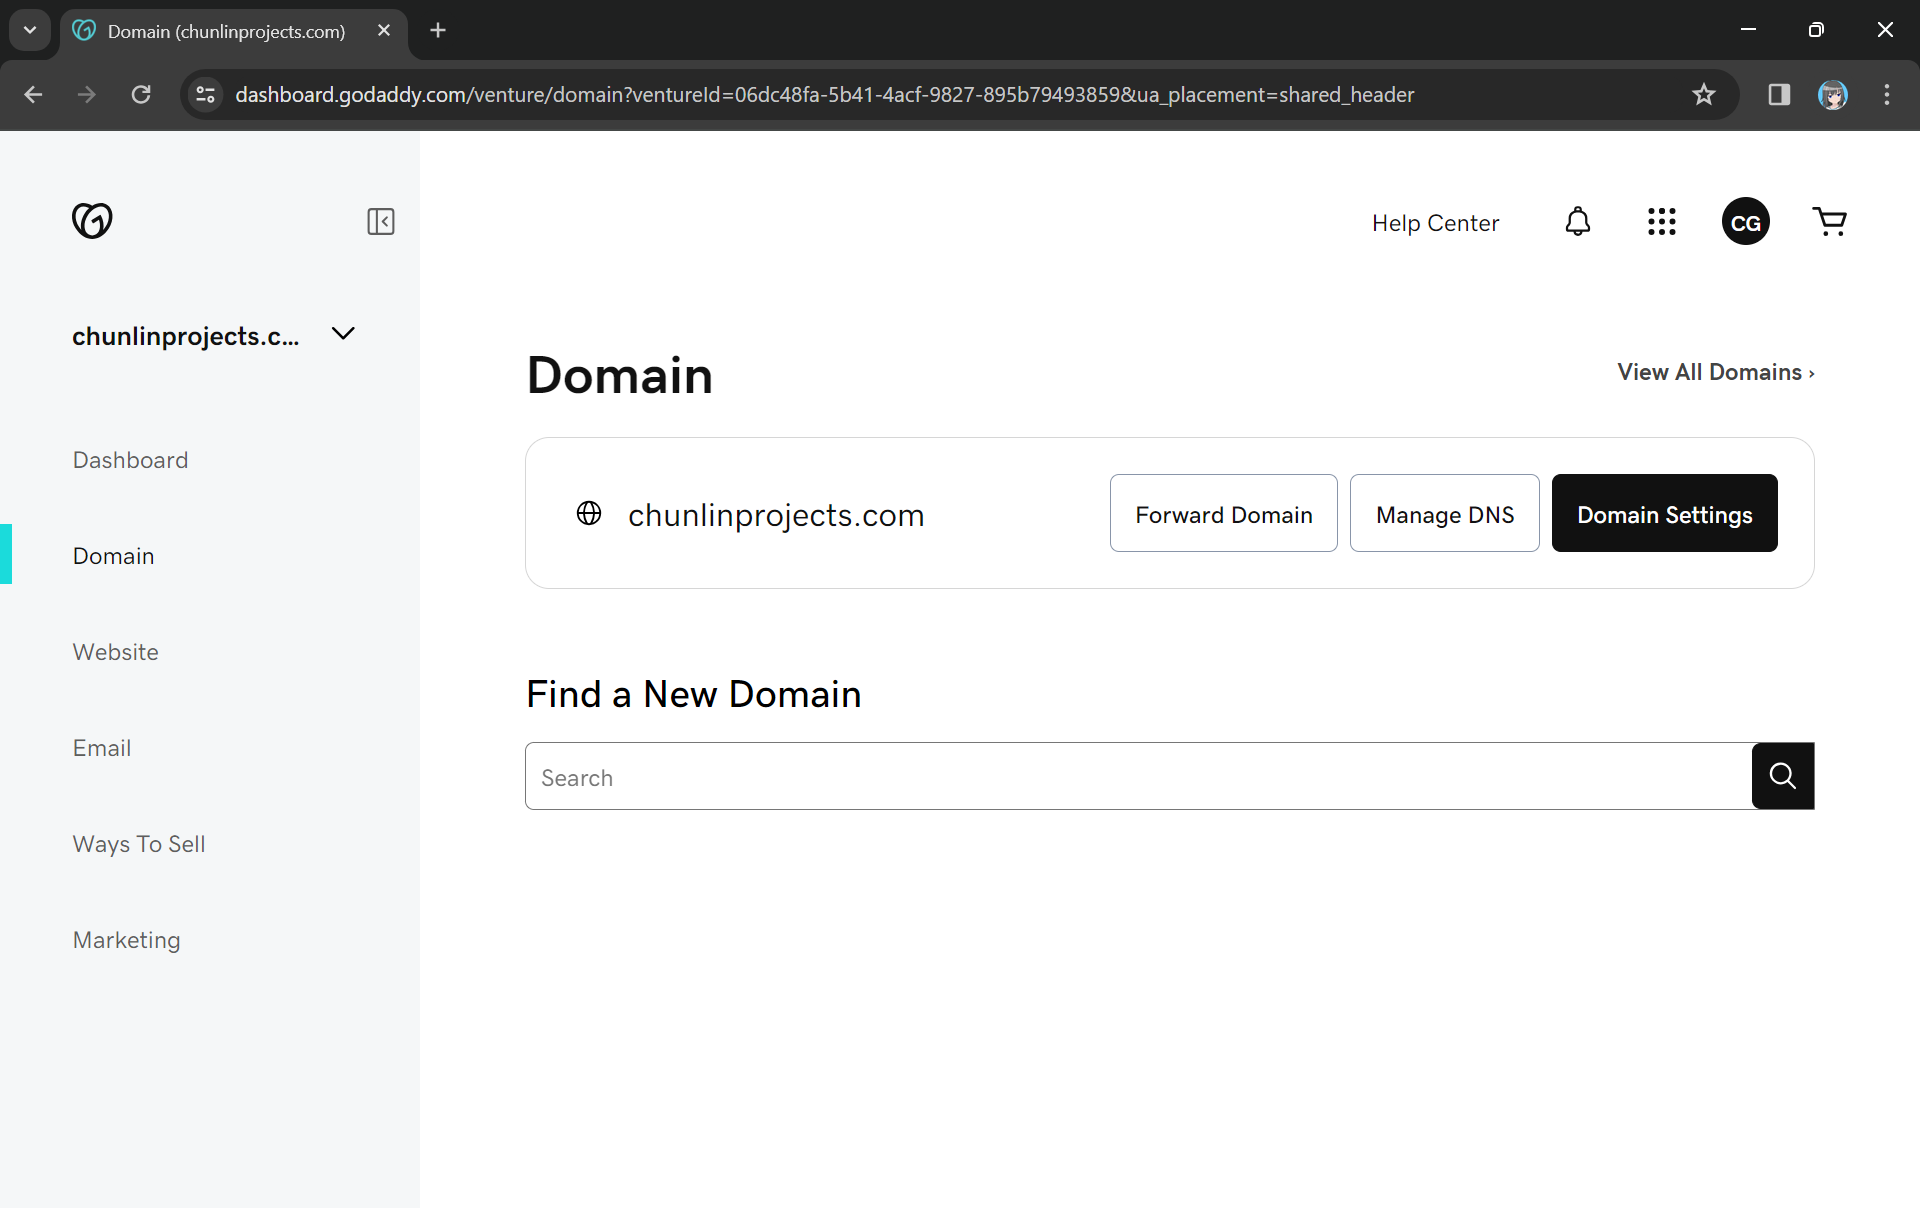
Previously, I have registered a domain name, chunlinprojects.com, on GoDaddy, one of the world’s largest domain registrars. Hence, I decided to create a subdomain called poker.chunlinprojects.com and then use it for my API Gateway.
My personal domain, chunlinprojects.com, on GoDaddy.
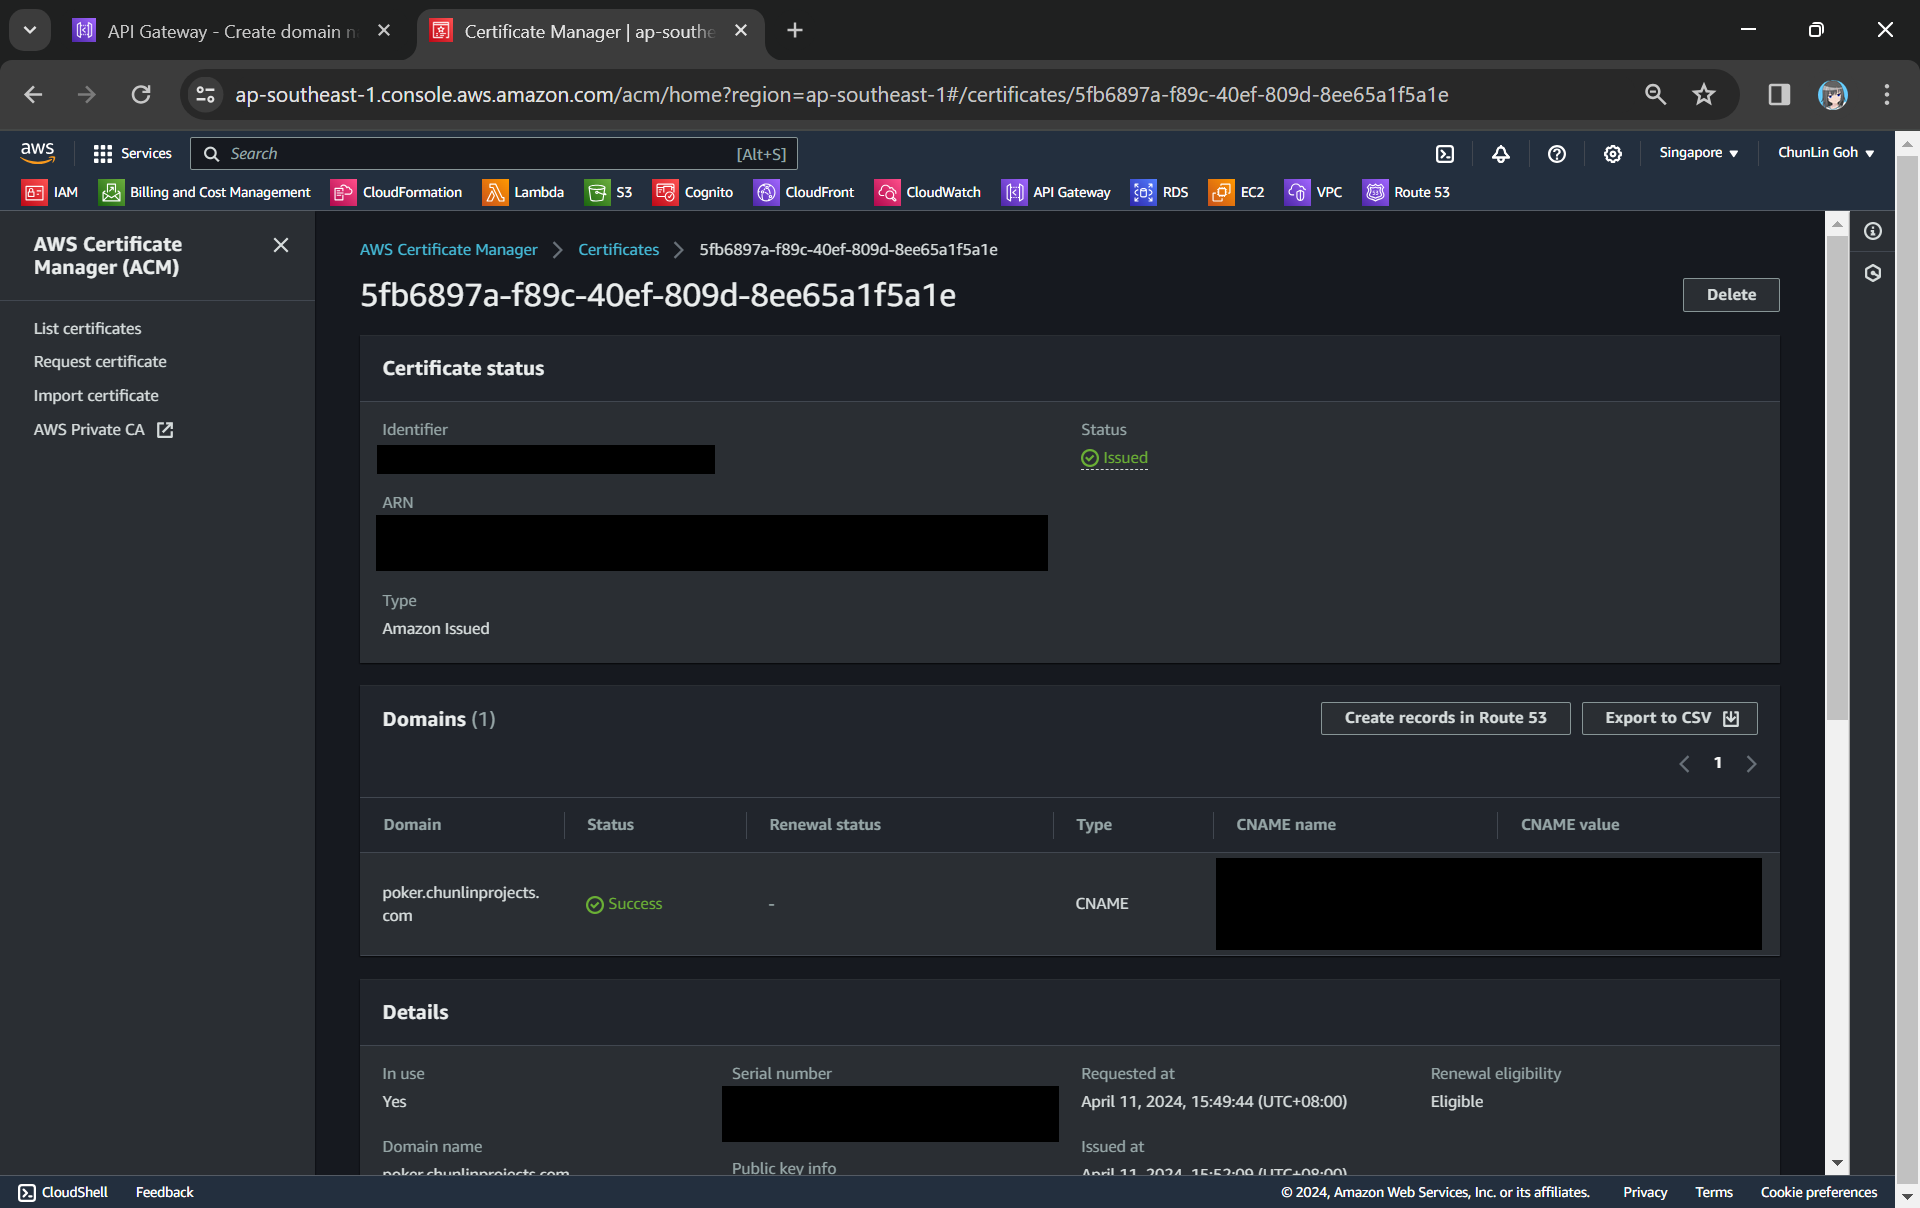
In the certificate request page, we need to specify the domain name. In my case, it should be poker.chunlinprojects.com. Once it is done, we will need to add a CNAME record to our domain registrar. Its status will only be “Success” after we have added the CNAME record successfully, as shown in the screenshot below.
We need to add the CNAME record under the “Domain” section to our domain registrar.
Route 53
As shown in the screenshot above, it is also possible to add the CNAME record to Route 53. So what is this Route 53 about?
Route 53 is Amazon Domain Name System (DNS) web service. It allows us to manage the DNS records for your domain, including A records, CNAME records, TXT records, and more. This is similar to what we can do on GoDaddy, so why do we need Route 53?
Route 53 is a better option because Route 53 provides a user-friendly interface for adding, updating, and deleting these records. In addition, Route 53 supports alias records, which can be used to map our custom domain directly to the API Gateway endpoint. Alias records work similarly to CNAME records but with the advantage of being resolved by Route 53 without incurring additional DNS lookup costs. This can improve the performance and reliability of our API Gateway by reducing latency and DNS resolution times.
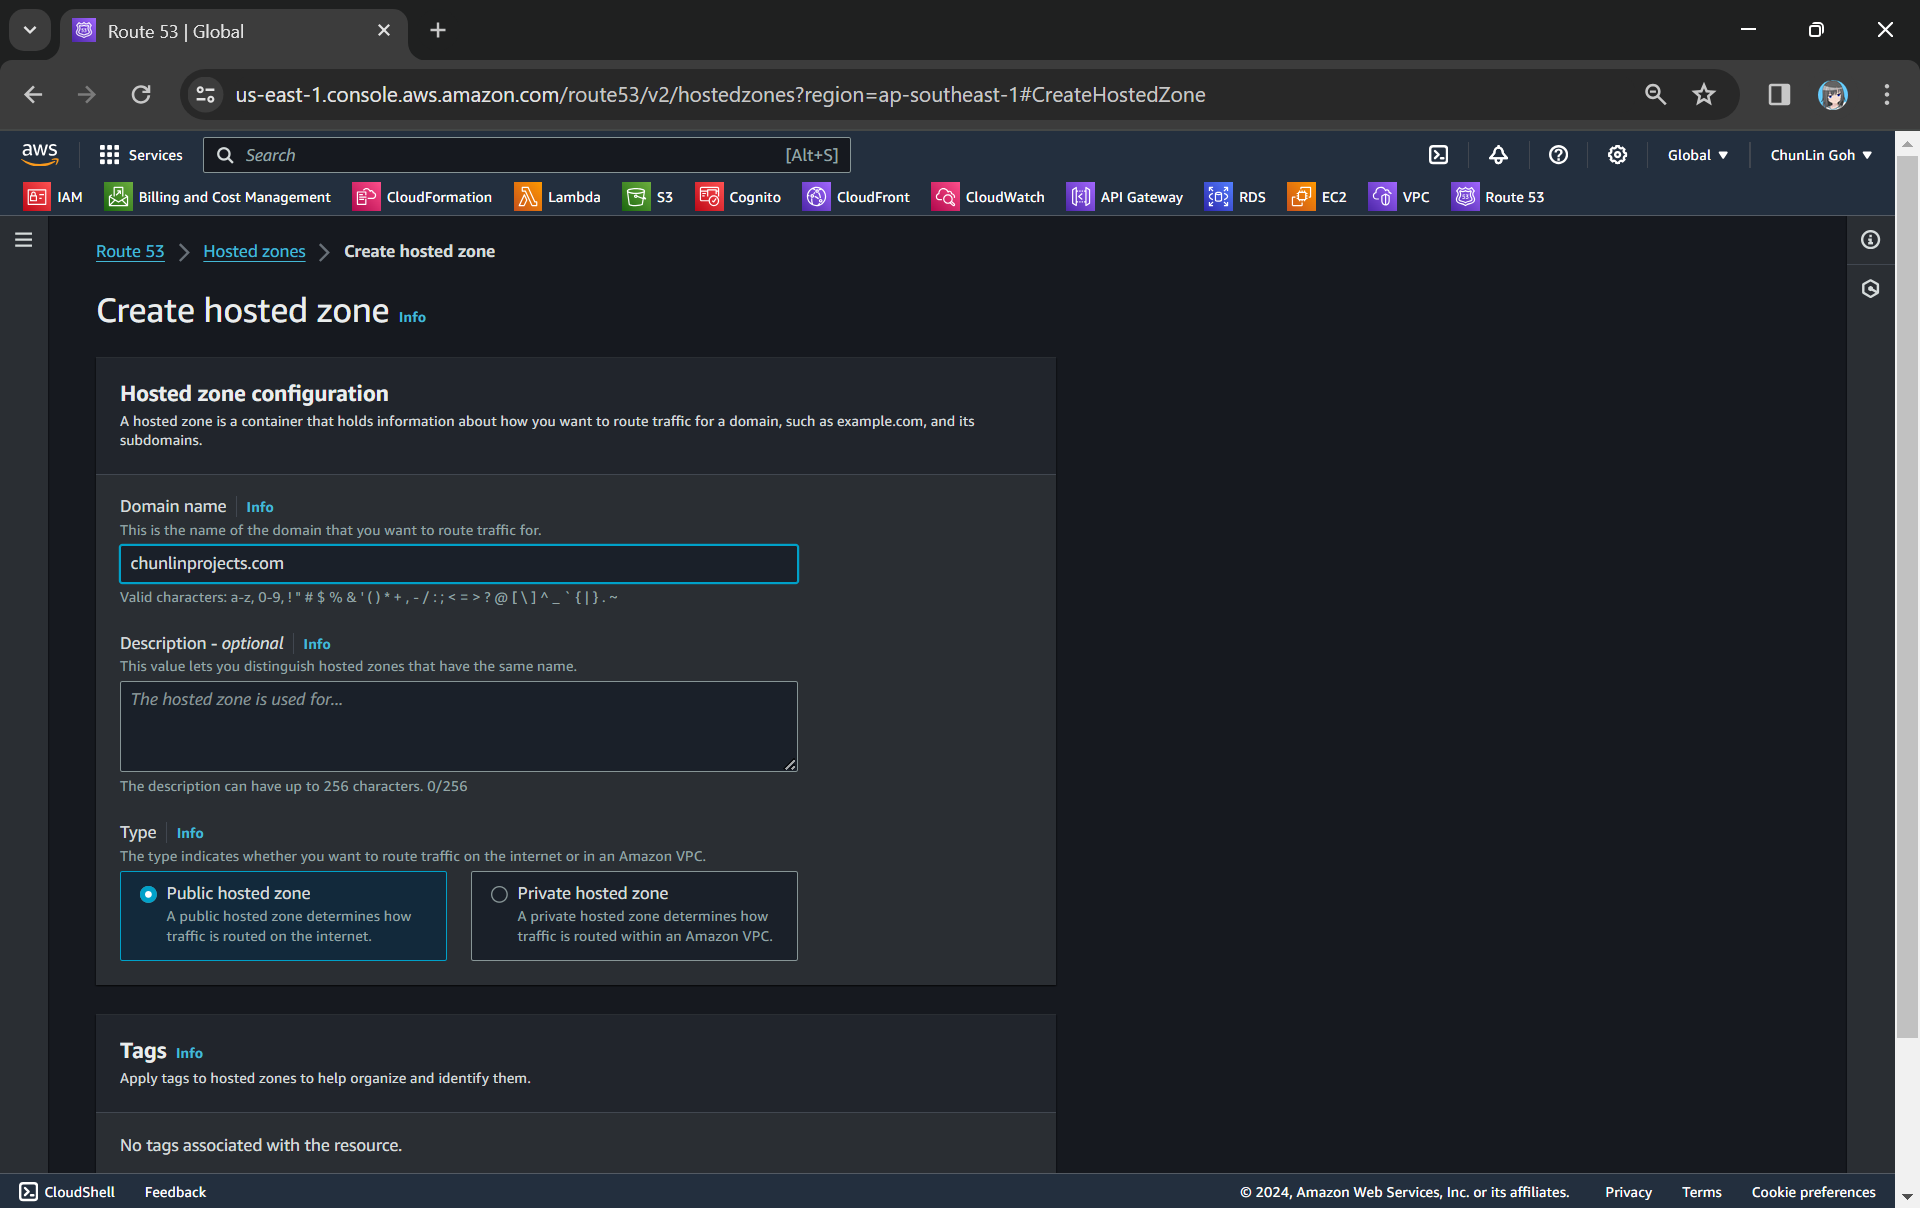
To setup Route 53 for our custom domain, we first need to create a Hosted Zone in Route 53 for our domain, as shown in the screenshot below.
Creating a new hosted zone for our custom domain.
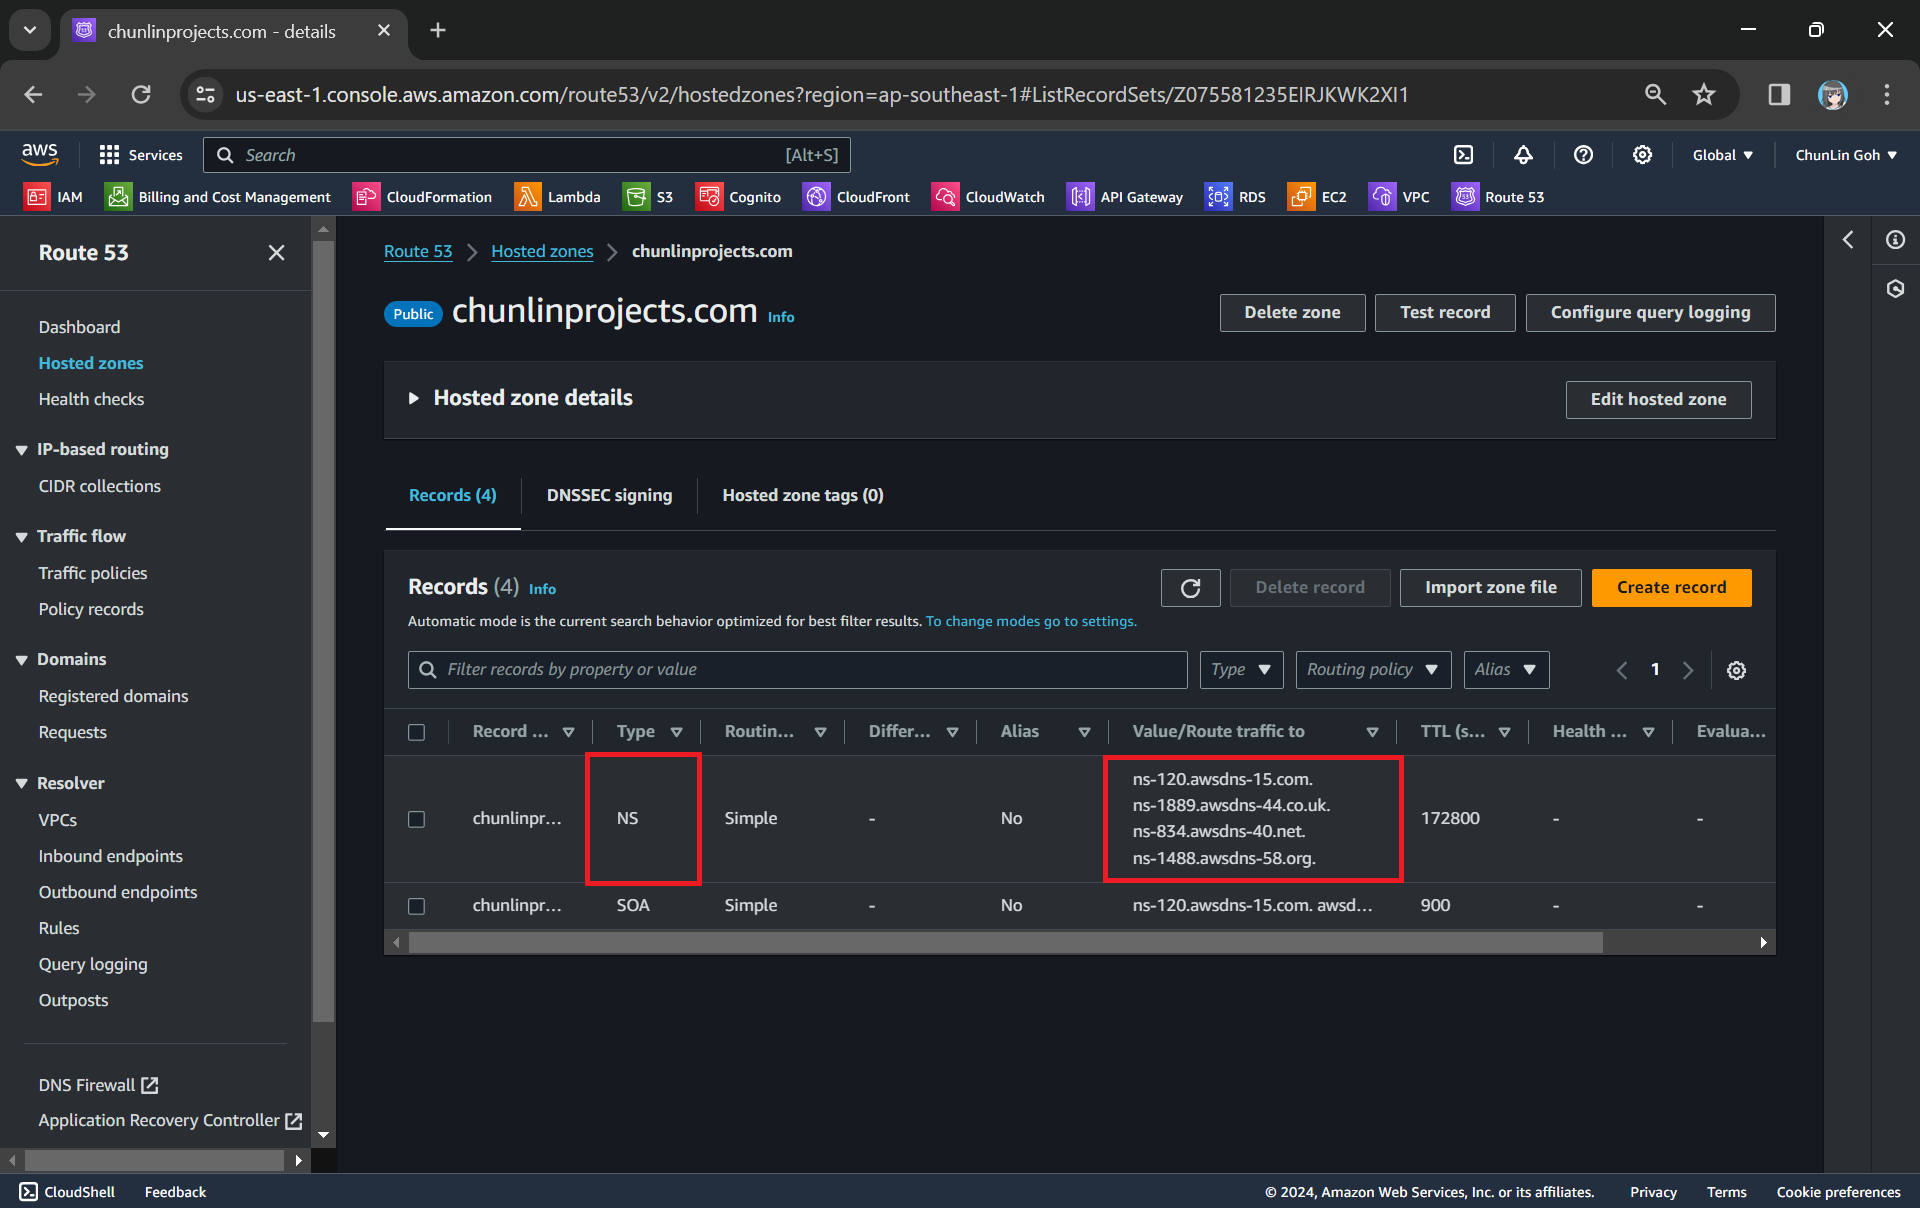
After getting the hosted zone created, we will be able to get the list of name servers that we can use, as shown in the following screenshot.
NS (Name Server) records in Route 53 are used to specify the name servers responsible for answering DNS queries for our domain.
Since we want to use Route 53 name servers for DNS resolution, we need to update the (NS) records in GoDaddy DNS settings to point to the Route 53 name servers.
The name servers in GoDaddy for my domain have been updated to use Route 53 ones.
Now we can add the CNAME record earlier in our Route 53 hosted zone too.
The CNAME record required by the ACM certificate has been added to Route 53.
Custom Domain Name in API Gateway
After we have both ACM and Route 53 setup completely, we can move on to configure our custom domain name for the API Gateway.
The ACM certificate we created earlier will be available as one of the options.
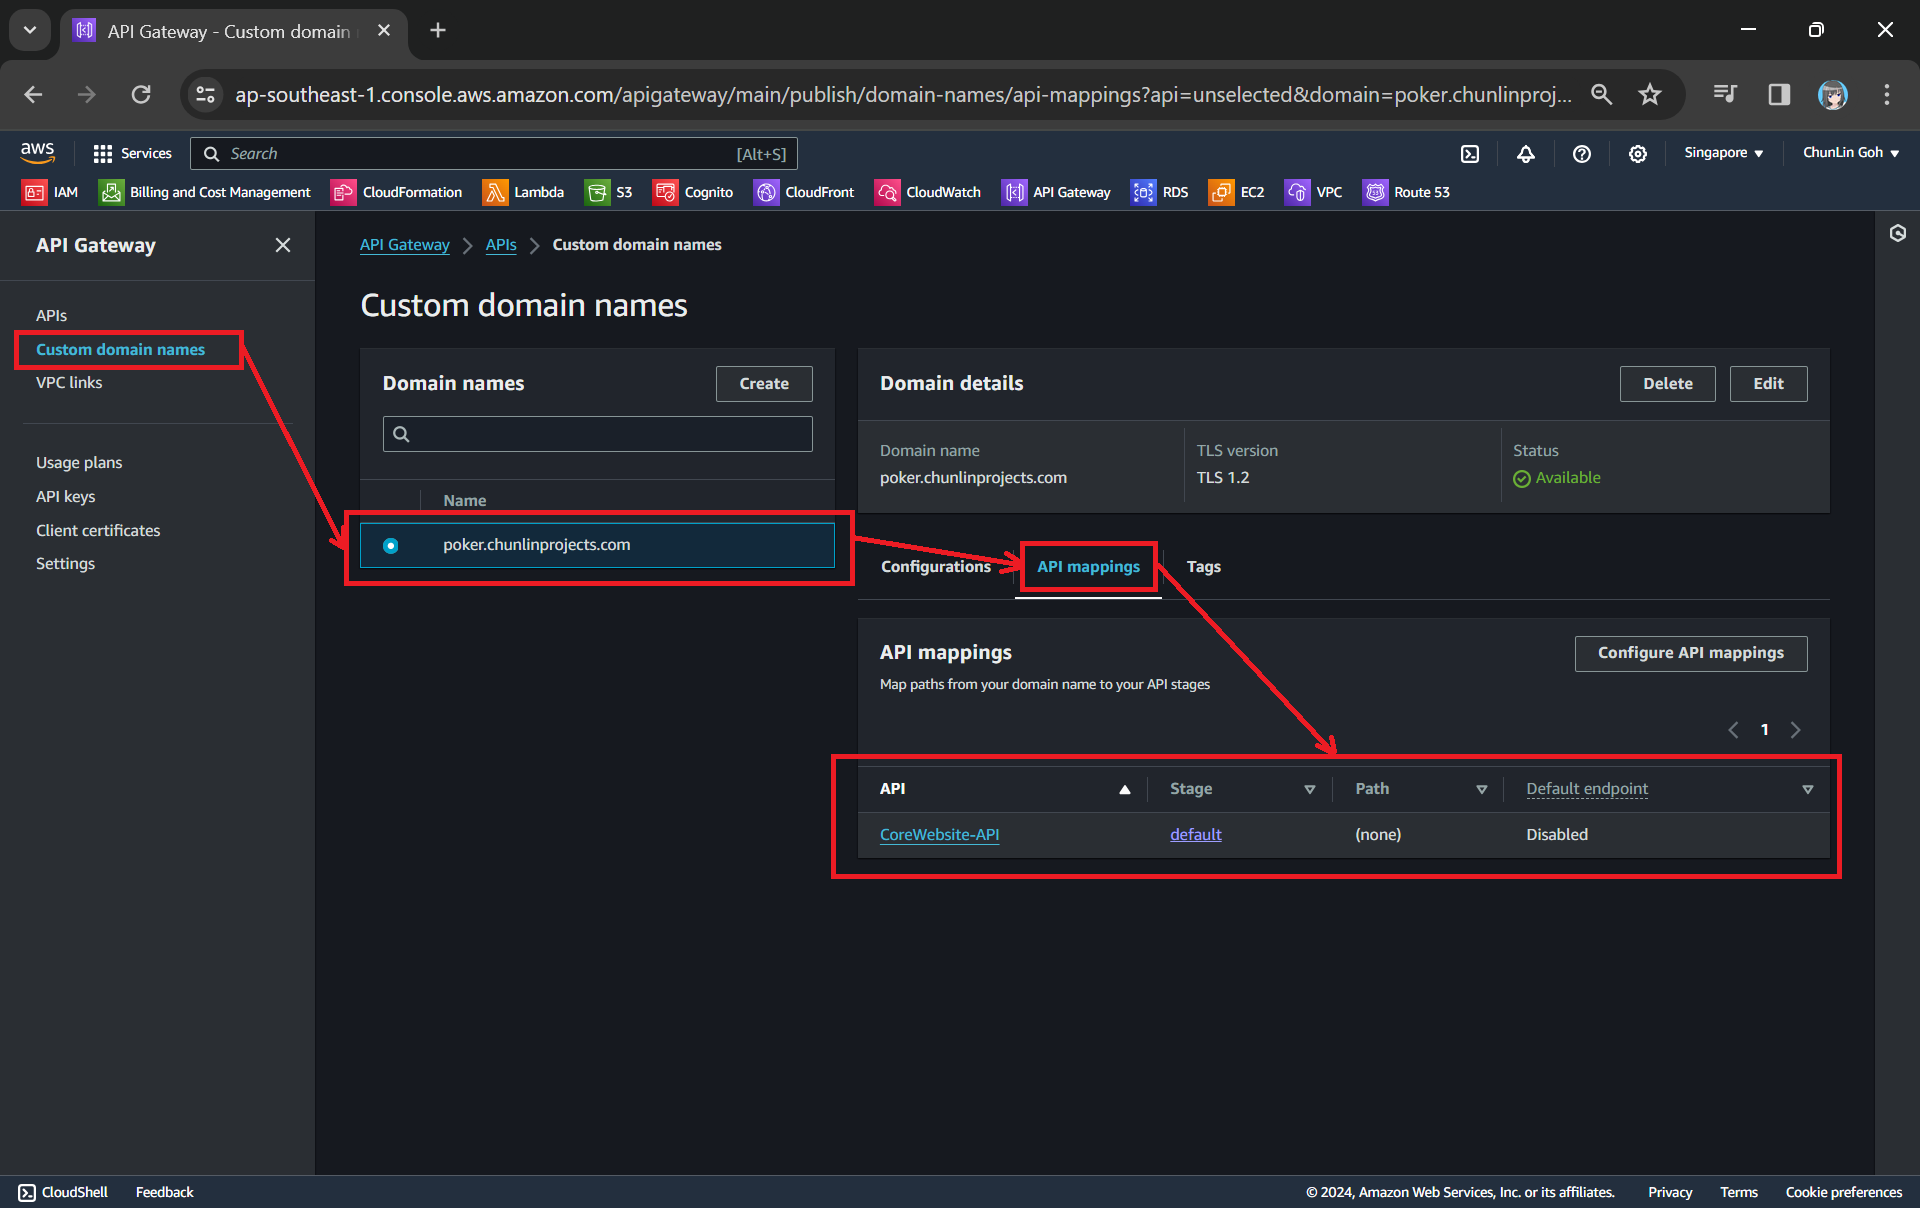
Next, we use API mappings to connect API stages to the custom domain name. For more information about how API mapping is configured, please read the official AWS documentation.
We have mapped the custom domain to the API Gateway that we created.
If you ever encounter an error message saying “Not Found” as shown in the screenshot below, it is possible that the API mapping is not done properly or there is a typo in the Path.
Error message: { “message”: “Not Found” }
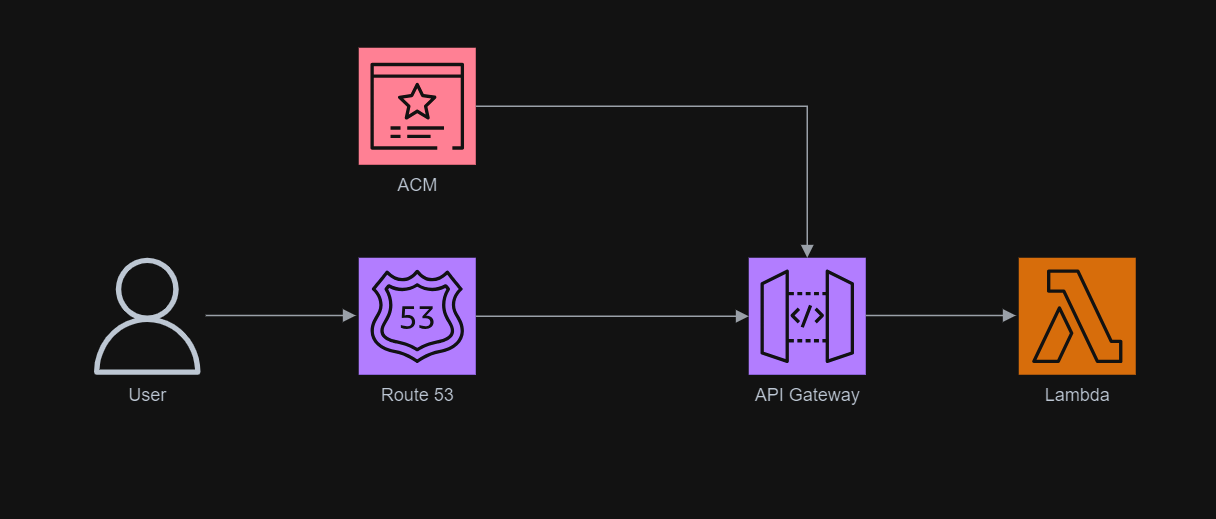
The entire infrastructure that we have gone through in this article basically can be described in the following diagram.
We have a static website for marketing purpose hosting on Amazon S3 buckets. S3 offers a pay-as-you-go model, which means we only pay for the storage and bandwidth used. This can be significantly cheaper than traditional web hosting providers, especially for websites with low traffic.
However, S3 is designed as a storage service, not a web server. Hence, it lacks many features found in common web hosting providers. We thus decide to use AWS Lambda to power our website.
AWS Lambda and .NET 6
AWS Lambda is a serverless service that runs code for backend service without the need to provision or manage servers. Building serverless apps means that we can focus on our web app business logic instead of worrying about managing and operating servers. Similar to S3, Lambda helps to reduce overhead and lets us reclaim time and energy that we can spent on developing our products and services.
So as the beginning, we will setup the following simple architecture to retrieve website content from S3 via Lambda.
Simple architecture to host our website using Lambda and S3.
API Gateway
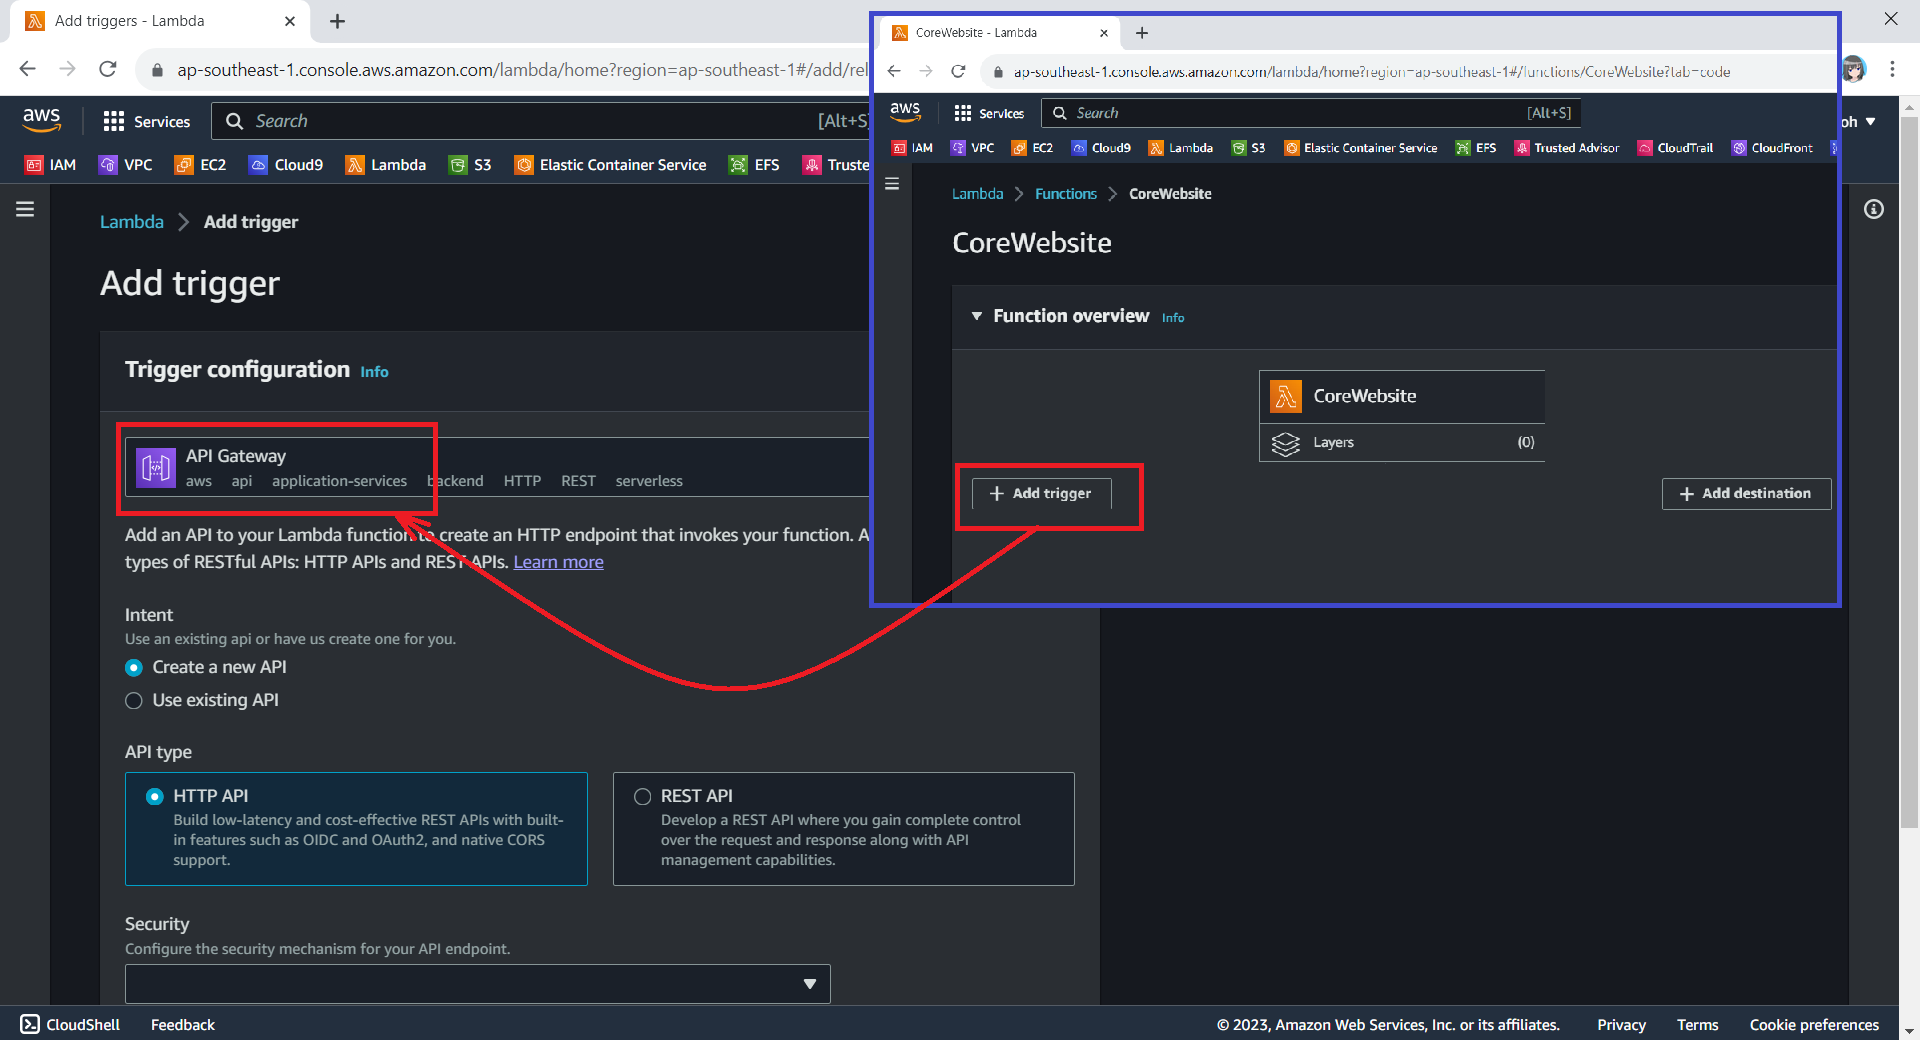
When we are creating a new Lambda service, we have the option to enable the function URL so that a HTTP(S) endpoint will be assigned to our Lambda function. With the URL, we can then use it to invoke our function through, for example, an Internet browser directly.
The Function URL feature is an excellent choice when we seek rapid exposure of our Lambda function to the wider public on the Internet. However, if we are in search of a more comprehensive solution, then opting for API Gateway in conjunction with Lambda may prove to be the better choice.
We can configure API Gateway as a trigger for our Lambda function.
Using API Gateway also enables us to invoke our Lambda function with a secure HTTP endpoint. In addition, it can do a bit more, such as managing large volumes of calls to our function by throttling traffic and automatically validating and authorising API calls.
Keeping Web Content in S3
Now, we will create a new S3 bucket called “corewebsitehtml” to store our web content files.
We then can upload our HTML file for our website homepage to the S3 bucket.
We will store our homepage HTML in the S3 for Lambda function to retrieve it later.
Retrieving Web Content from S3 with C# in Lambda
With our web content in S3, the next issue will be retrieving the content from S3 and returning it as response via the API Gateway.
According to performance evaluation, even though C# is the slowest on a cold start, it is one of the fastest languages if few invocations go one by one.
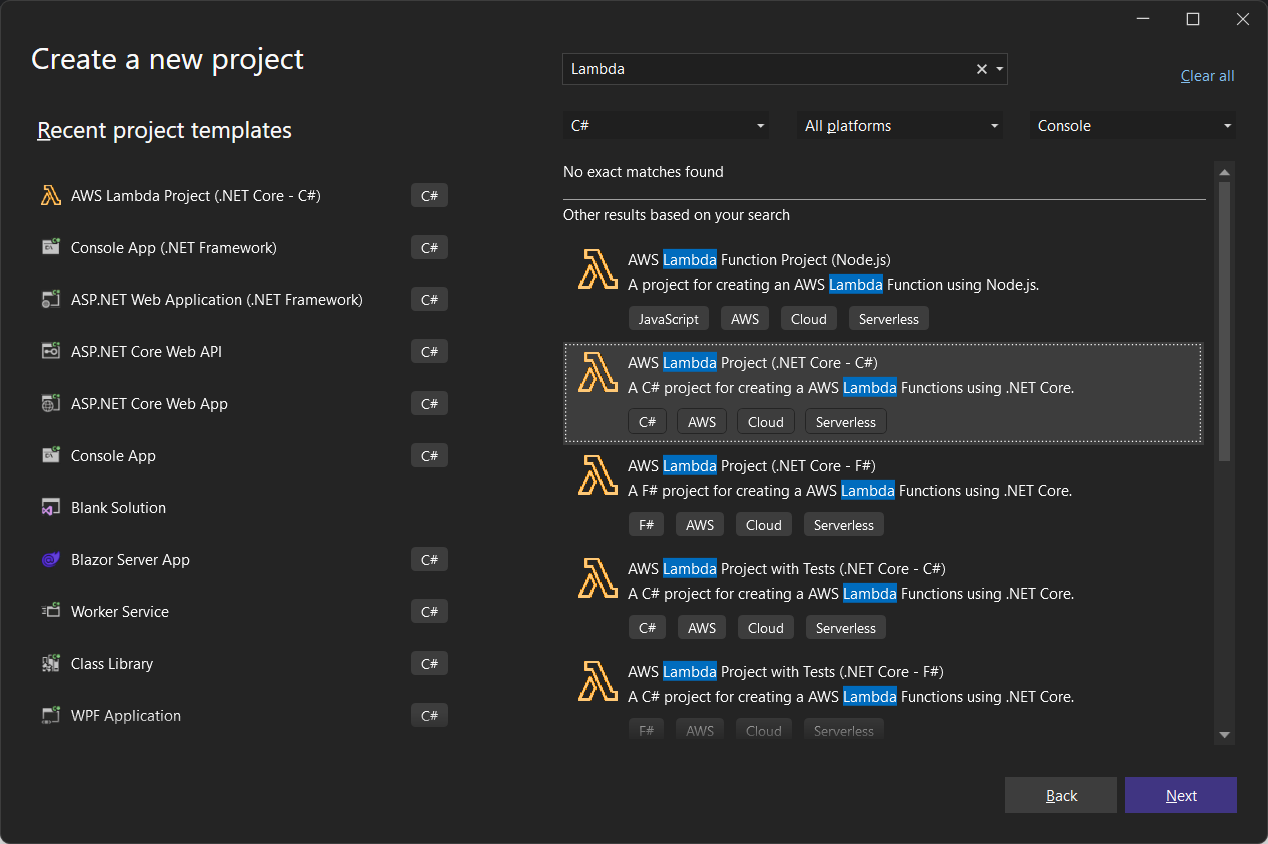
The code editor on AWS console does not support the .NET 6 runtime. Thus, we have to install the AWS Toolkit for Visual Studio, so that we can easily develop, debug, and deploy .NET applications using AWS, including the AWS Lambda.
Here, we will use the AWS SDK for reading the file from S3 as shown below.
As shown in the code above, we first need to specify the region of our S3 Bucket, which is Asia Pacific (Singapore). After that, we also need to specify our bucket name “corewebsitehtml” and the key of the file which we are going to retrieve the web content from, i.e. “index.html”, as shown in the screenshot below.
Getting file key in S3 bucket.
Deploy from Visual Studio
After ew have done the coding of the function, we can right click on our project in the Visual Studio and then choose “Publish to AWS Lambda…” to deploy our C# code to Lambda function, as shown in the screenshot below.
Publishing our function code to AWS Lambda from Visual Studio.
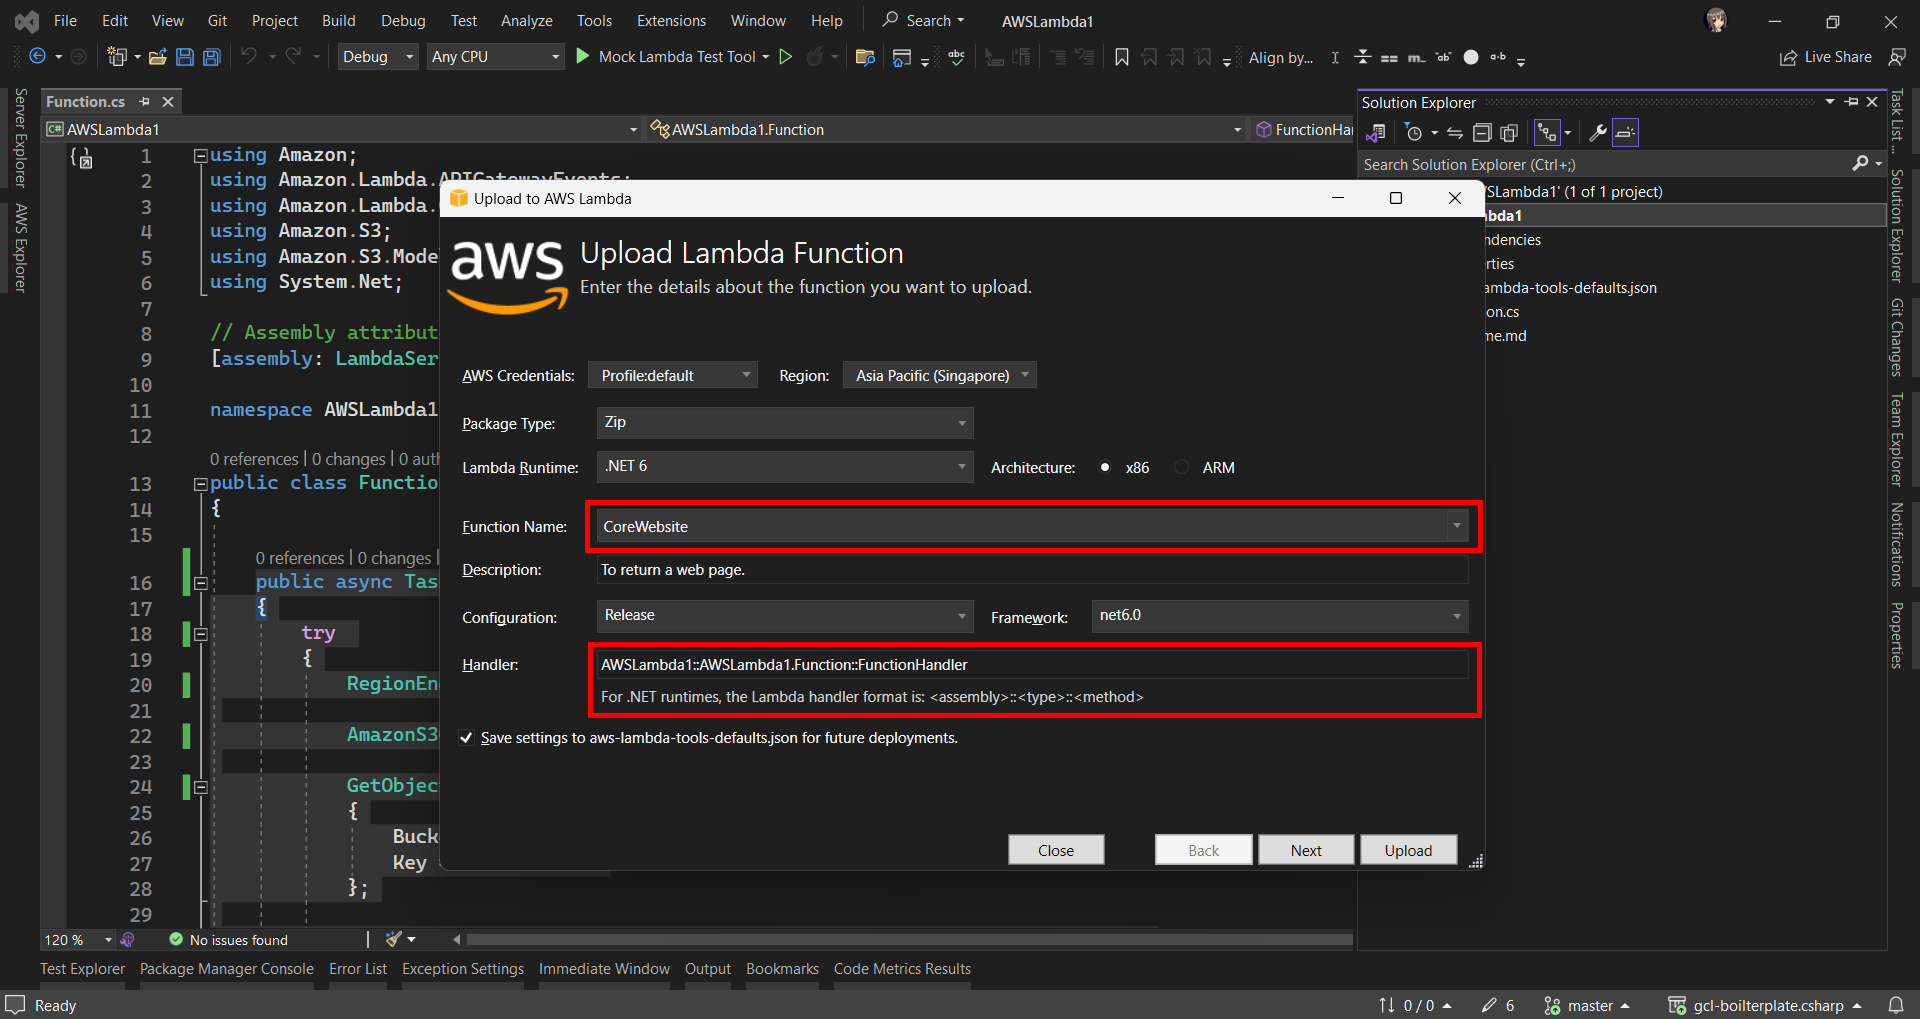
After that, we will be prompted to key in the name of the Lambda function as well as the handler in the format of <assembly>::<type>::<method>.
Then we are good to proceed to deploy our Lambda function.
Logging with .NET in Lambda Function
Now when we hit the URL of the API Gateway, we will receive a HTTP 500 internal server error. To investigate, we need to check the error logs.
Lambda logs all requests handled by our function and automatically stores logs generated by our code through CloudWatch Logs. By default, info level messages or higher are written to CloudWatch Logs.
Thus, in our code above, we can use the Logger to write a warning message if the file is not found or there is an error retrieving the file.
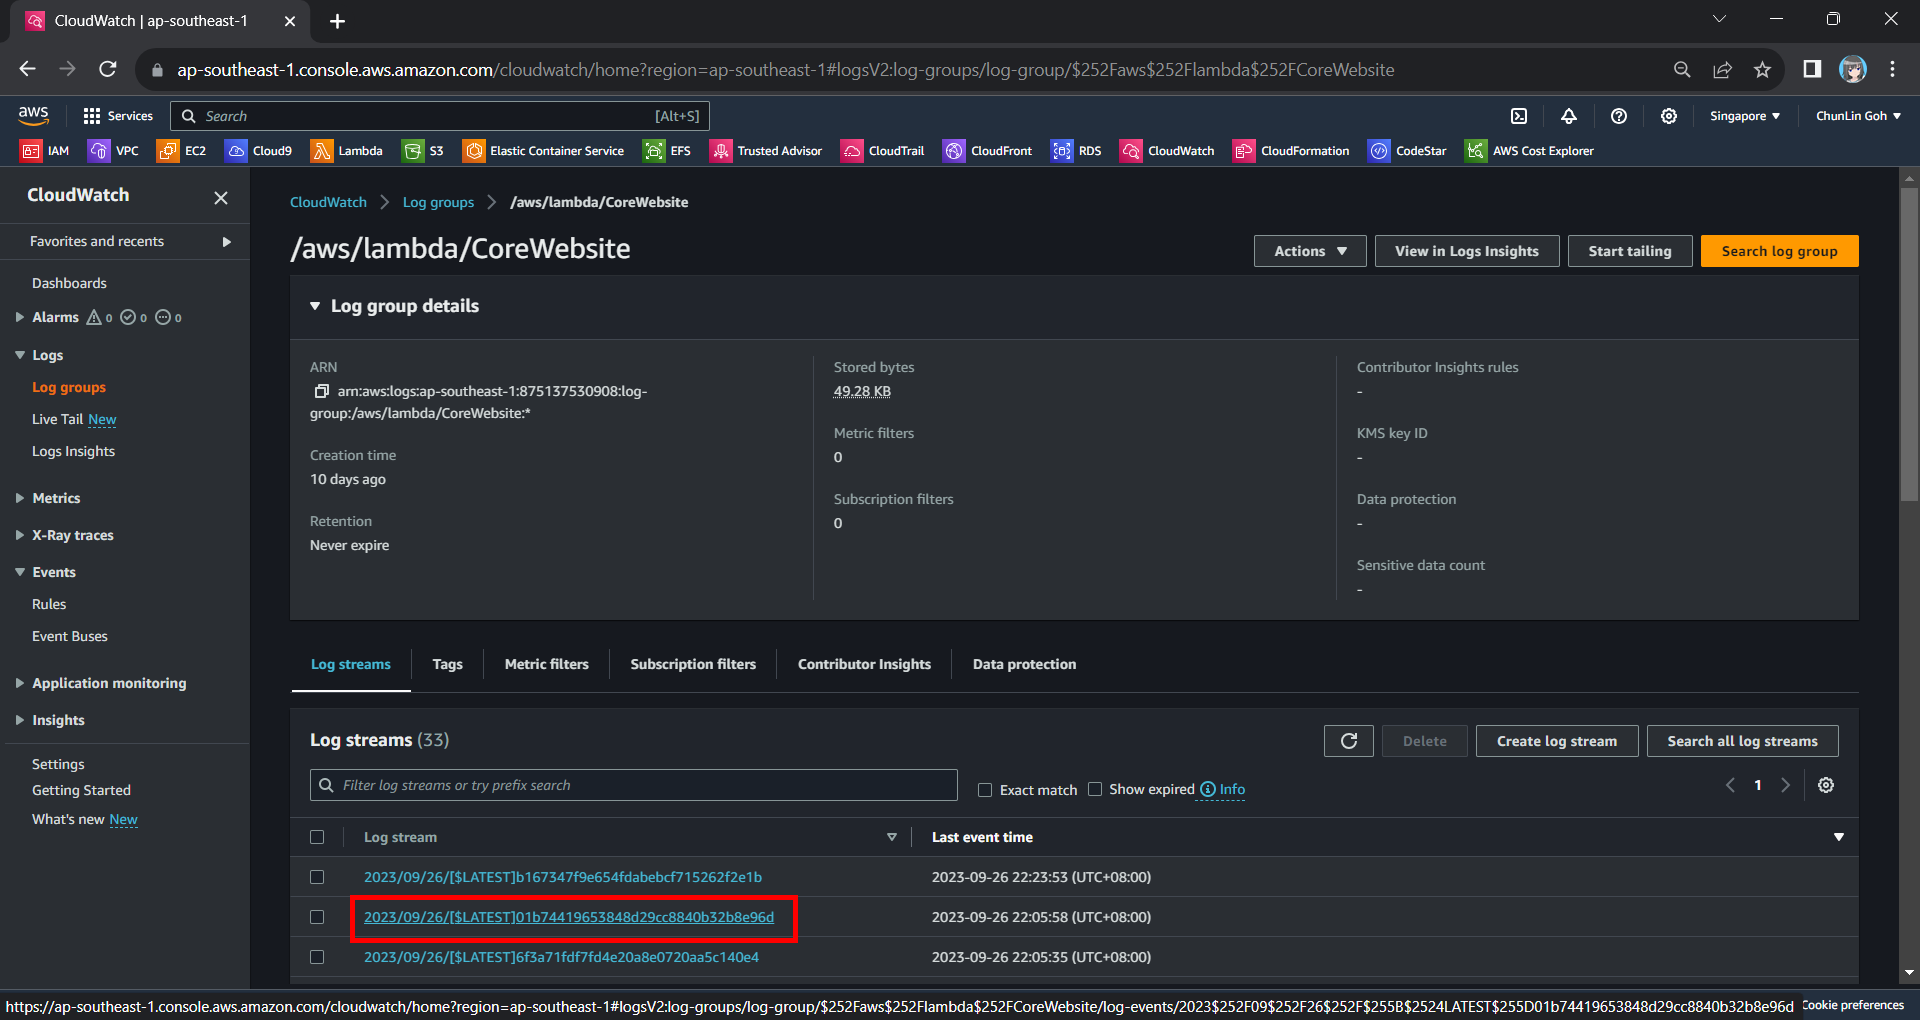
Hence, now if we access our API Gateway URL now, we should find a warning log message in our CloudWatch, as shown in the screenshot below. The page can be accessed from the “View CloudWatch logs” button under the “Monitor” tab of the Lambda function.
Viewing the log streams of our Lambda function on CloudWatch.
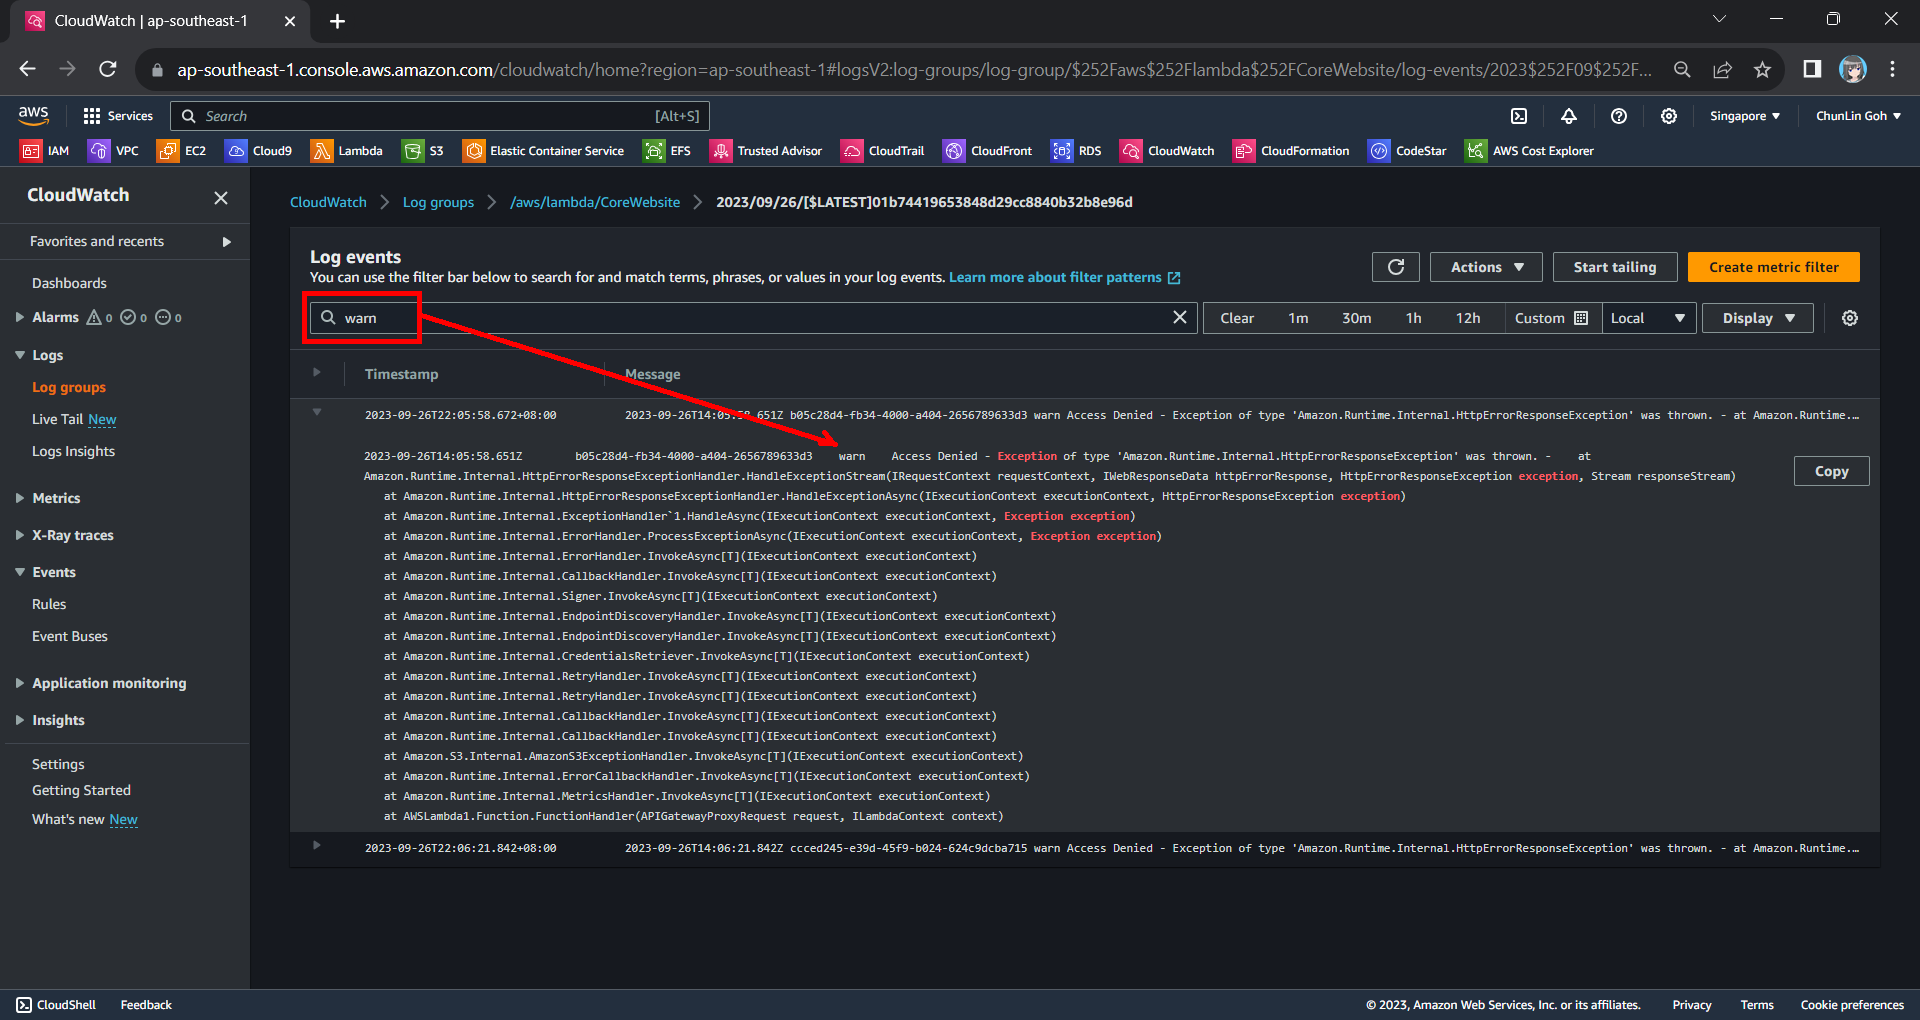
From one of the log streams, we can filter the results to list only those with the keyword “warn”. From the log message, we then know that our Lambda function has access denied from accessing our S3 bucket. So, next we will setup the access accordingly.
Connecting Lambda and S3
Since both our Lambda function and S3 bucket are in the same AWS account, we can easily grant the access from the function to the bucket.
Step 1: Create IAM Role
By default, Lambda creates an execution role with minimal permissions when we create a function in the Lambda console. So, now we first need to create an AWS Identity and Access Management (IAM) role for the Lambda function that also grants access to the S3 bucket.
In the IAM homepage, we head to the Access Management > Roles section to create a new role, as shown in the screenshot below.
Click on the “Create role” button to create a new role.
In the next screen, we will choose “AWS service” as the Trusted Entity Type and “Lambda” as the Use Case so that Lambda function can call AWS services like S3 on our behalf.
Select Lambda as our Use Case.
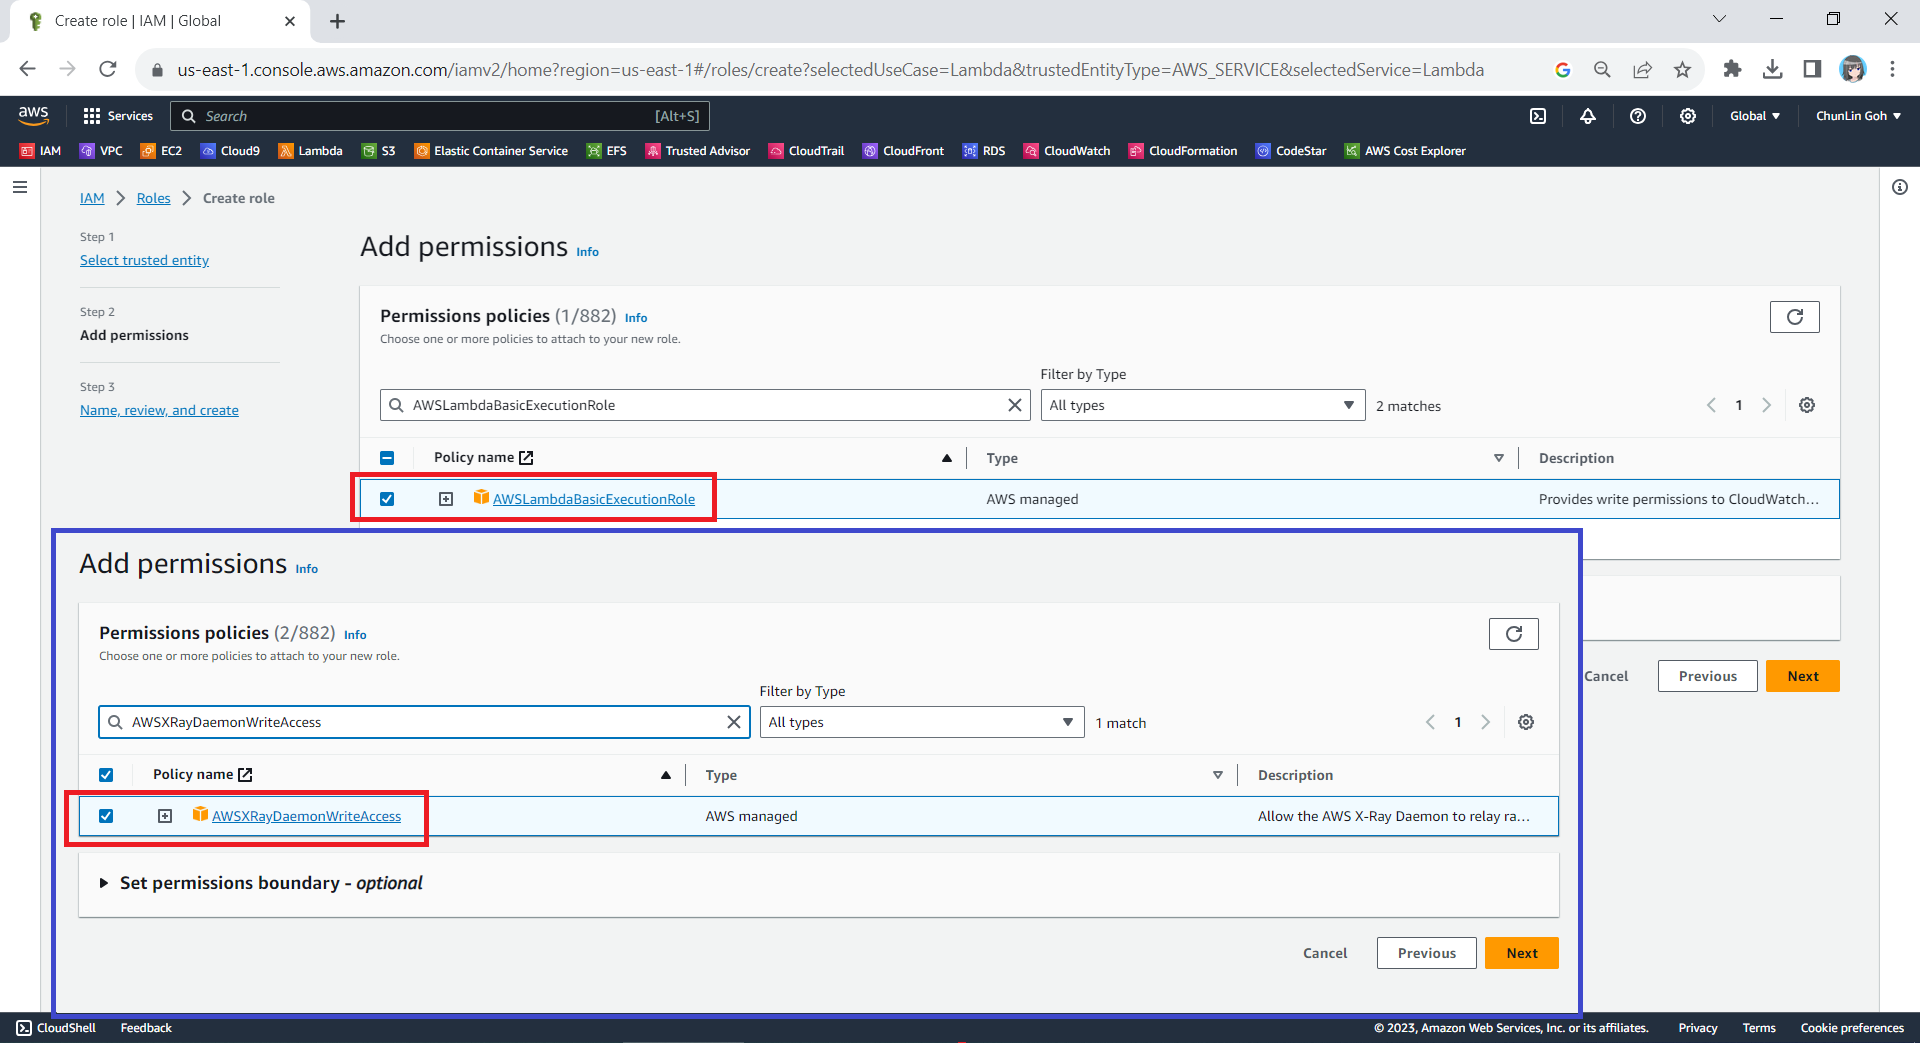
Next, we need to select the AWS managed policies AWSLambdaBasicExecutionRole and AWSXRayDaemonWriteAccess.
Attaching two policies to our new role.
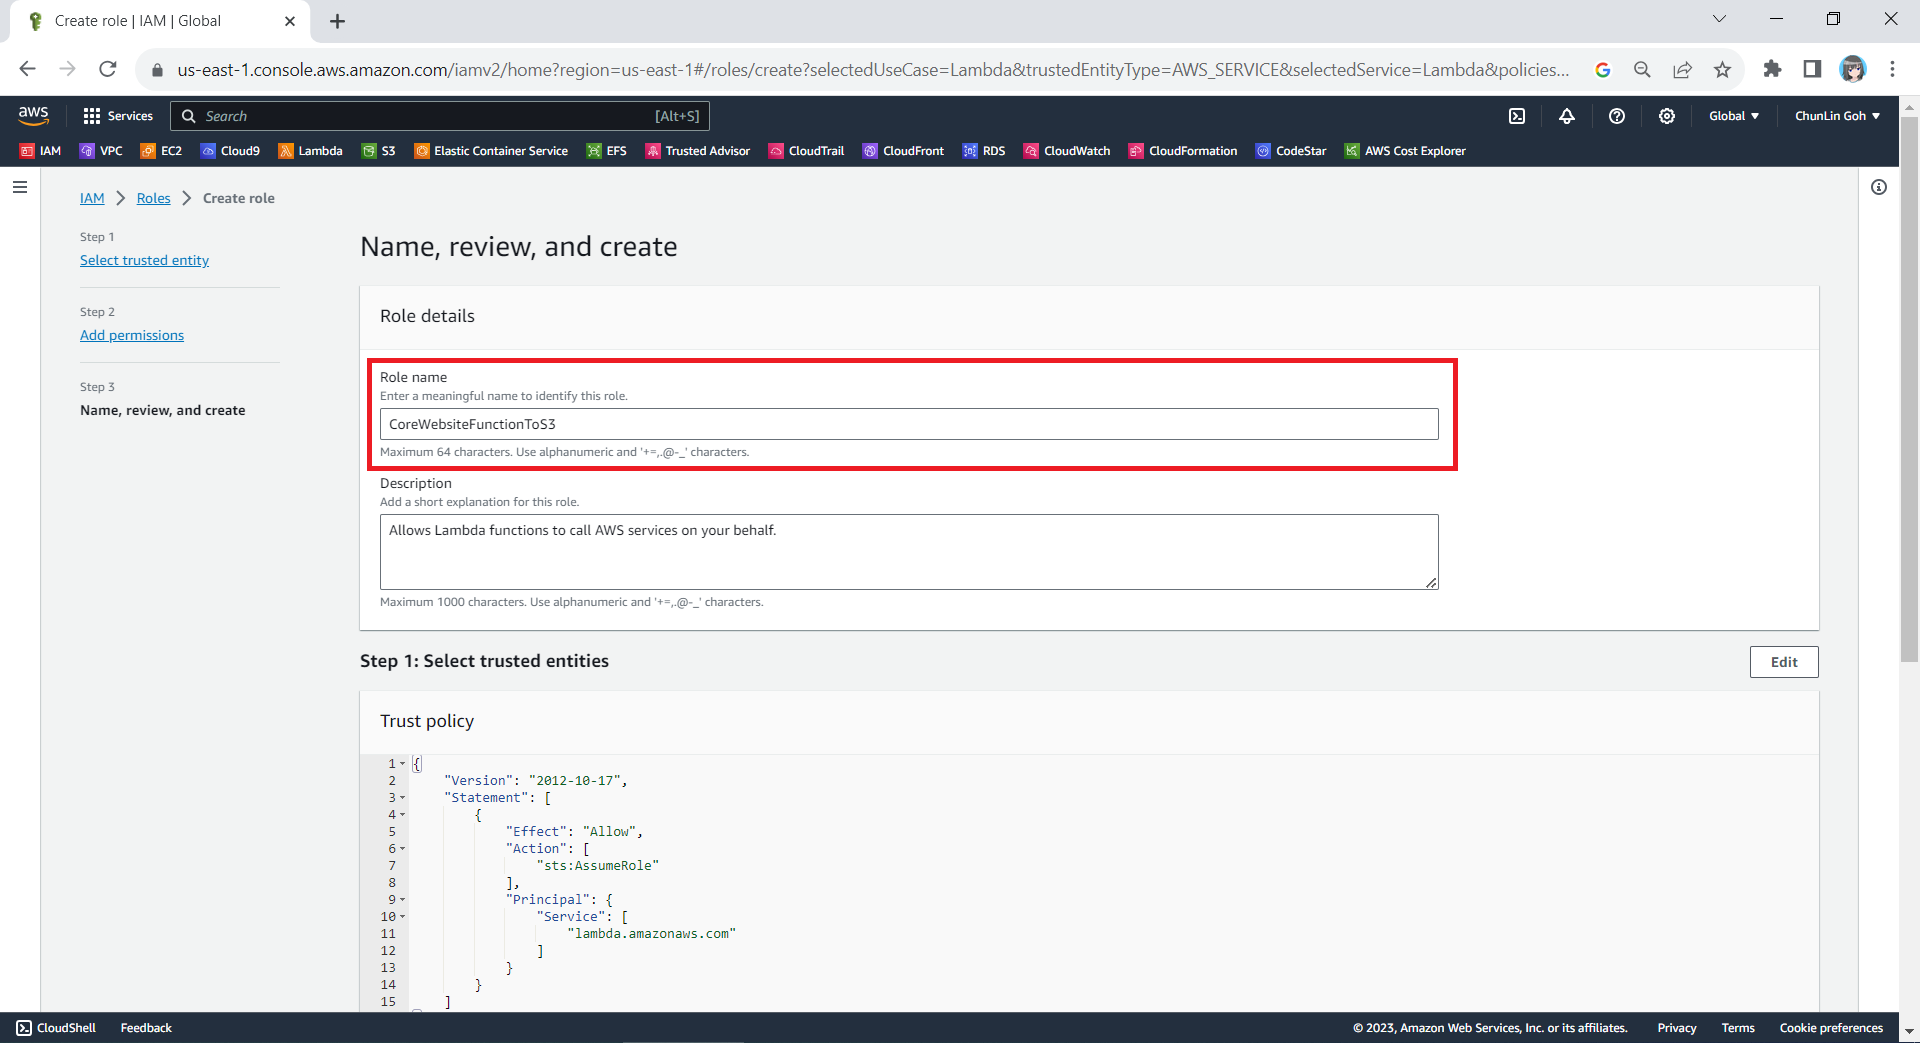
Finally, in the Step 3, we simply need to key in a name for our new role and proceed, as shown in the screenshot below.
We will call our new role “CoreWebsiteFunctionToS3”.
Step 2: Configure the New IAM Role
After we have created this new role, we can head back to the IAM homepage. From the list of IAM roles, we should be able to see the role we have just created, as shown in the screenshot below.
Search for the new role that we have just created.
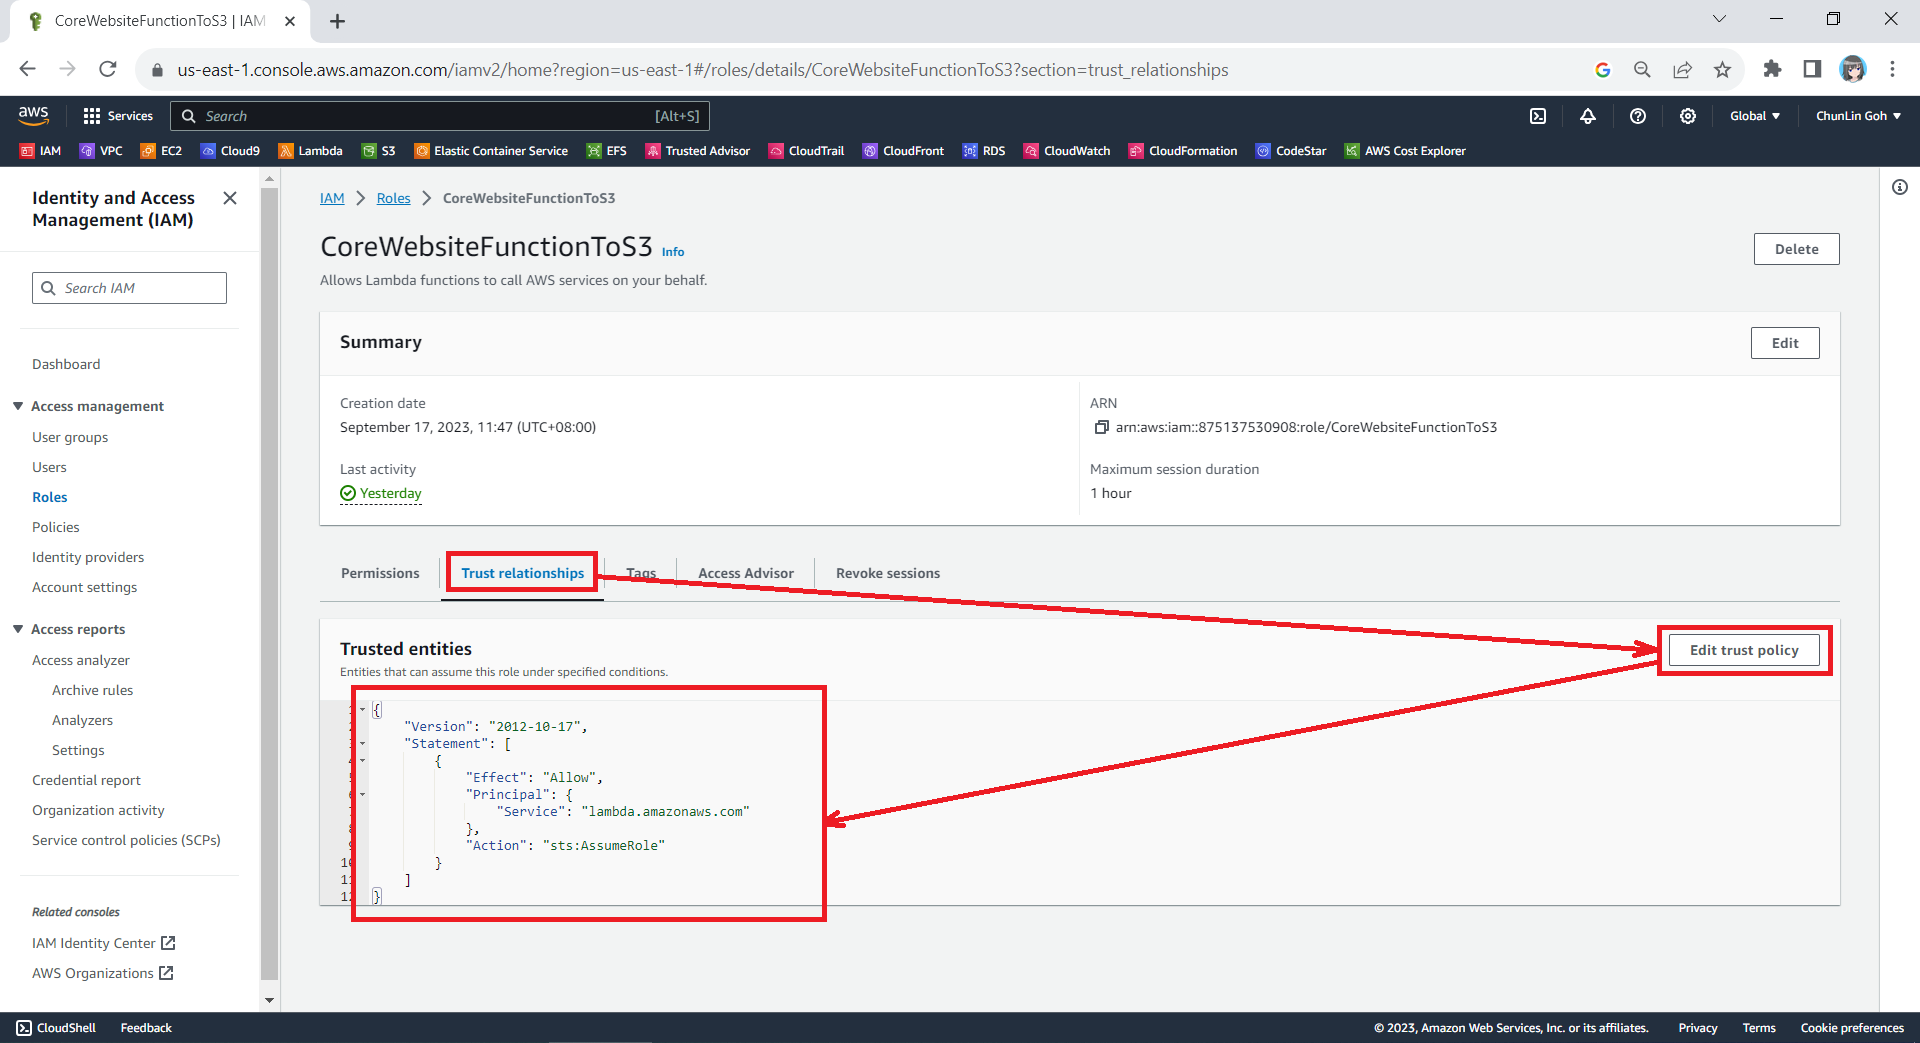
Since the Lambda needs to assume the execution role, we need to add lambda.amazonaws.com as a trusted service. To do so, we simply edit the trust policy under the Trust Relationships tab.
Updating the Trust Policy of the new role.
The trust policy should be updated to be as follows.
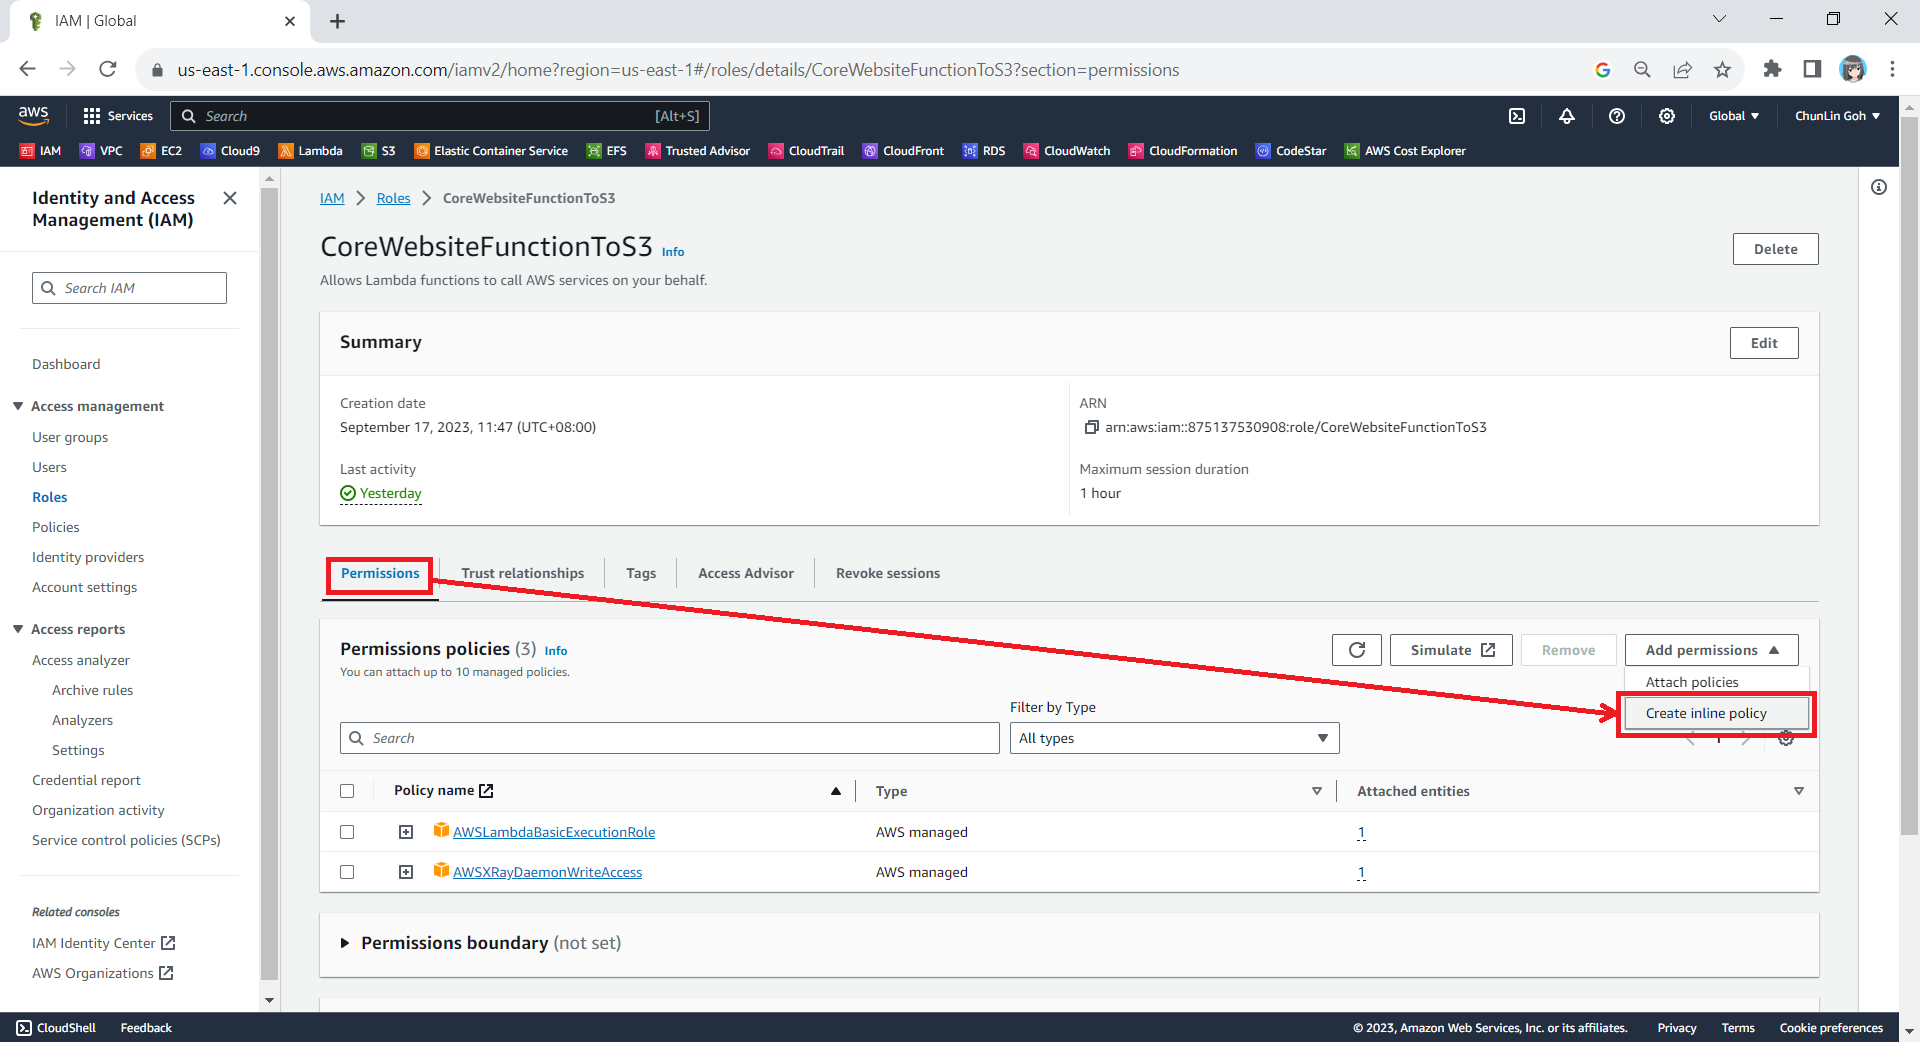
After that, we also need to add one new inline policy under the Permissions tab.
Creating new inline policy.
We need to grant this new role to the list and read access (s3:ListBucket and s3:GetObject) access our S3 bucket (arn:aws:s3:::corewebsitehtml) and its content (arn:aws:s3:::corewebsitehtml/*) with the following policy in JSON. The reason why we grant the list access is so that our .NET code later can tell whether the list is empty or not. If we only grant this new role the read access, the AWS S3 SDK will always return 404.
You can switch to the JSON editor, as shown in the following screenshot, to easily paste the JSON above into the AWS console.
Creating inline policy for our new role to access our S3 bucket.
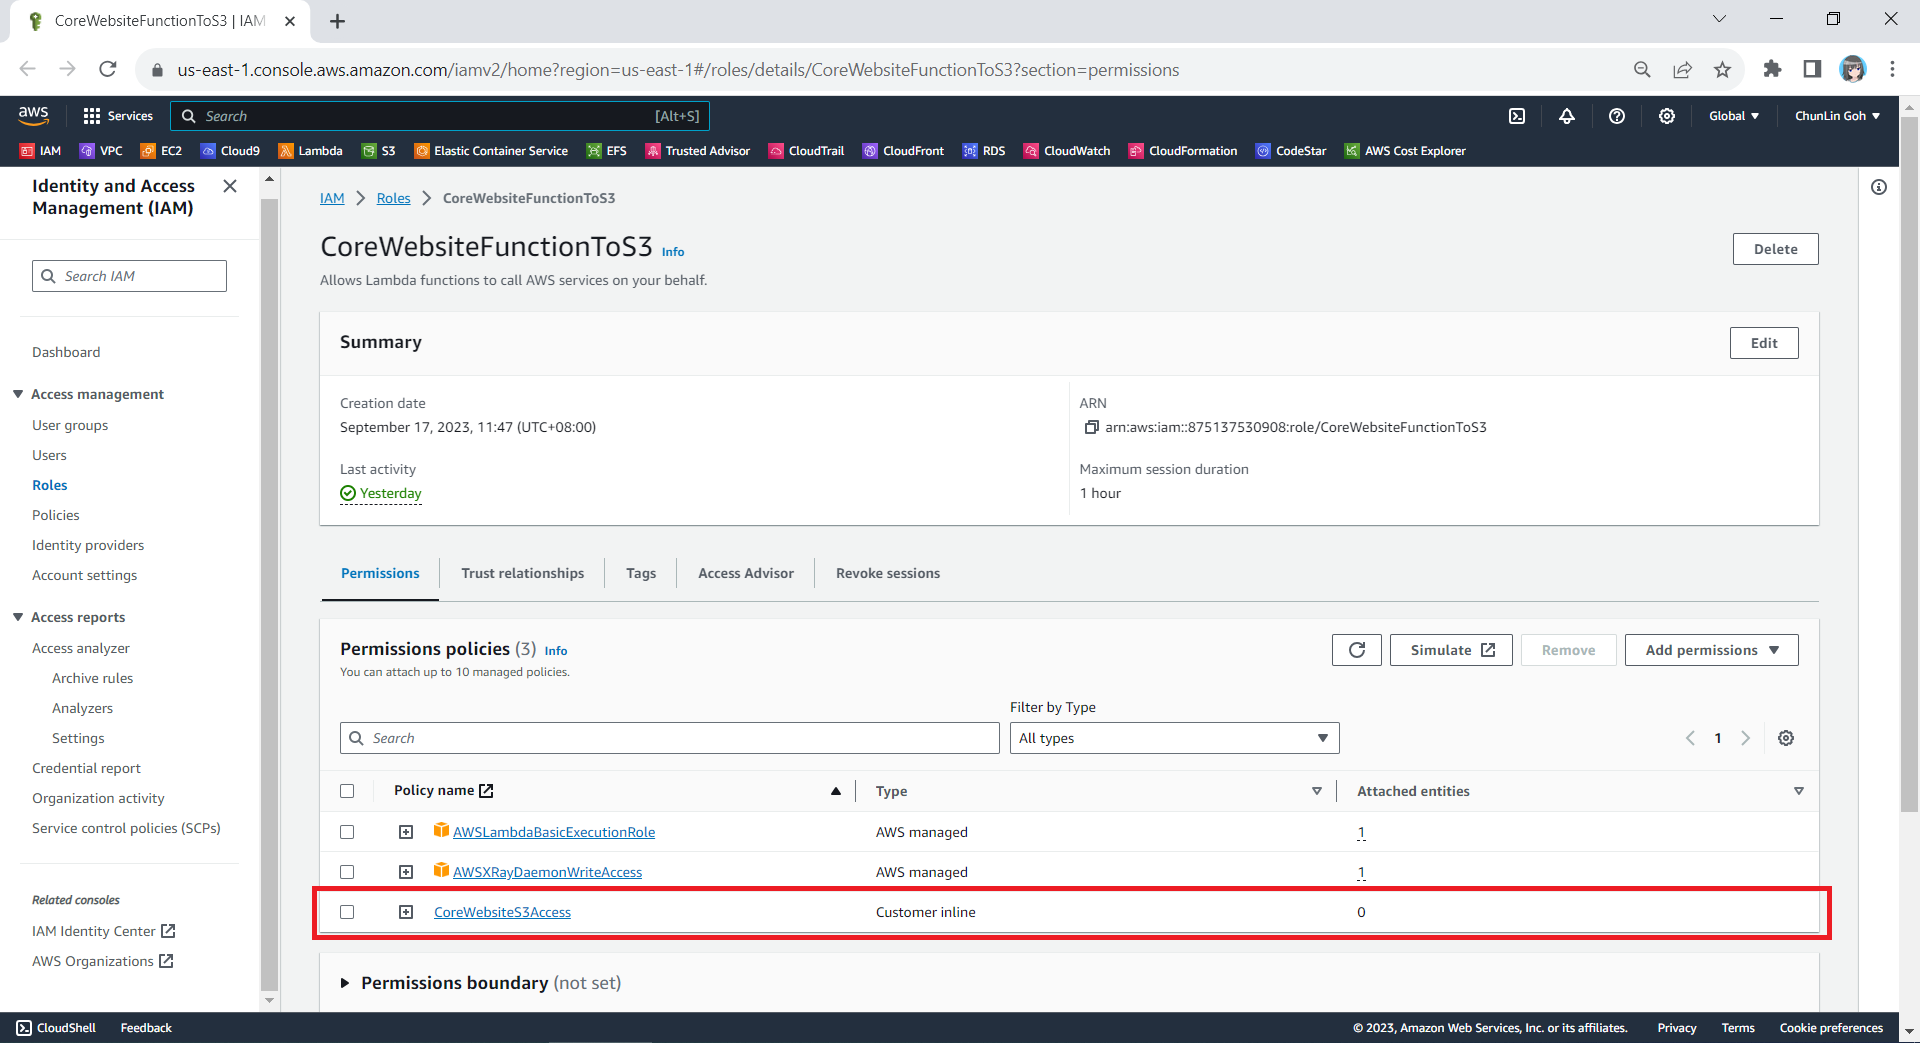
After giving this inline policy a name, for example “CoreWebsiteS3Access”, we can then proceed to create it in the next step. We should now be able to see the policy being created under the Permission Policies section.
We will now have three permission policies for our new role.
Step 3: Set New Role as Lambda Execution Role
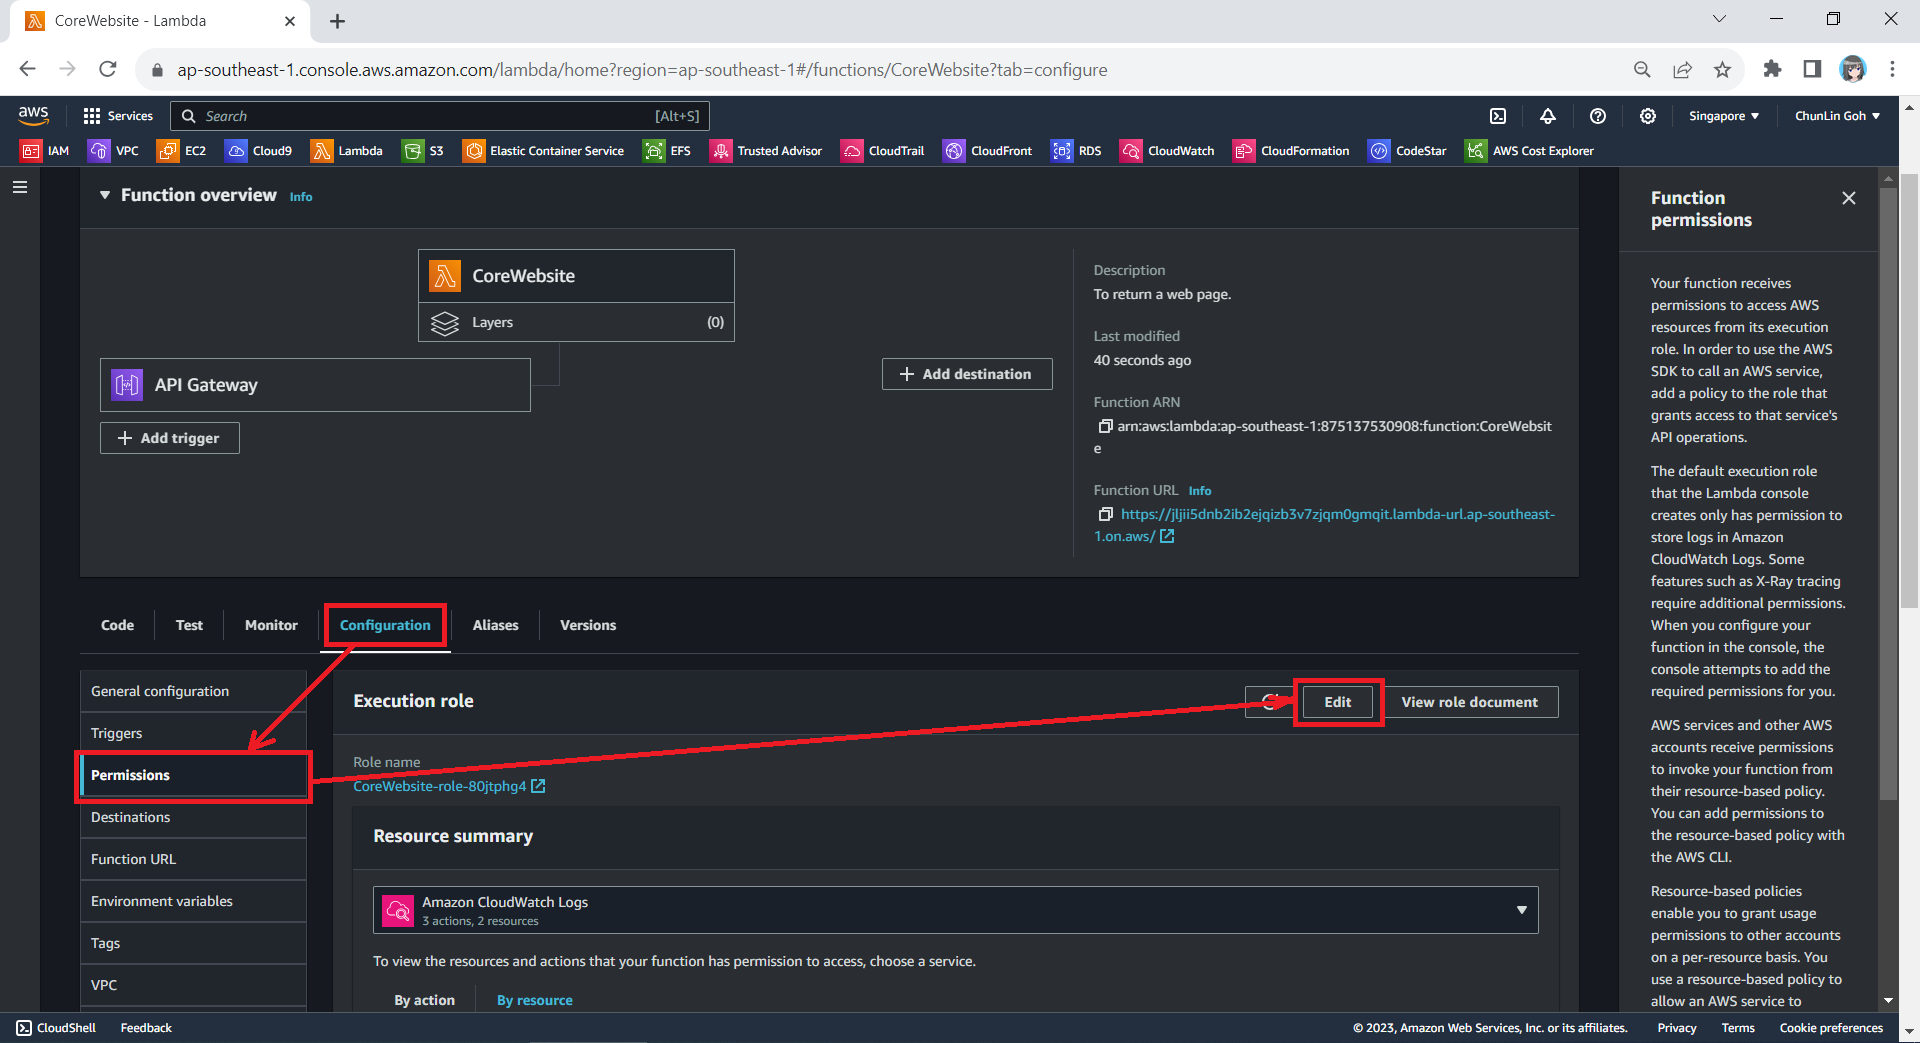
So far we have only setup the new IAM role. Now, we need to configure this new role as the Lambda functions execution role. To do so, we have to edit the current Execution Role of the function, as shown in the screenshot below.
Edit the current execution role of a Lambda function.
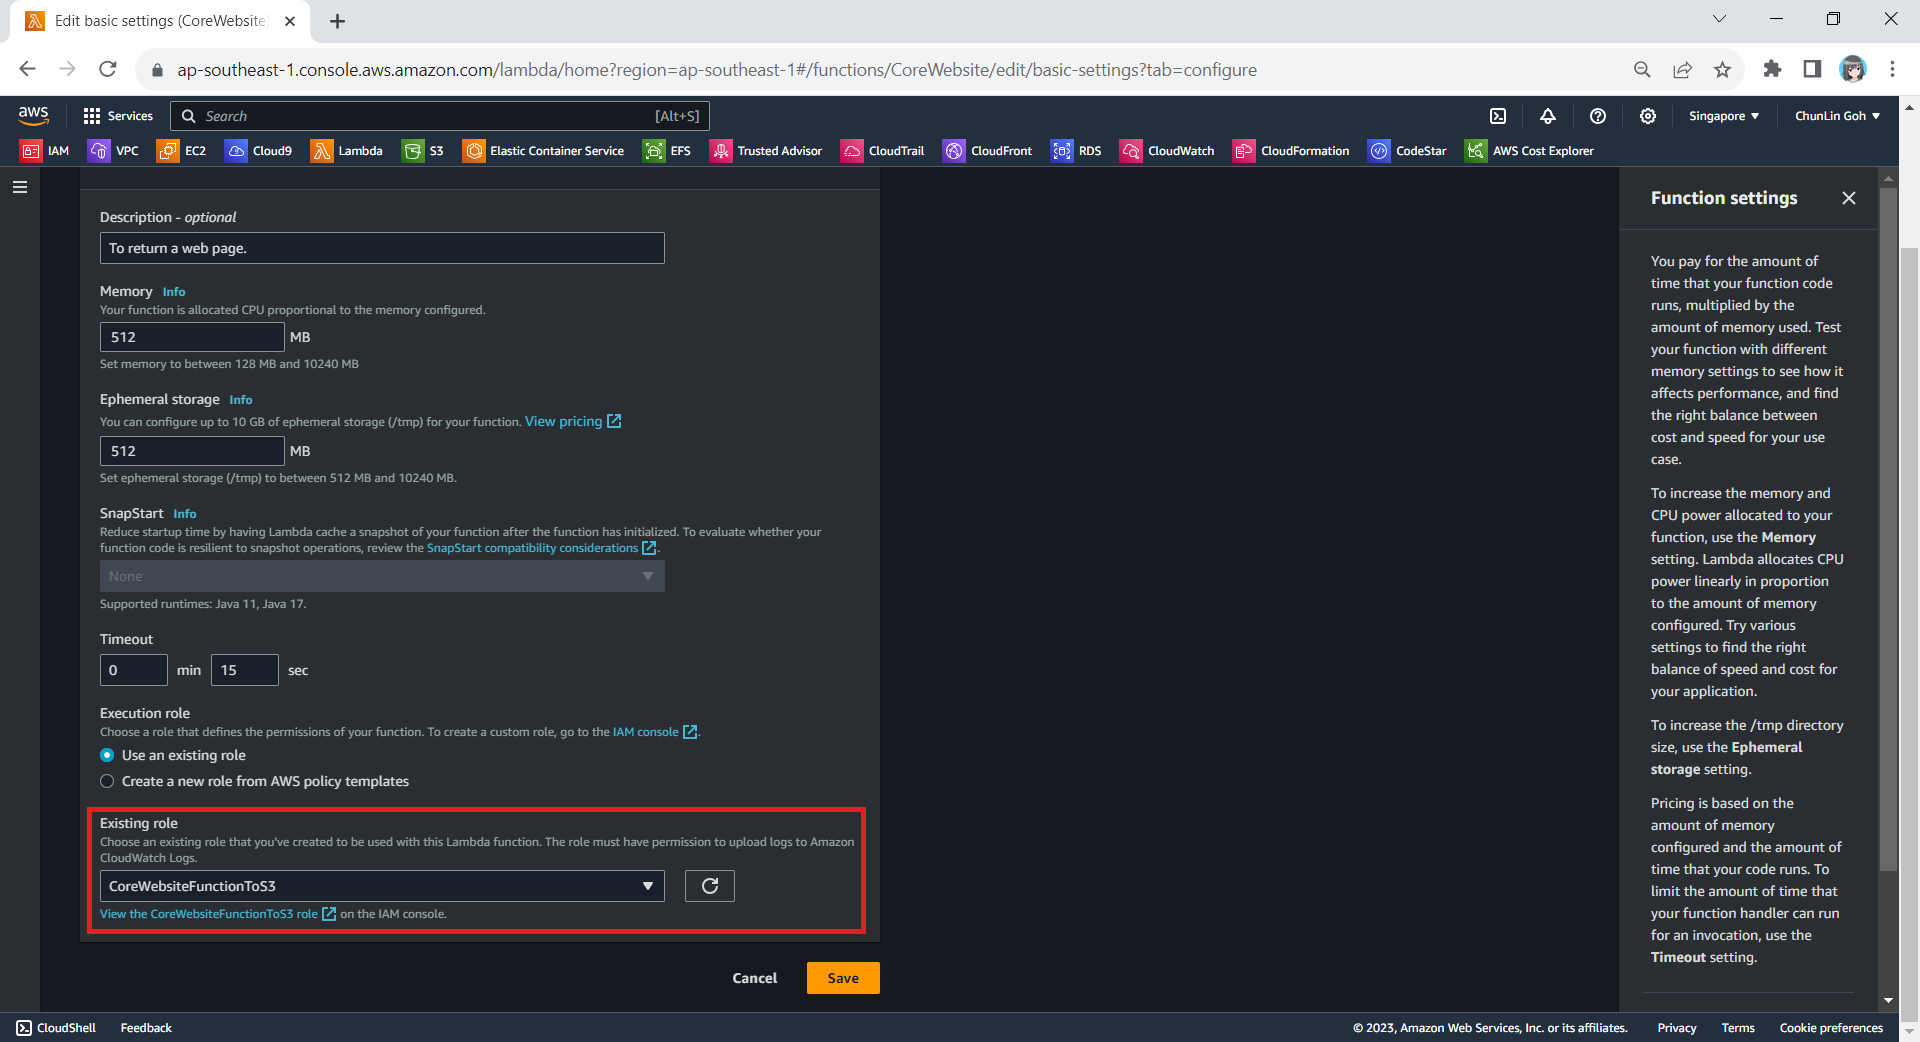
Next, we need to change the execution role to the new IAM role that we have just created, i.e. CoreWebsiteFunctionToS3.
After save the change above, when we visit the Execution Role section of this function again, we should see that it can already access Amazon S3, as shown in the following screenshot.
Yay, our Lambda function can access S3 bucket now.
Step 4: Allow Lambda Access in S3 Bucket
Finally, we also need to make sure that the S3 bucket policy doesn’t explicitly deny access to our Lambda function or its execution role with the following policy.
The JSON policy above can be entered in the Bucket Policy section, as demonstrated in the screenshot below.
Simply click on the Edit button to input our new bucket policy.
Setup Execution Role During Deployment
Since we have updated to use the new execution role for our Lambda function, in our subsequent deployment of the function, we should remember to set the role to be the correct role, i.e. CoreWebsiteFunctionToS3, as highlighted in the screenshot below.
Please remember to use the correct execution role during the deployment.
After we have done all these, we shall be able to see our web content which is stored in S3 bucket to be displayed when we visit the API Gateway URL on our browser.