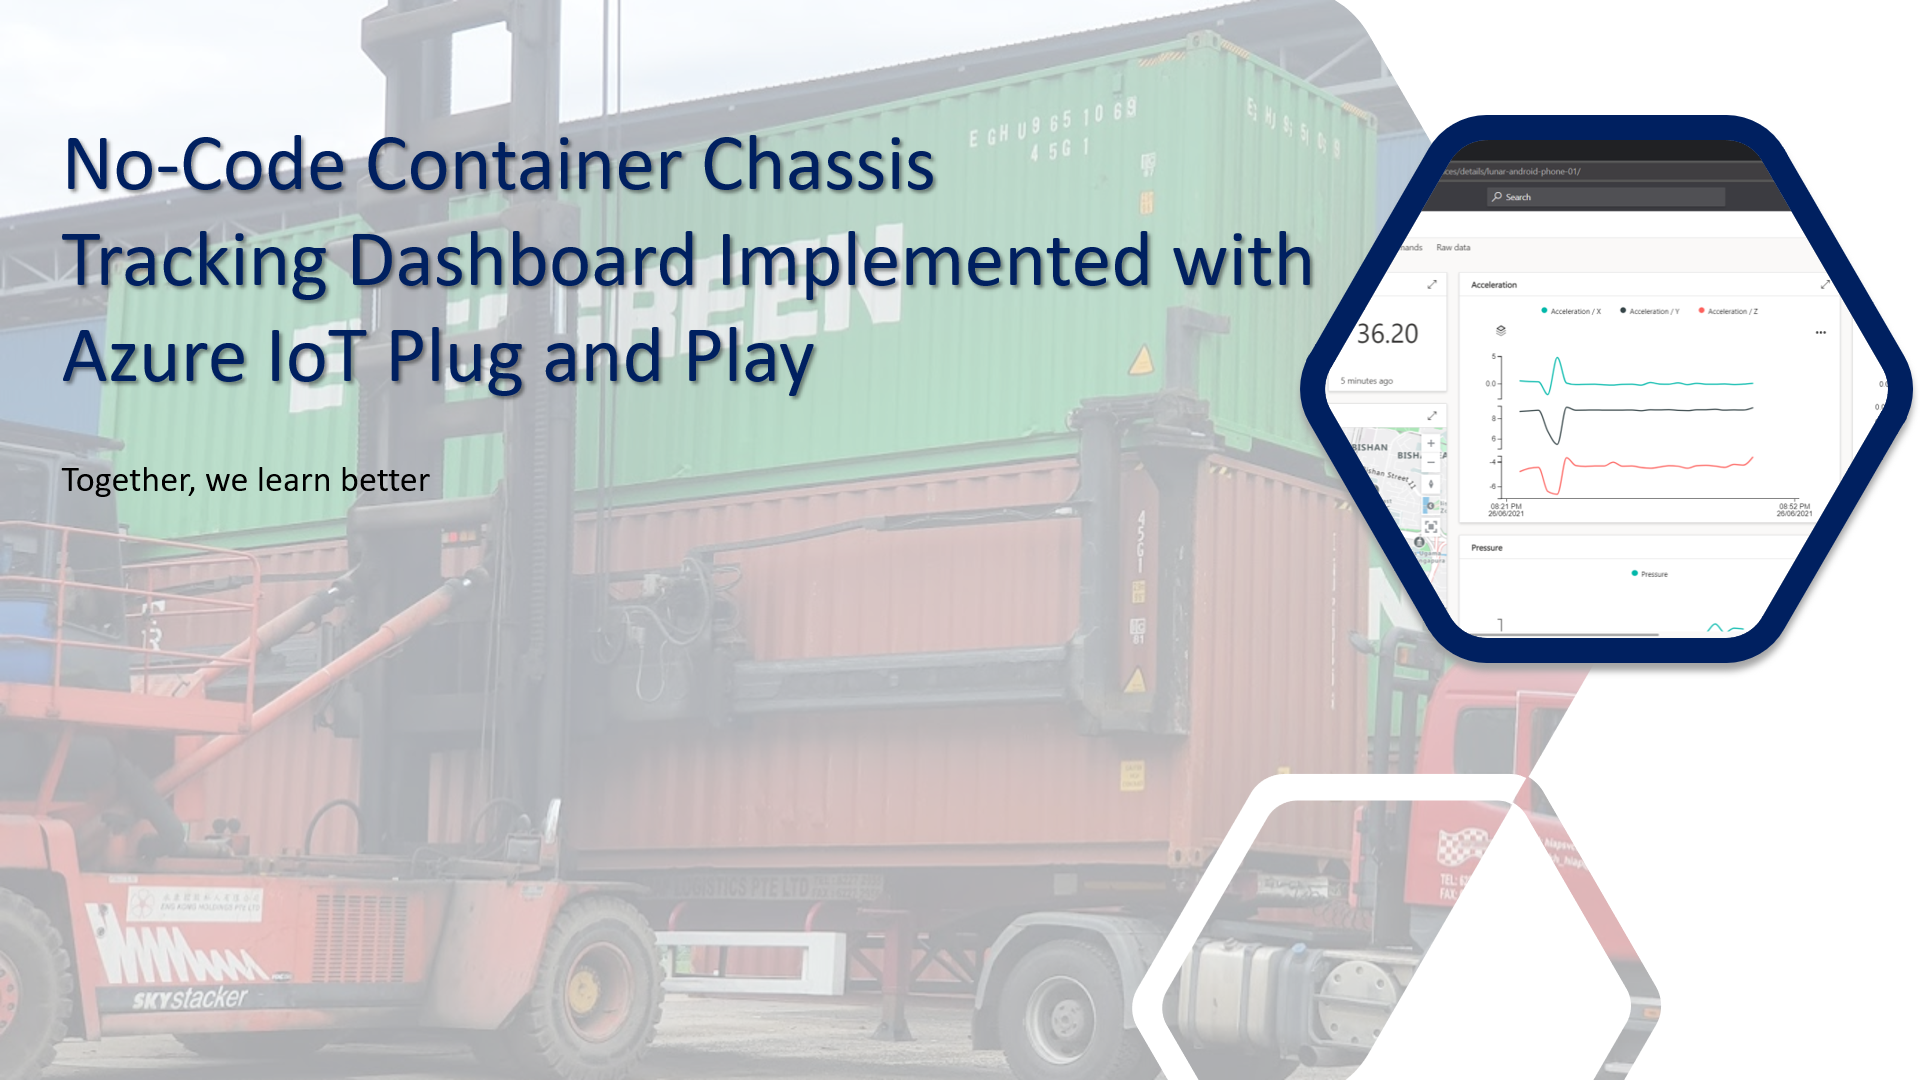
Normally on the roads, we will see trailer trucks, which are the combination of a prime mover and a container chassis to carry freight. Container chassis is an important asset of a trucking company. It is usually an unpowered vehicle towed by another. If you still have no idea what it is, please watch the video below.
Tracking container chassis is not a simple problem to solve. We do not only need to build trackers, which are IoT devices to send back telemetry and sensor data collected from the container chassis, but also need to have another system to store, process, and display the data. This does not sound like a system that can be easily built within, let’s say, 5 minutes.
Now what if we can turn our smart phones into trackers and then install one of them on the container chassis? Also, what if we can make use of Microsoft Azure to provide a IoT data dashboard for us in just a few clicks?
Few days ago, Microsoft release a mobile app called IoT Plug and Play on both Android and iOS.
So, you may ask, why is this IoT Plug and Play interesting? This is because it can turn our iOS or Android device into an IoT device without any coding or device modeling. Our phones can then seamlessly connect to Azure IoT Central or IoT Hub with telemetry and sensor data from the devices will be automatically uploaded to the Azure in a defined delivery interval.
In this post, I am just going to share what I have tried out so far. Hopefully it helps my friends who are looking for similar solutions.
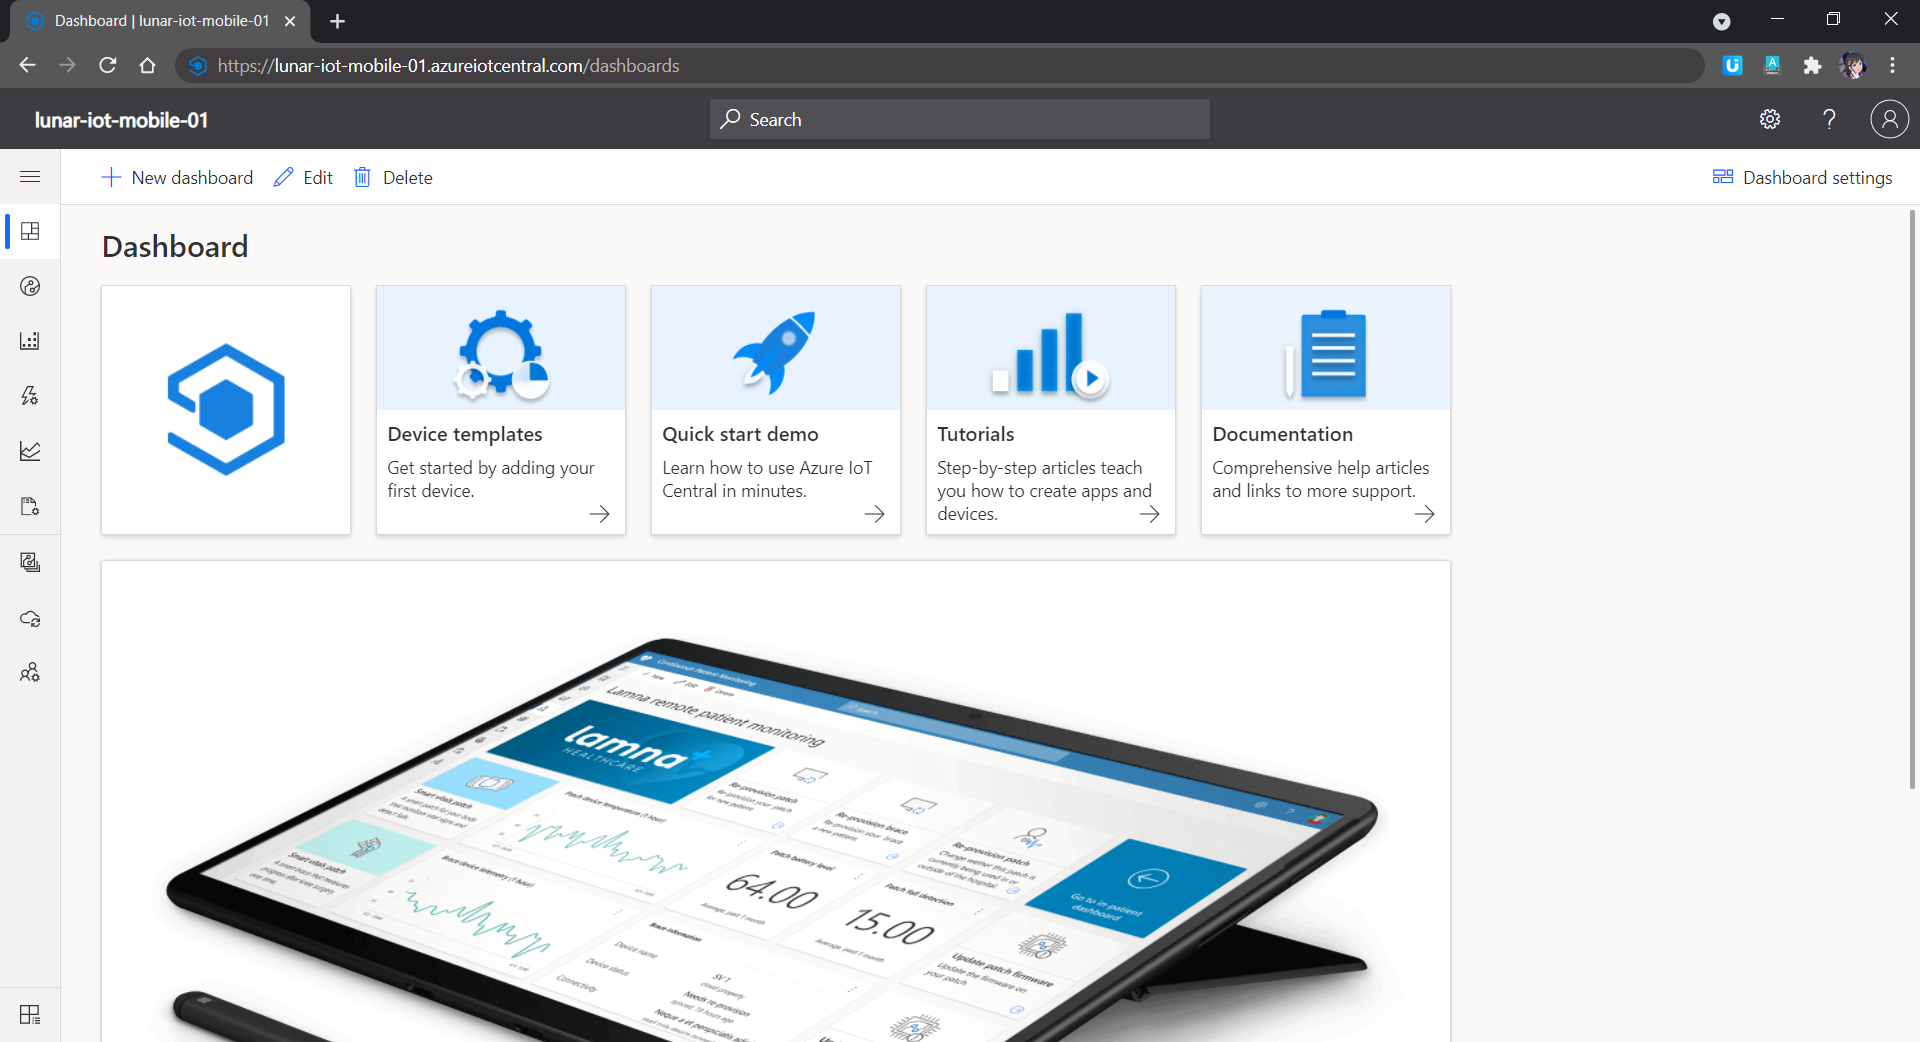
Setup Azure IoT Central
Before we proceed further, we need to understand that even though the example I use here may sound simple to you, but the services, such as Azure IoT Central is actually meant for production use so that the industries can use it to build enterprise-grade IoT applications on a secure, reliable, and scalable infrastructure.
When we are setting up Azure IoT Central, we can have a quick start by directly applying templates which are all industry focused examples available for these industries today. For example, using the templates on Azure, logistics company can create an Azure IoT Central application to track shipments in real time across air, water, and land with location and condition monitoring. This will play an important role in the logistics industry because the technology can then provide total end-to-end supply chain enablement.
Dr Robert Yap, the Executive Chairman of YCH Group, shared about their vision of integrating the data flows in the supply chain with analytics capabilities.
In my example, I will start with a customised template which has nothing inside. We then can proceed to the “Devices” page to add a devices for our phones.
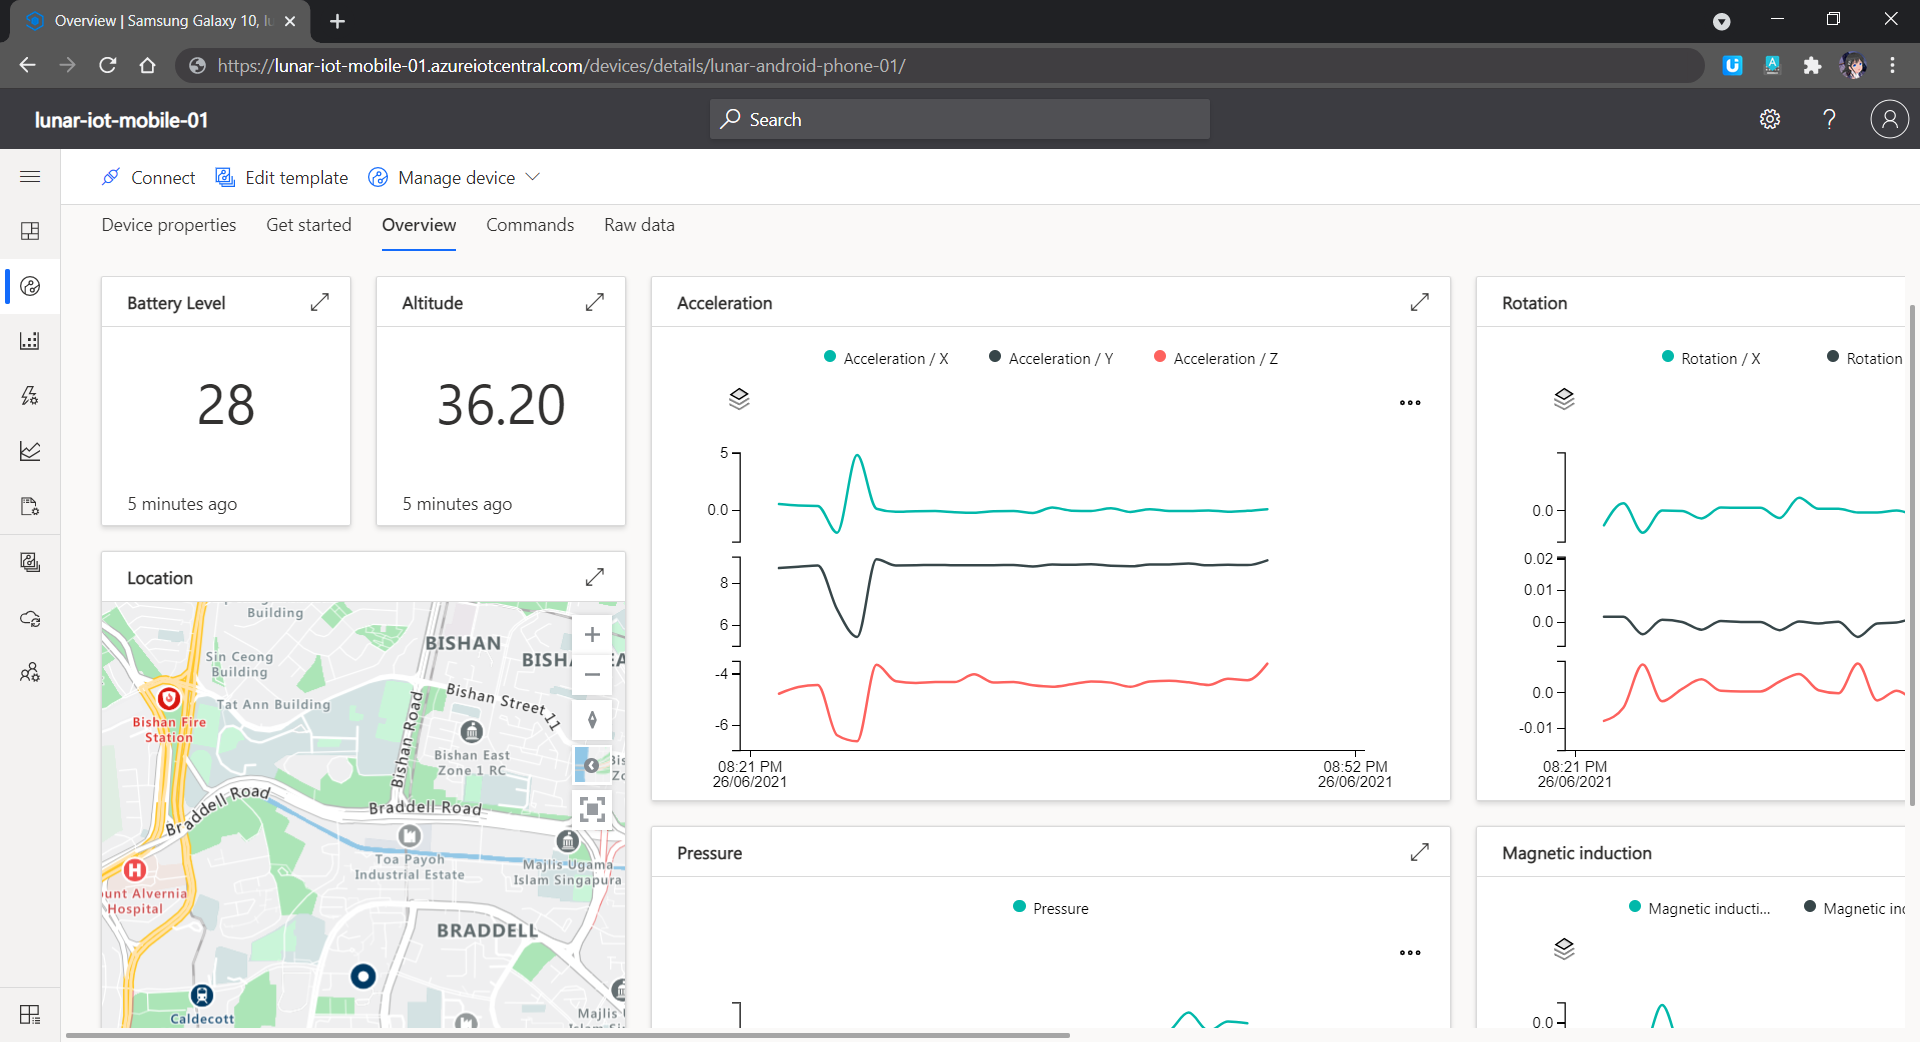
Data collected from accelerometer, gyroscope, magnetometer, and barometer on my phone.
Rules and Triggers
We are also able to specify rules in the Azure IoT Central so that there will be an action triggered when the defined conditions are met. We can also integrate the rule with Power Automate and Azure Logic Apps to perform relevant automated workflows.
We can also have Azure IoT Central to send us an email when the device is running on low battery, for example.
Scheduled Jobs
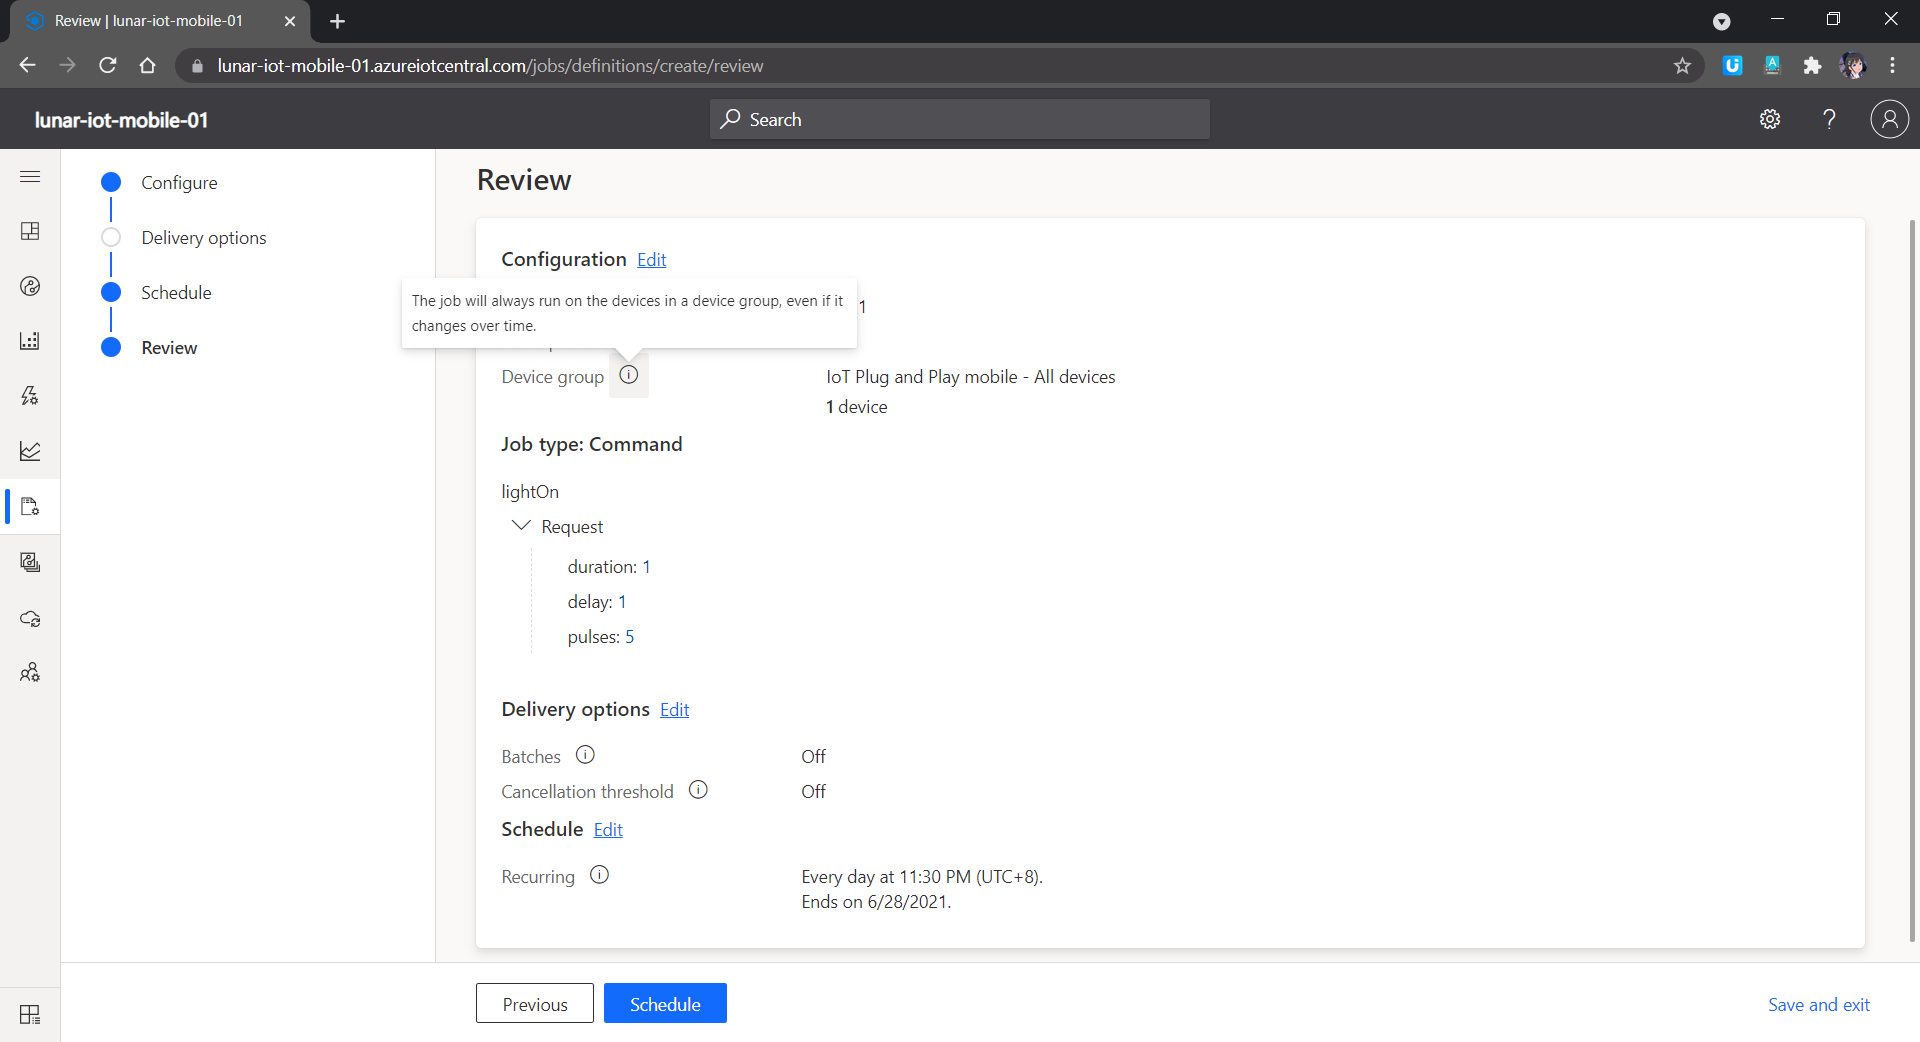
Another cool feature in Azure IoT Central is that we can send the commands back to the devices. In addition, we can send the commands in a scheduled manner. For example, in the following screenshot, the “lightOn” will be sent to all the devices in the Device Group and thus the connected phones in the Device Group will switch on their flashlight at 11.30pm in the midnight.
Don’t be scared if there is flashlight suddenly coming from chassis in midnight.
Image Upload
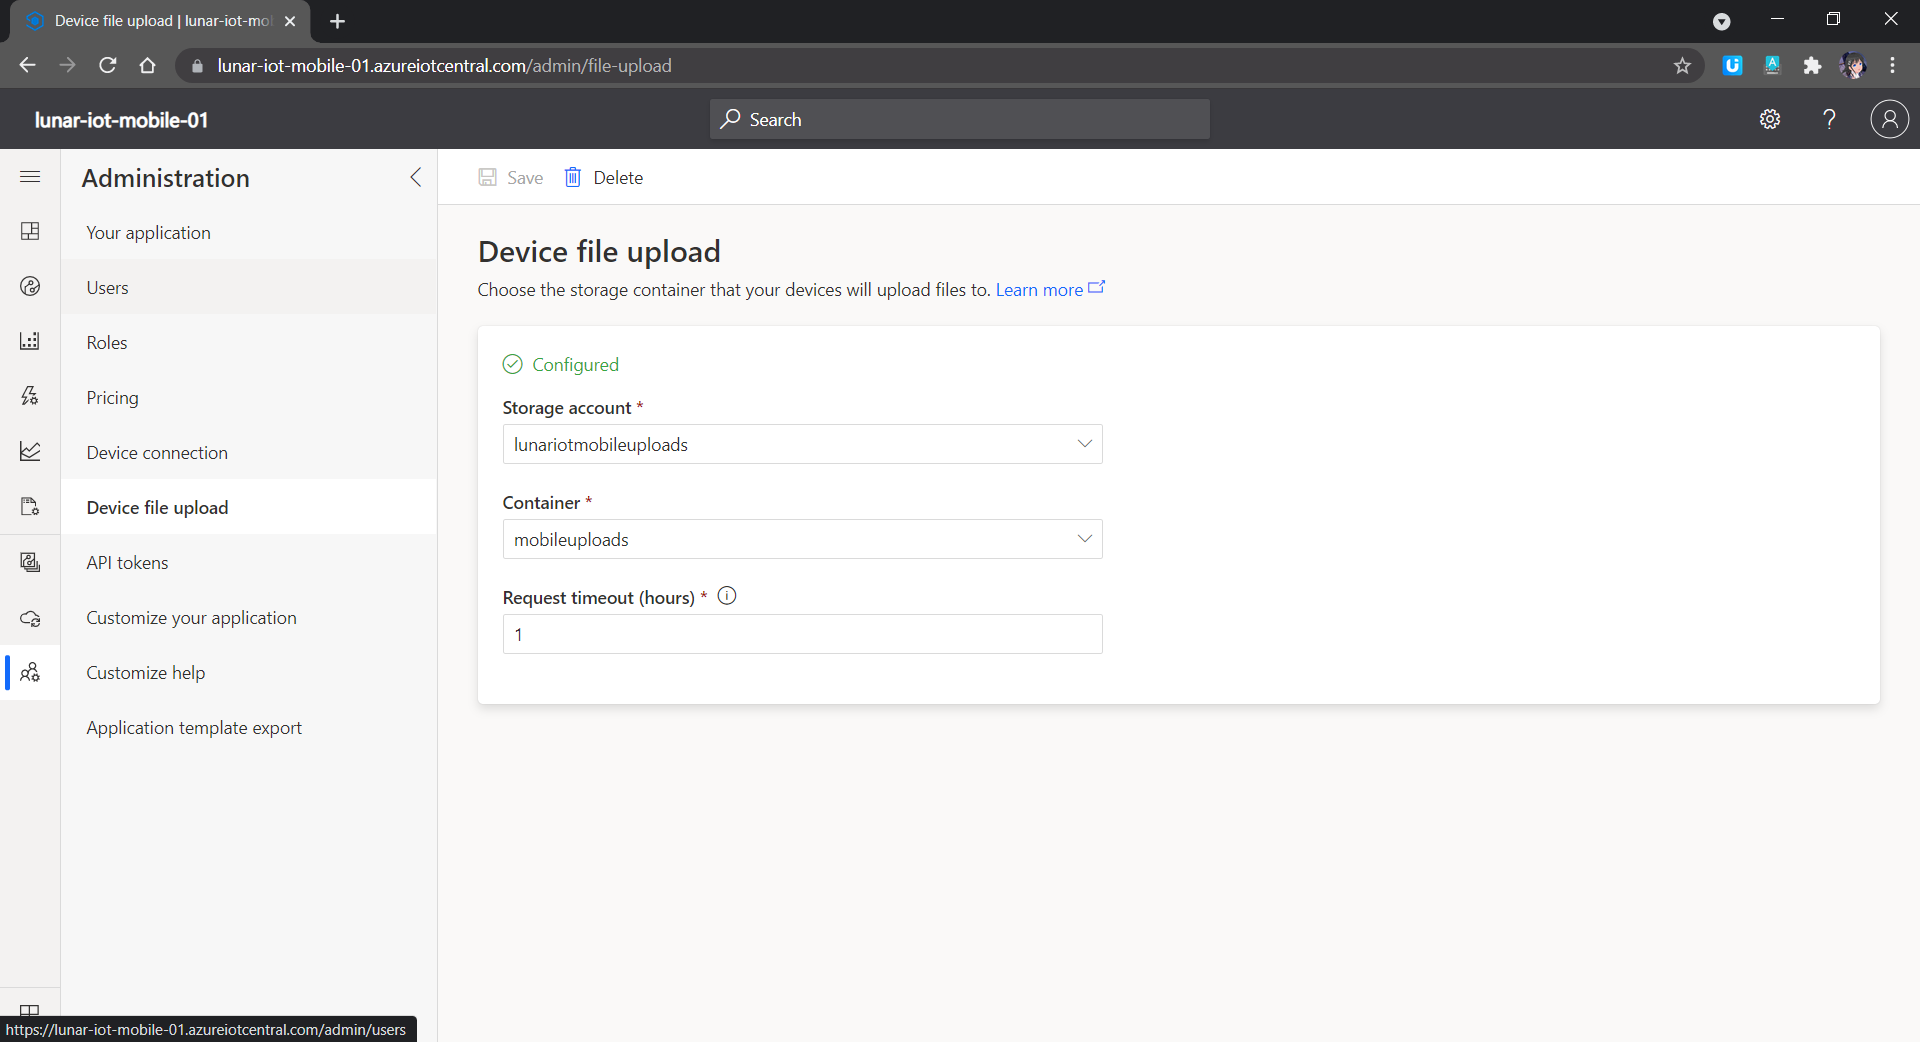
In the IoT Plug and Play app, we can also try out the image upload feature which allows us to submit images to the cloud from the IoT devices. As shown in the screenshot below, each IoT Central app can only link with one Azure Storage container. Hence, in the container, there will be folder for each of the registered IoT devices so that files uploaded will be categorised into their own folder accordingly.
We need to link Azure IoT Central to a container in the Azure Storage.
So with the phones setup as IoT devices, we can now install them on the container chassis to continuously send back the location data to the Azure IoT Central. The business owner can thus easily figure out where their container chassis is located at by looking at the dashboard.
After working on the beacon projects back half a year ago, I was given a new task which is building a dashboard for displaying data collected from IoT devices. The IoT devices basically are GPS tracker with a few other additional sensors such as temperature and shaking detection.
I’m new to IoT field, so I’m going to share in this article what I had learnt and challenges I faced in this project so that it would benefit to juniors who are going to do similar things.
Project Requirements
We plan to have the service to receive data from the IoT devices to be on Microsoft Azure. There will be thousands or even millions of the same devices deployed eventually, so choosing cloud platform to help us scaling up easily.
We also need to store the data in order to display it on dashboard and reports for business use cases.
Challenge 1: Azure IoT Hub and The Restriction of Device Firmware
In the documentation of the device protocol, there is a set of instructions as follows.
First when device connects to server, module sends its IMEI as login request. IMEI is sent the same way as encoding barcode. First comes short identifying number of bytes written and then goes IMEI as text (bytes).
After receiving IMEI, server should determine if it would accept data from this module. If yes server will reply to module 01 if not 00.
I am not sure who wrote the documentation but I am certain that his English is not that easy to comprehend in the first read.
Anyway, this is a good indication that Azure IoT Hub will be helpful because it provides secure and reliable C2D (Cloud-to-Device) and D2C communication with HTTP, AMQP, and MQTT support.
However, when I further read the device documentation, I realized that the device could only send TCP packets over in a protocol the device manufacturer defined. In addition, the device doesn’t allow us to update its firmware at this moment, making it to send data using protocols accepted by Azure IoT Hub is impossible.
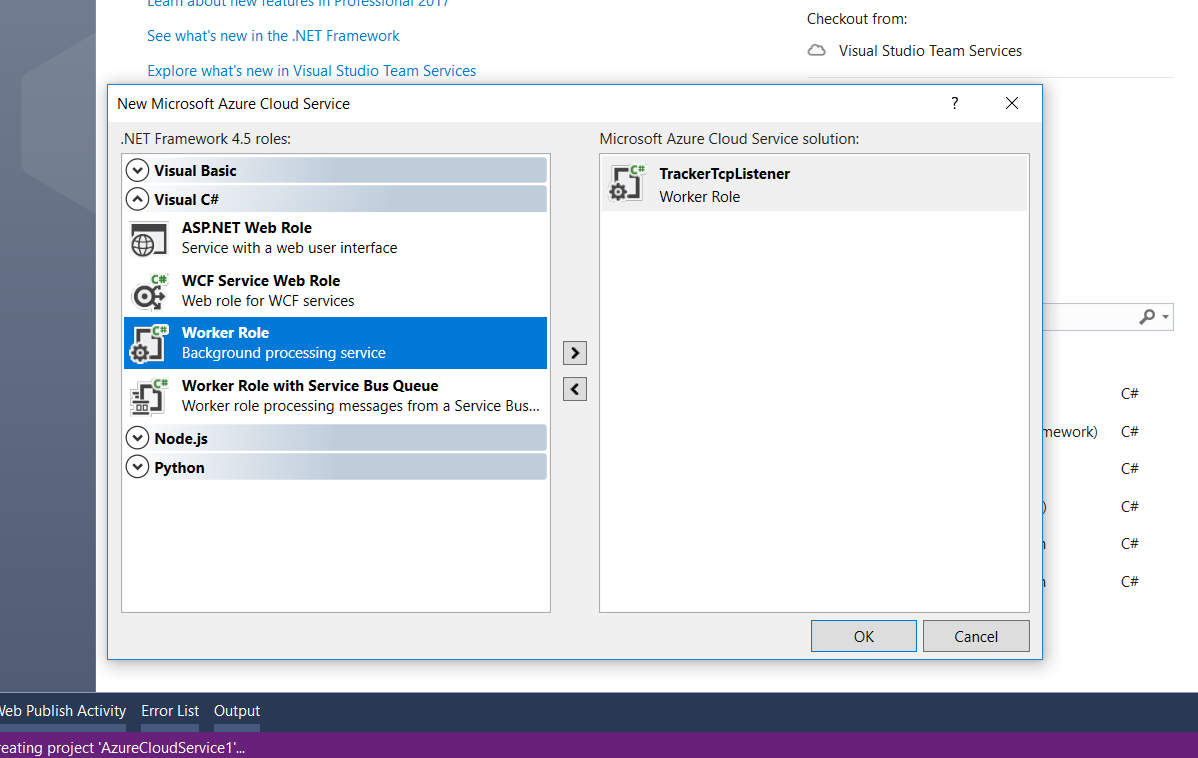
The only easy option we have now is to use Azure Cloud Service with Worker Role. Worker Role does not use IIS and it can run our app standalone.
Creating a new Cloud Service project with one Worker Role on Visual Studio 2017.
A default template of WorkerRole class will be provided.
public class WorkerRole : RoleEntryPoint
{
    private readonly CancellationTokenSource cancellationTokenSource = new CancellationTokenSource();
    private readonly ManualResetEvent runCompleteEvent = new ManualResetEvent(false);

    public override void Run()
    {
        Trace.TraceInformation("TrackerTcpListener is running");

        try
        {
            this.RunAsync(this.cancellationTokenSource.Token).Wait();
        }
        finally
        {
            this.runCompleteEvent.Set();
        }
    }

    public override bool OnStart()
    {
        // Set the maximum number of concurrent connections
        ServicePointManager.DefaultConnectionLimit = 12;

        // For information on handling configuration changes
        // see the MSDN topic at https://go.microsoft.com/fwlink/?LinkId=166357.

        bool result = base.OnStart();

        Trace.TraceInformation("TrackerTcpListener has been started");

        return result;
    }

    public override void OnStop()
    {
        Trace.TraceInformation("TrackerTcpListener is stopping");

        this.cancellationTokenSource.Cancel();
        this.runCompleteEvent.WaitOne();

        base.OnStop();

        Trace.TraceInformation("TrackerTcpListener has stopped");
    }

    private async Task RunAsync(CancellationToken cancellationToken)
    {
        // TODO: Replace the following with your own logic.
        while (!cancellationToken.IsCancellationRequested)
        {
            Trace.TraceInformation("Working");
            await Task.Delay(1000);
        }
    }
}
It’s obvious that the first method we are going to work on is the RunAsync method with a “TODO” comment.
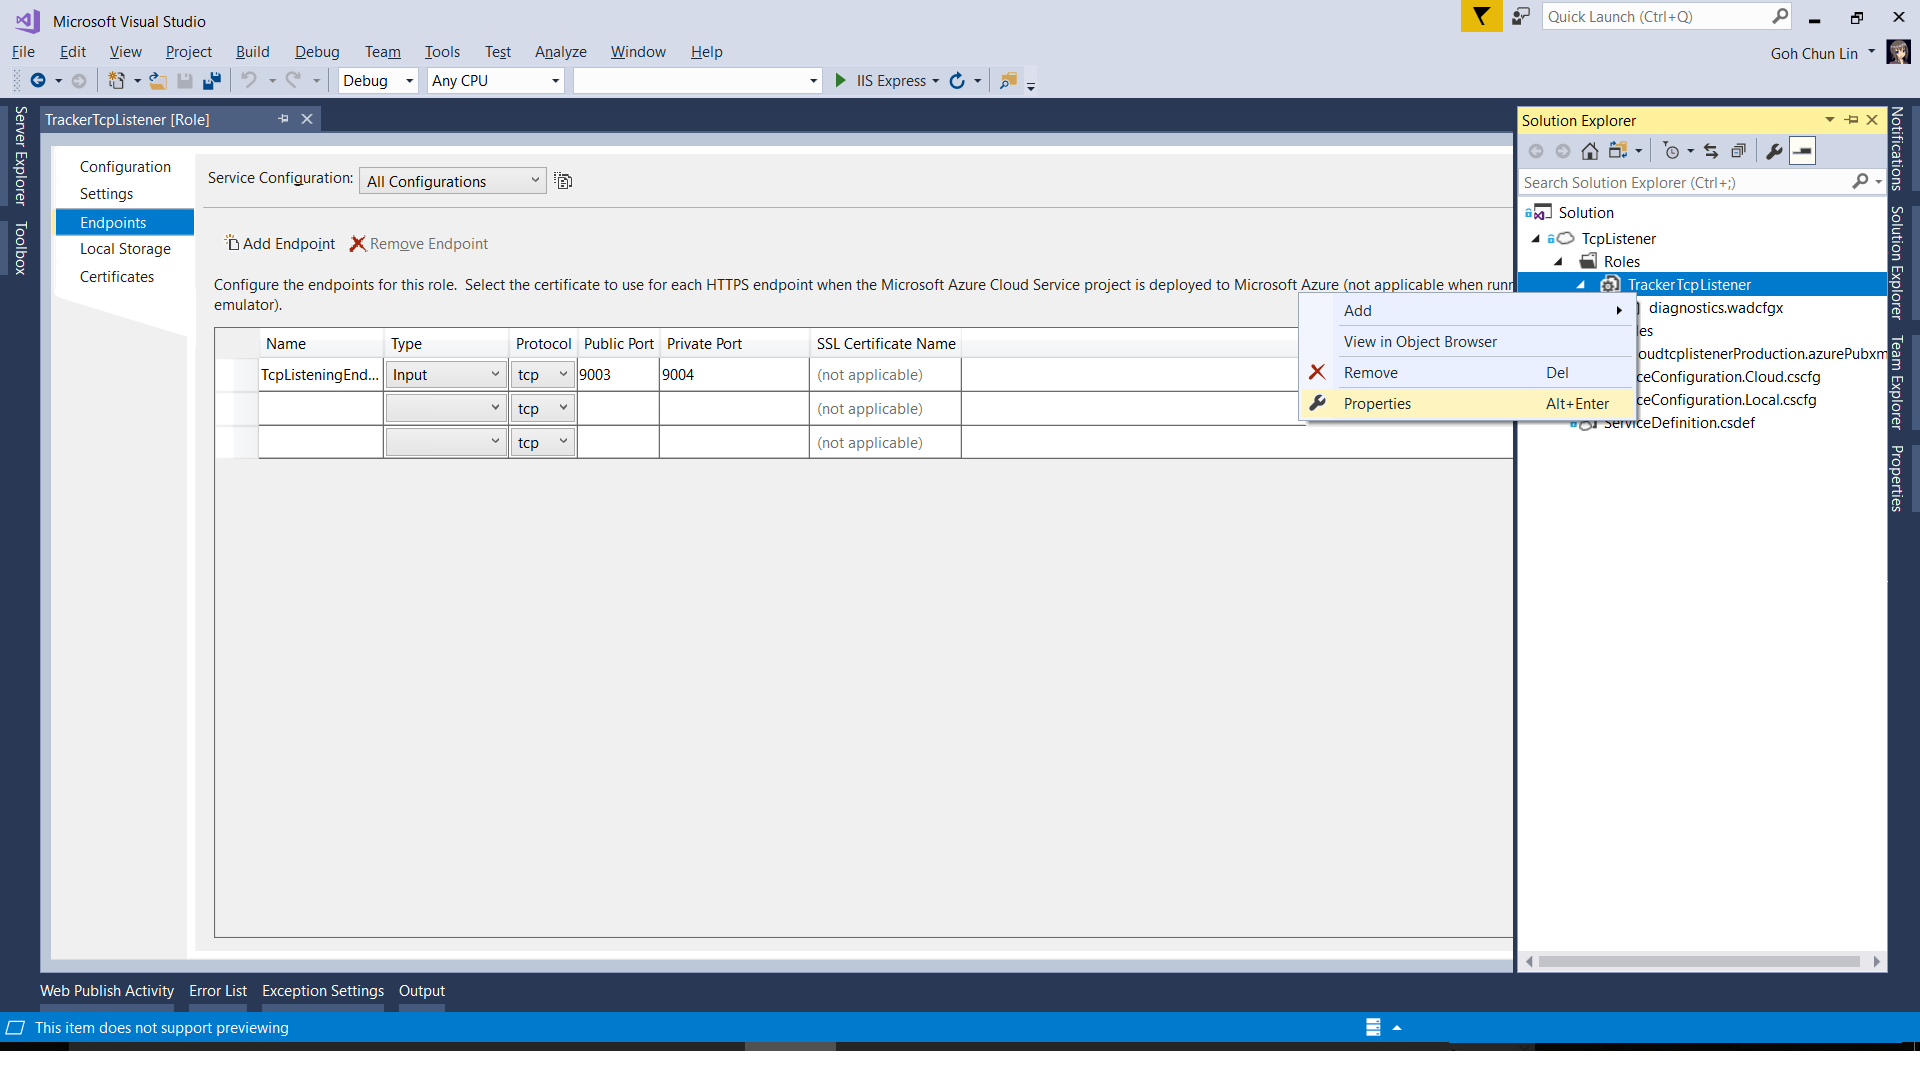
However, before that, we need to define an IP Endpoint for this TCP listener so that we can tell the IoT device to send the packets to the specified port on the IP address.
Configuring Endpoints of a Cloud Service.
With endpoints defined, we can then proceed to modify the code.
private async Task RunAsync(CancellationToken cancellationToken)
{
    try
    {
        TcpClient client;

        while (!cancellationToken.IsCancellationRequested)
        {
            var ipEndPoint = RoleEnvironment.CurrentRoleInstance.InstanceEndpoints["TcpListeningEndpoint1"].IPEndpoint;

            var listener = new System.Net.Sockets.TcpListener(ipEndPoint) { ExclusiveAddressUse = false };
            listener.Start();

            // Perform a blocking call to accept requests.
            client = listener.AcceptTcpClient();

            // Get a stream object for reading and writing
            NetworkStream stream = null;

            try
            {
                stream = client.GetStream();

                await ProcessInputNetworkStreamAsync(stream);
            }
            catch (Exception ex)
            {
                // Log the exception
            }
            finally
            {
                // Shutdown and end connection
                if (stream != null)
                {
                    stream.Close();
                }

                client.Close();

                listener.Stop();
            }
        }
    }
    catch (Exception ex)
    {
        // Log the exception
    }
}
The code for the method ProcessInputNetworkStreamAsync above is as follows.
private async Task ProcessInputNetworkStreamAsync(string imei, NetworkStream stream)
{
    Byte[] bytes = new Byte[5120];
    int i = 0;
    byte[] b = null;
    var receivedData = new List<string>();

    while ((i = stream.Read(bytes, 0, bytes.Length)) != 0)
    {
        receivedData = new List<string>();

        for (int reading = 0; reading < i; reading++)
        {
            using (MemoryStream ms = new MemoryStream())
            {
                ms.Write(bytes, reading, 1);
                b = ms.ToArray();
            }

            receivedData.Add(ConvertHexadecimalByteArrayToString(b));
        }

        Trace.TraceInformation("Received Data: " + string.Join(",", receivedData.ToArray()));

        // Respond from the server to device
        byte[] serverResponse = ConvertStringToHexadecimalByteArray("<some text to send back to the device>");
        stream.Write(serverResponse, 0, serverResponse.Length);
    }
}
You may wonder what I am doing above with ConvertHexadecimalByteArrayToString and ConvertStringToHexadecimalByteArray methods. They are needed because the packets used in the TCP protocol of the device is in hexadecimal. There is a very interesting discussion about how to do the conversion on Stack Overflow, so I won’t repeat it here.
Challenge 3: Multiple Devices
The code above is only handling one port. Unfortunately, the IoT device doesn’t send over the IMEI number or any other identification number of the device when the actual data pack is sent to the server. Hence, that means if there is more than one IoT device sending data to the same port, we will have no way to identify who is sending the data at the server side.
Hence, we need to make our TCP Listener to listen on multiple ports. The way I chose is to use List<Task> in the Run method as shown in the code below.
public override void Run()
{
    try
    {
        // Reading a list of ports assigned for trackers use
        ...

        var tasks = new List<Task>();

        foreach (var port in trackerPorts)
        {
            tasks.Add(this.RunAsync(this.cancellationTokenSource.Token, port));
        }

        Task.WaitAll(tasks.ToArray());
    }
    finally
    {
       this.runCompleteEvent.Set();
    }
}
Challenge 4: Worker Role Not Responding Irregularly
This turns out to be the biggest challenge in using Worker Role. After receiving data from the IoT devices for one or two days, the server was not recording any further new data even though the devices are working fine. So far, I’m still not sure about the cause even though there are people encountering similar issues as well.
I proceed to use Azure Automation which provides Runbooks to help handling the creation, deployment, monitoring, and maintenance of Azure resources. The Powershell Workflow Runbook that I use for rebooting the worker role daily is as follows.
In case you wonder where I defined the values for variables such as AzureSubscriptionId, CloudServiceName, and WorkerRoleInstanceName, as well as automation PowerShell credential, there are all easily found in the Azure Portal under “Share Resources” section of Azure Automation Account.
Providing credentials and variables for the Runbook.
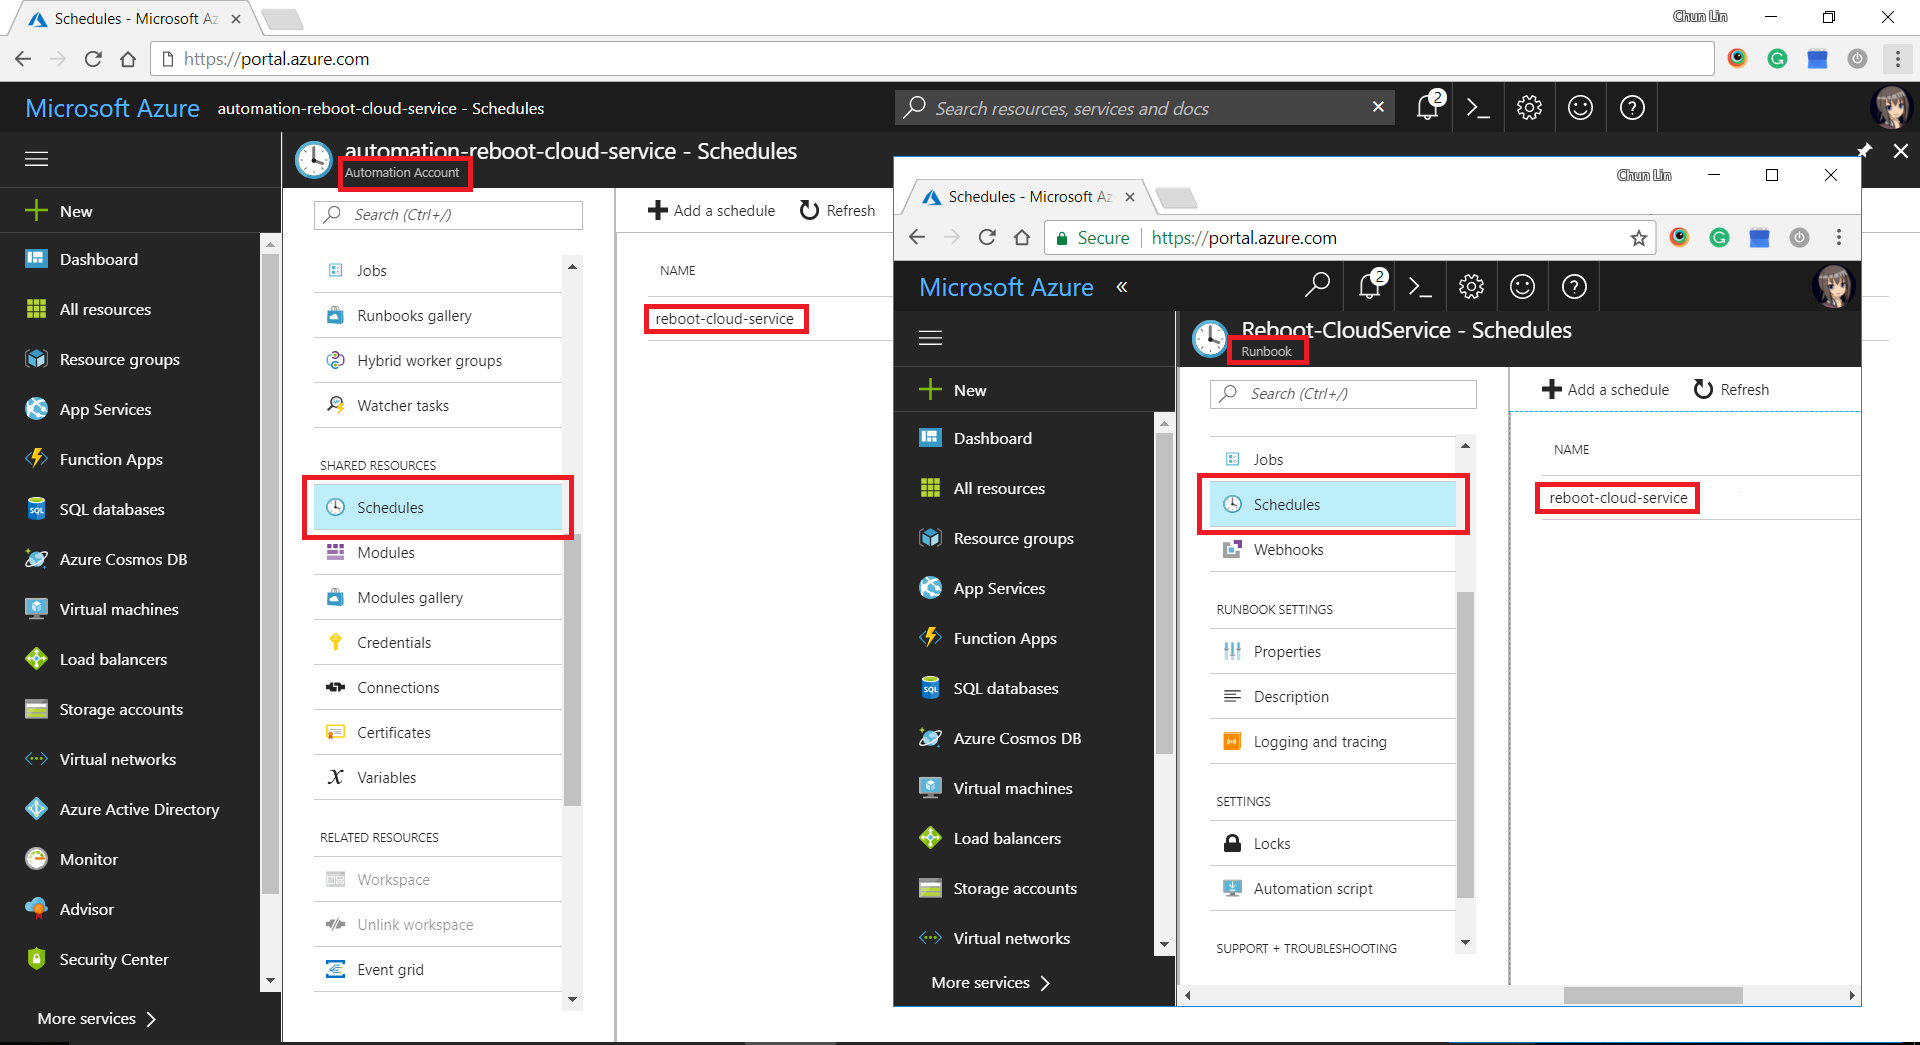
After setting up the Runbook, we need to define schedules in Automation Account and then link it to the Runbook.
Setting up schedule and linking it to the Runbook.
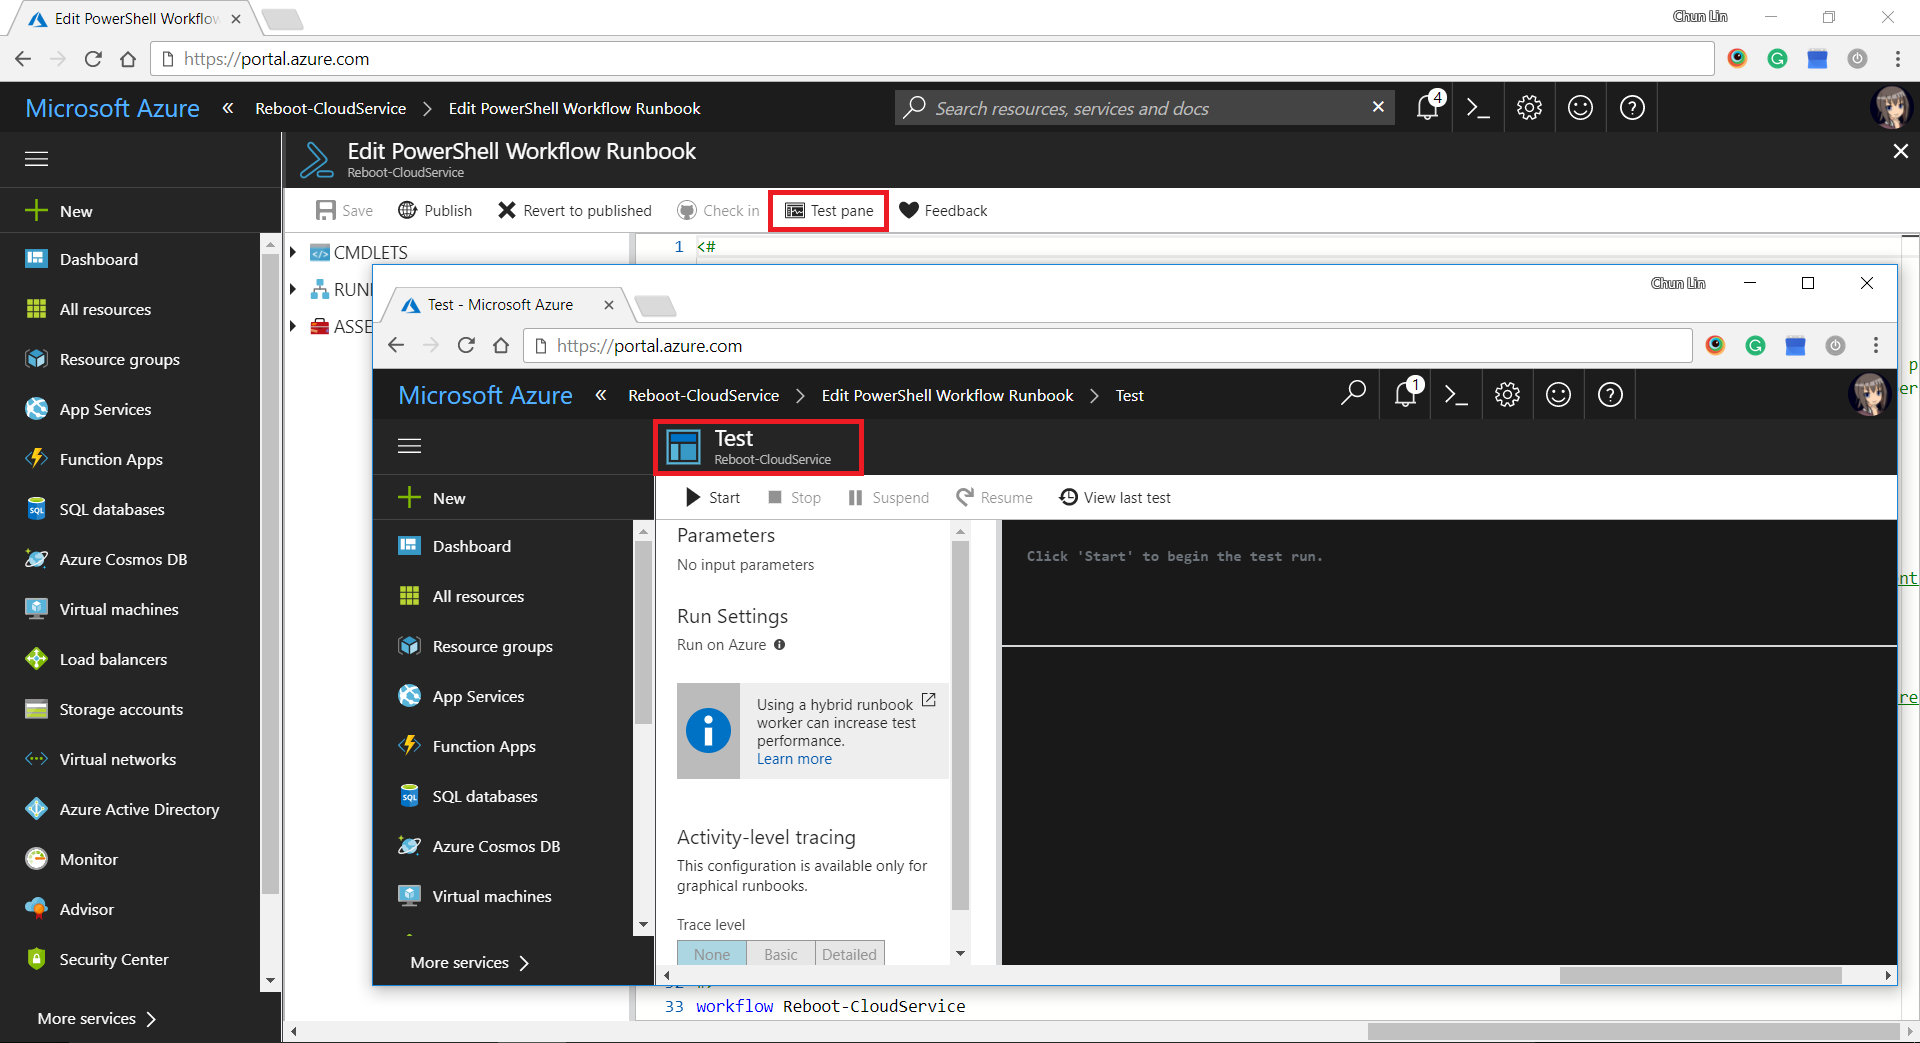
There is another tool in the Azure Portal that I find it to be very useful to debug my PowerShell script in the Runbook. It is called the “Test Pane”. By using it, we can easily find out if the PowerShell script is correctly written to generate desired outcome.
Test Pane available in Runbook.
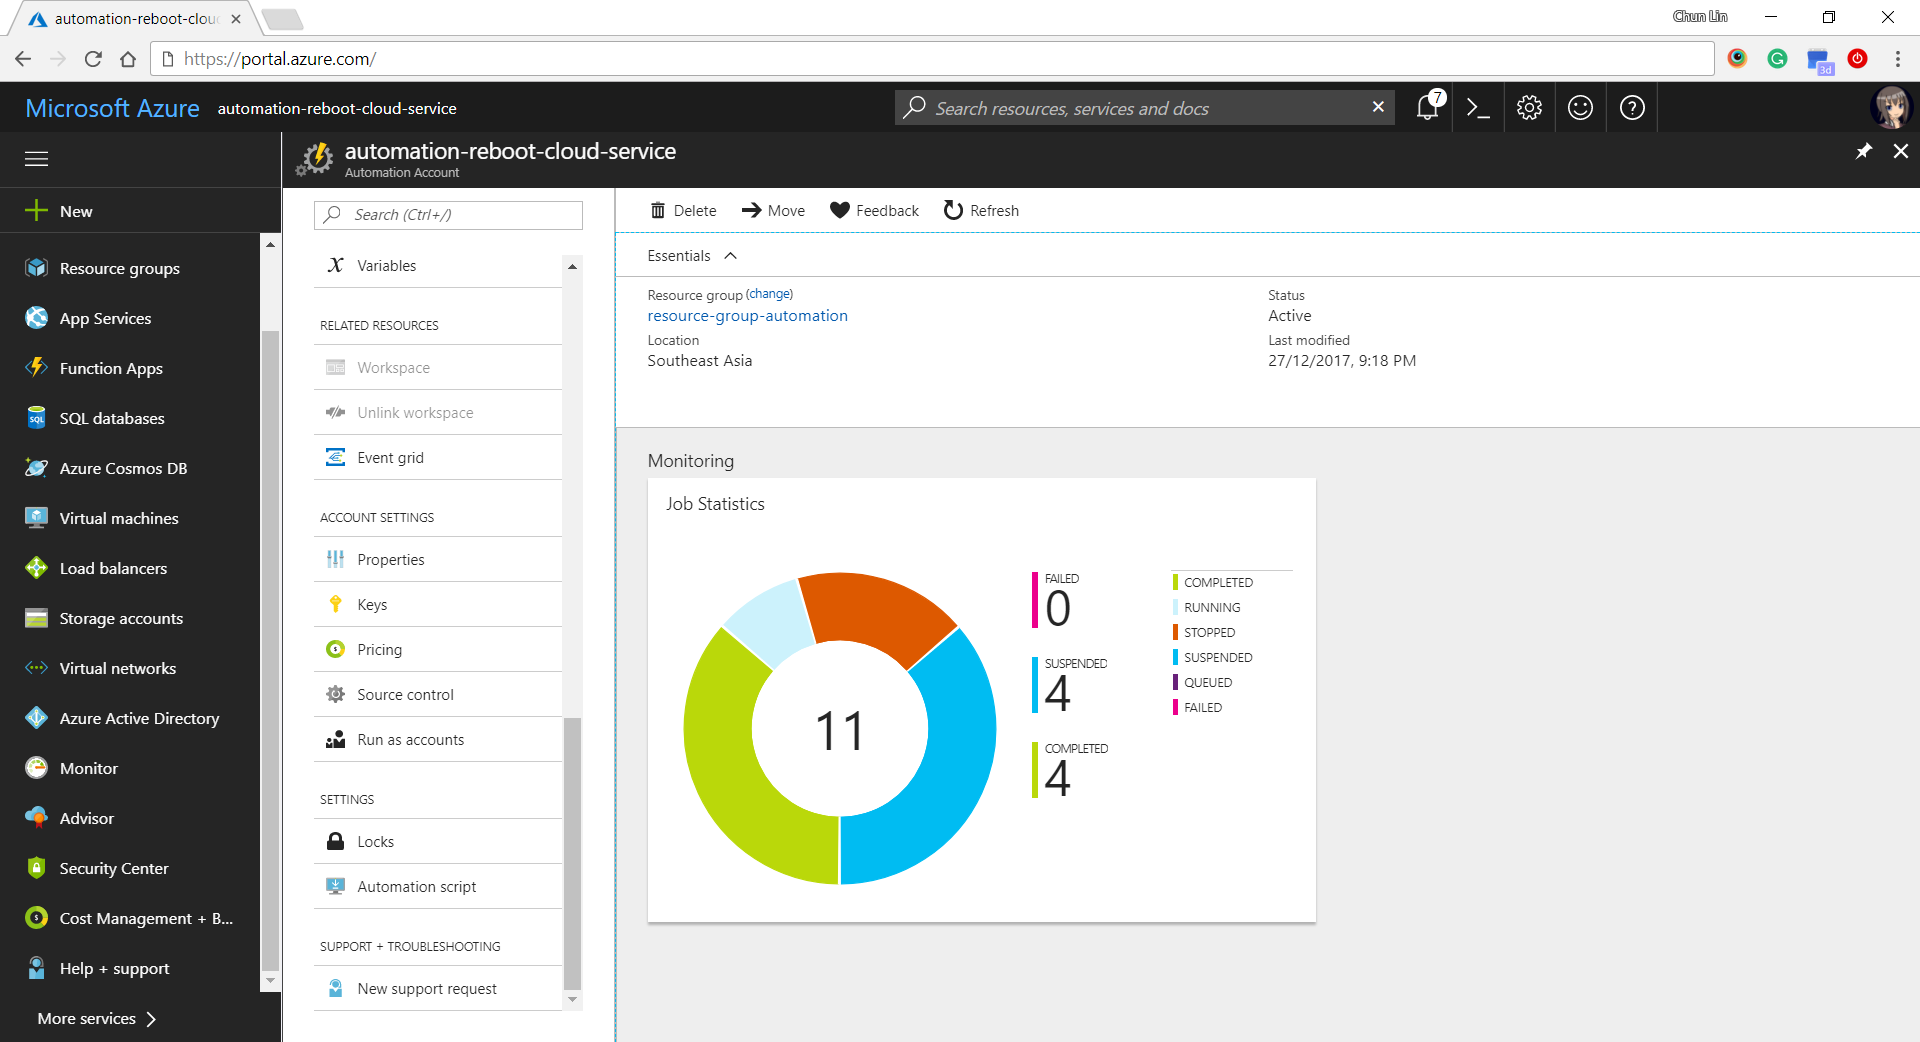
After that, we can easily get a summary of how the job runs on Azure Portal, as shown in the following screenshot.
Job Statistics of Azure Automation.
Yup, that’s all what I had learnt in the December while everyone was enjoying the winter festivals. Please comment if you find a better alternative to handle the challenges above. Thanks in advance and happy new year to you!