In the past, we published our Android app with APK, or Android Package file format, to the Google Play Store. However, starting from August 2021, if we have new apps to be published to the Google Play Store, we must use the AAB format, or Android App Bundle, instead.
AAB was first introduced in May 2018. AAB is a publishing format that includes all the compiled code and resources of our app, and defers APK generation and signing to Google Play. AAB also makes our app smaller (on average, 15% smaller than a universal APK) and faster to download.
Hence, today in this article, we will see how we can publish our Android app which is newly built using Xamarin.Forms in AAB format to the Google Play Store.
Step 0: Configure MainActivity And Android Manifest
In the Android project, we will see a class called MainActivity which is used to powered our Android app. It has an attribute called Activity which lets Android know that the class is part of the app managed by the Android Manifest.
There are many properties in the Activity attribute. One of them is called MainLauncher. By default, MainLauncher will be set to true for MainActivity class to state that the MainActivity is where our app starts up.
Step 0.1: App Name, Icon, and MainActivity
We also can customise our app name by updating the Label property in MainActivity Activity attribute. However, please take note that the value of Label here will override the app name value in the Android Manifest. Hence, it is preferable to delete the Label property here and set the name in the Android Manifest instead with strings.xml.
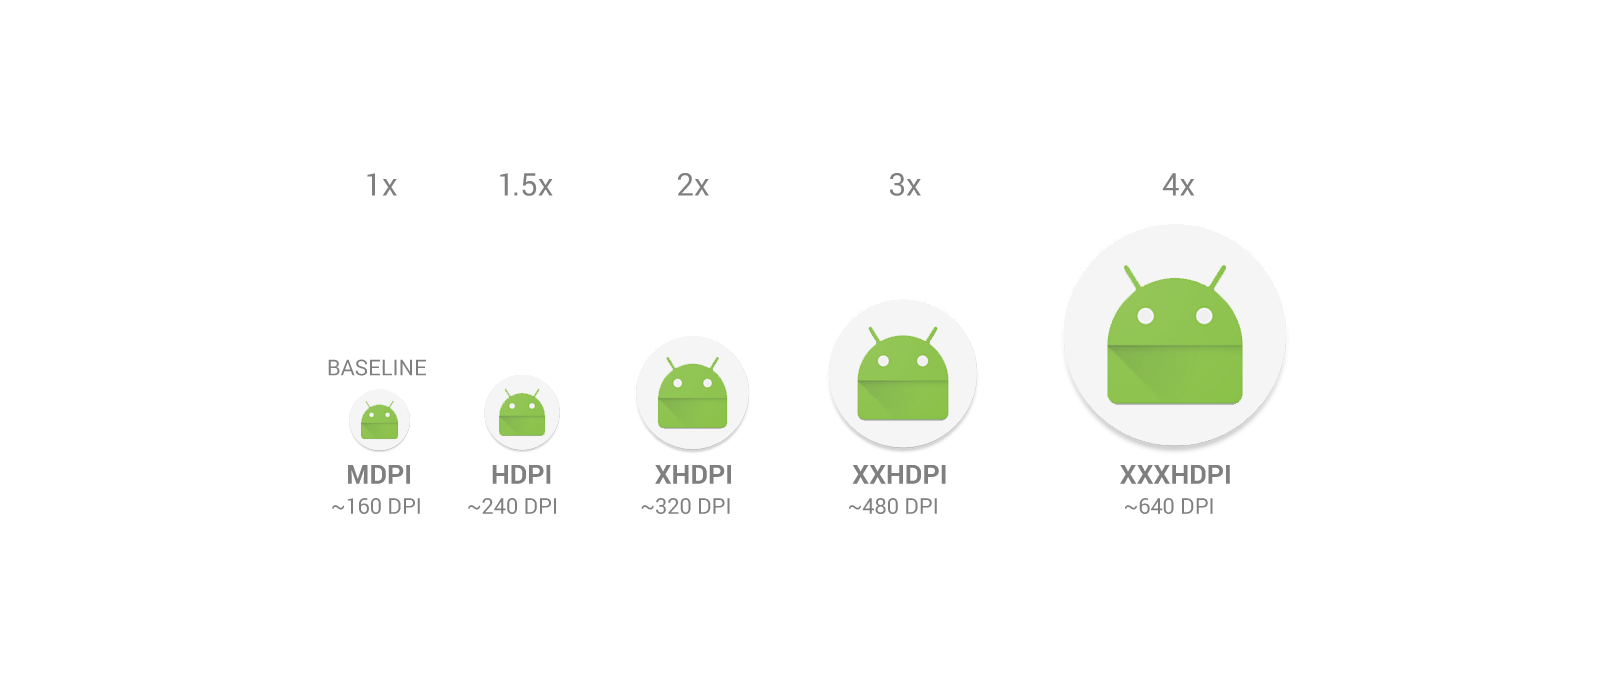
The Icon property here specifies the application icon. By default, it is set to be “@mipmap/icon”. Hence, we simply need to update the icon.png files in all the mipmap folders. We don’t use drawable folder because our app icon may need to be scaled differently on different UIs. The launcher app will then pick the best resolution icon to display on the screen. An alternative to creating multiple density-specific versions of an image is to create just one vector graphic.
Finally, if you are using Xamarin plugins, such as Rg.Plugins.Popup, you will be asked to configure the ConfigurationChanges property. This is to declare that our app handles the configuration change itself which prevents the system from restarting our activity.
Step 0.2: App Manifest
Android Manifest allows us to describe the functionality and requirements of our Android app. We can either directly edit the AndroidManifest.xml file or edit it through the Properties window of the Android project.
Step 0.2.1: Android API Level
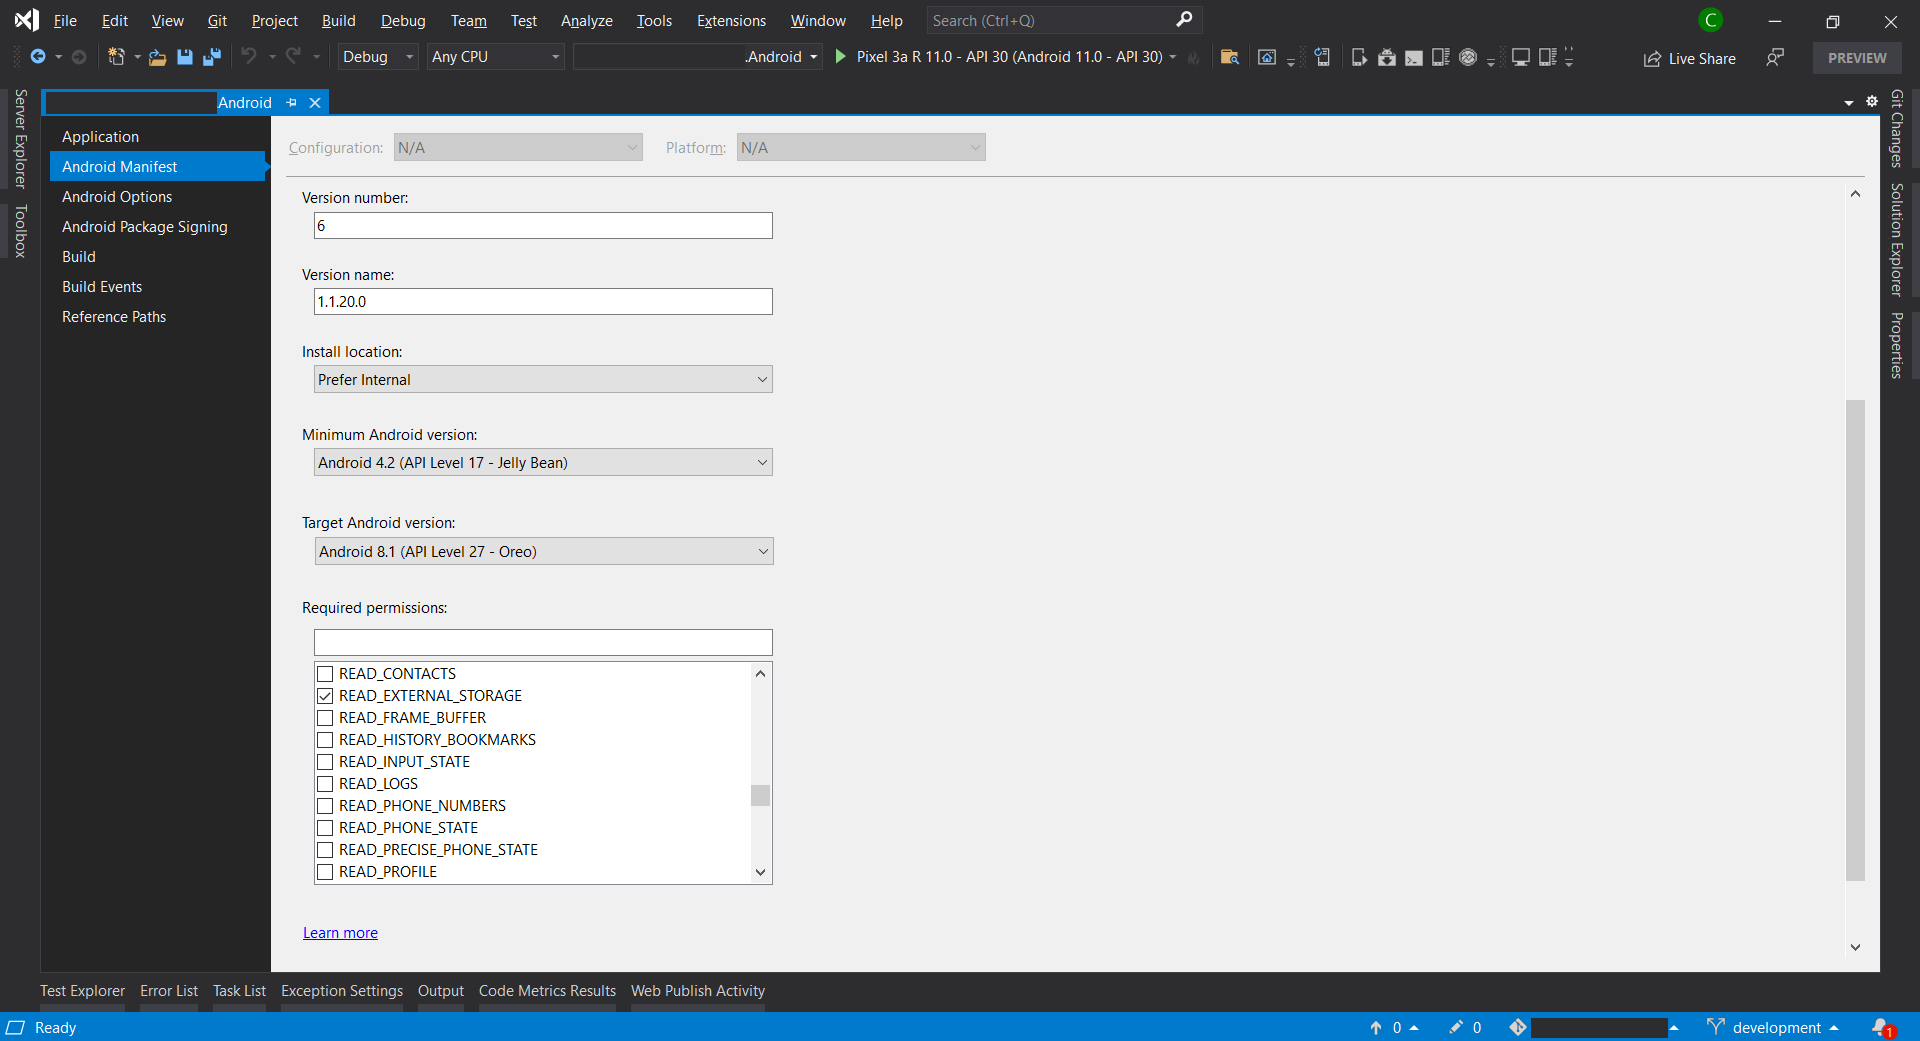
In the manifest, we can specify the minimum and target Android versions.
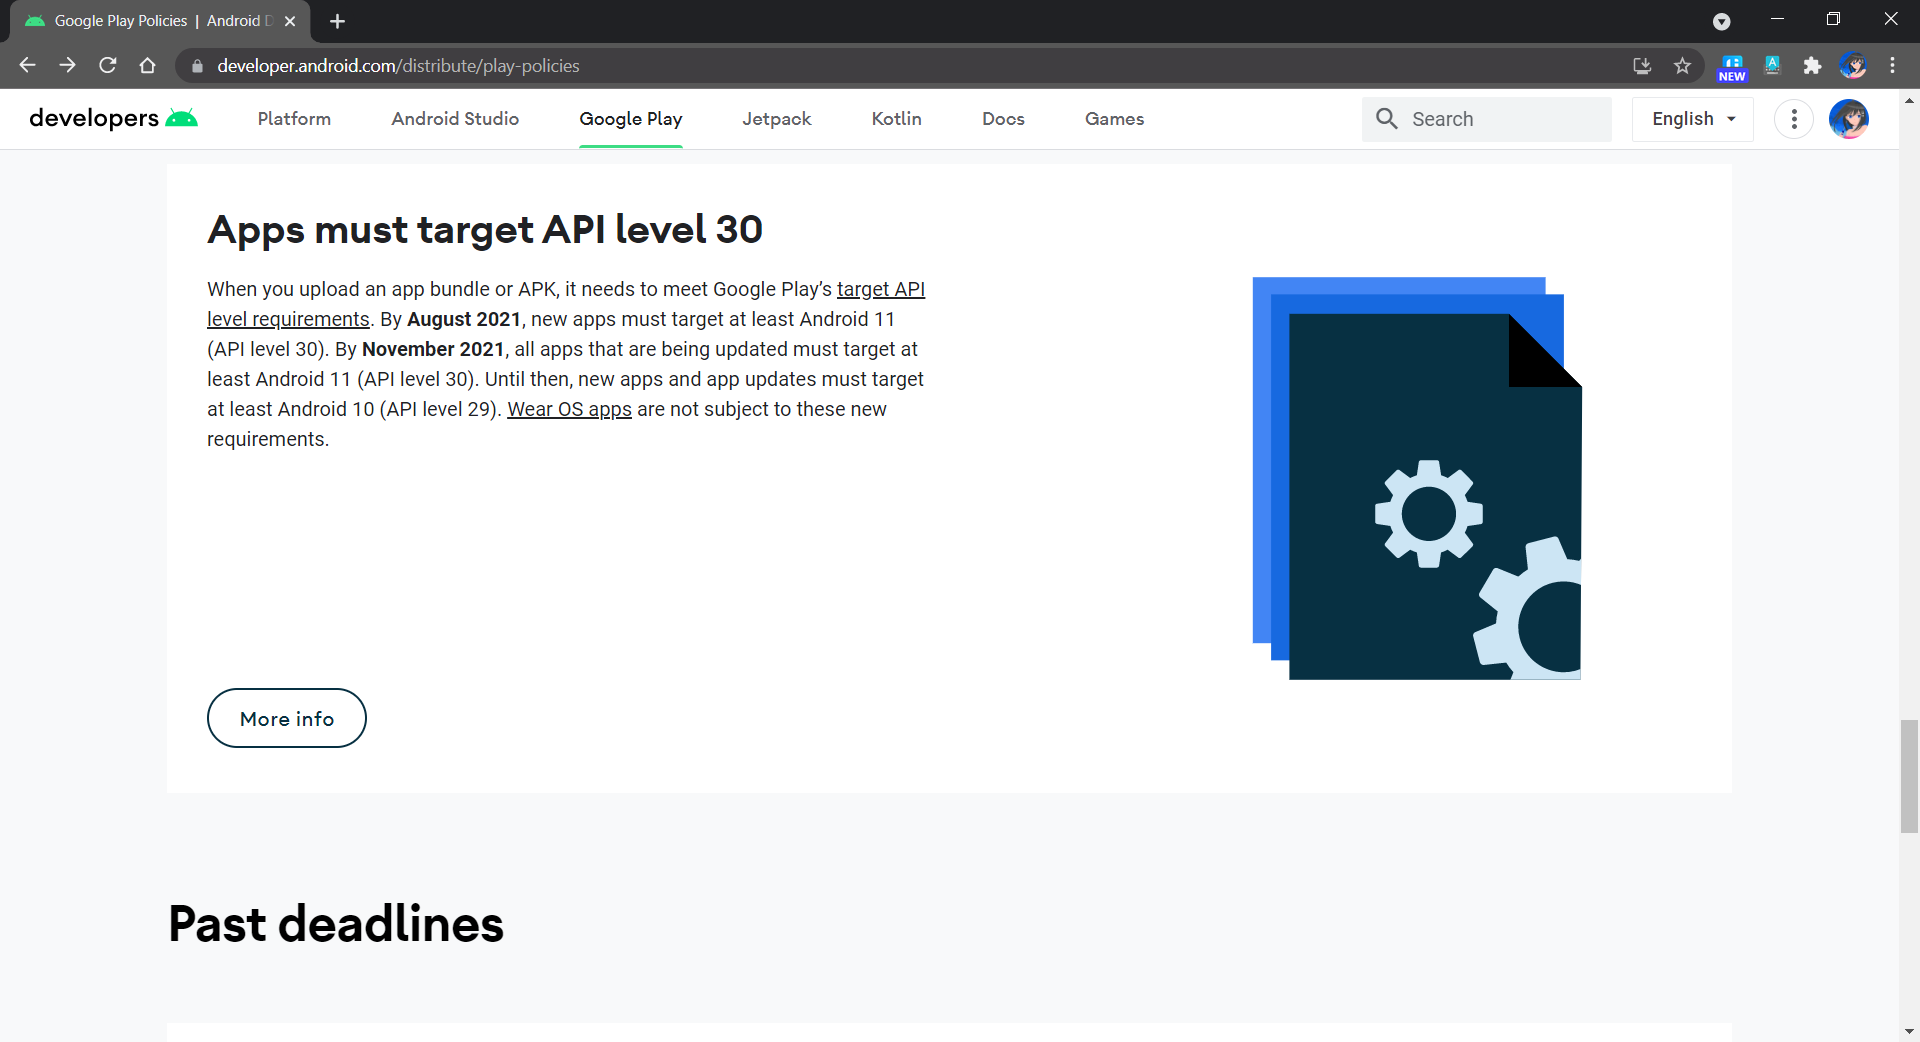
By November 2021, all apps that are being updated must target at least API Level 30, as shown in the announcement in Google Play Policies screenshot below.
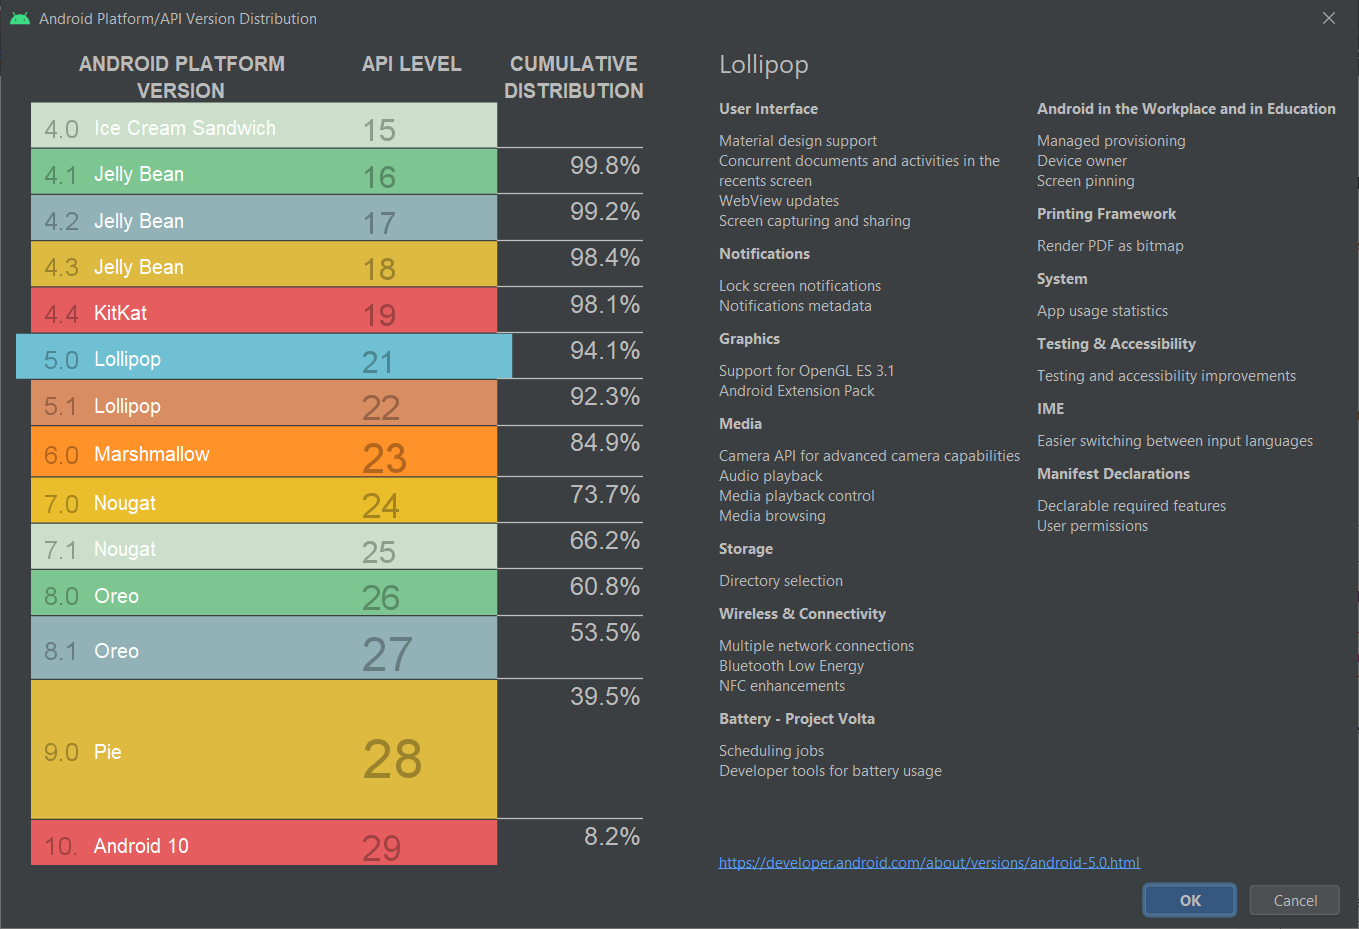
In addition, in order to not make our app to run on Android devices which are still using the discontinued Dalvik VM, we shall set minimum Android API Level to be 21 at least. According to the chart provided in Android Studio, we can see that 94.1% of the Android devices are already using API Level 21 and above as of October 2021. So it is safe to set the minimum Android API Level to be 21.
Step 0.2.2: Permissions
In the manifest, we also need to specify the permissions our app requires to run. We should only request necessary permissions because users will be prompted to allow these permissions when they download our app from the Google Play Store.
By the way, if we find that switching to a Release build causes our app to lose a permission that was available in the Debug build, verify that the permission is explicitly set in the Android Manifest in Properties window, as shown in the Screenshot A above.
Step 0.2.3: App Version
Finally, in the manifest, we need to version our app release. Android recognises two different types of version information:
- Version Number: A positive integer value (used internally by Android and the application, and thus not displayed to users) that represents the version of the application. Normally it starts with 1;
- Version Name: A string about the app version and it’s displayed to users in Google Play Store.
Step 1: Change To AAB
As mentioned earlier, Google requires us to publish our apps with the Android App Bundle (AAB). Hence, we need to first update the Android Package Format for our app in Android Options to use bundle instead of apk, as shown in the following screenshot.

Step 2: Configure Linker
In order to have an efficient app deployment, we need to build and release small app packages. To do so, we execute a process, known as Linking, that examines the application and removes any code that is not directly used.
The Linker in Xamarin.Android uses static analysis to determine which assemblies, types, and type members are used or referenced by a Xamarin.Android application. The linker will then discard all the unused assemblies, types, and members that are not used or referenced.
There are three linking options available:
- None: No linking will be executed;
- SDK Assembly Only: Linking will be performed on the assemblies required by Xamarin.Android only, NOT user’s assemblies;
- SDK and User Assemblies: Linking will be performed on ALL assemblies, including user’s assemblies.
Normally, we will pick “SDK Assembly Only”. If we choose the “SDK and User Assemblies” option, the Linker may sometimes remove classes that are not seemed to be used by our code, especially if they are in the Xamarin shared project (or PCL library project).
Please take note that linking can produce some unintended side effects, so it is important that an application be re-tested in Release mode on a physical device.
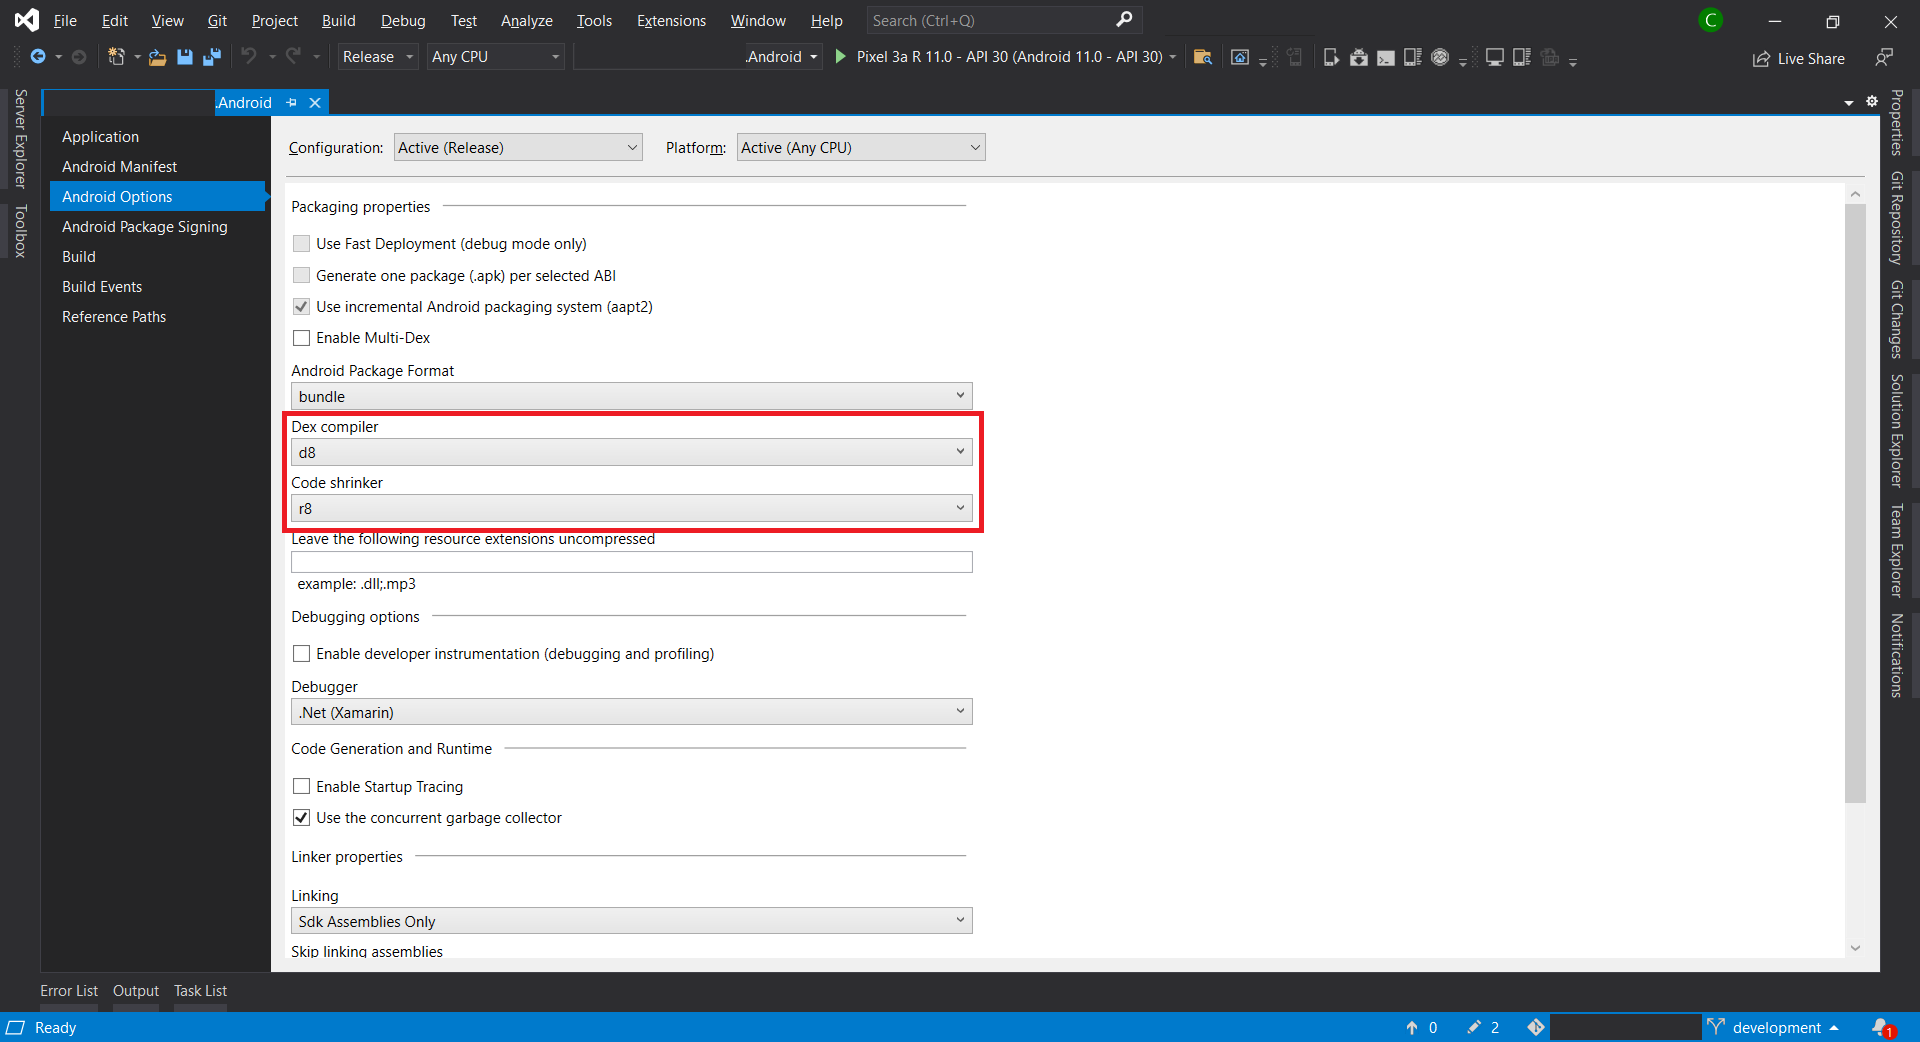
Step 3: Dex Compilation
In order to have our app run on Android Runtime (ART), which is the successor of Dalvik VM, there is a process known as Dex (Dalvik Executable) Compilation which will transform .class bytecode into .dex bytecode. Inevitably, Xamarin.Android also has to compile Java source code into Dex format as part of the build.
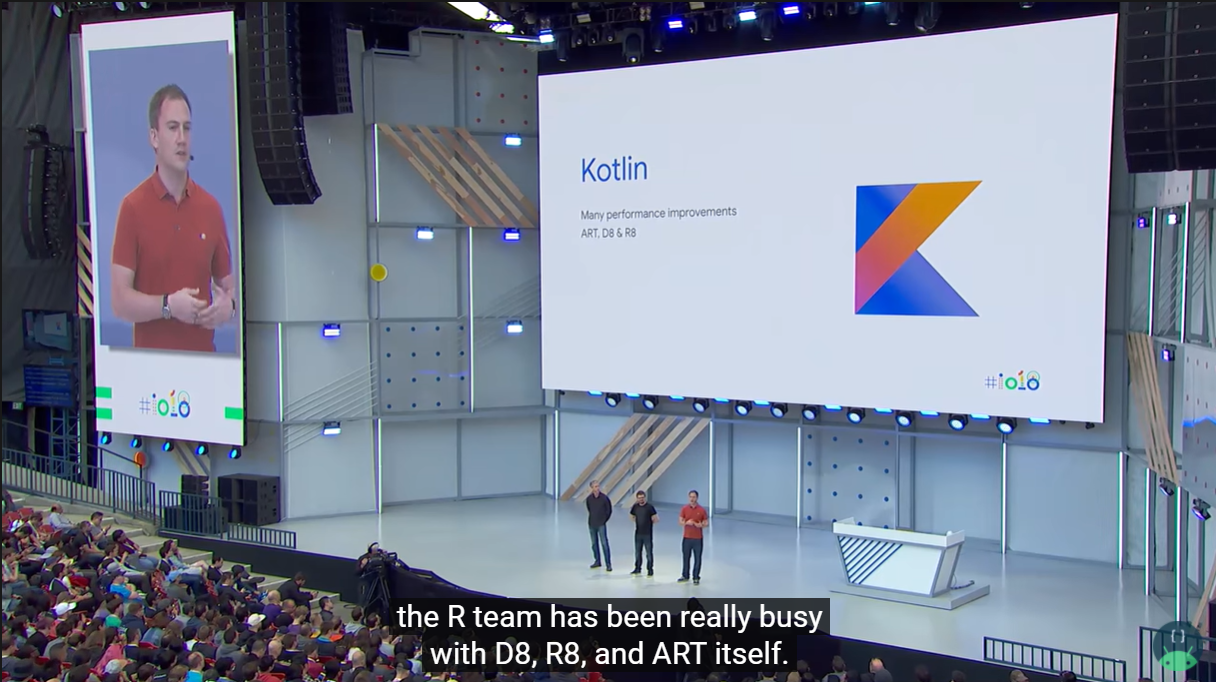
In 2017, Google introduced a new Dex compiler know as D8 and one year later Google made it as the default Dex compiler in Android Studio. Soon, in Visual Studio 2019 Preview 2, D8 was allowed to be set in csproj.
As an extension to D8, R8 is a Java code shrinker. R8 will remove unused code and resources from our app release so that the released is shrank. According to Google, in R8, we can also benefit from obfuscation, which shortens the names of classes and members in our app, and optimization, which applies more aggressive strategies to further reduce the size of our app. However, R8 doesn’t obfuscate when used with Xamarin.
Step 4: Disable Debugging
In the Android Options shown above, we need to make sure we have disabled the “Enable developer instrumentation (debugging and profiling)” option for Release mode.
In addition, we should disable the debug state in a released application as it is possible to gain full access to the Java process and execute arbitrary code in the context of the app via JDWP (Java Debug Wire Protocol, which is turned on by default) if this debug state is not disabled. To disable it, we need to add the following lines into AssemblyInfo.cs file.
#if DEBUG
[assembly: Application(Debuggable=true)]
#else
[assembly: Application(Debuggable=false)]
#endif
Step 5: Set Supported Architecture
Currently, all our apps published on Google Play must support 64-bit architectures because starting from August 2021, Google Play stops serving non-64-bit capable devices. This means that apps with 32-bit native code will need to have an additional 64-bit version as well.
Fortunately, Xamarin.Android having supported 64-bit CPU architectures for some time and is the default in Visual Studio 2019.
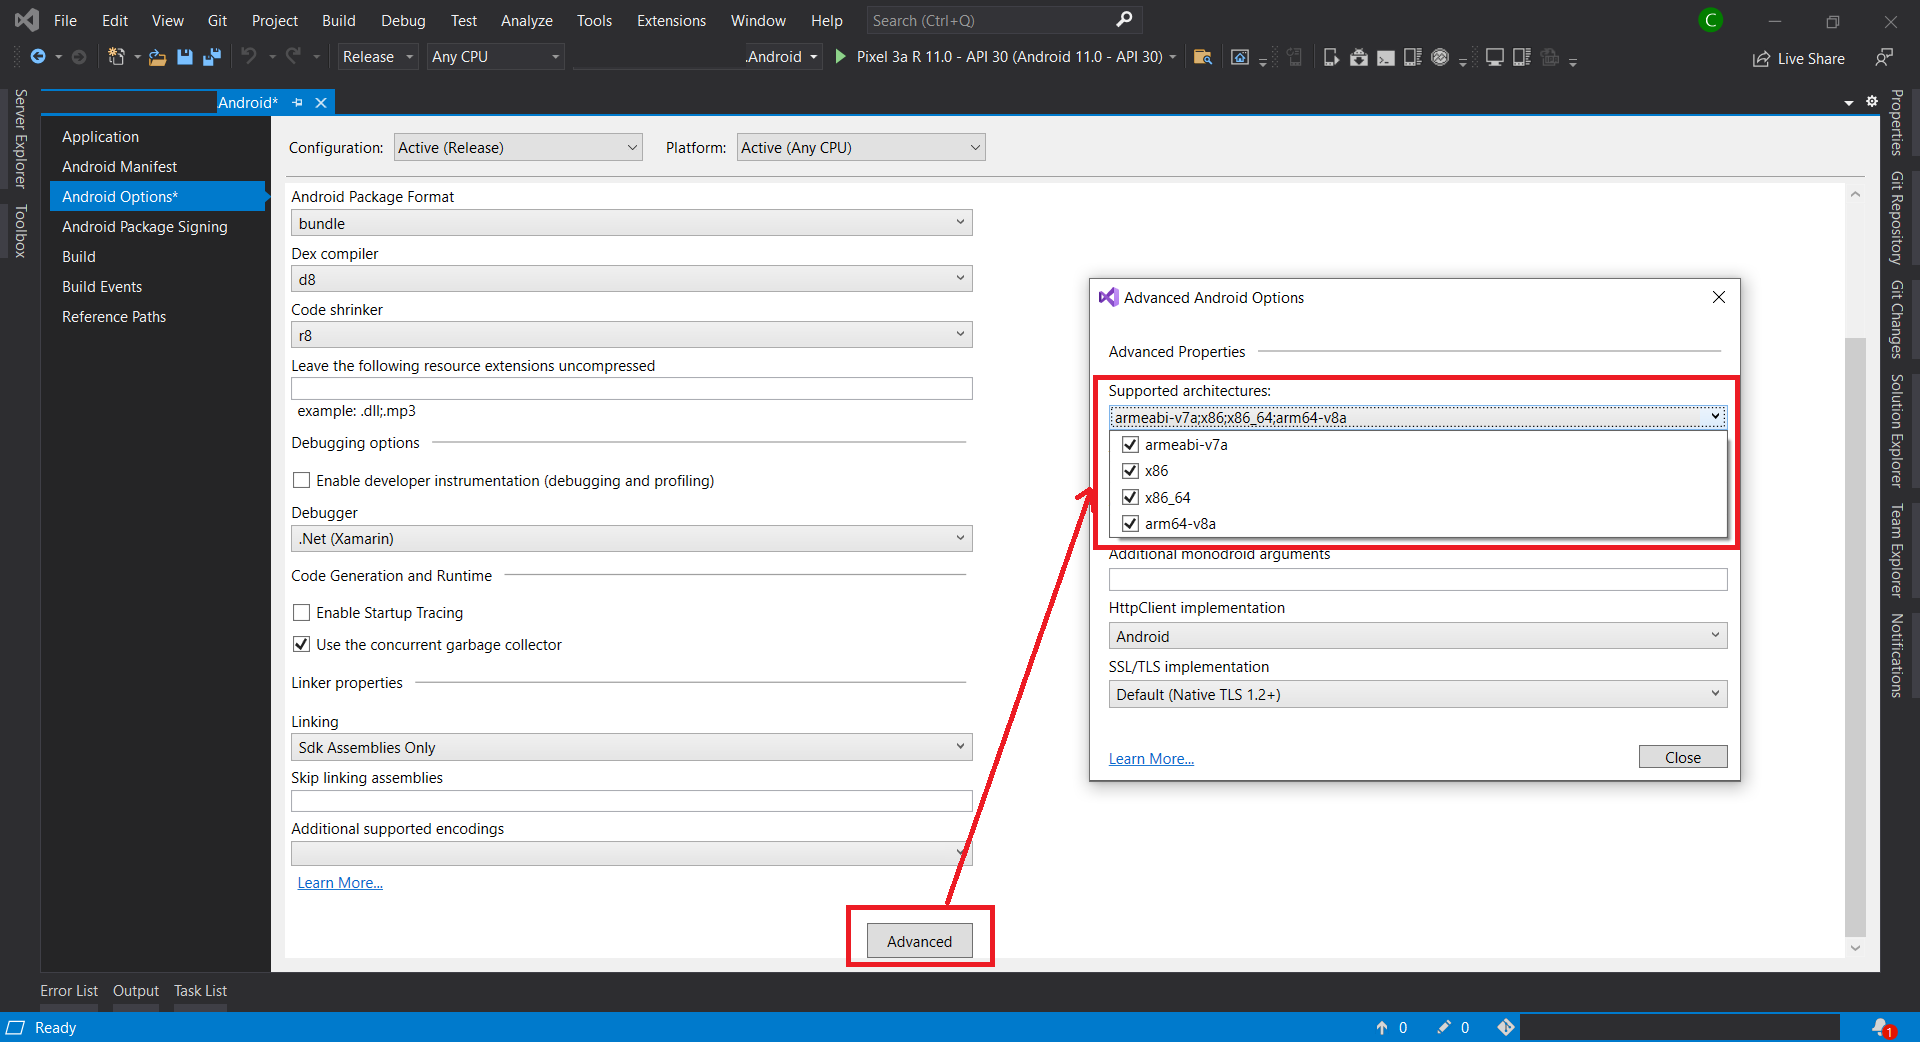
Take note that with AAB, Google Play now can use our app bundle to generate and serve optimized APKs for each device configuration. Hence, only the code and resources that are needed for a specific device are downloaded to run our app. This means that including additional architectures will no longer have any impact on the binary size when using AAB.
Step 6: Compile and Archive
After all of the above steps are completed, we can now proceed to compile our app in Release mode. We need to make sure that our app can be built successfully in Release mode.
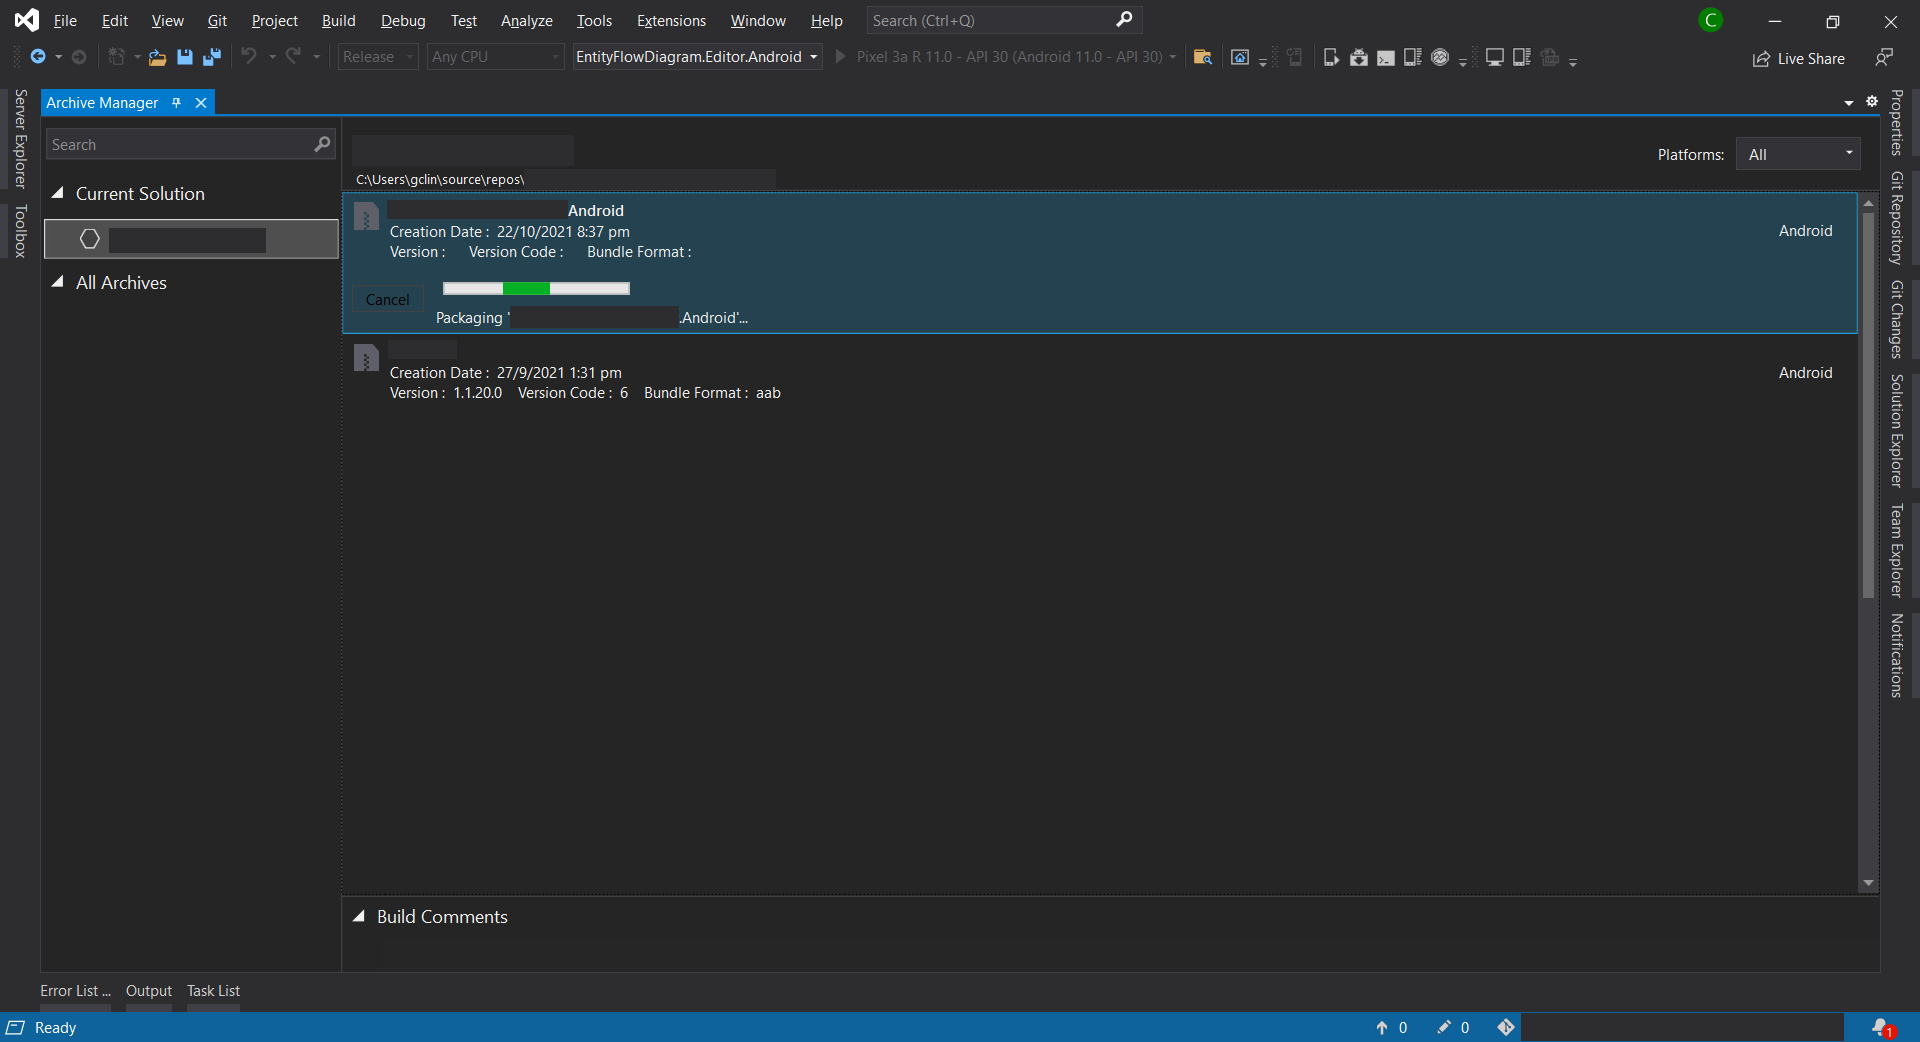
Next, we will right-click on the Android project and choose the “Archive…” option. Then the Archive Manager will be displayed, as shown below. We just need wait for the packaging process to finish.
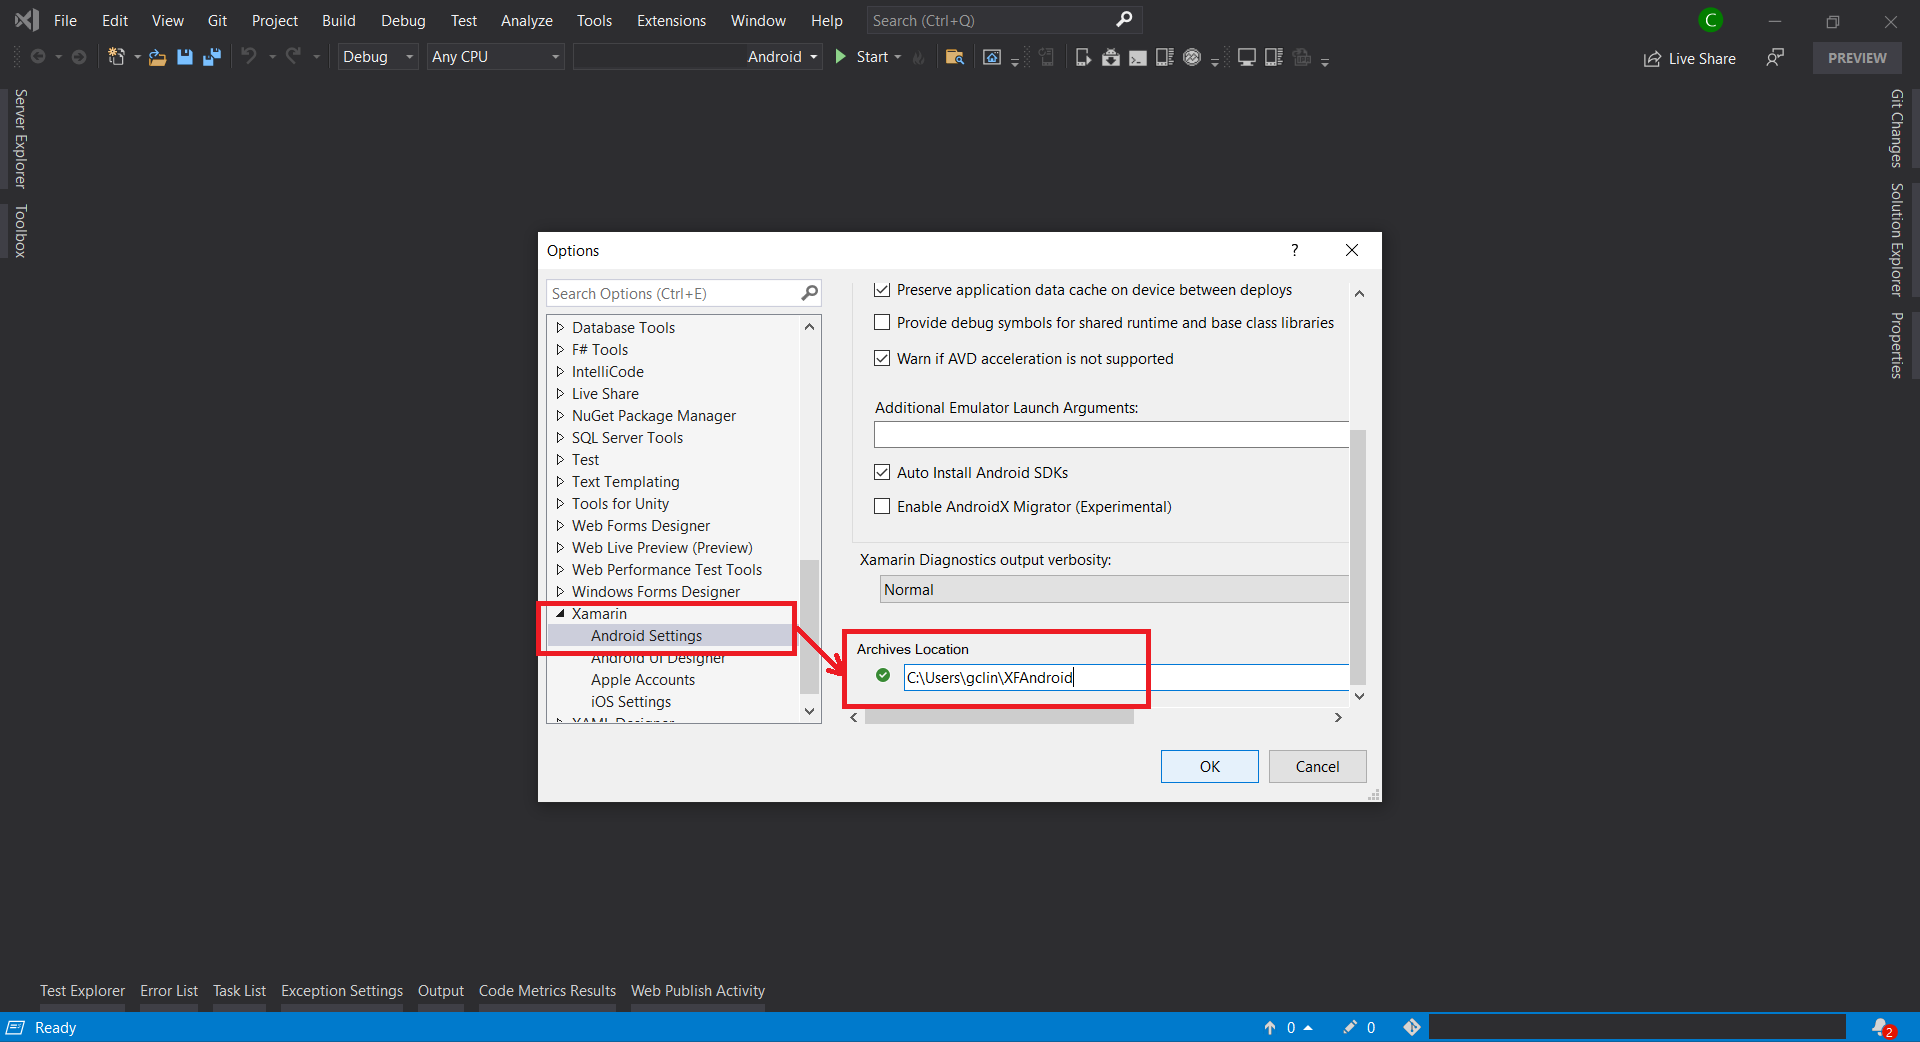
Sometimes, the archive process will fail with an error message saying “Cannot create the archive file because the copy of mdbs files failed.” or “Could not find part of the path”. According to the discussion on MSDN, this is because the Xamarin Android Archive Location path is too long. Hence, the solution is to update it to a shorter path under Tools -> Options in Visual Studio, as shown below.
Step 7: Configure Distribution Channel
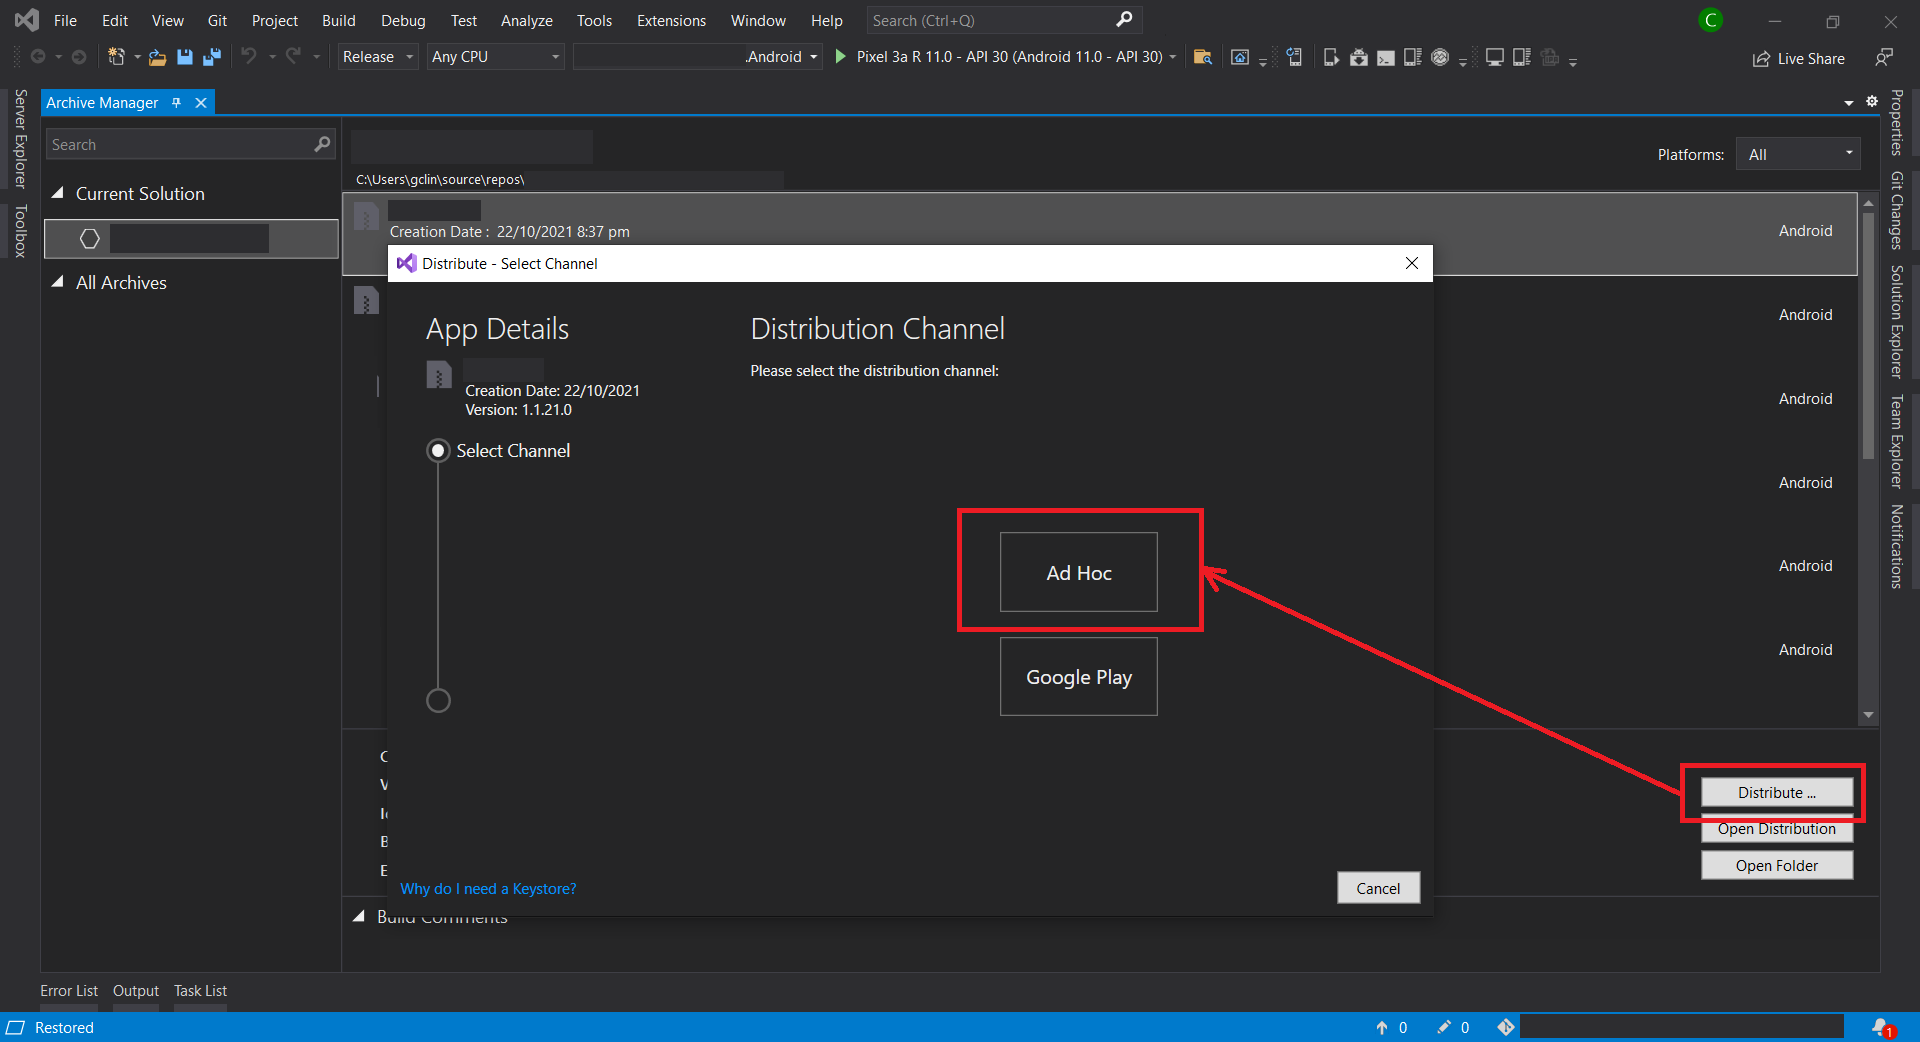
After the archive has been successfully built, we can proceed to choose the distribution channel. Here, we will choose Ad Hoc instead of Google Play as our distribution channel. This is because to Ad Hoc approach does not restrict our app to be published to Google Play only and thus gives us more freedom. In addition, to use Google Play as the channel, we will need to obtain OAuth 2.0 client credentials from the Google Cloud Console. So, to keep thing simple, we will use the Ad Hoc approach here.
Step 8: Generate Signed Bundle
Before we can publish our app on the Google Play, we need to sign our aab with a certificate (aka upload key). We sign our aab so users know the app is really from us. Hence, after Ad Hoc is selected, Visual Studio will display the Signing Identity page.
If we already have an existing certificate, we can simply import it (password is needed). Otherwise, we can choose to create a new signing certificate.

We must back up the resulting keystore file and password in a safe place. To retrieve the keystore, we can simply double click on the certificate in the list shown in the screenshot above. From there we can choose to view the keystore file in the Windows Explorer.
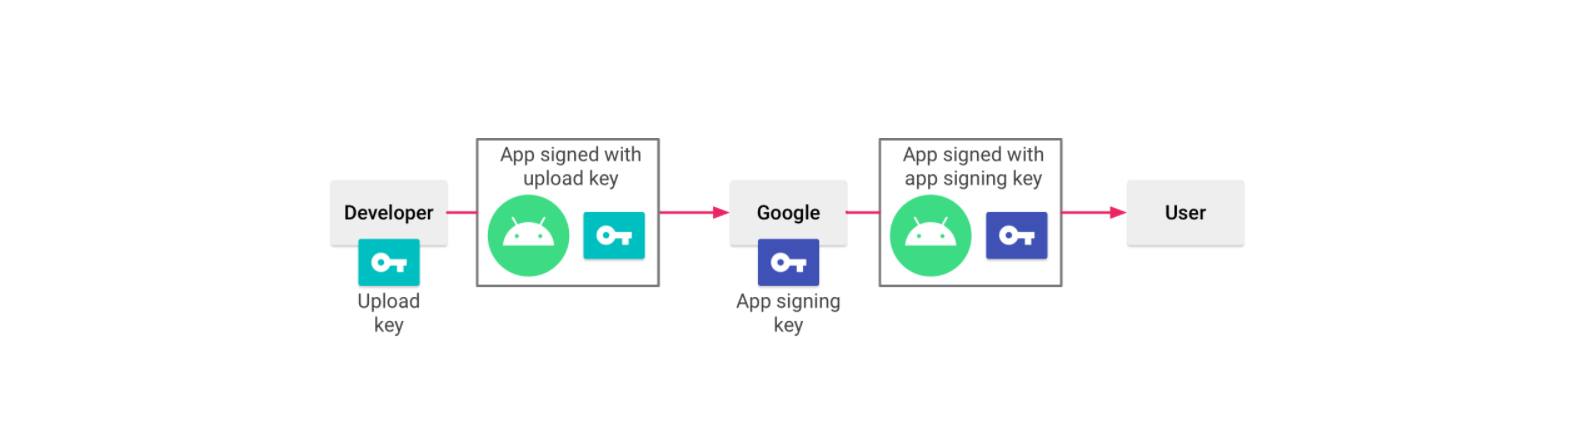
Once we have signed our aab, Play App Signing will take care of the rest. With Play App Signing, Google manages and protects our app signing key for us and uses it to sign optimized, distribution APKs that are generated from our aab, as illustrated in the chart above.
Currently, when our app is updated to a new version, Android will first makes sure the certificate of new version is same as the one in the previous version. Hence, when the app signing key expires, users will no longer be able to seamlessly upgrade to new versions of our app. Now, with Play App Signing, Google helps to keep our app signing key safe, and ensures our apps are correctly signed and able to receive updates throughout their lifespans.
In addition, when we use Play App Signing, if we lose our upload key, we can request for Upload Key Rest by contacting Play Store support. Since our app signing key is secured by Google, we can then continue to upload new versions of our app as updates to the original app, even if the upload keys have been changed.
For more information about Play App Signing, please watch the video below.
After we have signed and save our app bundle as aab file locally, we can move on to create and setup our new app on Google Play Store.
Step 9: Setup App on Google Play Console
In June 2020, new Google Play Console was introduced.
There are many steps involved to setup our app on Google Play Console. Fortunately, there is a very good YouTube tutorial from MJSD Coding about how to create and setup a new app on the new Google Play Console. You can simply refer to the video below.
Step 10: Release our App
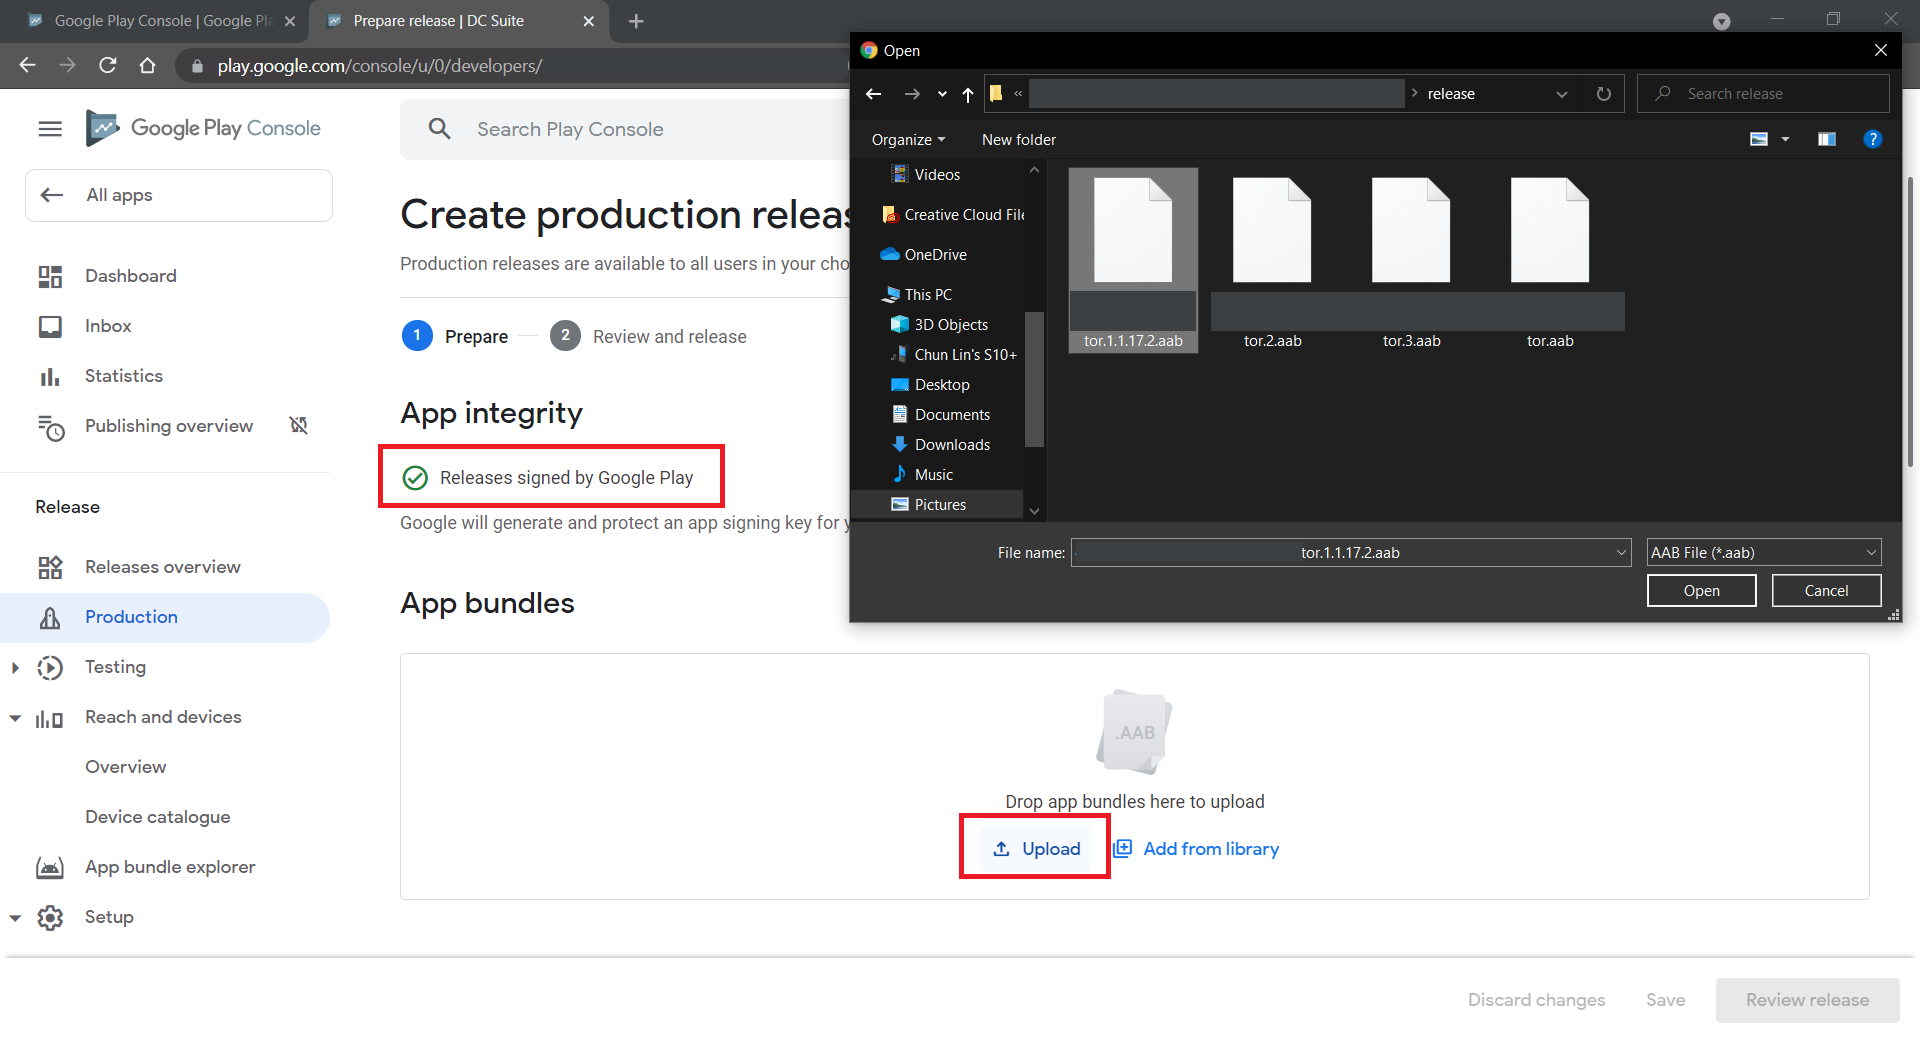
In the video above, we learnt about the step to create production release. After we have confirmed to use the Play App Signing, we can proceed to upload our aab file generated in Step 8, as shown in the screenshot below. Once it is successfully uploaded to the Google Play Console, we can proceed to rollout our app release.