
In our earlier post about setting up AWS Lambda, we understood that for Lambda which will be invoked by HTTP requests, we normally need API Gateway to handle incoming HTTP requests and route them to the appropriate Lambda function. Hence, the API Gateway is often used as a complementary service to manage and expose our Lambda functions to the outside world.
By default, AWS provides a custom domain name in the form of api-id.execute-api.region.amazonaws.com, as shown in the screnshot below.

Usually, we would like to expose our API Gateway through a domain name that we own, rather than using the default domain provided, in order to enhance the visibility, security, and professionalism of our API, while also providing greater flexibility and control over its configuration and branding. In this article, we will show one of the available approaches.
Domain Registrar
We must have a registered Internet domain name before we can set up custom domain names for our API Gateway.
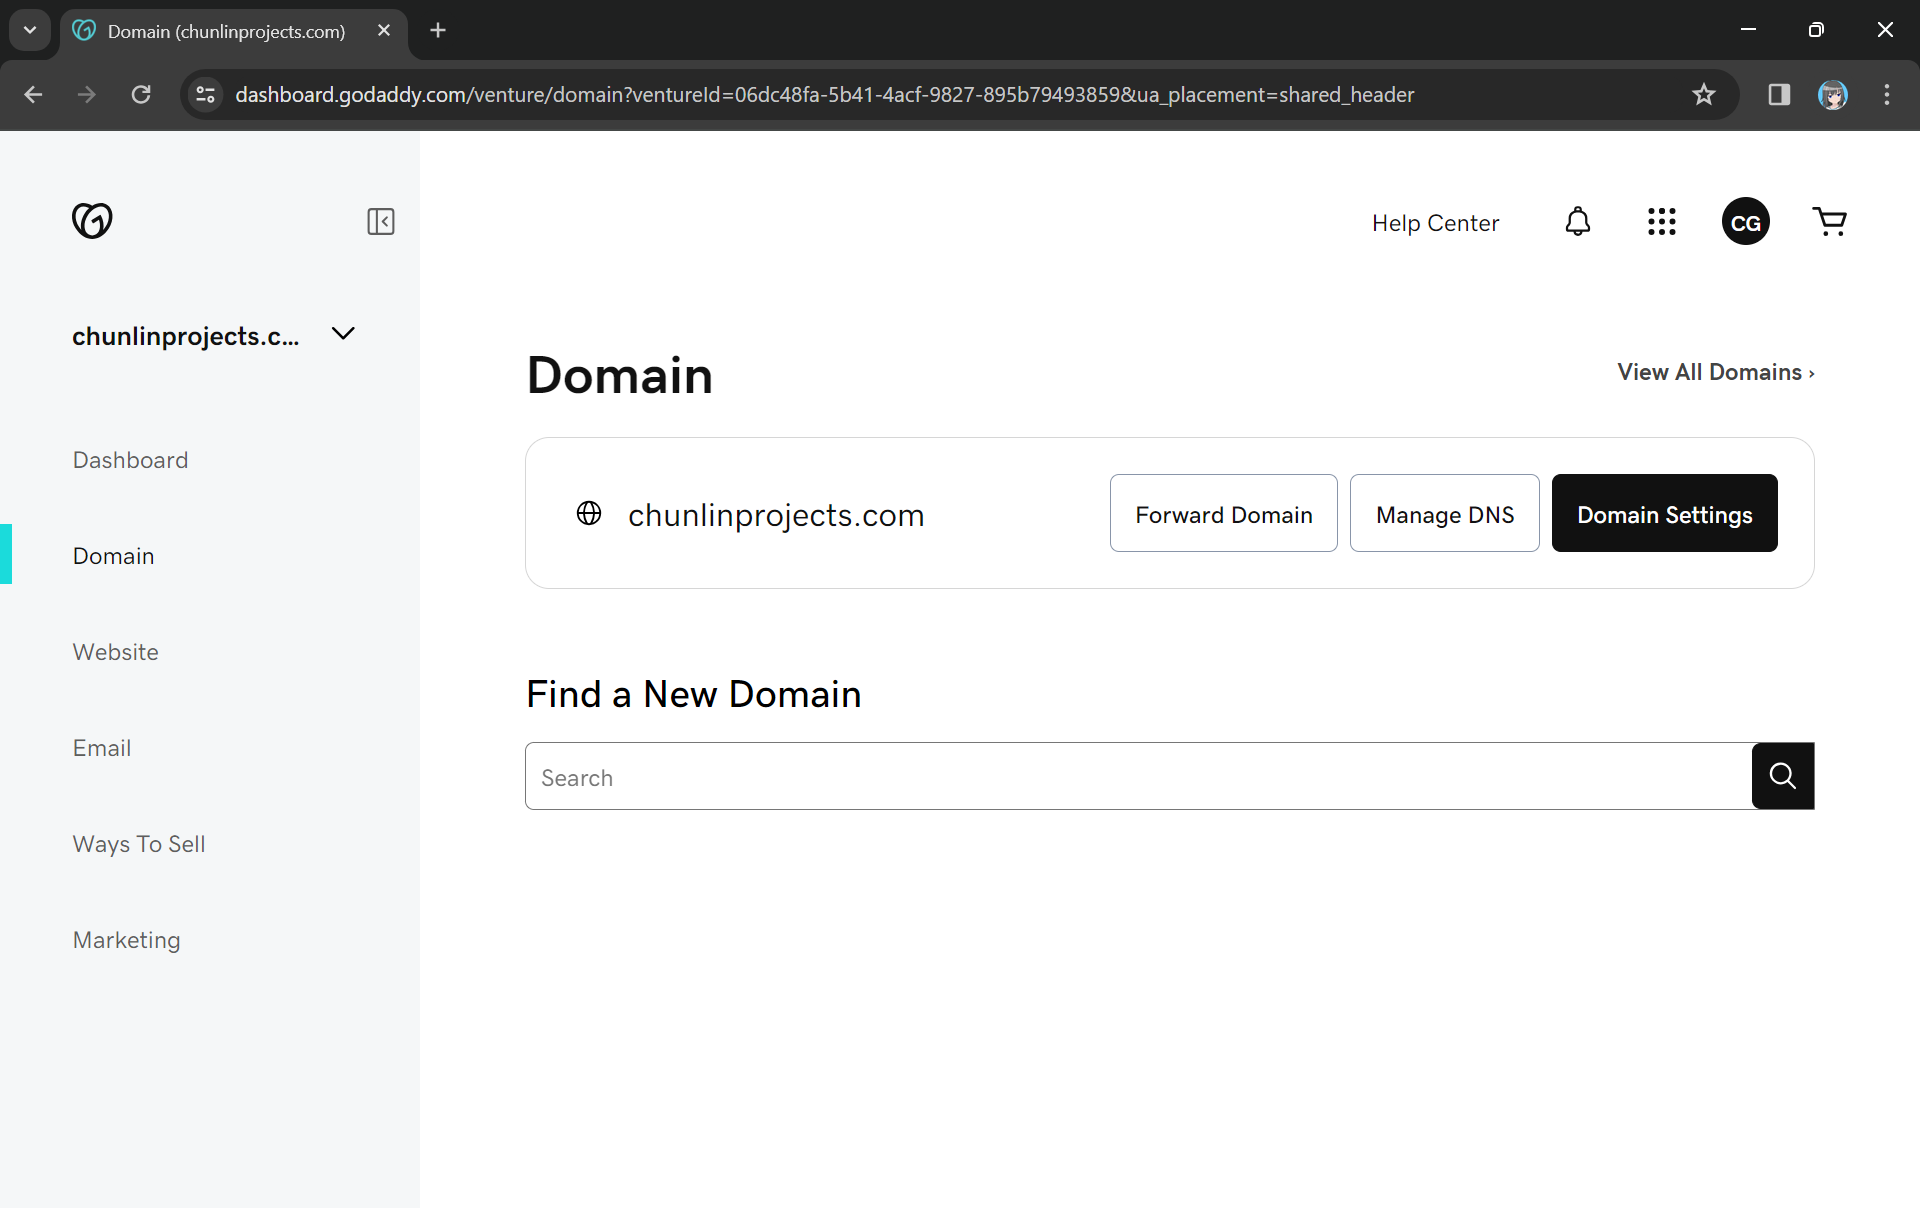
Previously, I have registered a domain name, chunlinprojects.com, on GoDaddy, one of the world’s largest domain registrars. Hence, I decided to create a subdomain called poker.chunlinprojects.com and then use it for my API Gateway.
ACM Certificate
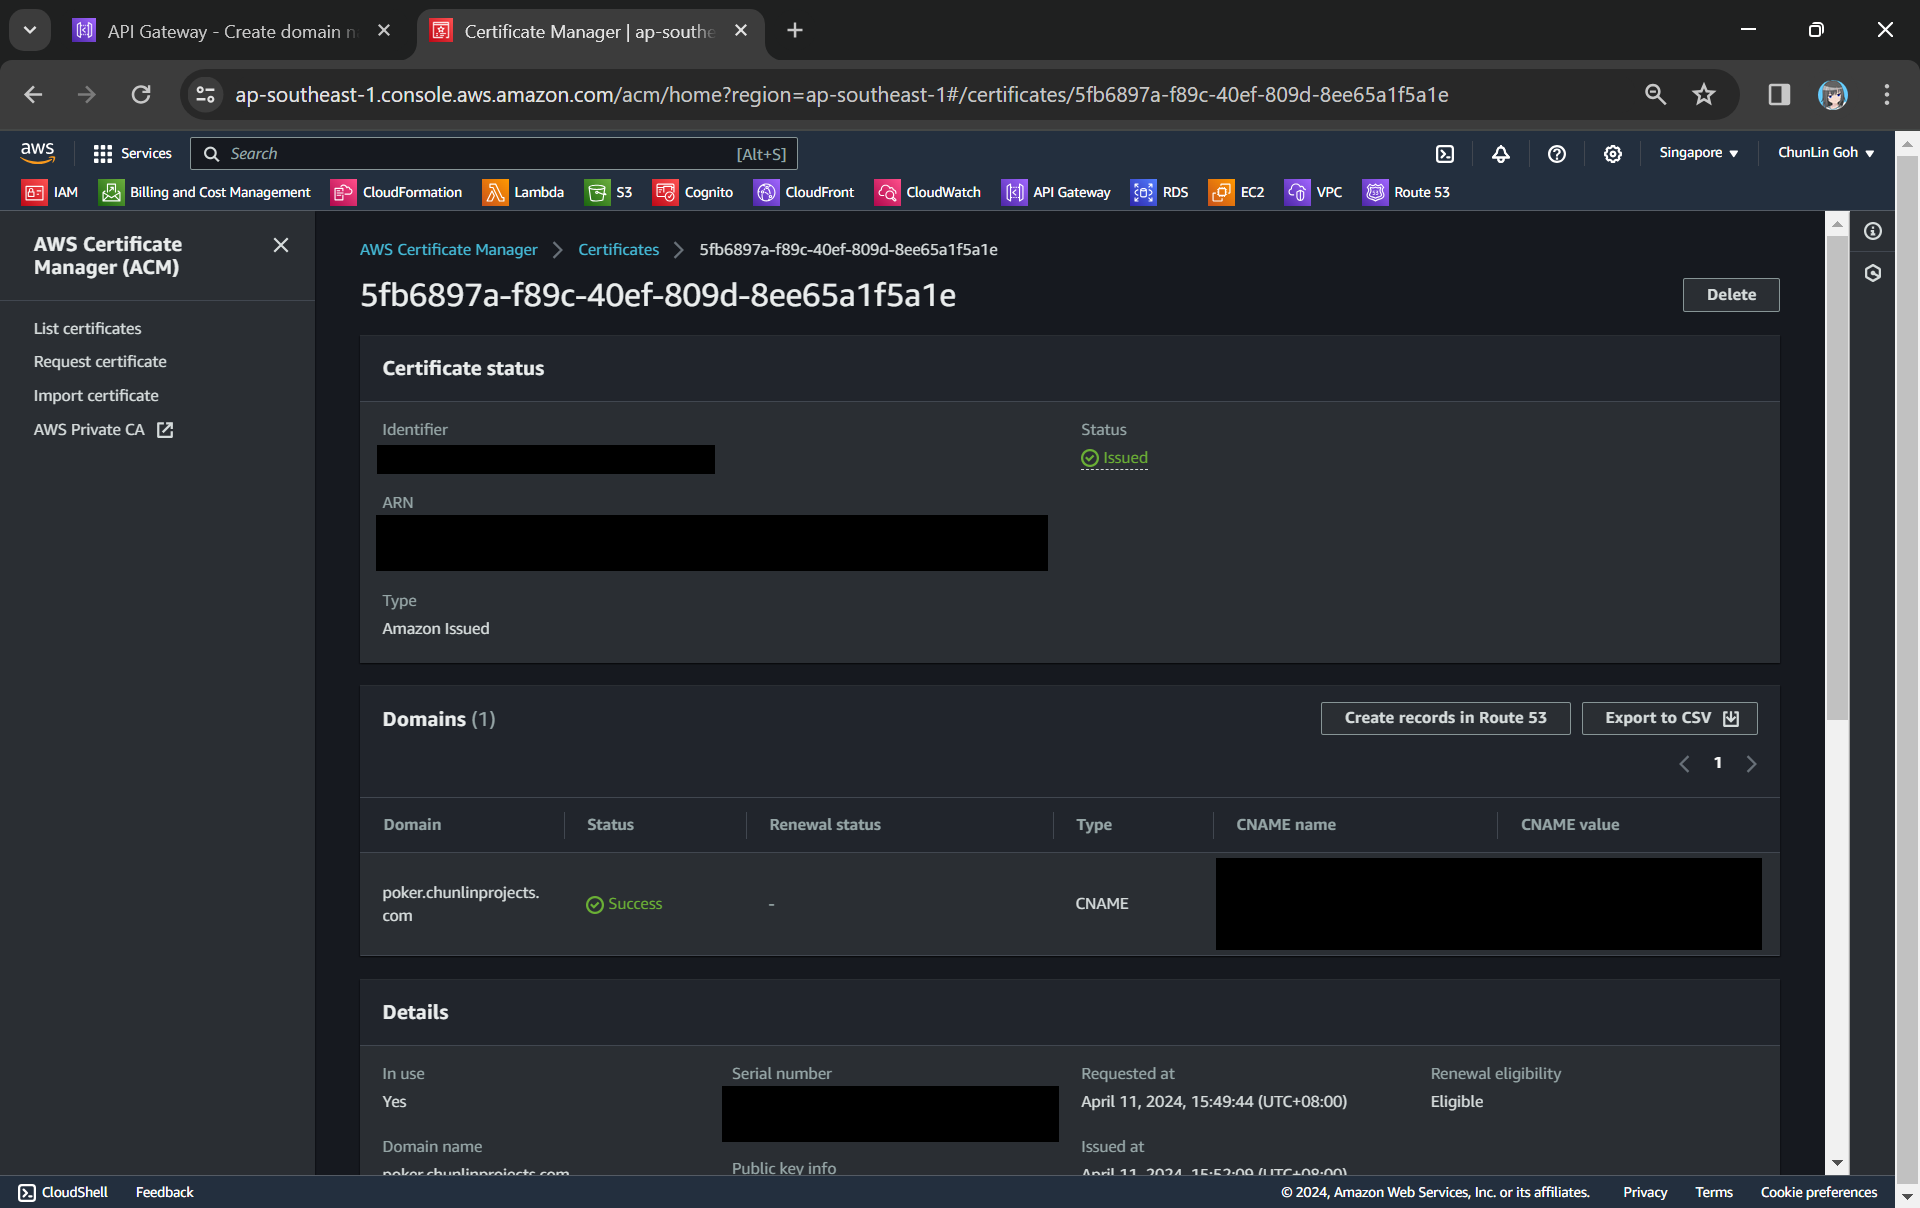
Before setting up a custom domain name for an API, we also must have an SSL/TLS certificate ready in AWS Certificate Manager (ACM). Please take note that for API Gateway Regional custom domain name, we must request or import the certificate in the same Region as our API Gateway.

In the certificate request page, we need to specify the domain name. In my case, it should be poker.chunlinprojects.com. Once it is done, we will need to add a CNAME record to our domain registrar. Its status will only be “Success” after we have added the CNAME record successfully, as shown in the screenshot below.
Route 53
As shown in the screenshot above, it is also possible to add the CNAME record to Route 53. So what is this Route 53 about?
Route 53 is Amazon Domain Name System (DNS) web service. It allows us to manage the DNS records for your domain, including A records, CNAME records, TXT records, and more. This is similar to what we can do on GoDaddy, so why do we need Route 53?
Route 53 is a better option because Route 53 provides a user-friendly interface for adding, updating, and deleting these records. In addition, Route 53 supports alias records, which can be used to map our custom domain directly to the API Gateway endpoint. Alias records work similarly to CNAME records but with the advantage of being resolved by Route 53 without incurring additional DNS lookup costs. This can improve the performance and reliability of our API Gateway by reducing latency and DNS resolution times.
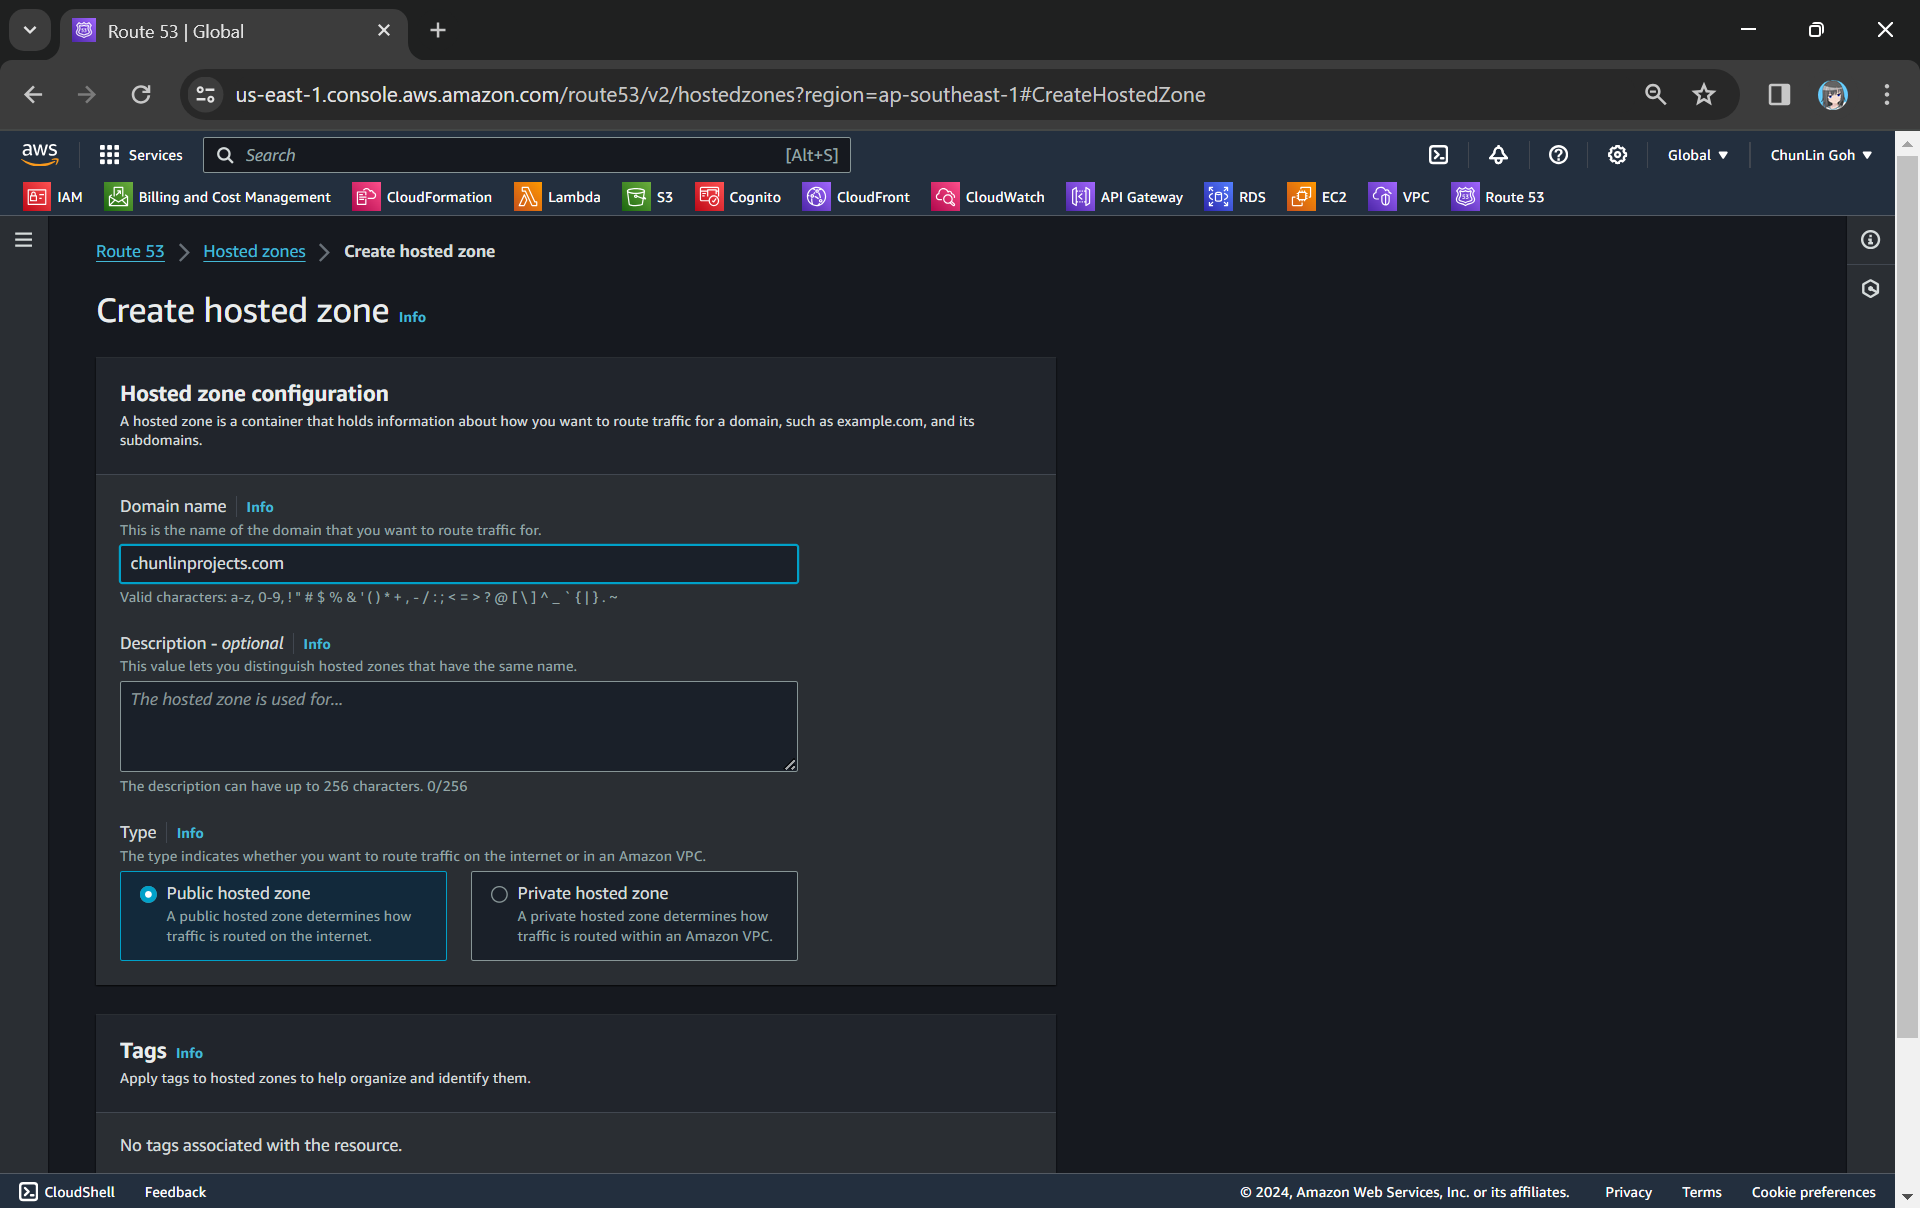
To setup Route 53 for our custom domain, we first need to create a Hosted Zone in Route 53 for our domain, as shown in the screenshot below.
After getting the hosted zone created, we will be able to get the list of name servers that we can use, as shown in the following screenshot.
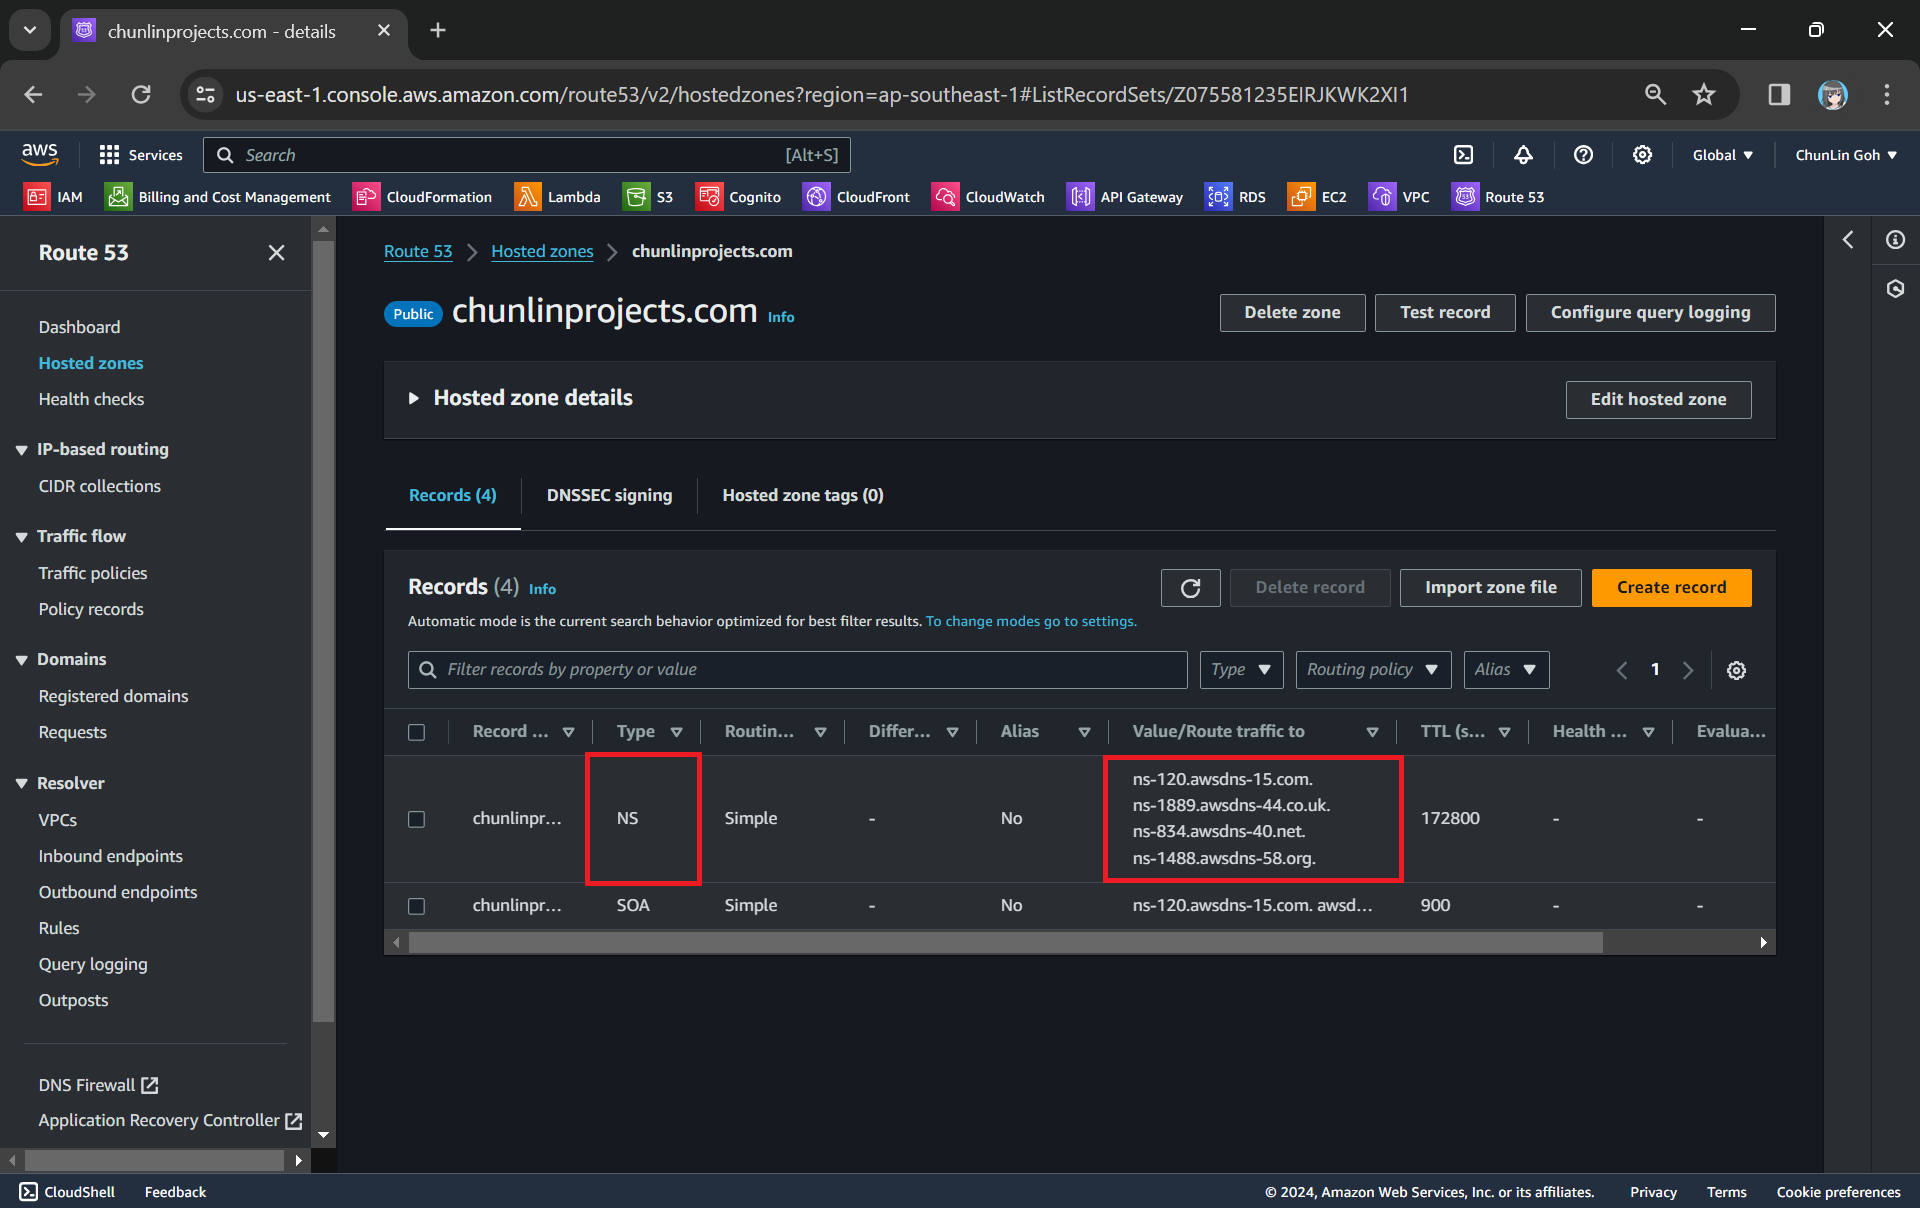
Since we want to use Route 53 name servers for DNS resolution, we need to update the (NS) records in GoDaddy DNS settings to point to the Route 53 name servers.

Now we can add the CNAME record earlier in our Route 53 hosted zone too.

Custom Domain Name in API Gateway
After we have both ACM and Route 53 setup completely, we can move on to configure our custom domain name for the API Gateway.

Next, we use API mappings to connect API stages to the custom domain name. For more information about how API mapping is configured, please read the official AWS documentation.
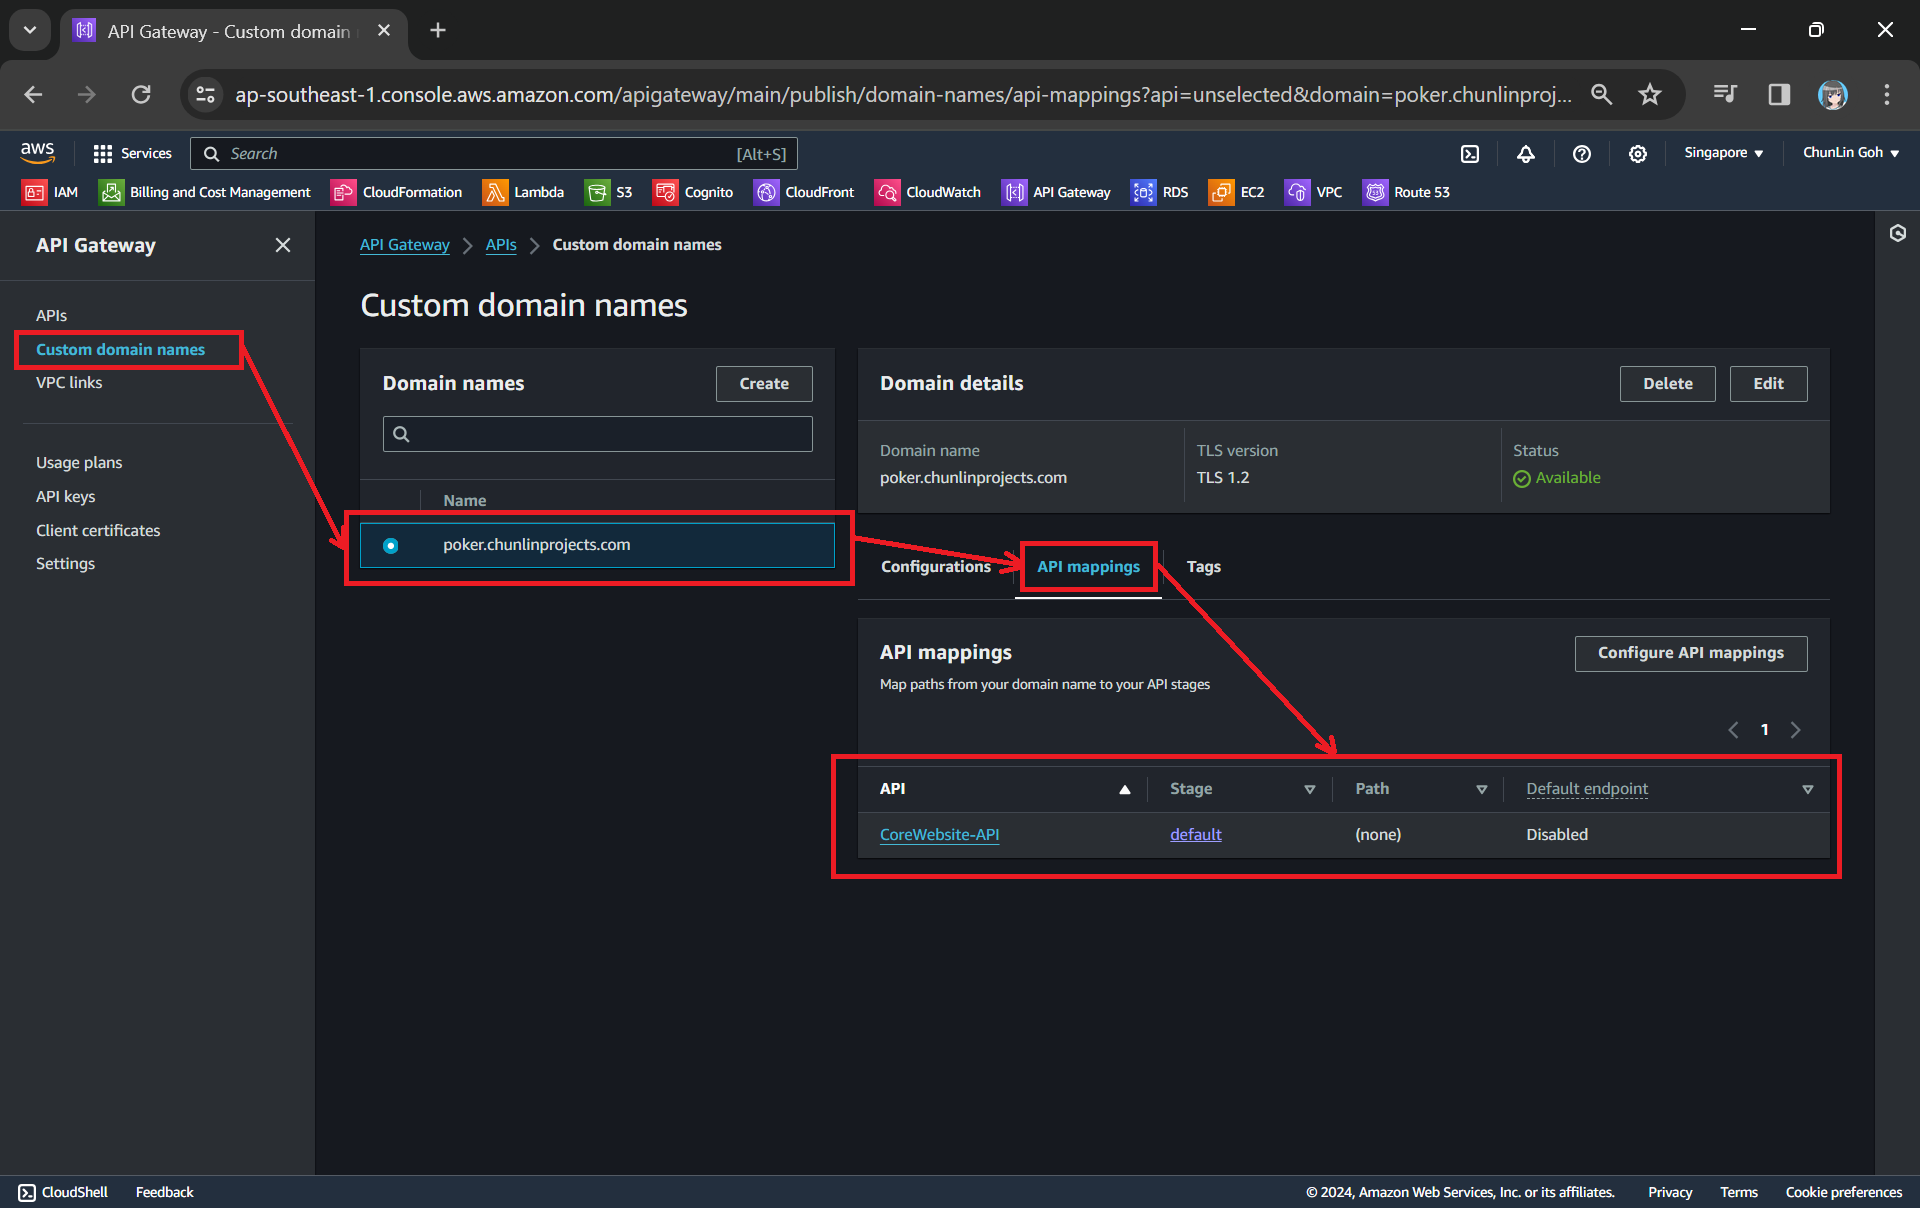
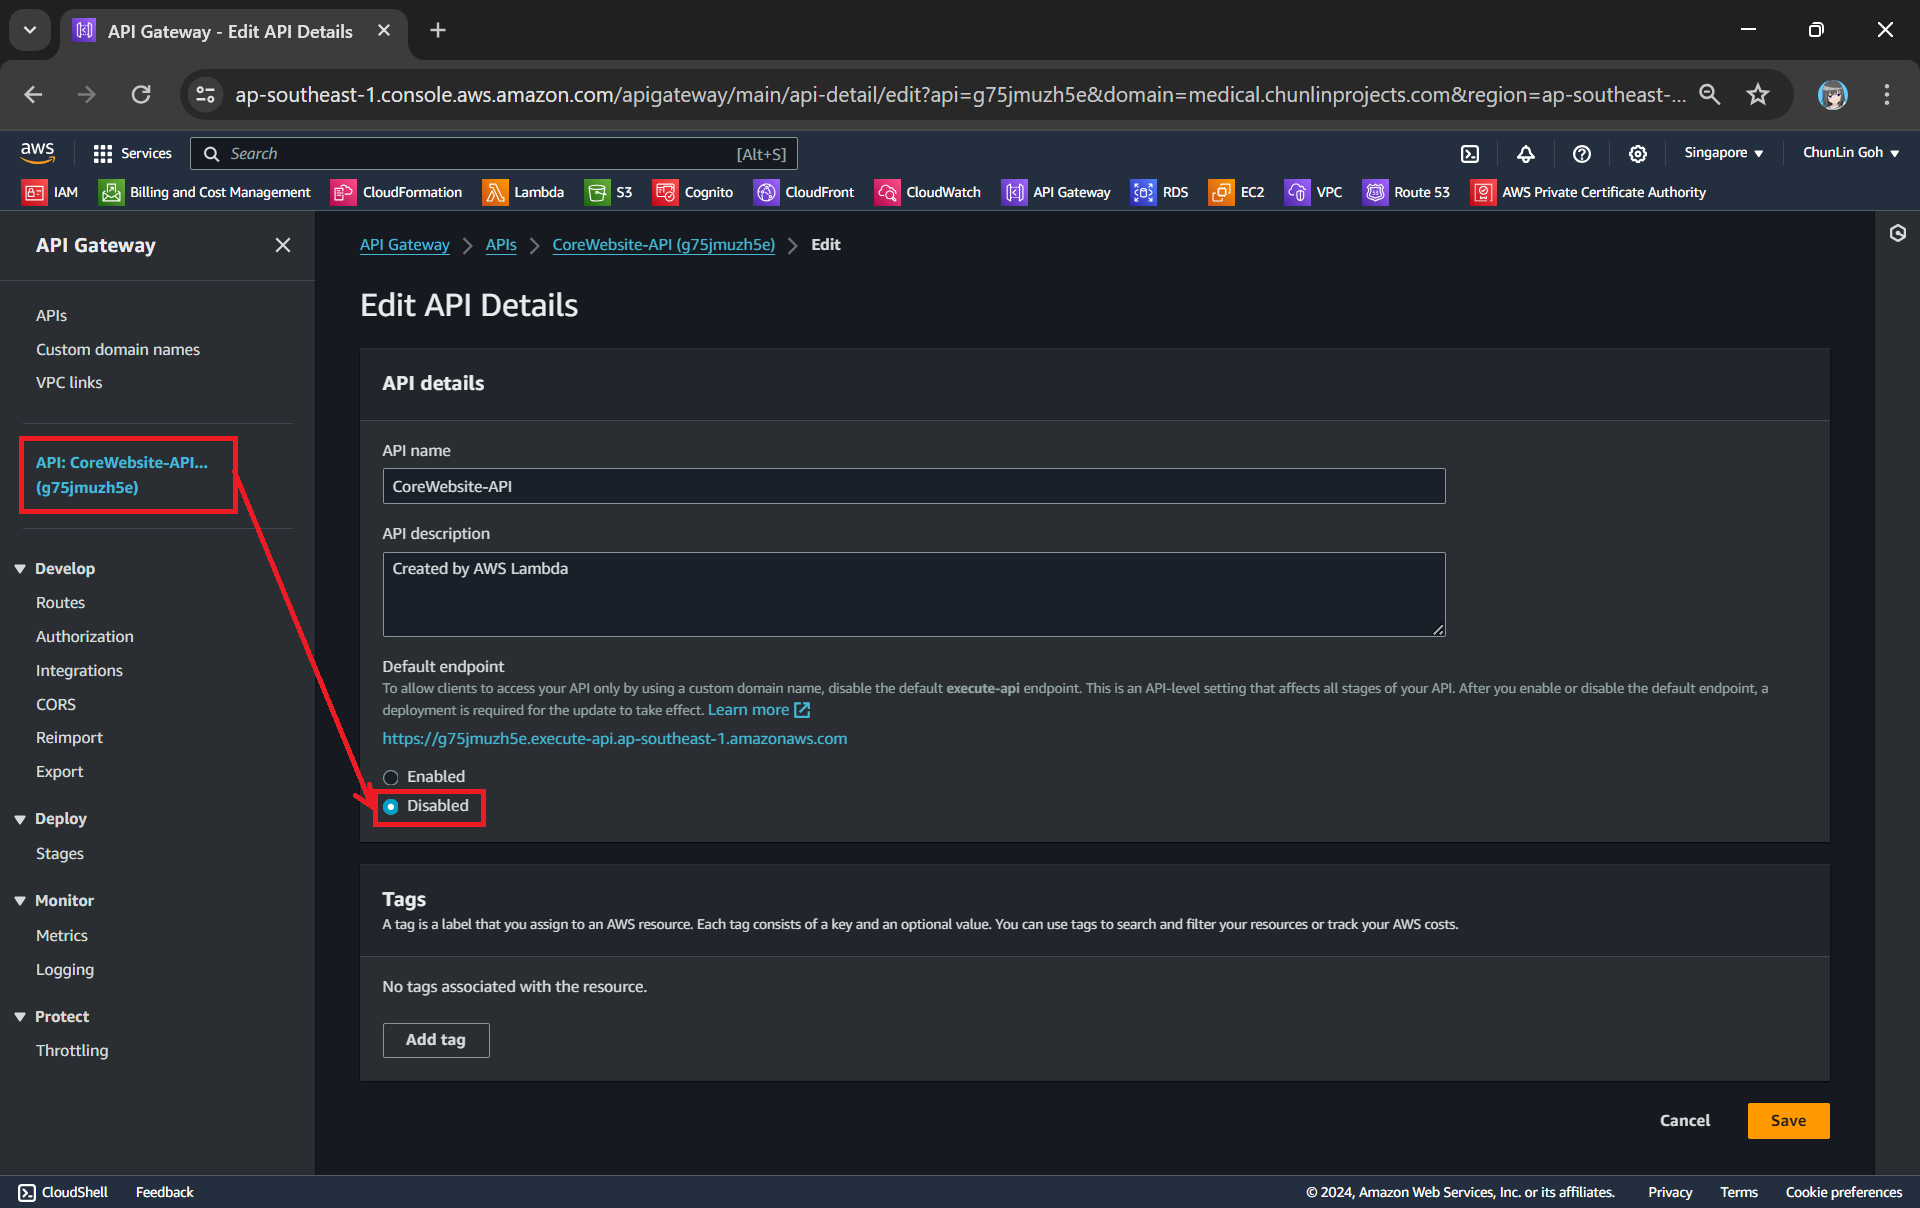
As shown in the screenshot above, under the Default Endpoint section of the API, we can choose to disable it so that users are unable to access the API using the AWS-generated default endpoint.
Create A Record in Route 53
The last step is to add a new A Record pointing to our API Gateway using alias.

After creating it, AWS console will allow us to view the status of the record creation, as shown in the screenshot below.

Wrap-Up
Now, when we visit our custom domain name together with the path, we should be able to access the Lambda function that we setup earlier in another article.
If you ever encounter an error message saying “Not Found” as shown in the screenshot below, it is possible that the API mapping is not done properly or there is a typo in the Path.

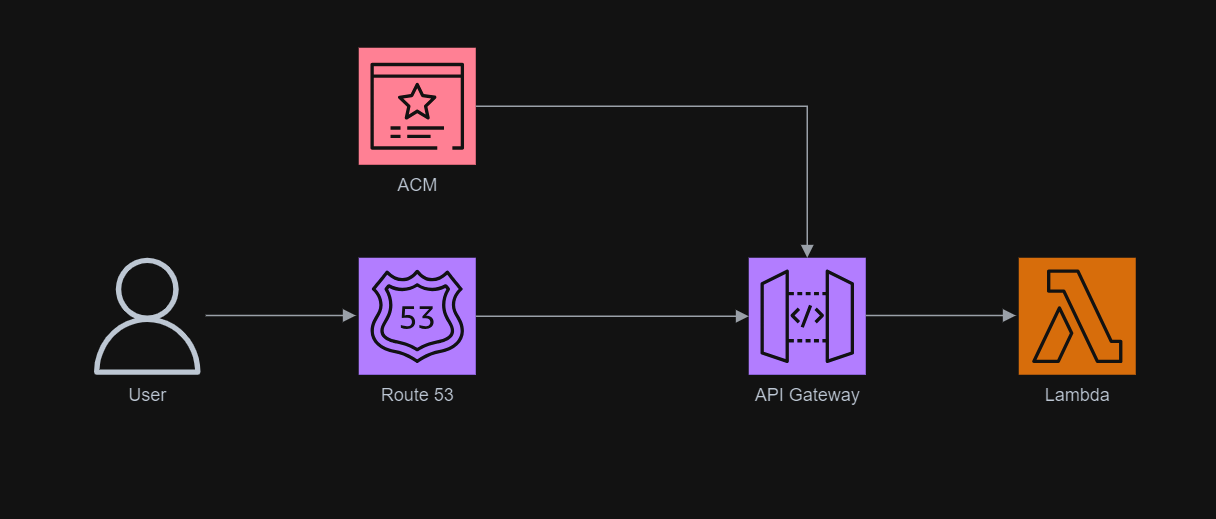
The entire infrastructure that we have gone through in this article basically can be described in the following diagram.
References
- Setting up Custom Domain Names for HTTP APIs;
- Setting up a Regional Custom Domain Name in API Gateway;
- How to Setup a Custom Domain Name with AWS API Gateway;
- [YouTube] API Gateway Custom Domain with Step by Step Demo | With Certificate Manager;
- [Stack Overflow] Entering Route53 Nameservers Gives me Errors on GoDaddy;
- Domain by GoDaddy, DNS by Route53.


