Containerize Golang Code and Deploy to Azure Web App

Continue from the previous topic

Learning about containers is essentially a huge topic but for beginners, there needs to be something small to help them get started. Hence, in this article, we will focus only on the key concepts of containers and the steps to containerize the program and deploy it to Azure Web App.

In 2017, Azure introduced Web Apps for Containers. Before that, the Azure Web Apps actually ran on Windows VMs managed by Microsoft. So now with this new feature, we can build a custom Docker image containing all the binaries and files and then run a Docker container based on the image on Azure Web Apps. Hence, we can now bring our own Docker container images supporting Golang to Azure with its PaaS option.

As explained in the book “How to Containerize Your Go Code“, containers isolates an application so that container thinks it’s running on its own private machine. So, a container is similar to a VM but it uses the OS kernel on the host rather than having its own.

Firstly, we need to prepare the Dockerfile, a file having the instructions telling the Docker how to build the images automatically. So, a Dockerfile is simply a text file containing all the commands a user could call on the command line to assemble an image. Traditionally, the Dockerfile is named Dockerfile and located in the root of the context.

The Dockerfile we have for our project is as follows.

FROM scratch

EXPOSE 80

COPY GoLab /
COPY public public
COPY templates templates

ENV APPINSIGHTS_INSTRUMENTATIONKEY '' \
CONNECTION_STRING '' \
OAUTH_CLIENT_ID '' \
OAUTH_CLIENT_SECRET '' \
COOKIE_STORE_SECRET '' \
OAUTH2_CALLBACK ''

CMD [ "/GoLab" ]

The Dockerfile starts with a FROM command that specifies the starting point for the image to build. For our project, we don’t have any dependencies, so we can start from scratch. So what is scratch? Scratch is basically a special Docker image that is empty (0B). That means there will be nothing else in our container later aside from what we put in with the rest of the Dockerfile.

The reason why we build from scratch is because not only we can have a smaller image to build later, but also our container will have smaller attack surface. This is because the less code there is within our container, the less likely it is to include a vulnerability.

The EXPOSE 80 command is telling Docker that we need to open the port 80 because the web server is listening on port 80. Hence, in order to access our program from outside the container through HTTP, we need to define it in the Dockerfile that we need the port 80 to be always opened.

The next three COPY commands are basically copying firstly the GoLab executable into the root directory of the container and secondly the two directories, public and templates into the container. Without the HTML, CSS, and JavaScript, our web app will not work.

Now you may wonder why the first COPY command says GoLab instead of GoLab.exe. We shall discuss it later in this article.

After that, we use ENV command to set the environment variables that we will be using in the app.

Finally we have the line CMD [“/GoLab”] to directs the container as to which command to execute when the container is run.

Since the container is not a Windows container, the code that runs inside the container thus needs to be a Linux binary. Fortunately, this is really simple to obtain with the cross-compilation support in Go using the following command.

$ $env:GOOS = "linux"
$ go build -o GoLab .

Thus, in the Dockerfile, we use GoLab file instead of GoLab.exe.

We can now proceed to build the container image with the following command (Take note of the dot in the end of line).

$ docker image build -t chunlindocker/golab:v1 .

The -t flag is for us to specify the name and tag of the container. In this case, I call it chunlindocker/golab:v1 where chunlindocker is the Docker ID of my Docker Hub. Naming in such a way later helps me to push it to a registry, i.e. the Docker Hub.

My Docker Hub profile.

If we want to build the image with another dockerfile, for example Dockerfile.development, we can do it as follows.

$ docker image build -t chunlindocker/golab:v1 -f Dockerfile.development .

Once the docker image is built, we can see it listen when we perform the list command as shown in the screenshot below.

Created docker images.

Now the container image is “deployable”. That means we can run it anywhere with a running docker engine. Since our laptop has Docker installed, so we can proceed to run it locally with the following command.

$ docker container run -P chunlindocker/golab:v1

If you run the command above in the Terminal window inside VS Code, you will see that the command line is “stuck”. This is because the container is already running on local machine. So what we need to do is just open another terminal window and view all the running containers.

The docker ps command by default only shows running containers.

To help humans, Docker auto generates a random name with two words and assigns it to the container. We can see that the container we created is given a random name “nifty_elgama”, lol. So now our container has a “human” name to call. If you want to remove the container later, you not only need to Ctrl+C to stop it, but to totally remove it, you need to use the rm command as follows.

$ docker container rm nifty_elgama

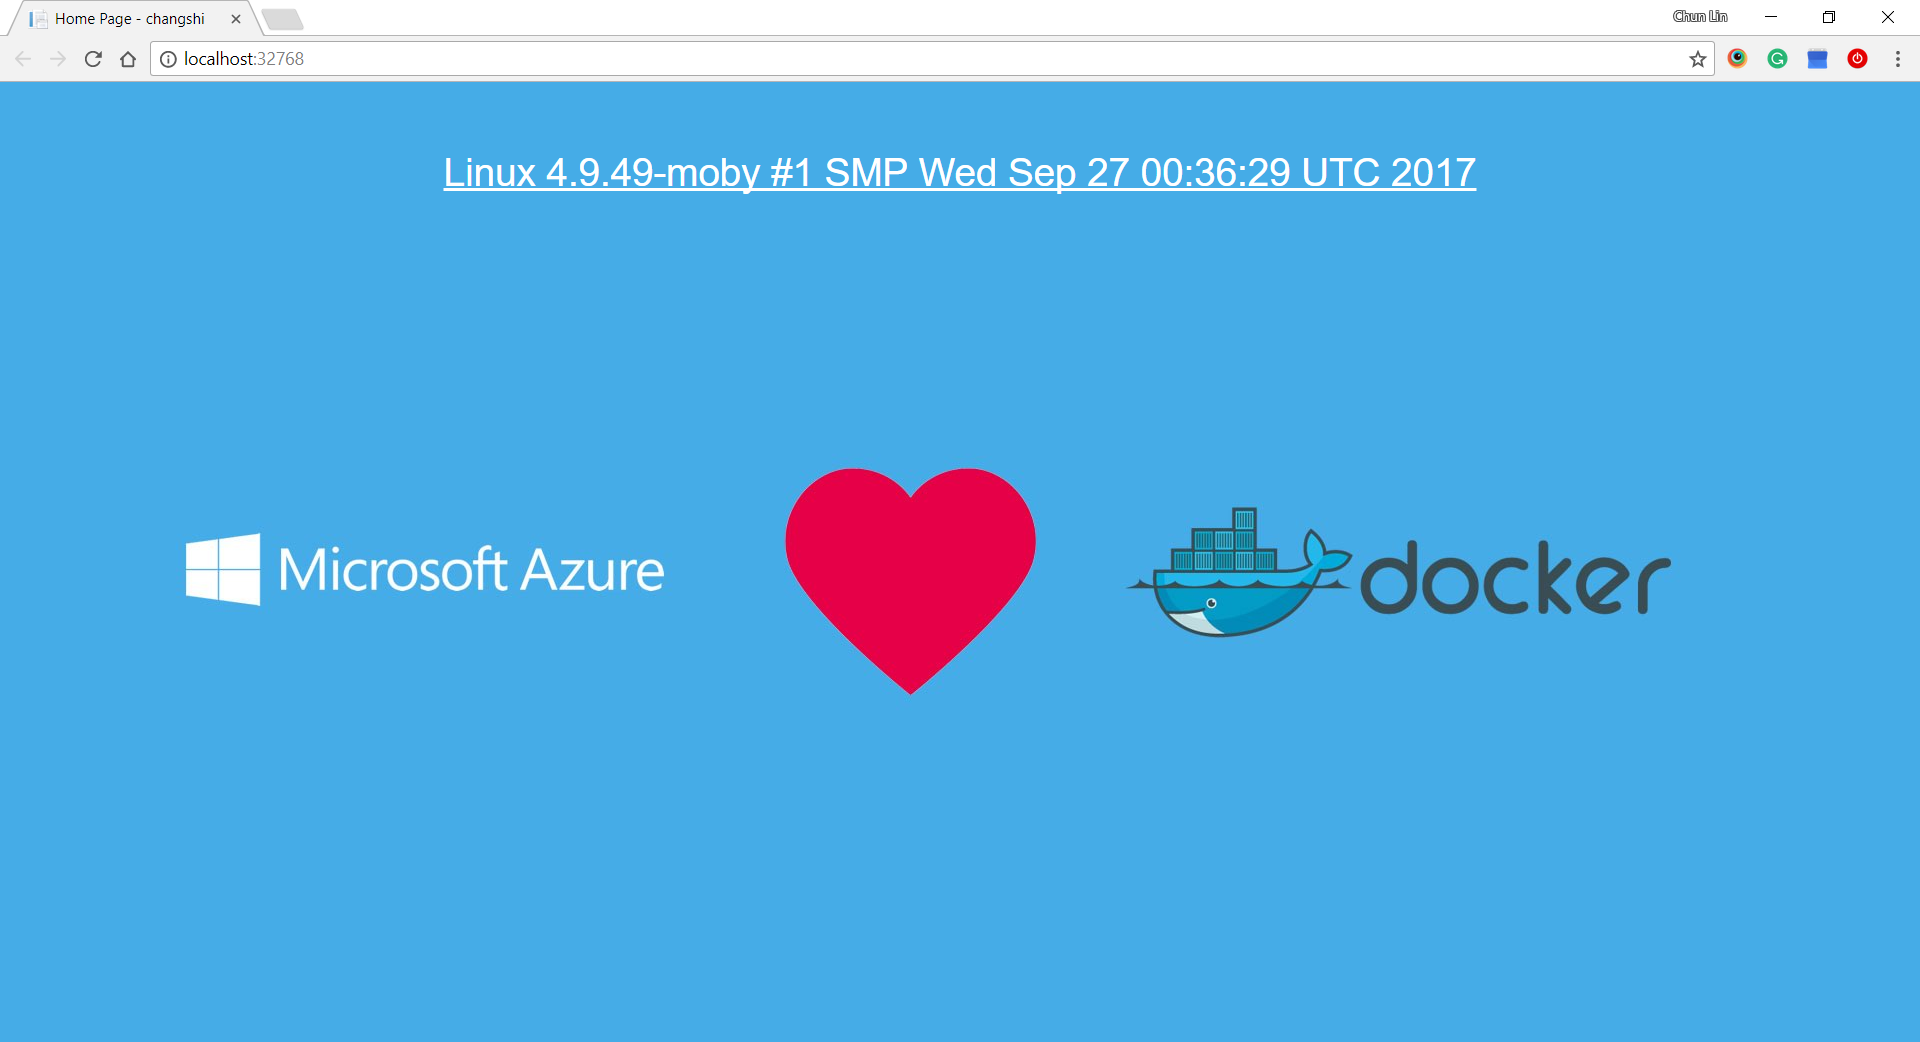
The PORTS column shown in the screenshot is important because it tells us how ports exposed on the container can be accessed from the host. So to test it locally, we shall visit http://localhost:32768.

So our next step is to upload it to a container registry so that later it can be pulled onto any machines, including Azure Web Apps, that will run it. To do so, we do push the image we built above to Docker Hub with the following command.

$ docker push chunlindocker/golab:v1
Successfully push our new container image to Docker Hub.

So, now how do we deploy the container to Azure?

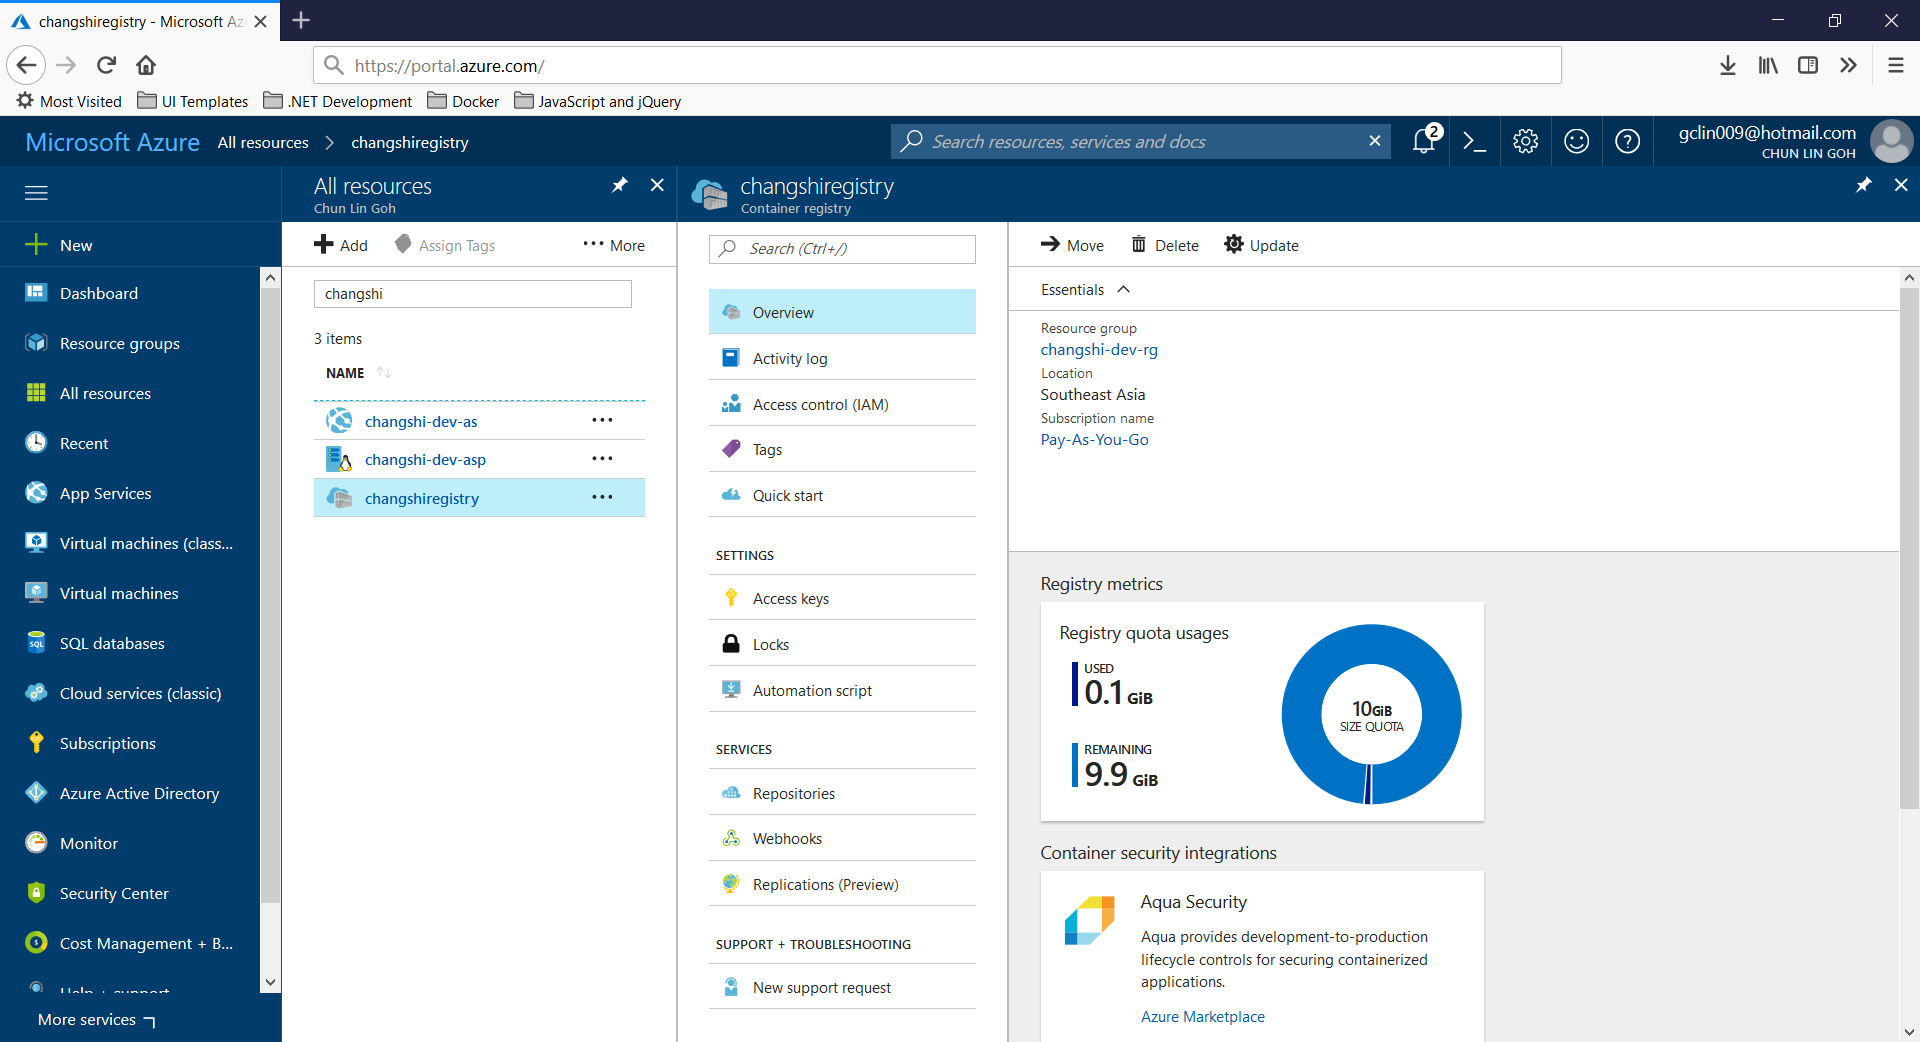
Firstly, we need to create a Web App for Containers on the Azure Portal, as shown in the screenshot below.

Creating Web App for Containers.

The last item in the configuration is the “Configure Container”. Clicking on that, we will be brought to the following screen where we can then specify the container image we want to use and pull it from Docker Hub.

We will be deploying single container called chunlindocker/golab:v4 from Docker Hub.

You can of course deploy a private container from Docker Hub by choosing “Private” as Repository Access. Then Azure Portal will prompt you for Docker Hub login credential for it to pull image from Docker Hub.

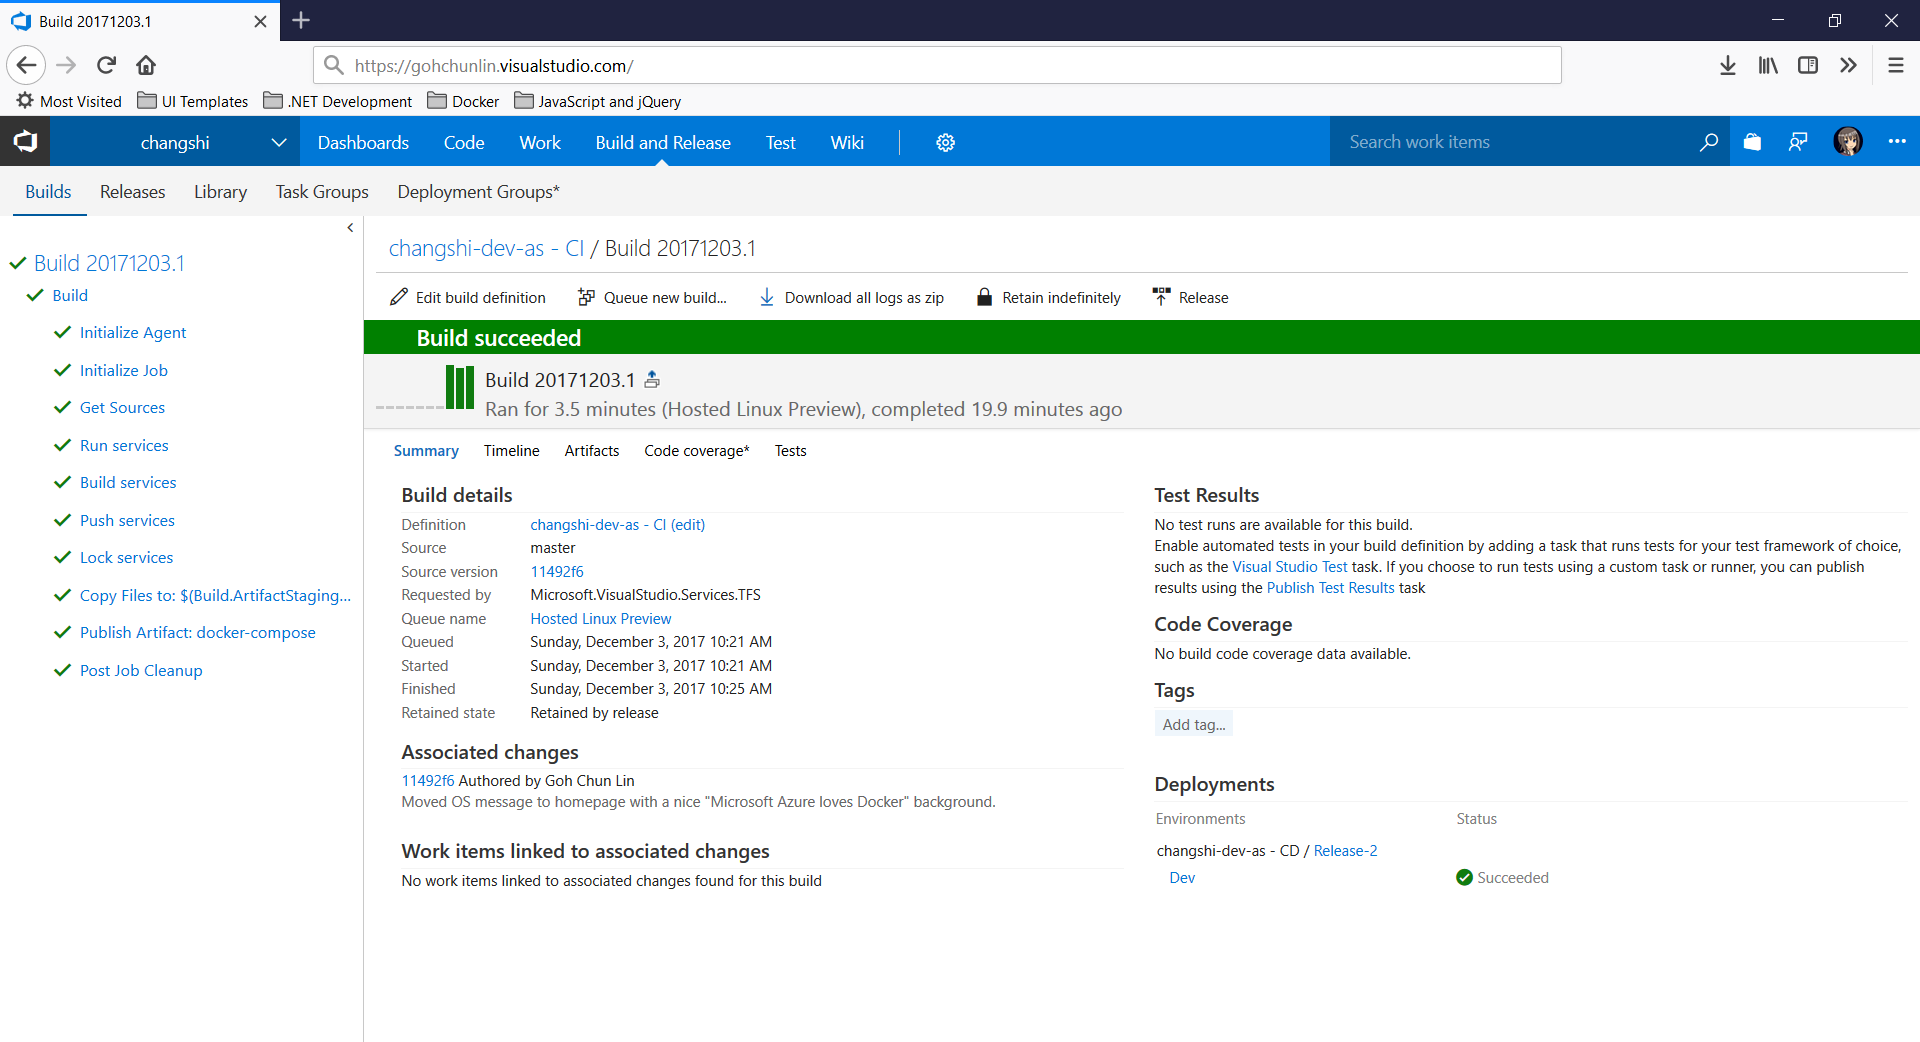
Once the App Service is created, we can proceed to read the Logs under “Container Settings”. Then we can see the container initializing process.

Logs about the container in App Service.

After that we can proceed to fill up the Application Settings with the environment variables we have in the web application and then we are good to go.

The website is up and running on Azure Web App for Containers.

References

Create a Docker Image from CentOS Minimal ISO

virtual-box-centos-docker.png

When we are dockerizing an ASP .NET Core application, there will be a file called Dockerfile. For example, the Dockerfile in my previous project, Changshi, has the following content.

FROM microsoft/aspnetcore:2.0
ARG source
WORKDIR /app
EXPOSE 80
COPY ${source:-obj/Docker/publish} .
ENTRYPOINT ["dotnet", "changshi.dll"]

The Dockerfile basically is a set of instructions for Docker to build images automatically. The FROM instruction in the first line initializes a new build stage and sets the Parent Image for subsequent instructions. In the Dockerfile above, it is using microsoft/aspnetcore, the official image for running compiled ASP .NET Core apps, as the Parent Image.

If we need to control the contents of the image, then one way that we can do is to create a Base Image. So, in this post, I’m going to share about my journey of creating a Docker image from CentOS Minimal ISO.

Step 1: Setting up Virtual Machine on VirtualBox

We can easily get the minimal ISO of CentOS on their official website.

download-centos-iso.png
Minimal ISO is available on CentOS Download Page.

After successfully downloading the minimal ISO, we need to proceed to launch the Oracle VM VirtualBox (Download here if you don’t have one).

turn-off-hyperv.png
Switching off Hyper-V.

For Windows users who have Hyper-V enabled because of Docker for Windows, please disable it first otherwise you will either not able to start a VM with 64-bit guest OS even though your host OS is 64-bit Windows 10 or simply encounter a BSOD.

bsod.png
Please switch off Hyper-V before running CentOS 64-bit OS on VirtualBox.

Funny thing is that after switching off Hyper-V, Docker for Windows will make noise saying that it needs Hyper-V to be enabled to work properly. So currently I have to keep switching on and off the Hyper-V feature option depends on which tool I’m going to use.

the-conflict-of-virtualbox-and-docker-between-hyperv.png
VirtualBox vs. Docker for Windows. Pick one.

There is one important step on running CentOS on the VM. We need to remember to configure the Network of the VM to use network adapter attached to “Bridged Adapter”. This is to connect the VM through the host to whatever is our default network device that allocates IP addresses for our physical network. Doing so will help us to retrieve the Docker image tar file via SCP later.

Then in the Network & Host Name section of the installation, we shall see the IP address allocated to the VM.

centos-7-network-and-host-name.png
The IP Address should be available when Ethernet is connected.

To verify whether it works or not, we simply need to use the following command to check if an IP address is successfully allocated to the VM or not. In the minimal installation of CentOS 7, the command ifconfig is already not in use.

# ip a

We then can get the IP Address which is allocated to the VM. Sometimes, I need to wait for about 5 minutes before it can display the IP address successfully.

getting-ip-address.png
The IP address!

Step 2: Installing Docker on VM

After we get the IP address of the VM, we then can SSH into it. On Windows, I use PuTTY, a free SSH client for Windows, to easily SSH to the VM.

ssh-into-vm.png
SSH to the VM with the IP address using PuTTY.

We proceed to install EPEL repository before we can install Docker on the VM.

Since we are going to use wget to retrieve EPEL, we first need to install wget as following.

# yum install wget

Then we can use the wget command to download EPEL repository on the VM.

# wget http://dl.fedoraproject.org/pub/epel/epel-release-latest-7.noarch.rpm

The file will be downloaded to the temp folder. So, to install it we will do the following.

# cd /tmp
# sudo yum install epel-release-latest-7.noarch.rpm

After the installation is done, there should be a success message as following showing on the console.

Installed:
    epel-release.noarch 0:7-11
Complete!

Now if we head to /etc/yum.repos.d, we will see the following files.

CentOS-Base.repo        CentOS-fasttrack.repo       CentOS-Vault.repo
CentOS-CR.repo          CentOS-Media.repo           epel.repo
CentOS-Debuginfo.repo   CentOS-Sources.repo         epel-testing.repo

In the CentOS-Base.repo, we need to enable the CentOS Plus repository which is by default disabled. To do so, we simply change the value of enabled to 1 under [centosplus] section.

Then we can proceed to install docker on the VM using yum.

# yum install docker

Step 3: Start Docker

Once docker is installed, we can then start the docker service with the following command.

# service docker start

So now if we list the images and containers inside the docker, the results should be 0 image and 0 container, as shown in the screenshot below.

docker-installed-without-images-and-containers (2)
No image and no container.

Step 4: Building First Docker Image

Thanks to the people in Moby Project, a collaborative project for the container ecosystem to assemble container-based systems, we have a script to create a base CentOS Docker image using yum.

The script is now available on Moby Project Github repository.

We now need to create a folder called scripts in the root and then create a file called createimage.sh in the folder. This step can be summarized as the following commands.

# mkdir scripts
# cd scripts
# vim createimage.sh

We then need to copy-and-paste the script from Moby Project to createimage.sh.

After that, we need to make createimage.sh executable with the following command.

# chmod +x createimage.sh

To run this script now, we need to do as follows, where centos7base is the name of the image file.

# ./createimage.sh centos7base

After it is done, we will see the centos7base image added in docker. The image is very, very small with only 271MB as its size.

first-docker-image.png
First docker image!

Step 5: Add Something (.NET Core SDK) to Container

Since now we have our first Docker image, then we can proceed to create a container with the following command.

# docker run -i -t  /bin/bash

We will be brought into the container. So now we can simply add something, such as the .NET Core SDK to the container by following the .NET Core installation steps for CentOS 7.1 (64-bit) which can be summarized as the following commands to execute.

# sudo rpm --import https://packages.microsoft.com/keys/microsoft.asc

# sudo sh -c 'echo -e "[packages-microsoft-com-prod]\nname=packages-microsoft-com-prod \nbaseurl=https://packages.microsoft.com/yumrepos/microsoft-rhel7.3-prod\nenabled=1\ngpgcheck=1\ngpgkey=https://packages.microsoft.com/keys/microsoft.asc" > /etc/yum.repos.d/dotnetdev.repo'

# sudo yum update
# sudo yum install libunwind libicu
# sudo yum install dotnet-sdk-2.0.0

# export PATH=$PATH:$HOME/dotnet

We then can create a new image from the changes we have done on the container using the following command where the centos_netcore is the repository name and 1.0 is its tag.

docker commit  [centos_netcore:1.0]

We will then realize the new image container will be quite big with 1.7GB as its size. Thanks to .NET Core SDK.

Step 6: Moving the New Image to PC

The next step that we are going to do is exporting the new image as a .tar file using the following command.

docker save  > /tmp/centos_netcore.tar

Now, we need to launch WinSCP to retrieve the .tar file via SCP (Secure Copy Protocol) to local host.

login-as-root-on-winscp.png
Ready to access the VM via SCP.

Step 7: Load Docker Image

So now we can shutdown the VM and enable back the Hyper-V because the subsequent steps will need Docker for Windows to work.

After restarting our local computer with Hyper-V enabled, we can launch Docker for Windows. After that, we load the image to the Docker using the following command in the directory where we keep the .tar file in local host.

docker load < centos_netcore.tar

Step 8: Running ASP .NET Core Web App on the Docker Image

Now, we can change the Dockerfile to use the new image we created.

FROM centos_netcore:1.0
ARG source
WORKDIR /app
EXPOSE 80
COPY ${source:-obj/Docker/publish} .
ENTRYPOINT ["dotnet", "changshi.dll"]

When we hit F5 to make it run in Docker, yup, we will get back the website.

No, just kidding. We will actually get an error message that says localhost doesn’t send any data.

localhost-did-not-send-any-data.png
Localhost did not send any data. Why?

So if we read the messages in Visual Studio Output Window, we will see one line of message saying that it’s unable to bind to http://localhost:5000 on the IPv6 loopback interface.

error--99-eaddrnotavail.png
Error -99 EADDRNOTAVAIL

According to Cesar Blum Silveira, Software Engineer from Microsoft ASP .NET Core Team, this problem is because “localhost will attempt to bind to both the IPv4 and IPv6 loopback interfaces. If IPv6 is not available or fails to bind for some reason, you will see that warning.

ipv6-problem-explanation.png
Explanation of Error -99 EADDRNOTAVAIL by Microsoft engineer. (Link)

Then I switch to view the output from Docker on the Output Window.

output-docker.png
Output from Docker

It turns out that the port on docker is port 80. So I tried to add the following line in Program.cs.

public static IWebHost BuildWebHost(string[] args) =>
    WebHost.CreateDefaultBuilder(args)
    .UseUrls("http://0.0.0.0:80") // Added this line
    .UseStartup()
    .Build();

Now, it works again with the beautiful web page.

launched-at-localhost
Success!

Containers, Containers Everywhere

containers-containers-everywhere.png
The whole concept of Docker images, containers, micro-services are still very new to me. Hence, if you spot any problem in my post, feel free to point out. Thanks in advance!

References

[KOSD Series] First Attempt of Deploying ASP .NET Core to Azure Container Service

KOSD, or Kopi-O Siew Dai, is a type of Singapore coffee that I enjoy. It is basically a cup of coffee with a little bit of sugar. This series is meant to blog about technical knowledge that I gained while having a small cup of Kopi-O Siew Dai.

kosd-docker-azure_container_registry-vsts

Last month, after sharing the concepts and use cases of Domain Driven Development, Riza moved on to talk about Containers in the sharing session of Singapore .NET Developers Community.

microservices-not-equal-to-containers.png
Riza’s talking about Containers. Yes, microservices are not containers!

Learning Motivation

In the beginning of Riza’s talk, he mentioned GO-JEK, an Indonesia ride-hailing phone service. Due to their rapid growth, the traditional monolithic architecture can no longer support their business. Hence, they switched to use a modern approach which includes moving apps to containers.

go-jek-containers.png
Go-Jek team is working on moving apps to container.

Hence, after the meetup, I was very excited to find out more about micro-services and Docker containers. With the ability of .NET Core to be cross-platform, as a Azure lover, I am interested to find out more how I can deploy ASP .NET Core web app to a container in Azure. So, I decided to write this short article to share with my teammates about this that they can learn while drinking a cup of coffee.

Creating New Project with Docker Support

Since I am trying it out as personal project, I choose to start it with a new ASP .NET Core project. Then in the Visual Studio, I can easily turn it to be a Docker supporting app easily by checking the “Enable Docker Support” option.

enable-docker-support.png
Enable Docker Support

For existing web application projects, we will not have the screen above. Luckily, it is still easy to add Docker Support to an existing ASP .NET Core project on Visual Studio.

add-docker-support-to-existing-project
Enabling Docker Support in existing projects.

Then by clicking on the “F5” button to run the project, I manage to get the following screen (The background is customized by me). The message is displayed using the following line.

System.Runtime.InteropServices.RuntimeInformation.OSDescription;

launched-at-localhost.png
Yay, we managed to run the web app inside a Linux container locally.

Publishing to Microsoft Azure with Continuous Delivery

Without Continuous Delivery, we also can easily right-click the web application to publish it to the Container Registry on Azure.

publishing-to-container-registry
Creating a new Azure Container Registry which will have the Docker image published to.

Then, on Azure Portal, we will see three new resources added. Firstly, we will have the Container Registry.

Then, we will also have an app service site which is running the image downloaded from the Container Registry. Finally, we have an App Service Plan which needs to be at least B1 because free and shared SKUs are not available for apps running on Linux (The official Microsoft documentation says we should have the VM size of the App Service Plan to be S1 or larger though).

container-registry-on-azure.png
Container Registry for my new web app, Changshi.

To enable Continuous Delivery, I choose to use Github + Visual Studio Team Services (VSTS). By doing so, build and release will be automatically started whenever I check in code to Github.

build-on-vsts
Build history and details on VSTS.

Yup, this is so far what I have tried out in my first step of playing with containers. If you are interested, please check out the references listed below.

References