Kubernetes CronJob to Send Email via Azure Communication Services

In March 2021, Azure Communication Services was made generally available after being showcased in Microsoft Ignite. In the beginning, it only provides services such as SMS as well as voice and video calling. One year after that, in May 2022, it also offers a way to facilitate high volume transactional emails. However, currently this email function is still in public preview. Hence, the email relevant APIs and SDKs are provided without a SLA, which is thus not recommended for production workloads.

Currently, our Azure account has a set of limitation on the number of email messages that we can send. For all the developers, email sending is limited to 10 emails per minute, 25 emails in an hour, and 100 emails in day.

Setup Azure Communication Services

To begin, we need to createa a new Email Communication Services resource from the marketplace, as shown in the screenshot below.

US is the only option for the Data Location now in Email Communication Services.

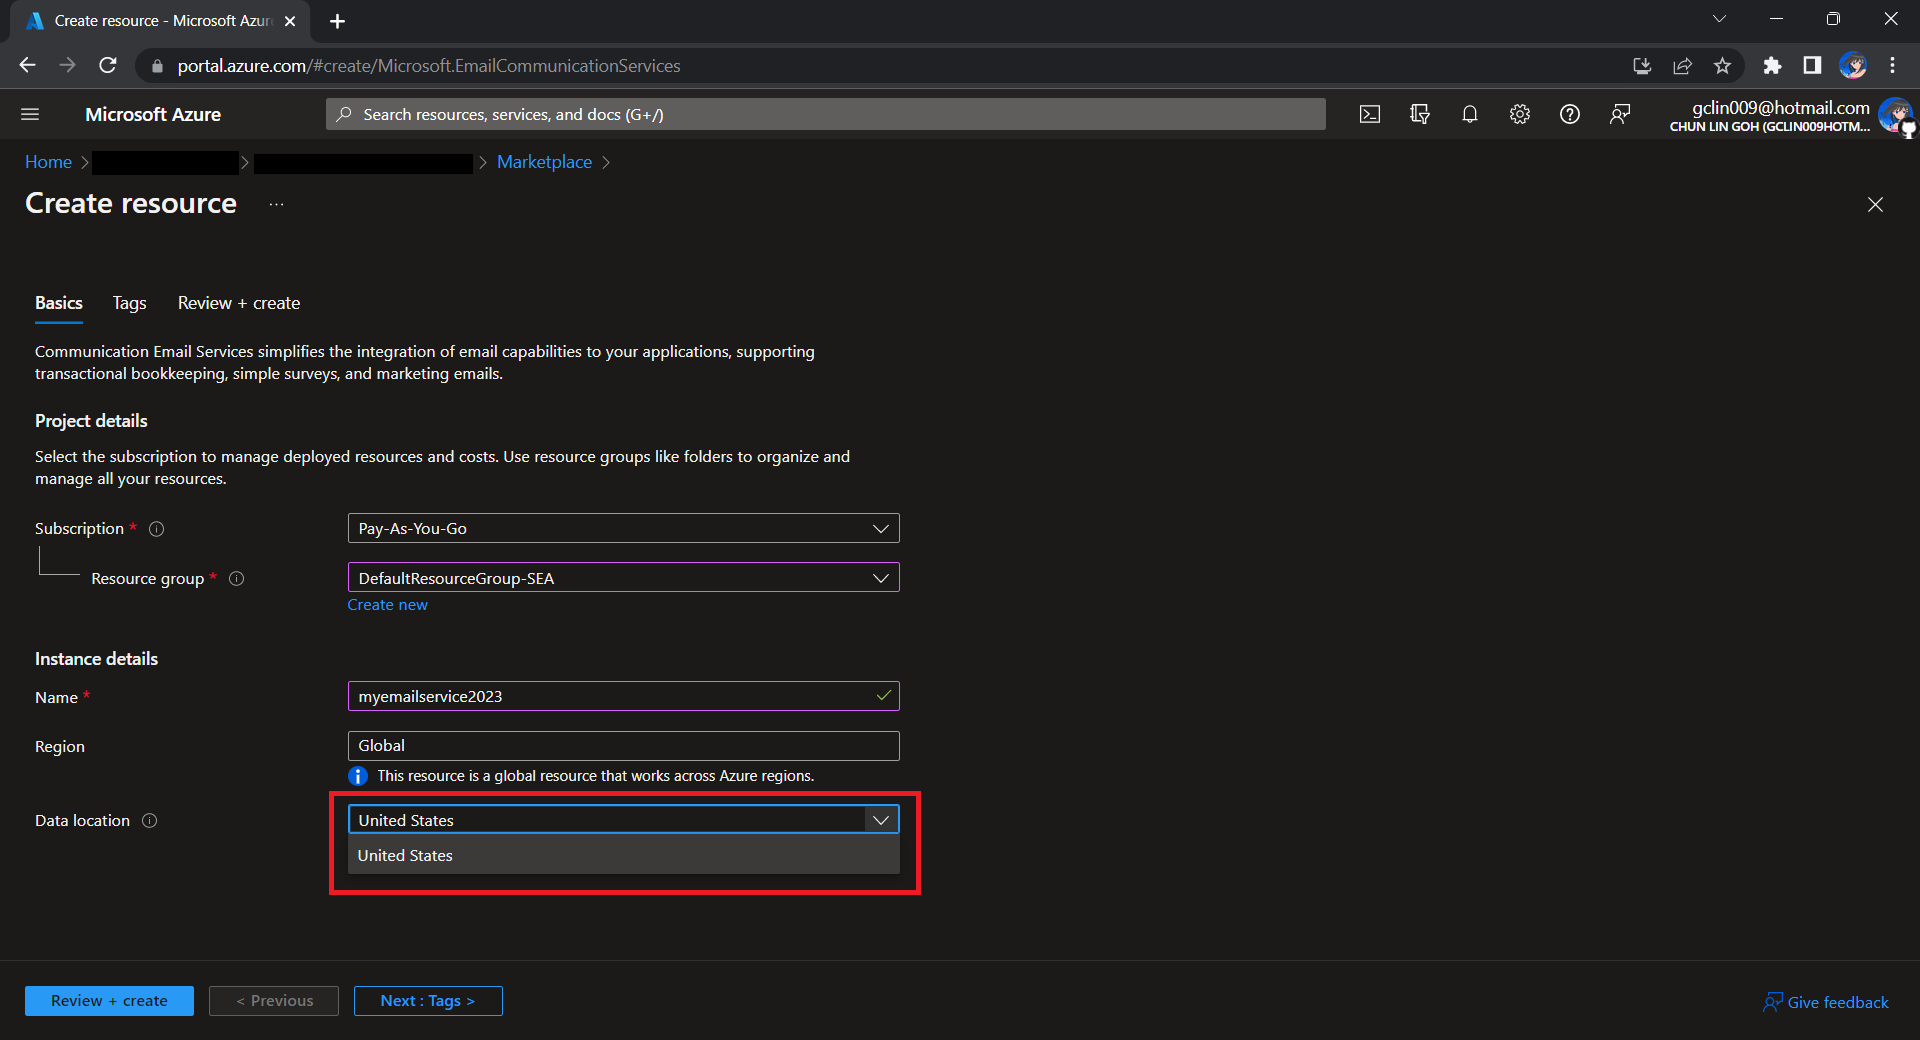
Take note that currently we can only choose United States as the Data Location, which determines where the data will be stored at rest. This cannot be changed after the resource has been created. This thus make our Azure Communication Services which we need to configure next to store the data in United States as well. We will talk about this later.

Once the Email Communication Service is created, we can begin by adding a free Azure subdomain. With the “1-click add” function, as shown in the following screenshot, Azure will automatically configures the required email authentication protocols based on the email authentication best practices.

Click “1-click add” to provision a free Azure managed domain for sending emails.

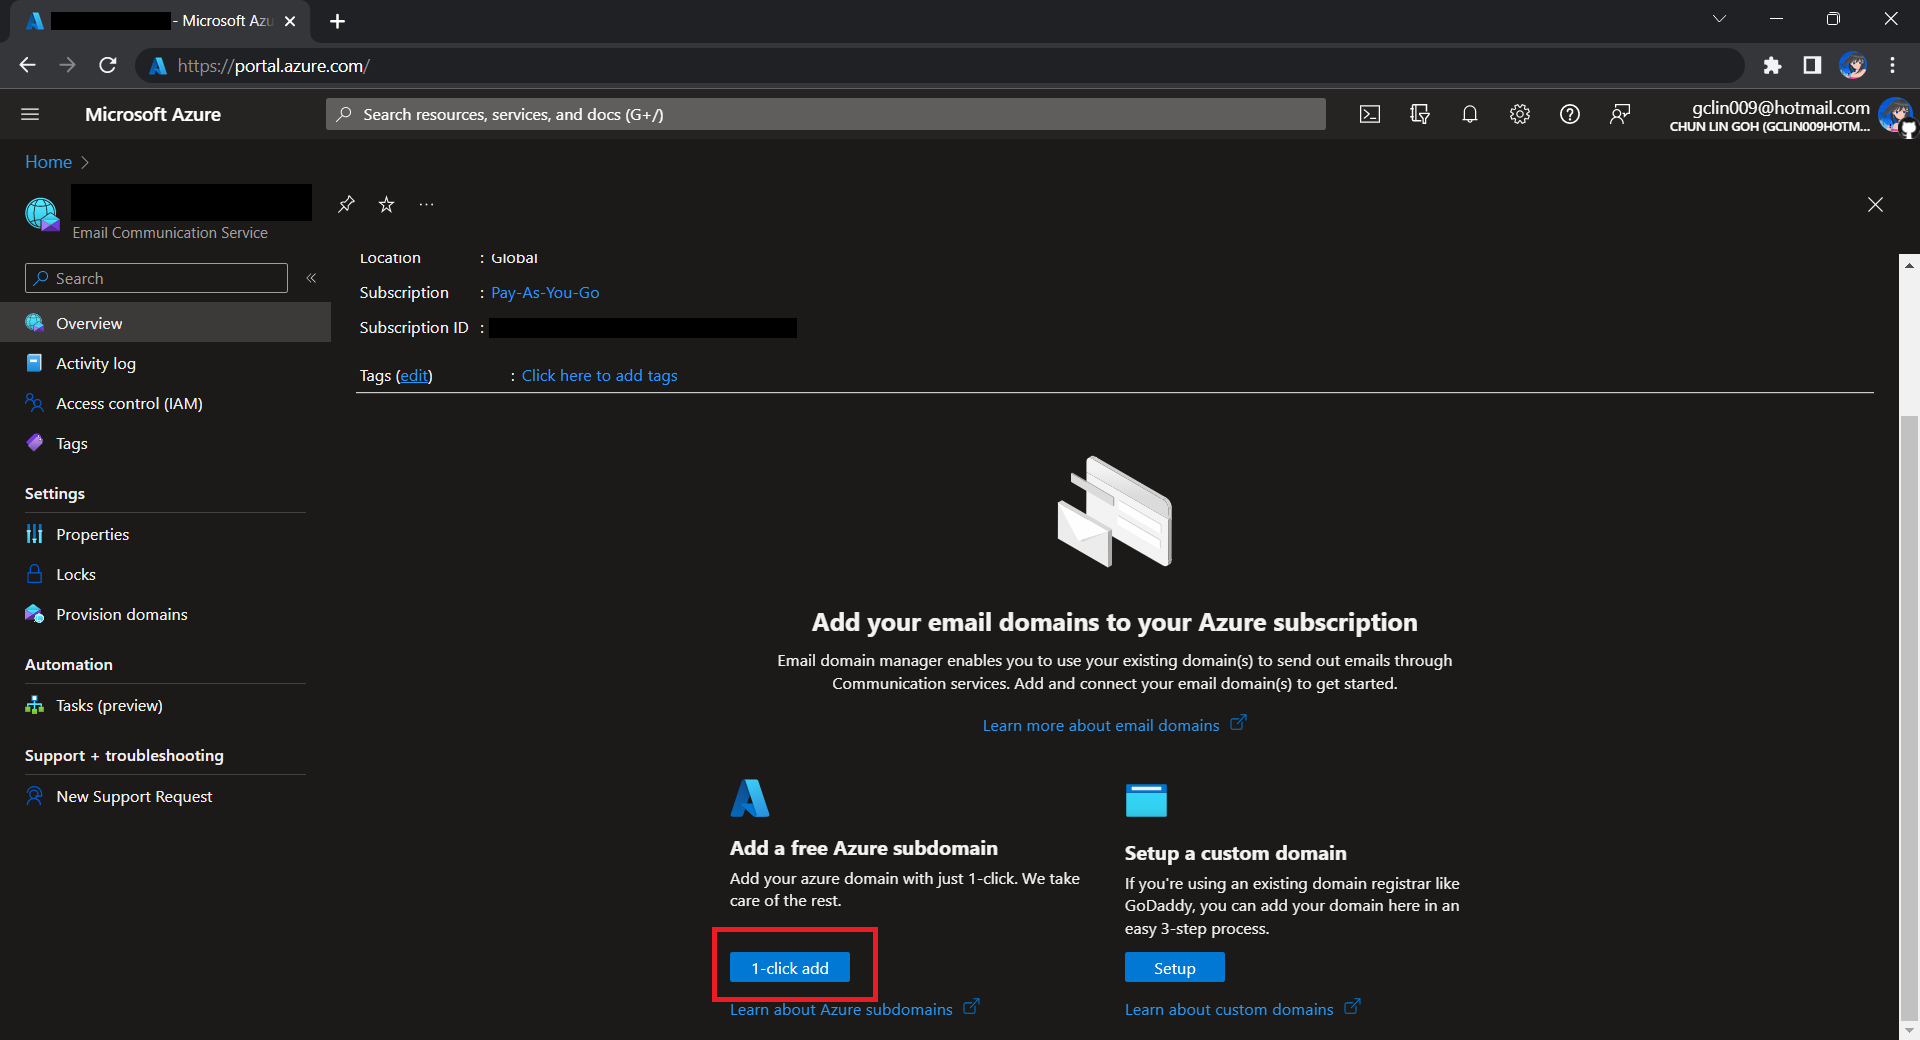
We will then have a MailFrom address in the format of donotreply@xxxx.azurecomm.net which we can use to send email. We are allowed to modify the MailFrom address and From display name to more user-friendly values.

After getting the domain, we need to connect Azure Communication Services to it to send emails.

As we talked earlier, we need to make sure that the Azure Communication Services to have United States as its Data Location as well. Otherwise, we will not be able to link the email domain for email sending.

Successfully connected our email domain. =)

A Simple Console App for Sending Email

Now, we need to create the console app which we will be used in our Kubernetes CronJob later to send the emails with the Azure Communication Services Email client library.

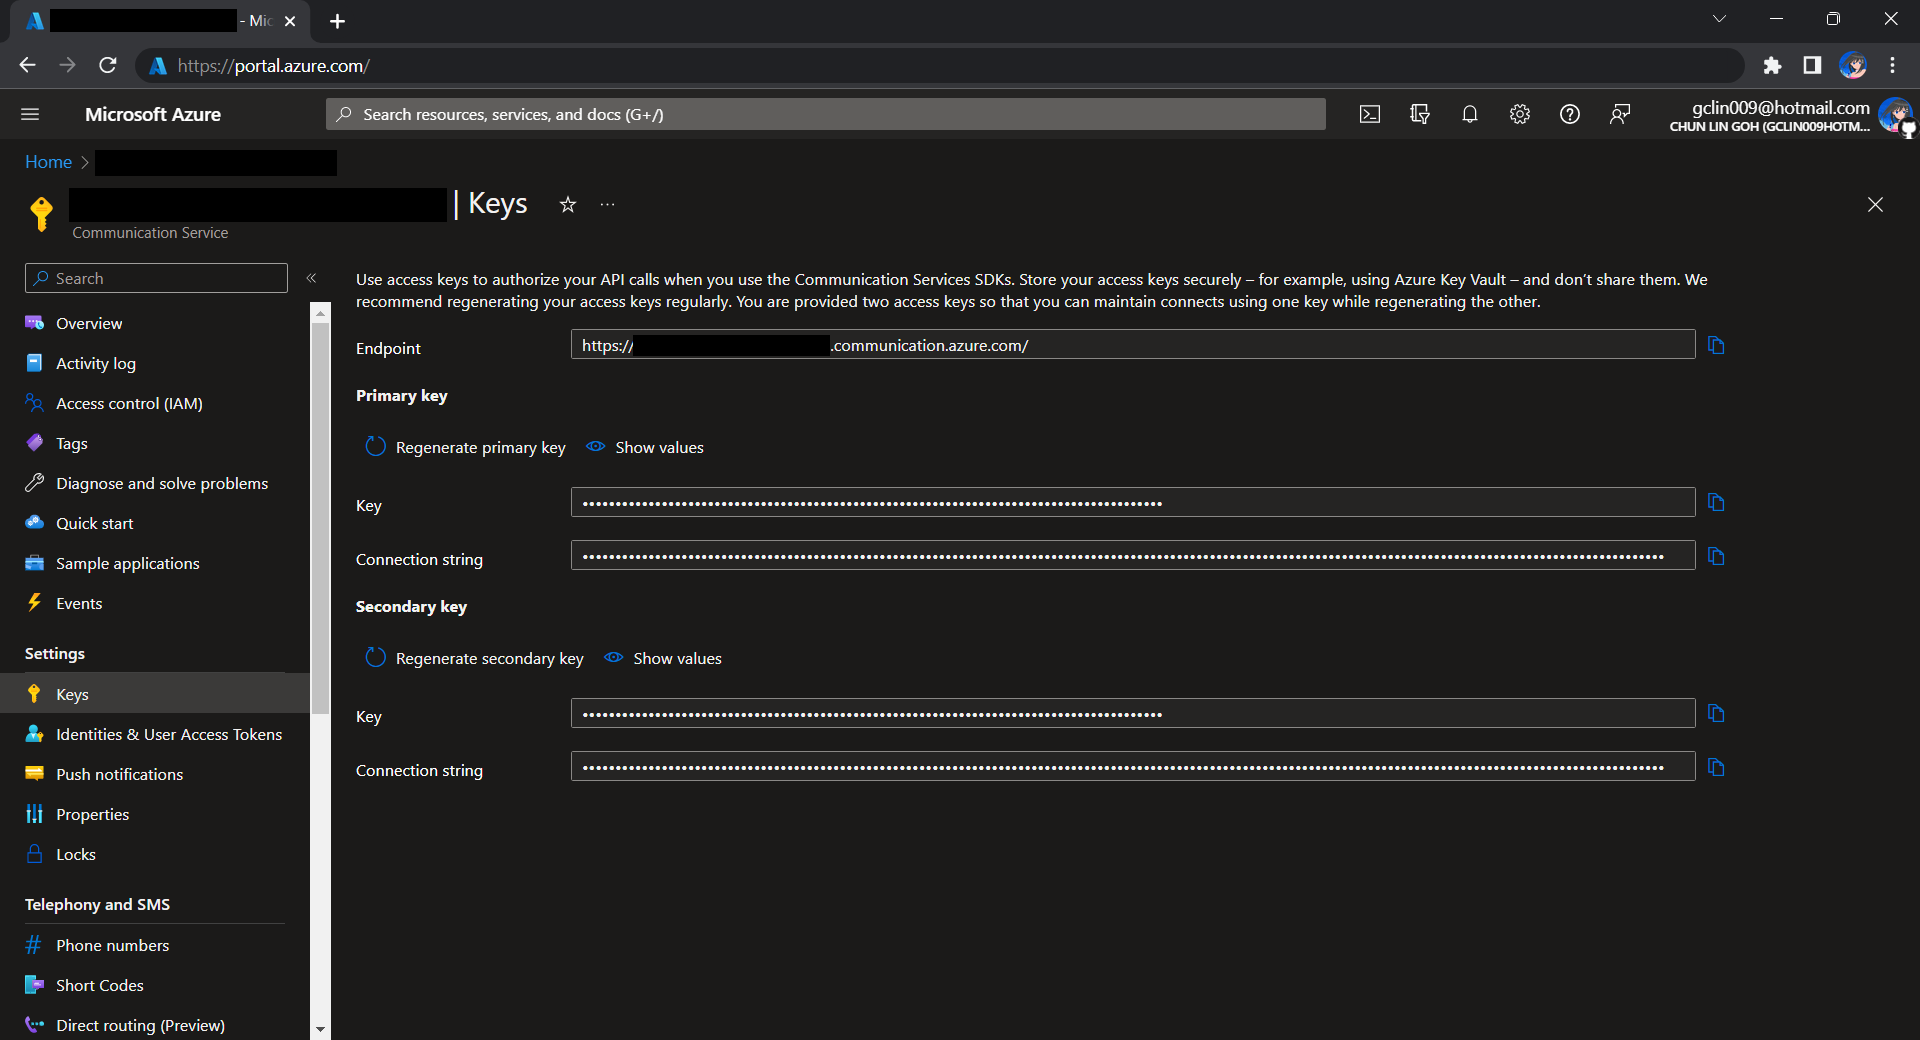
Before we begin, we have to get the connection string for the Azure Communication Service resource.

Getting connection string of the Azure Communication Service.

Here I have the following code to send a sample email to myself.

using Azure.Communication.Email.Models;
using Azure.Communication.Email;

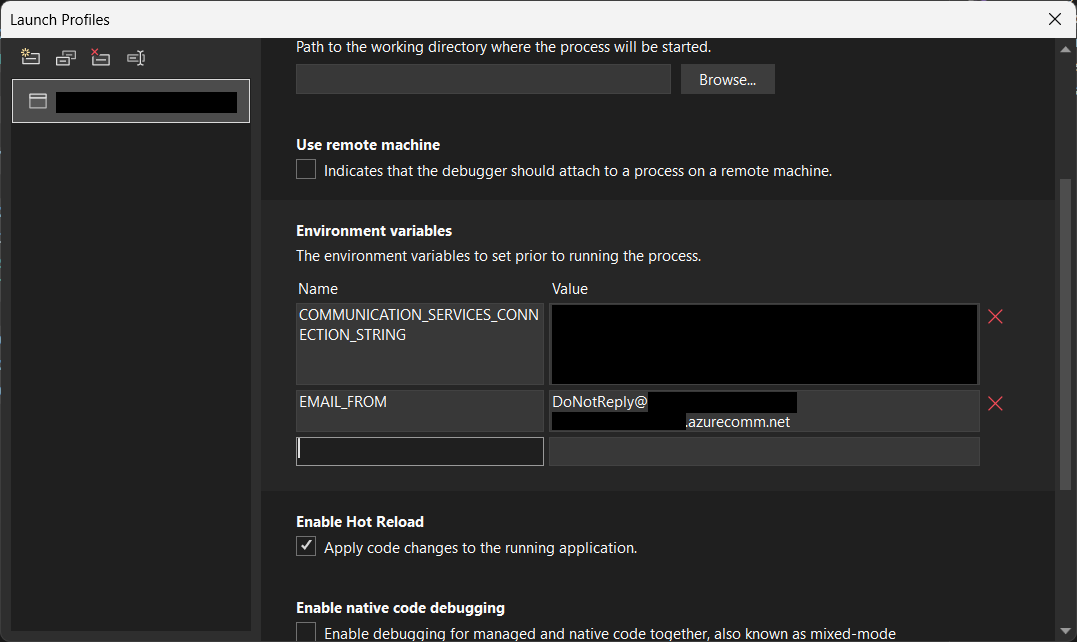
string connectionString = Environment.GetEnvironmentVariable("COMMUNICATION_SERVICES_CONNECTION_STRING") ?? string.Empty;
string emailFrom = Environment.GetEnvironmentVariable("EMAIL_FROM") ?? string.Empty;

if (connectionString != string.Empty)
{
    EmailClient emailClient = new EmailClient(connectionString);

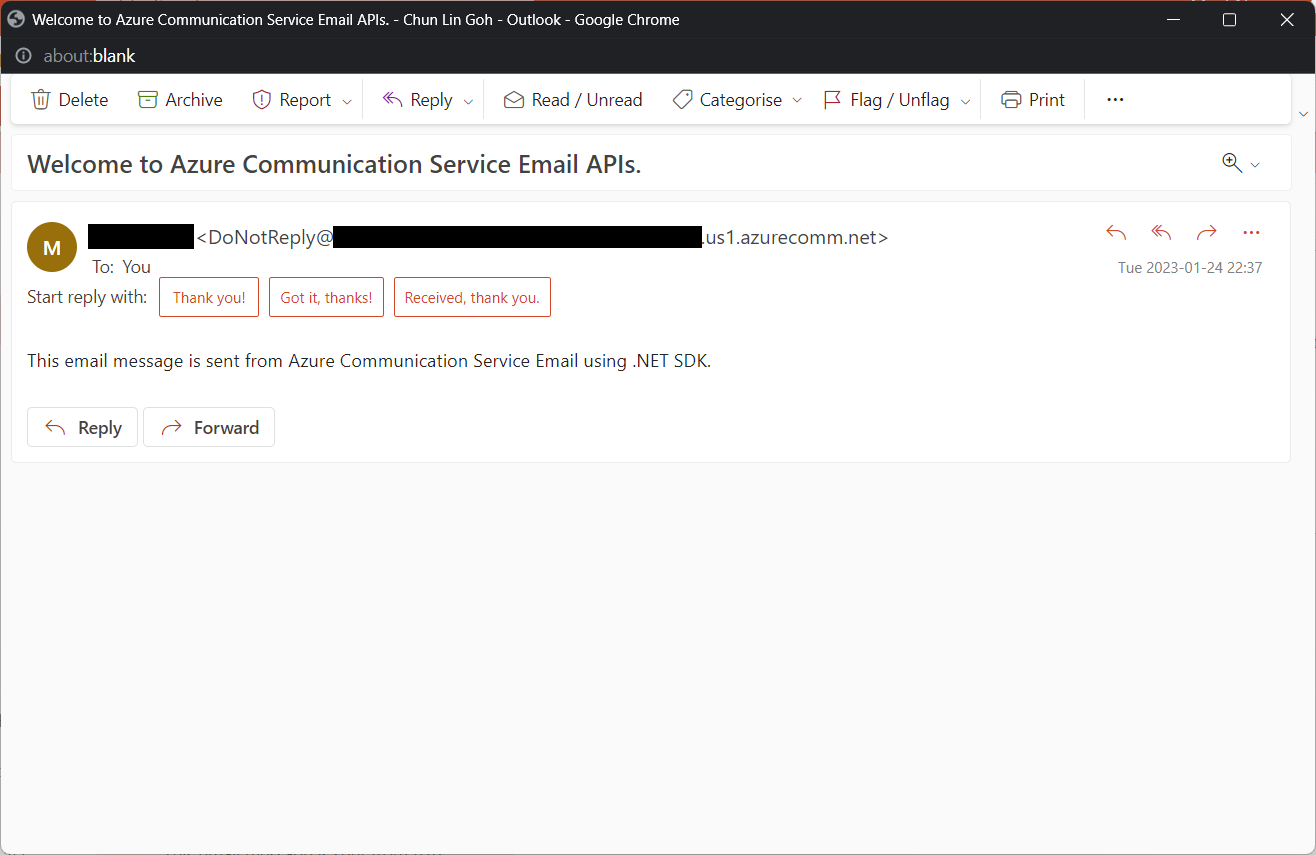
    EmailContent emailContent = new EmailContent("Welcome to Azure Communication Service Email APIs.");
    emailContent.PlainText = "This email message is sent from Azure Communication Service Email using .NET SDK.";
    List<EmailAddress> emailAddresses = new List<EmailAddress> {
            new EmailAddress("gclin009@hotmail.com") { DisplayName = "Goh Chun Lin" }
        };
    EmailRecipients emailRecipients = new EmailRecipients(emailAddresses);
    EmailMessage emailMessage = new EmailMessage(emailFrom, emailContent, emailRecipients);
    SendEmailResult emailResult = emailClient.Send(emailMessage, CancellationToken.None);
}
Setting environment variables for local debugging purpose.

Tada, there should be an email successfully sent out as instructed.

Email is successfully sent and received. =)

Containerise the Console App

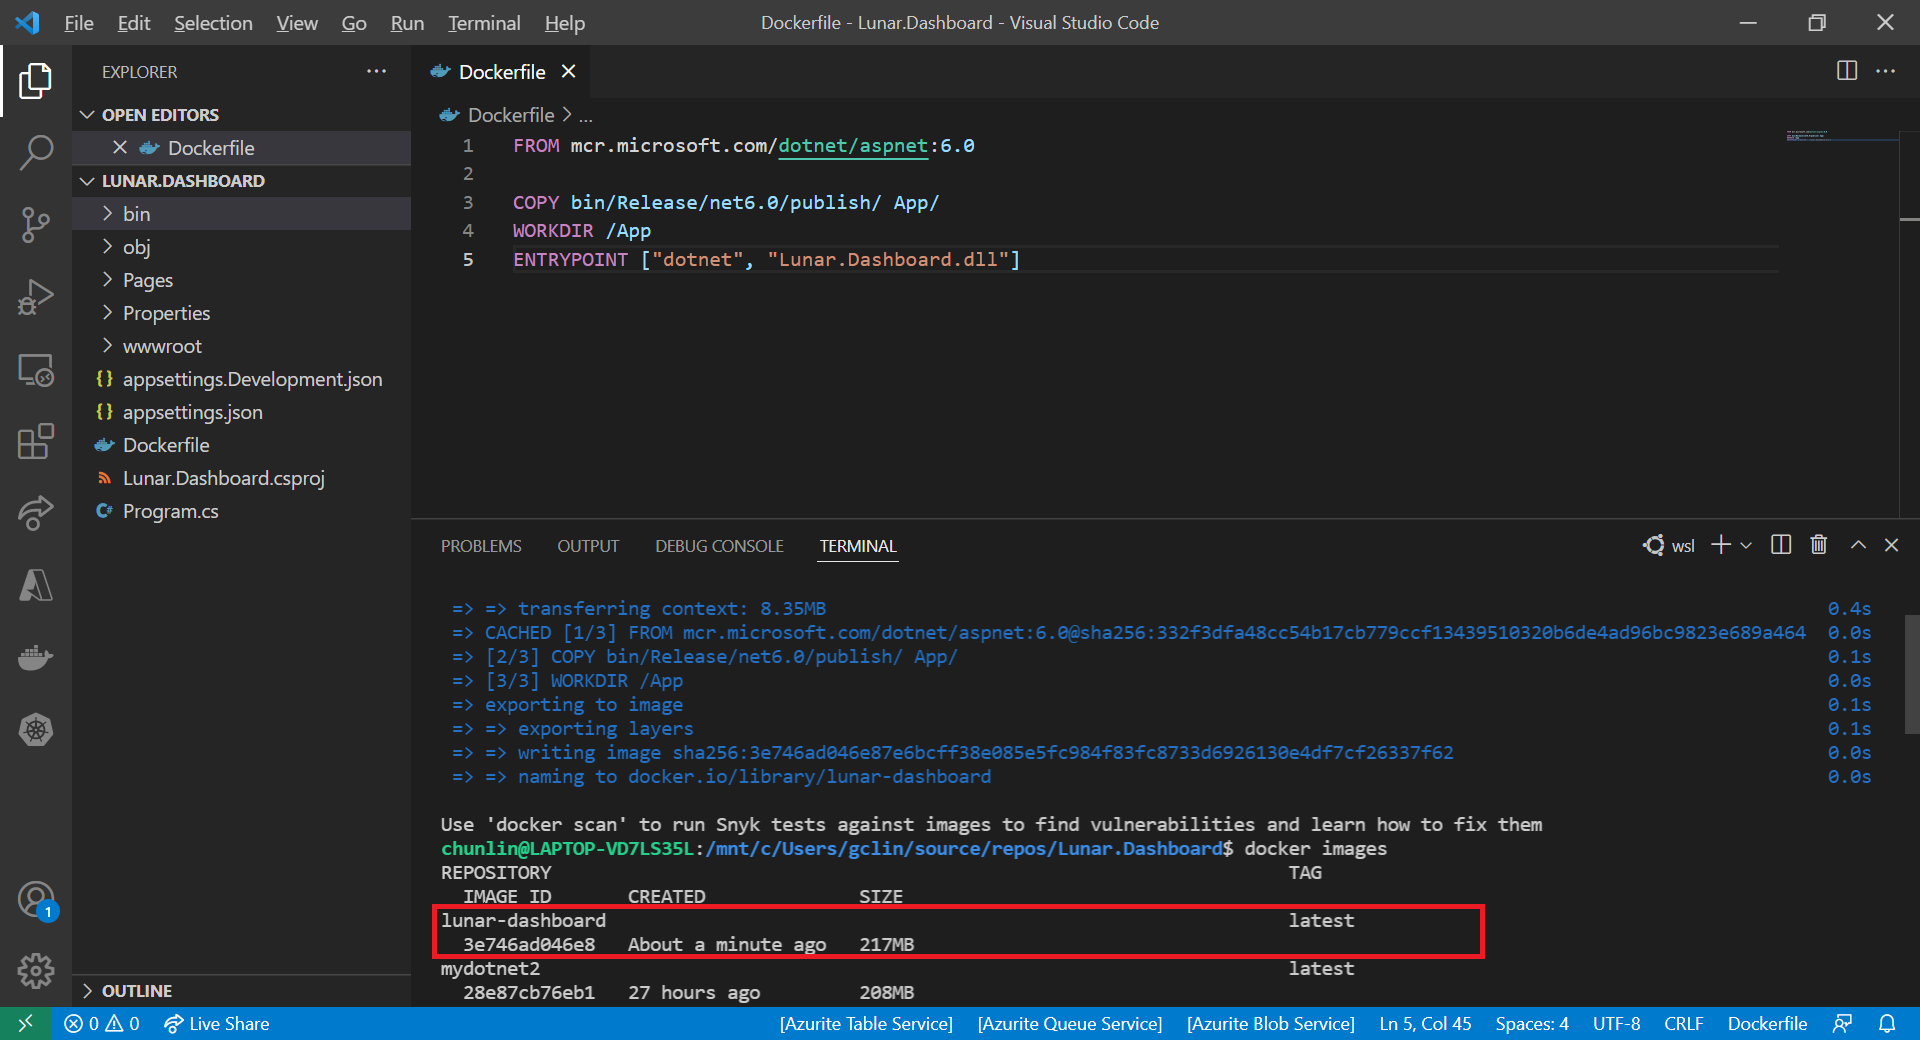
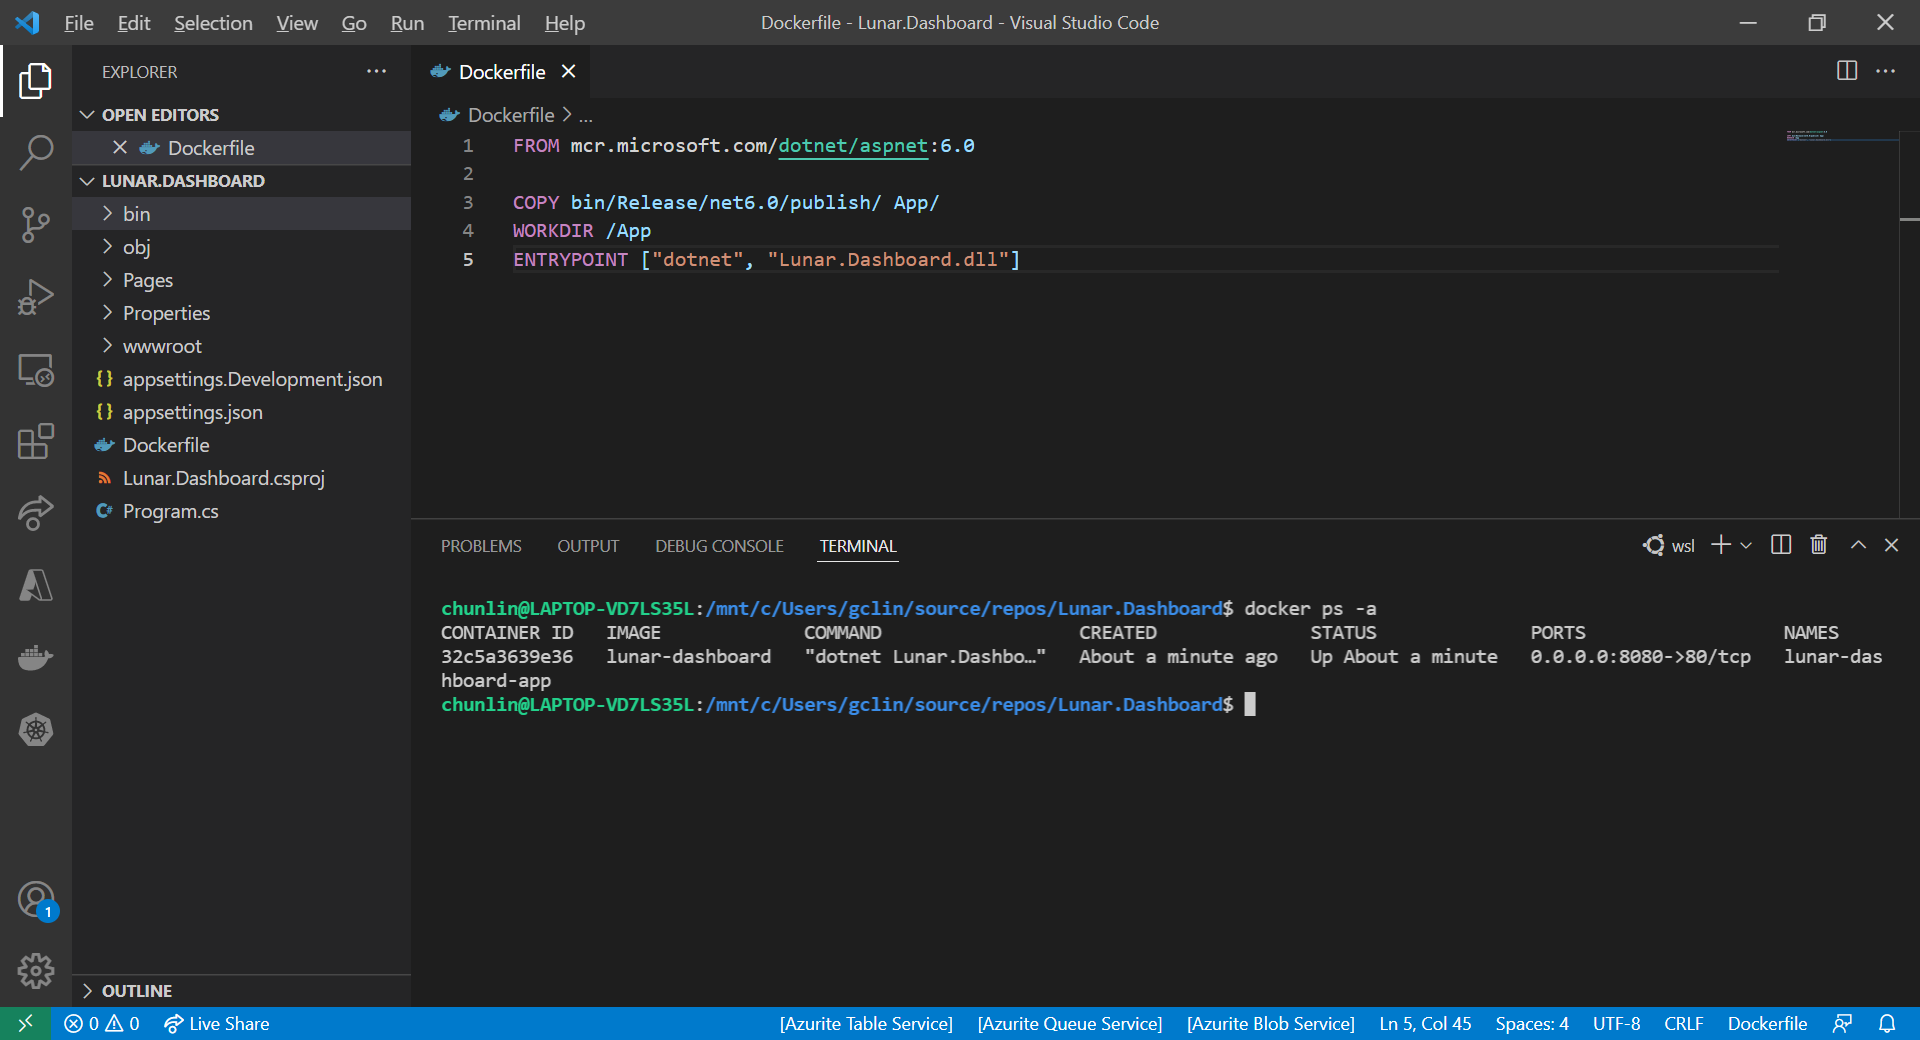
Next what we need to do is containerising our console app above.

Assume that our console app is called MyConsoleApp, then we will prepare a Dockerfile as follows.

FROM mcr.microsoft.com/dotnet/runtime:6.0 AS base
WORKDIR /app

FROM mcr.microsoft.com/dotnet/sdk:6.0 AS build
WORKDIR /src
COPY ["MyMedicalEmailSending.csproj", "."]
RUN dotnet restore "./MyConsoleApp.csproj"
COPY . .
WORKDIR "/src/."
RUN dotnet build "MyConsoleApp.csproj" -c Release -o /app/build

FROM build AS publish
RUN dotnet publish "MyConsoleApp.csproj" -c Release -o /app/publish /p:UseAppHost=false

FROM base AS final
WORKDIR /app
COPY --from=publish /app/publish .
ENTRYPOINT ["dotnet", "MyConsoleApp.dll"]

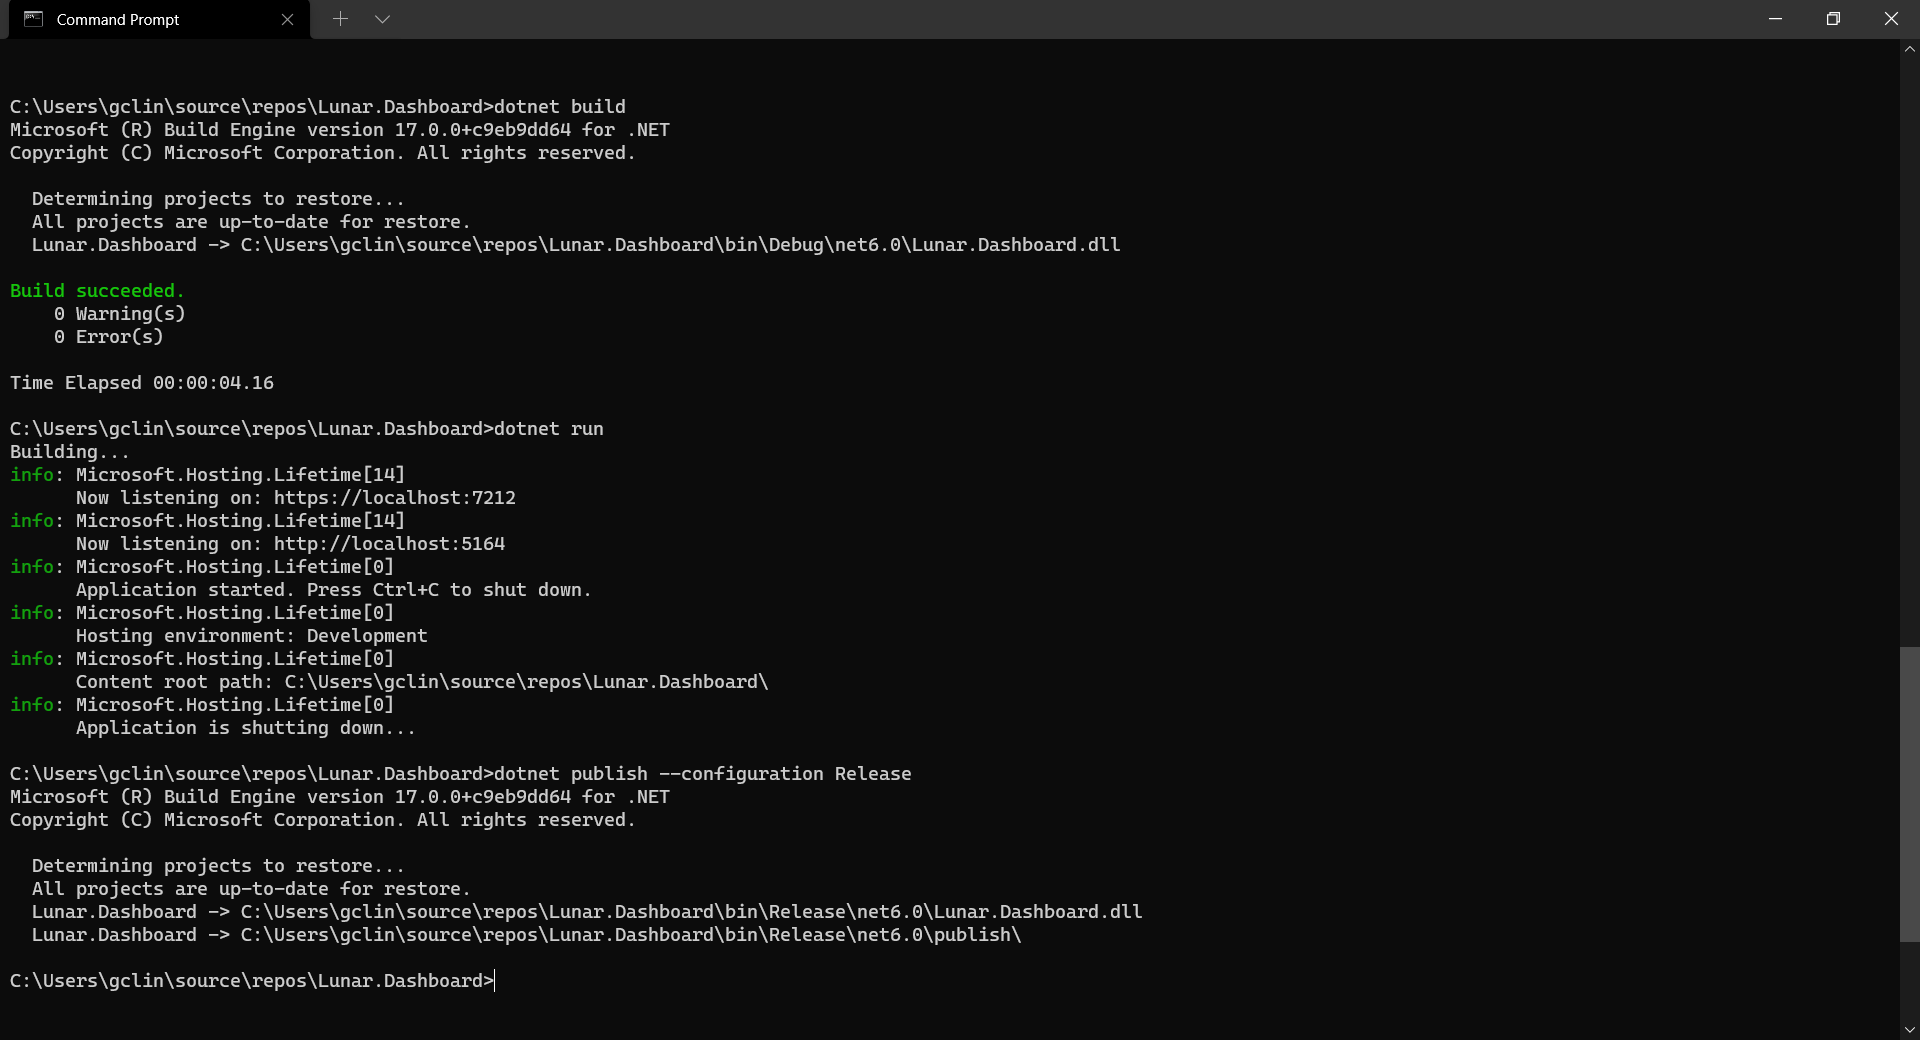
We then can publish it to Docker Hub for consumption later.

If you prefer to use Azure Container Registry, you can refer to the documentation on how to do it on Microsoft Learn.

Create the CronJob

In Kubernetes, pods are the smallest deployable units of computing we can create and manage. A pod can have one or more relevant containers, with shared storage and network resources. Here, we will be scheduling a job so that it creates pods containing our container with the image we created above to operate the execution of the pods, which is in our case, to send emails.

The schedule of the cronjob is defined as follows, according to the Kubernetes documentation on the schedule syntax.

# ┌───────────── minute (0 - 59)
# │ ┌───────────── hour (0 - 23)
# │ │ ┌───────────── day of the month (1 - 31)
# │ │ │ ┌───────────── month (1 - 12)
# │ │ │ │ ┌───────────── day of the week (sun, mon, tue, wed, thu, fri, sat)
# │ │ │ │ │
# * * * * *

Hence, if we would like to have the email scheduler to be triggered at 8am of every Friday, we can create a CronJob in the namespace my-namespace with the following YAML file.

apiVersion: batch/v1
kind: CronJob
metadata:
  name: email-scheduler
  namespace: ns-mymedical
spec:
  jobTemplate:
    metadata:
      name: email-scheduler
    spec:
      template:
        spec:
          containers:
          - image: chunlindocker/emailsender:v2023-01-25-1600
            name: email-scheduler
          restartPolicy: OnFailure
  schedule: 0 8 * * fri

After the CronJob is created, we can proceed to annotate it with the command below.

kubectl annotate cj email-scheduler jobtype=scheduler frequency=weekly

This helps us to query the cron jobs with jsonpath easily in the future. For example, we can list all cronjobs which are scheduled weekly, we can do it with the following command.

kubectl get cj -A -o=jsonpath="{range .items[?(@.metadata.annotations.jobtype)]}{.metadata.namespace},{.metadata.name},{.metadata.annotations.jobtype},{.metadata.annotations.frequency}{'\n'}{end}"

Create ConfigMap

In our email sending programme, we have two environment variables. Hence, we can create ConfigMap to store the data as key-value pair.

apiVersion: v1
kind: ConfigMap
metadata:
  name: email-sending
  namespace: my-namespace
data:
  EMAIL_FROM: DoNotReply@xxxxxx.azurecomm.net

For connection string of Azure Communication Service, since it is a sensitive data, we will store it in Secret. Secrets are similar to ConfigMaps but are specifically intended to hold confidential data. We will create a Secret with the command below.

kubectl create secret generic azure-communication-service --from-literal=CONNECTION_STRING=xxxxxx --dry-run=client --namespace=my-namespace -o yaml

It should generate a YAML which is similar to the following.

apiVersion: v1
kind: Secret
metadata:
  name: azure-communication-service
  namespace: my-namespace
data:
  CONNECTION_STRING: yyyyyyyyyy

Then, the Pods created by the CronJob can thus consume the ConfigMap and Secret above as environment variables. So, we need to update the CronJob YAML file to be as follows.

apiVersion: batch/v1
kind: CronJob
metadata:
  name: email-scheduler
  namespace: my-namespace
spec:
  jobTemplate:
    metadata:
      name: email-scheduler
    spec:
      template:
        spec:
          containers:
          - image: chunlindocker/emailsender:v2023-01-25-1600
            name: email-scheduler
            env:
              - name: EMAIL_FROM
                valueFrom:
                  configMapKeyRef:
                    name: email-sending
                    key: EMAIL_FROM
              - name: COMMUNICATION_SERVICES_CONNECTION_STRING
                valueFrom:
                  secretKeyRef:
                    name: azure-communication-service
                    key: CONNECTION_STRING
          restartPolicy: OnFailure
  schedule: 0 8 * * fri

Using SealedSecret

Problem with using Secrets is that we can’t really commit them to our code repository because the data are only encoded but not encrypted. Hence, in order to store our Secrets safely, we need to use SealedSecret which helps us to encrypt our Secret. The SealedSecret can only be decrypted by the controller running in the targer cluster.

Currently, the SealedSecret Helm Chart is officially supported and hosted on GitHub.

Helm is the package manager for Kubernetes. Helm uses a packaging format called Chart, a collection of files describing a related set of Kubernetes resource. Each Chart comprises one or more Kubernetes manifests. With Chart, developers are able to configure, package, version, and share the apps with their dependencies and sensible defaults.

To install Helm on Windows 11 machine, we can execute the following commands in Ubuntu on Windows console.

  1. Download desired version of Helm release, for example, to download version 3.11.0:
    wget https://get.helm.sh/helm-v3.11.0-linux-amd64.tar.gz
  2. Unpack it:
    tar -zxvf helm-v3.2.0-linux-amd64.tar.gz
  3. Move the Helm binary to desired location:
    sudo mv linux-amd64/helm /usr/local/bin/helm

Once we have successfully downloaded Helm and have it ready, we can add a Chart repository. In our case, we need to add the repo of SealedSecret Helm Chart.

helm repo add sealed-secrets https://bitnami-labs.github.io/sealed-secrets

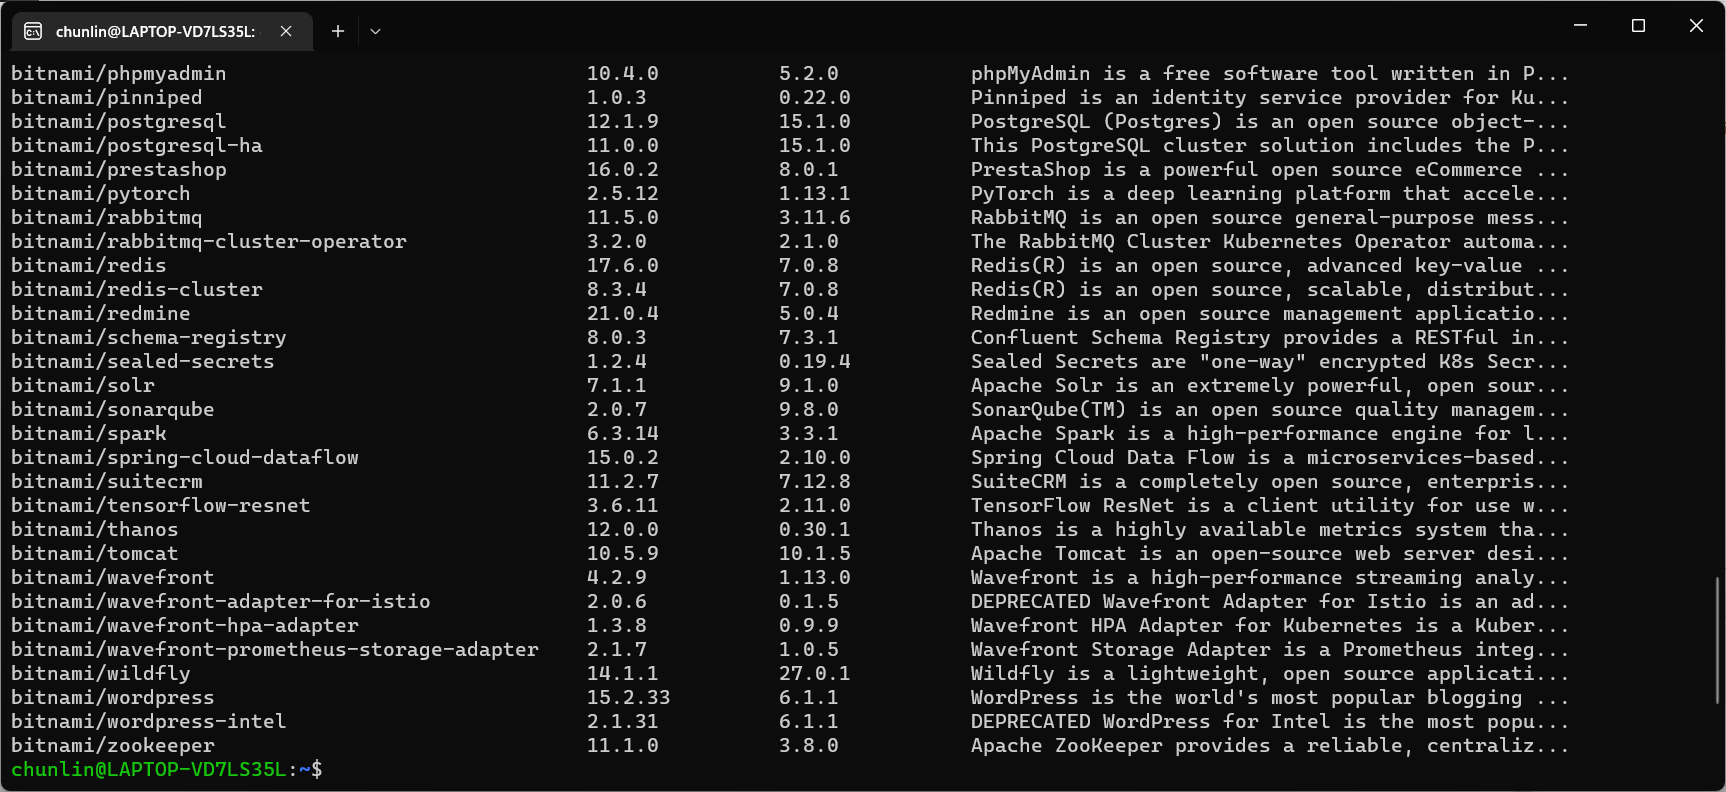
We should be able to locate the SealedSecret chart that we can install with the following command.

helm search repo bitnami
The Chart bitnami/sealed-secret is one of the Charts we can install.

To installed SealedSecret Helm Chart, we will use the following command.

helm install sealed-secrets -n kube-system --set-string fullnameOverride=sealed-secrets-controller sealed-secrets/sealed-secrets

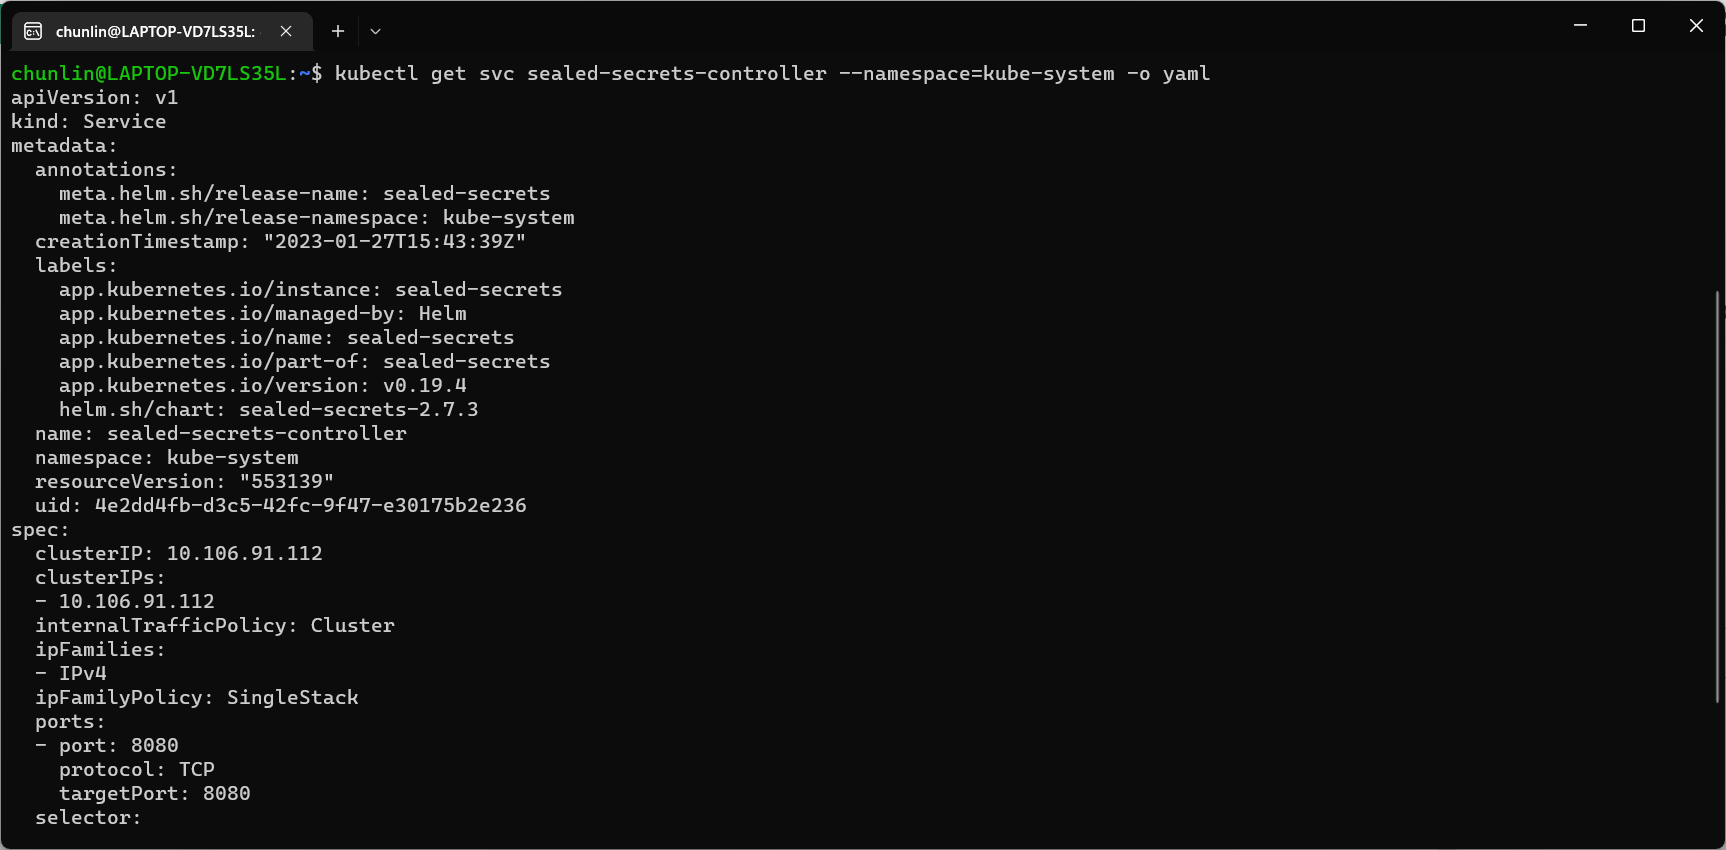
Once we have done this, we should be able to locate a new service called sealed-secret-controller under Kubernetes services.

The sealed-secret-controller service is under kube-system namespace.

Before we can proceed to use kubeseal to create an encrypted secret, for me at least, there is a need to edit the sealed-secret-controller service. Otherwise, there will be an error message saying “cannot fetch certificate: no endpoints available for service”. If you also encounter the same issue, simply follow the steps mentioned by ghostsquad to edit the service YAML accordingly.

My final edit of the sealed-secret-controller service YAML.

Next, we then can proceed to encrypt our secret, as instructed on the SealedSecret GitHub readme.

kubectl create secret generic azure-communication-service --from-literal=CONNECTION_STRING=xxxxxx --dry-run=client --namespace=my-namespace -o json > mysecret-acs.json

kubeseal < mysecret-acs.json > mysealedsecret-acs.json

The generated file mysealedsecret-acs.json should look something as shown below.

The connection string is now encrypted.

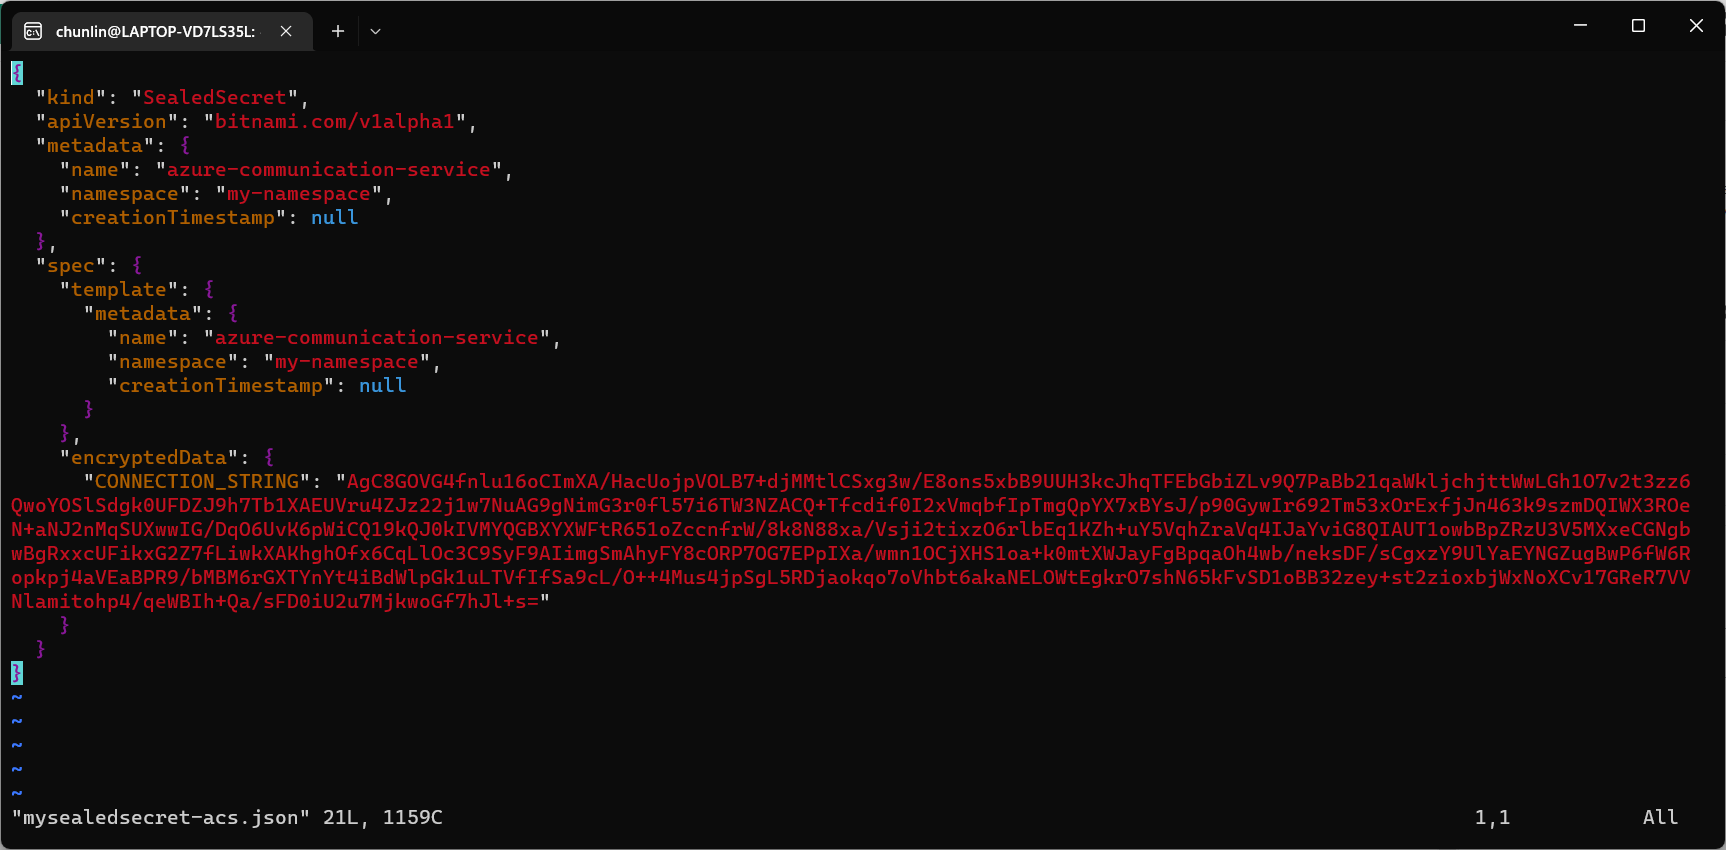
To create the Secret resource, we will simply create it based on the file mysealedsecret-acs.json.

This generated file mysealedsecret-acs.json is thus safe to be committed to our code repository.

Going Zero-Trust: Using Kamus and InitContainer

Besides SealedSecret, there is also another open-source solution known as Kamus, a zero-trust secrets encryption and decryption solution for Kubernetes apps. We can also use Kamus to encrypt our secrets and make sure that the secrets can only be decrypted by the desired Kubernetes apps.

Similarly, we can also install Kamus using Helm Chart with the commands below.

helm repo add soluto https://charts.soluto.io
helm upgrade --install kamus soluto/kamus

Kamus will encrypt secrets for only a specific application represented by a ServiceAccount. A service account provides an identity for processes that run in a Pod, and maps to a ServiceAccount object. Hence, we need to create a Service Account with the YAML below.

apiVersion: v1
kind: ServiceAccount
metadata:
  name: my-kamus-sa

After creating the ServiceAccount, we can update our CronJob YAML to mount it on the pods.

Next, we can proceed to download and install Kamus CLI which we can use to encrypt our secret with the following command.

kamus-cli encrypt \
  --secret xxxxxxxx \
  --service-account my-kamus-sa \
  --namespace my-namespace \
  --kamus-url <Kamus URL>

The Kamus URL could be found after we installed Kamus as shown in the screenshot below.

Kamus URL in localhost

We need to follow the instruction printed on the screen to get the Kamus URL. To do so, we need to forward local port to the pod, as shown in the following screenshot.

Successfully forward the port and thus can use the URL as the Kamus URL.

Hence, let’s say we want to encrypt a secret “alamak”, we can do so as follows.

Since our localhost Kamus URL is using HTTP, so we have to specify “–allow-insecure-url”.

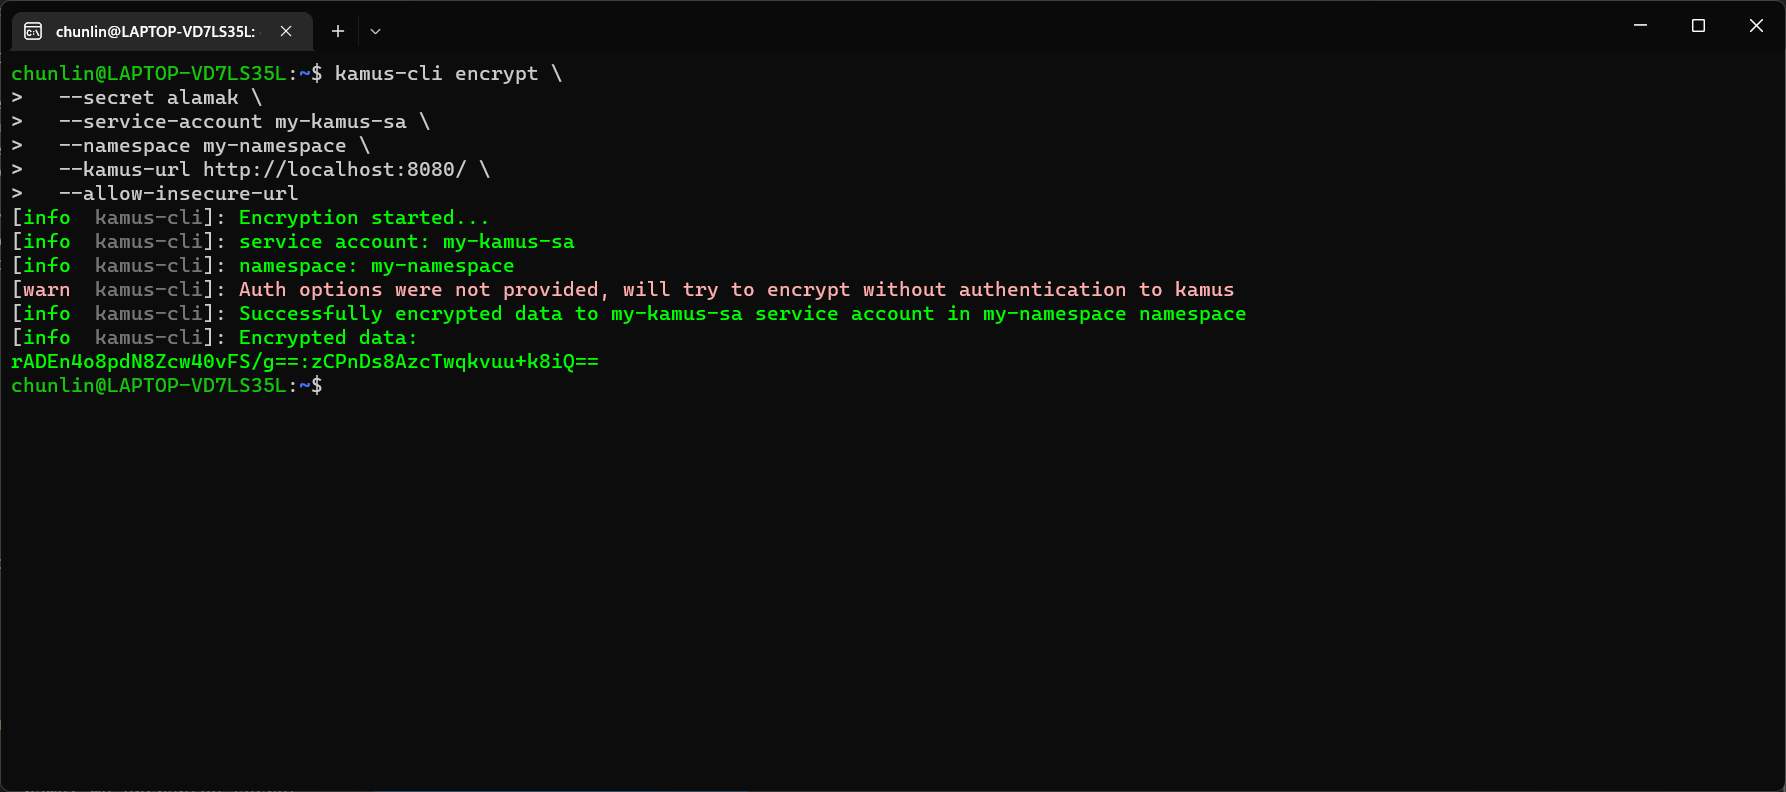
After we have encrypted our secret successfully, we need to configure our pod accordingly so that it can decrypt the value with Kamus Decrypt API. The simplest way will be storing our secret in a ConfigMap because it is already encrypted, so it’s safe to store it in ConfigMap.

apiVersion: v1
kind: ConfigMap
metadata:
  name: my-encrypted-secret
  namespace: my-namespace
data:
  data: rADEn4o8pdN8Zcw40vFS/g==:zCPnDs8AzcTwqkvuu+k8iQ==

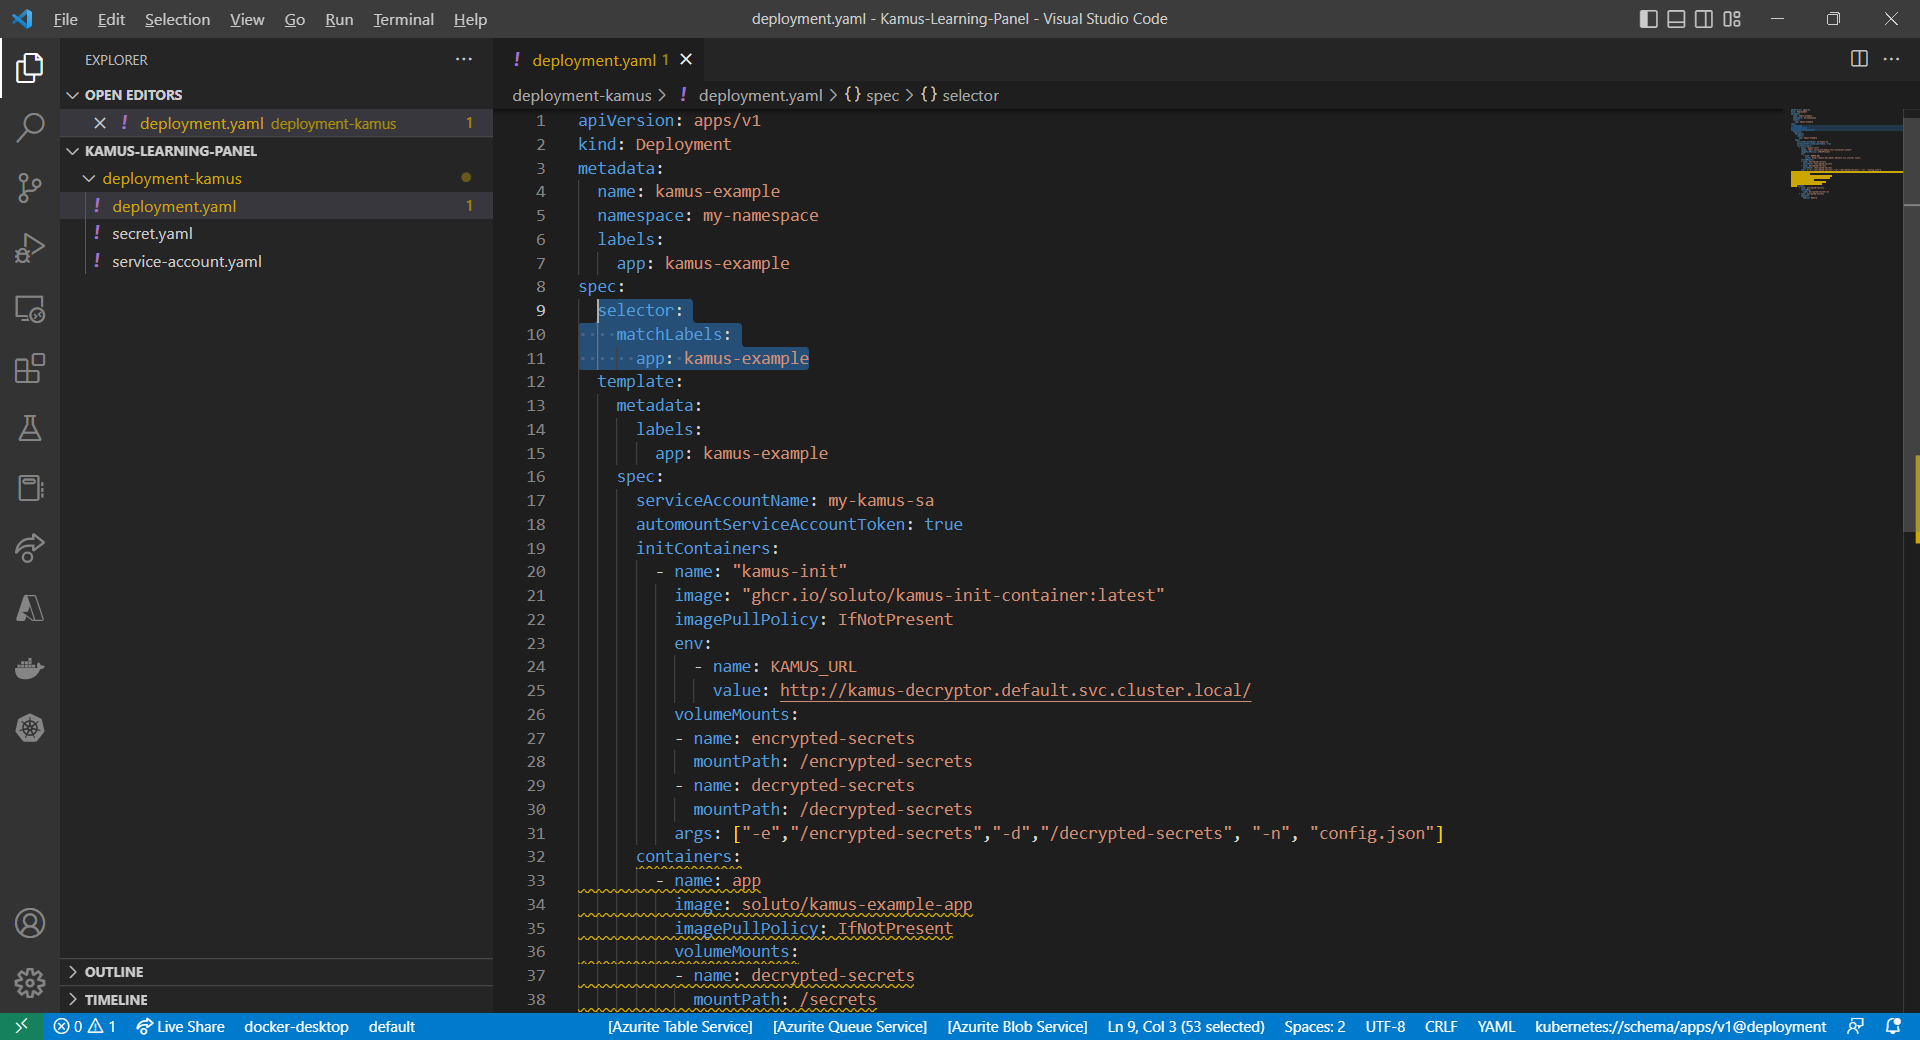
Then we can include an InitContainer in our pod. This is because the use of an initContainer allows one or more containers to run only if one or more previous containers run and exit successfully. So we can make use of Kamus Init Container to decrypt the secret using Kamus Decryptor API and output it to a file to be consumed by our app. There is an official demo from the Kamus Team on how to do that on the GitHub. Please take note that one of their YAML files is outdated and thus there is a need to update their deployment.yaml to use “apiVersion: apps/v1” with a proper selector.

Updated deployment.yaml.

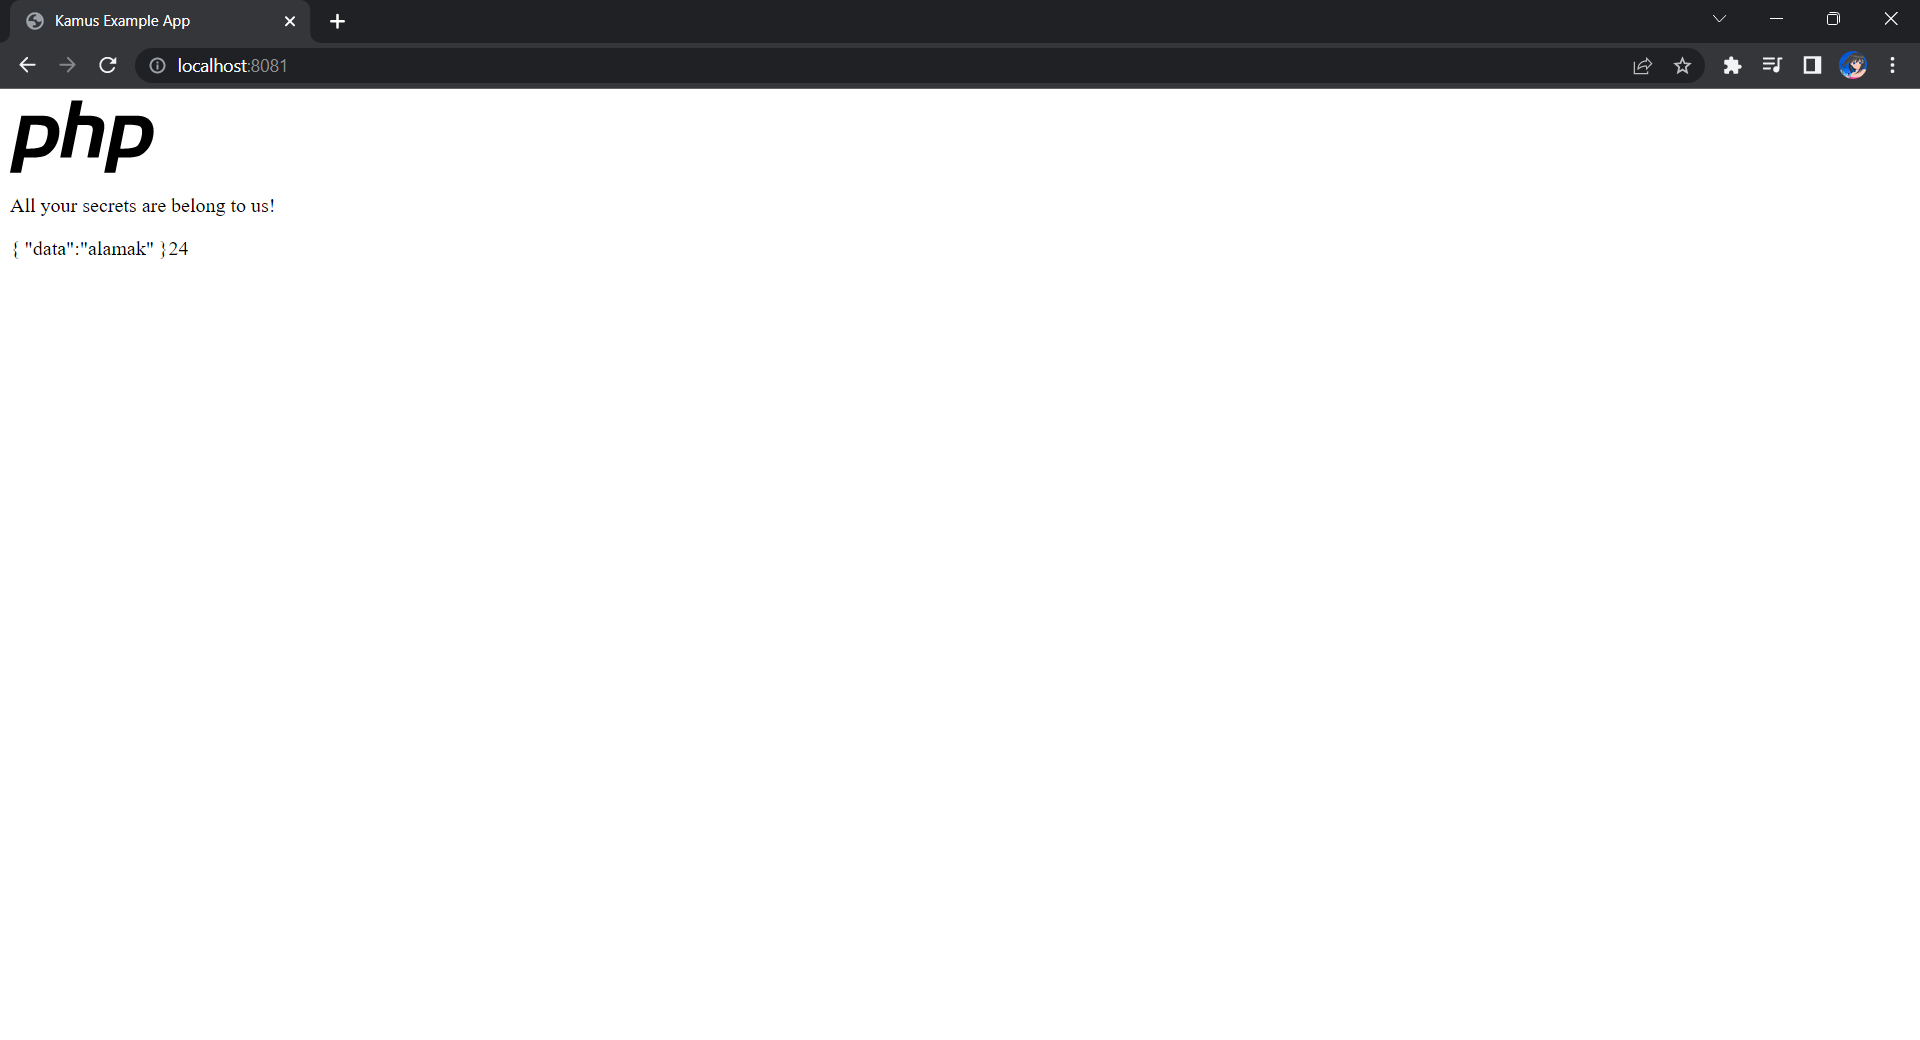
After the deployment is successful, we can forward the port 8081 to the pod in the deployment as shown below.

kubectl port-forward deployment/kamus-example 8081:80

If the deployment is successful, we should be able to see the following when we visit localhost:8081 on our Internet browser, as shown in the following screenshot.

Yay, the original text “alamak” is successfully decrypted and displayed.

Deploy Our CronJob

Now, since we have everything setup, we can create our Kubernetes CronJob with the YAML file we have earlier. For local testing, I have edited the schedule to be “*/2 * * * *”. This means that an email will be sent to me every 2 minutes.

After waiting for a couple of minutes, I have received a few emails sent via the Azure Communication Services, as shown below.

Now the emails are received every 2 minutes. =)

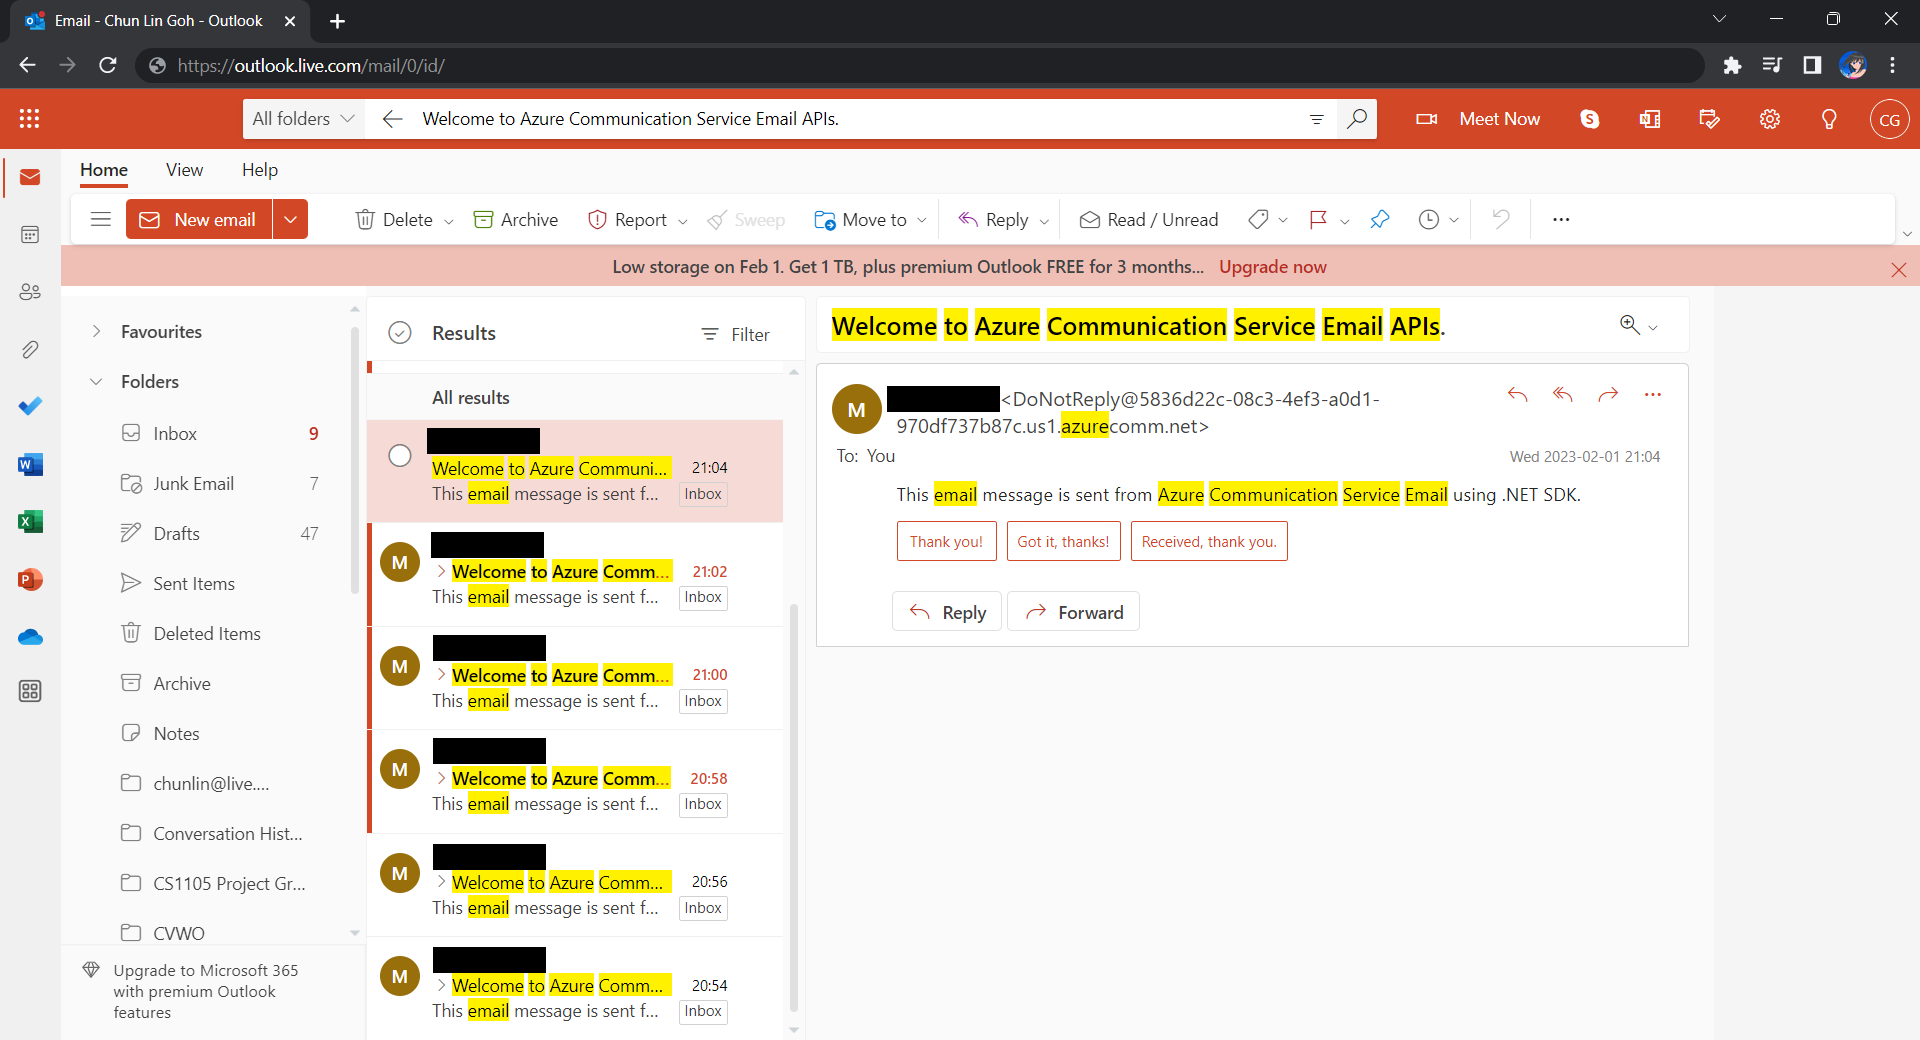
Hoorey, this is how we build a simple Kubernetes CronJob and how we can send emails with the Azure Email Communication Services.

Multi-Container ASP .NET Core Web App with Docker Compose

Previously, we have seen how we could containerise our ASP .NET Core 6.0 web app and manage it with docker commands. However, docker commands are mainly for only one image/container. If our solution has multiple containers, we need to use docker-compose to manage them instead.

docker-compose makes things easier because it encompasses all our parameters and workflow into a configuration file in YAML. In this article, I will share my first experience with docker-compose to build mutli-container environments as well as to manage them with simple docker-compose commands.

To help my learning, I will create a simple online message board where people can login with their GitHub account and post a message on the app.

PROJECT GITHUB REPOSITORY

The complete source code of this project can be found at https://github.com/goh-chunlin/Lunar.MessageWall.

Create Multi-container App

We will start with a solution in Visual Studio with two projects:

  • WebFrontEnd: A public-facing web application with Razor pages;
  • MessageWebAPI: A web API project.

By default, the web API project will have a simple GET method available, as shown in the Swagger UI below.

Default web API project created in Visual Studio will have this WeatherForecast API method available by default.

Now, we can make use of this method as a starting point. Let’s have the our client, WebFrontEnd, to call the API and output the result returned by the API to the web page.

var request = new System.Net.Http.HttpRequestMessage();
request.RequestUri = new Uri("http://messagewebapi/WeatherForecast");

var response = await client.SendAsync(request);

string output = await response.Content.ReadAsStringAsync();

In both projects, we will add Container Orchestrator Support with Linux as the target OS. Once we have the docker-compose YAML file ready, we can directly run our docker compose application by simply pressing F5 in Visual Studio.

The docker-compose YAML file for our solution.

Now, we shall be able to see the website output some random weather data returned by the web API.

Congratulations, we’re running a docker compose application.

Configure Authentication in Web App

Our next step is to allow users to login to our web app first before they can post a message on the app.

It’s usually a good idea not to build our own identity management module because we need to deal with a lot more than just building a form to allow users to create an account and type their credentials. One example will be managing and protecting our user’s personal data and passwords. Instead, we should rely on Identity-as-a-Service solutions such as Azure Active Directory B2C.

Firstly, we will register our web app in our Azure AD B2C tenant.

Normally for first-timers, we will need to create a Azure AD B2C tenant first. However, there may be an error message saying that our subscription is not registered to use namespace ‘Microsoft.AzureActiveDirectory’. If you encounter this issue, you can refer to Adam Storr’s article on how to solve this with Azure CLI.

Once we have our Azure AD B2C tenant ready (which is Lunar in my example here), we can proceed to register our web app, as shown below. For testing purposes, we set the Redirect URI to https://jwt.ms, a Microsoft-owned web application that displays the decoded contents of a token. We will update this Redirect URL in the next section below when we link our web app with Azure AD B2C.

Registering a new app “Lunar Message Wall” under the Lunar Tenant.

Secondly, once our web app is registered, we need to create a client secret, as shown below, for later use.

Secrets enable our web app to identify itself to the authentication service when receiving tokens. In addition, please take note that although certificate is recommended over client secret, currently certificates cannot be used to authenticate against Azure AD B2C.

Adding a new client secret which will expire after 6 months.

Thirdly, since we want to allow user authentication with GitHub, we need to create a GitHub OAuth app first.

The Homepage URL here is a temporary dummy data.

After we have registered the OAuth app on GitHub, we will be provided a client ID and client secret. These two information are needed when we configure GitHub as the social identity provider (IDP) on our Azure AD B2C, as shown below.

Configuring GitHub as an identity provider on Azure AD B2C.

Fourthly, we need to define how users interact with our web app for processes such as sign-up, sign-in, password reset, profile editing, etc. To keep thing simple, here we will be using the predefined user flows.

For simplicity, we allow only GitHub sign-in in our user flow.

We can also choose the attributes we want to collect from the user during sign-up and the claims we want returned in the token.

User attributes and token claims.

After we have created the user flow, we can proceed to test it.

In our example here, GitHub OAuth app will be displayed.

Since we specify in our user flow that we need to collect the user’s GitHub display name, there is a field here for the user to enter the display name.

The testing login page from running the user flow.

Setup the Authentication in Frontend and Web API Projects

Now, we can proceed to add Azure AD B2C authentication to our two ASP.NET Core projects.

We will be using the Microsoft Identity Web library, a set of ASP.NET Core libraries that simplify adding Azure AD B2C authentication and authorization support to our web apps.

dotnet add package Microsoft.Identity.Web

The library configures the authentication pipeline with cookie-based authentication. It takes care of sending and receiving HTTP authentication messages, token validation, claims extraction, etc.

For the frontend project, we will be using the following package to add GUI for the sign-in and an associated controller for web app.

dotnet add package Microsoft.Identity.Web.UI

After this, we need to add the configuration to sign in user with Azure AD B2C in our appsettings.json in both projects (The ClientSecret is not needed for the Web API project).

"AzureAdB2C": {
    "Instance": "https://lunarchunlin.b2clogin.com",
    "ClientId": "...",
    "ClientSecret": "...",
    "Domain": "lunarchunlin.onmicrosoft.com",
    "SignedOutCallbackPath": "/signout/B2C_1_LunarMessageWallSignupSignin",
    "SignUpSignInPolicyId": "B2C_1_LunarMessageWallSignupSignin"
}

We will use the configuration above to add the authentication service in Program.cs of both projects.

With the help of the Microsoft.Identity.Web.UI library, we can also easily build a sign-in button with the following code. Full code of it can be seen at _LoginPartial.cshtml.

<a class="nav-link text-dark" asp-area="MicrosoftIdentity" asp-controller="Account" asp-action="SignIn">Sign in</a>

Now, it is time to update the Redirect URI to the localhost. Thus, we need to make sure our WebFrontEnd container has a permanent host port. To do so, we first specify the ports we want to use in the launchsettings.json of the WebFrontEnd project.

"Docker": {
    ...
    "environmentVariables": {
      "ASPNETCORE_URLS": "https://+:443;http://+:80",
      "ASPNETCORE_HTTPS_PORT": "44360"
    },
    "httpPort": 51803,
    "sslPort": 44360
}

Then in the docker-compose, we will specify the same ports too.

services:
  webfrontend:
    image: ${DOCKER_REGISTRY-}webfrontend
    build:
      context: .
      dockerfile: WebFrontEnd/Dockerfile
    ports:
      - "51803:80"
      - "44360:443"

Finally, we will update the Redirect URI in Azure AD B2C according, as shown below.

Updated the Redirect URI to point to our WebFrontEnd container.

Now, right after we click on the Sign In button on our web app, we will be brought to a GitHub sign-in page, as shown below.

The GitHub sign-in page.

Currently, our Web API has only two methods which have different required scopes declared, as shown below.

[Authorize]
public class UserMessageController : ControllerBase
{
    ...
    [HttpGet]
    [RequiredScope("messages.read")]
    public async Task<IEnumerable<UserMessage>> GetAsync()
    {
        ...
    }

    [HttpPost]
    [RequiredScope("messages.write")]
    public async Task<IEnumerable<UserMessage>> PostAsync(...)
    {
        ...
    }
}

Hence, when the frontend needs to send the GET request to retrieve messages, we will first need to get a valid access token with the correct scope.

string accessToken = await _tokenAcquisition.GetAccessTokenForUserAsync(new[] { "https://lunarchunlin.onmicrosoft.com/message-api/messages.read" });

client.DefaultRequestHeaders.Authorization = new AuthenticationHeaderValue("Bearer", accessToken);

client.DefaultRequestHeaders.Accept.Add(new MediaTypeWithQualityHeaderValue("application/json"));

Database

Since we need to store the messages submitted by the users, we will need a database. Here, we use PostgresSQL, an open-source, standards-compliant, and object-relational database.

To run the PostgresSQL with docker-compose we will update our docker-compose.yml file with the following contents.

services:
  ...
  messagewebapi:
    ...
    depends_on:
     - db

  db:
    container_name: 'postgres'
    image: postgres
    environment:
      POSTGRES_PASSWORD: ...

In our case, only the Web API will interact with the database. Hence, we need to make sure that the db service is started before the messagewebapi. In order to specify this relationship, we will use the depends_on option.

User’s messages can now be stored and listed on the web page.

Next Step

This is just the very beginning of my learning journey of dockerising ASP .NET Core solution. In the future, I shall learn more in this area.

References

[KOSD] Dockerise an ASP .NET Core 6.0 Web App

Let’s assume now we want to dockerise a new ASP .NET Core 6.0 web app project that we have locally.

Now, when we build and run the project, we should be able to view it on localhost as shown below.

The default homepage of a new ASP .NET Core web app.

Before adding the .NET app to the Docker image, first it must be published with the following command.

dotnet publish --configuration Release
Build, run, and publish our ASP .NET Core web app.

Create the Dockerfile

Now, we will create a file named Dockerfile in directory containing the .csproj and open it in VS Code. The content of the Dockerfile is as follows.

FROM mcr.microsoft.com/dotnet/aspnet:6.0

COPY bin/Release/net6.0/publish/ App/
WORKDIR /App
ENTRYPOINT ["dotnet", "Lunar.Dashboard.dll"]

A Dockerfile must begin with a FROM instruction. It specifies the parent image from which we are building. Here, we are using mcr.microsoft.com/dotnet/aspnet:6.0, an image contains the ASP.NET Core 6.0 and .NET 6.0 runtimes for running ASP.NET Core web apps.

The COPY command tells Docker to copy the publish folder from our computer to the App folder in the container. Then the current directory inside of the container is changed to App with the WORKDIR command.

Finally, the ENTRYPOINT command tells Docker to configure the container to run as an executable.

Docker Build

Now that we have the Dockerfile, we can build an image from it.

In order to perform docker build, we first need to navigate the our project root folder and issue the docker build command, as shown below.

docker build -t lunar-dashboard -f Dockerfile .

We assign a tag lunar-dashboard to the image name using -t. We then specify the name of the Dockerfile using -f. The . in the command tells Docker to use the current folder, i.e. our project root folder, as the context.

Once the build is successful, we can locate the newly created image with the docker images command, as highlighted in the screenshot below.

The default docker images command will show all top level images.

Create a Container

Now that we have an image lunar-dashboard that contains our ASP .NET Core web app, we can create a container with the docker run command. 

docker run -d -p 8080:80 --name lunar-dashboard-app lunar-dashboard

When we start a container, we must decide if it should be run in a detached mode, i.e. background mode, or in a foreground mode. By default the container will be running in foreground.

In the foreground mode, the console that we are using to execute docker run will be attached to standard input, output and error. This is not what we want. What we want is after we start up the container, we can still use the console for other commands. Hence, the container needs to be in detached mode. To do so, we use the -d option which will start the container in detached mode.

We then publish a port of the container to the host with -p 8080:80, where 8080 is the host port and 80 is the container port.

Finally, we name our container lunar-dashboard-app with the --name option. If we do not assign a container name with the --name option, then the daemon will generate a random string name for us. Most of the time, the auto-generated name is quite hard to remember, so it’s better for us to give a meaningful name to the container so we can easily refer the container later.

After we run the docker run command, we should be able to find our newly created container lunar-dashboard with the docker ps command, as shown in the following screenshot. The option -a is to show all containers because by default docker ps will show only containers which are running.

Our container lunar-dashboard is now running.

Now, if we visit the localhost at port 8080, we shall be able to see our web app running smoothly.

This web app is hosting on our Docker container.

Running Docker on Windows 11 Home

You may notice that I am using WSL (Windows Subsystem for Linux). This is because to install Docker Desktop, which includes the Docker Engine that builds and containerise our apps, on Windows, we need to have Hyper-V feature enabled. However, Hyper-V is available only on Windows 10/11 Pro, Enterprise, and Education.

Hence, I have no choice but to use WSL, which runs a Linux kernel inside of a lightweight utility VM. WSL provides a mechanism for running Docker (with Linux containers) on the Windows machine.

For those who are interested to read more about this, please refer to a very detailed online tutorial about how to run Docker with WSL, written by Padok SRE Baptiste Guerin.

References

KOSD, or Kopi-O Siew Dai, is a type of Singapore coffee that I enjoy. It is basically a cup of coffee with a little bit of sugar. This series is meant to blog about technical knowledge that I gained while having a small cup of Kopi-O Siew Dai.

[KOSD Series] Running MS SQL Server 2019 on macOS

Few days ago, my teammate would like to learn how to use MS SQL Server. However, he only has a Macbook and MS SQL Server doesn’t run on macOS. Hence, I decided to write him a quick setup guide on how to do that with the help of container.

Starting from March 2016, besides Windows, SQL Sever 2019 also runs on Linux. So, we can easily spin up a Linux container and host SQL Server on it.

🎨 Microsoft introduced SQL Server on Linux in 2016. 🎨

Docker

We need to run Docker on our Mac machine. Since my teammate is new to Docker, he can simply choose a rather straight-forward path for this, which is to use Docker Desktop on Mac. Kindly take note of the system requirement before proceed to install it.

Once the Docker is up and running, we can proceed to pull the image of SQL Server 2019 from the Docker Hub.

SQL Server 2019 Developer Edition

In 2019, continuing with the approach to delivering a consistent and trustworthy acquisition experience for Microsoft container images, Microsoft Container Registry (MCR) is announced.

We can run the following command in Terminal window to start the database server. Here we are using 1501 as the port. Take note that, we need to replace the password with our password which meets the following guideline:

  • at least 8 characters;
  • including uppercase, lowercase letters, base-10 digits and/or non-alphanumeric symbols.
$ docker run -e 'ACCEPT_EULA=Y' -e 'SA_PASSWORD=yourStrong(!)Password' -p 1501:1433 -d mcr.microsoft.com/mssql/server:2019-latest

In the command above, there are two environment variables.

Firstly, it is the environment variable “ACCEPT_EULA”. Setting it to Y means that we accept the End-User Licensing Agreement of the product. So far I still couldn’t find the EULA of the Microsoft SQL Server 2019. If you know, please drop me a message in the comment section. Thanks!

Secondly, it is the “SA_PASSWORD” which is used to set the password that we will later use to connect to the SQL server later as the database admin (userid = “sa”).

Actually, there is another environment variable which is not set here. It is the MSSQL_PID, i.e. the product ID of the SQL Server. By default, it is the Developer edition. If we would like to use Express or Enterprise edition, we can specify it here.

The reason we chose the Developer edition is because it is the edition that it is licensed for use as a development and test system, not as a production server. In addition, despite being Developer edition, it includes all the functionality of Enterprise edition. Hence, SQL Server Developer is an ideal choice for developers like us to build and test applications.

🎨 Docker Hub page of Microsoft SQL Server. 🎨

There are more information about the MS SQL Server image on the Docker Hub page. Hence I will not repeat them here.

Azure Data Studio

To visualise and manage our data in the databases, we need to use tools such as SQL Server Management Studio (SSMS). However, SSMS is only for Windows (AMD or Intel). So, on macOS, we have to choose another cross-platform alternative, which is Azure Data Studio. Azure Data Studio is usable on Windows and Linux too.

Interestingly, Azure Data Studio was previously called SQL Operations Studio. Hence, please only use the latest one, which is the Azure Data Studio.

Now we can connect to the SQL Server from Azure Data Studio as shown below. Take note that the Server is “localhost,1501” and it is using comma, not dot, between the word localhost and the port number.

🎨 Connecting to the Microsoft SQL Server from Azure Data Studio. 🎨

If the connection is successful, we shall be able to see the Server Dashboard as shown below.

🎨 Server Dashboard in Azure Data Studio. 🎨

That’s all. Now we can have MS SQL Server running on our Mac machine for local testing and development.

References

KOSD, or Kopi-O Siew Dai, is a type of Singapore coffee that I enjoy. It is basically a cup of coffee with a little bit of sugar. This series is meant to blog about technical knowledge that I gained while having a small cup of Kopi-O Siew Dai.