
Getting our apps to the market is always an exciting moment. I once remembered I worked with the business co-founders until mid-night when we launched our first version of the app. There was also a time when minister and other government officers visited the launch event of our UWP app. So, yup, publishing and releasing the apps to market is a crucial knowledge to learn for developers. Today, this post will share my journey of submitting my first UWP app to the Microsoft Store.
Microsoft Store is a digital distribution platform for distributing our UWP apps which. It has a great amount of users which can be helpful in getting exposure. Once our UWP apps are ready on the platform, Windows 10 users can conveniently download and install our apps to their Windows 10 machine. In addition, organizational customers can acquire our apps to distribute internally to their organizations through the Microsoft Store for Business.

When we package our apps using Visual Studio and then release it to the Microsoft Store, a special capability will be added automatically. It’s called runFullTrust, a restricted capability. It allows our apps to run at the full trust permission level and to have full access to resources on the users’ machine. Hence, we need to submit our apps to the Microsoft Store and then wait for approval from Microsoft before our apps can be released on the Microsoft Store.
So, let’s start the app publish journey with me now.
Mission 1: Setup App Manifest
Before we release our app, we should make sure it works as expected on all device families that we plan to support. It’s important to test our app with the Release configuration and check that our app behaves as expected.
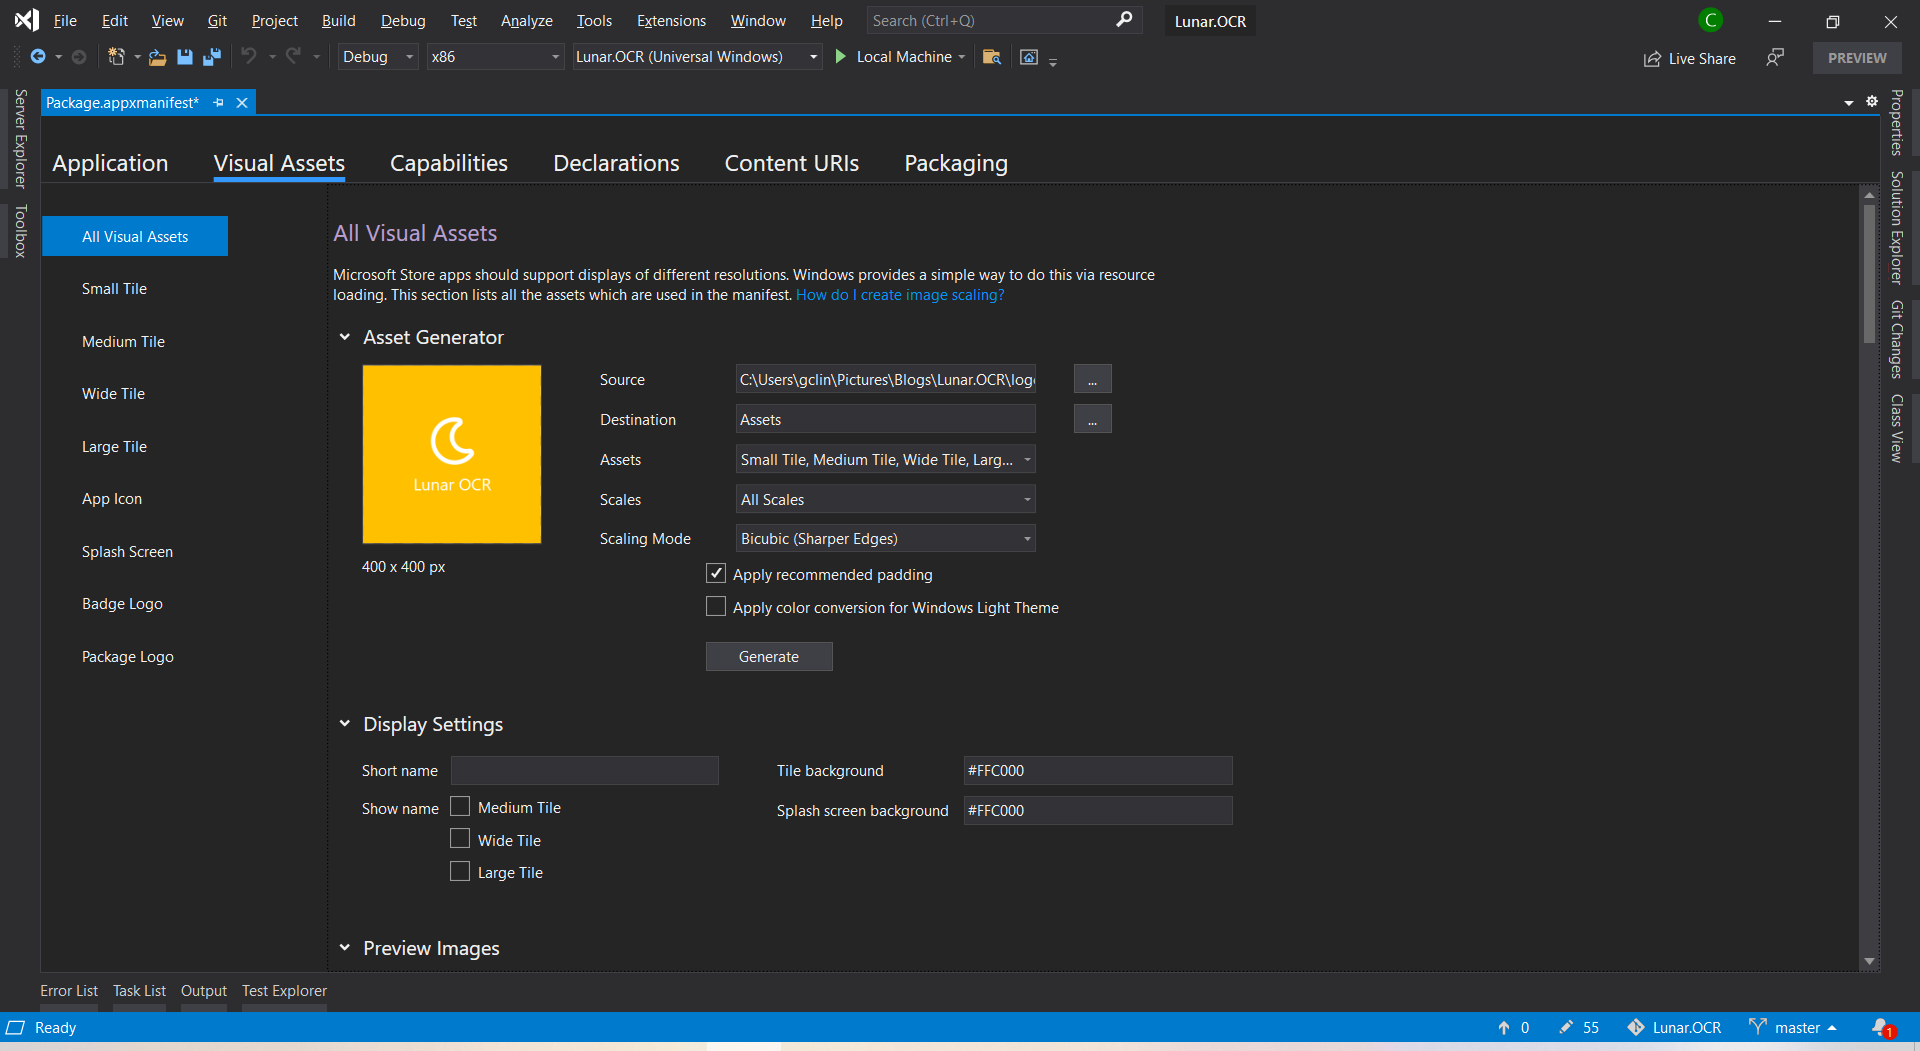
After that, we will proceed to configure our app manifest file Package.appxmanifest. It’s an XML file that contains the properties and settings required to create our app package.

After that, we will need to upload the product logo. Even though there are many visual assets for different sizes of tiles, icons, package logo, and splash screen, what we need to do is simply just upload one logo image which is at least 400×400 pixels. Then Visual Studio will be able to help us to generate the necessary assets.
I will skip the Capabilities, Declarations, and Content URIs tabs here because they are not relevant to our app for now.
Mission 2: Create Developer Account
Before we proceed, we need to make sure we have a Microsoft Developer account so that we can submit our UWP apps to the Microsoft Store.

After we have logged in to the Microsoft Partner Center, we can first reserve our product name first. So we can take our time developing and publishing our apps without worrying the name will be used by other developer or company within the next three months.

Mission 3: Associate App with the Microsoft Store
After we have successfully created a developer account, we can then associate our app with the Microsoft Store in Visual Studio.

After the association is done, we will see that, in the Packaging tab of our app manifest, the app has already been signed with a trusted certificate. This allows the users to install and run our app without installing the associated app signing certificate.
Mission 4: Create the App Package
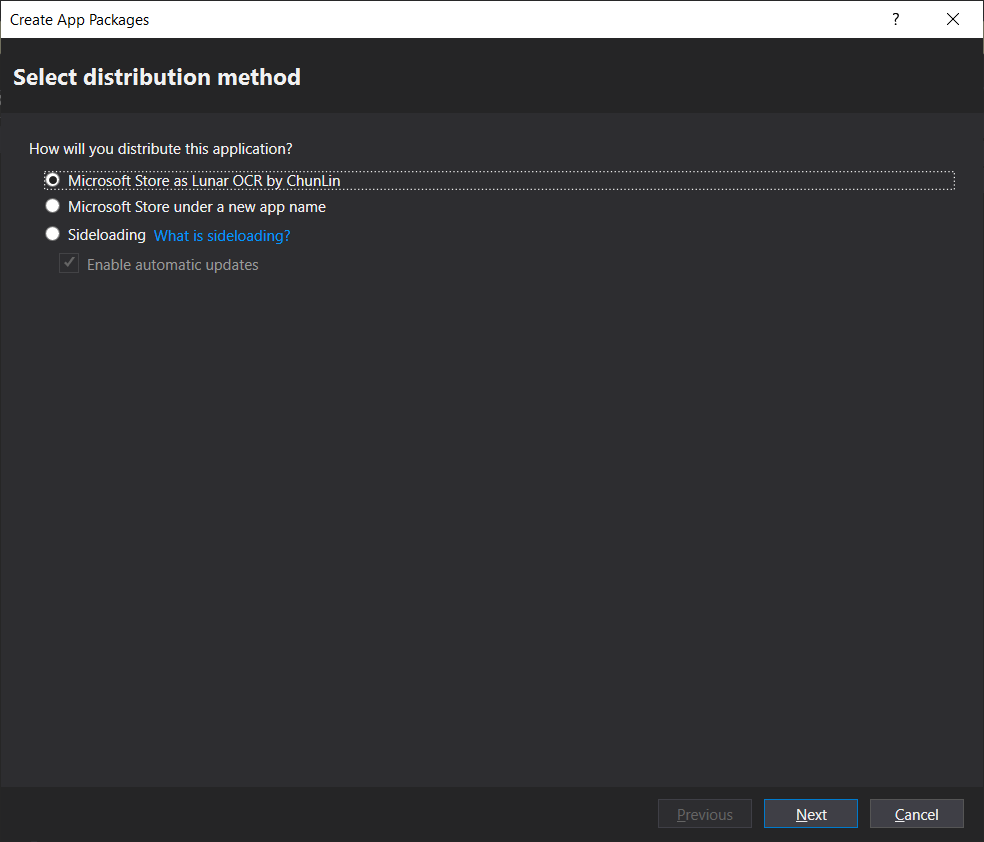
Since we have already associated the app, now when we proceed to create the app package, we will have an option to distribute to the Microsoft Store for the app directly.
After that, we will need to select the architectures for our app. In order to make it runnable on most of the platforms, we should choose relevant ones.

After that, we can proceed to create the app package. The app package creation will take about 1 to 2 minutes to complete. Then we will be promoted, as shown below, to validate our app package. The validation process involves a tool called Windows App Certification Kit (WACK). It is to make sure that our app complies with Microsoft Store requirements and is ready to publish.

This mission is successfully completed as long as the Overall Result shows “PASSED”.
Mission 5: Publish to Microsoft Store!
Before we can submit our package on the Microsoft Partner Center, there are a few information we need to prepare.
- Markets: There are in total 241 markets available. We need to choose to list our app in which markets. Currently, if the app is made available in Singapore, then the app can also be found on the Microsoft Store on Xbox One for Singapore market;
- Visibility: By default, our app will be visible to a Public audience, i.e. all of the Microsoft Store users. Alternatively, we can also make it visible to a Private audience, which is a defined group of people. Take note that, if an app is submitted with Public audience option, we can’t change it to Private audience in the future submissions;
- Pricing: We need to either set a price for our app or allow free download. We can also optionally schedule price changes so that the pricing will change at a specific date and time.
- Privacy Policy: We need to provide a privacy policy URL to our app.
- Website: A web page showing what our app is about.

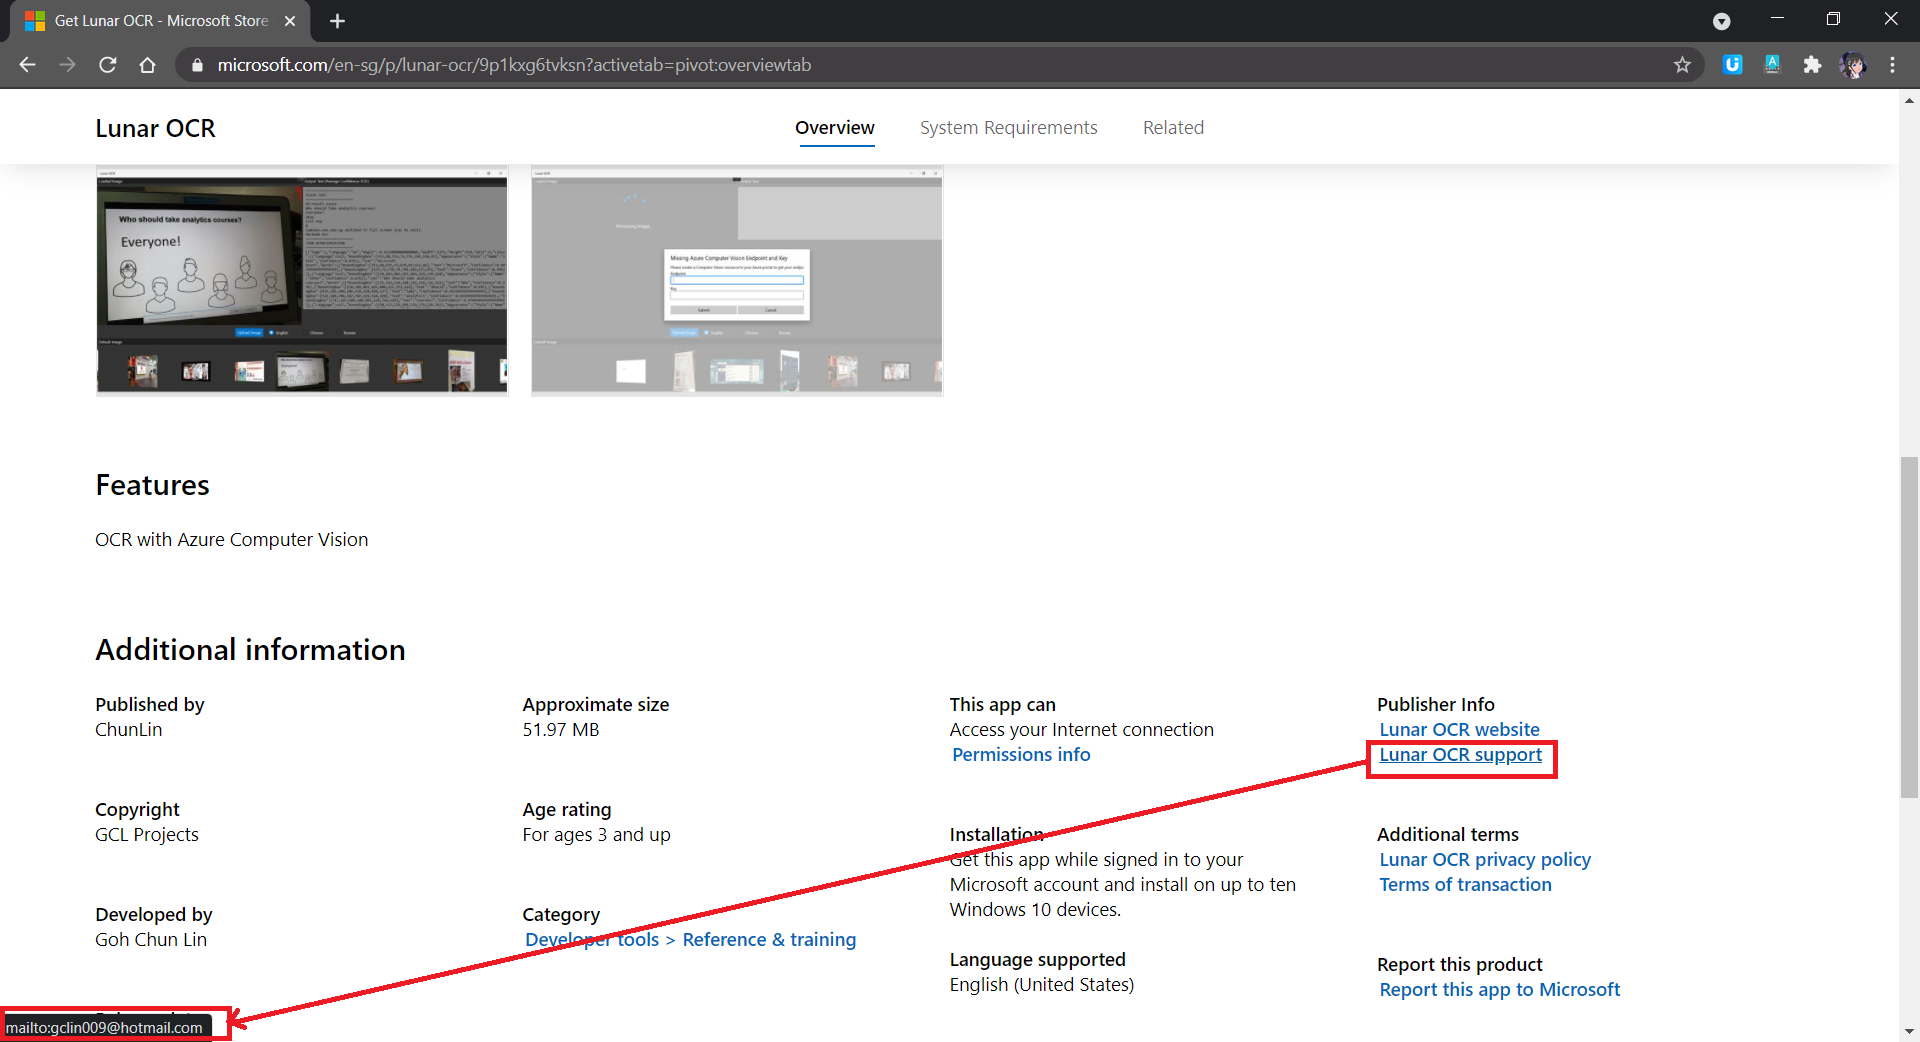
- Support Contact Info: Please do not enter email as Support Contact Info, provide URL of a support page of the app instead. I received many spam mails after using my email for this field. Haha.
- System Requirements: If customers are using hardware that doesn’t meet the minimum requirements, they may see a warning before they download our app.
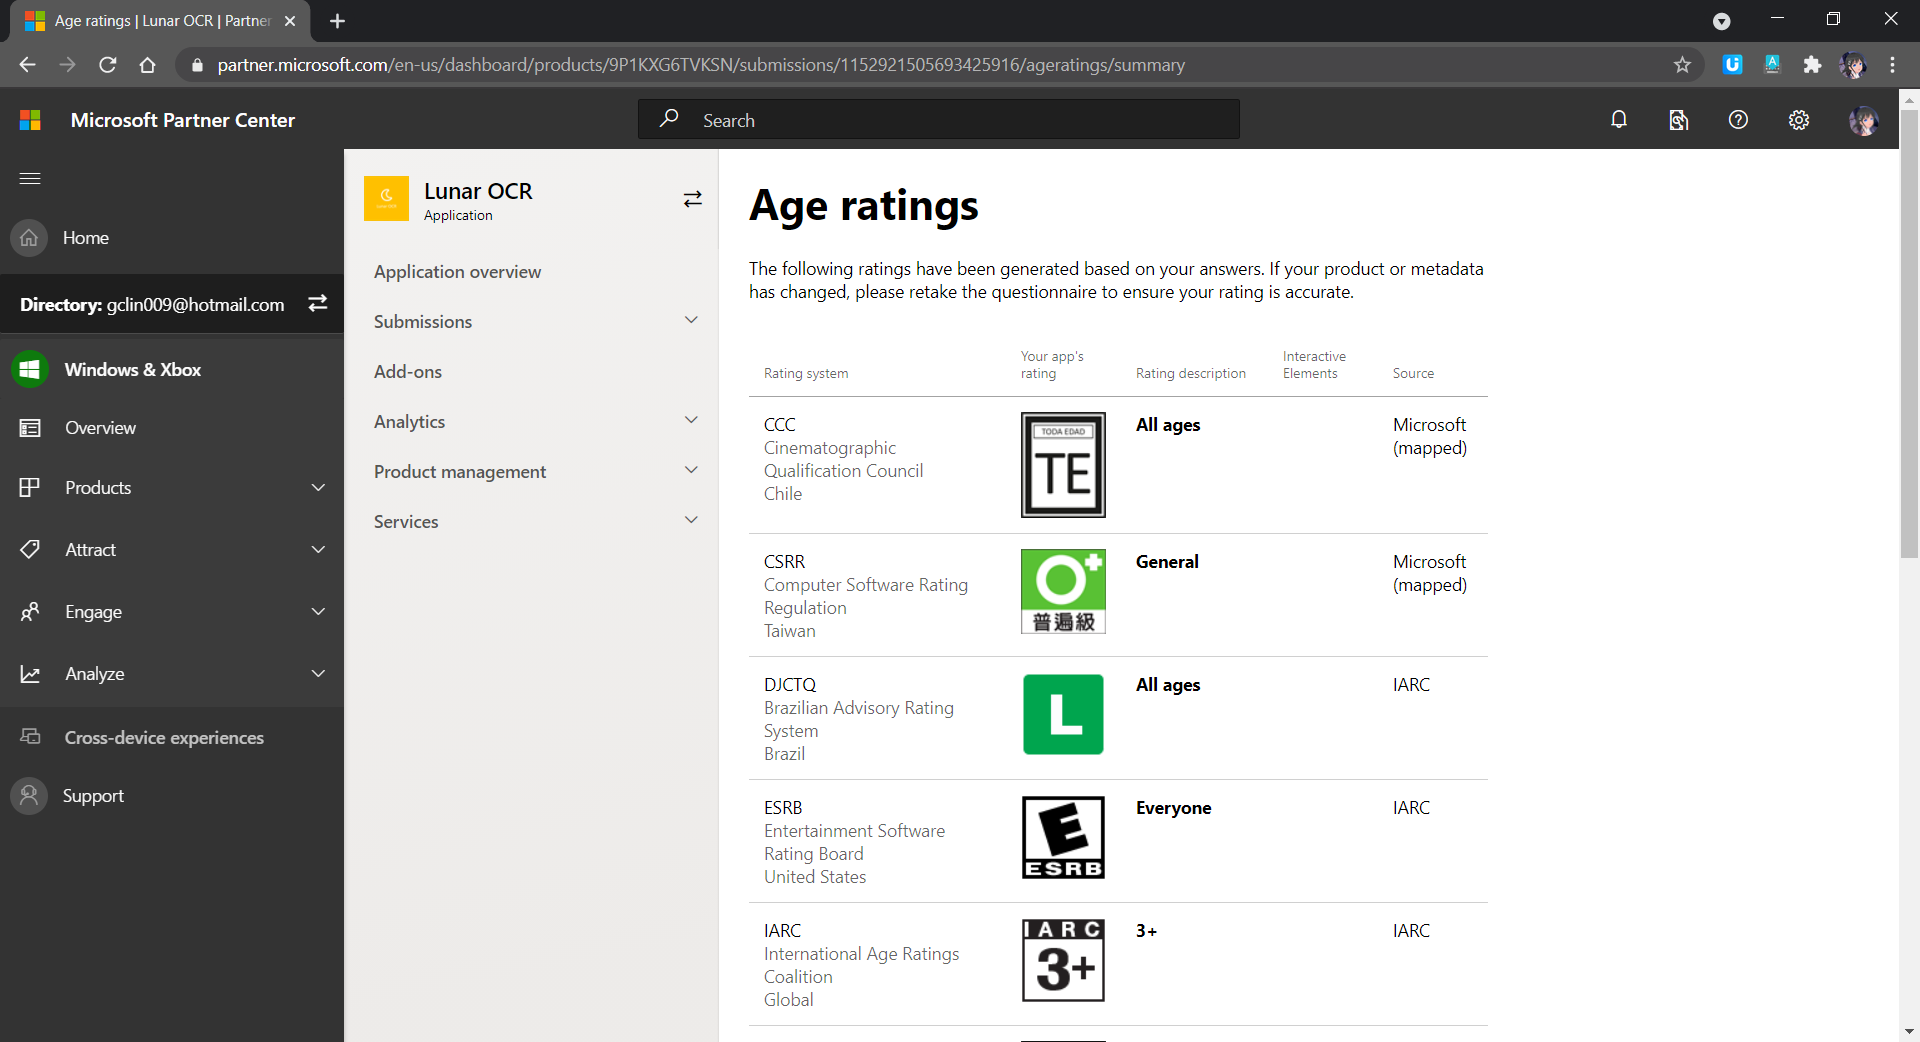
- Age Rating: There will be a tool to help us determine the rating of our app in each of the markets.
- Publish Date: By default, our app will be published to the Microsoft Store as soon as the submission passes certification. However, we can also manually publish it later or schedule the publish to a later date and time.
Once we have provided all the information above, we can proceed to upload our app package to the Packages section, as shown in the screenshot below.

After our submission is done, we just need to wait for the Microsoft staff to certify our app.
If our submission is rejected, we will see a report as follows under the Submission where there will be details on action to take.

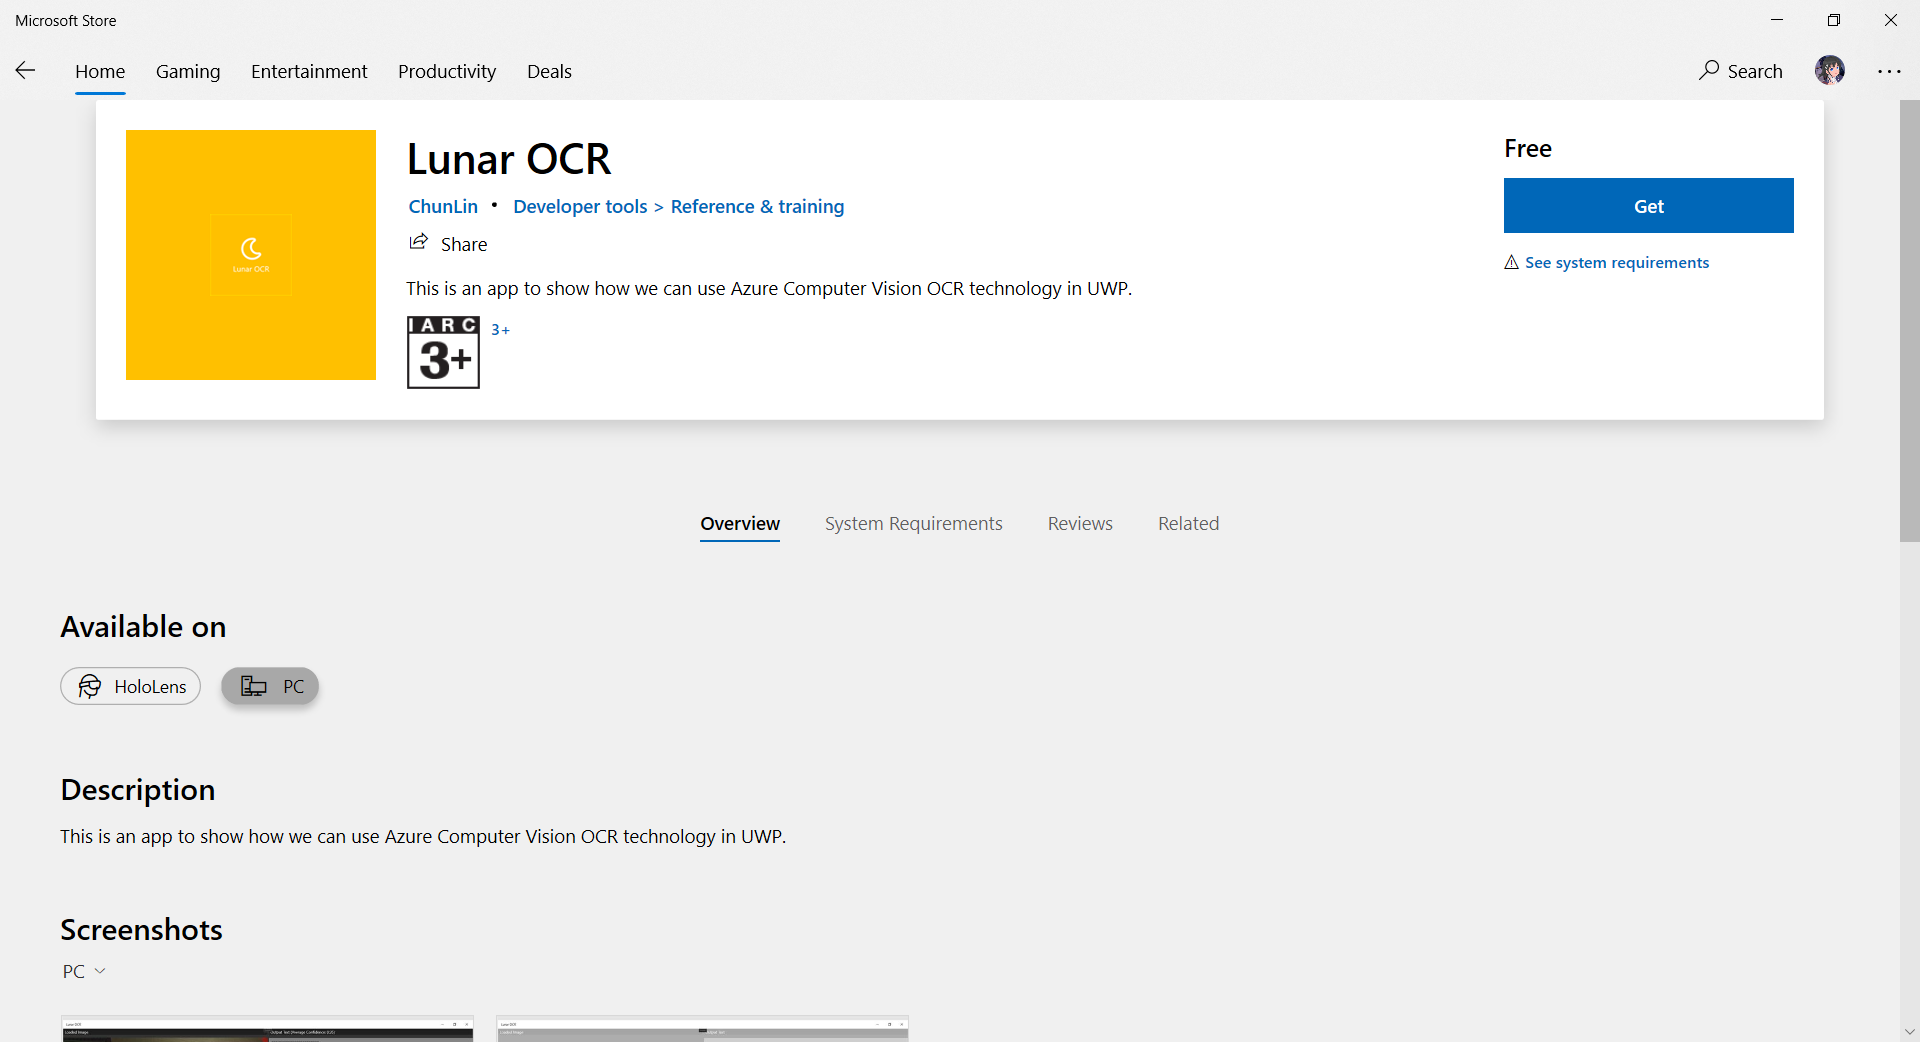
If there is no problem, we will be able to see our app on the Microsoft Store, as demonstrated in the following screenshot. The whole certification and release process is very fast to me.
Mission 6: Monetise App with In-app Ads
Since I am supporting open-source software, so the apps I publish are all free to the public to download. However, it would still be great if I can get financial supports from users who love my work. Hence, monetisation our app with in-app ads is one of the options.
Unfortunately, starting from 2020, the Microsoft Ad Monetization platform for UWP apps had been shut down. So, we have no choice but to look into 3rd party solutions. The service that I am using is AdsJumbo, a verified advertisement network for Windows 10, desktop apps & games because it is straightforward to use.

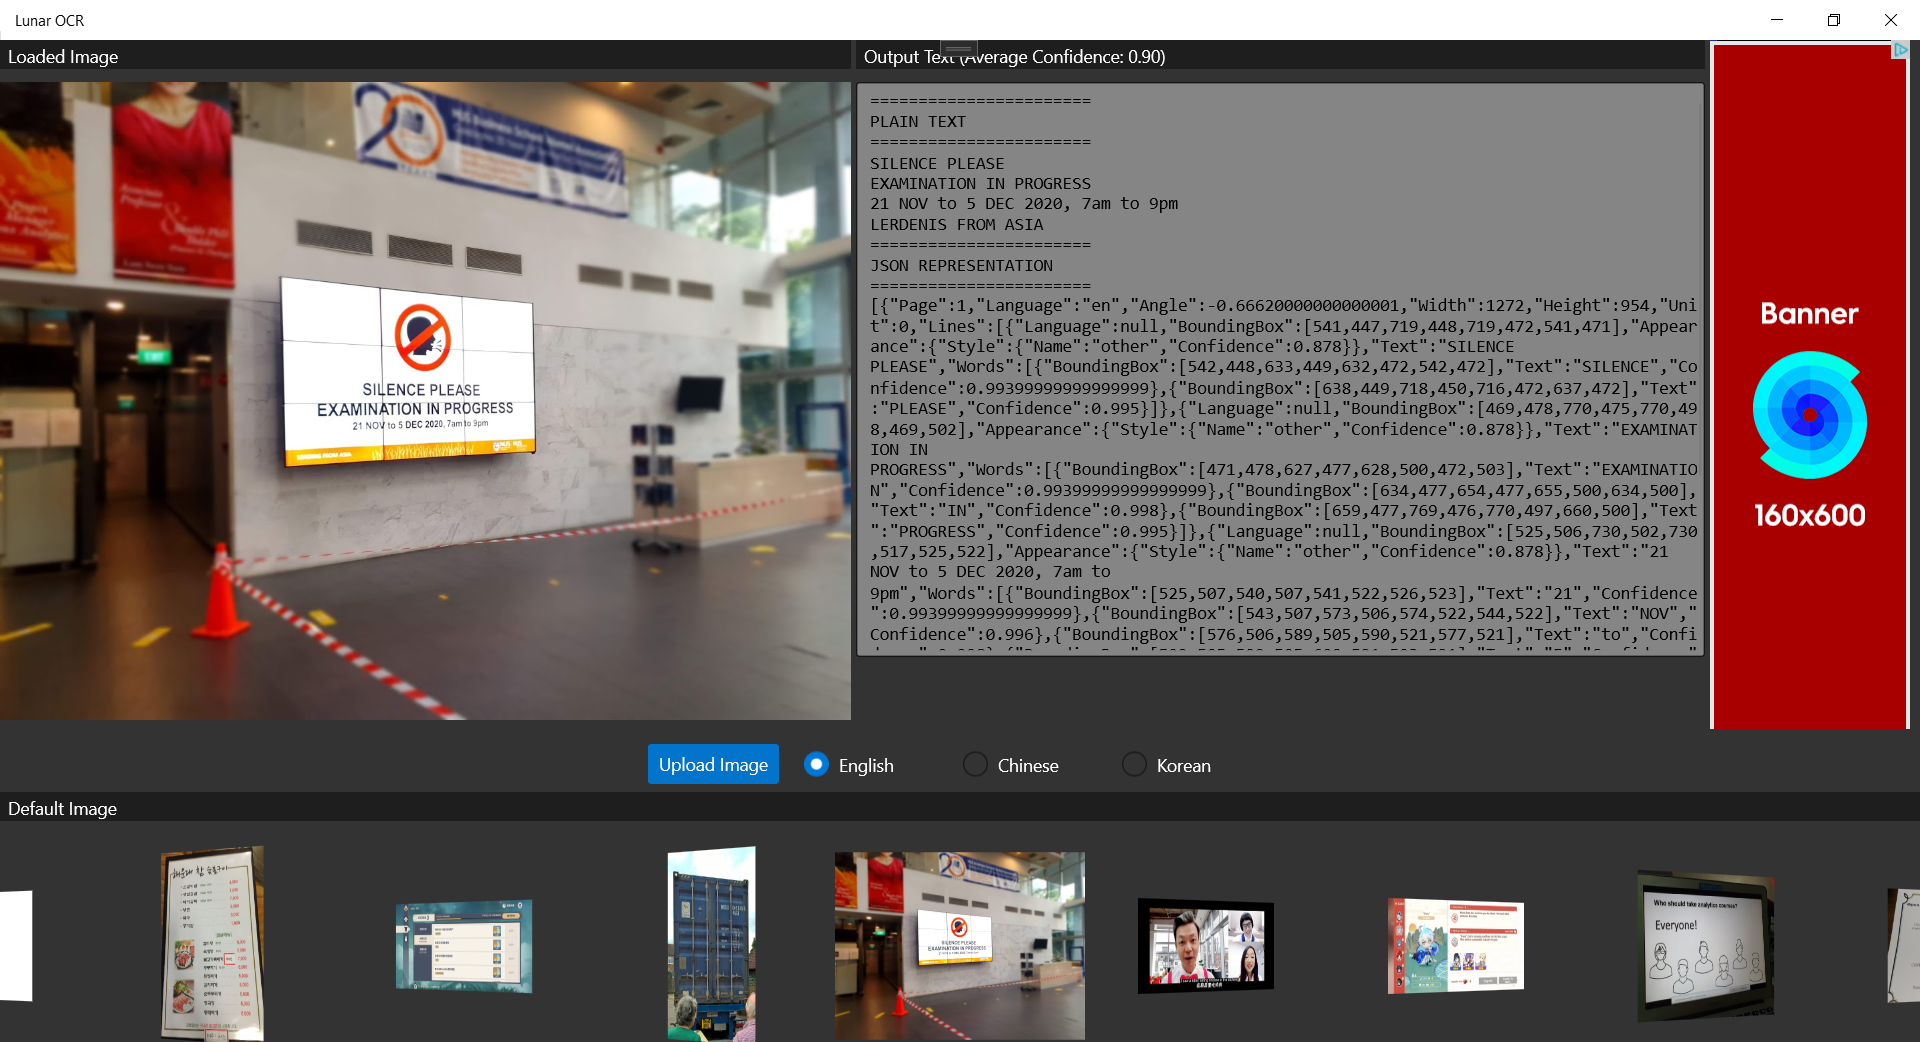
The approval process on Ads Jumbo is fast to me. My app was approved on the day I submitted it on Ads Jumbo. While waiting for approval, we can also first do a test so that we can visualise the ads positioning in our app, as shown below.
Yup, that’s all about my journey of getting my first Windows 10 UWP app on the Microsoft Store. Please download it now and let me know what you think. Thank you!
Download URL: https://www.microsoft.com/en-sg/p/lunar-ocr/9p1kxg6tvksn
Source Code: https://github.com/goh-chunlin/Lunar.OCR/tree/microsoft-store
References
- Package a Desktop or UWP App in Visual Studio;
- Distribute Your Packaged Desktop App;
- App Icons and Logos;
- Associate Azure Active Directory with Your Partner Center Account;
- Create and Manage Submissions;
- Visual Studio Team Services Extension for the Windows Store;
- Configure CI/CD Pipeline with YAML File;
- The App Certification Process;
- Where can I Find APP ID URI for Microsoft App?
- Gradual Package Rollout;
- Mandatory Package Updates.
