Recently, we are working on a project which needs a long-running service for processing CPU-intensive data. We choose to build a .NET worker service because with .NET, we are now able to make our service cross-platform and run it on Amazon ECS, for example.
Setup
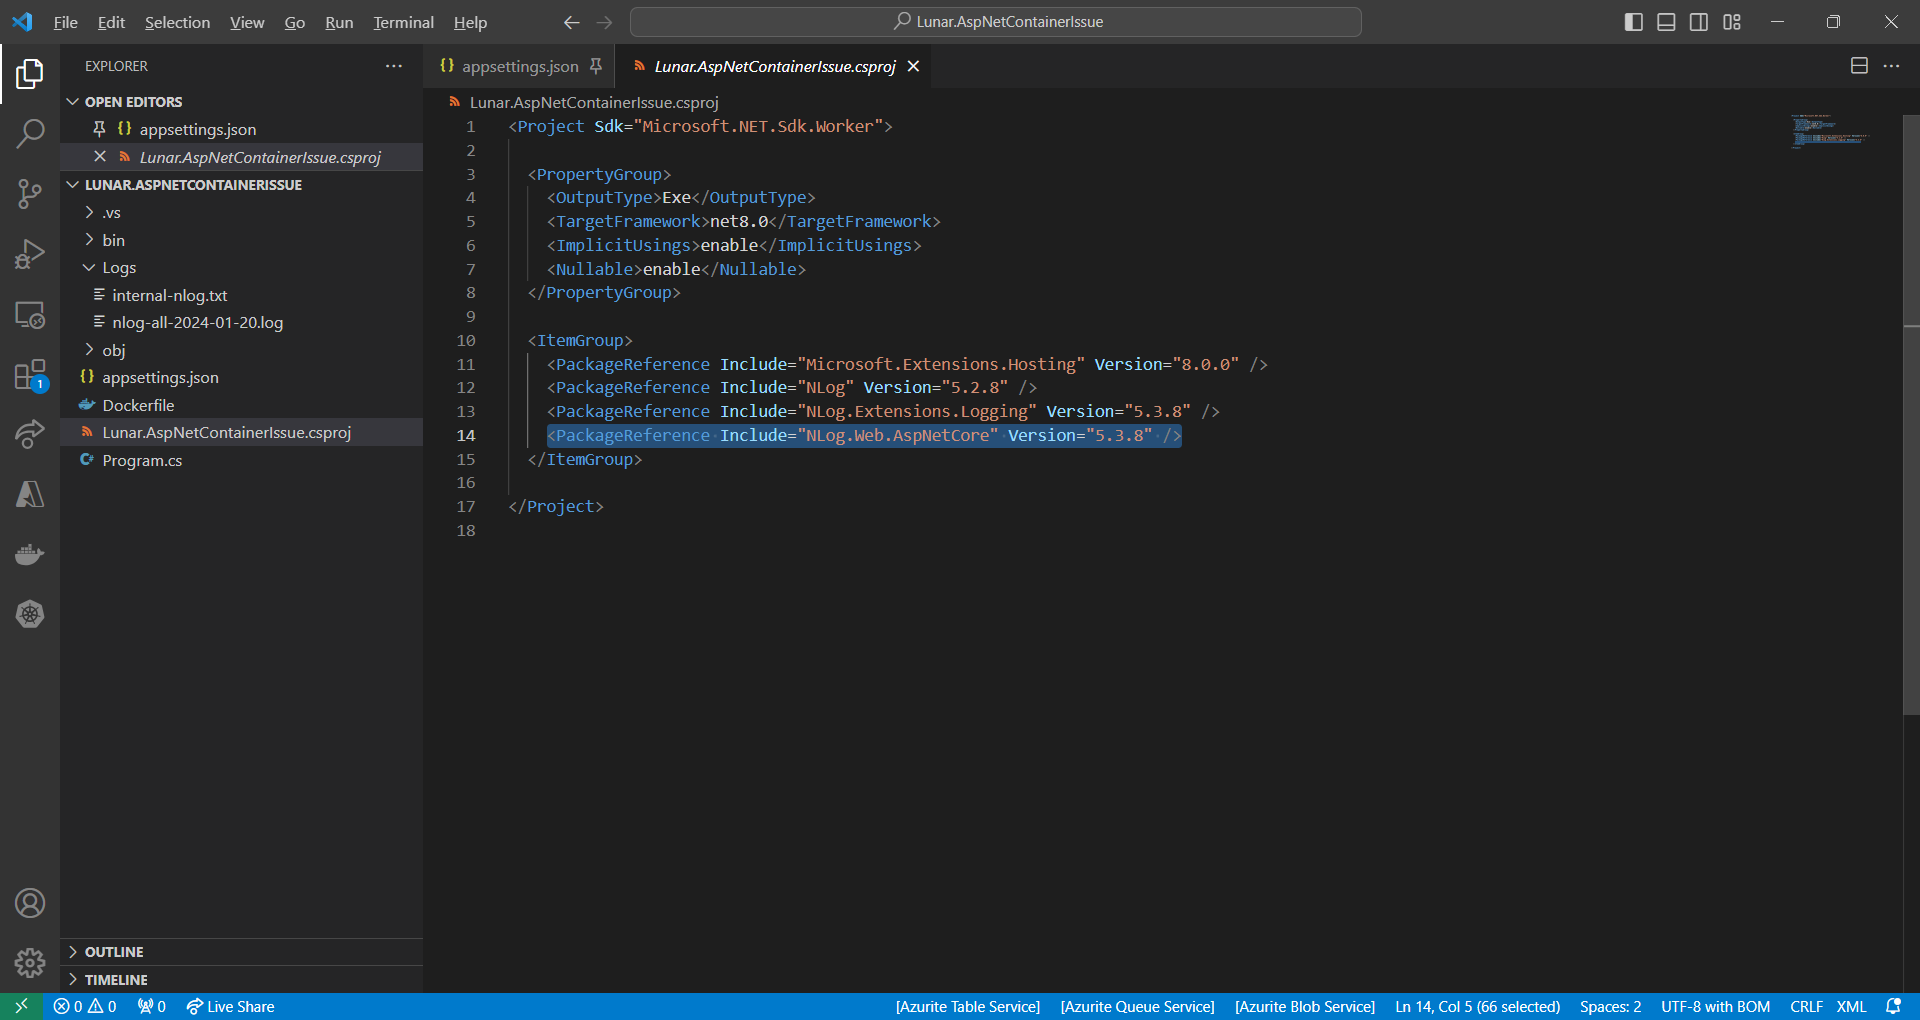
To simplify, in this article, we will be running the following code as a worker service.
using Microsoft.Extensions.Hosting;

using NLog;

using NLog.Extensions.Logging;


Console.WriteLine("Hello, World!");


var builder = Host.CreateApplicationBuilder(args);


var logger = LogManager.Setup()

    .GetCurrentClassLogger();


try

{

    builder.Logging.AddNLog();


    logger.Info("Starting");


    using var host = builder.Build();

    await host.RunAsync();

}

catch (Exception e)

{

    logger.Error(e, "Fatal error to start");

    throw;

}

finally

{

    // Ensure to flush and stop internal timers/threads before application-exit (Avoid segmentation fault on Linux)

    LogManager.Shutdown();

}
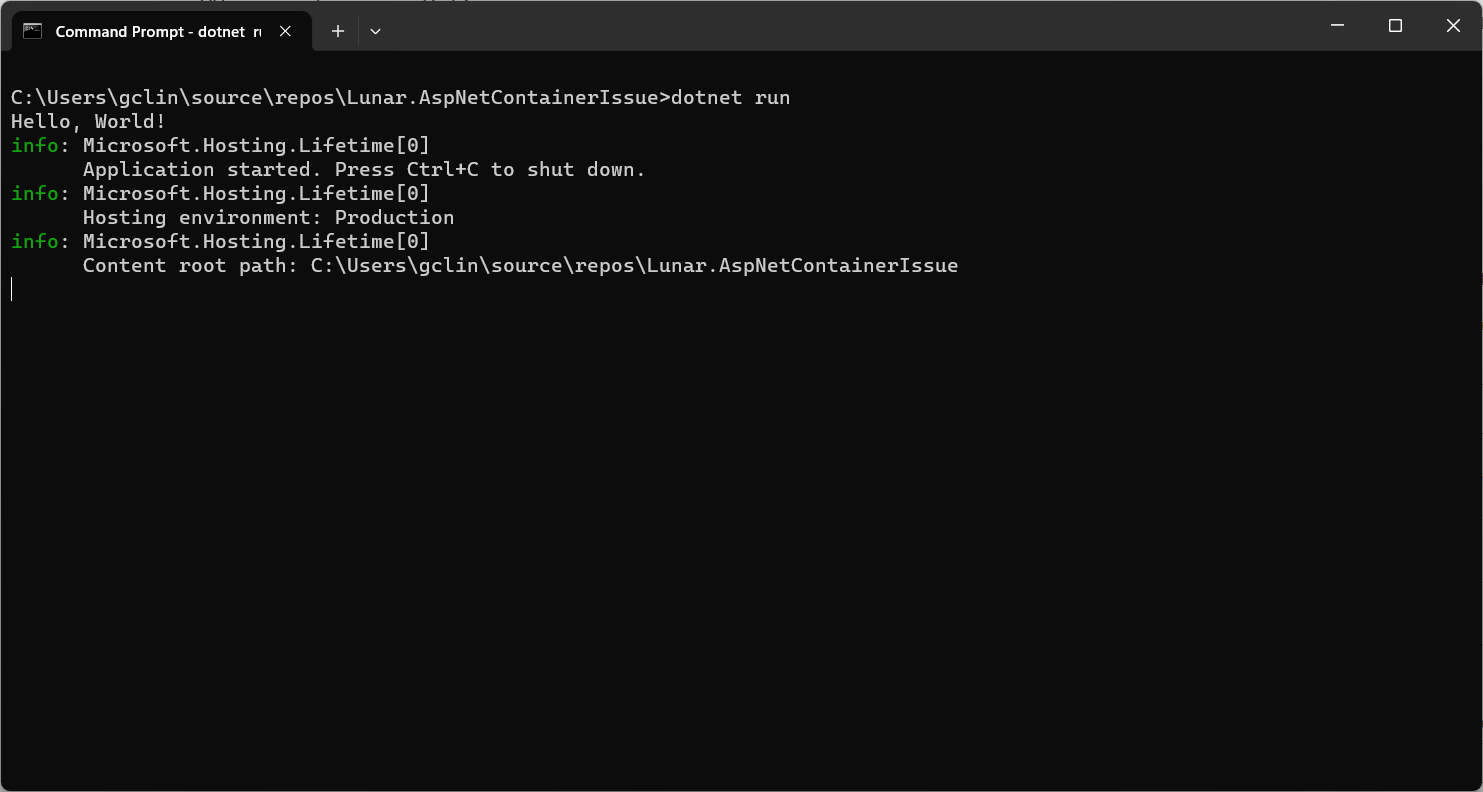
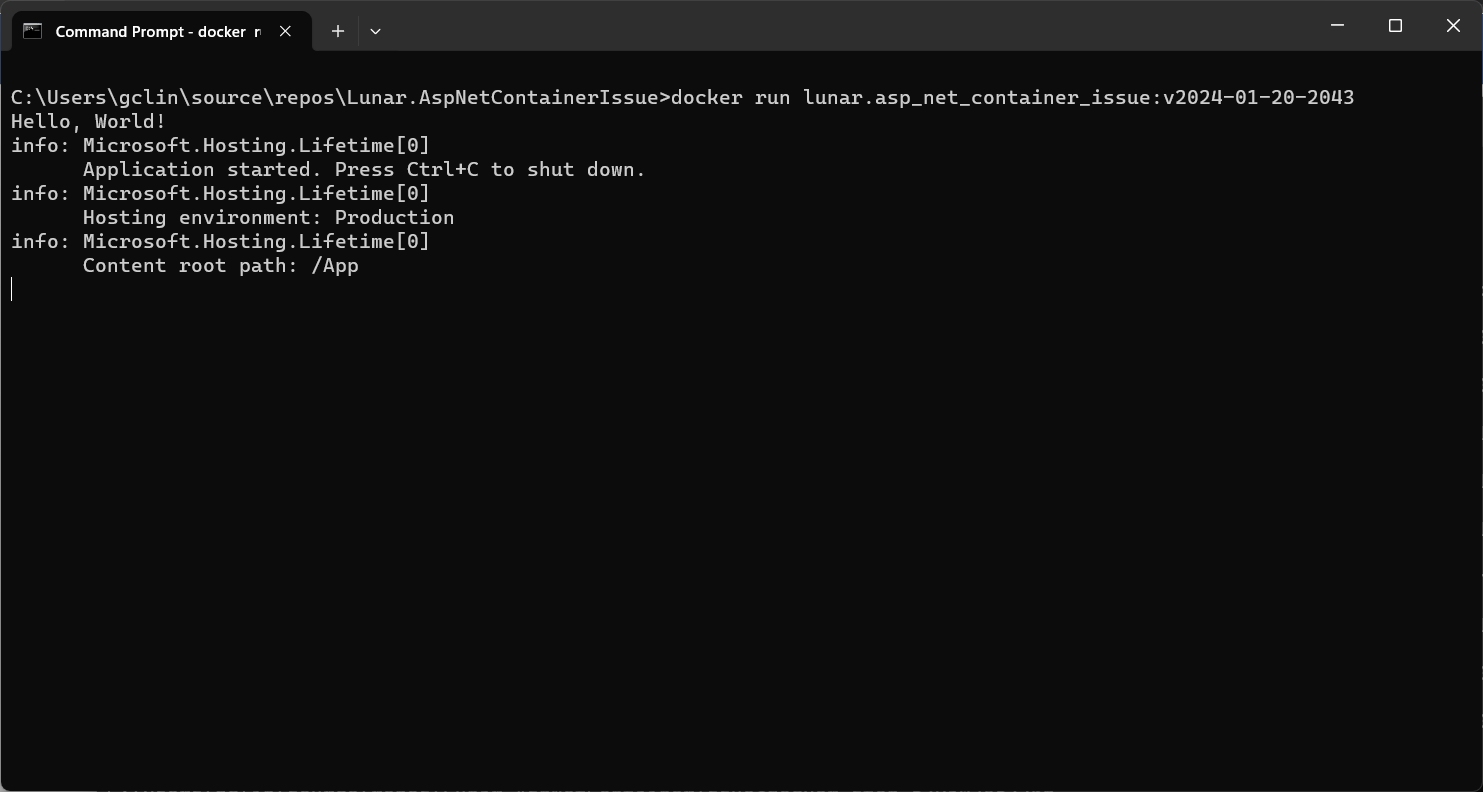
So, if we run the code above locally, we should be seeing the following output.
The output of our simplified .NET worker service.
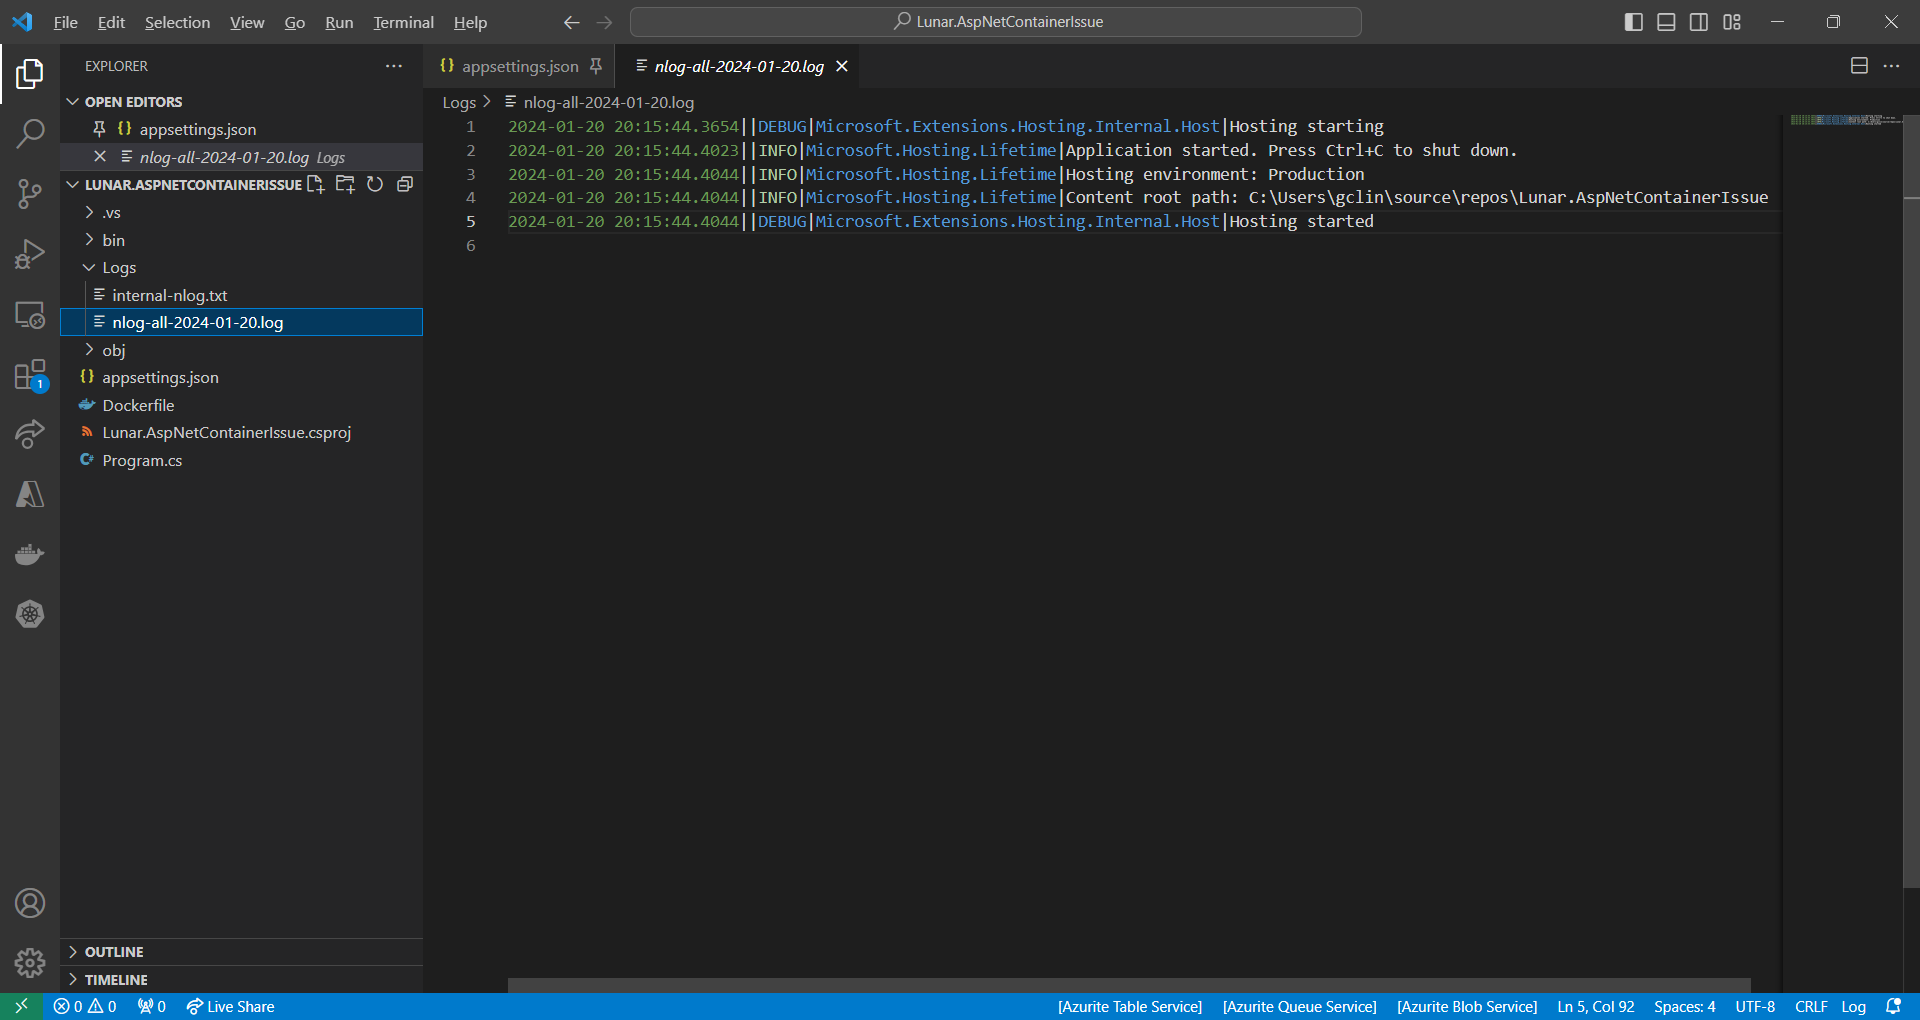
In this project, we are using the NuGet library NLog.Extensions.Logging, thus the NLog configuration is by default read from appsettings.json, which is provided below.
So, we should be having two log files generated with one showing something similar to the output on the console earlier.
The log file generated by NLog.
Containerisation and the Issue
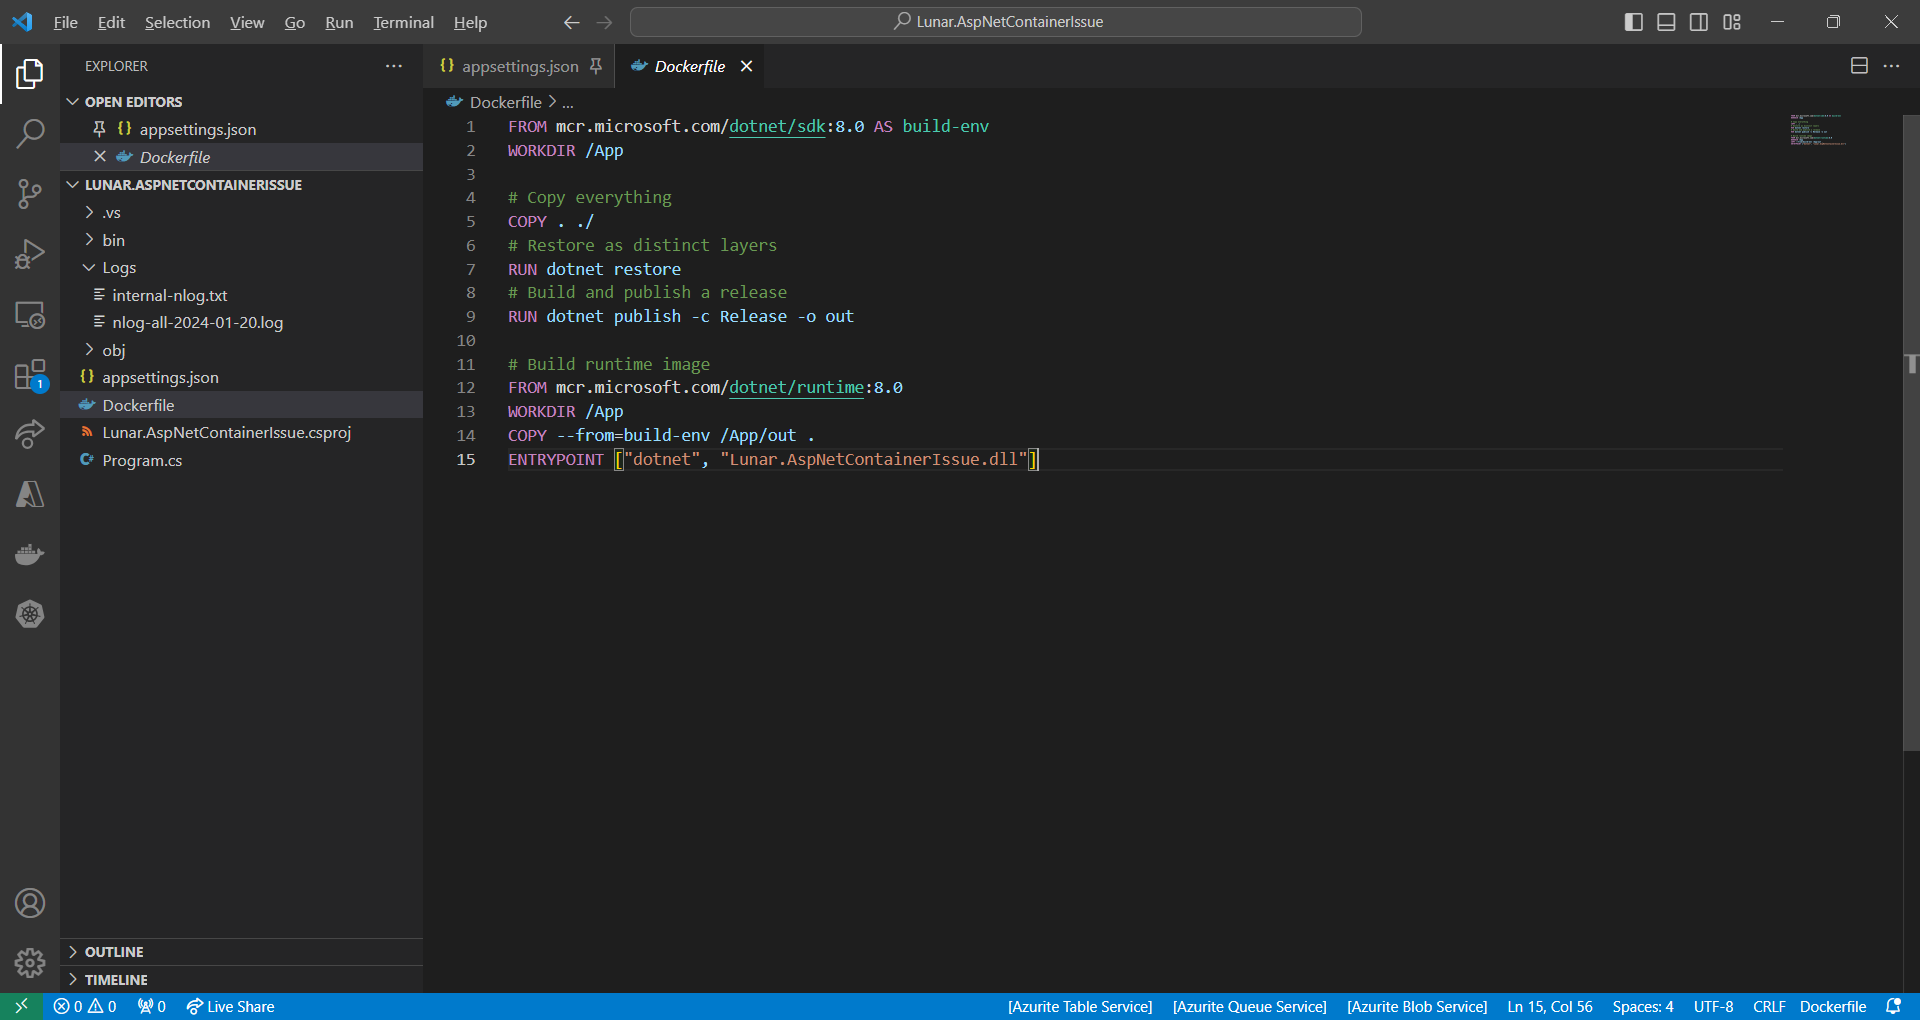
Since we will be running this worker service on Amazon ECS, we need to containerise it first. The Dockerfile we use is simplified as follows.
Simplified version of the Dockerfile we use.
However, when we run the Docker image locally, we receive an error, as shown in the screenshot below, saying “You must install or update .NET to run this application.” However, aren’t we already using .NET runtime as stated in our Dockerfile?
No framework is found.
In fact, if we read the error message clearly, it is the ASP .NET Core that it could not find. This confused us for a moment because it is a worker service project, not a ASP .NET project. So why does it complain about ASP .NET Core?
We accidentally include the NLog.Web.AspNetCore NuGet package which supports only ASP .NET Core platform. This library is not used in our worker service at all.
NLog.Web.AspNetCore supports only ASP .NET platform.
So, after we remove the reference, we can now run the Docker image successfully.
WRAP-UP
That’s all for how we solve the issue we encounter when developing our .NET worker service.
KOSD, or Kopi-O Siew Dai, is a type of Singapore coffee that I enjoy. It is basically a cup of coffee with a little bit of sugar. This series is meant to blog about technical knowledge that I gained while having a small cup of Kopi-O Siew Dai.
By default, Azure Storage already supports TLS 1.2 on public HTTPS endpoints. However, for some companies, they are still using TLS 1.0 or 1.1. Hence, to maintain their connections to Azure Storage, they have to update their OS and apps to support TLS 1.2.
About TLS
The history of TLS can be traced back to SSL.
SSL stands for “Secure Sockets Layer,” and it was developed by Netscape in the 1990s. SSL was one of the earliest cryptographic protocols developed to provide secure communication over a computer network.
SSL has been found to have several vulnerabilities over time, and these issues have led to its deprecation in favor of more secure protocols like TLS. In 2019, TLS 1.0 was introduced as an improvement over SSL. Nowadays, while the term “SSL” is still commonly used colloquially to refer to the broader category of secure protocols, it typically means TLS.
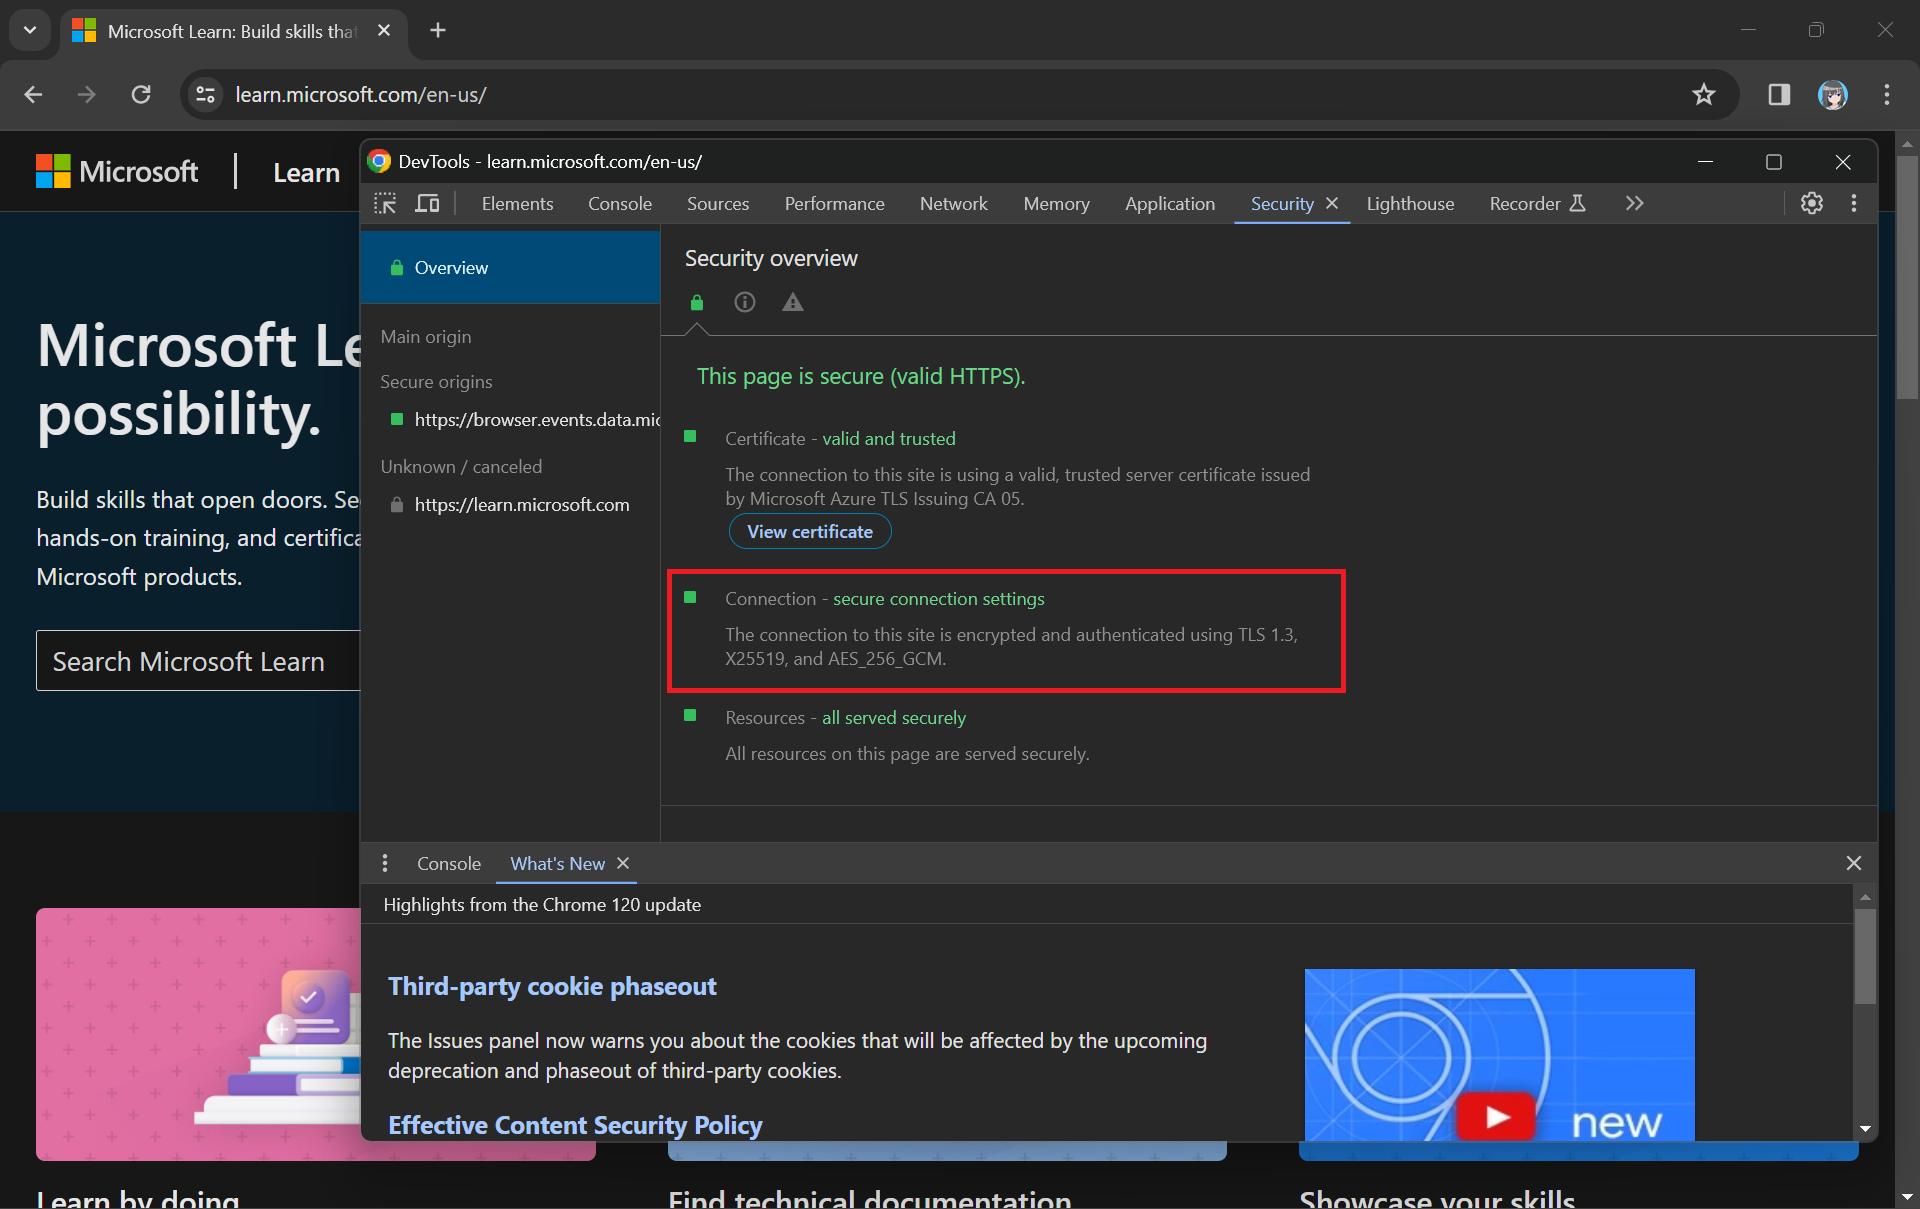
When we see “https://” in the URL and the padlock icon, it means that the website is using either TLS or SSL to encrypt the connection.
While TLS addressed some SSL vulnerabilities, it still had weaknesses, and over time, security researchers identified new threats and attacks. Subsequent versions of TLS, i.e. TLS 1.1, TLS 1.2, and TLS 1.3, were developed to further enhance security and address vulnerabilities.
Why TLS 1.2?
By the mid-2010s, it became increasingly clear that TLS 1.2 was a more secure choice, and we were encouraged to upgrade our systems to support it instead. TLS 1.2 introduced new and stronger cipher suites, including Advanced Encryption Standard (AES) cipher suites, providing better security compared to older algorithms.
Older TLS versions (1.0 and 1.1) are deprecated and removed to meet regulatory standards from NIST (National Institute of Standards and Technologies). (Photo Credit: R. Jacobson/NIST)
The coexistence of TLS 1.2 and TLS 1.3 is currently part of a transitional approach, allowing organisations to support older clients that may not yet have adopted TLS 1.3.
Before we enabling that, we should setup logging to make sure that our Azure policy is working as intended. Here, we will be using Azure Monitor.
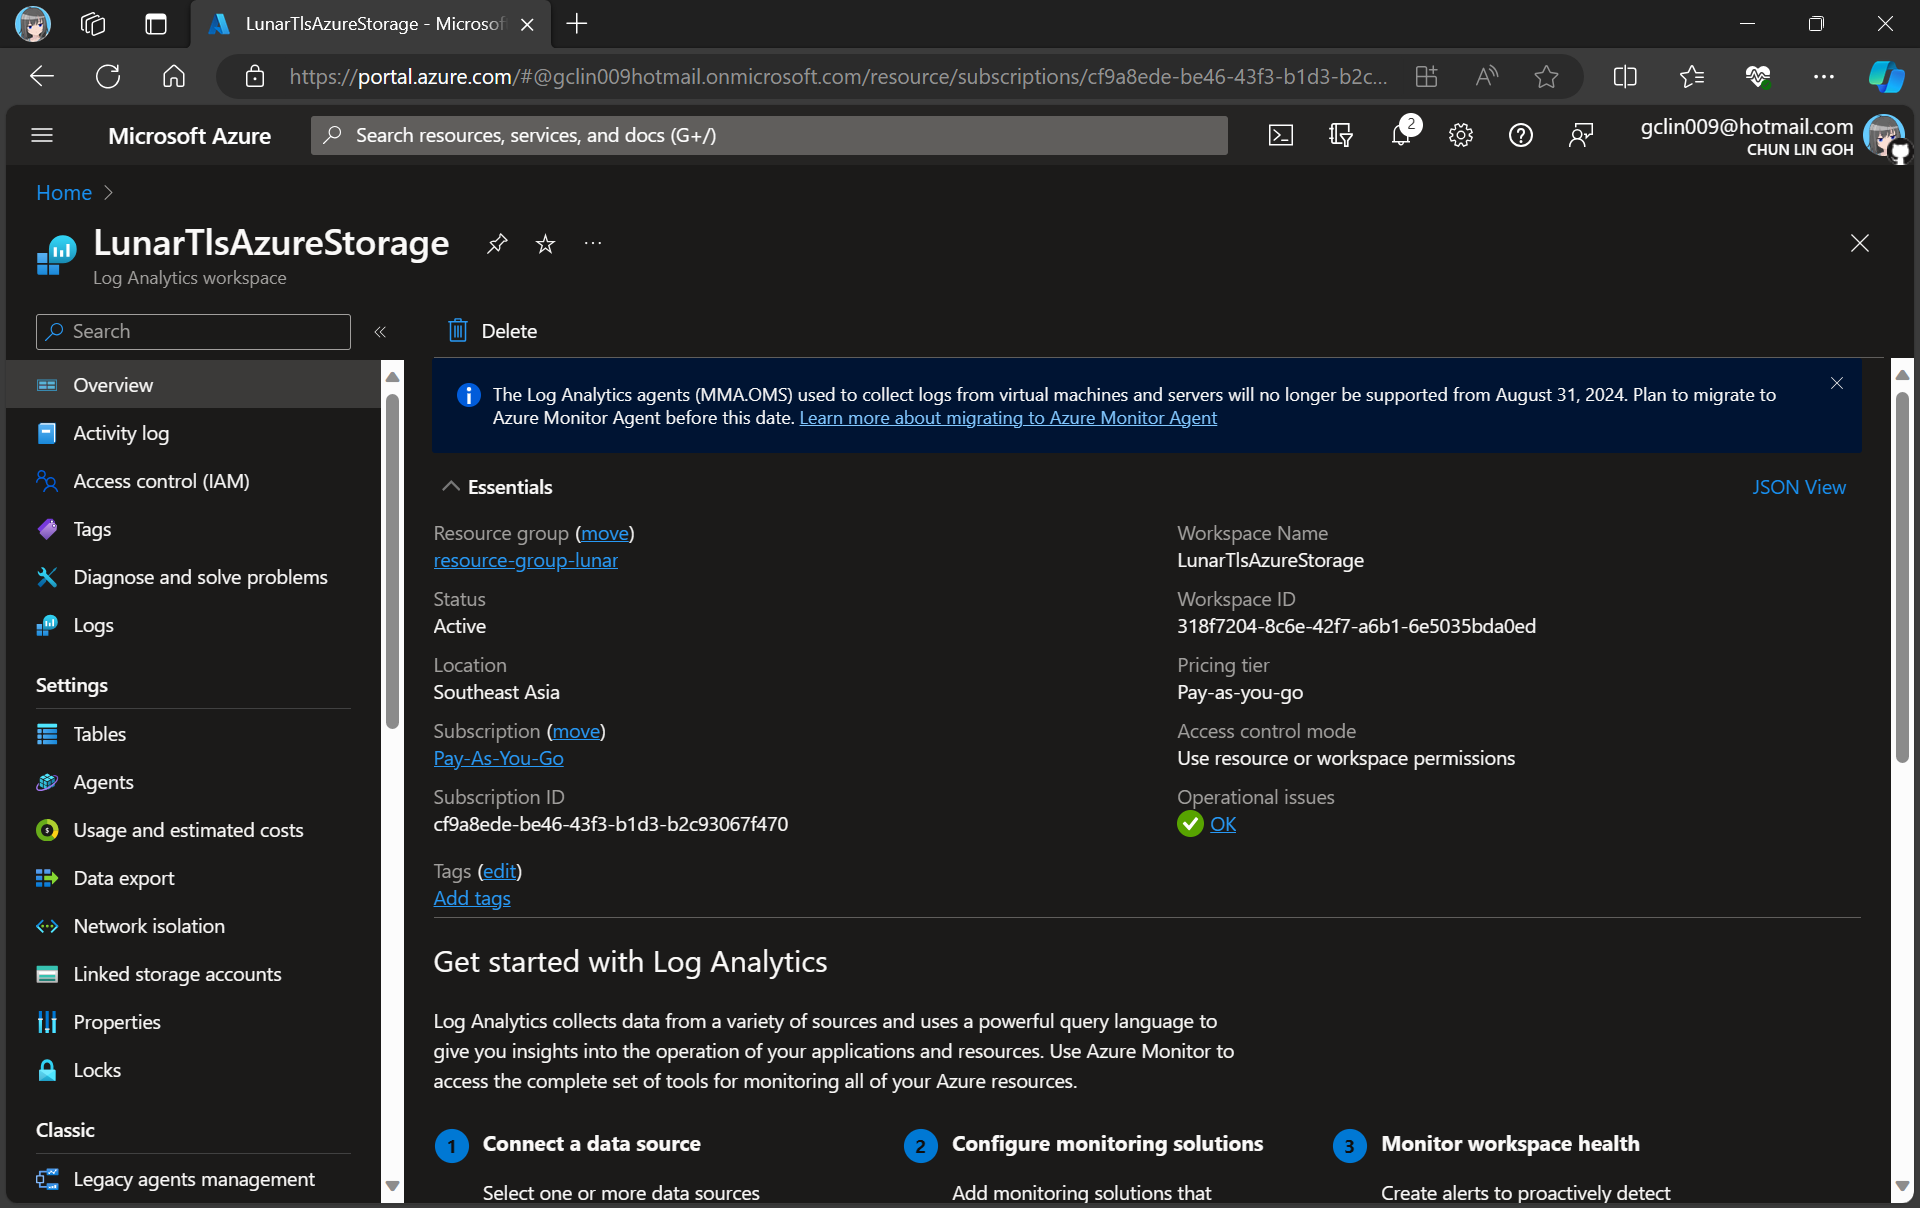
For demonstration purpose, we will create a new Log Analytics workspace called “LunarTlsAzureStorage”.
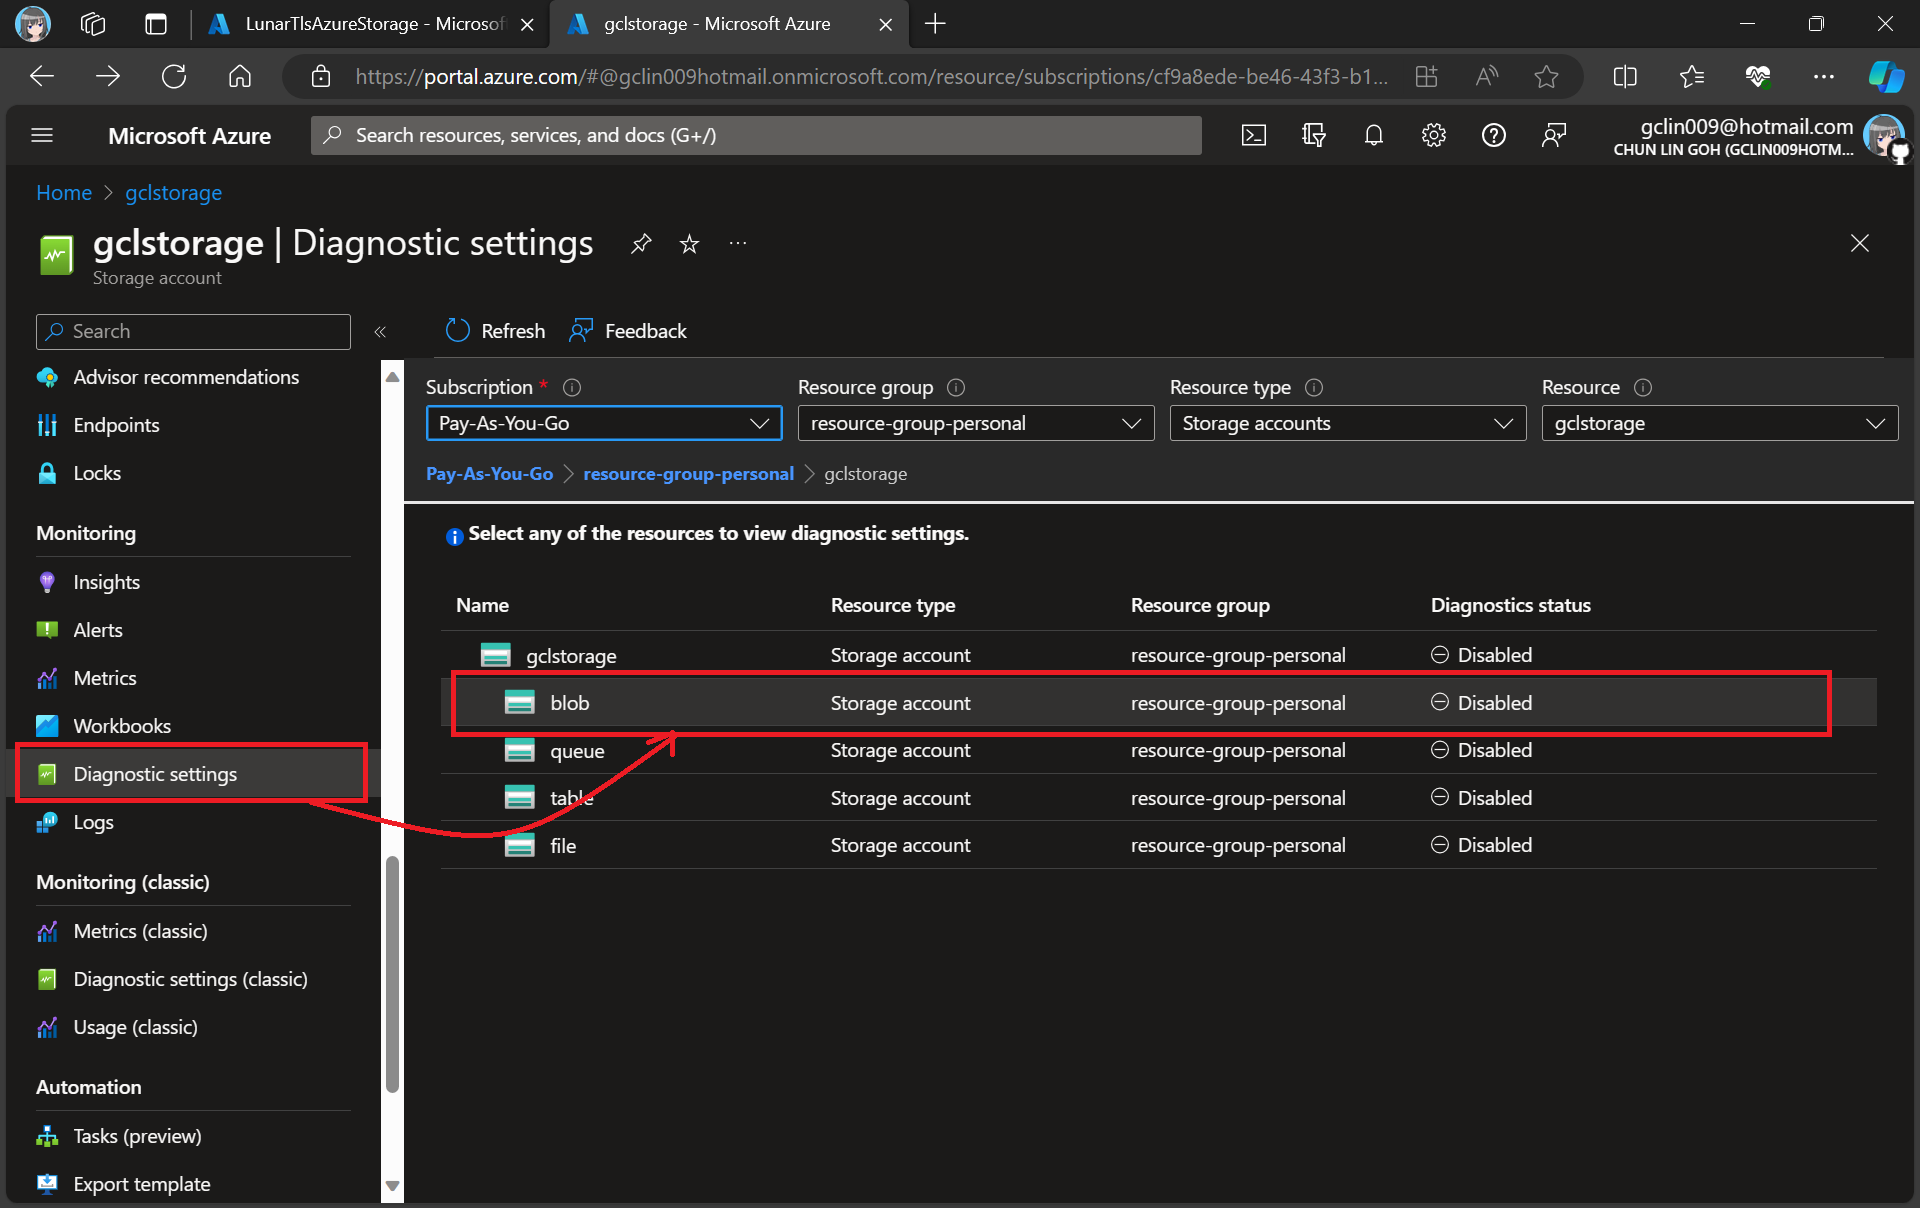
In this article, we will only be logging requests for the Blob Storage, hence, we will be setting up the Diagnostic of the Storage Account as shown in the screenshot below.
Adding new diagnostic settings for blob.
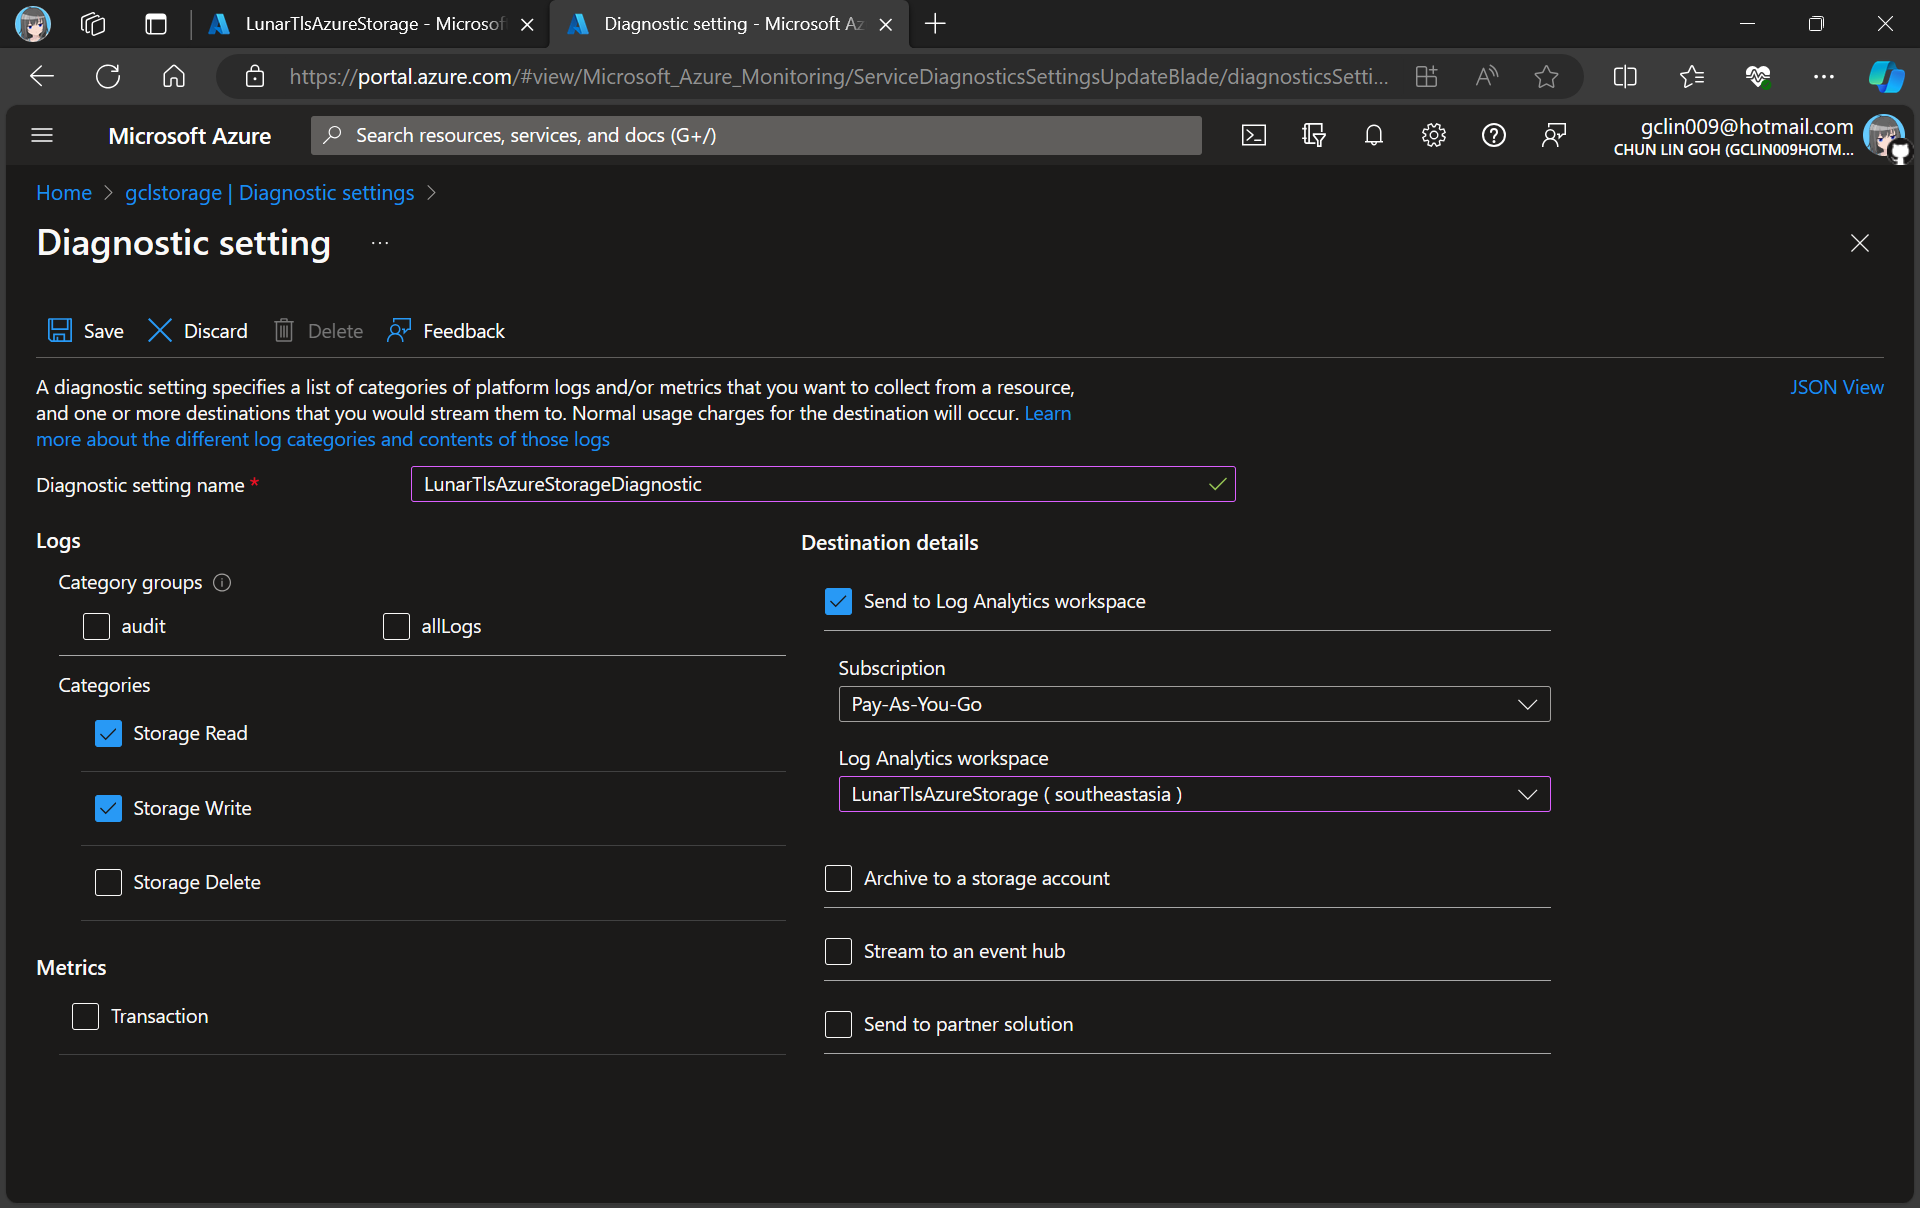
In the next step, we need to specify that we would like to collect the logs of only read and write requests of the Azure Blob Storage. After that, we will send the logs to Log Analytics we have just created above.
Creating a new diagnostic setting for our blob storage.
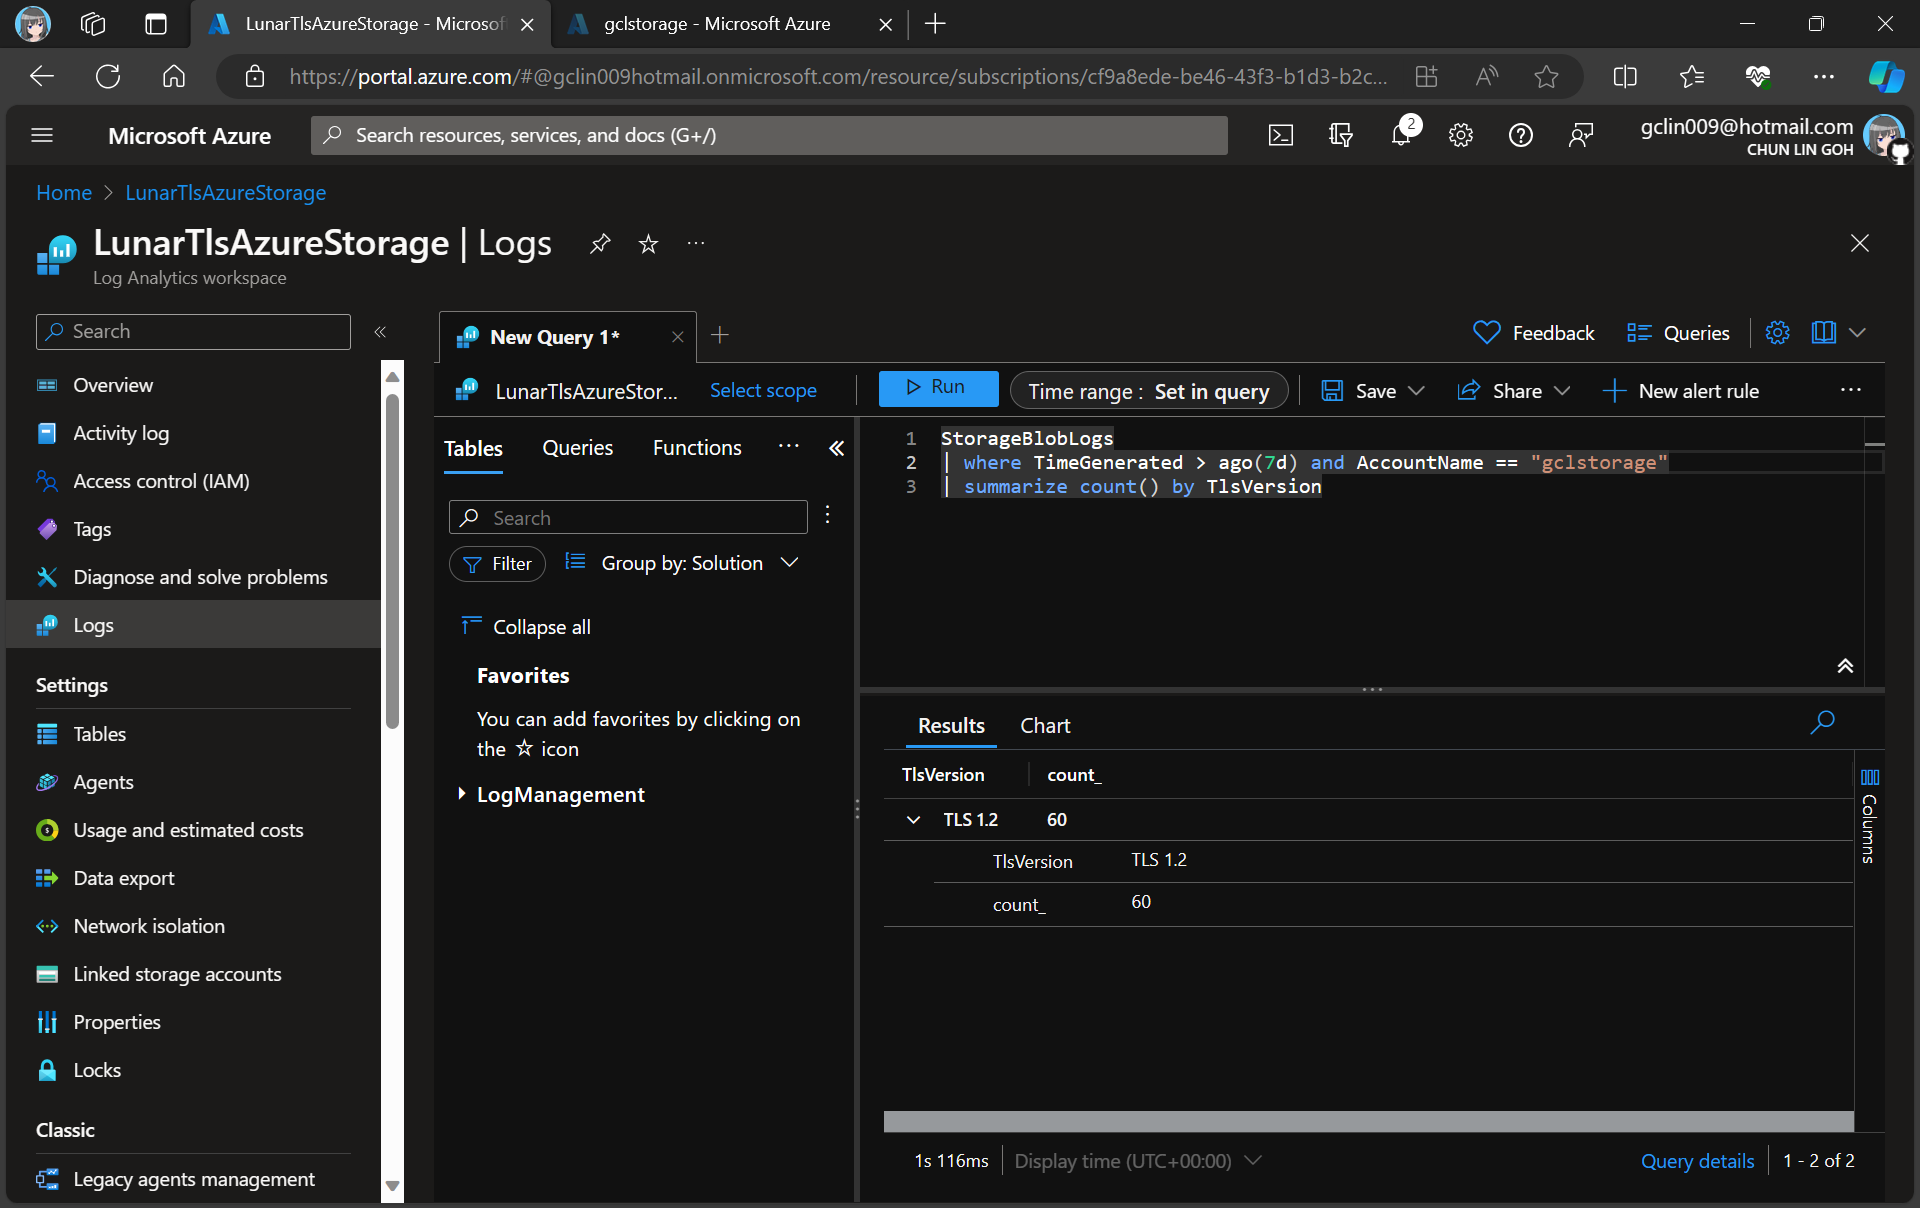
After we have created the diagnostic setting, requests to the storage account are subsequently logged according to that setting.
As demonstrated in the following screenshot, we use the query below to find out how many requests were made against our blob storage with different versions of TLS over the past seven day.
There are only TLS 1.2 requests for the “gclstorage” blob storage.
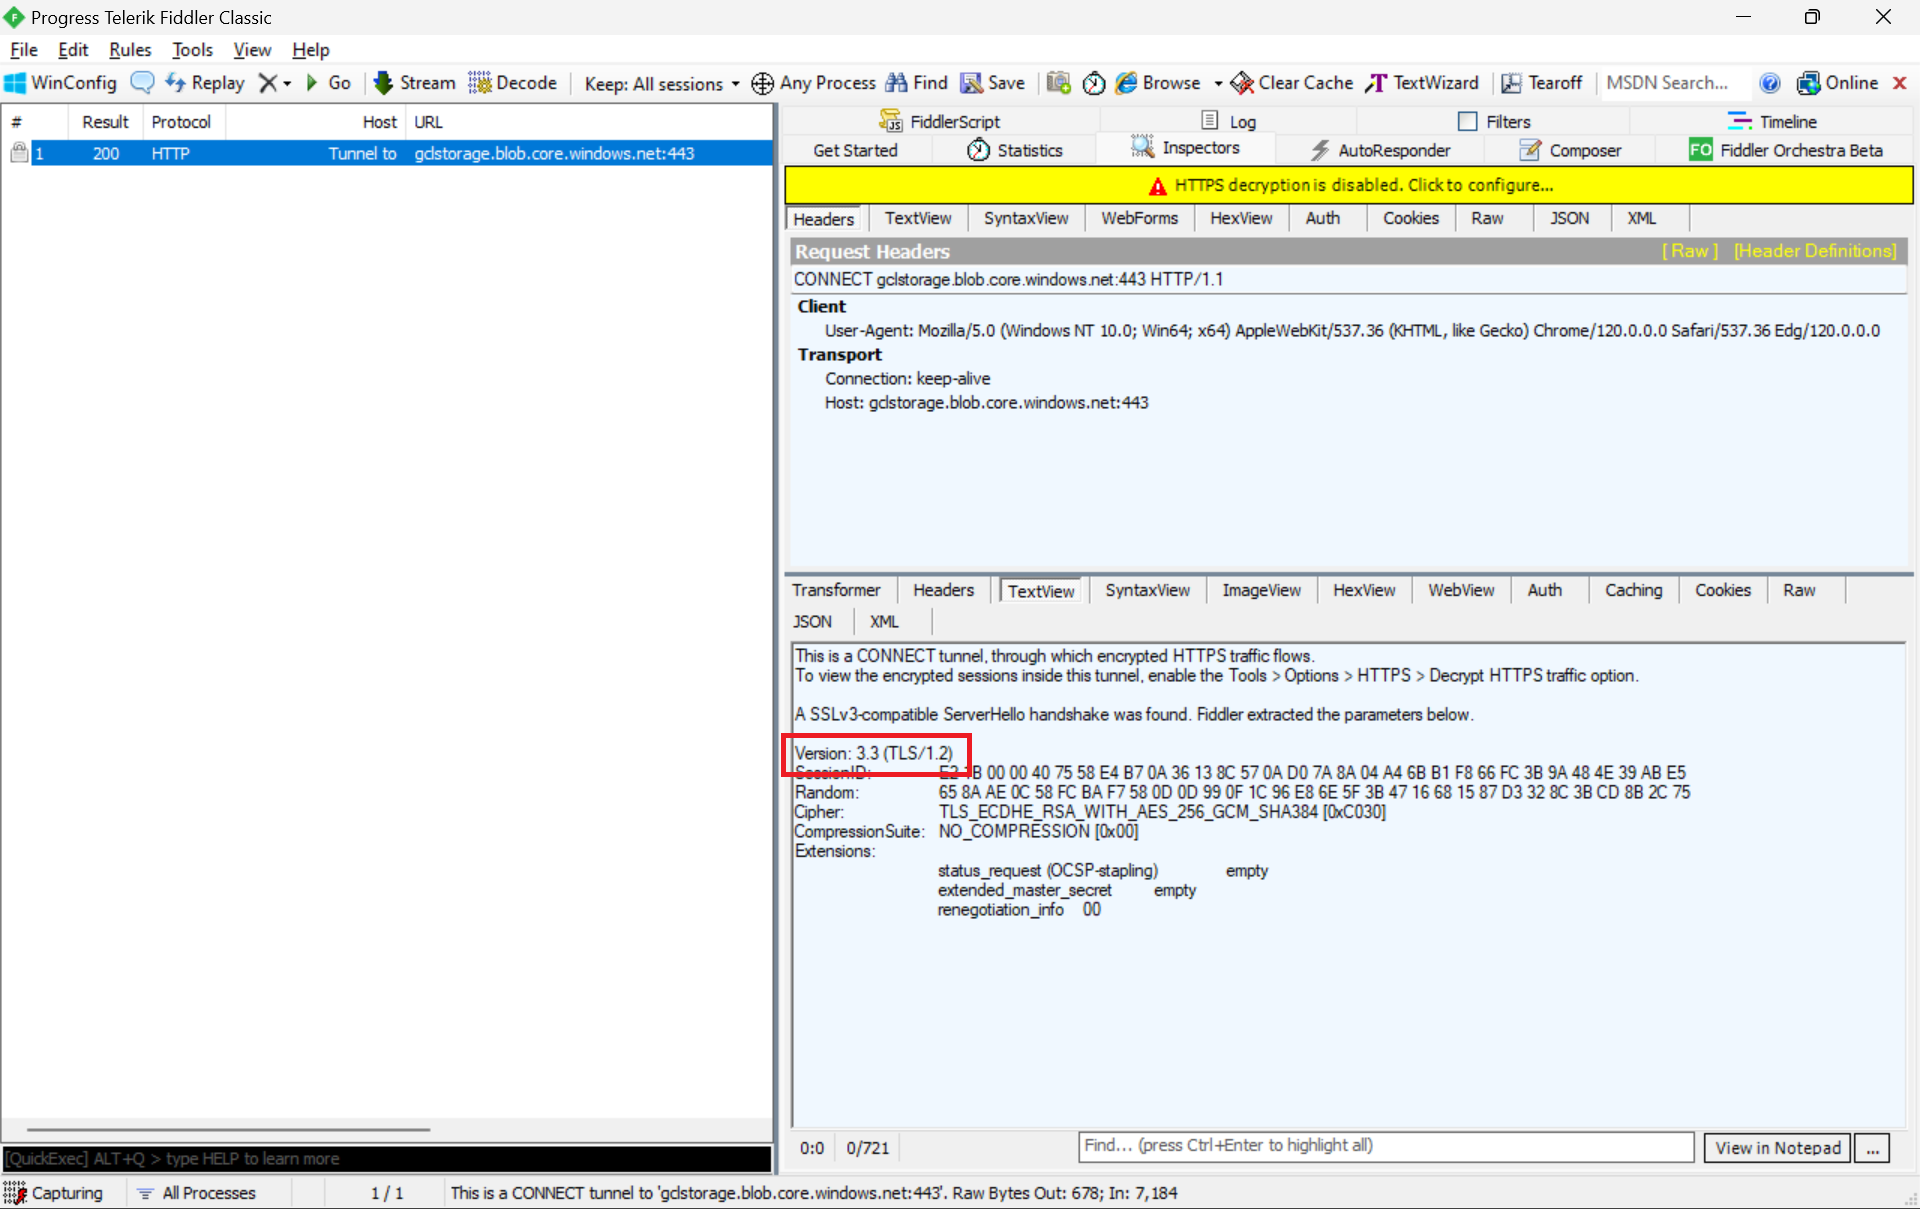
Verify with Telerik Fiddler
Fiddler is a popular web debugging proxy tool that allows us to monitor, inspect, and debug HTTP traffic between our machine and the Internet. Fiddler can thus be used to inspect and analyze both TLS and SSL requests.
We can refer to the Fiddler trace to confirm that the correct version of TLS 1.2 was used to send the request to the blob storage “gclstorage”, as shown in the following screenshot.
TLS 1.2 is SSL 3.3, thus the version there states that it is version 3.3.
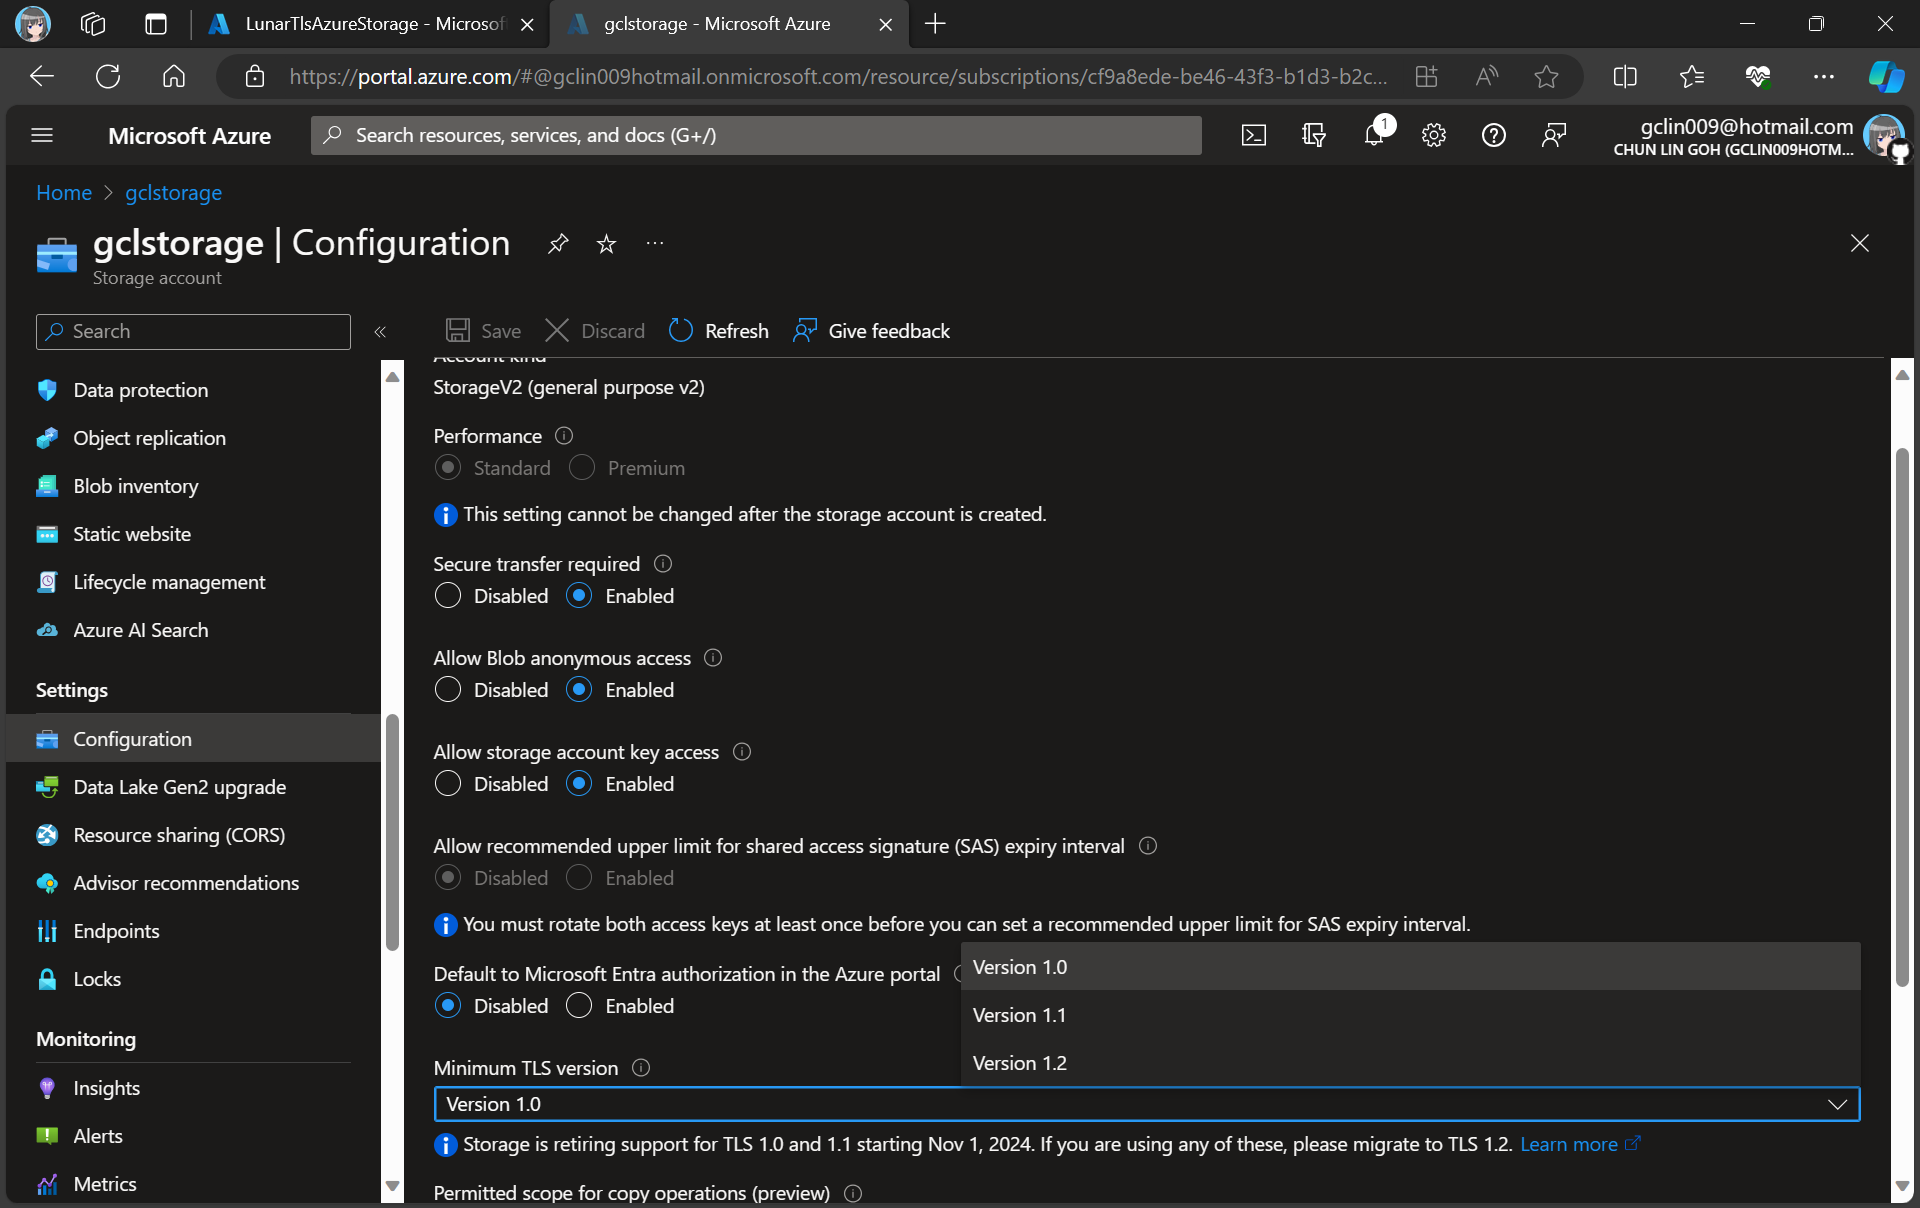
Enforce the Minimum Accepted TLS Version
Currently, the minimum TLS version accepted by storage account is set to TLS 1.0 by default before November 2014.
We at most can only set Version 1.2 for the minumum TLS version.
In advance of the deprecation date, we can enable Azure policy to enforce minimum TLS version to be TLS 1.2. Hence, we can now update the value to 1.2 so that we can reject all requests from clients that are sending data to our Azure Storage with an TLS 1.0 and 1.1.
Thus, if we are running our apps on the latest Windows servers, then the latest TLS should be automatically used by our apps without any configuration from our side.
In fact, according to the TLS best practices guide from Microsoft, we should not specify the TLS version. Instead, we shall configure our code to let the OS decide on the TLS version for us.
Wrap-Up
Enhancing the security stance for Windows users, as of September 2023, the default configuration of the operating system will deactivate TLS versions 1.0 and 1.1.
As developers, we should ensure that all apps and services running on Windows are using up-to-date versions that support TLS 1.2 or higher. Hence, prior to the enforcement of TLS updates, we must test our apps in a controlled environment to verify compatibility with TLS 1.2 or later.
While TLS 1.0 and 1.1 will be disabled by default, it is also good to confirm these settings and ensure they align with your security requirements.
By taking these proactive measures, we should be able to have a seamless transition to updated TLS versions, maintaining a secure computing environment while minimising any potential disruptions to applications or services.
Back in April 2018, I had the priviledge of sharing about Avalonia UI app development with the Singapore .NET Developers Community. At the time, Avalonia was still in its early stages, exclusively tailored for the creation of cross-platform desktop applications. Fast forward to the present, five years since my initial adventure to Avalonia, there is a remarkable transformation in this technology landscape.
In this artlcle, I will share about my new development experience with Avalonia UI.
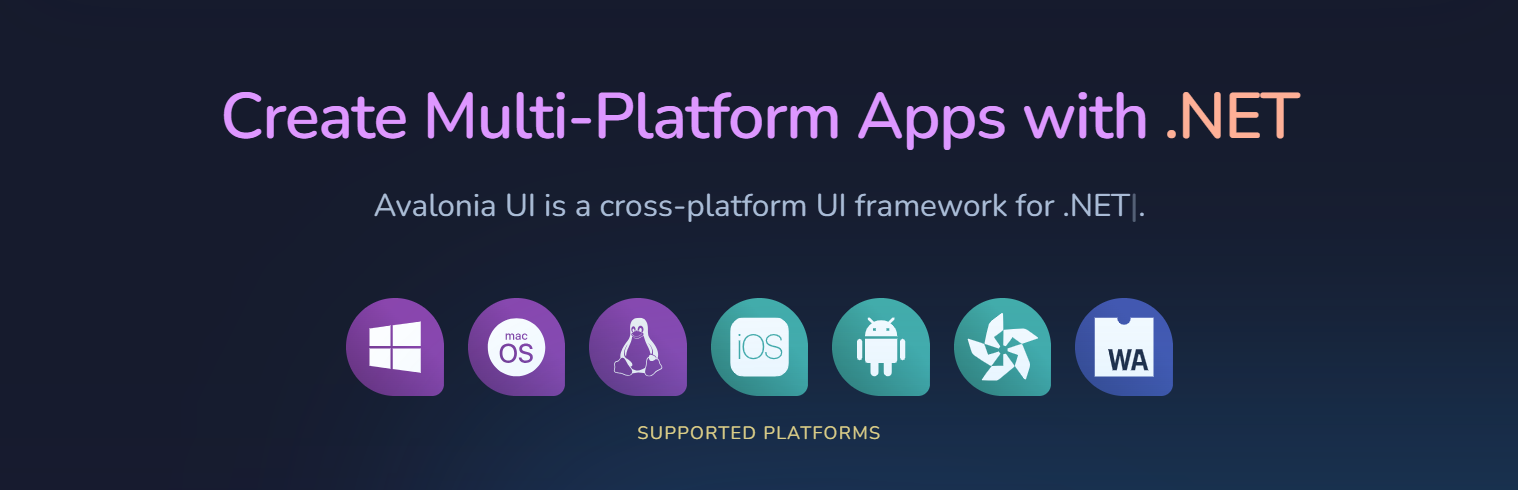
About Avalonia UI
Avalonia UI, one of the .NET Foundations projects, is an open-source, cross-platform UI framework designed for building native desktop apps. It has been described as the spiritual successor to WPF (Windows Presentation Foundation), enabling our existing WPF apps to run on macOS and Linux without expensive and risky rewrites.
Hence, for WPF developers, they will find the transition to Avalonia relatively smooth because they can apply their knowledge of XAML and WPF design patterns to create UI layouts in Avalonia easily. With Avalonia, they can reuse a significant portion of their existing WPF code when developing cross-platform apps. This reusability can save time and effort in the development process.
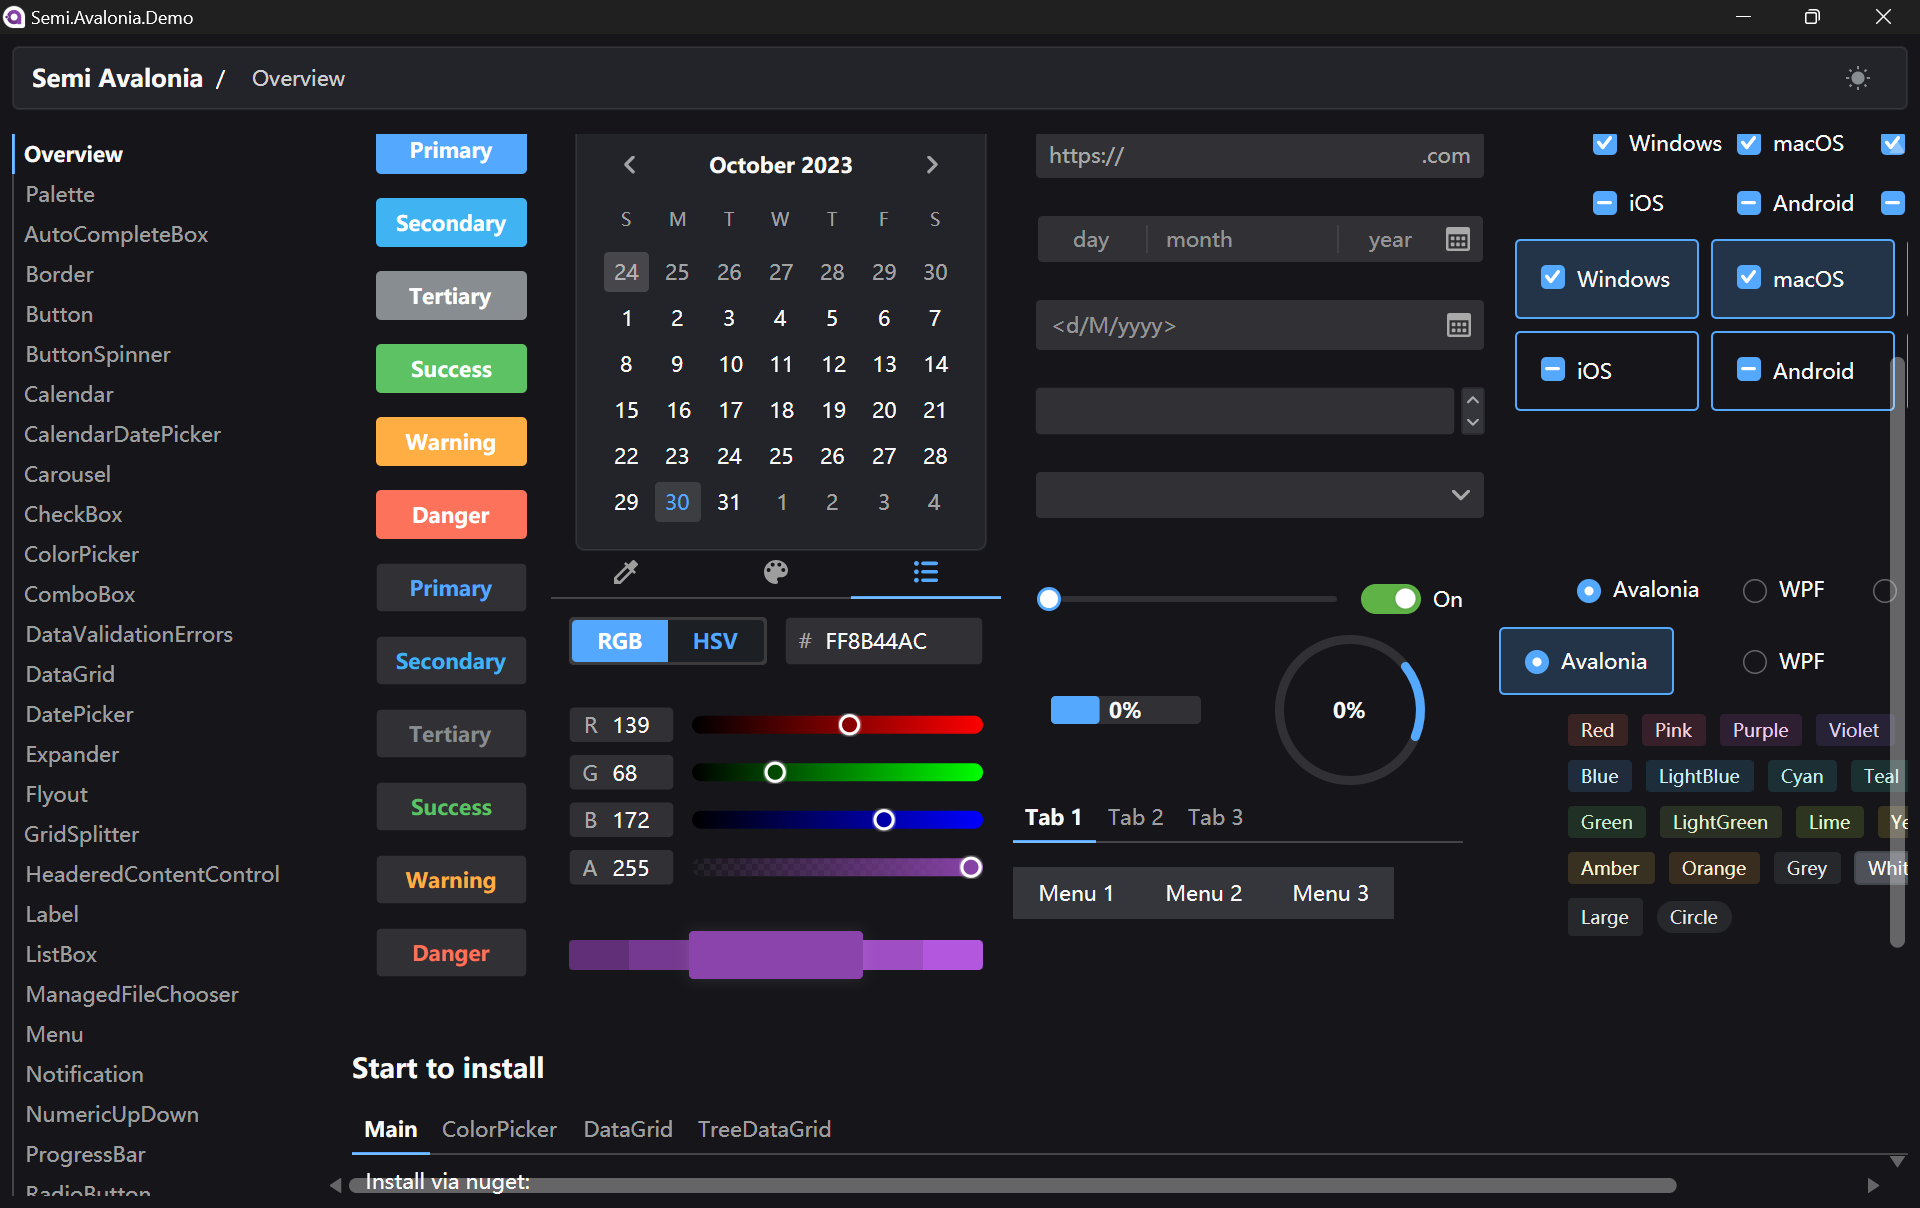
Semi.Avalonia is a theme inspired by Semi Design, a design system designed and currently maintained by Douyin. The reason why I chose Semi.Avalonia is because there is a demo app which demonstrating all of the general controls and styles available to develop Avalonia apps.
There is a demo executable available for us to play around with Semi Avalonia Themes.
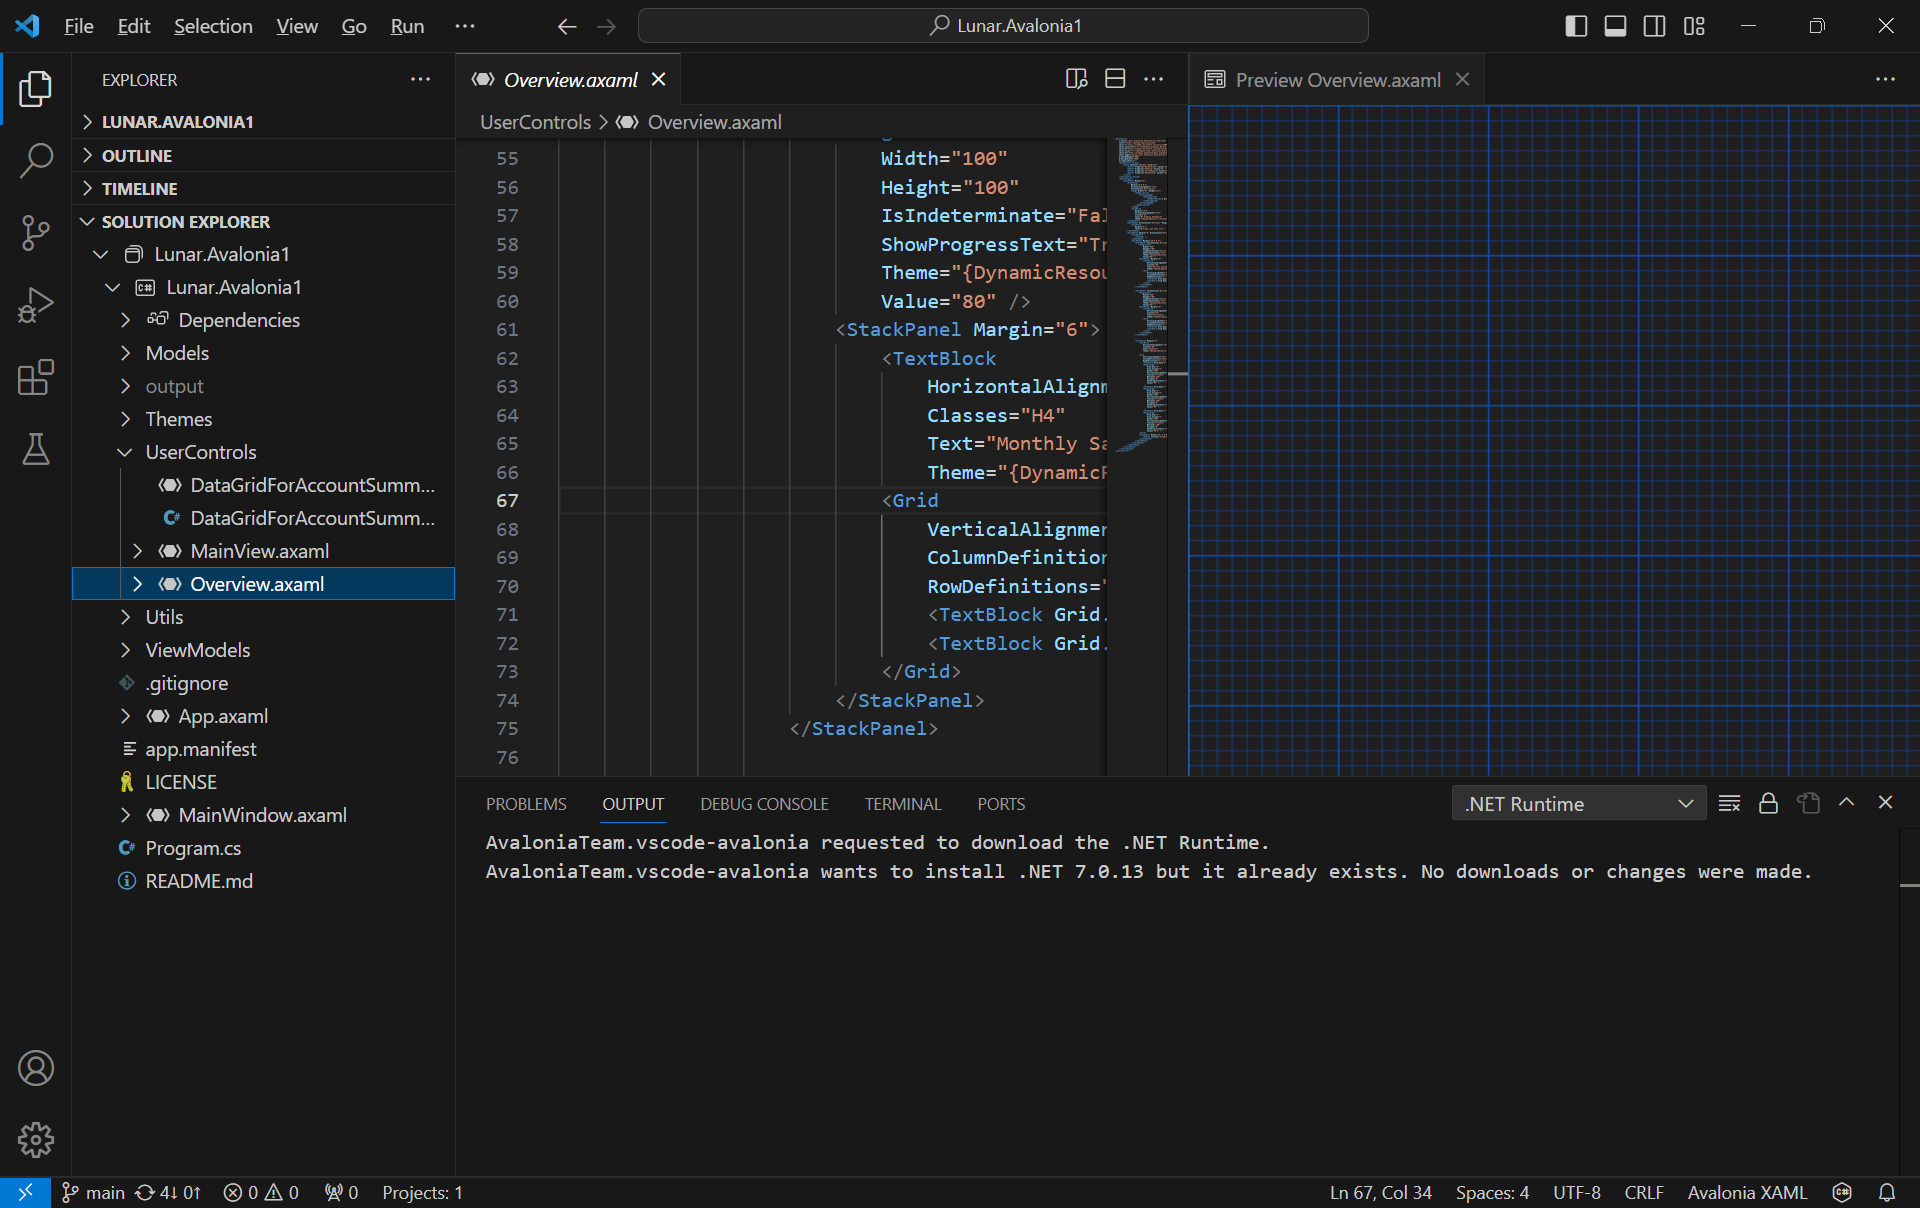
The Avalonia XAML Previewer offers real-time visualisation of XAML code. With this capability, developers can deftly craft and refine user interfaces, swiftly pinpoint potential issues, and witness the immediate effects of their alterations.
Unlike Visual Studio, VS Code will reuse the single preview window. Hence, the previewer will refresh everytime when we switch between multiple XAML files.
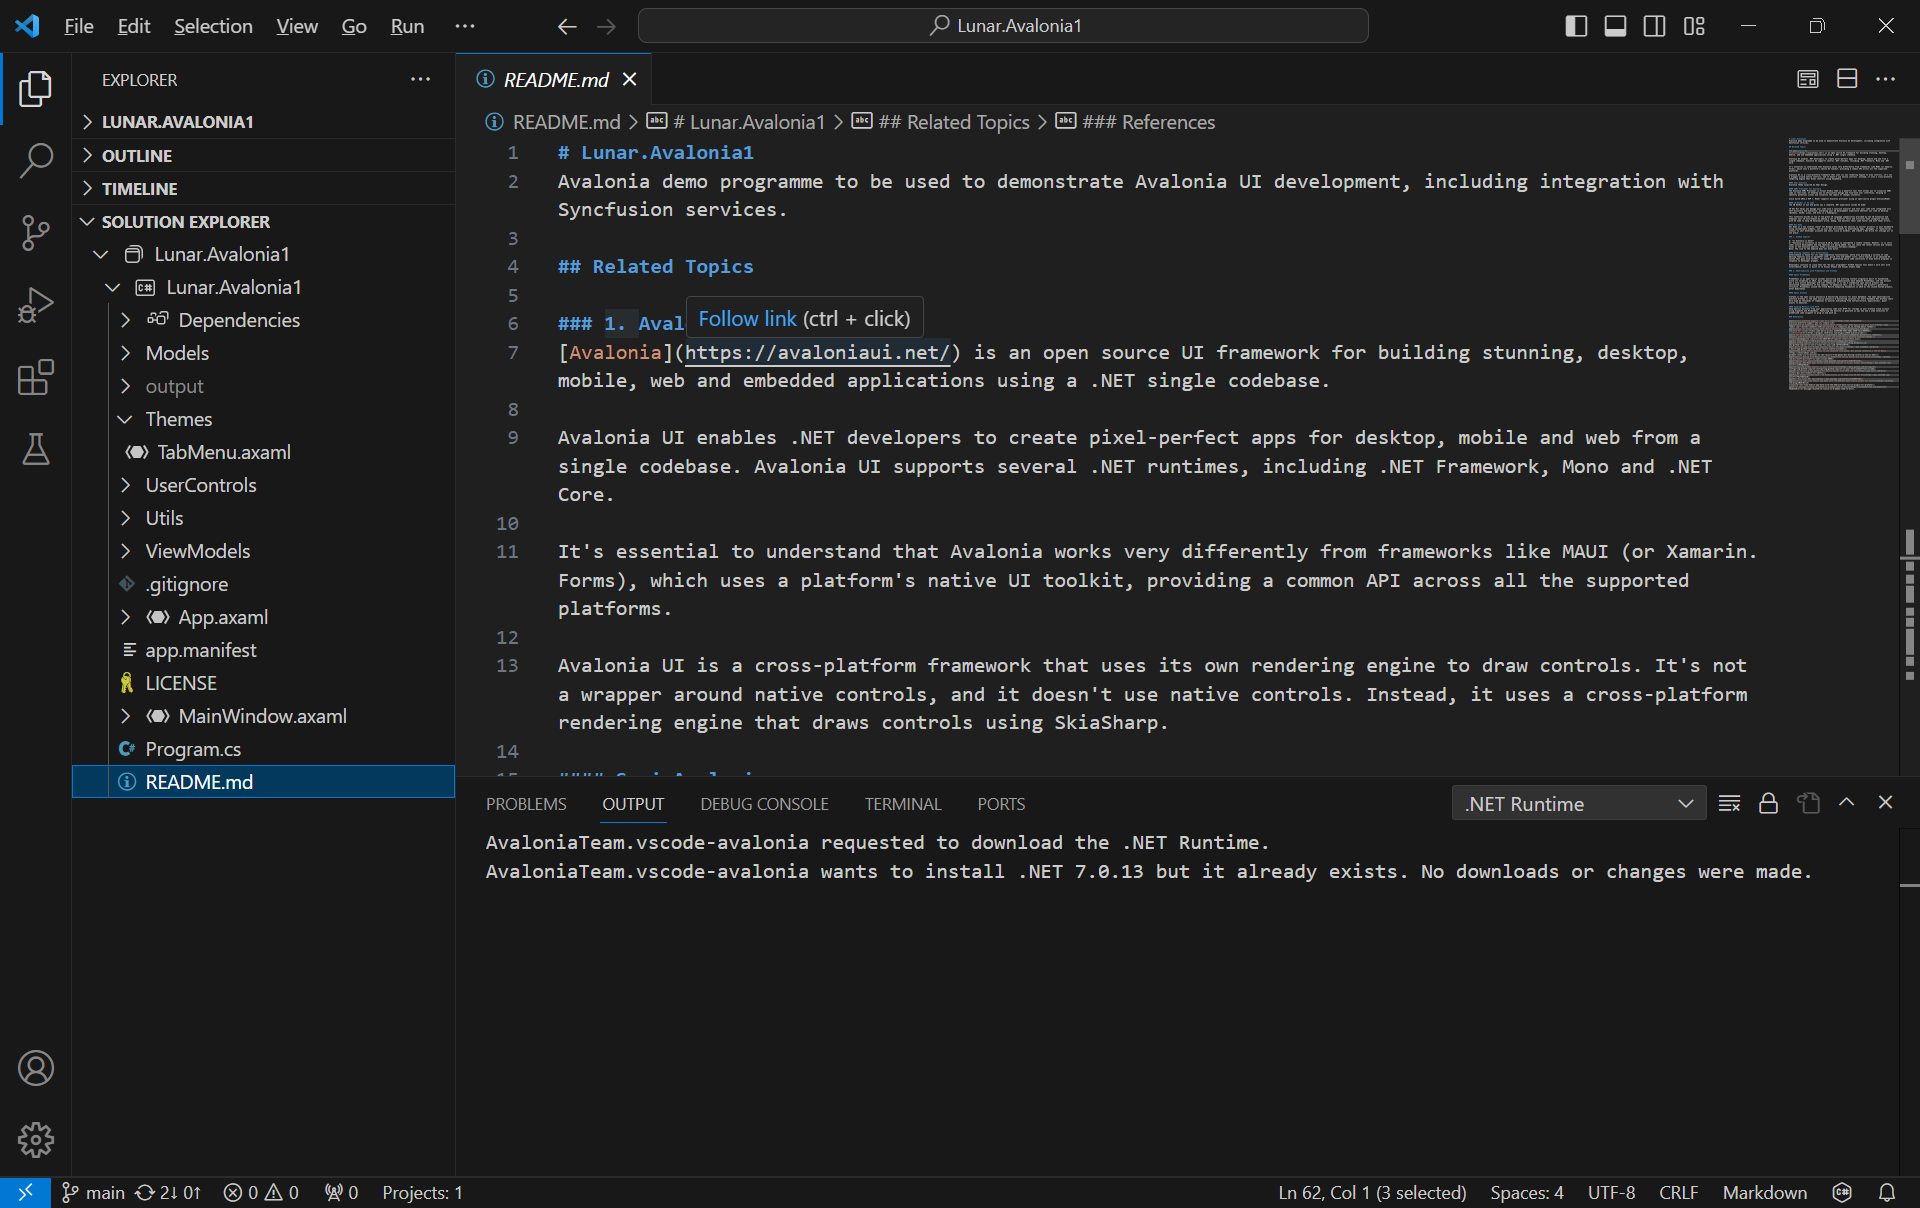
With C# Dev Kit, we can now manage our projects with the Solution Explorer that we have been very familiar with on the Visual Studio.
Besides the normal file explorer, we now can have the Solution Explorer in VS Code too.
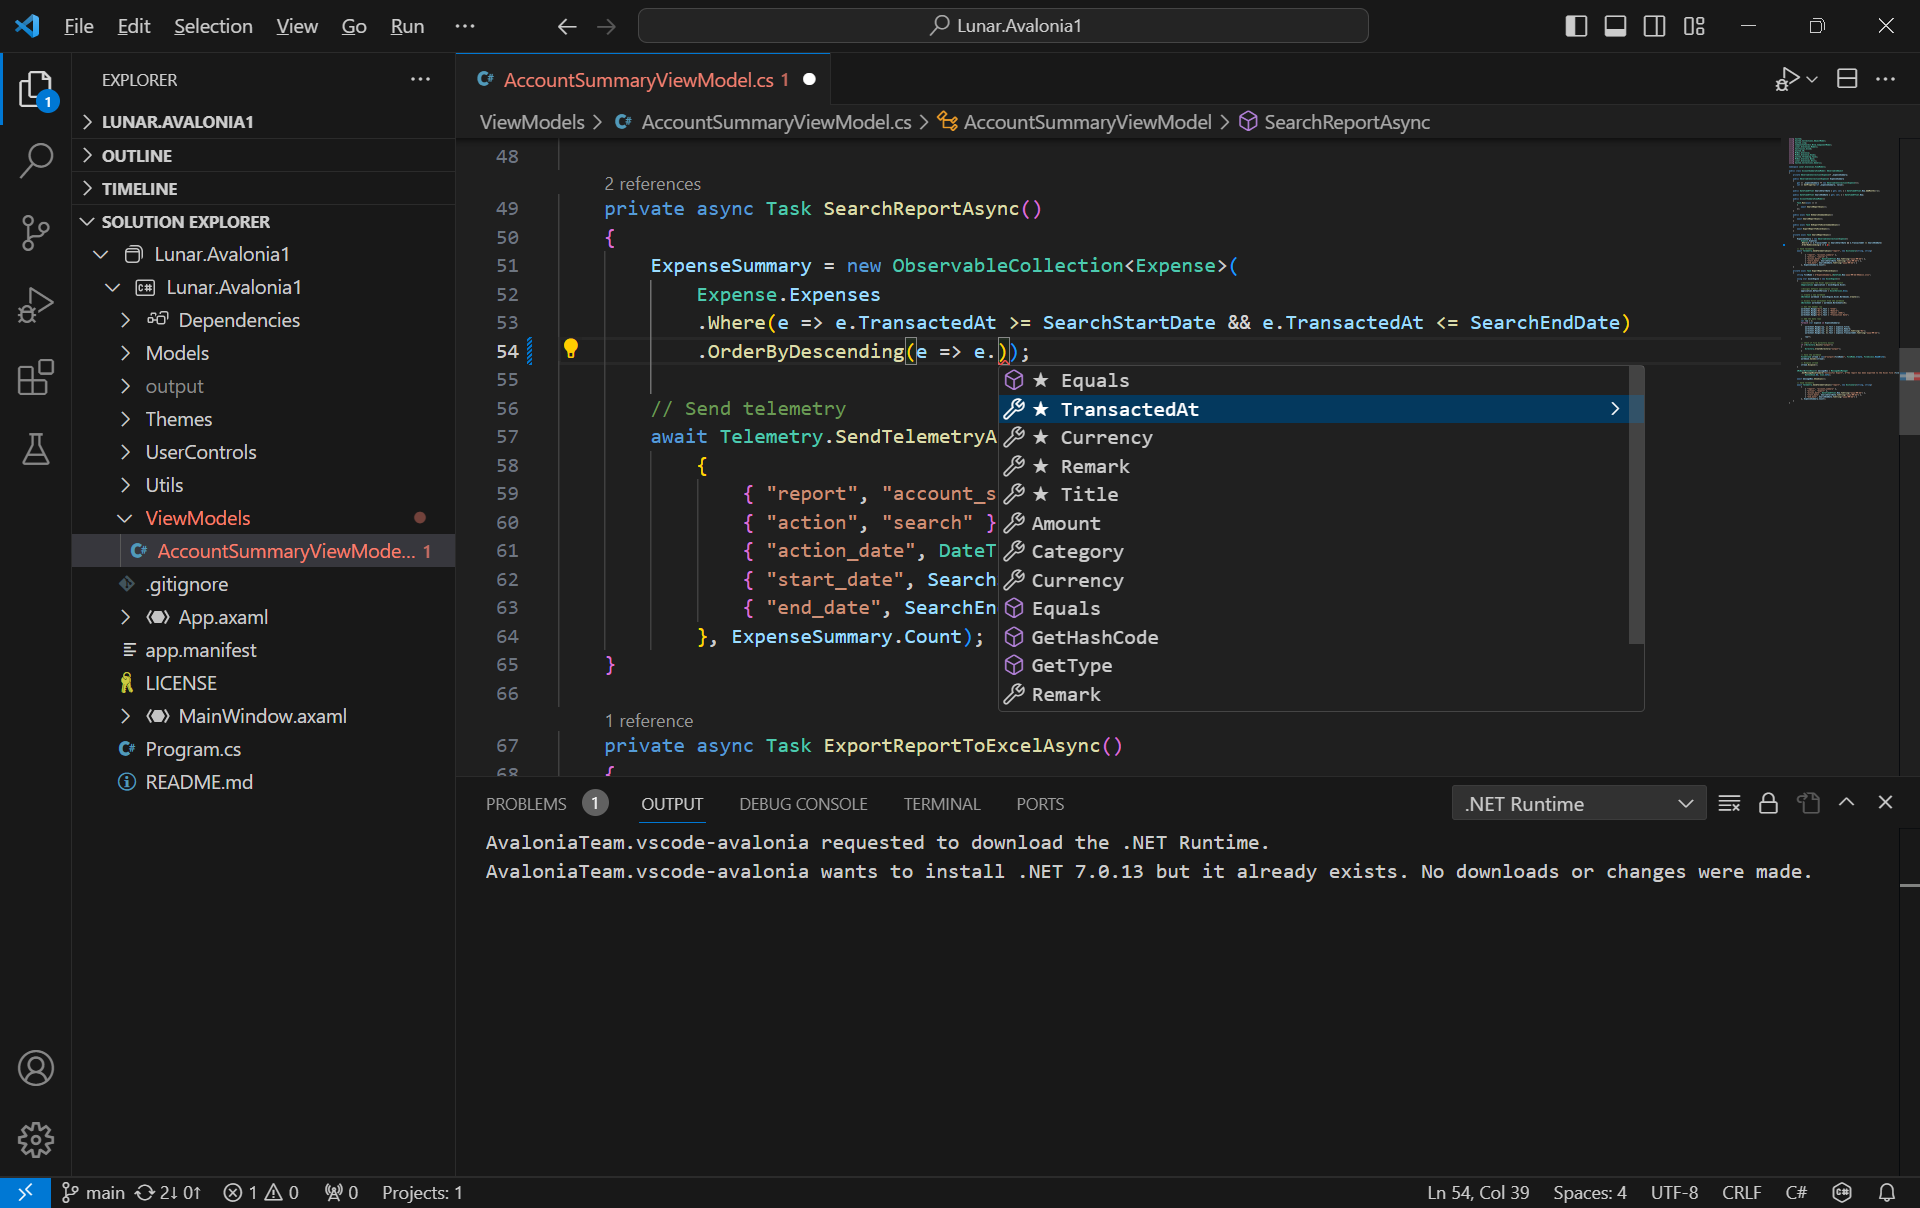
Since the IntelliCode for C# Dev Kit extension is installed together, on top of the basic IntelliSense code-completion found in the existing C# extension, we can also get powerful IntelliCode features such as whole-line completions and starred suggestions based on our personal codebase.
AI-assisted IntelliCode predicts the most likely correct method to use in VSCode.
Grafana Dashboard
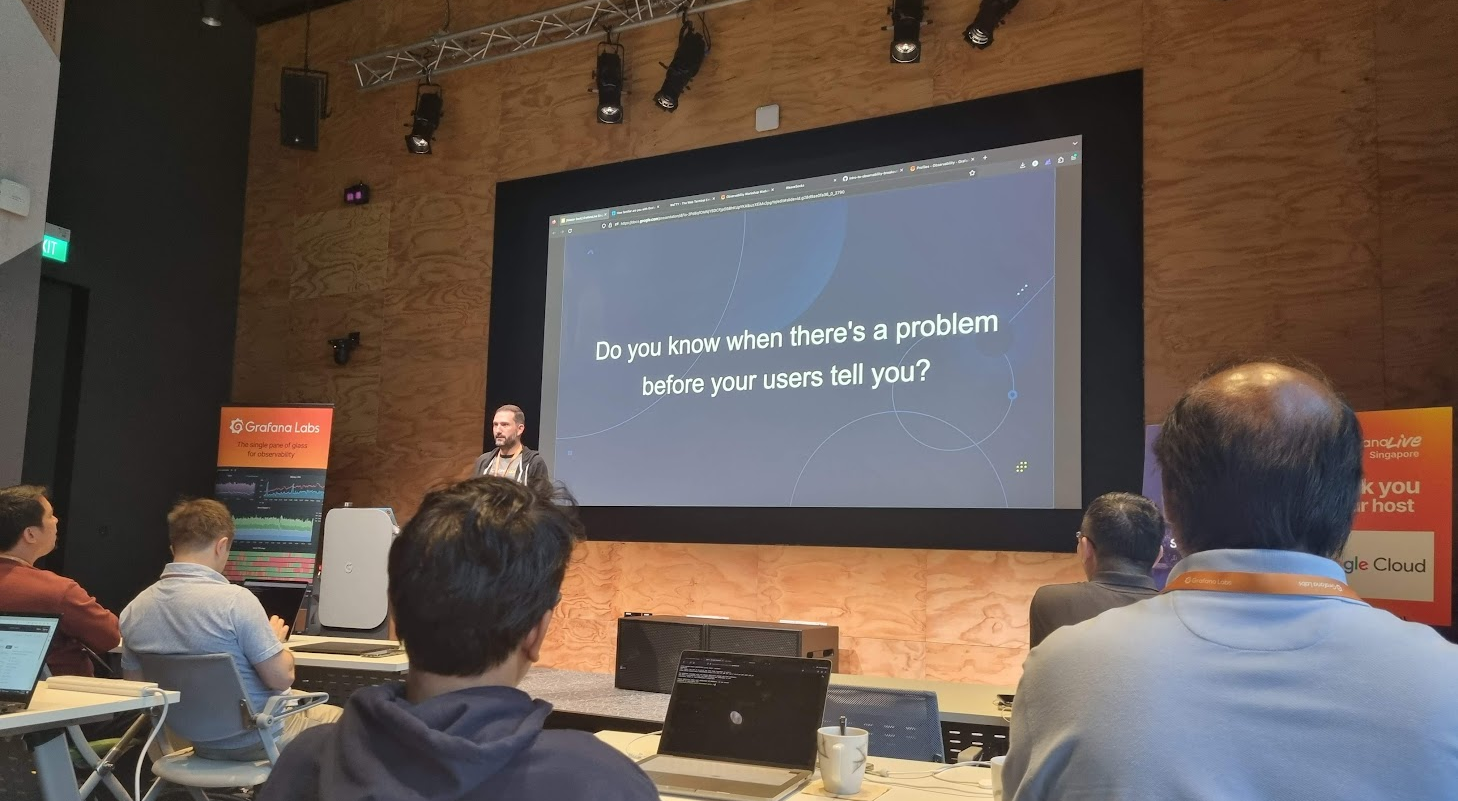
Next, I would like to talk about the observability of an app.
Observability plays a crucial role in system and app management, allowing us to gain insights into the inner workings of the system, understand its functions, and leverage the data it produces effectively.
In the realm of observability, our first concern is to assess how well the system can gauge its internal status merely by examining its external output. This aspect of observability is crucial for proactive issue detection and troubleshooting, as it allows us to gain a deeper insight into performance and potential problems of the system without relying on manual methods.
Effective observability not only aids in diagnosing problems but also in understanding the system behavior in various scenarios, contributing to better decision-making and system optimisation.
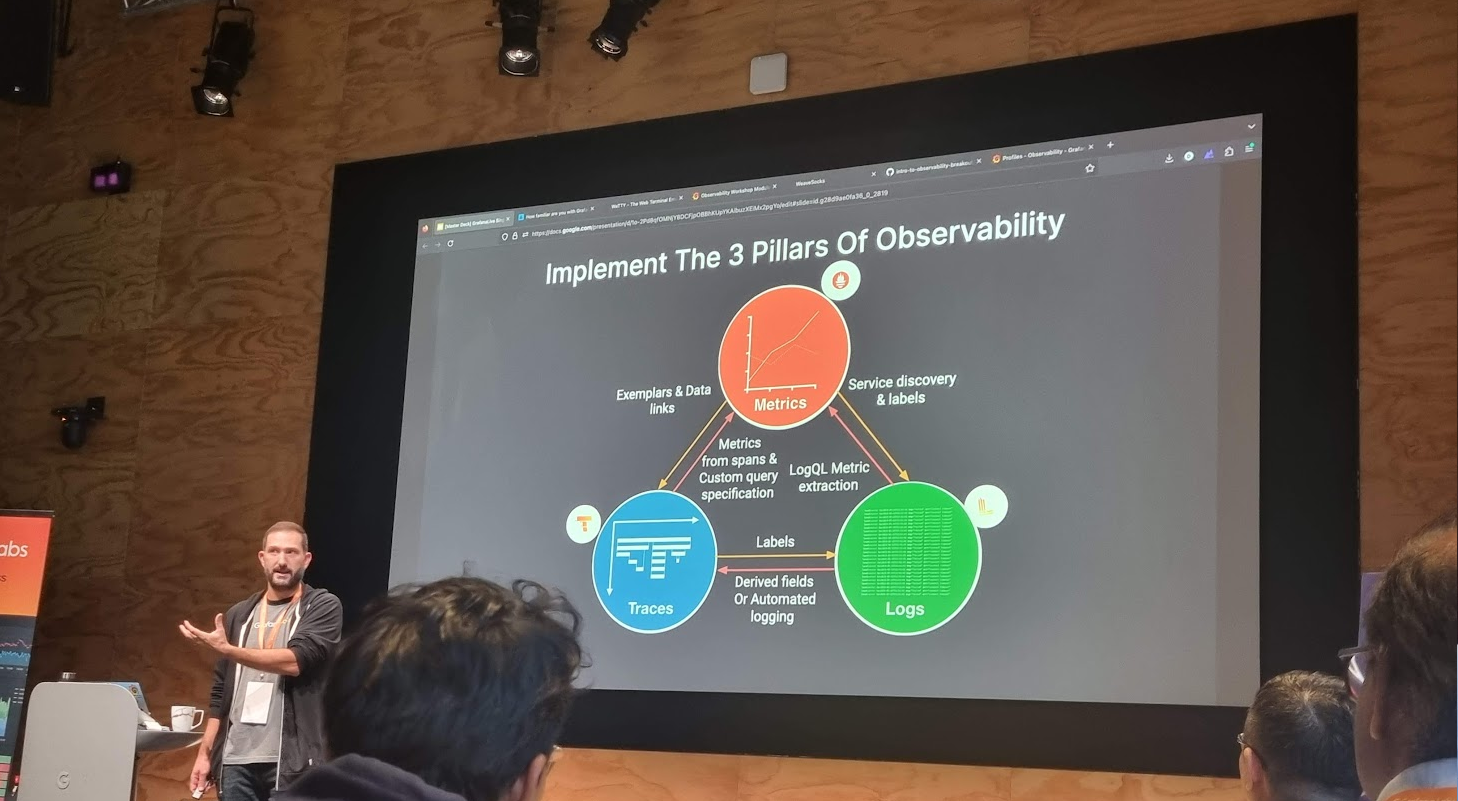
Grafana engineer shared about the 3 pillars of observability.
There are three fundamental components of observability, i.e. monitoring, logging, and tracing. Monitoring enhances the understanding of system actions by collecting, storing, searching, and analysing monitoring metrics from the system.
Prometheus and Grafana are two widely used open-source monitoring tools that, when used together, provide a powerful solution for monitoring and observability. Often, Prometheus collects metrics from various systems and services. Grafana then connects to Prometheus as a data source to fetch these metrics. Finally, we design customised dashboards in Grafana, incorporating the collected metrics.
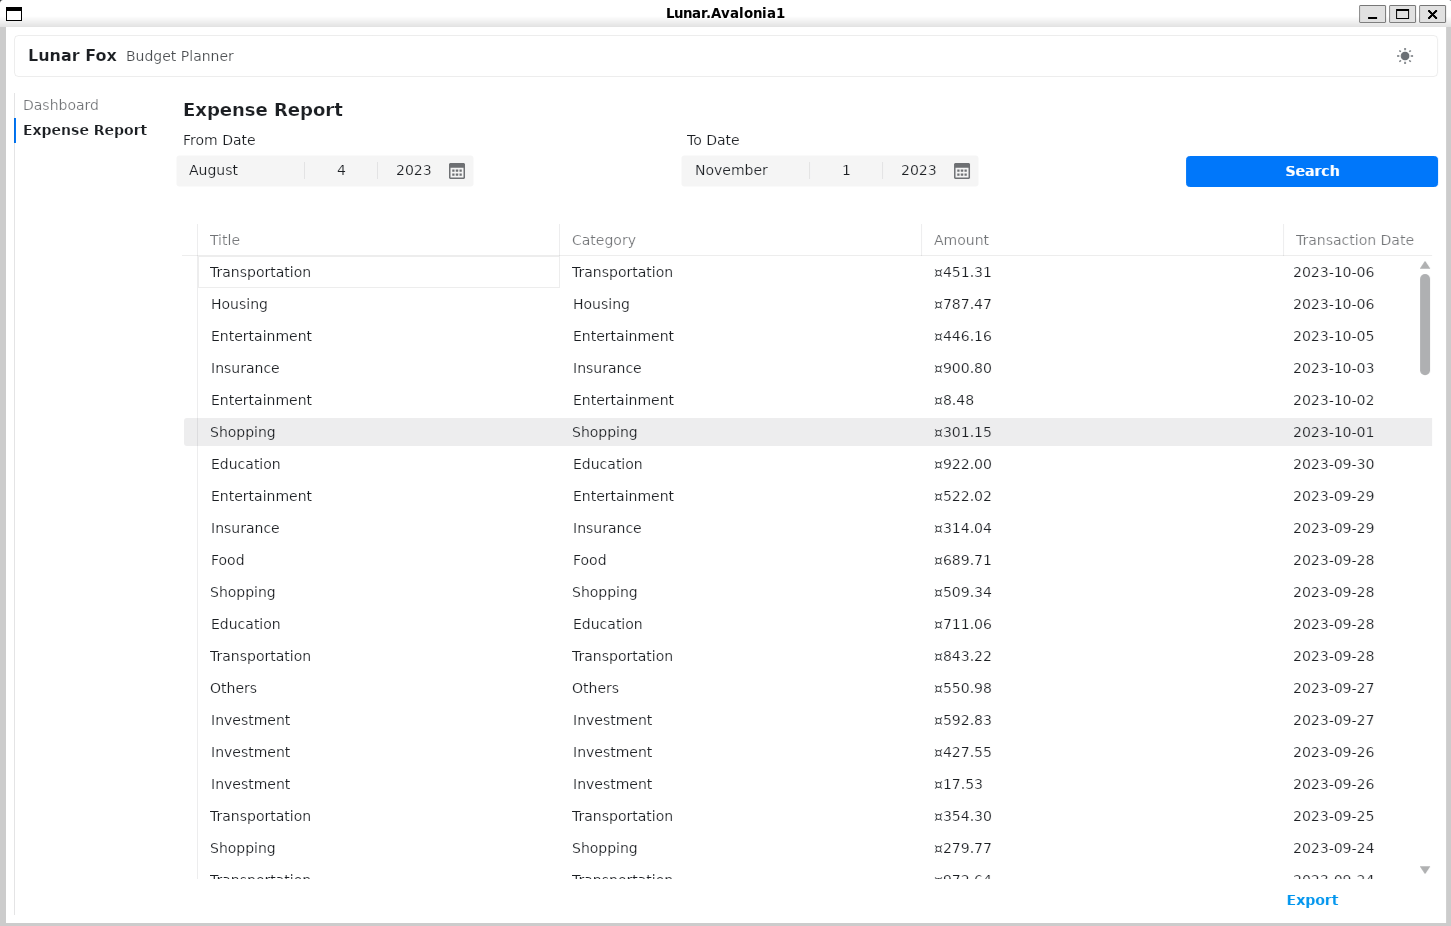
A simple dashboard collecting metrics from the Avalonia app though HTTP metrics.
We can get started quickly with Grafana Cloud, a hosted version of Grafana, without the need to set up and manage infrastructure components.
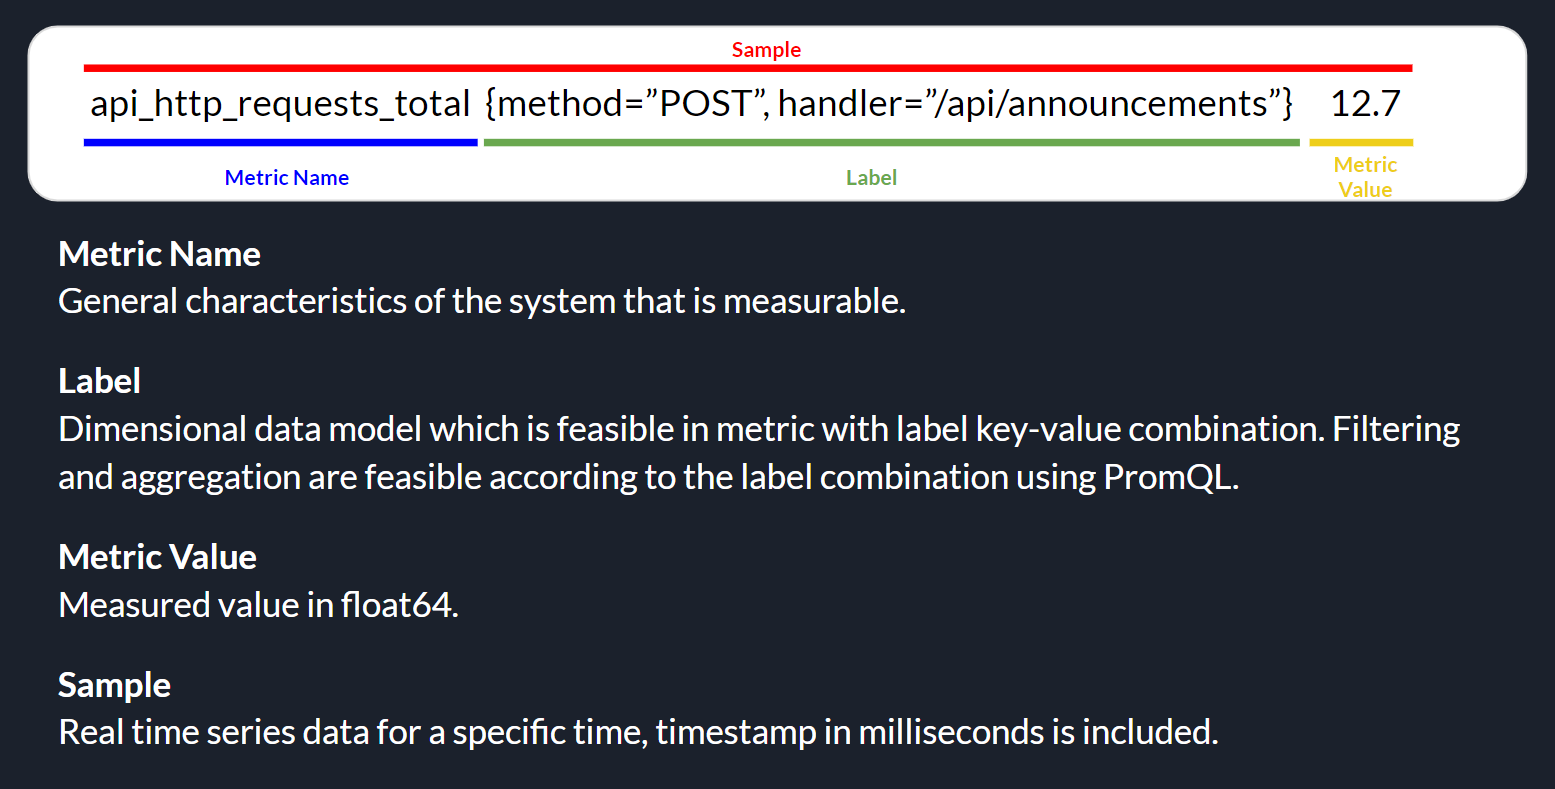
On Grafana Cloud, using the “HTTP Metrics”, we are able to easily send metrics directly from our app over HTTP for storage in the Grafana Cloud using Prometheus. Prometheus uses a specific data model for organising and querying metrics, which includes the components as highlighted in the following image.
Prometheus metrics basic structure.
Thus, in our Avalonia project, we can easily send metrics to Grafana Cloud with the codes below, where apiUrl, userId, and apiKey are given by the Grafana Cloud.
The complete source code of this project can be found at https://github.com/goh-chunlin/Lunar.Avalonia1. In the Readme file, I have also included both the presentation slide and recording for my presentation in the Singapore .NET Developers Community meetup in October 2023.
My Avalonia app can run on WSLg without any major issues.
We have a static website for marketing purpose hosting on Amazon S3 buckets. S3 offers a pay-as-you-go model, which means we only pay for the storage and bandwidth used. This can be significantly cheaper than traditional web hosting providers, especially for websites with low traffic.
However, S3 is designed as a storage service, not a web server. Hence, it lacks many features found in common web hosting providers. We thus decide to use AWS Lambda to power our website.
AWS Lambda and .NET 6
AWS Lambda is a serverless service that runs code for backend service without the need to provision or manage servers. Building serverless apps means that we can focus on our web app business logic instead of worrying about managing and operating servers. Similar to S3, Lambda helps to reduce overhead and lets us reclaim time and energy that we can spent on developing our products and services.
So as the beginning, we will setup the following simple architecture to retrieve website content from S3 via Lambda.
Simple architecture to host our website using Lambda and S3.
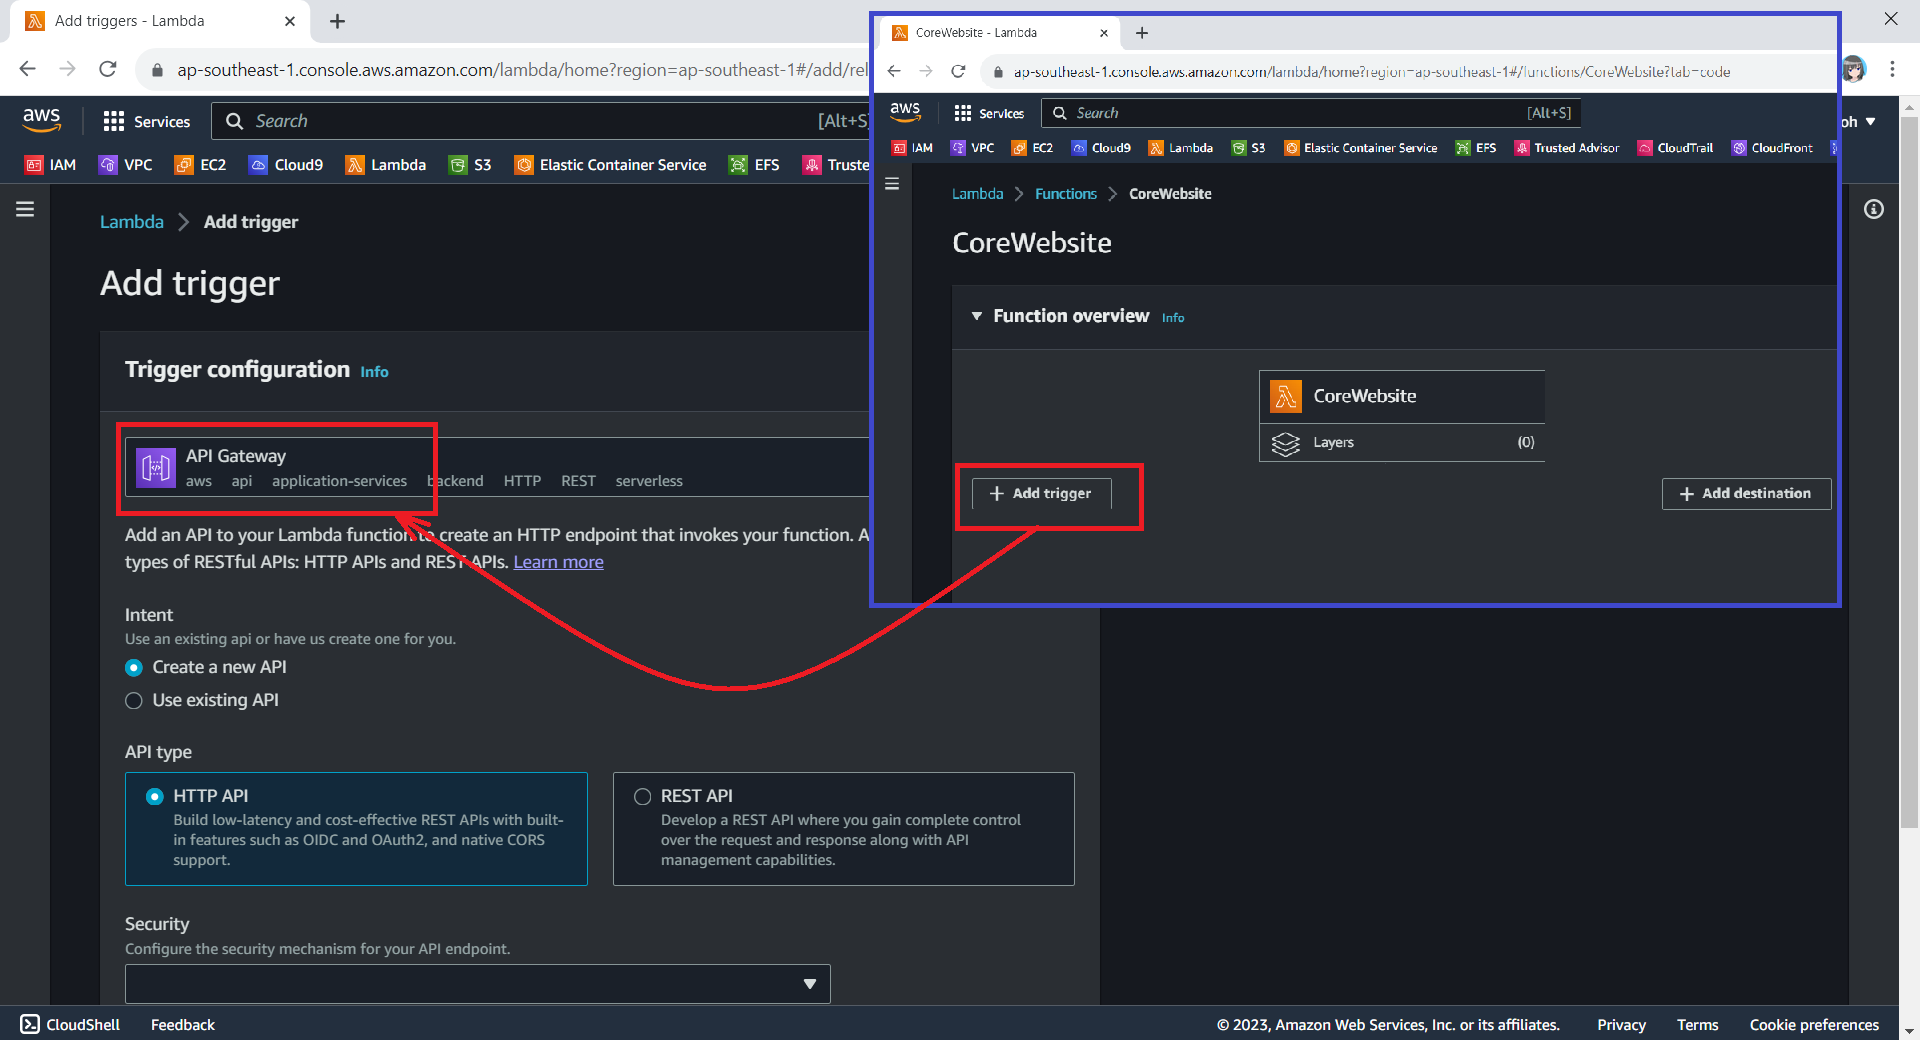
API Gateway
When we are creating a new Lambda service, we have the option to enable the function URL so that a HTTP(S) endpoint will be assigned to our Lambda function. With the URL, we can then use it to invoke our function through, for example, an Internet browser directly.
The Function URL feature is an excellent choice when we seek rapid exposure of our Lambda function to the wider public on the Internet. However, if we are in search of a more comprehensive solution, then opting for API Gateway in conjunction with Lambda may prove to be the better choice.
We can configure API Gateway as a trigger for our Lambda function.
Using API Gateway also enables us to invoke our Lambda function with a secure HTTP endpoint. In addition, it can do a bit more, such as managing large volumes of calls to our function by throttling traffic and automatically validating and authorising API calls.
Keeping Web Content in S3
Now, we will create a new S3 bucket called “corewebsitehtml” to store our web content files.
We then can upload our HTML file for our website homepage to the S3 bucket.
We will store our homepage HTML in the S3 for Lambda function to retrieve it later.
Retrieving Web Content from S3 with C# in Lambda
With our web content in S3, the next issue will be retrieving the content from S3 and returning it as response via the API Gateway.
According to performance evaluation, even though C# is the slowest on a cold start, it is one of the fastest languages if few invocations go one by one.
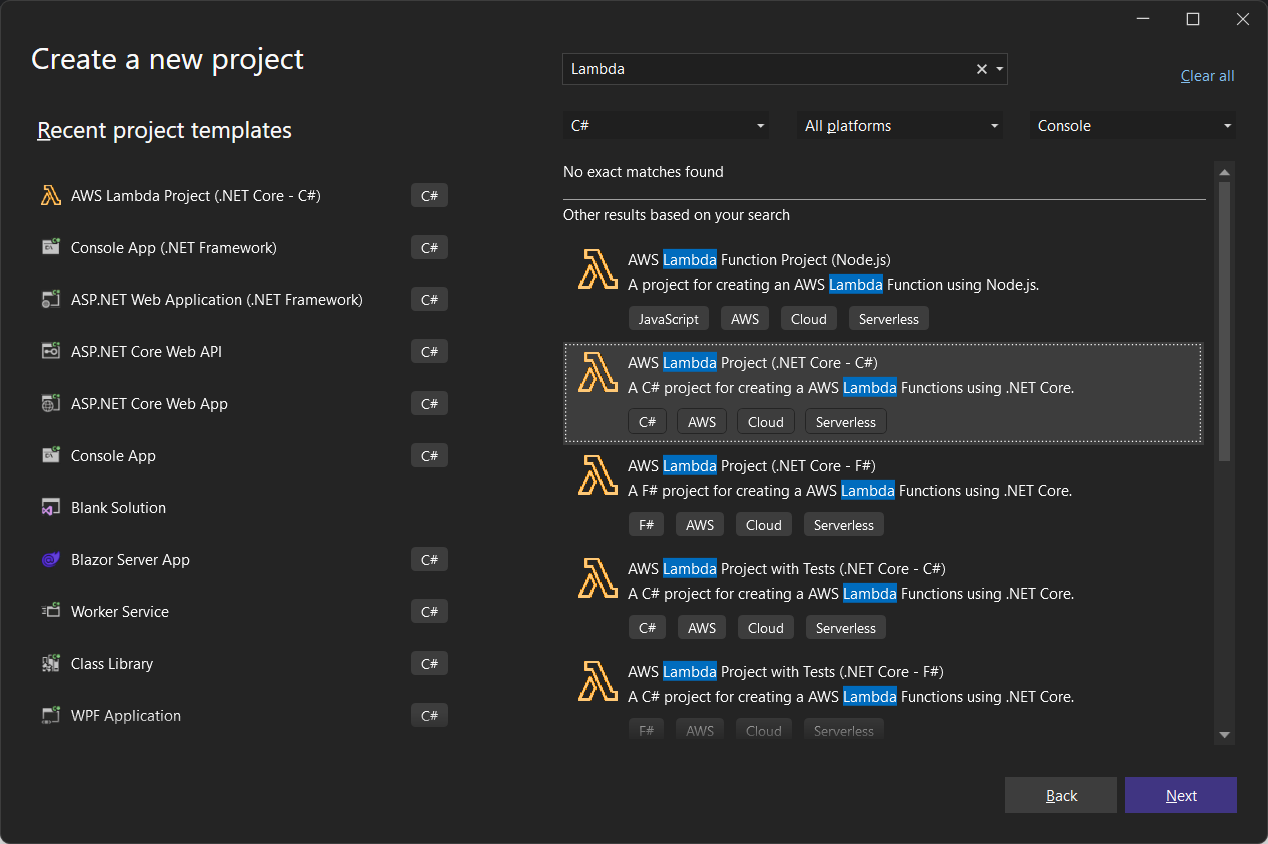
The code editor on AWS console does not support the .NET 6 runtime. Thus, we have to install the AWS Toolkit for Visual Studio, so that we can easily develop, debug, and deploy .NET applications using AWS, including the AWS Lambda.
Here, we will use the AWS SDK for reading the file from S3 as shown below.
As shown in the code above, we first need to specify the region of our S3 Bucket, which is Asia Pacific (Singapore). After that, we also need to specify our bucket name “corewebsitehtml” and the key of the file which we are going to retrieve the web content from, i.e. “index.html”, as shown in the screenshot below.
Getting file key in S3 bucket.
Deploy from Visual Studio
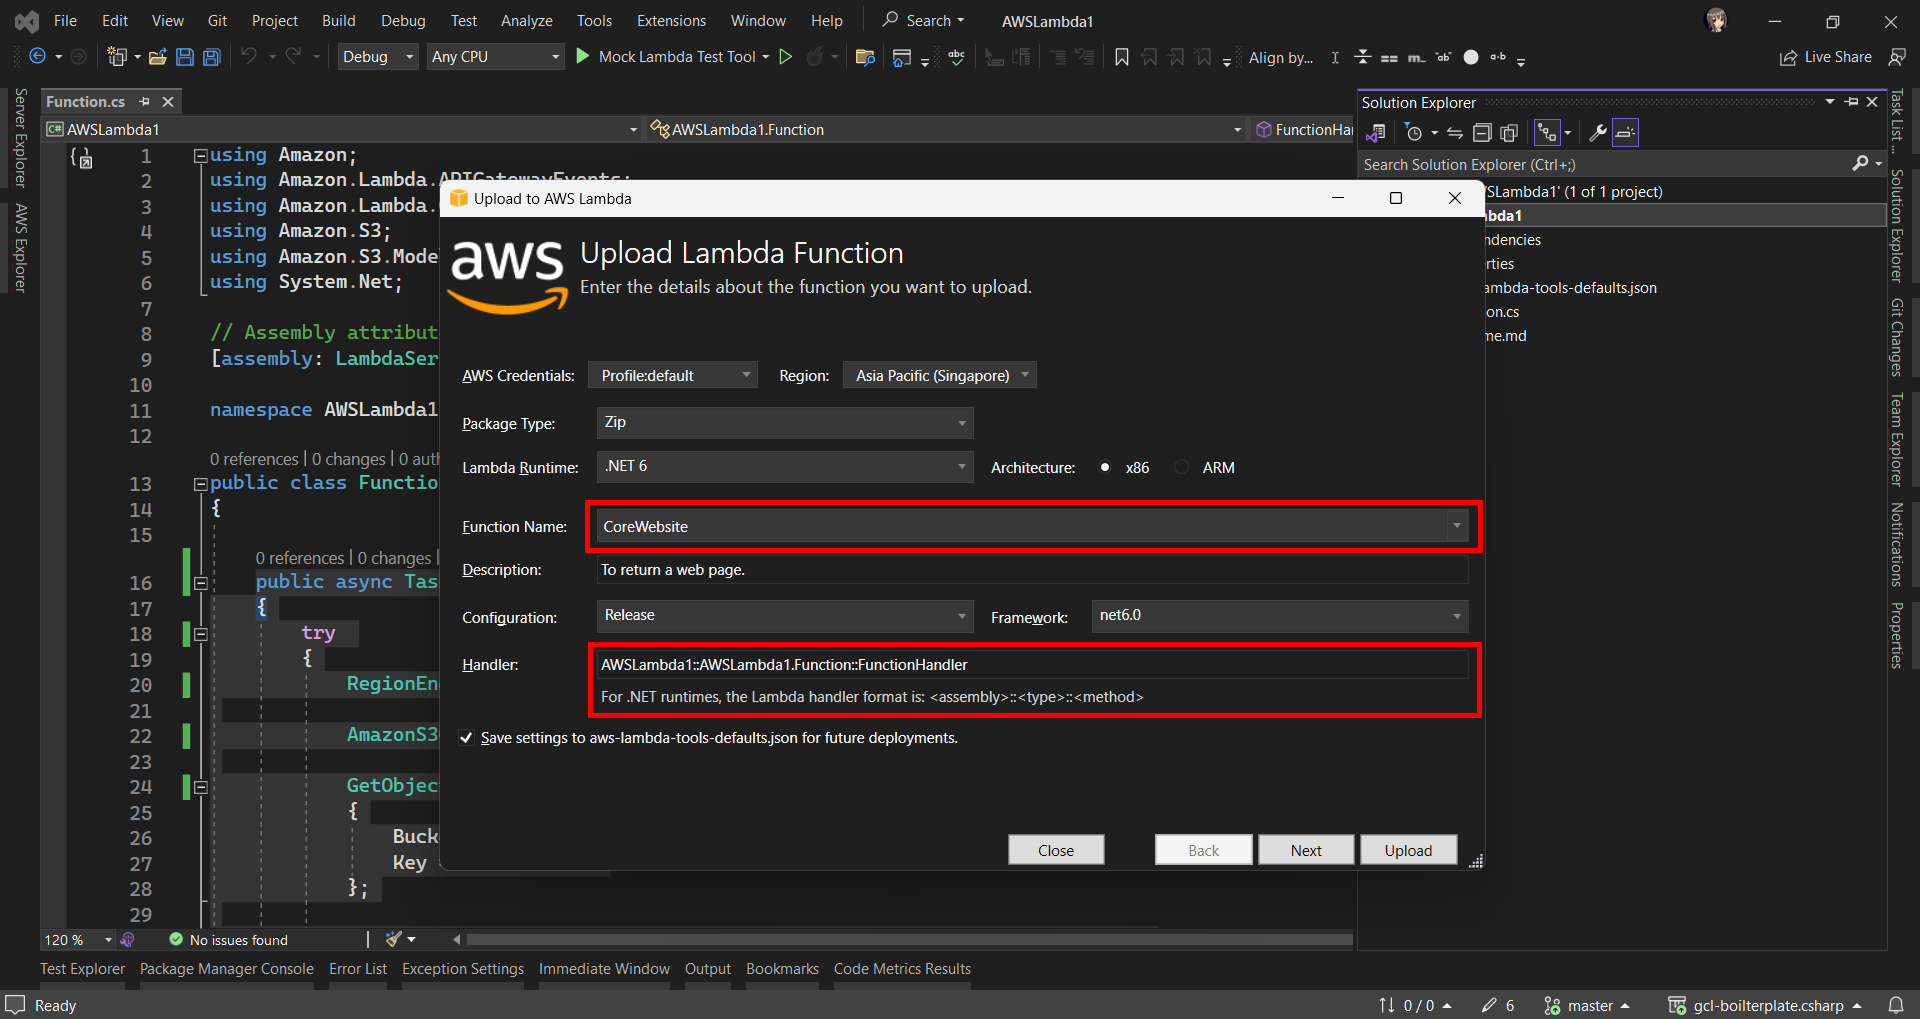
After ew have done the coding of the function, we can right click on our project in the Visual Studio and then choose “Publish to AWS Lambda…” to deploy our C# code to Lambda function, as shown in the screenshot below.
Publishing our function code to AWS Lambda from Visual Studio.
After that, we will be prompted to key in the name of the Lambda function as well as the handler in the format of <assembly>::<type>::<method>.
Then we are good to proceed to deploy our Lambda function.
Logging with .NET in Lambda Function
Now when we hit the URL of the API Gateway, we will receive a HTTP 500 internal server error. To investigate, we need to check the error logs.
Lambda logs all requests handled by our function and automatically stores logs generated by our code through CloudWatch Logs. By default, info level messages or higher are written to CloudWatch Logs.
Thus, in our code above, we can use the Logger to write a warning message if the file is not found or there is an error retrieving the file.
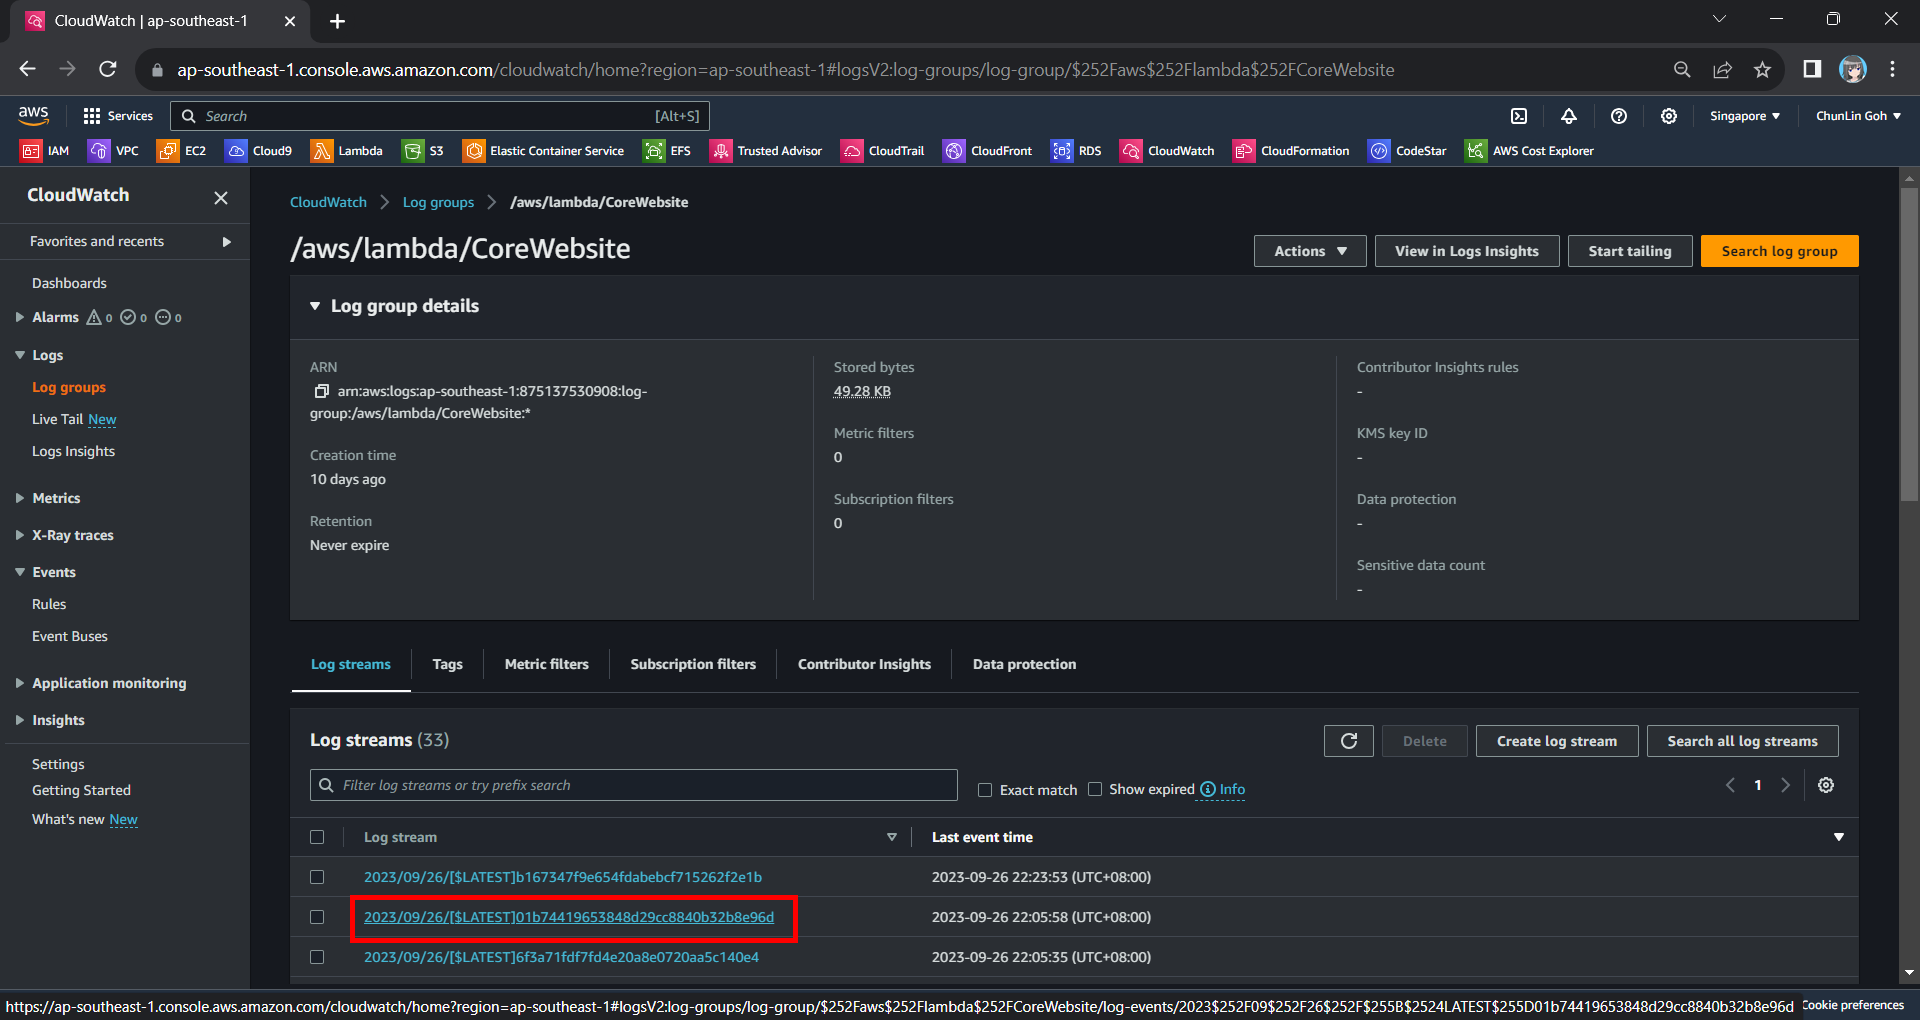
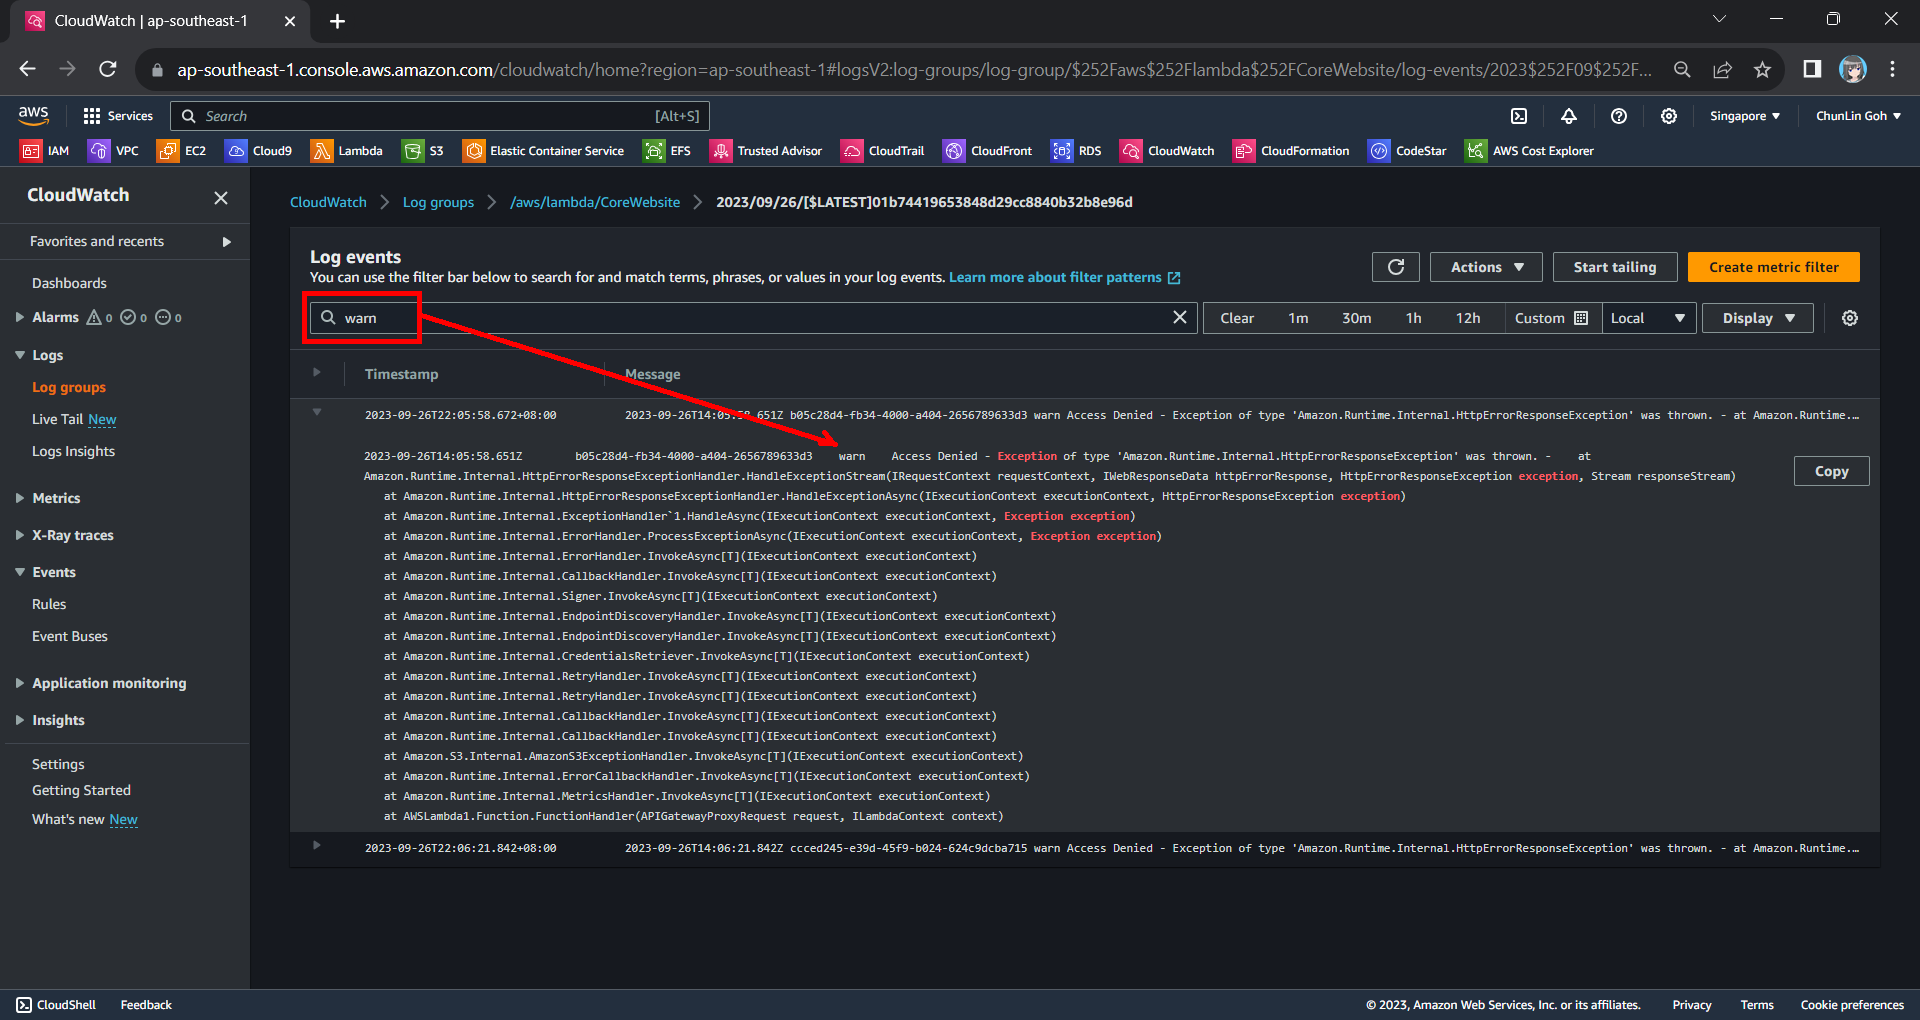
Hence, now if we access our API Gateway URL now, we should find a warning log message in our CloudWatch, as shown in the screenshot below. The page can be accessed from the “View CloudWatch logs” button under the “Monitor” tab of the Lambda function.
Viewing the log streams of our Lambda function on CloudWatch.
From one of the log streams, we can filter the results to list only those with the keyword “warn”. From the log message, we then know that our Lambda function has access denied from accessing our S3 bucket. So, next we will setup the access accordingly.
Connecting Lambda and S3
Since both our Lambda function and S3 bucket are in the same AWS account, we can easily grant the access from the function to the bucket.
Step 1: Create IAM Role
By default, Lambda creates an execution role with minimal permissions when we create a function in the Lambda console. So, now we first need to create an AWS Identity and Access Management (IAM) role for the Lambda function that also grants access to the S3 bucket.
In the IAM homepage, we head to the Access Management > Roles section to create a new role, as shown in the screenshot below.
Click on the “Create role” button to create a new role.
In the next screen, we will choose “AWS service” as the Trusted Entity Type and “Lambda” as the Use Case so that Lambda function can call AWS services like S3 on our behalf.
Select Lambda as our Use Case.
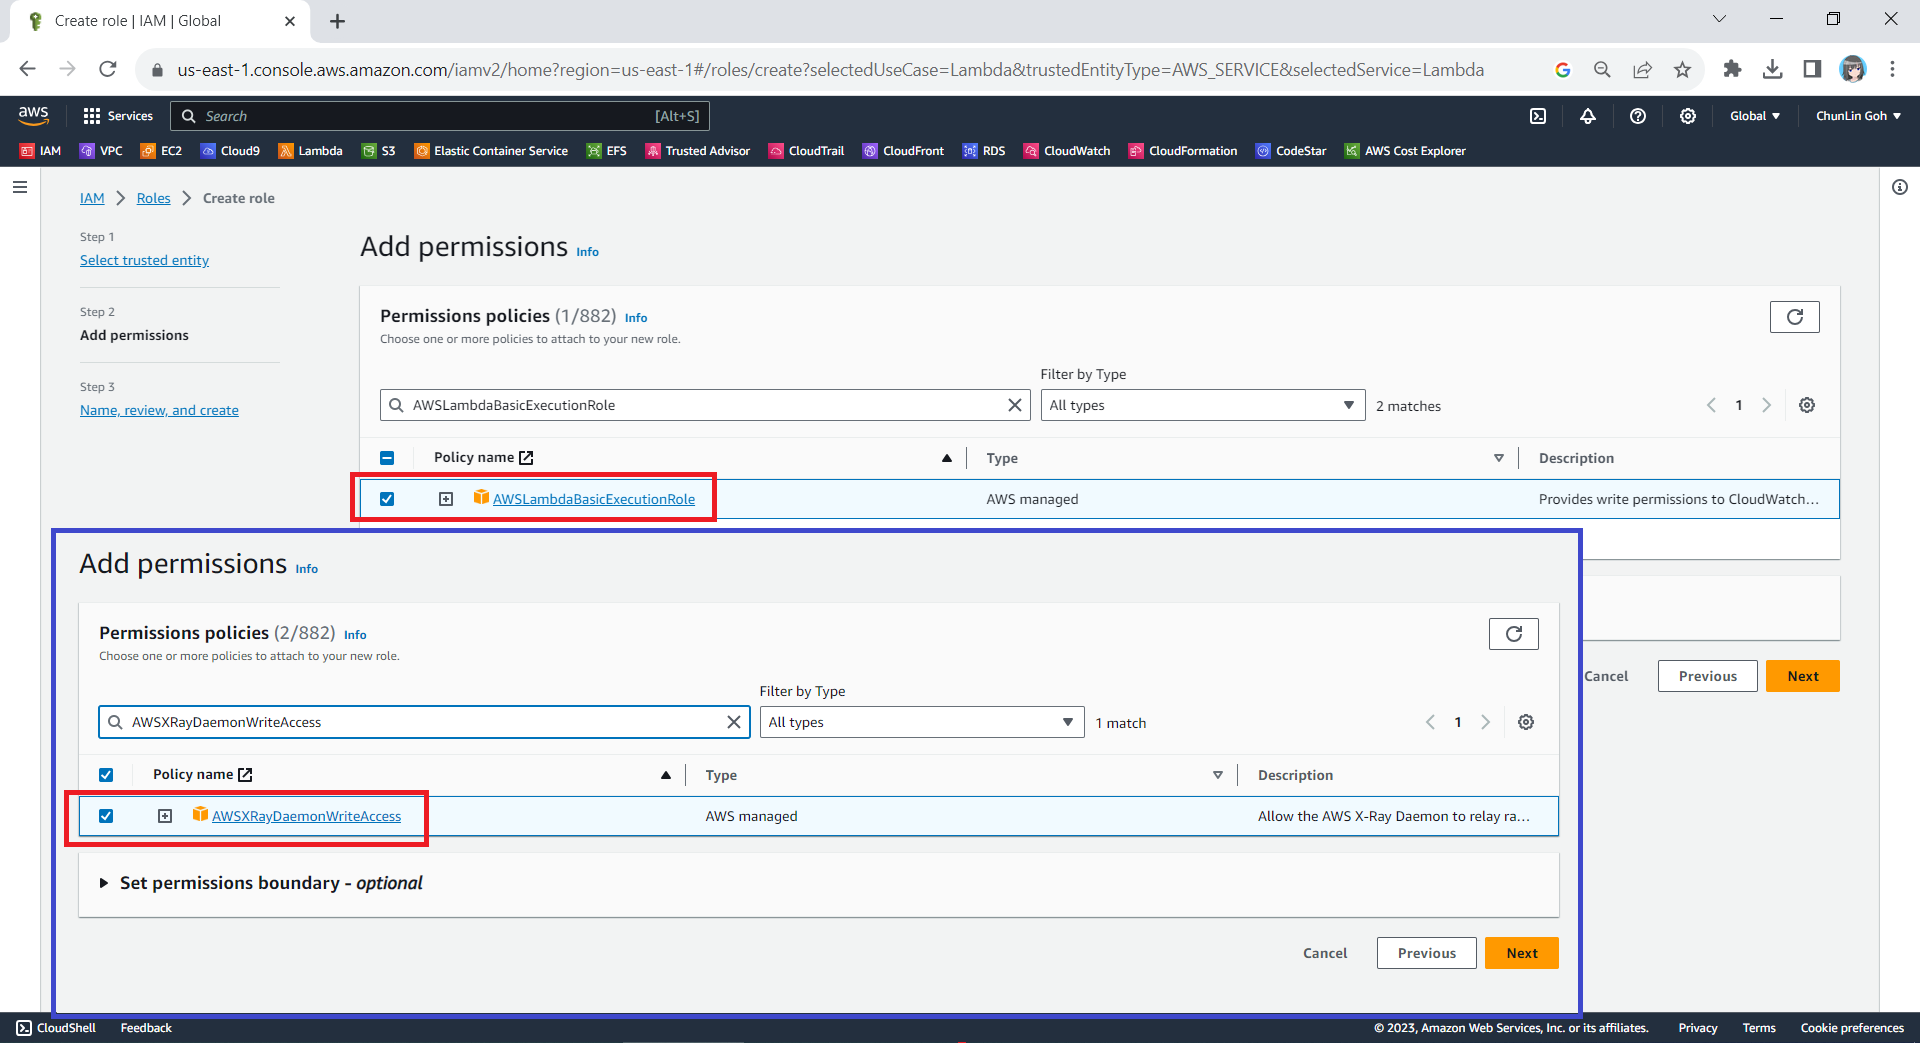
Next, we need to select the AWS managed policies AWSLambdaBasicExecutionRole and AWSXRayDaemonWriteAccess.
Attaching two policies to our new role.
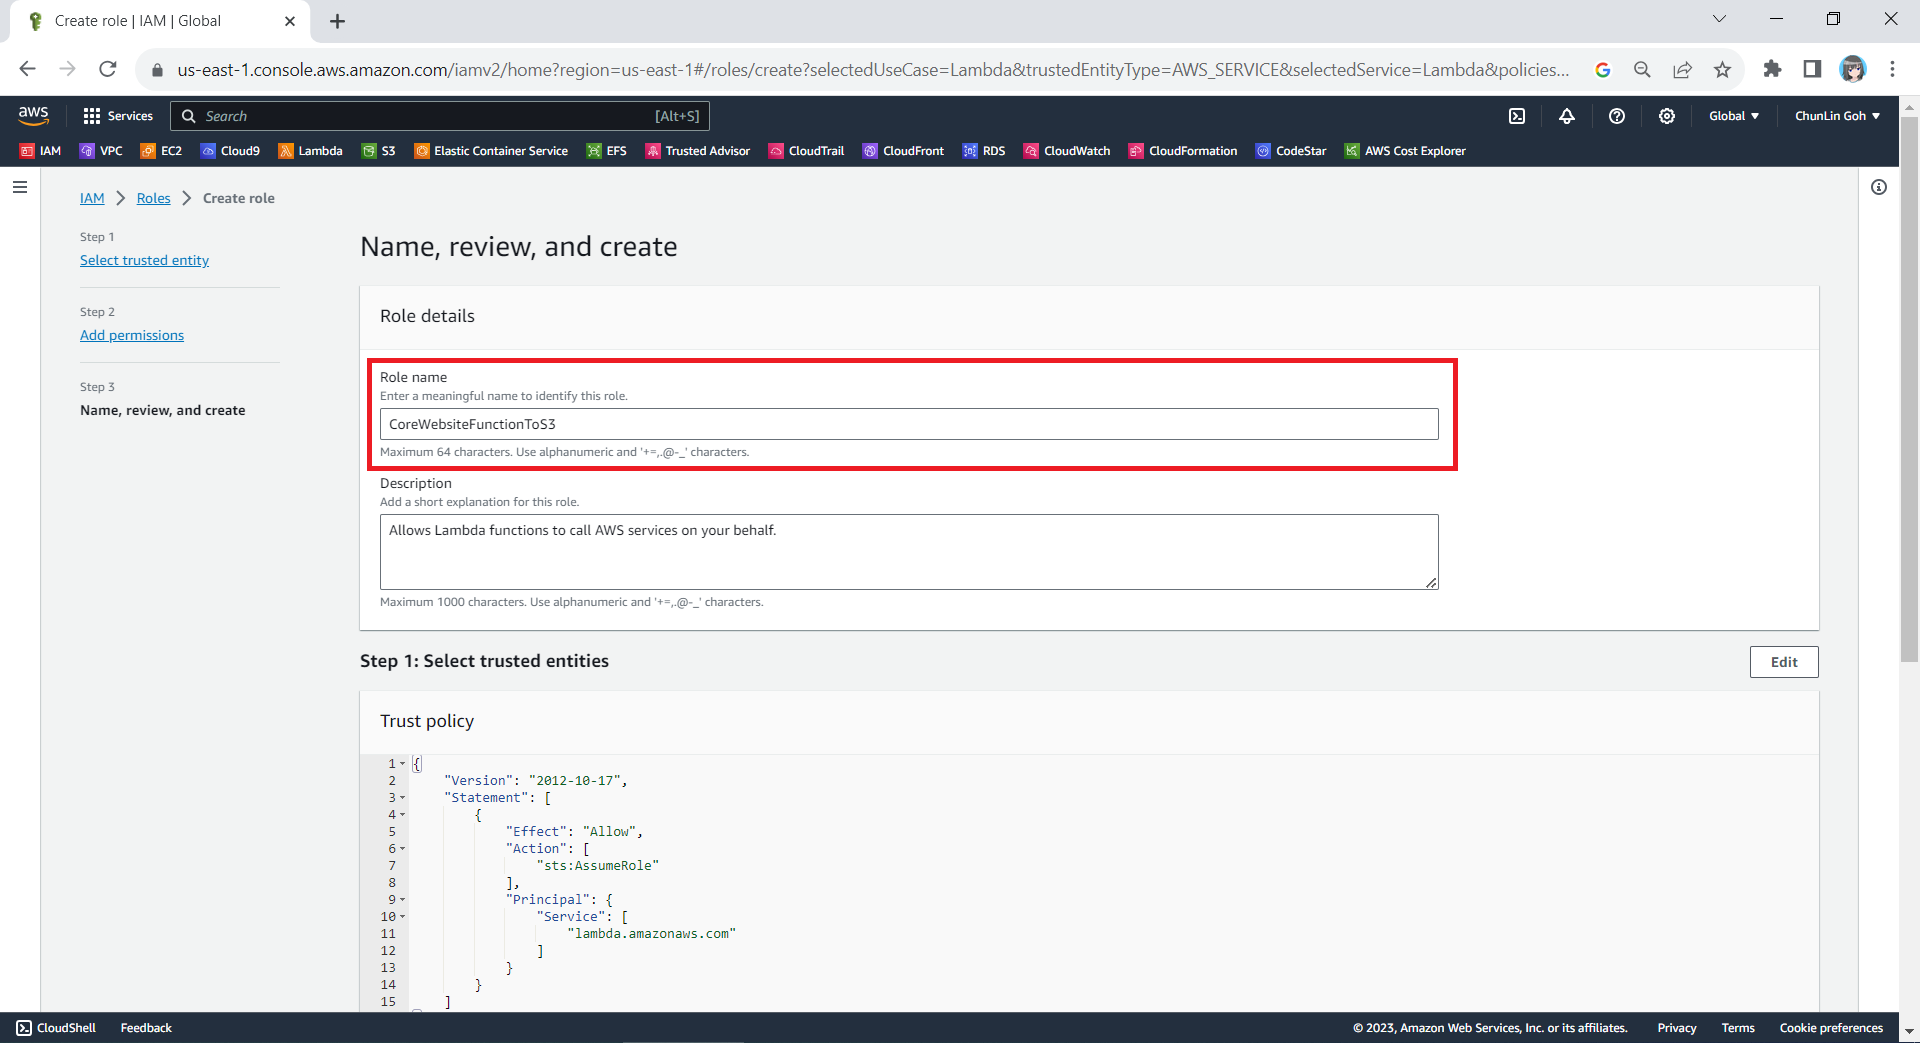
Finally, in the Step 3, we simply need to key in a name for our new role and proceed, as shown in the screenshot below.
We will call our new role “CoreWebsiteFunctionToS3”.
Step 2: Configure the New IAM Role
After we have created this new role, we can head back to the IAM homepage. From the list of IAM roles, we should be able to see the role we have just created, as shown in the screenshot below.
Search for the new role that we have just created.
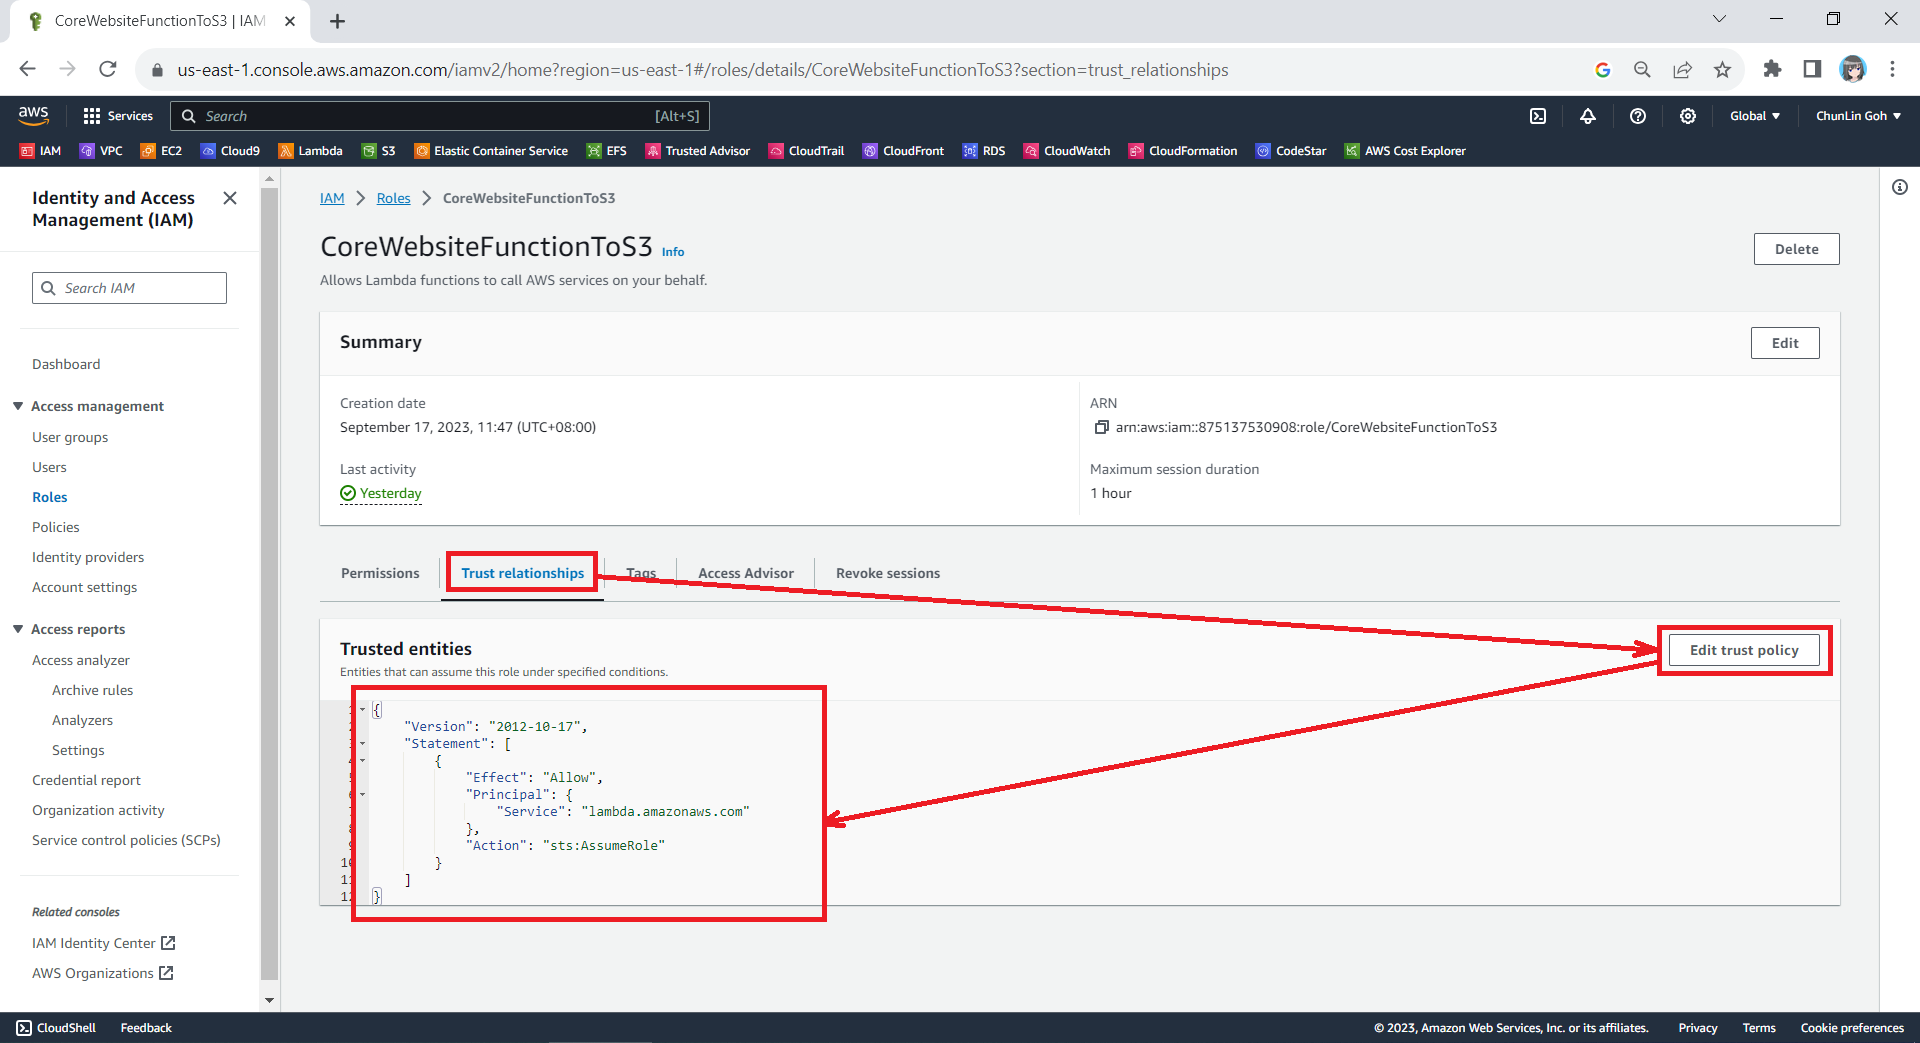
Since the Lambda needs to assume the execution role, we need to add lambda.amazonaws.com as a trusted service. To do so, we simply edit the trust policy under the Trust Relationships tab.
Updating the Trust Policy of the new role.
The trust policy should be updated to be as follows.
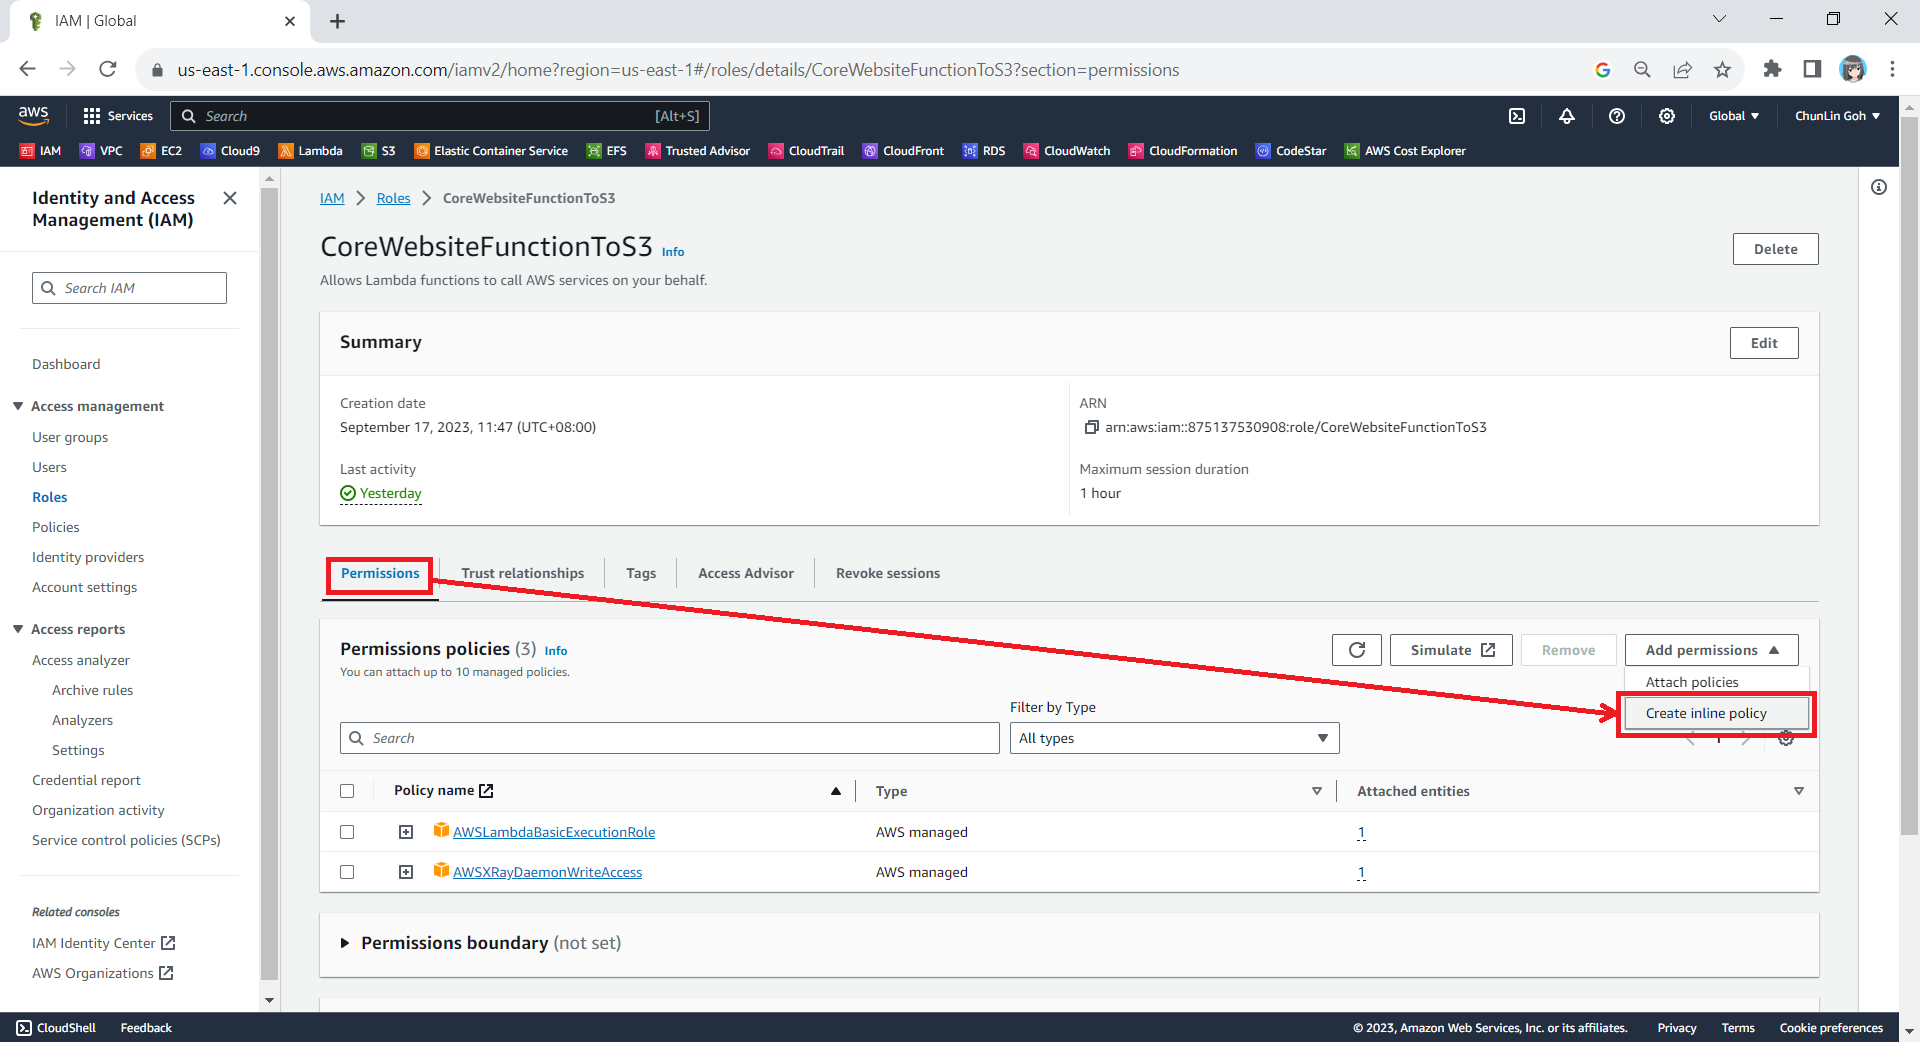
After that, we also need to add one new inline policy under the Permissions tab.
Creating new inline policy.
We need to grant this new role to the list and read access (s3:ListBucket and s3:GetObject) access our S3 bucket (arn:aws:s3:::corewebsitehtml) and its content (arn:aws:s3:::corewebsitehtml/*) with the following policy in JSON. The reason why we grant the list access is so that our .NET code later can tell whether the list is empty or not. If we only grant this new role the read access, the AWS S3 SDK will always return 404.
You can switch to the JSON editor, as shown in the following screenshot, to easily paste the JSON above into the AWS console.
Creating inline policy for our new role to access our S3 bucket.
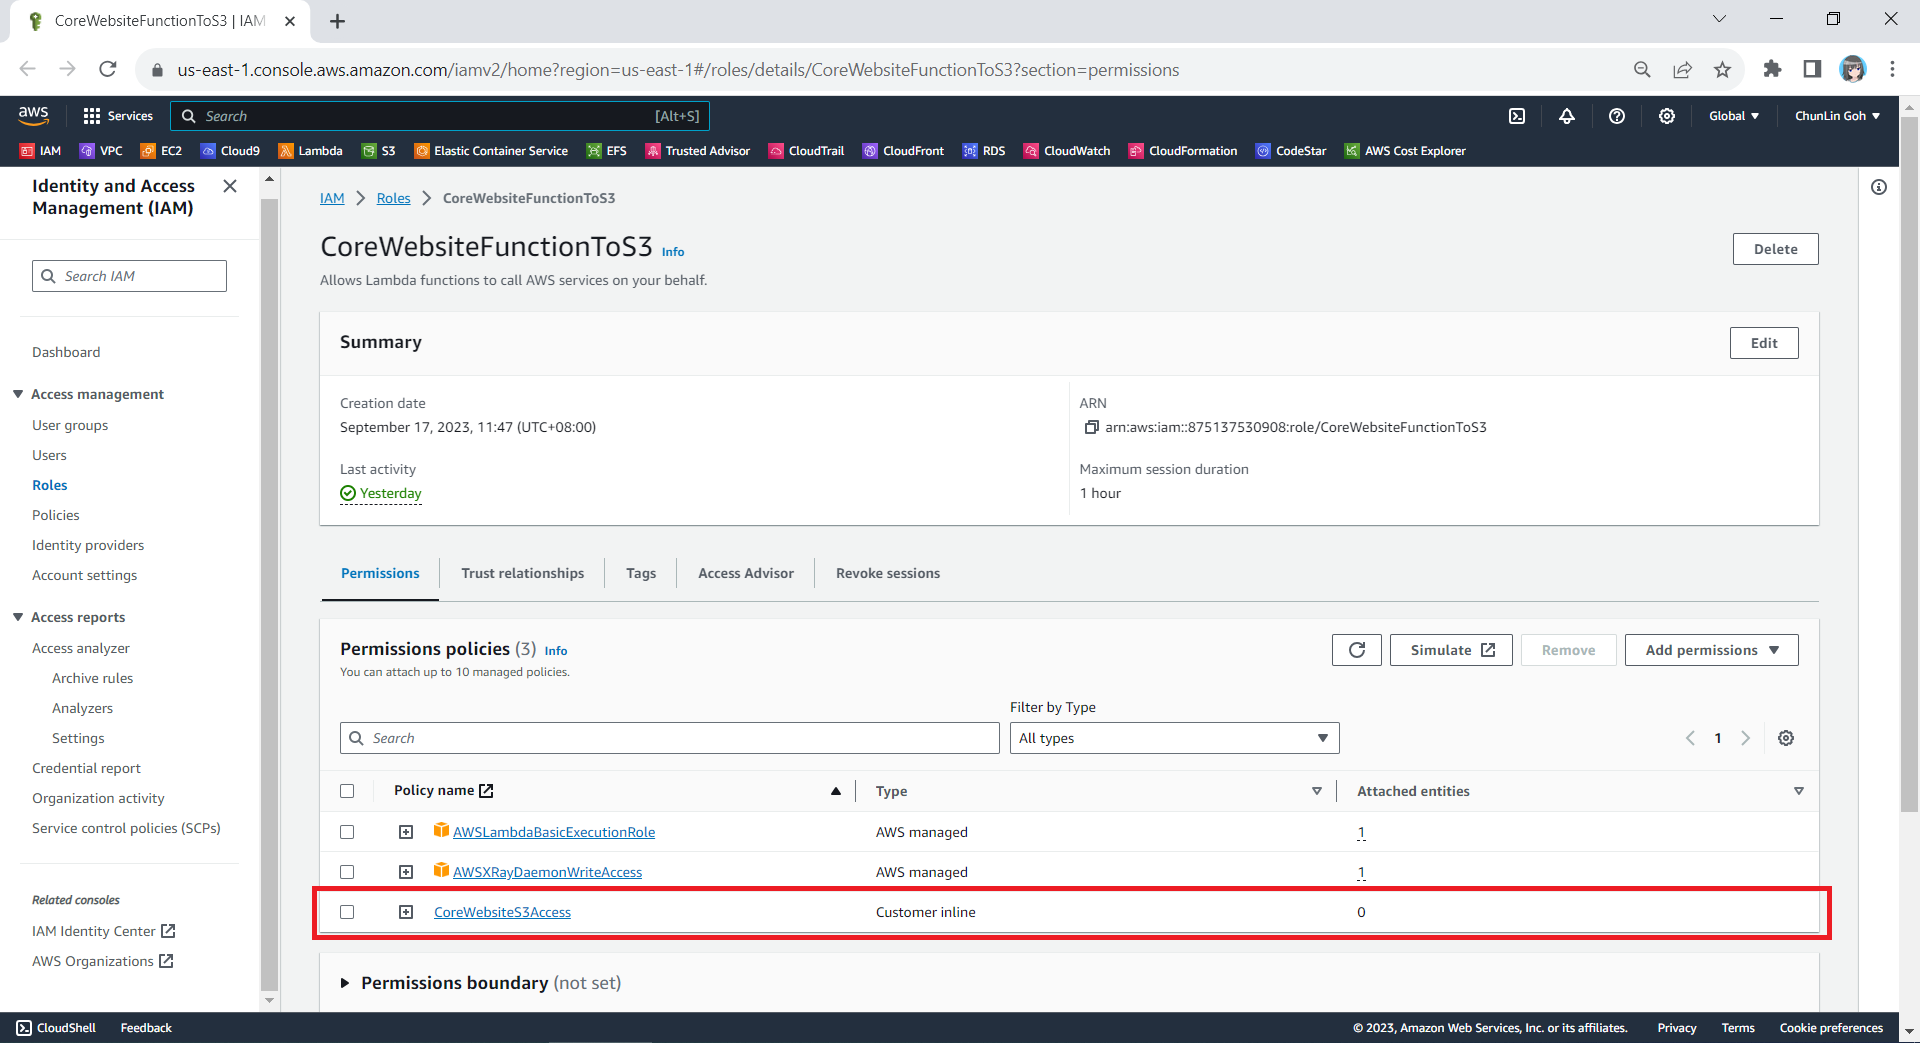
After giving this inline policy a name, for example “CoreWebsiteS3Access”, we can then proceed to create it in the next step. We should now be able to see the policy being created under the Permission Policies section.
We will now have three permission policies for our new role.
Step 3: Set New Role as Lambda Execution Role
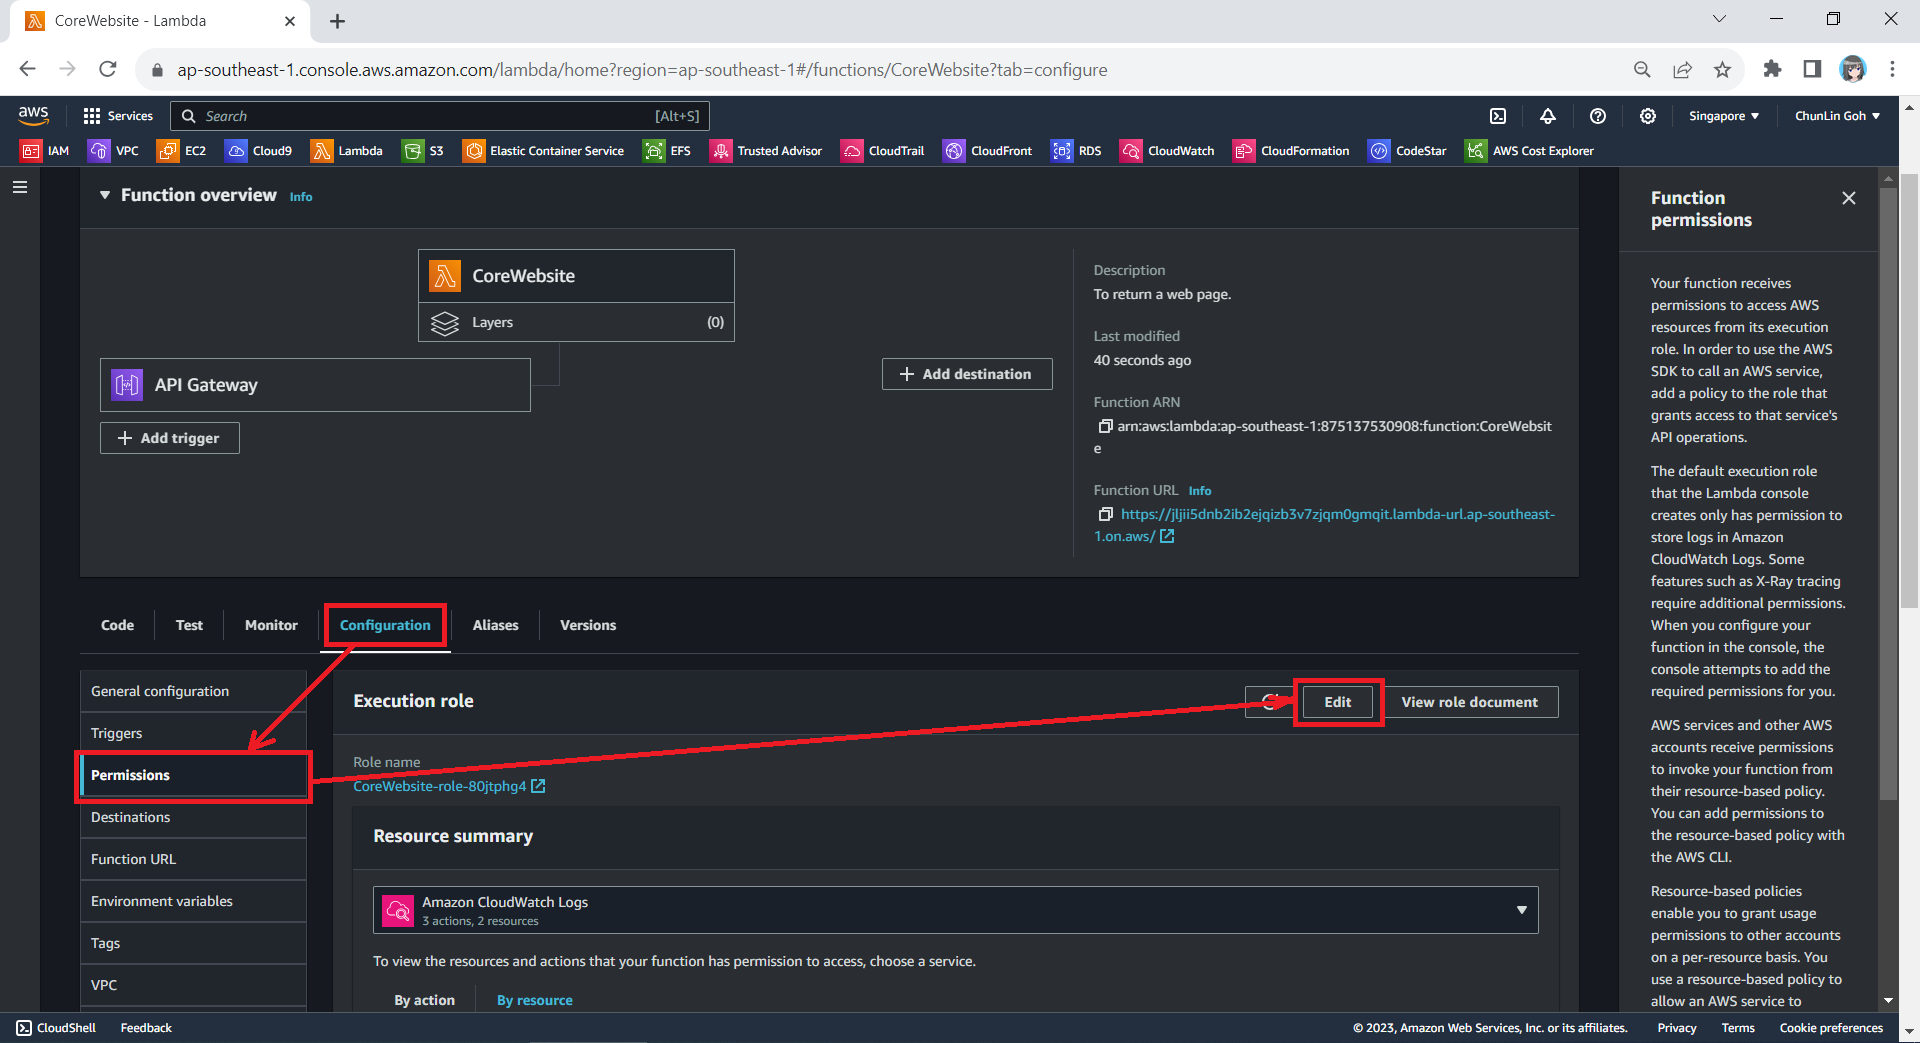
So far we have only setup the new IAM role. Now, we need to configure this new role as the Lambda functions execution role. To do so, we have to edit the current Execution Role of the function, as shown in the screenshot below.
Edit the current execution role of a Lambda function.
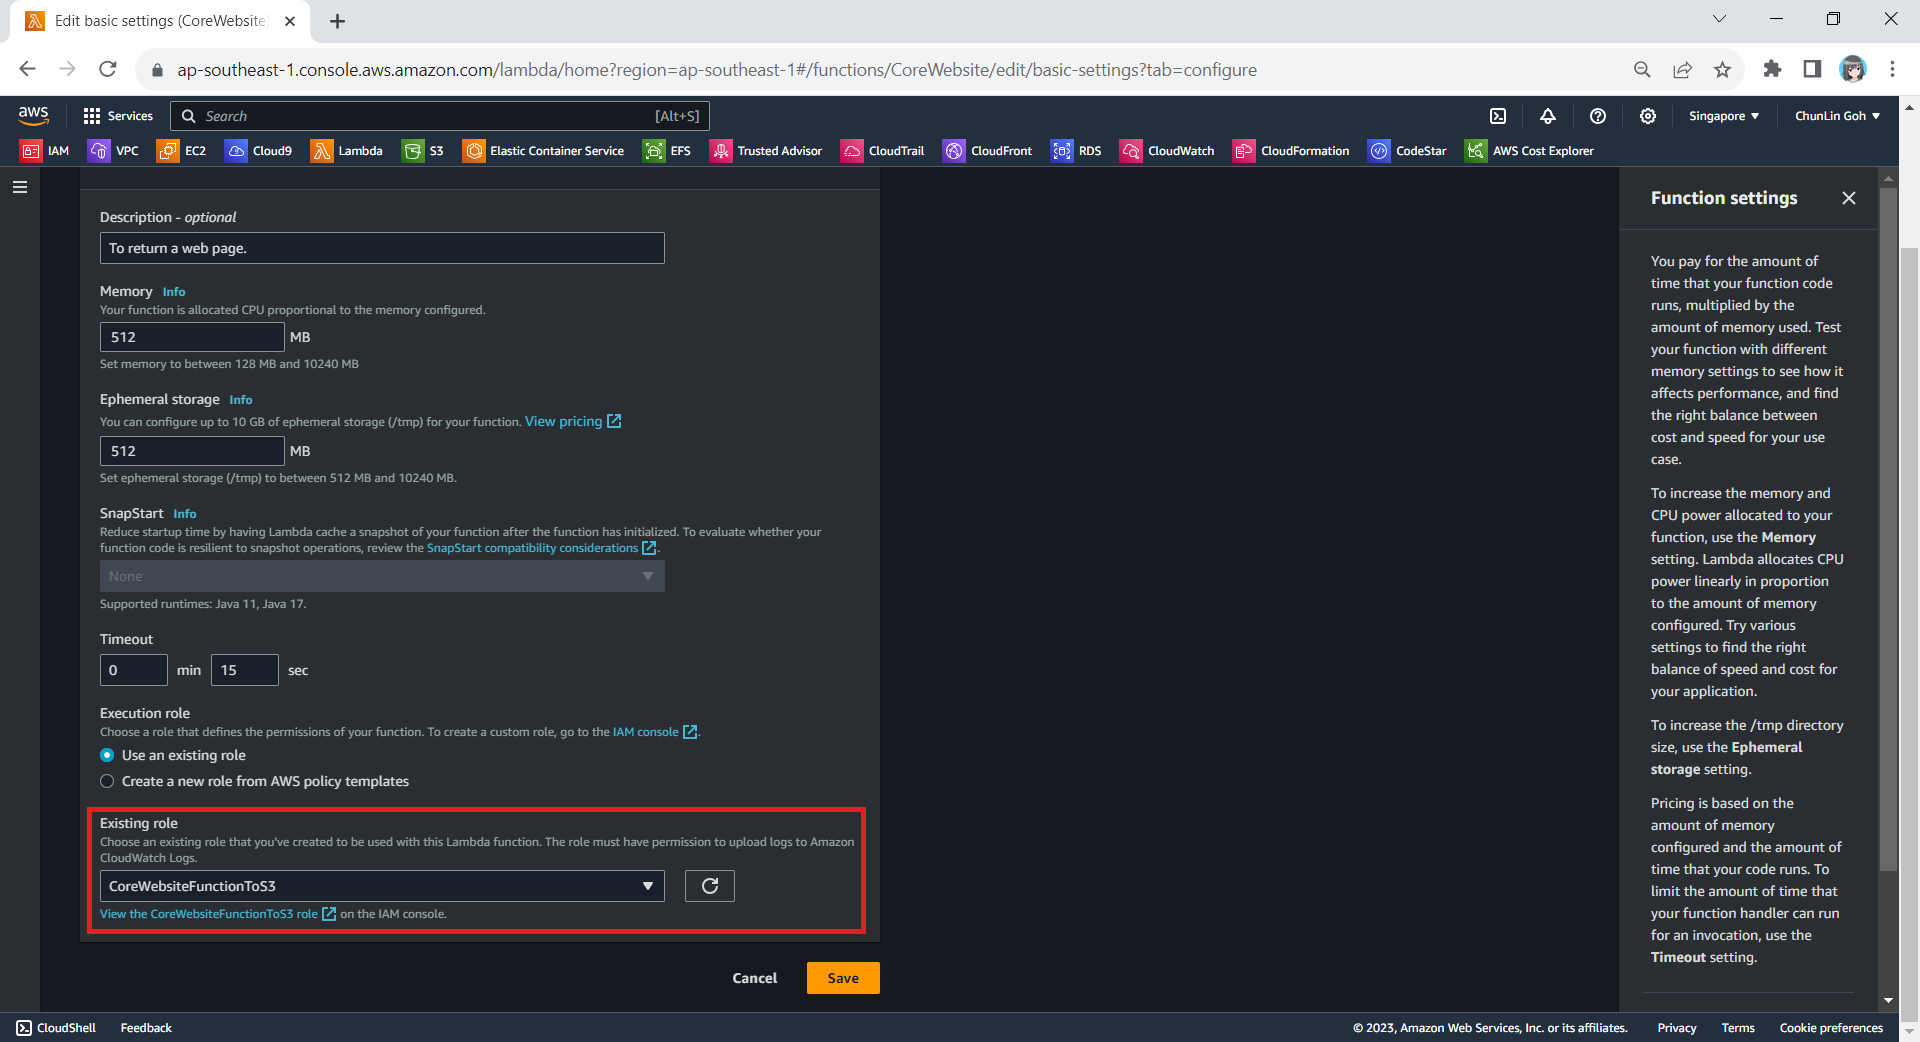
Next, we need to change the execution role to the new IAM role that we have just created, i.e. CoreWebsiteFunctionToS3.
After save the change above, when we visit the Execution Role section of this function again, we should see that it can already access Amazon S3, as shown in the following screenshot.
Yay, our Lambda function can access S3 bucket now.
Step 4: Allow Lambda Access in S3 Bucket
Finally, we also need to make sure that the S3 bucket policy doesn’t explicitly deny access to our Lambda function or its execution role with the following policy.
The JSON policy above can be entered in the Bucket Policy section, as demonstrated in the screenshot below.
Simply click on the Edit button to input our new bucket policy.
Setup Execution Role During Deployment
Since we have updated to use the new execution role for our Lambda function, in our subsequent deployment of the function, we should remember to set the role to be the correct role, i.e. CoreWebsiteFunctionToS3, as highlighted in the screenshot below.
Please remember to use the correct execution role during the deployment.
After we have done all these, we shall be able to see our web content which is stored in S3 bucket to be displayed when we visit the API Gateway URL on our browser.