Create a Docker Image from CentOS Minimal ISO

virtual-box-centos-docker.png

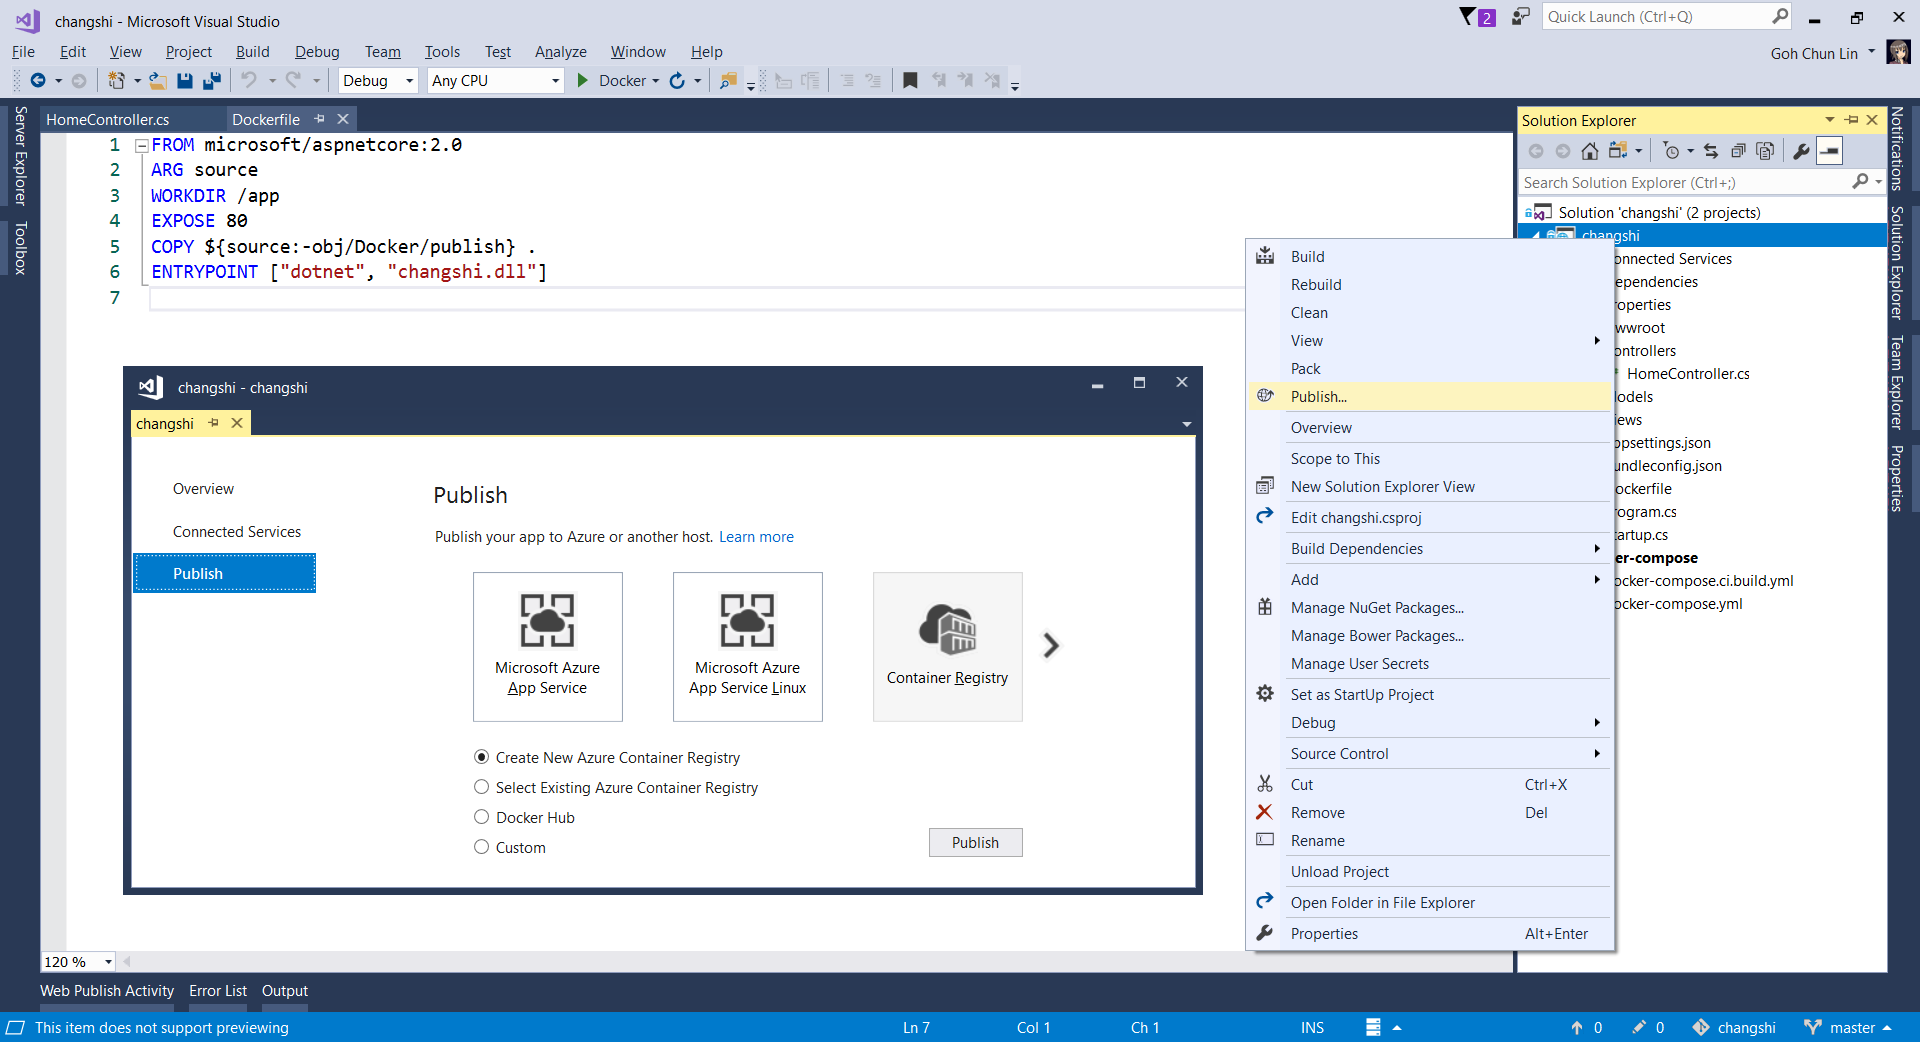
When we are dockerizing an ASP .NET Core application, there will be a file called Dockerfile. For example, the Dockerfile in my previous project, Changshi, has the following content.

FROM microsoft/aspnetcore:2.0
ARG source
WORKDIR /app
EXPOSE 80
COPY ${source:-obj/Docker/publish} .
ENTRYPOINT ["dotnet", "changshi.dll"]

The Dockerfile basically is a set of instructions for Docker to build images automatically. The FROM instruction in the first line initializes a new build stage and sets the Parent Image for subsequent instructions. In the Dockerfile above, it is using microsoft/aspnetcore, the official image for running compiled ASP .NET Core apps, as the Parent Image.

If we need to control the contents of the image, then one way that we can do is to create a Base Image. So, in this post, I’m going to share about my journey of creating a Docker image from CentOS Minimal ISO.

Step 1: Setting up Virtual Machine on VirtualBox

We can easily get the minimal ISO of CentOS on their official website.

download-centos-iso.png
Minimal ISO is available on CentOS Download Page.

After successfully downloading the minimal ISO, we need to proceed to launch the Oracle VM VirtualBox (Download here if you don’t have one).

turn-off-hyperv.png
Switching off Hyper-V.

For Windows users who have Hyper-V enabled because of Docker for Windows, please disable it first otherwise you will either not able to start a VM with 64-bit guest OS even though your host OS is 64-bit Windows 10 or simply encounter a BSOD.

bsod.png
Please switch off Hyper-V before running CentOS 64-bit OS on VirtualBox.

Funny thing is that after switching off Hyper-V, Docker for Windows will make noise saying that it needs Hyper-V to be enabled to work properly. So currently I have to keep switching on and off the Hyper-V feature option depends on which tool I’m going to use.

the-conflict-of-virtualbox-and-docker-between-hyperv.png
VirtualBox vs. Docker for Windows. Pick one.

There is one important step on running CentOS on the VM. We need to remember to configure the Network of the VM to use network adapter attached to “Bridged Adapter”. This is to connect the VM through the host to whatever is our default network device that allocates IP addresses for our physical network. Doing so will help us to retrieve the Docker image tar file via SCP later.

Then in the Network & Host Name section of the installation, we shall see the IP address allocated to the VM.

centos-7-network-and-host-name.png
The IP Address should be available when Ethernet is connected.

To verify whether it works or not, we simply need to use the following command to check if an IP address is successfully allocated to the VM or not. In the minimal installation of CentOS 7, the command ifconfig is already not in use.

# ip a

We then can get the IP Address which is allocated to the VM. Sometimes, I need to wait for about 5 minutes before it can display the IP address successfully.

getting-ip-address.png
The IP address!

Step 2: Installing Docker on VM

After we get the IP address of the VM, we then can SSH into it. On Windows, I use PuTTY, a free SSH client for Windows, to easily SSH to the VM.

ssh-into-vm.png
SSH to the VM with the IP address using PuTTY.

We proceed to install EPEL repository before we can install Docker on the VM.

Since we are going to use wget to retrieve EPEL, we first need to install wget as following.

# yum install wget

Then we can use the wget command to download EPEL repository on the VM.

# wget http://dl.fedoraproject.org/pub/epel/epel-release-latest-7.noarch.rpm

The file will be downloaded to the temp folder. So, to install it we will do the following.

# cd /tmp
# sudo yum install epel-release-latest-7.noarch.rpm

After the installation is done, there should be a success message as following showing on the console.

Installed:
    epel-release.noarch 0:7-11
Complete!

Now if we head to /etc/yum.repos.d, we will see the following files.

CentOS-Base.repo        CentOS-fasttrack.repo       CentOS-Vault.repo
CentOS-CR.repo          CentOS-Media.repo           epel.repo
CentOS-Debuginfo.repo   CentOS-Sources.repo         epel-testing.repo

In the CentOS-Base.repo, we need to enable the CentOS Plus repository which is by default disabled. To do so, we simply change the value of enabled to 1 under [centosplus] section.

Then we can proceed to install docker on the VM using yum.

# yum install docker

Step 3: Start Docker

Once docker is installed, we can then start the docker service with the following command.

# service docker start

So now if we list the images and containers inside the docker, the results should be 0 image and 0 container, as shown in the screenshot below.

docker-installed-without-images-and-containers (2)
No image and no container.

Step 4: Building First Docker Image

Thanks to the people in Moby Project, a collaborative project for the container ecosystem to assemble container-based systems, we have a script to create a base CentOS Docker image using yum.

The script is now available on Moby Project Github repository.

We now need to create a folder called scripts in the root and then create a file called createimage.sh in the folder. This step can be summarized as the following commands.

# mkdir scripts
# cd scripts
# vim createimage.sh

We then need to copy-and-paste the script from Moby Project to createimage.sh.

After that, we need to make createimage.sh executable with the following command.

# chmod +x createimage.sh

To run this script now, we need to do as follows, where centos7base is the name of the image file.

# ./createimage.sh centos7base

After it is done, we will see the centos7base image added in docker. The image is very, very small with only 271MB as its size.

first-docker-image.png
First docker image!

Step 5: Add Something (.NET Core SDK) to Container

Since now we have our first Docker image, then we can proceed to create a container with the following command.

# docker run -i -t  /bin/bash

We will be brought into the container. So now we can simply add something, such as the .NET Core SDK to the container by following the .NET Core installation steps for CentOS 7.1 (64-bit) which can be summarized as the following commands to execute.

# sudo rpm --import https://packages.microsoft.com/keys/microsoft.asc

# sudo sh -c 'echo -e "[packages-microsoft-com-prod]\nname=packages-microsoft-com-prod \nbaseurl=https://packages.microsoft.com/yumrepos/microsoft-rhel7.3-prod\nenabled=1\ngpgcheck=1\ngpgkey=https://packages.microsoft.com/keys/microsoft.asc" > /etc/yum.repos.d/dotnetdev.repo'

# sudo yum update
# sudo yum install libunwind libicu
# sudo yum install dotnet-sdk-2.0.0

# export PATH=$PATH:$HOME/dotnet

We then can create a new image from the changes we have done on the container using the following command where the centos_netcore is the repository name and 1.0 is its tag.

docker commit  [centos_netcore:1.0]

We will then realize the new image container will be quite big with 1.7GB as its size. Thanks to .NET Core SDK.

Step 6: Moving the New Image to PC

The next step that we are going to do is exporting the new image as a .tar file using the following command.

docker save  > /tmp/centos_netcore.tar

Now, we need to launch WinSCP to retrieve the .tar file via SCP (Secure Copy Protocol) to local host.

login-as-root-on-winscp.png
Ready to access the VM via SCP.

Step 7: Load Docker Image

So now we can shutdown the VM and enable back the Hyper-V because the subsequent steps will need Docker for Windows to work.

After restarting our local computer with Hyper-V enabled, we can launch Docker for Windows. After that, we load the image to the Docker using the following command in the directory where we keep the .tar file in local host.

docker load < centos_netcore.tar

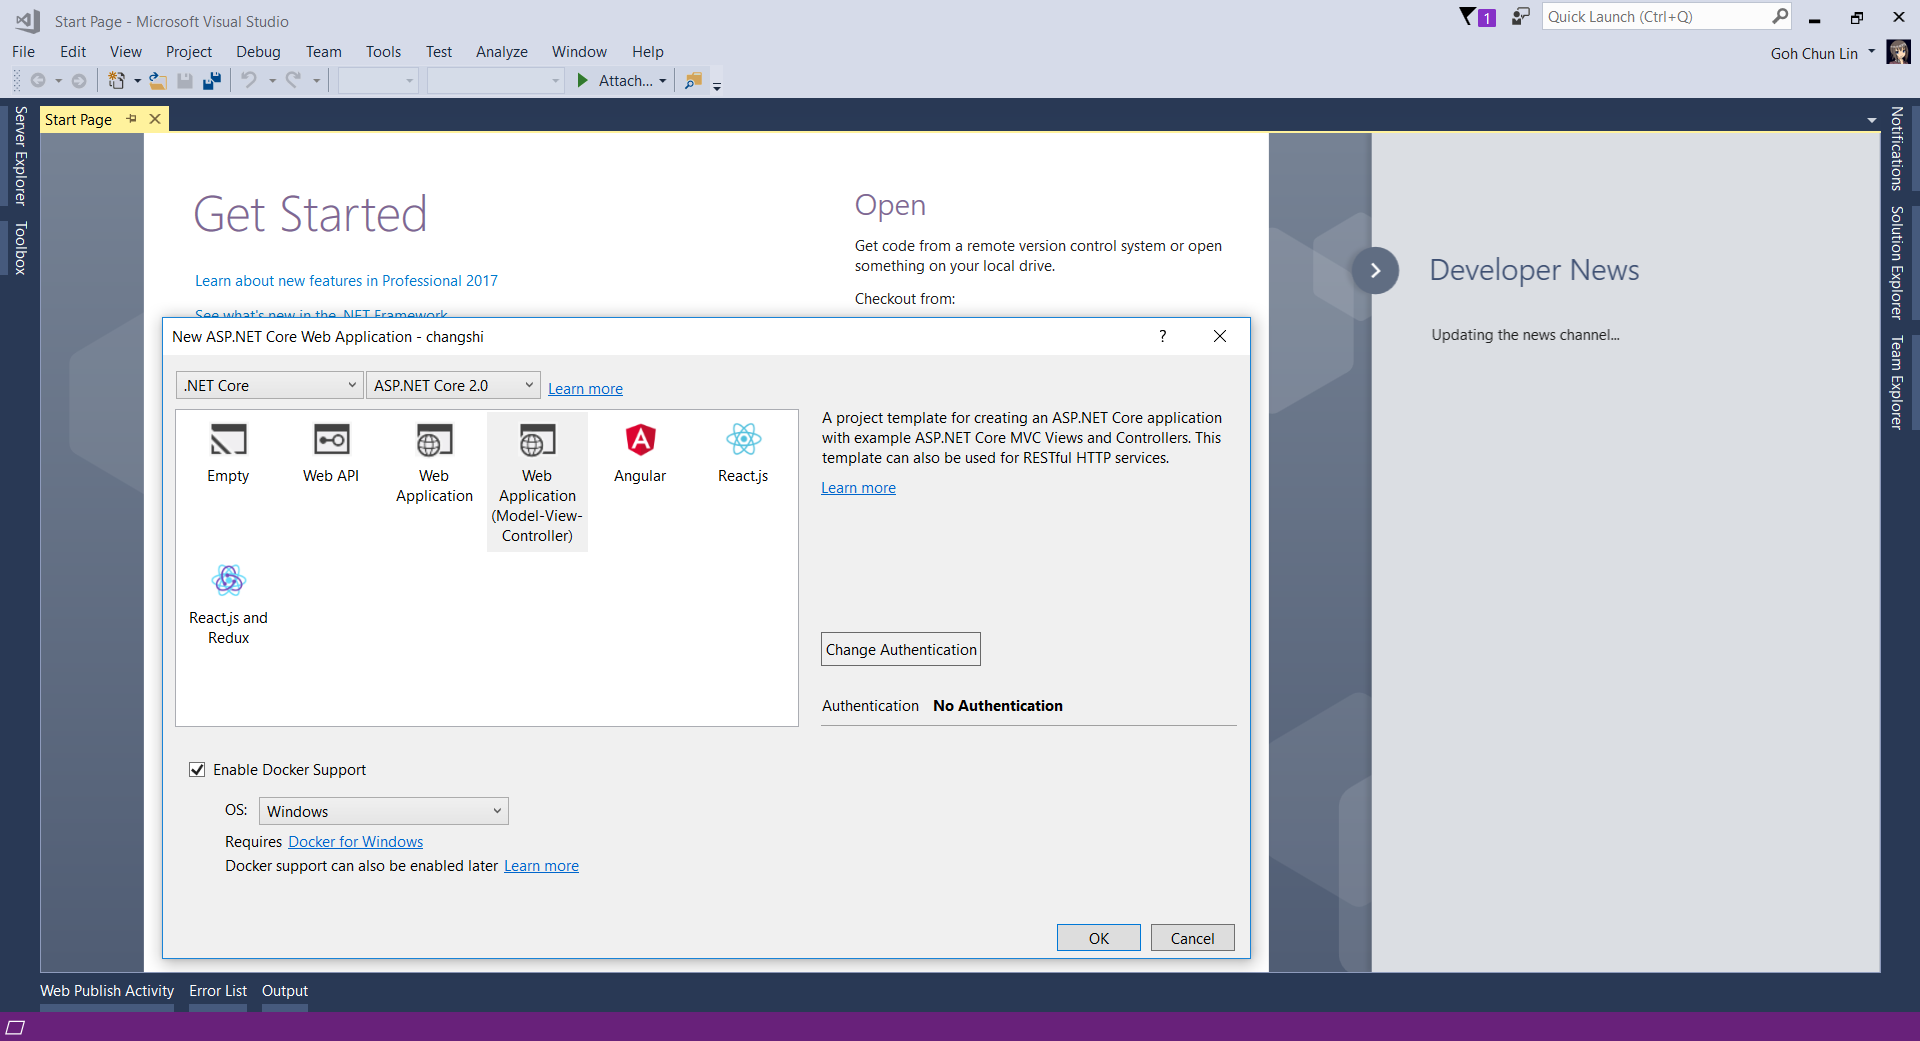
Step 8: Running ASP .NET Core Web App on the Docker Image

Now, we can change the Dockerfile to use the new image we created.

FROM centos_netcore:1.0
ARG source
WORKDIR /app
EXPOSE 80
COPY ${source:-obj/Docker/publish} .
ENTRYPOINT ["dotnet", "changshi.dll"]

When we hit F5 to make it run in Docker, yup, we will get back the website.

No, just kidding. We will actually get an error message that says localhost doesn’t send any data.

localhost-did-not-send-any-data.png
Localhost did not send any data. Why?

So if we read the messages in Visual Studio Output Window, we will see one line of message saying that it’s unable to bind to http://localhost:5000 on the IPv6 loopback interface.

error--99-eaddrnotavail.png
Error -99 EADDRNOTAVAIL

According to Cesar Blum Silveira, Software Engineer from Microsoft ASP .NET Core Team, this problem is because “localhost will attempt to bind to both the IPv4 and IPv6 loopback interfaces. If IPv6 is not available or fails to bind for some reason, you will see that warning.

ipv6-problem-explanation.png
Explanation of Error -99 EADDRNOTAVAIL by Microsoft engineer. (Link)

Then I switch to view the output from Docker on the Output Window.

output-docker.png
Output from Docker

It turns out that the port on docker is port 80. So I tried to add the following line in Program.cs.

public static IWebHost BuildWebHost(string[] args) =>
    WebHost.CreateDefaultBuilder(args)
    .UseUrls("http://0.0.0.0:80") // Added this line
    .UseStartup()
    .Build();

Now, it works again with the beautiful web page.

launched-at-localhost
Success!

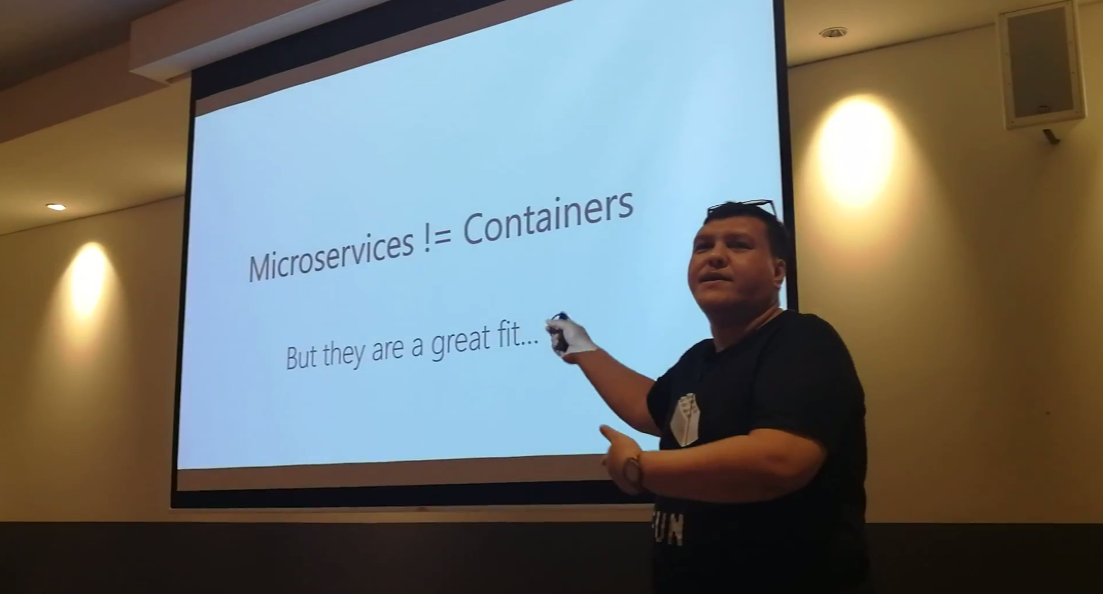
Containers, Containers Everywhere

containers-containers-everywhere.png
The whole concept of Docker images, containers, micro-services are still very new to me. Hence, if you spot any problem in my post, feel free to point out. Thanks in advance!

References

[KOSD Series] IP Addresses of Our Azure App Services that need to be Whitelisted by Our API Providers

KOSD, or Kopi-O Siew Dai, is a type of Singapore coffee that I enjoy. It is basically a cup of coffee with a little bit of sugar. This series is meant to blog about technical knowledge that I gained while having a small cup of Kopi-O Siew Dai.

kosd-azure_web_app-powershell

It is a common scenario for developers to integrate with different parties by using their APIs. Most of the time, the APIs are located in a locked-down network environment where only whitelisted IP addresses are allowed to access their APIs. We will then be asked to give the API providers the IP addresses of our servers.

If it’s our web back-end calling the APIs and we host our web applications on Microsoft Azure App Services, then how could we get the IP addresses?

As mentioned in a discussion about inbound IP address by Benjamin Perkins, the Escalation Engineer on the Azure team, there are about 4 outgoing IP addresses for an Azure Web Apps normally. To retrieve the outbound IP addresses of an Azure web app, we simply need to get it from the Properties of the web app on Azure Portal.

outbound-ip-addresses-in-azure-app-service.png
Locate the outbound IP addresses here.

We can also get the same result if we use the Azure Resource Explorer which is still in preview now.  Benjamin covered this in a video clip on his article too.

For PowerShell lovers, as pointed out by Adrian Calinescu, one of the commenters on Benjamin’s article, we can use PowerShell to find out the outbound IP addresses too. With the new Azure Cloud Shell, we can simply use the following command to retrieve directly the outbound IP addresses of an Azure web app on Azure Portal directly.

Get-AzureRmResource -ResourceGroupName  -ResourceType Microsoft.Web/sites -ResourceName  | select -expand Properties | Select-Object outboundIpAddresses
outbound-ip-addresses-in-azure-app-service-using-powershell.png
Managing Azure resources using shell directly on a browser.

For those who would like to have your own set of outbound IP addresses, please check out ASE (App Service Environment) which grants users control over inbound and outbound application network traffic.

Finally, we can also whitelist all the IP addresses of the Azure datacentres, which can be downloaded here.

azure-datacenter-ip-range-download.png
List of Microsoft Azure Datacentre IP addresses are available on Microsoft website.

References

[KOSD Series] First Attempt of Deploying ASP .NET Core to Azure Container Service

KOSD, or Kopi-O Siew Dai, is a type of Singapore coffee that I enjoy. It is basically a cup of coffee with a little bit of sugar. This series is meant to blog about technical knowledge that I gained while having a small cup of Kopi-O Siew Dai.

kosd-docker-azure_container_registry-vsts

Last month, after sharing the concepts and use cases of Domain Driven Development, Riza moved on to talk about Containers in the sharing session of Singapore .NET Developers Community.

microservices-not-equal-to-containers.png
Riza’s talking about Containers. Yes, microservices are not containers!

Learning Motivation

In the beginning of Riza’s talk, he mentioned GO-JEK, an Indonesia ride-hailing phone service. Due to their rapid growth, the traditional monolithic architecture can no longer support their business. Hence, they switched to use a modern approach which includes moving apps to containers.

go-jek-containers.png
Go-Jek team is working on moving apps to container.

Hence, after the meetup, I was very excited to find out more about micro-services and Docker containers. With the ability of .NET Core to be cross-platform, as a Azure lover, I am interested to find out more how I can deploy ASP .NET Core web app to a container in Azure. So, I decided to write this short article to share with my teammates about this that they can learn while drinking a cup of coffee.

Creating New Project with Docker Support

Since I am trying it out as personal project, I choose to start it with a new ASP .NET Core project. Then in the Visual Studio, I can easily turn it to be a Docker supporting app easily by checking the “Enable Docker Support” option.

enable-docker-support.png
Enable Docker Support

For existing web application projects, we will not have the screen above. Luckily, it is still easy to add Docker Support to an existing ASP .NET Core project on Visual Studio.

add-docker-support-to-existing-project
Enabling Docker Support in existing projects.

Then by clicking on the “F5” button to run the project, I manage to get the following screen (The background is customized by me). The message is displayed using the following line.

System.Runtime.InteropServices.RuntimeInformation.OSDescription;
launched-at-localhost.png
Yay, we managed to run the web app inside a Linux container locally.

Publishing to Microsoft Azure with Continuous Delivery

Without Continuous Delivery, we also can easily right-click the web application to publish it to the Container Registry on Azure.

publishing-to-container-registry
Creating a new Azure Container Registry which will have the Docker image published to.

Then, on Azure Portal, we will see three new resources added. Firstly, we will have the Container Registry.

Then, we will also have an app service site which is running the image downloaded from the Container Registry. Finally, we have an App Service Plan which needs to be at least B1 because free and shared SKUs are not available for apps running on Linux (The official Microsoft documentation says we should have the VM size of the App Service Plan to be S1 or larger though).

container-registry-on-azure.png
Container Registry for my new web app, Changshi.

To enable Continuous Delivery, I choose to use Github + Visual Studio Team Services (VSTS). By doing so, build and release will be automatically started whenever I check in code to Github.

build-on-vsts
Build history and details on VSTS.

Yup, this is so far what I have tried out in my first step of playing with containers. If you are interested, please check out the references listed below.

References

Load Balancing Azure Web Apps with Nginx

nginx-ubuntu-azurevm.png

This morning, my friend messaged me a Chinese article about how to do clustering with Linux + .NET Core + Nginx. As we are geek first, we are going to try it out with different approaches. While my friend was going to set up on RaspberryPi, as a developer who loves playing with Microsoft Azure, I proceed to do load balancing of Azure Web Apps in different regions with Nginx.

Setup Two Azure Web Apps

Firstly, I deployed the same ASP .NET Core 2 web app to two different Azure App Services. One of them is deployed at Australia East; another one is deployed at South India (Huuray, Microsoft opens Azure India to the world in April 2017!).

The homepage of my web app, Index.cshtml, is as follows to display the information in Request.Headers.


Index.png
Since WordPress cannot show the HTML code properly, I show the code as an image here.


In the code above, Request.Headers[“X-Forwarded-For”] is used to get the actual visitor’s IP address instead of the IP address of the Nginx load balancer. To allow this to work, we need to have the following codes added in Startup.cs.

app.UseForwardedHeaders(new ForwardedHeadersOptions
{
    ForwardedHeaders = 
        ForwardedHeaders.XForwardedFor | ForwardedHeaders.XForwardedProto
});
azure-regions.png
In this article, we will set up load balancer in Singapore for websites hosting in India and Australia.

Configure Linux Virtual Machine on Azure

Secondly, as described in the Chinese article mentioned above, the Nginx needs to be set up on a Linux server. The OS used in my case is Ubuntu 17.04.

installing-ubuntu-server-17-on-azure.png
Creating a new Ubuntu server running on Microsoft Azure virtual machine.

The Authentication Type that was chosen is the SSH Public Key option. Hence, we need to create public and private keys using OpenSSL tool. There is a tutorial from Microsoft showing steps on how to generate the keys using Git Bash and Putty.

Installing Nginx

After that, I installed Nginx by using the following command.

sudo apt-get install nginx

After installing it, in order to test whether Nginx is installed properly, I visited the public IP address of the virtual machine. However, it turns out that I couldn’t visit the server because the port 80 by default is not opened on the virtual machine.

Hence, the next step I need to do is opening port using Azure Portal by adding a new inbound security rule for the port 80 and then associate it to the subnet of the virtual network of the virtual machine.

Then when I revisited the public IP of the server, I could finally see the “Welcome to Nginx” success page.

successfully-opened-port-and-installed-nginx.png
Nginx is now successfully running on our Ubuntu server!

Mission: Load Balancing Azure Web Apps with Nginx

As the success page mentioned, further configuration is required. So, we need to edit the configuration file by first opening it up with the following command.

sudo nano /etc/nginx/sites-available/default

The first section that I added is the Cache Configuration.

# Cache configuration
proxy_temp_path /var/www/proxy_tmp;
proxy_cache_path /var/www/proxy_cache levels=1:2 keys_zone=my_cache:20m inactive=60m max_size=500m;

The proxy_temp_path is the path to the directory where the temporary files should be stored at when the response from the upstream server cannot fit into the configured buffers.

The proxy_cache_path is about in which directory the cache should be stored at. The levels=1:2 means that the cache will be stored in a single-character directory with a two-character subdirectory. The keys_zone parameter defines a my_cache cache zone which can store 20MB of keys at most but with the maximum size of the actual data to be 500MB. The inactive=60m means the maximum inactive time cache can be stored, which is 60 minutes in this case.

Next, upstream needs to be defined as follows.

# Cluster sites configuration
upstream backend {
    server dotnetcore-clustering-web01.azurewebsites.net fail_timeout=30s;
    server dotnetcore-clustering-web02.azurewebsites.net fail_timeout=30s;
}

For the default server configuration, we need to make a few modifications to it.

# Default server configuration
# 
server {
    listen 80 default_server;
    listen [::]:80 default_server;
    server_name localhost;
    
    ...
    
    location / {
        proxy_pass http://backend;
        proxy_set_header X-Forwarded-For $proxy_add_x_forwarded_for;
        try_files $uri $uri/ =404;
    }
}

Now, we just need to restart the Nginx with the following command.

sudo service nginx restart

Then when we visit the Ubuntu server again, we will realize that we sort of able to reach Azure Web Apps but not really so because it says 404!

404-on-azure.png
Oops, the Nginx routes the visitor to 404 land.

Troubleshooting 404 Error

According to another article which is written by Issac Lázaro, he said this was due to the fact that Azure App Service uses cookies to do ARR (Application Request Routing), hence we need to have the Ubuntu server to pass the header to the web apps by modifying our Nginx configuration to the following.

# Cluster sites configuration
upstream backend {
    server localhost:8001 fail_timeout=30s;
    server localhost:8002 fail_timeout=30s;
}
...

server {
    listen 8001;
    server_name web01;

    location / {
        proxy_set_header Host dotnetcore-clustering-web01.azurewebsites.net;
        proxy_pass http://dotnetcore-clustering-web01.azurewebsites.net;
    }
}

server {
    listen 8002;
    server_name web02;
    
    location / {
        proxy_set_header Host dotnetcore-clustering-web02.azurewebsites.net;
        proxy_pass http://dotnetcore-clustering-web02.azurewebsites.net;
    }
}

Then when we refresh the page, we shall see the website is loaded correctly with the content will be delivered from either web01 or web02.

success.png
Yay, we make it!

Yup, that’s all about setting up a simple Nginx to load balance multiple Azure Web Apps. You can refer to the following articles for more information about Nginx and load balancing.

References

  1. How to open ports to a virtual machine with the Azure portal
  2. Can’t start Nginx – Job for nginx.service failed
  3. Linux+.NetCore+Nginx搭建集群
  4. Understanding Nginx HTTP Proxying, Load Balancing, Buffering, and Caching
  5. Module ngx_http_upstream_module
  6. How To Set Up Nginx Load Balancing with SSL Termination