Beginning with Windows 2000, Microsoft Windows operating systems have been shipped with a data protection interface known as DPAPI (Data Protection Application Programming Interface). DPAPI is a simple cryptographic API. It doesn’t store any persistent data for itself; instead, it simply receives plaintext and returns cyphertext.
In the code above, instead of storing key at the default location, which is %LOCALAPPDATA%, we store it on a network drive by specifying the path to the UNC Share.
The code above shows how we can store keys on a UNC share. If we head to the directory \server\shared\directory\, we will be seeing an XML file with content similar as what is shown below.
As we can see, the key <masterKey> itself is in an unencrypted form.
Hence, in order to protect the data protection key ring, we need to make sure that the storage location should be protected as well. Normally, we can use file system permissions to ensure only the identity under which our web app runs has access to the storage directory. Now with Azure, we can also protect our keys using Azure Key Vault, a cloud service for securely storing and accessing secrets.
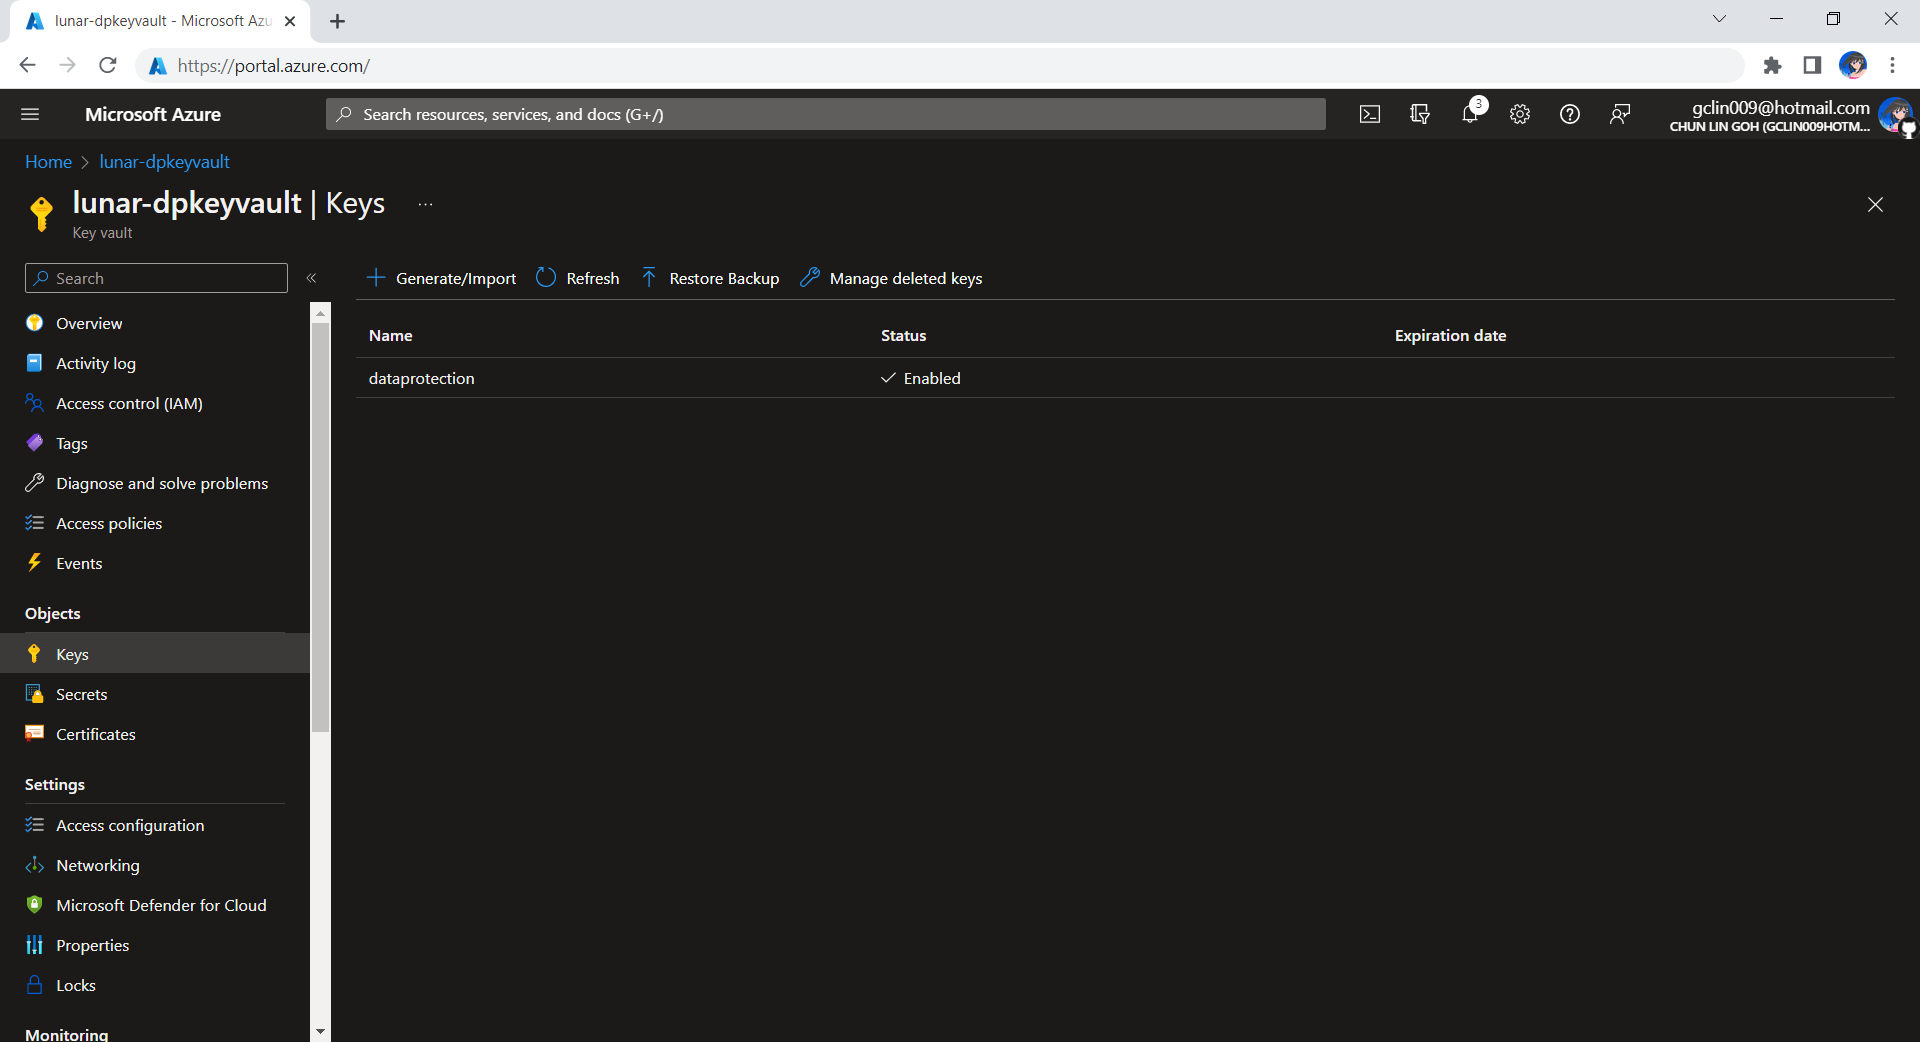
The approach we will take is to first create an Azure Key Vault called lunar-dpkeyvault with a key named dataprotection, as shown in the screenshot below.
Created a key called dataprotection on Azure Key Vault.
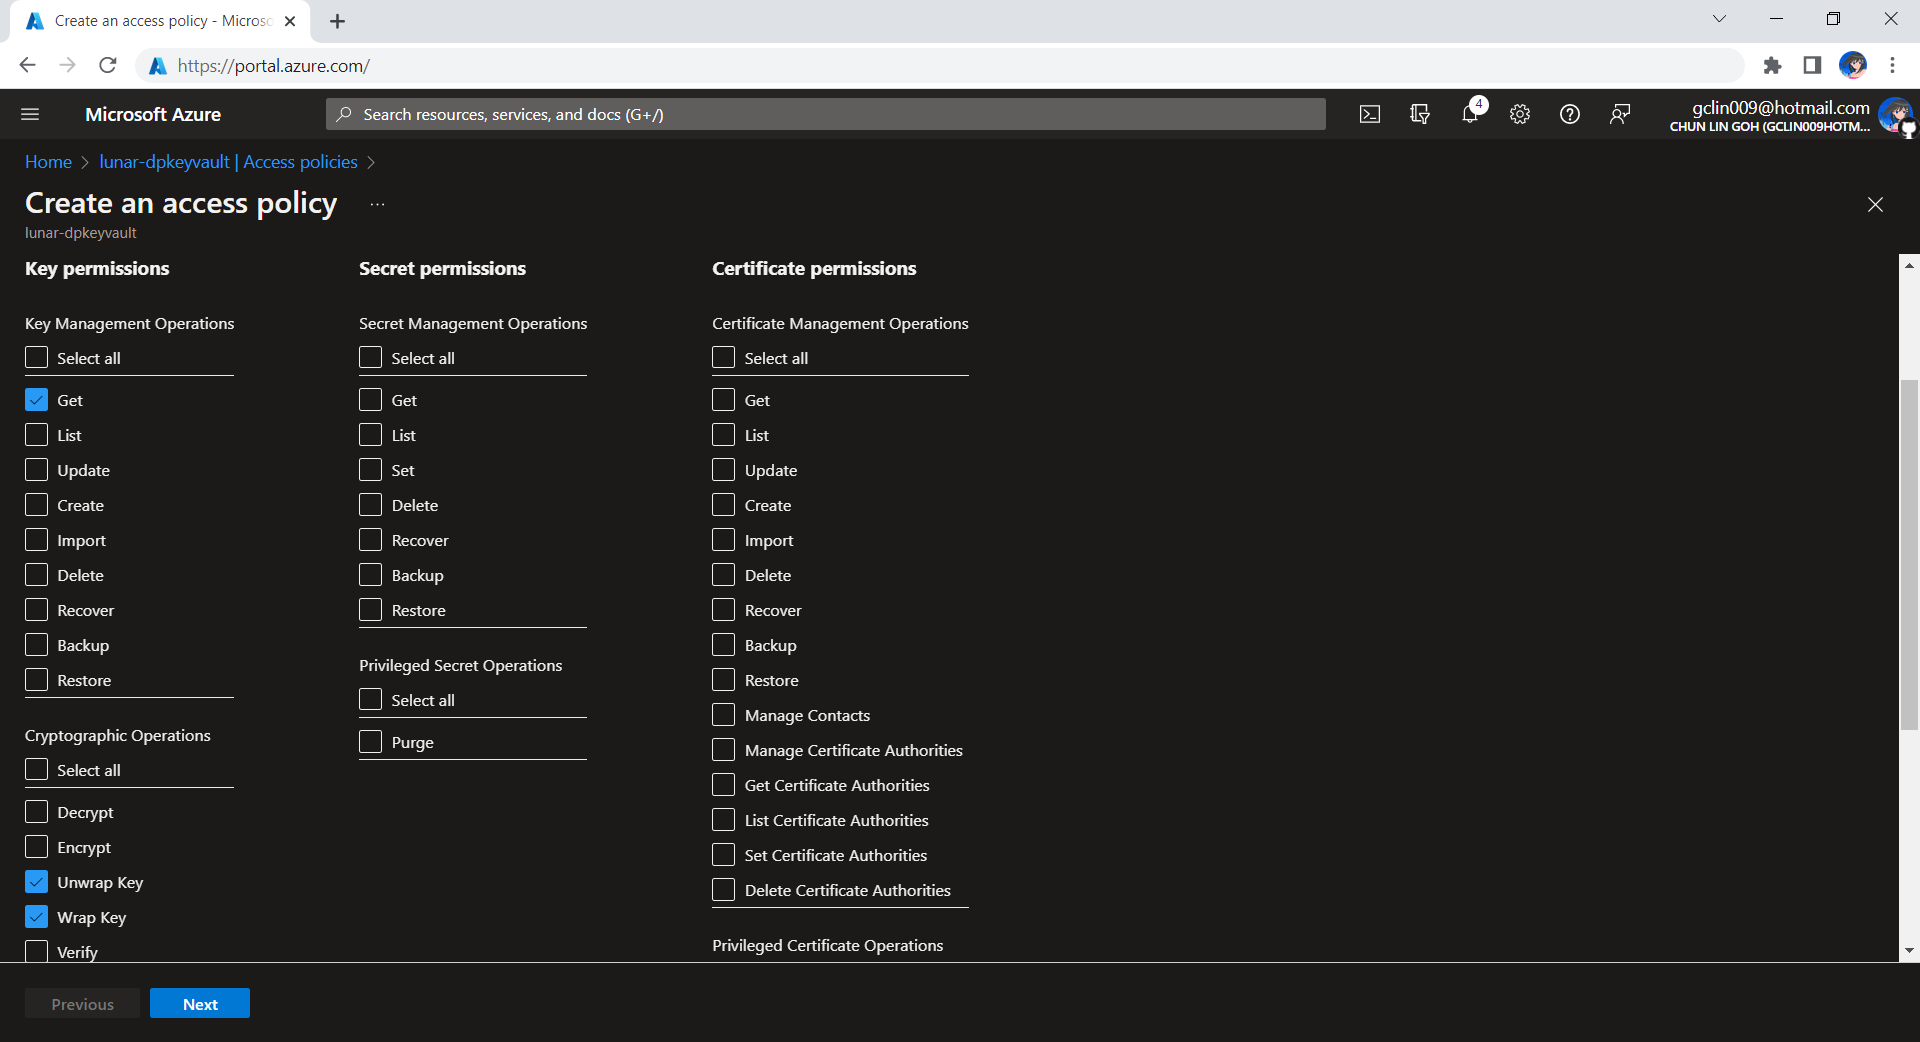
The credential can be a ClientSecretCredential object or DefaultAzureCredential object.
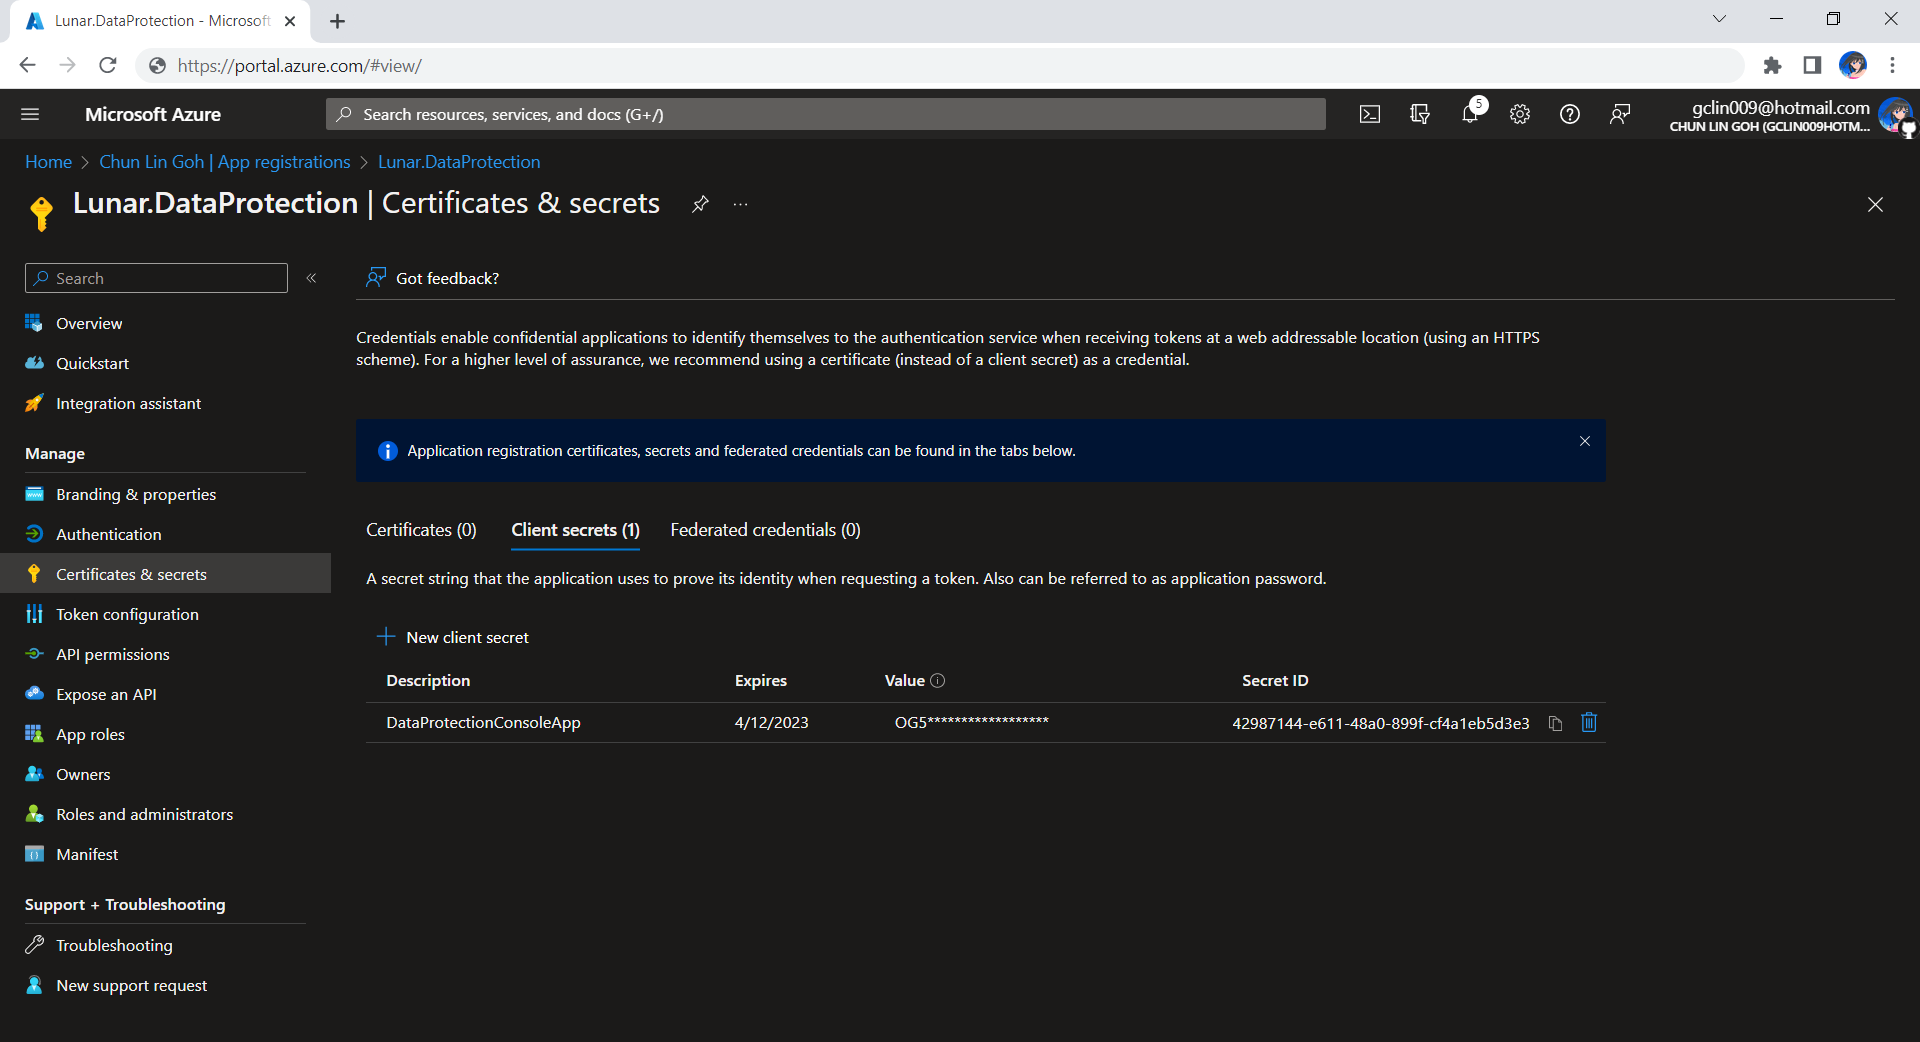
Tenant Id, Client Id, and Client Secret can be retrieved from the App Registrations page of the app having the access to the Azure Key Vault above. We can use these three values to create a ClientSecretCredential object.
Now, if we check again the newly generated XML file, we shall see there won’t be <masterKey> element anymore. Instead, it is replaced with the content shown below.
<encryptedKey xmlns="">
    <!-- This key is encrypted with Azure Key Vault. -->
    <kid>https://lunar-dpkeyvault.vault.azure.net/keys/dataprotection/...</kid>
    <key>HSCJsnAtAmf...RHXeeA==</key>
    <iv>...</iv>
    <value>...</value>
</encryptedKey>
Key Lifetime
We shall remember that, by default, the generated key will have a 90-day lifetime. This means that the app will automatically generate a new active key when the current active key expires. However, the retired keys can still be used to decrypt any data protected with them.
To create a protector, we need to specify Purpose Strings. A Purpose String provides isolation between consumers so that a protector cannot decrypt cyphertext encrypted by another protector with different purpose.
Now we need to have a web app as a remote control which will send command to the music player to play the selected song. In this article, we will talk about the web portal and how we access the OneDrive with Microsoft Graph and go-onedrive client.
[Image Caption: System design of this music player together with its web portal.]
I had a discussion with Shaun Chong, the Ninja Van CTO, and I was told that they’re using Gin web framework. Hence, now I decide to try the framework out in this project as well.
Gin offers a fast router that’s easy to configure and use. For example, to serve static files, we simply need to have a folder static_files, for example, in the root of the programme together with the following one line.
However, due to the fact that later I need to host this web app on Azure Function, I will not go this route. Hence, currently the following are the main handlers in the main function.
The first line is to load all the HTML template files (*.tmpl.html) located in the templates folder. The templates we have include some reusable templates such as the following footer template in the file footer.tmpl.html.
After importing the templates, we have five routes defined. All of the routes start with /api/HttpTrigger is because this web app is designed to be hosted on Azure Function with a HTTP-triggered function called HttpTrigger.
The first three routes are for authentication. Then after that is one route for loading the web pages, and one handler for sending RabbitMQ message to the Raspberry Pi.
The showMusicListPage handler function will check whether the user is logged in to Microsoft account with access to OneDrive or not. It will display the homepage if the user is not logged in yet. Otherwise, if the user has logged in, it will list the music items in the user’s OneDrive Music folder.
There are many ways to host Golang web application on Microsoft Azure. The place we will be using in this project is Azure Function, the serverless service from Microsoft Azure.
The custom handler provides a lightweight HTTP server written in any language which then enables developers to bring applications, such as those written in Golang, into Azure Function.
[Image Caption: The relationship between the Functions host and a web server implemented as a custom handler. (Image Source: Microsoft Docs – Azure)]
The defaultExecutablePath is pointing to the our Golang web app binary executable which is output by go build command.
So, in the wwwroot folder of the Azure Function, we should have the following items, as shown in the screenshot below.
[Image Caption: The wwwroot folder of the Azure Function.]
Since we have already enabled the HTTP Request Forwarding, we don’t have to worry about the HttpTrigger directory. Also, we don’t have to upload our web app source codes because the executable is there already. What we need to upload is just the static resources, such as our HTML template files in the templates folder.
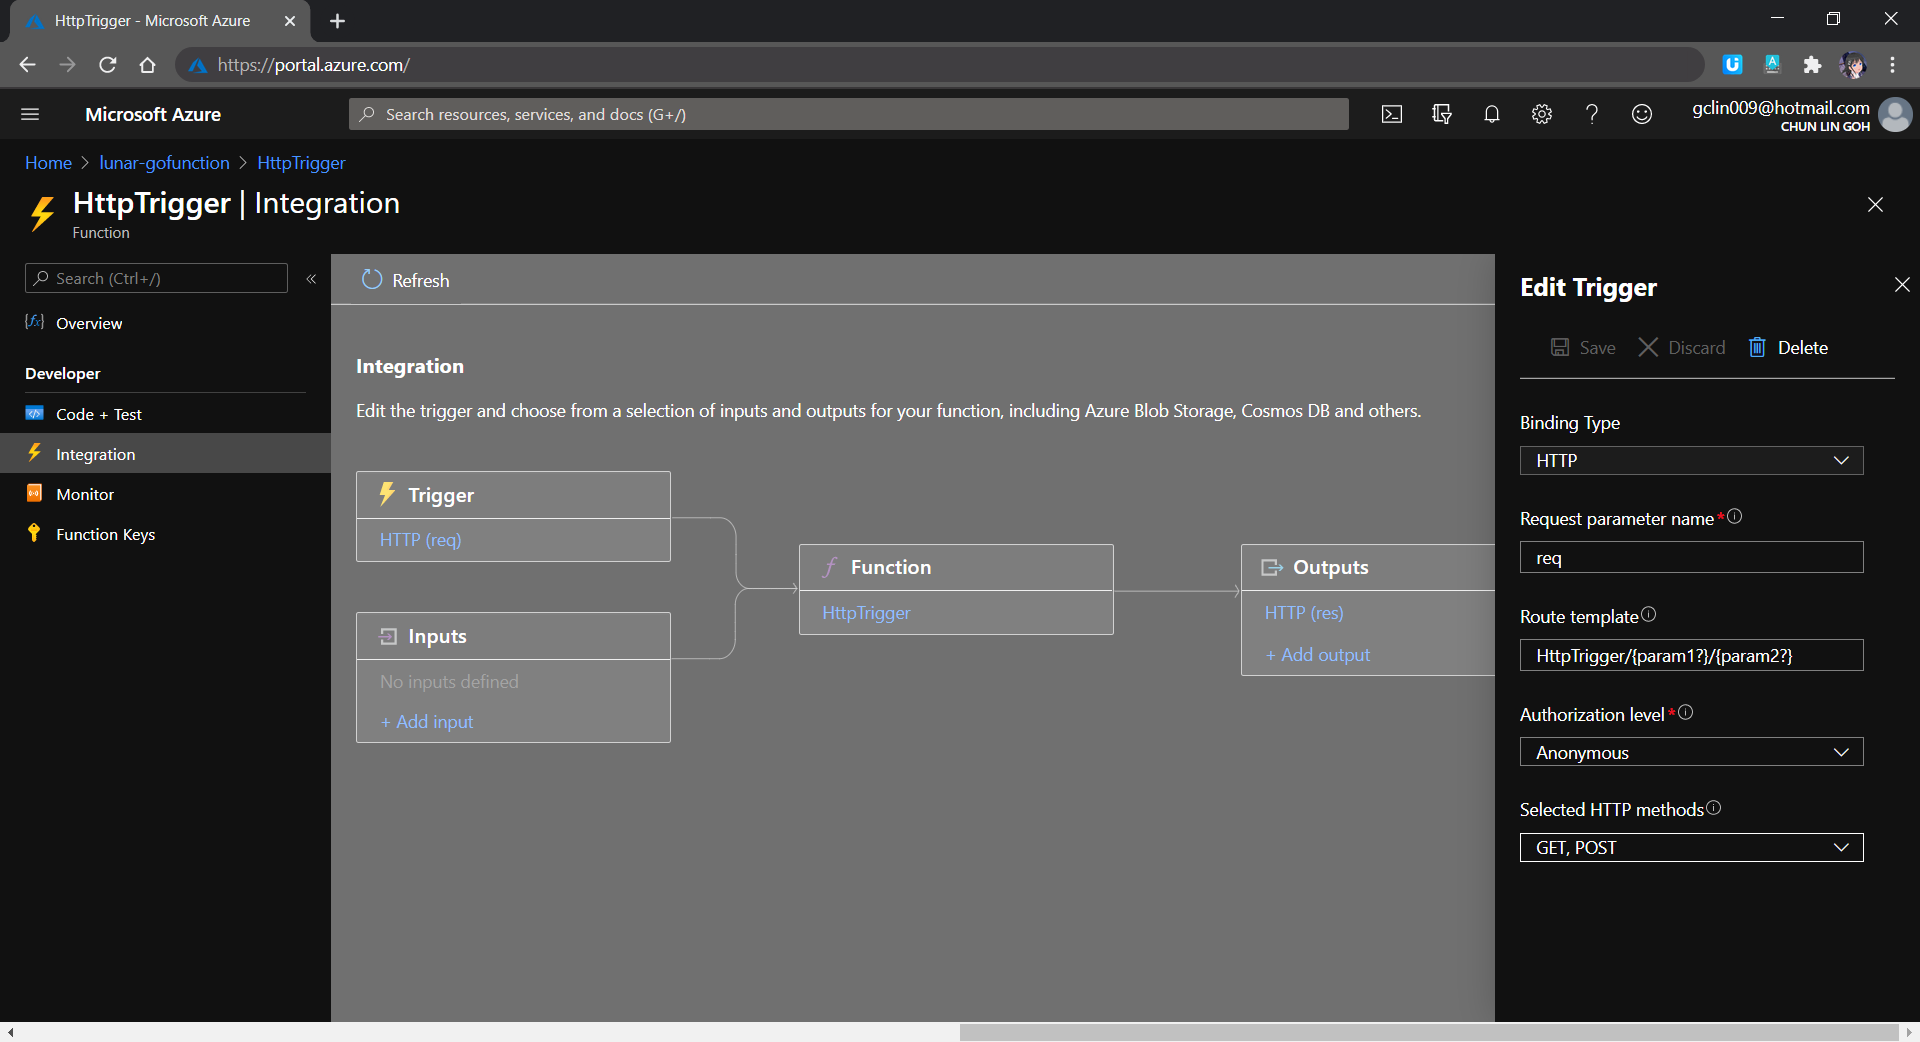
The reason why I don’t upload other static files, such as CSS JavaScript, and image files, is that those static files can be structured to have multiple directory levels. We will encounter a challenge when we are trying to define the Route Template of the Function, as shown in the screenshot below. There is currently no way to define route template without knowing the maximum number of directory level we can have in our web app.
[Image Caption: Defining the route template in the HTTP Trigger of a function.]
Hence, I move all the CSS, JS, and image files to Azure Storage instead.
From the Route Template in the screenshot above, we can also understand why the routes in our Golang web app needs to start with /api/HttpTrigger.
Golang Client Library for OneDrive API
In this project, users will first store the music files online at their personal OneDrive Music folder. I restrict it to only the Music folder is to make the management of the music to be more organised. So it is not because there is technical challenge in getting files from other folders in OneDrive.
Currently, the go-onedrive only support simple API methods such as getting Drives and DriveItems. These two are the most important API methods for our web app in this project. I will continue to enhance the go-onedrive library in the future.
[Image Caption: OneDrive can access the metadata of a music file as well, so we can use API to get more info about the music.]
The go-onedrive library does not directly handle authentication. Instead, when creating a new client, we need to pass an http.Client that can handle authentication. The easiest and recommended way to do this is using the oauth2 library.
So the next thing we need to do is adding user authentication feature to our web app.
Microsoft Graph and Microsoft Identity platform
Before our web app can make requests to OneDrive, it needs users to authenticate and authorise the application to have access to their data. Currently, the official recommended way of doing so is to use Microsoft Graph, a set of REST APIs which enable us to access data on Microsoft cloud services, such as OneDrive, User, Calendar, People, etc. For more information, please refer to the YouTube video below.
So we can send HTTP GET requests to endpoints to retrieve information from OneDrive, for example /me/drives will return the default drive of the currently authenticated user.
Generally, to access OneDrive API, developers are recommend to use the standard OAuth 2.0 authorisation framework with the Azure AD v2.0 endpoint. This is where we will talk about the new Microsoft Identity Platform, which is the recommended way for accessing Microsoft Graph APIs. Microsoft Identity Platform allows developers to build applications that sign in users, get tokens to call the APIs, as shown in the diagram below.
[Image Caption: Microsoft Identity Platform experience. (Image Source: Microsoft Docs – Azure)]
[Image Caption: Microsoft Identity Platform endpoints are used in the Golang OAuth2 package since December 2017.]
Now the first step we need to do is to register an Application with Microsoft on the Azure Portal. From there, we can get both the Client ID and the Client Secret (secret is now available under the “Certificates & secrets” section of the Application).
After that, we need to find out the authentication scopes to use so that the correct access type is granted when the user is signed in from our web app.
With those information available, we can define the OAuth2 configuration as follows in our web app.
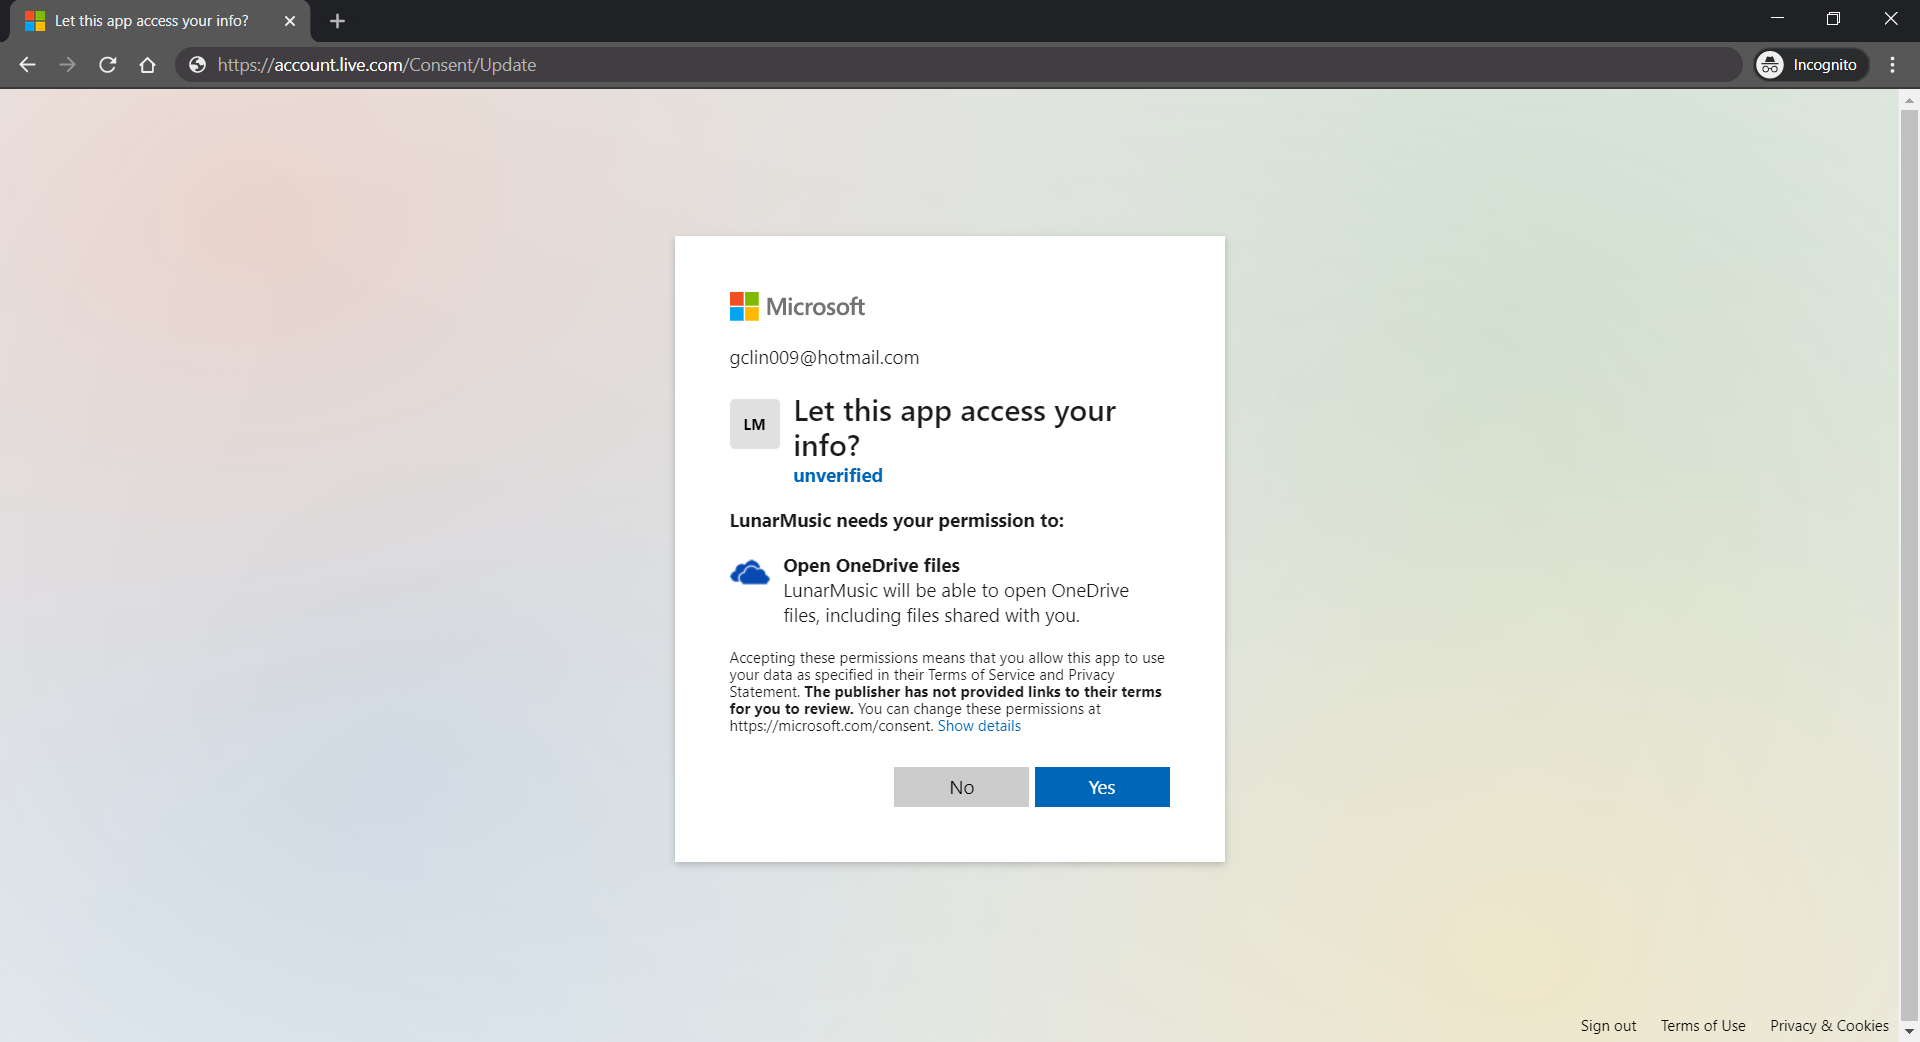
The “file.read” scope is to grant read-only permission to all OneDrive files of the logged in user. By the way, to check the Applications that you are given access to so far in Microsoft Account, you can refer to the consent management page of Microsoft Account.
Access Token, Refresh Token, and Cookie
The “offline_access” scope is used here because we need a refresh token that can be used to generate additional access tokens as necessary. However, please take note that this “offline_access” scope is not available for the Token Flow. Hence, what we can only use is the Code Flow, which is described in the following diagram.
Hence, this explains why we have the following codes in the /auth/callback, which is the Redirect URL of our registered Application. What the codes do is to get the access token and refresh token from the /token endpoint using the auth code returned from the /authorize endpoint.
Here, we cannot simply decode the response body into the oauth2.Token yet. This is because the JSON in the response body from the Azure AD token endpoint only has expires_in but not expiry. So it does not have any field that can map to the Expiry field in oauth2.Token. Without Expiry, the refresh_token will never be used, as highlighted in the following screenshot.
[Image Caption: Even though the Expiry is optional but without it, refresh token will not be used.]
Hence, we must have our own struct tokenJSON defined so that we can first decode the response body to tokenJSON and then convert it to oauth2.Token with value in the Expiry field before passing the token to the go-onedrive client. By doing so, the access token will be automatically refreshed as necessary.
Finally, we just need to store the token in cookies using gorilla/securecookie which will encode authenticated and encrypted cookie as shown below.
Besides encryption, we also enable both Secure and HttpOnly attributes so that the cookie is sent securely and is not accessed by unintended parties or JavaScript Document.cookie API. The SameSite attribute also makes sure the cookie above not to be sent with cross-origin requests and thus provides some protection against Cross-Site Request Forgery (CSRF) attacks.
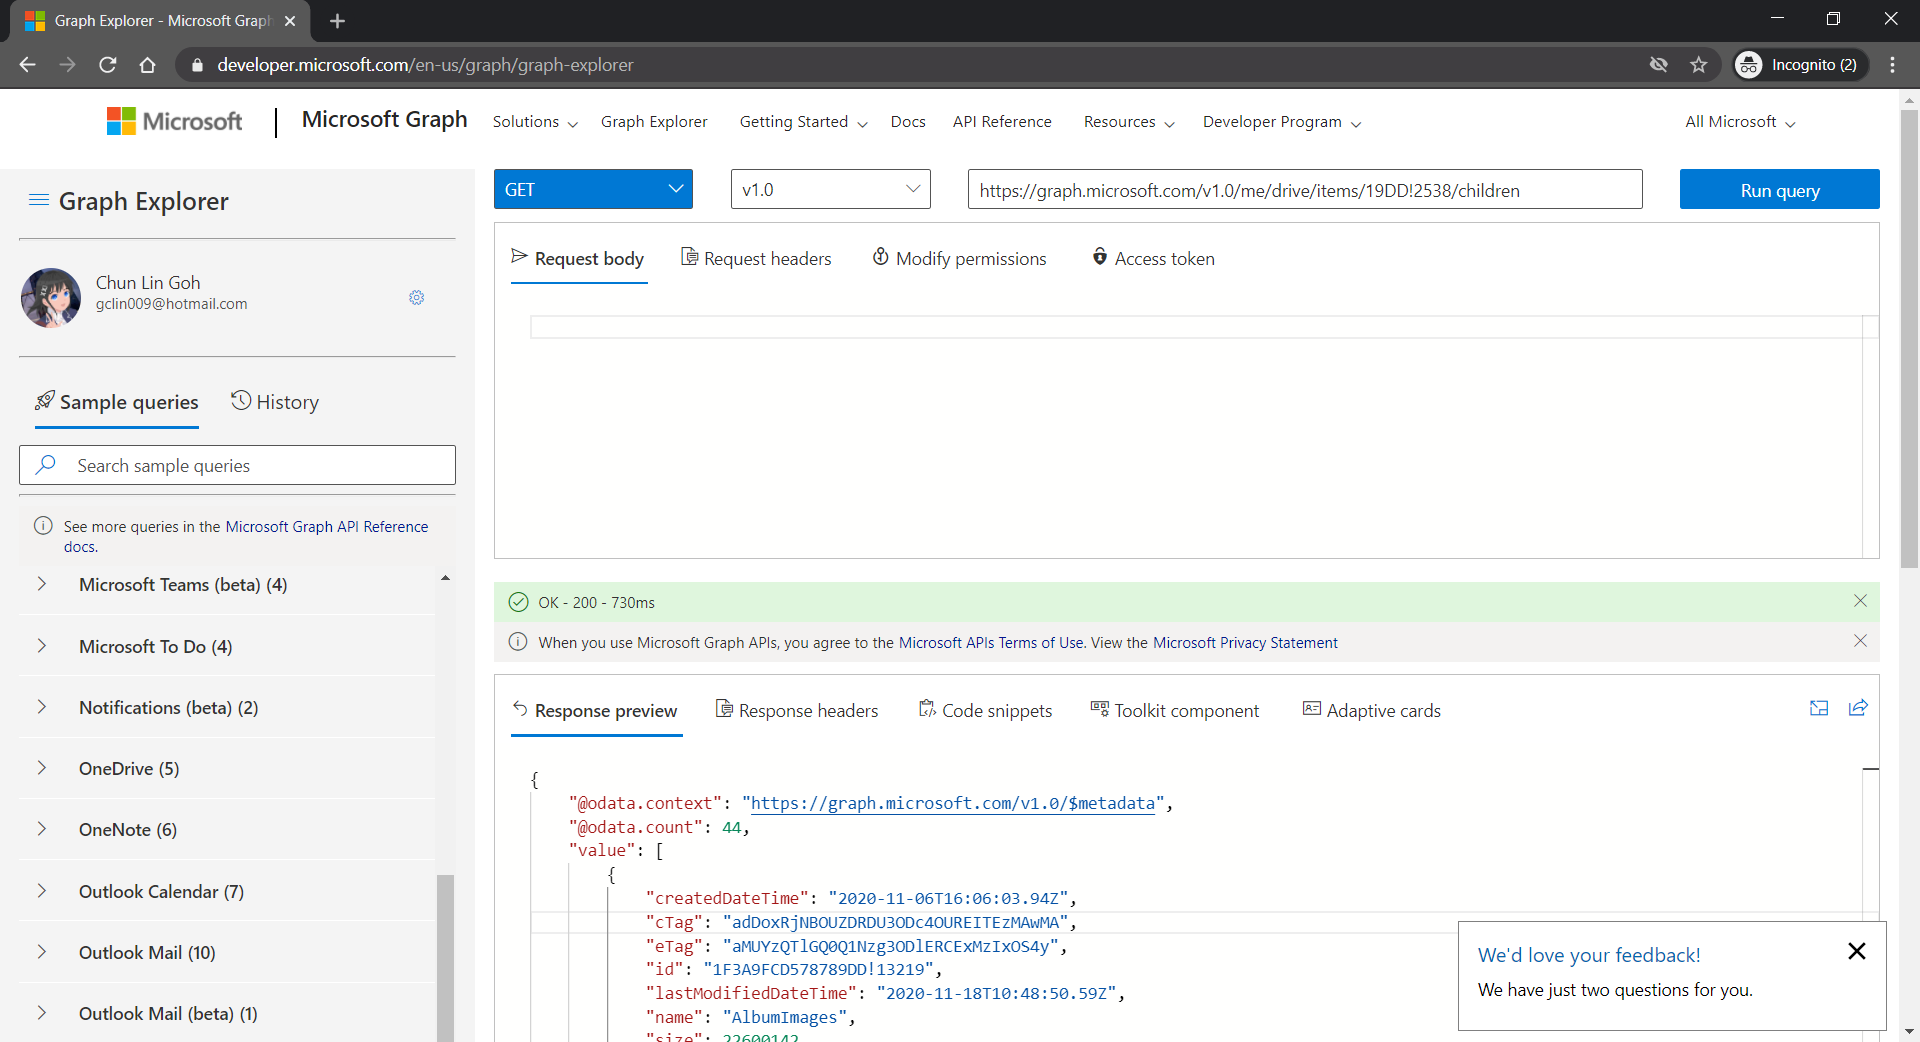
Microsoft Graph Explorer
For testing purposes, there is an official tool known as the Graph Explorer. It’s a tool that lets us make requests and see responses against the Microsoft Graph. From the Graph Explorer, we can also retrieve the Access Token and use it on other tools such as Postman to do further testing.
[Image Caption: Checking the response returned from calling the get DriveItems API.]
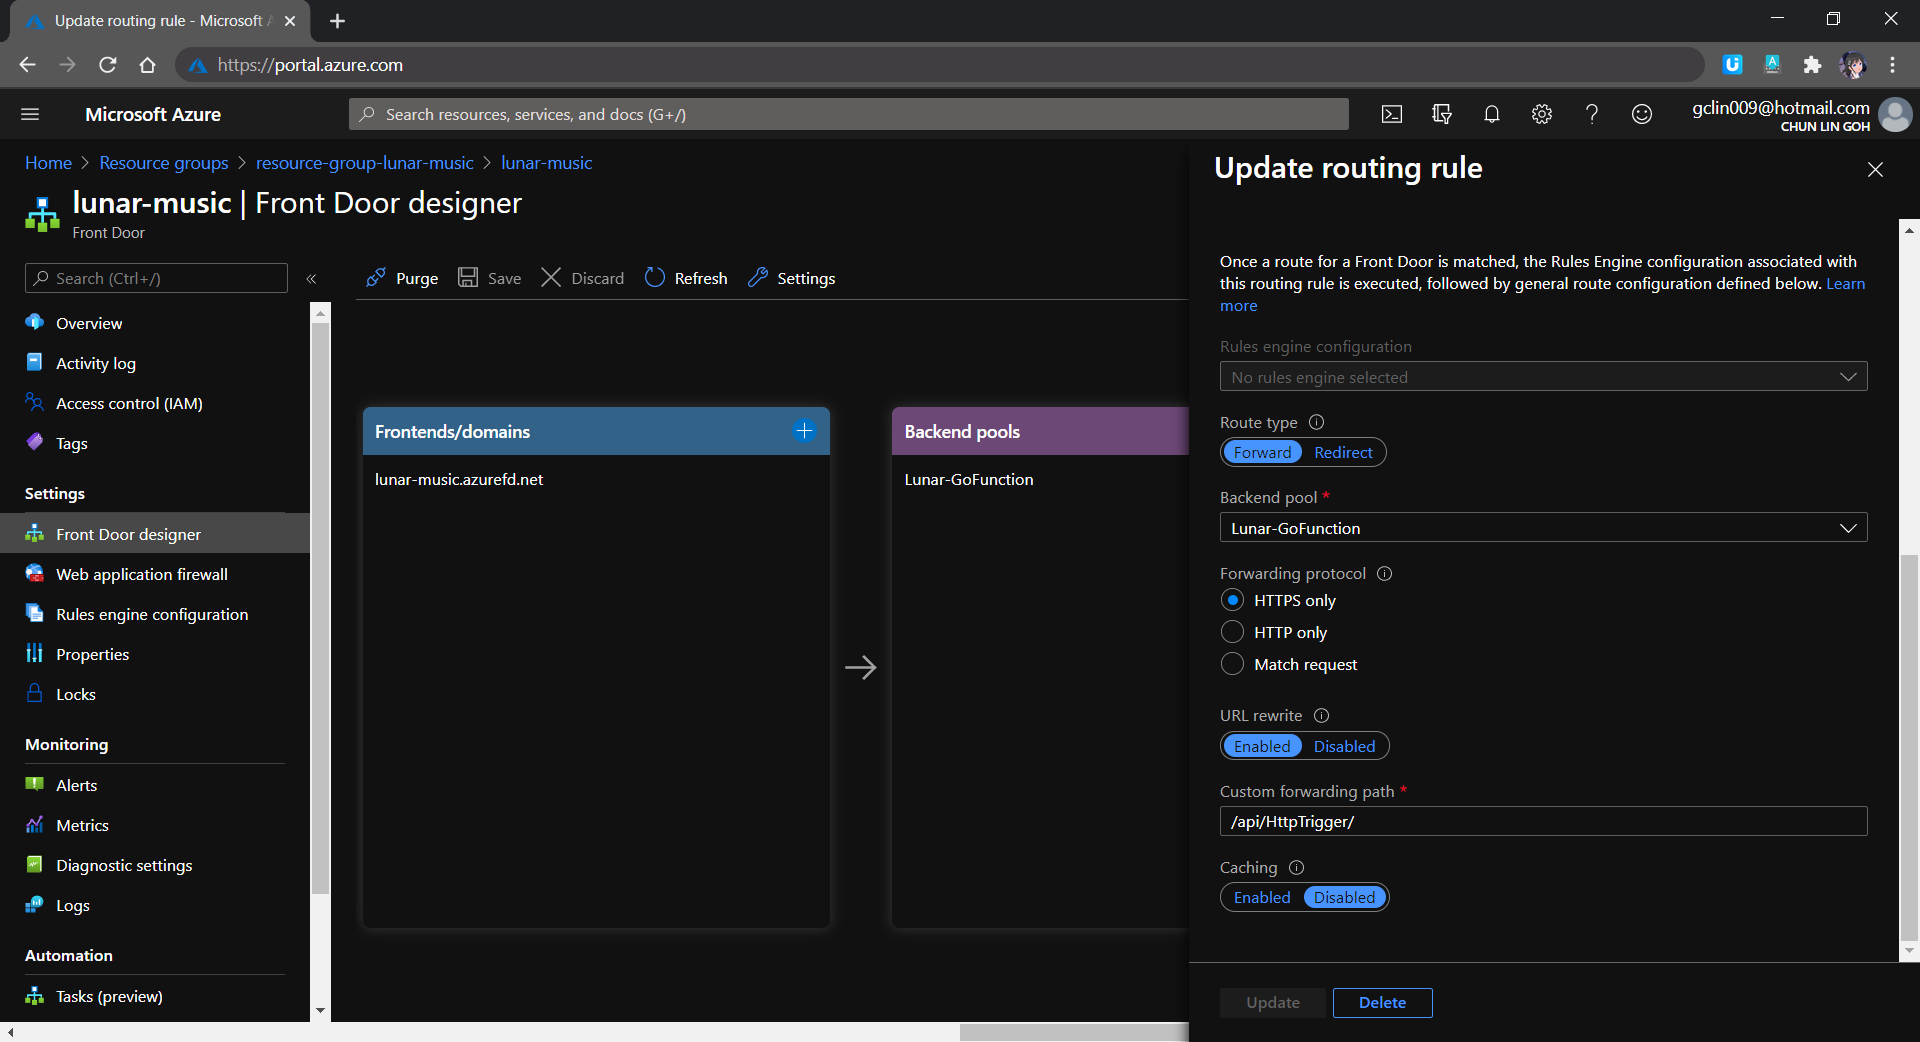
The very first reason why I use Azure Front Door is also because I want to hide the /api/HttpTrigger part from the URL. This can be done by setting the custom forwarding path which points to the /api/HttpTrigger/ with URL rewrite enabled, as shown in the screenshot below.
[Image Caption: Setting the route details for the Rules Engine in Azure Front Door.]
Let’s take a look what it looks like after we’ve deployed the web app above and uploaded some music to the OneDrive. The web app is accessible through the Azure Front Door URL now at https://lunar-music.azurefd.net/.
[Image Caption: My playlist based on my personal OneDrive Music folder.]
Yup, that’s all. I finally have a personal music entertainment system on Raspberry Pi. =)
If you would like to find out more about Microsoft Identity Platform, you can also refer to the talk below given by Christos Matskas, Microsoft Senior Program Manager. Enjoy!
Without user authentication, we cannot secure our web services and protect our users’ privacy on our application. Hence, it is important to introduce ways to authenticate users in our Golang web application now.
In this article, we will focus only on authenticating users on our Golang web application with Google Sign-In in Google Identity Platform.
Configure OAuth on Google Cloud Platform
We first need to create a Project on Google Cloud Platform (GCP).
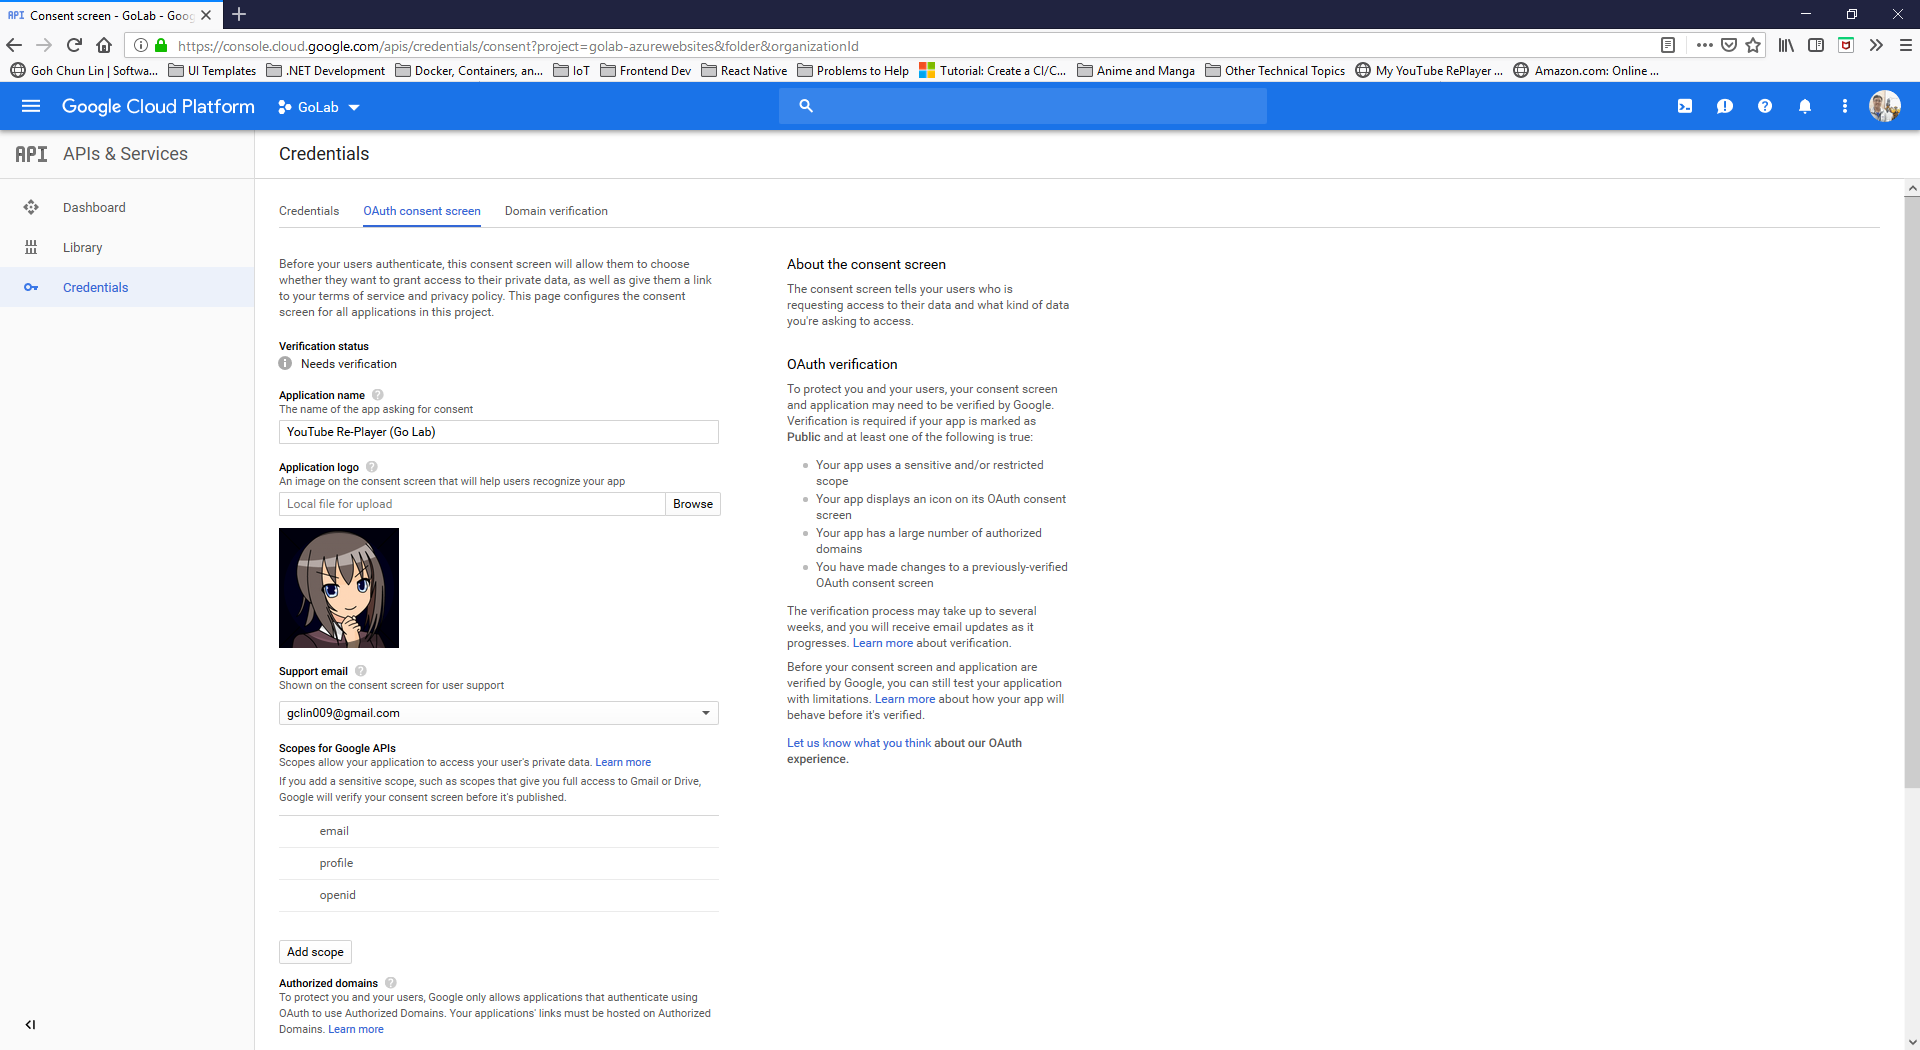
After the Project is created successfully, we need to proceed to OAuth Consent Screen to enter the information of our Golang web application, as shown in the following screenshot.
Setting up the OAuth consent screen for our Golang web application.
As you should have noticed by now, we are using OAuth because OAuth authentication system from Google makes it easy to provide a sign-in flow for all users of our application and provides our application with access to basic profile information about authenticated users.
Currently, Google only allows applications that authenticate using OAuth to use Authorized Domains which are required for redirect or origin URIs. Another thing to take note is that Authorized Domains must be a Top Private Domain. Hence, even though azurewebsites.net is a top level domain but it is not privately owned, so we cannot use the default Azure Web App URL. We thus need to assign a domain which is owned by us.
After entering all the information, we can then submit for verification. Interestingly, the verification step is not compulsory. We can choose to just save the information without submitting it for verification. However, users of unverified web applications might get warnings based on the OAuth scopes we’re using. This is how Google protects users and their data from deceptive applications.
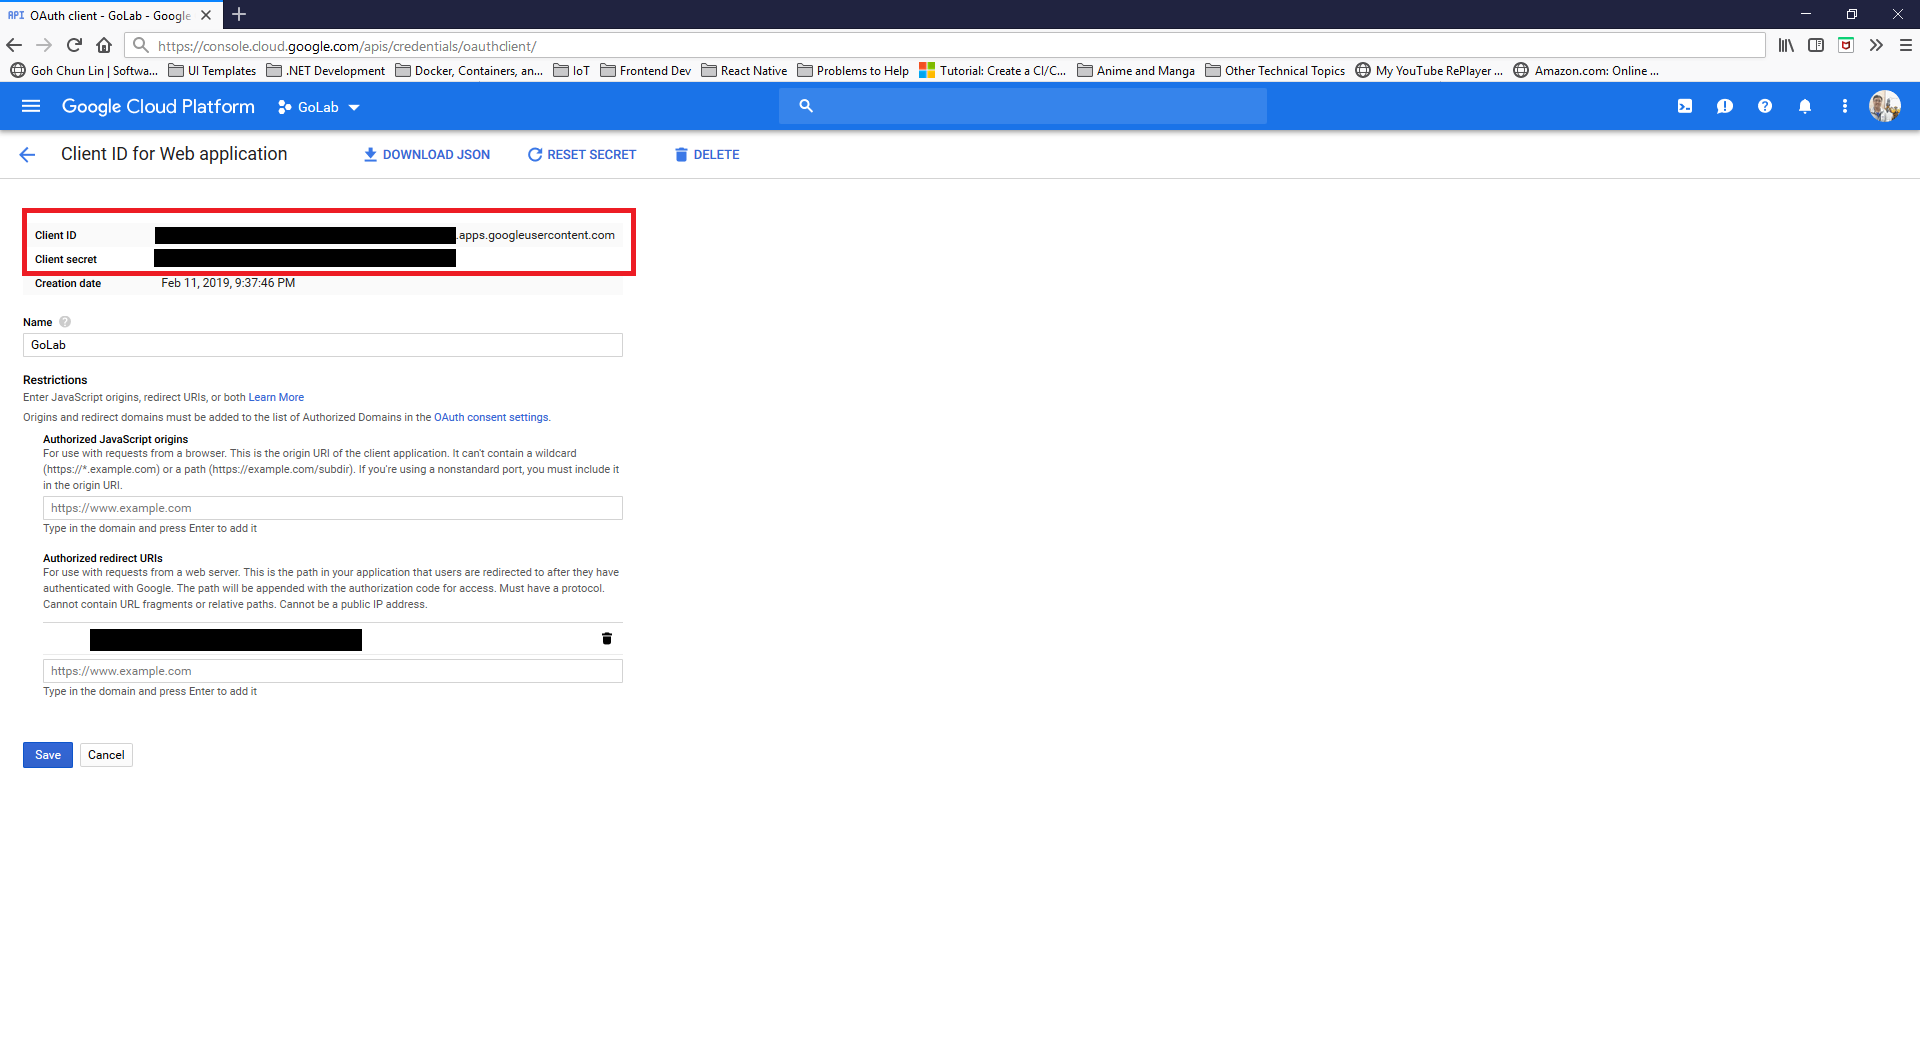
We will then be able to get both Client ID and Client Secret of our OAuth client for later use, as shown in the screenshot below.
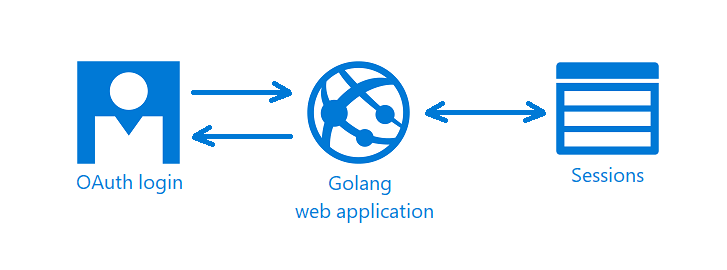
There is Sessions in the graph above because we need a way to store information about the current user. To do so, we make use of the CookieStore implementation to store session data in a secure cookie.
There are basically two new files need to be introduced.
Firstly, we have auth.go which is in charge of handling login/logout requests, handling callback from the OAuth, fetching user profile, and validating redirect URL to make sure there will be no attempts to redirect users to a path not existing within the web application.
Secondly, we have config.go which has all the configuration needed for the OAuth client on our web application. The two main functions are as follows. So this is the part when the Client ID and Client Secret from the GCP will be used.
func init() { // To enable user sign-in OAuthConfig = configureOAuthClient(os.Getenv("OAUTH_CLIENT_ID"), os.Getenv("OAUTH_CLIENT_SECRET"))
Our index handler will be changed to the following where it will show the homepage asking for user to login if the user is not yet logged in. Otherwise, it will bring the user to the page with the player.
func index(writer http.ResponseWriter, request *http.Request) { user := profileFromSession(request) if user == nil {
Users can login to our Golang web application through Google Sign-In.
Updates of Web Service
We also need to update the functions that we have done earlier for HTTP methods so that each of the functions will check for the user profile first. So we need to change the function handleVideoAPIRequests() to include the following code.
if user == nil { err = errors.New("sorry, you are not authorized") writer.WriteHeader(401)
return }
... } }
The response will be HTTP 401 Unauthorized if the user profile is not found.
If the user profile is found, then we will use the updated code to retrieve only the videos added by the current user. For example, when we are updating the info of a video record, we will need to also make sure the video record belongs to the current user, as shown in the following code.
func handleVideoAPIPut(...) (err error) {
    ...

    err = video.GetVideo(user.ID, videoID)
    if err != nil {
        // update the video record
    }
}
That means, the GetVideo function needs to be updated as well, as shown below, so that it can retrieve only video related to the currently logged-in user.
// GetVideo returns one single video record based on id func (video *Video) GetVideo(userID string, id int) (err error) { sqlStatement := "SELECT id, name, url FROM videos WHERE created_by = $1 AND id = $2;"
In January 2019, we also successfully presented our solution during the Singapore .NET Developers Community meetup. Taking the opportunity, I also presented how Azure Key Vault is used in our project to centralize our key and secret management.
Marvin is sharing with the audience about Custom Vision during the meetup.
Hence, in this article, I’d like to share about this project in terms of how we use Cognitive Services and Key Vault.
Code Repository
The code of our project is available in both Azure DevOps and Github. I will update both places to make sure the codes are updated.
The reason I have my codes in both places because the project is originally collaborated in Azure DevOps. However, during meetup, I realized majority of the audience still prefer us to have our codes on Github. Well…
Our “FutureNow” tool where user can use it to analyze text on images.
Custom Vision
What Marvin has contributed fully is to implement a function to detect and identify the handwritten texts in the uploaded image.
To do so, he first created a project in Custom Vision to train the model. In the project, he uploaded many images of paper documents and then labelled the handwritten texts found on the paper.
The part where the system analyzes the uploaded image and finds the handwriting part is in the TagAndAnalyzeService.cs.
In the AnalyzeImageAsync method, we first use the Custom Vision API which is linked to Marvin’s project to identify which parts in the image are “probably” handwritten.
At this point of time, the system still cannot be hundred-percent sure the parts it identifies as handwritten text really contain handwritten text. Hence, the result returns from the API contains a probability value. That’s why we have a percentage bar on our front-end to control the threshold for this probability value to accept only those results having a higher probability value will be accepted.
Handwritten Text Extraction with Computer Vision
After the previous step is done, then we will crop those filtered sections out from the uploaded image and then send each of the smaller image to the text recognition API in Cognitive Service to process the image and to extract out the text.
There is an interesting do…while loop in the method. The loop is basically used to wait for the API to return the image processing results. It turns out that most of the time, the API will not directly return the result. Instead, it will return a JSON object telling us that it’s still processing the image. Only when it returns the JSON object with status set to “Succeeded”, then we know that the analysis result is returned together in the JSON object.
do { var textOperation = response.Headers.GetValues("Operation-Location").FirstOrDefault();
var result = await client.GetAsync(textOperation);
if (!isAnalizying) { return handwrittenAnalyzeResult; } } while (isAnalizying);
In order to display to the user in front-end the results, we will store the cropped images in Azure Blob Storage and then display both the images and their corresponding extracted texts on the web page.
Using Computer Vision to perform OCR can better detect and extract text in an image especially when the image is a screenshot of a computer generated PDF file.
In OpticalCharacterRecognitionService, we simply call the Computer Vision API OCR method with the uploaded image and language set to English by default, then we can easily get the result of the OCR back in JSON format.
Key Vault
Key Vault in this project is mainly for managing the keys and connection string to the Azure Blob Storage.
Secrets of the FutureNow project in the Azure Key Vault.
var azureServiceTokenProvider = new AzureServiceTokenProvider();

var keyVaultClient = new KeyVaultClient(new KeyVaultClient.AuthenticationCallback(azureServiceTokenProvider.KeyVaultTokenCallback));

var secret = await keyVaultClient.GetSecretAsync($"https://futurenow.vault.azure.net/secrets/{ secretName }").ConfigureAwait(false);
According to Microsoft Azure documentation, there are service limits in Key Vault to ensure quality of service provided. Hence, when a service threshold is exceeded, any further requests from the client will not get successful response from Key Vault. Instead, HTTP status code 429 (Too many requests) will be returned.
Regarding this problem, I have raised issues (#22859 and #22860) and submitted a pull request to Microsoft on Github. Currently the PR is not yet approved but both Bryan Lamos and Prashanth Yerramilli have agreed that the code is indeed incorrect. Anyway, in our KeyVaultService class, the code has already been corrected.
EDIT (26 January 2019): The pull request has been approved. =)
Conclusion
Even though this project is just an experimental project for us to understand more about the power of Custom Vision and Computer Vision, I am glad that through this project, I manage to learn additional knowledge about Blob Storage, Azure DevOps, Key Vault, etc. and then later share it with the Singapore .NET Developers Community members.
Special thanks to Marvin for helping me in this project.