I like to explore interesting new technologies. I also love to learn more from the materials available on Microsoft Virtual Academy, Google Developers channel, and several other tech/dev events.
So if I run the following code in different browsers, I will get different results.
var test = [,,,,];
alert("Length of the array: " + test.length);
In IE 10, Firefox and Chrome, the length of the array will be 4. However, in IE 7 and 8, the length of the array is 5, which in this case does not chop off the “undefined” item at the end of the array.
Here is a list of online discussions that I found when I was trying to fix the bug.
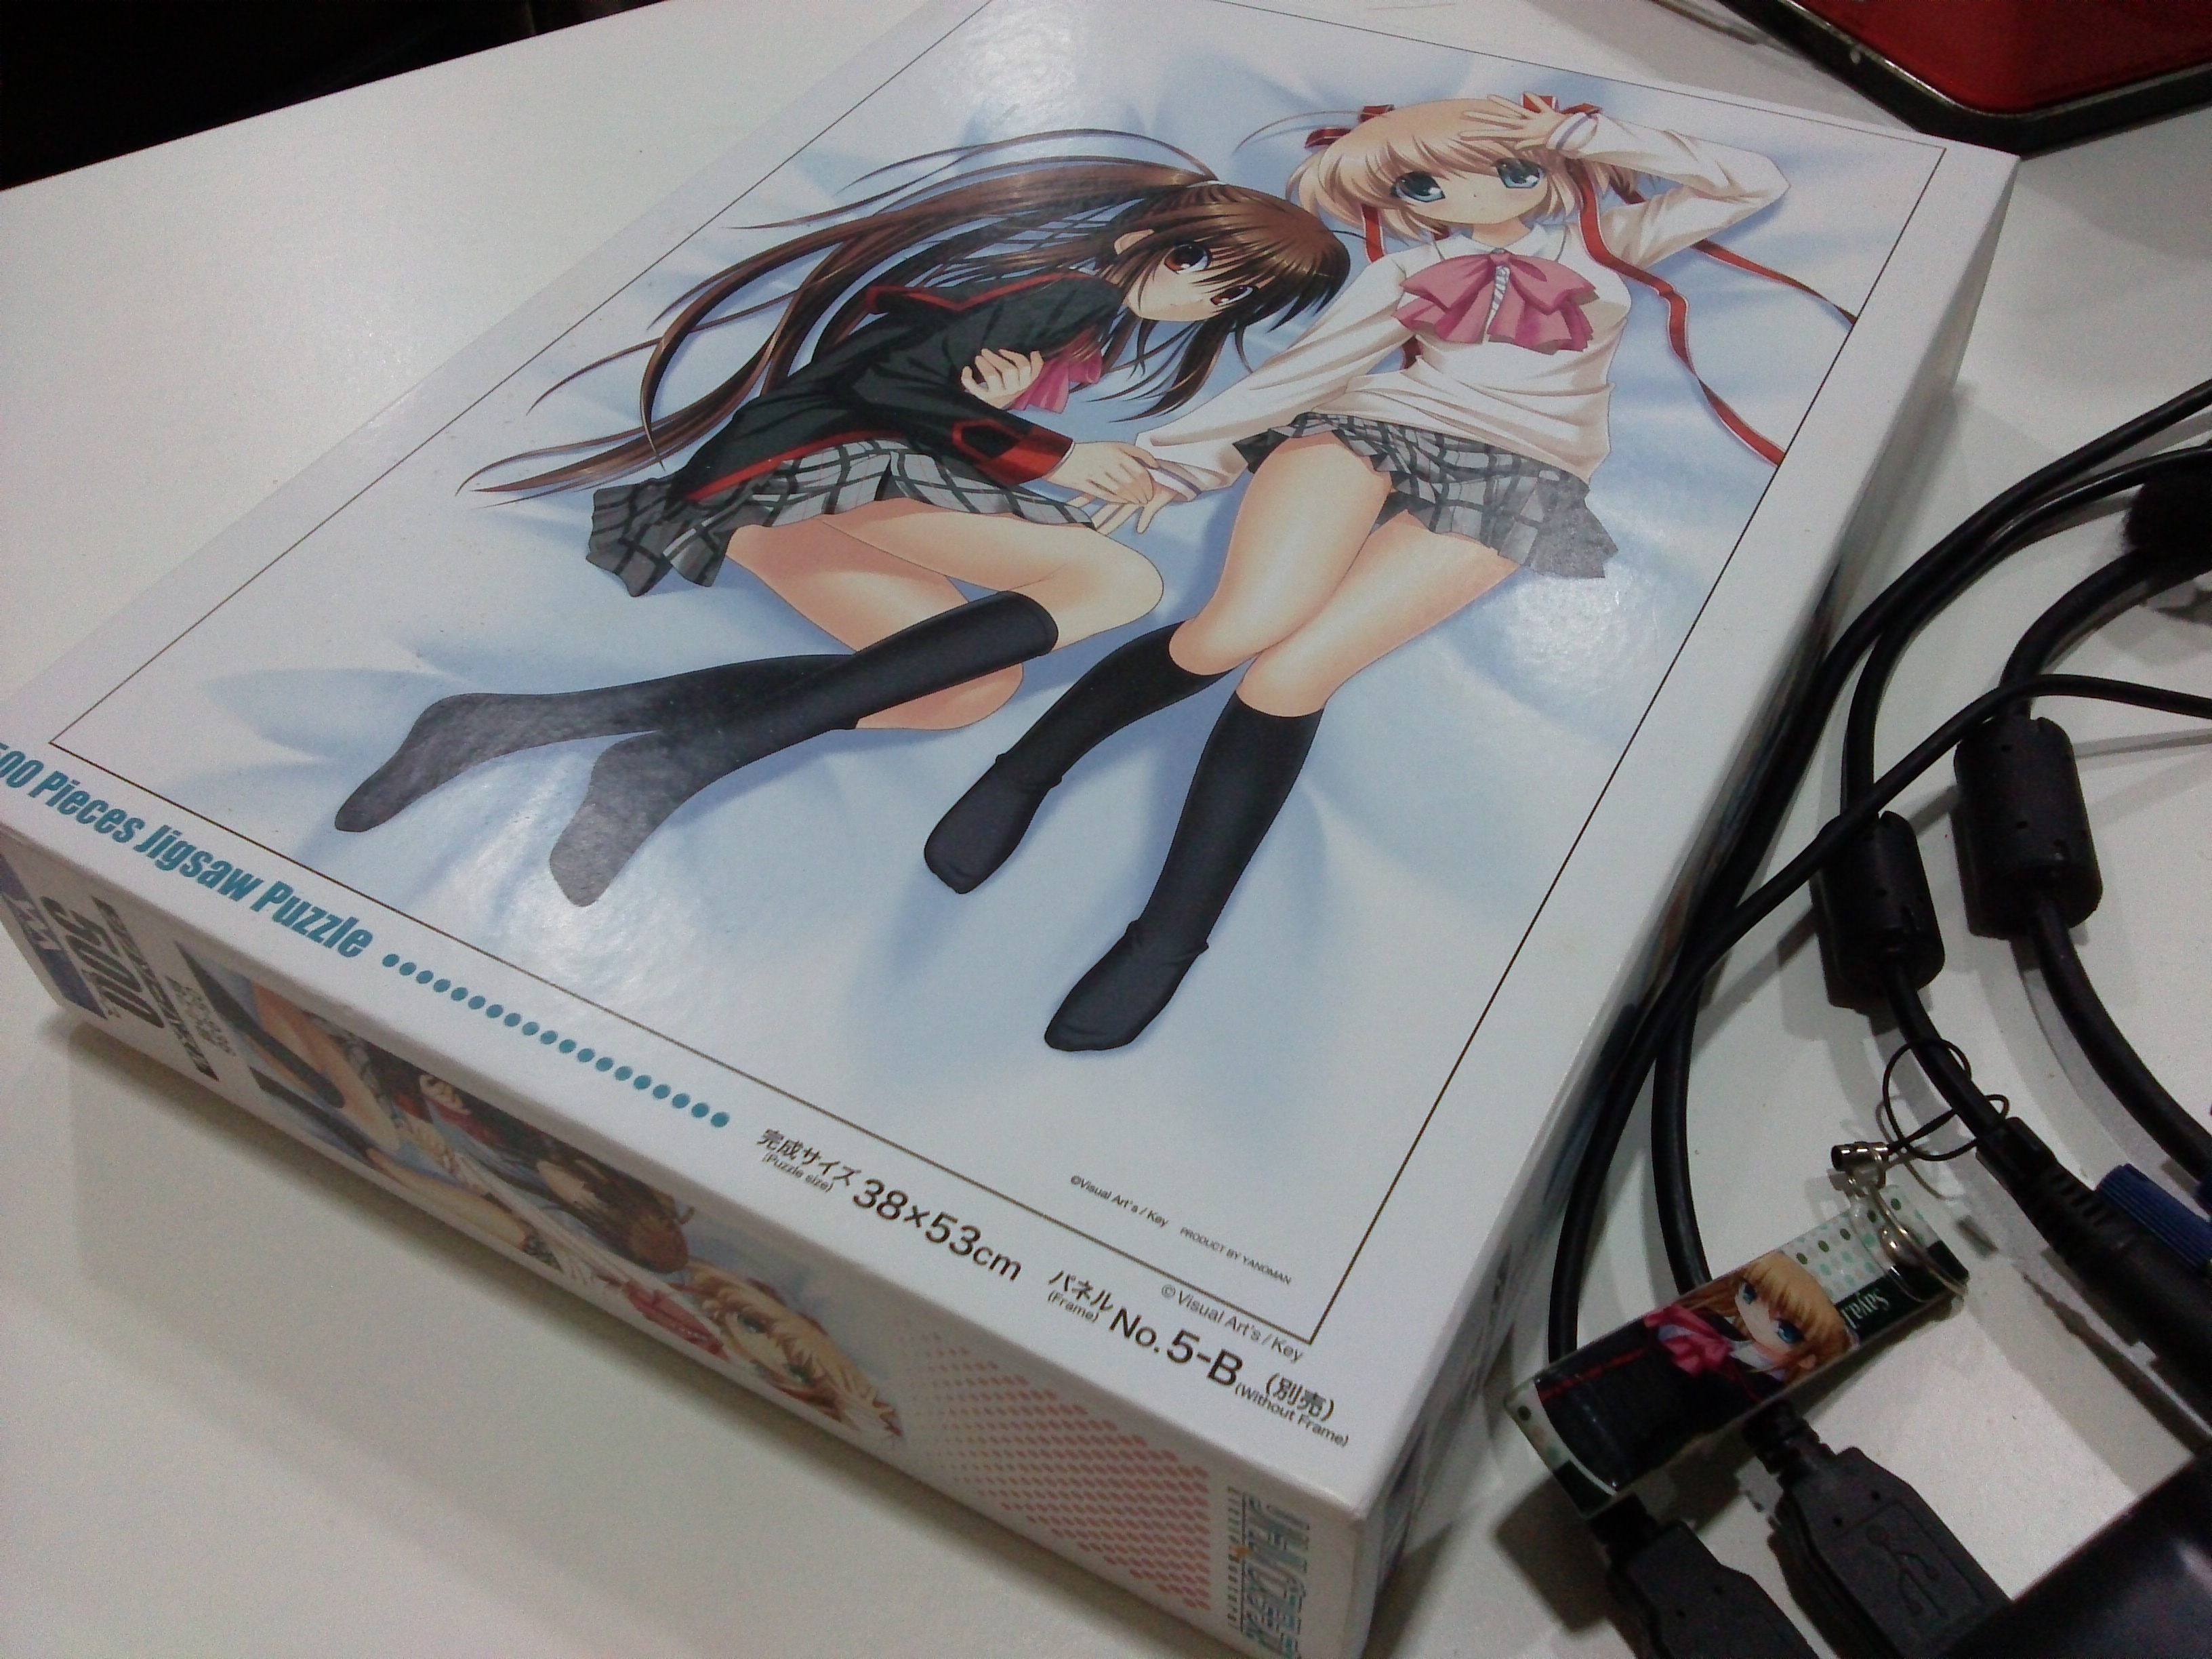
Recently, I got a Little Busters! (リトルバスターズ!) jigsaw puzzle of 500 pieces. According to the description printed on the box, the size of the puzzle is 38 x 53 cm. The estimated time to complete the whole puzzle will be 15 hours. So, I decided to build a tool to help me complete the task by identifying the location of each piece of the jigsaw puzzle.
Little Busters! (Rin and Komari) 500 Pieces Jigsaw Puzzle
The first thing I need is a webcam. Most of the modern laptops have a webcam, even Chromebook has one. So, the next problem will be capturing image using the webcam. Therefore, I built a simple project to do that using Silverlight because it is very easy to achieve simple webcam image capturing in Silverlight.
After that, since the Silverlight project is web based, I can embed it in another my Windows Form C# application with the WebBrowser control easily. So now what I have is a image capturing app without the saving function yet.
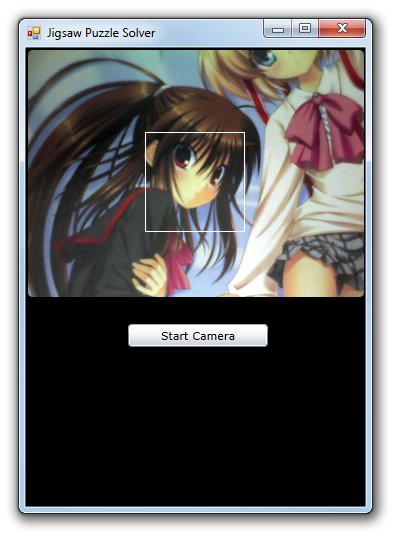
Successfully capture the image from webcam.
The main task of the C# application is to save the captured image and then compare it with a target image to identify the matching pieces in the jigsaw puzzle. The square with white border is the area where the image will be saved as an image for the use of image comparison later. The templates that the captured image will be compared with are the 500 squares from the original complete image. To save only the captured image inside the square (100×100 pixels), I do the following.
Rectangle bounds = this.Bounds;
int widthOfCaptureArea = 100;
int heightOfCaptureArea = 100;
int captureAreaX = 120;
int captureAreaY = 85;
Size captureArea = new Size(widthOfCaptureArea, heightOfCaptureArea);
Point webBrowserLocation = webBrowser1.PointToClient(new Point(bounds.Left, bounds.Top));
using (Bitmap bitmap = new Bitmap(widthOfCaptureArea, heightOfCaptureArea))
{
    using (Graphics g = Graphics.FromImage(bitmap))
    {
        g.CopyFromScreen(
        new Point(bounds.Left + captureAreaX + webBrowserLocation.X * -1, bounds.Top + captureAreaY + webBrowserLocation.Y * -1), Point.Empty, captureArea);
    }
    bitmap.Save("D://.../source.jpg", ImageFormat.Jpeg);
    bitmap.Dispose();
 }
private float CheckSimilarity(Bitmap sourceImage, Bitmap targetImage)
{
   // create template matching algorithm's instance
   ExhaustiveTemplateMatching tm = new ExhaustiveTemplateMatching(0.8f);
   // find all matchings with specified above similarity
   TemplateMatch[] matchings = tm.ProcessImage(sourceImage, targetImage);
   float similarity = 0;
   foreach (TemplateMatch m in matchings)
   {
       similarity = m.Similarity;
   }
   return similarity;
}
When comparing the images, I perform rotation three times because the direction of the piece is uncertain. So, I will just need to rotate the source image three times and compare the source and the template for each of the time to get the highest similarity value.
float similarity = CheckSimilarity(sourceImage, targetImage);
// Rotate the source image 90 degrees
for (int i = 1; i <= 3; i++)
{
    sourceImage.RotateFlip(RotateFlipType.Rotate90FlipNone);
    if (CheckSimilarity(sourceImage, targetImage) > similarity)
    {
        similarity = CheckSimilarity(sourceImage, targetImage);
    }
}
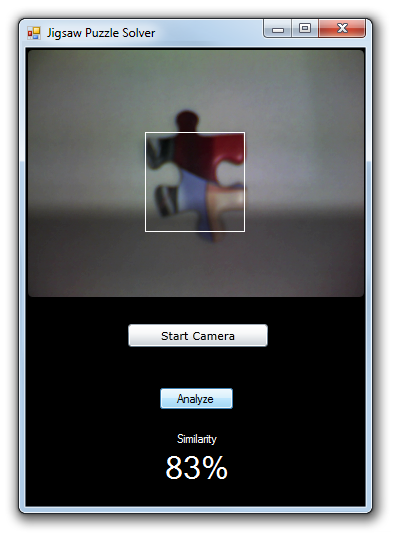
Similarity of 83% between this particular piece with one of the template images from the original complete image
Yup, now it is done and I can thus use it to complete my 500-piece jigsaw puzzle. However, in the whole project, I actually assume each piece to be a perfect square. So the similarity value is not that accurate as well. This can be improved in the next version to take the pattern of each piece into consideration.
One day before the end of my long weekend, I decided to learn setting up Windows Server 2012 instance on Amazon EC2. Also, I noted down the setup steps for my future reference.
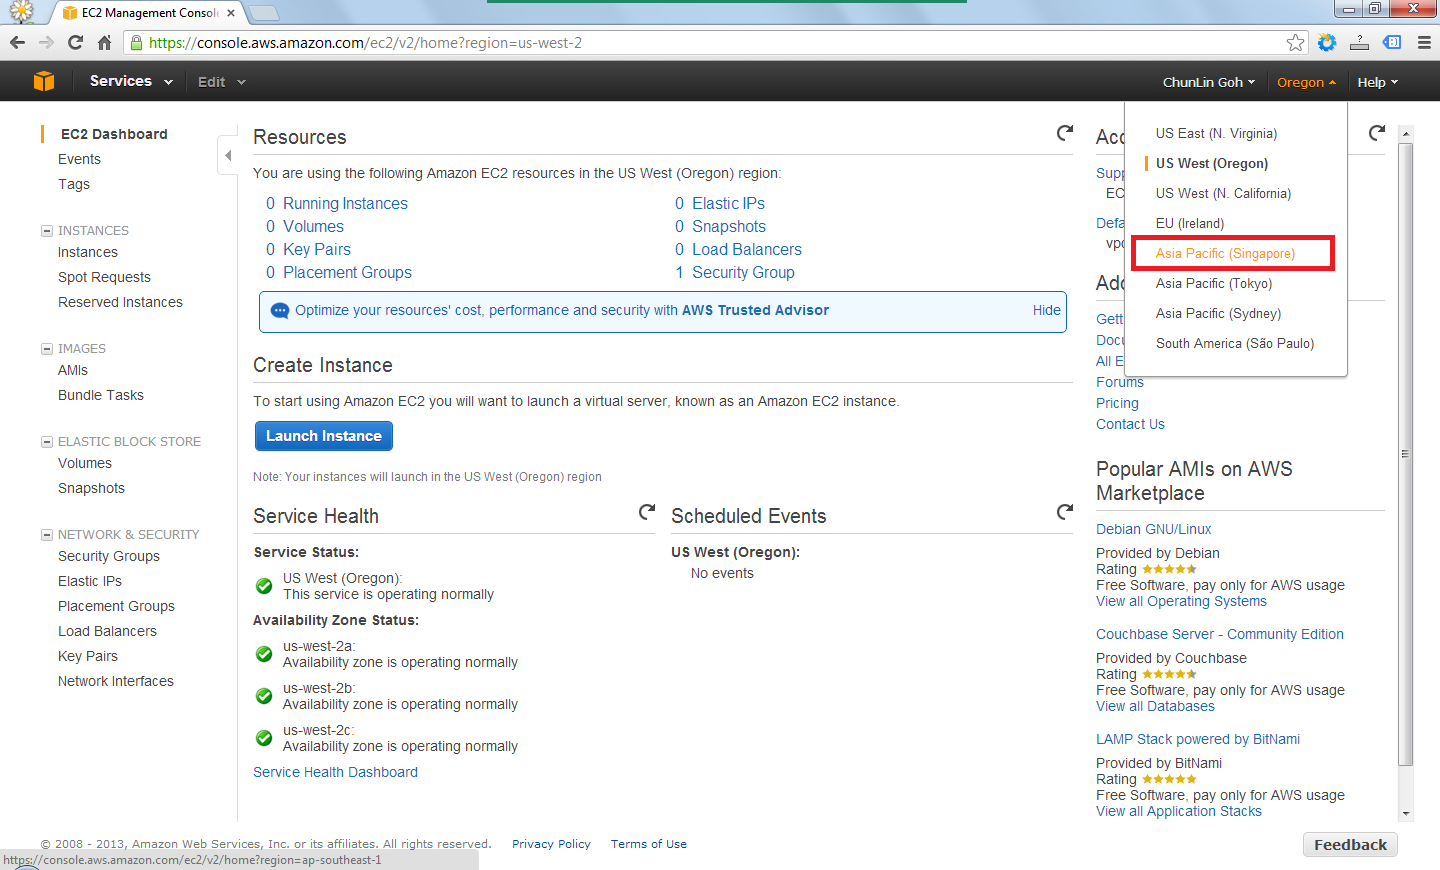
After signing up at Amazon Web Service website, I visited the EC2 Dashboard from the AWS Management Console. Since I’d like to setup one instance in Singapore, I had to choose the region from the drop-down list at the top-right corner of the website.
Choosing region for the instance.
After the region was chosen, I clicked on the blue “Launch Instance” button located at the middle of the web page to launch my first virtual server on EC2. Normally I chose the Classic Wizard so that some configurations could be changed before the setup.
Create a new instance.
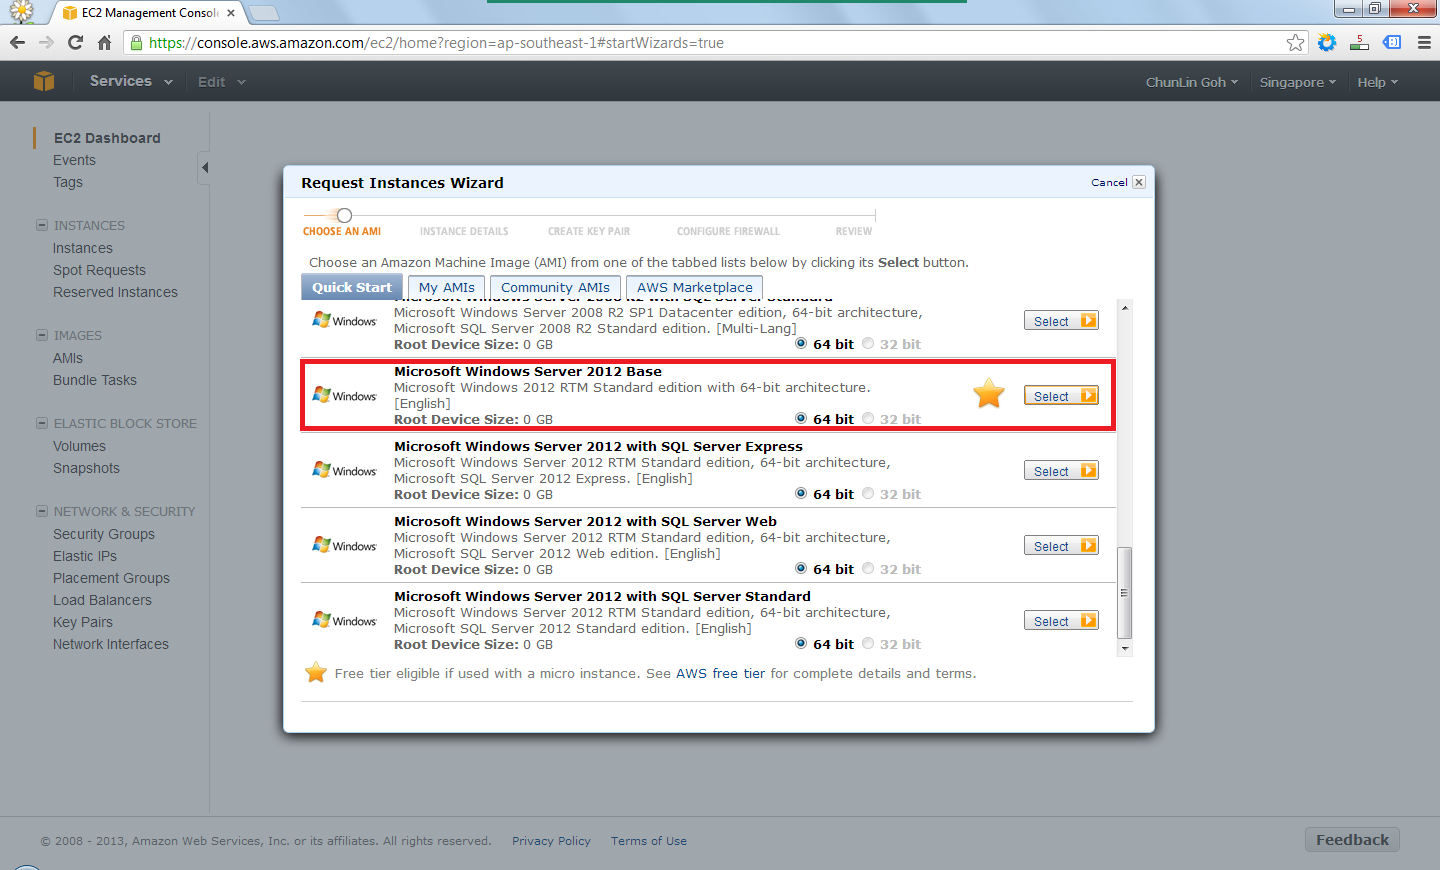
The following step would be choosing an Amazon Machine Image (AMI). Somehow the Root Device Size was 0 GB which I had no idea why so. Due to the fact that I only wanted to try out AWS, I chose the one with Free Usage Tier, i.e. the Microsoft Windows Server 2012 Base.
Choose an AMI.
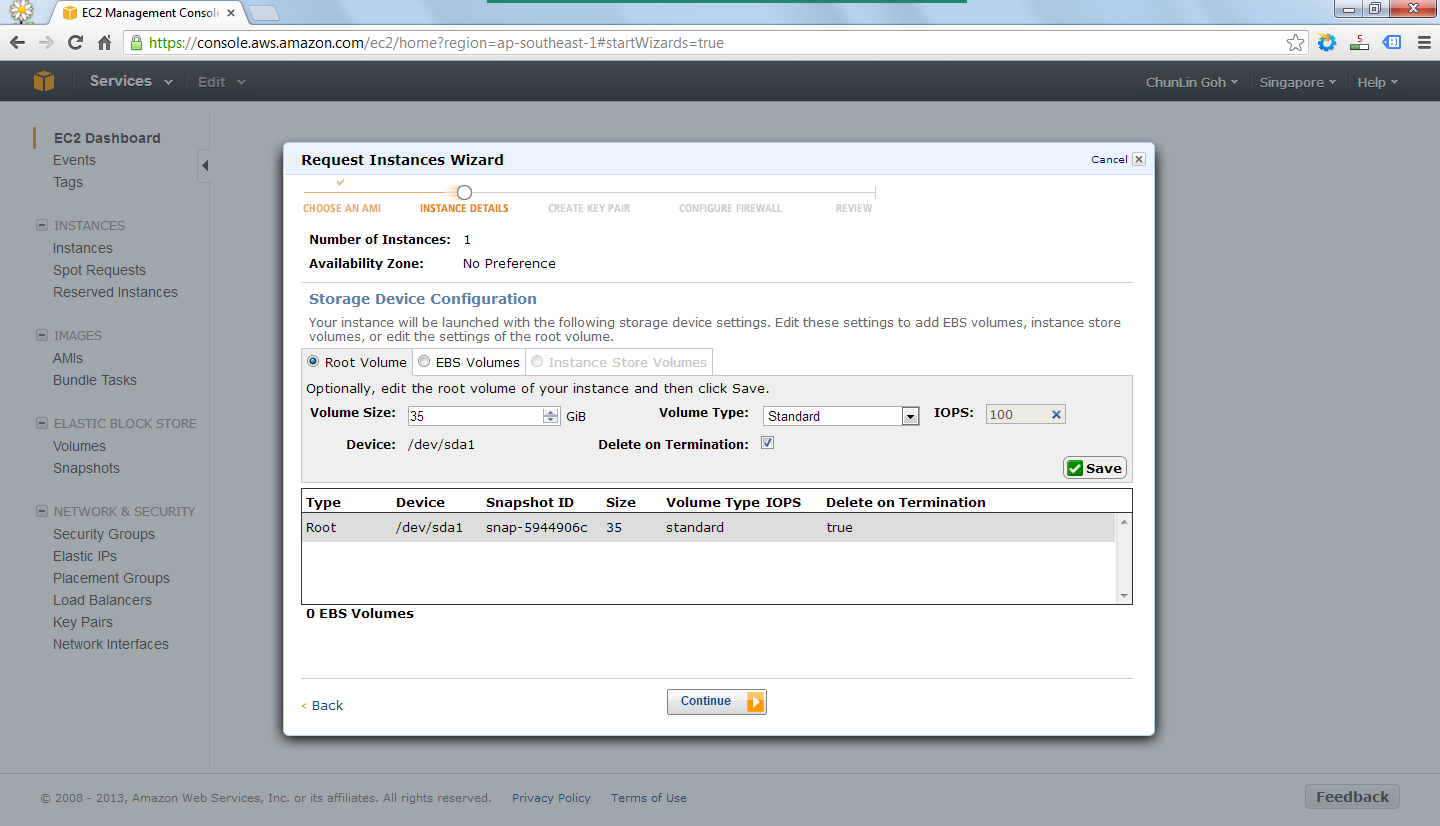
In the following steps, there were options for me to set the number of instances required, instance type (set to Micro to enjoy free usage tier), subnet, network interfaces, etc. After all these, there would be a section to set the root volume size. By default, it’s 0 GB. So the instance wouldn’t be launched if the value was left default. I set it to 35 GB.
Set the volume size of the root to be 35GB.
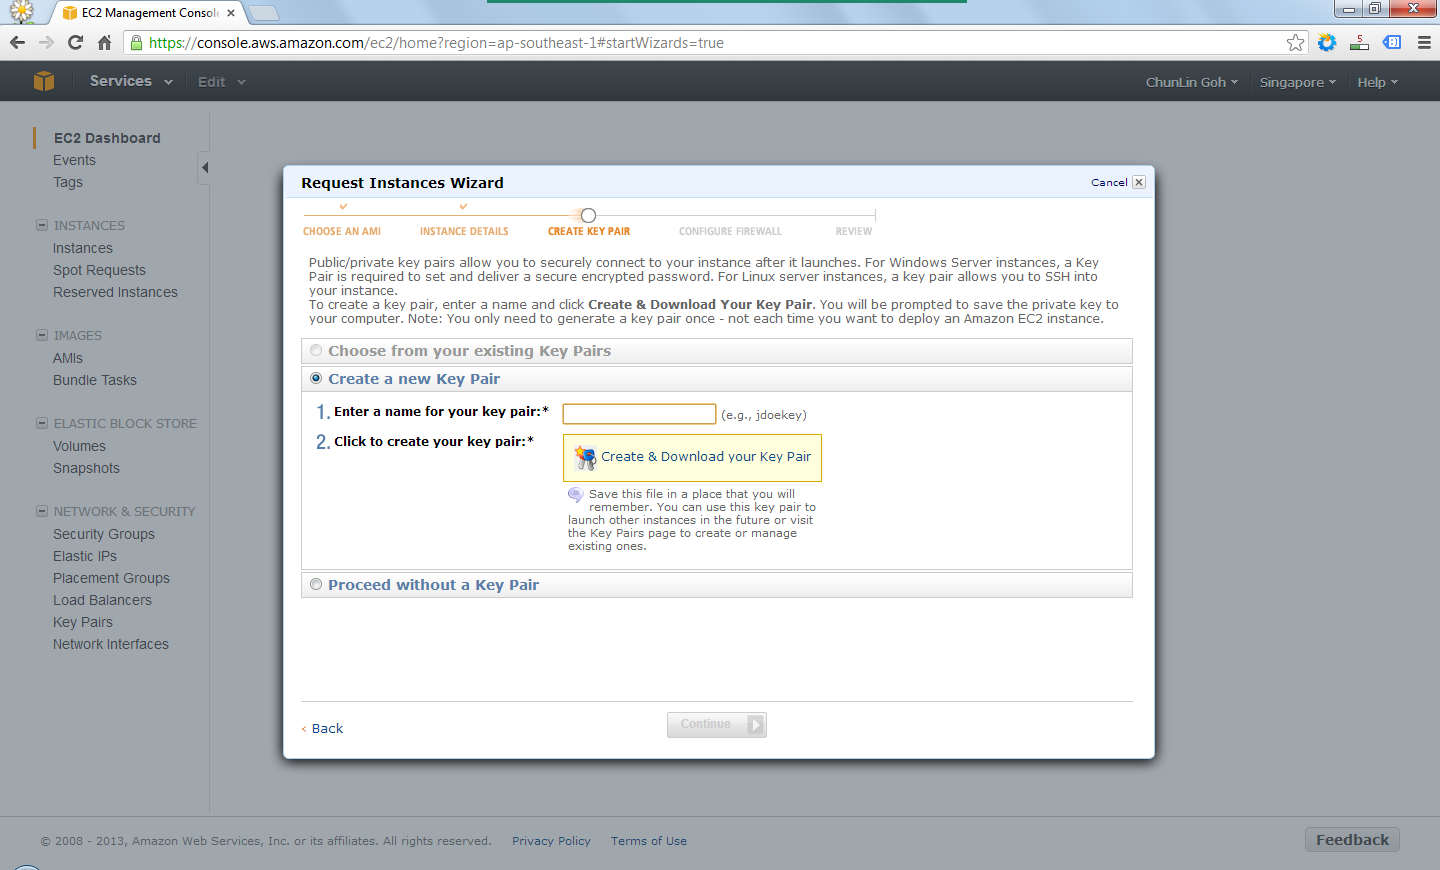
After providing the instance details, the next step would be creating key pair which would be used to decrypt the RDP password in the later stage. Thus, the key pair needed to be downloaded and stored safely on the computer.
Create a key pair.
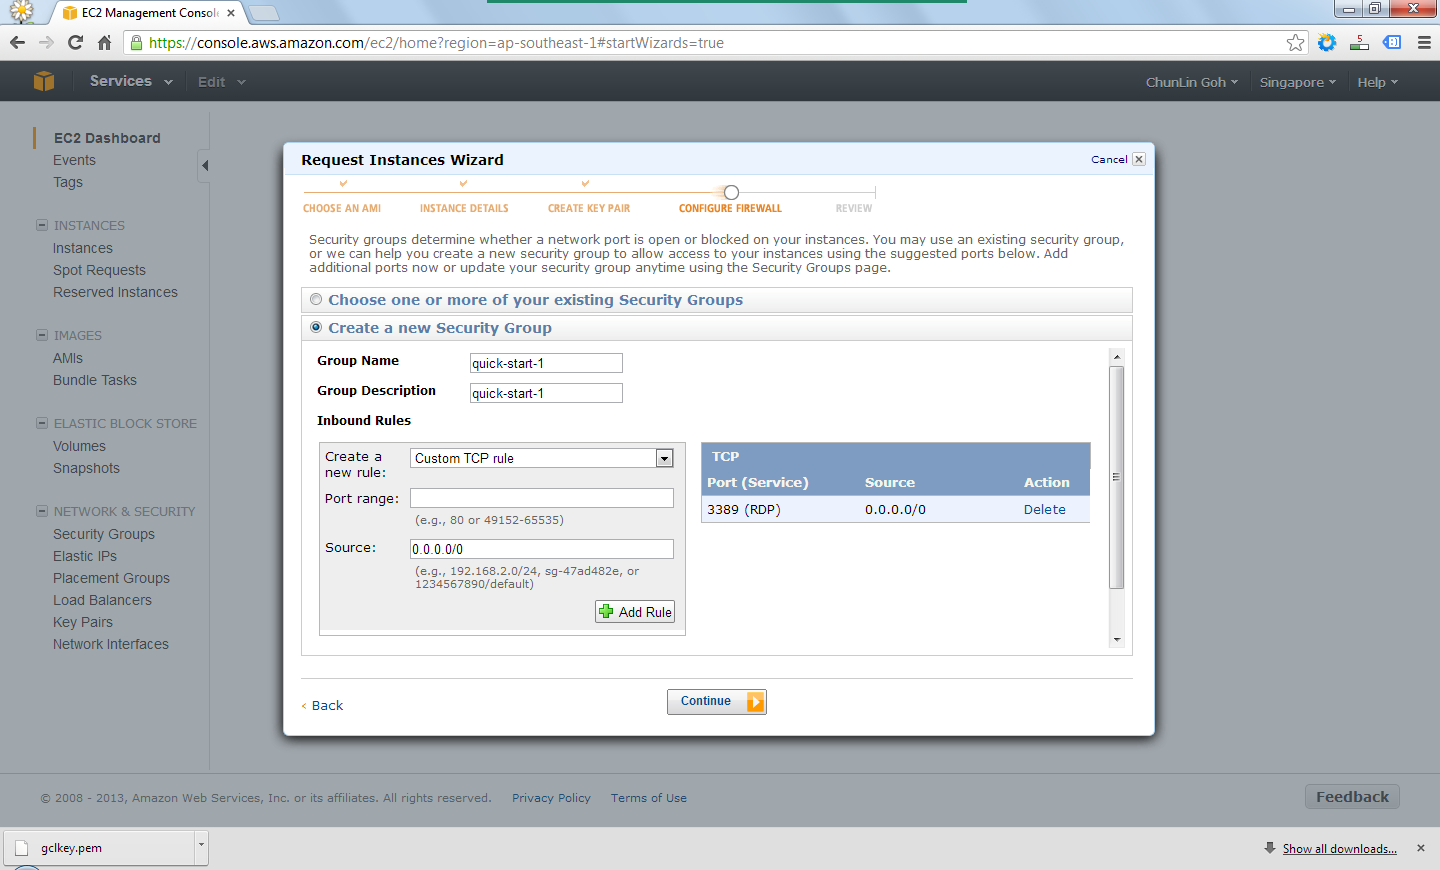
There was also another section to set which ports would be open/blocked on the instance.
Set up security group to determine whether a network port is open or blocked on the instance.
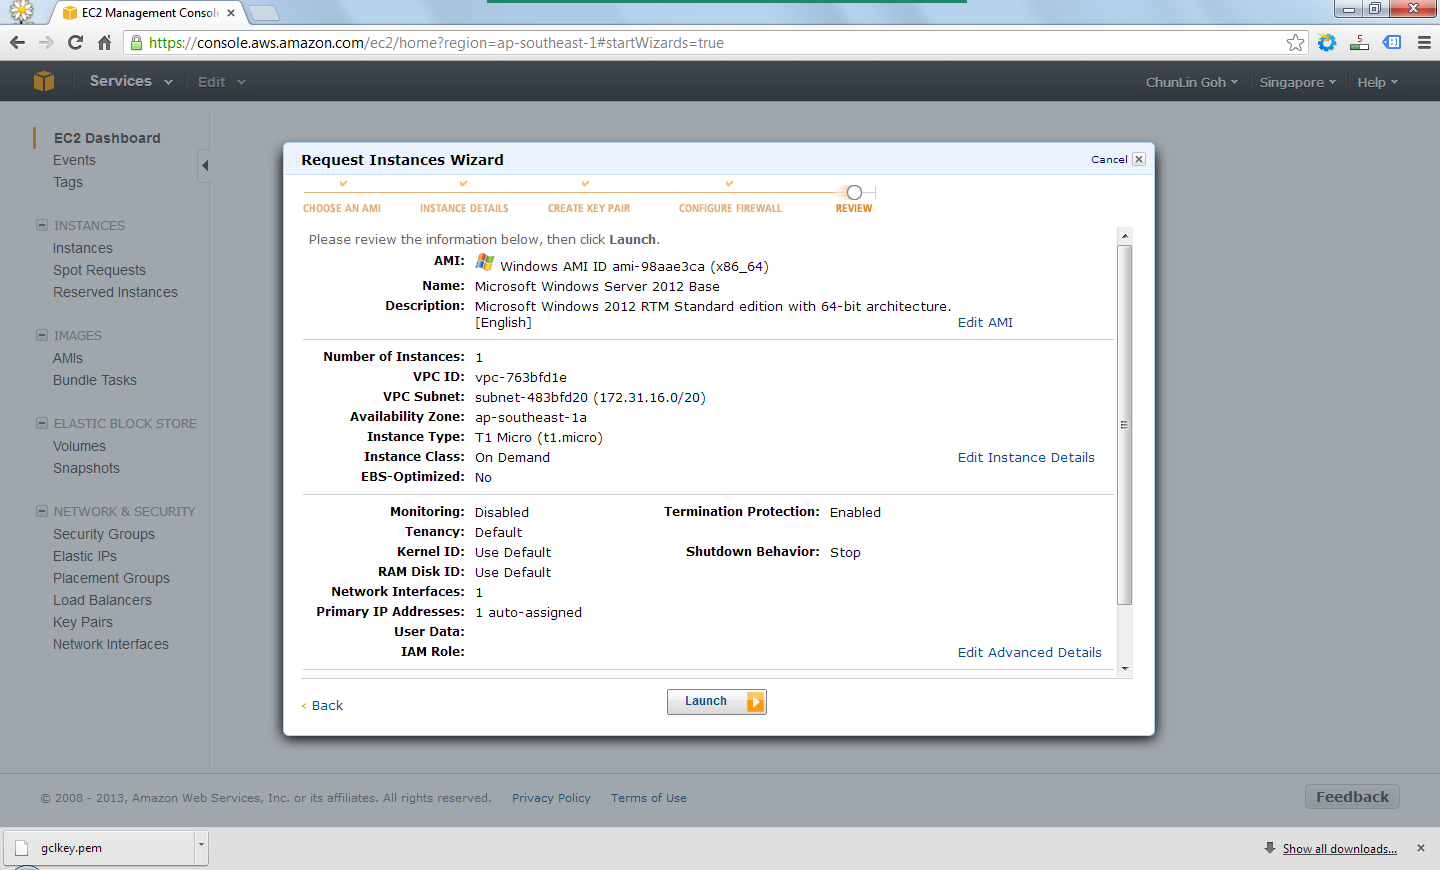
Finally, after reviewing all the details, I just clicked on the “Launch” button to launch the instance.
Review the information provided earlier before the launch of the instance.
Right after the button was clicked, there was a new record added to the Instances table and its State immediately changed to “running”.
The new instance is successfully added.
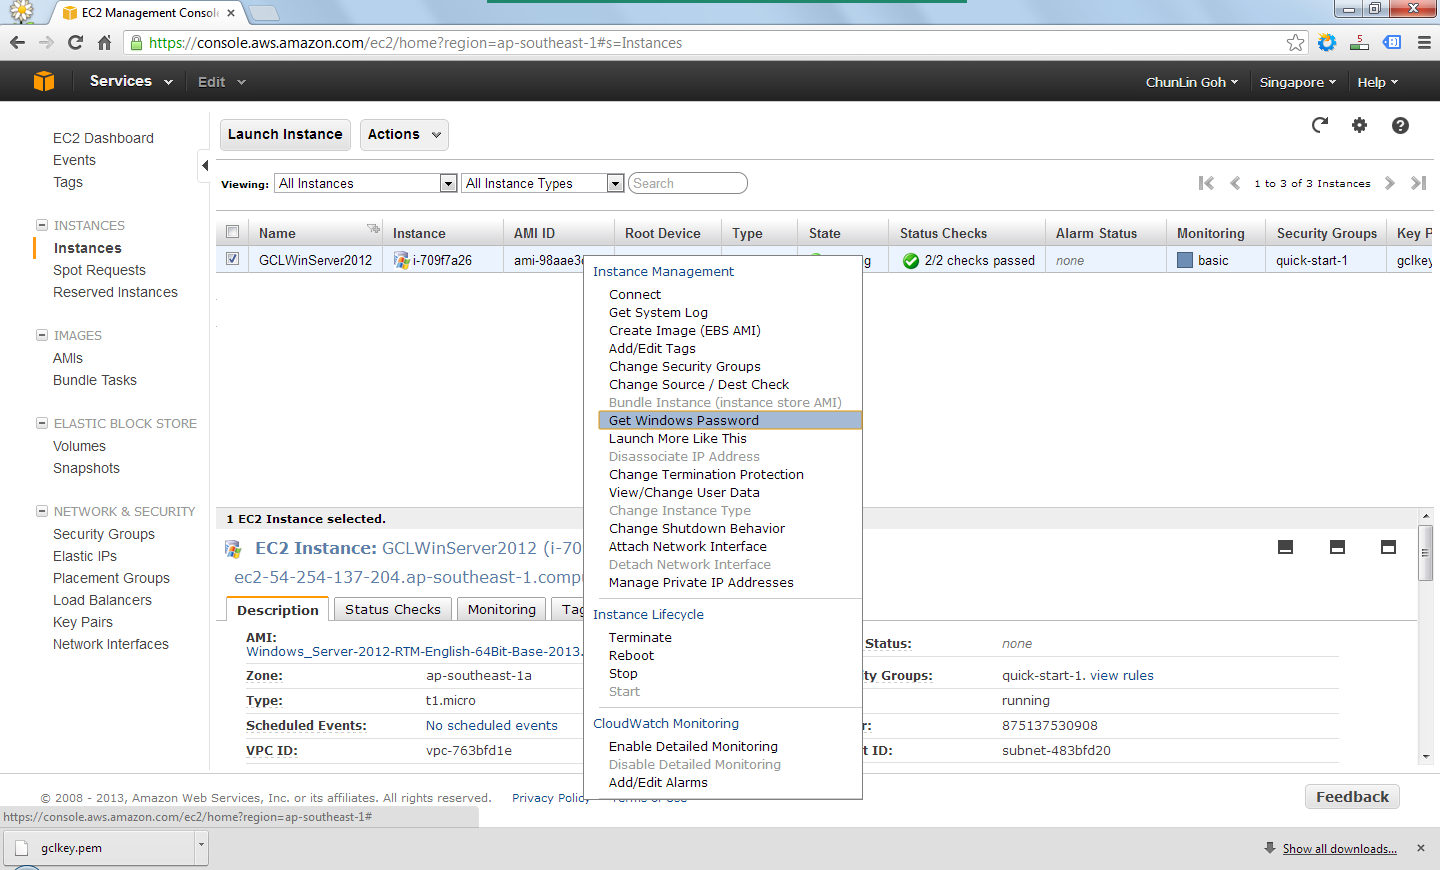
By right-clicking on the instance and choosing the item “Get Windows Password”, I received the default Windows Administrator password which would be used to access the instance remotely via RDP.
Retrieve the Windows Administrator password.
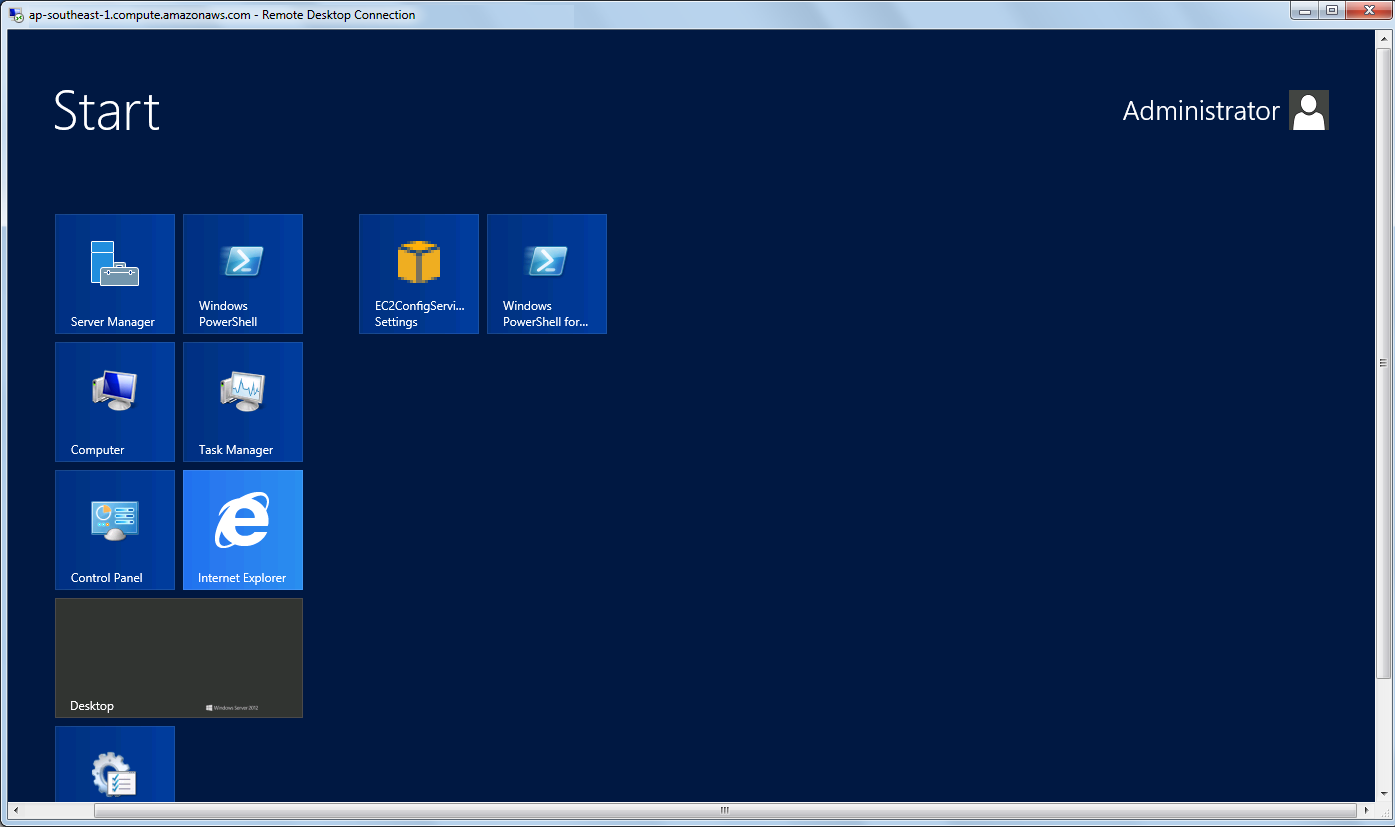
Yup, finally I can start playing with Windows Server 2012. =D
Yesh, successfully access the new Windows Server 2012!
I saw a status on Facebook saying that a professional model submitted her resume to a company looking for 3D modeller. I think most probably she misread “3D modeller” as “36D model” or something. So, I wonder whether people do read the job position and requirements that they are applying for carefully. However, if she is really interested in 3D modelling, she can probably try out some free 3D modelling software first.
I did a simple 3D model of the Town Hall from Warcraft II in my first experiment with the SketchUp. I did not even need to read any tutorial before using it as it’s quite easy to use. In fact, there is also a small window called Instructor to guide users on using the available tools with simple steps.
First Attempt: Warcraft II Town Hall (done in 2011)
Actually there is no need to model everything from scratch. SketchUp got this 3D Warehouse, the largest repository of free 3D content, where many well-done 3D model can be downloaded. I downloaded a nuclear power plant 3D model from there and after a few modification, I got the one as shown in the following picture.
Power plant (modified based on the original one from 3D Warehouse)