I like to explore interesting new technologies. I also love to learn more from the materials available on Microsoft Virtual Academy, Google Developers channel, and several other tech/dev events.
Since Visual Studio 2012, we can always find this file called modernizr-(version).js in the default ASP .NET 4.5 MVC template. So, what is Modernizr (can be downloaded from Nuget)?
With this information, we will then be able to provide alternative look-and-feel for those users who are using older versions of browser instead of telling those users “Best view in version xxx of browser yyy”.
With YepNope.js, we will also be able to tell Modernizr what to test and then what JS/CSS to load if the test passes or fails.
Finally, please remember that Modernizr only provides us information about which features are (not) supported. It won’t magically enable those features for us. We need to write corresponding JS/CSS to provide alternative views when the features are not supported on the browser.
In short, Modernizr is a good tool for designers to implement the idea of Progressive Enhancement.
The famous border-radius feature in CSS3 is supported in modern browsers like IE11, Edge, Chrome, and Firefox but it’s not supported in Internet Explorer 7 and 8. Does this stop us from using border-radius in our website? Nope. This is because for users who are still using IE7/8, they can still use the website in the same way as those who are using modern browsers. Just that those who are using old browsers cannot see the beautiful effect of border-radius.
I first said hi to ASP .NET MVC in the beginning of this year. On 28th January, I attended the .NET Developers Singapore meetup and listened to Nguyen Quy Hy’s talk about ASP .NET MVC. After that, I have been learning ASP .NET MVC and applying this new knowledge in both my work and personal projects.
After 6 months of learning ASP .NET MVC, I decided to again write down some new things that I have learnt so far.
URL in ASP .NET MVC and Google Recommendation
According to Google recommendation on URLs, it’s good to have URLs to be as simple as possible and human-readable. This can be easily done with the default URL mapping in ASP .NET MVC. For example, the following code allows to have human-readable URL such as http://www.example.com/Ticket/Singapore-Airlines.
In addition, Google also encourages us to use hyphens instead of underscores in our URLs as punctuation to separate the words. However, by default, ASP .NET MVC doesn’t support hyphens. One of the easy solutions is to extend the MvcRouteHandler to automatically replace underscores with hyphens.
Then in the RouteConfig.cs, we will replace the default route map to the following mapping.
routes.Add(
    new Route("{controller}/{action}/{id}",
    new RouteValueDictionary(
        new { controller = "Home", action = "Index", id = UrlParameter.Optional }),
        new HyphenatedRouteHandler())
);
By doing this, we can name our controllers and actions using underscores and then we set all the hyperlinks and links in sitemap to use hyphens.
There are actually many discussions about this online. I have listed below some of the online discussions that I found to be interesting.
Previously when I was working on WPF projects, I learnt the MVVM design pattern. So, it confused me when there was also a “View Model” in MVC. I thought with the use of View Model in ASP .NET MVC, I would be using MVVM too. It later turns out to be not the case.
Why is ViewModel able to provide the V a single object? This is because ViewModel can shape multiple entities from different data models into a single object.
public class CartViewModel
{
    ...

    public List<CartItems> items { get; set; }

    public UserProfile user { get; set; }
}
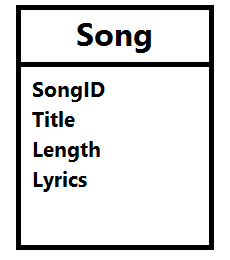
Besides, what I like about ViewModel is that it contains only fields that are needed in the V. Imagine the following model Song, we need to create a form to edit everything but the lyrics, what should we do?
The Song model.
Wait a minute. Why do we need to care about this? Can’t we just remove the Lyrics field from the edit form? Well, we can. However, generally we do not want to expose domain entities to the V.
If people manage to do a form post directly to your server, then they can add in the Lyrics field themselves and your server will happily accept the new Lyrics value. There will be a bigger problem if we are not talking about Lyrics, but something more critical, for example price, access rights, etc.
By using ViewModel, we need to having mapping code to map between the view model and the domain model. However, writing mapping code is very troublesome especially when there are many properties involved.
Luckily, there is AutoMapper. AutoMapper performs object-object mapping by transforming an input object of one type into an output object of another type.
Mapper.CreateMap<Location, LocationViewModel>();
AutoMapper has a smart way to map the properties from view model and the domain model. If there is a property called “LocationName” in the domain model, AutoMapper will automatically map to a property with the same name “LocationName” in the view model.
Session, ViewData, ViewBag, and TempData
In my first e-commerce project which is using ASP .NET, Session is widely used. From small things like referral URL to huge cart table, all are stored in Session. Everyone in the team was satisfied with using Session until the day we realized we had to do load balancing.
Another problem of using In-Process Session State is that once there is a restart on IIS or the server itself, the session variables stored on the server will be gone. Hence, for every deploy to the server, the customers will be automatically logged out from the e-commerce website.
Then you might wonder why we didn’t store session state in a database. Well, this won’t work because we store inserialisable objects in session variables, such as HtmlTable. Actually, there is another interesting mode for Session State, called StateServer. I will talk more about it in my another post about Azure load balancing.
This is to return an instance of the JsonResult class.
(4) success
If you are calling the GetAllMovies() through AJAX, probably you can do something as follows to check if there is any exception or error thrown.
$.ajax({
url:'/GetAllMovies',
success: function(data){
// No problem},
error: function(XMLHttpRequest, textStatus, errorThrown){
var obj = JSON.parse(jqXHR.responseText);
alert(obj.error);}});
The error callback above will only be triggered when the server returns non-200 status code. I thus introduced another status field to tell the caller more info, for example an exception raised in C# code or any invalid value being passed to GetAllMovies method through AJAX. Hence, in the AJAX call, we just need to update it to
$.ajax({
url:'/GetAllMovies',
success: function(data){
if (data.success) {
// No problem
} else {
alert(data.message);
}},
error: function(XMLHttpRequest, textStatus, errorThrown){
var obj = JSON.parse(jqXHR.responseText);
alert(obj.error);}});
To send email from my MVC project, I have the following code to help me out. It can accept multiple attachments too. So I also use it to send email with report generated using the code above attached. =)
public Task SendEmail(
    string sentTo, string sentCC, string sentBCC,  string subject, string body,
    string[] attachments = null)
{
    // Credentials:
    var credentialUserName = "<username provided by Amazon SES>;
    var sentFrom = "no-reply@mydomain.com";
    var pwd = "<password provided by Amazon SES>";

    // Configure the client:
    System.Net.Mail.SmtpClient client =
        new System.Net.Mail.SmtpClient("email-smtp.us-west-2.amazonaws.com");
    client.Port = 25;
    client.DeliveryMethod = System.Net.Mail.SmtpDeliveryMethod.Network;
    client.UseDefaultCredentials = false;

    // Create the credentials:
    System.Net.NetworkCredential credentials =
        new System.Net.NetworkCredential(credentialUserName, pwd);
    client.EnableSsl = true;
    client.Credentials = credentials;

    // Create the message:
    var mail = new System.Net.Mail.MailMessage(sentFrom, sentTo);
    string[] ccAccounts = sentCC.Split(new char[] { ';' }, StringSplitOptions.RemoveEmptyEntries);

    foreach (string ccEmail in additionalCcAccounts)
    {
        mail.CC.Add(ccEmail);
    }

    string[] bccAccounts = sentBCC.Split(new char[] { ';' }, StringSplitOptions.RemoveEmptyEntries);

    foreach (string bccEmail in additionalBccAccounts)
    {
        mail.Bcc.Add(bccEmail);
    }

    mail.Subject = subject;
    mail.Body = body;
    mail.IsBodyHtml = true;

    if (attachments != null)
    {
        for (int i = 0; i < attachments.Length; i++)
        {
            mail.Attachments.Add(new System.Net.Mail.Attachment(attachments[i]));
        }
    }

    client.SendComplete += (s, e) => client.Dispose();
    return client.SendMailAsync(mail);
}
To send an email without attachment, I just need to do the following in action method.
var emailClient = new Email();
await emailClient.SendEmail(
    "to@mydomain.com", "cc1@mydomain.com;cc2@domain.com", "bcc@mydomain.com",
    "Email Subject", "Email Body");
To send email with attachment, I will then use the following code.
string[] attachmentPaths = new string[1];

var reportServerPath = Server.MapPath("~/report");

attachmentPaths[0] = reportServerPath + "\\Report.xls";

var emailClient = new Email();
await emailClient.SendEmail(
    "admin@mydomain.com", "", "",
    "Email Subject", "Email Body", attachmentPaths);
Yup, that’s all what I have learnt so far in my MVC projects. I know this post is very, very long. However, I am still new to MVC and thus I am happy to be able to share with you what I learn in the projects. Please correct me if you find anything wrong in the post. Thanks! =)
I am very fortunate to be able to attend the Singapore .NET Developer meetup of this month. The topics of the meetup are MVVM, Windows 10, and Win2D. We are glad to have experienced developer, Riza, to be one of the speakers.
Riza’s sharing his thoughts about Win2D. (Image Credit: .NET Developer Singapore Community)
Retained Mode does not directly cause actual graphic rendering. Example: WPF.
Immediate Mode will directly cause actual graphic rendering. Example: Direct2D and System.Drawing library.
Last year, Microsoft proudly announced the Win2D which developers could use it to bring hardware accelerated Direct2D graphics to Windows 8.1 Universal Apps. This undoubtedly is a great news for game developers who would like to publish their games on Surface and Windows Phone in the future.
Let’s Start Coding!
I thus decided to read through some online tutorials to try out this new cool API. The following are two tutorials that I read.
The first app that I developed is an app similar to what is being shown in the first tutorial listed above.
Pavel’s code doesn’t work well when I am using the latest version of Win2D from Nuget (Version 0.0.20). For example, the way he sets the speed of the moving circle is as follows.
circle.Speed = new Vector2(-circle.Speed.X, circle.Speed.Y);
However, this won’t work in my project. So, I changed it to the code below.
circle.Speed = new Vector2() { X = -circle.Speed.X, Y = circle.Speed.Y };
Before doing the coding, there is a need to add Win2D to the Windows 8.1 Universal App project first.
The interface of Nuget Package Manager has changed in VS2015! Here, we can find Win2D package.
VS2015 and Azure
As you can see from the screenshot above, it’s actually VS2015 on Microsoft Azure! On Azure, we can easily create a VM with one of the following editions of VS2015 installed: Professional, Enterprise, and Community. Hence, I no longer need to download VS2015 to my own laptop. =)
However, when I first started the VS 2015 on the new VM, I encountered two problems once I tried to compile my Windows 8.1 Universal App.
Firstly, it said developer license couldn’t be approved because of having no Desktop Experience feature enabled.
“We couldn’t get your developer license for Windows Server 2012 R2”
This was easily solved by enabling the Desktop Experience feature. In the beginning, I was having a hard time finding where to enable the Desktop Experience. Thanks to a blog post written by Tamer Sherif Mahmoud, I found the option as shown in the following screenshot.
Desktop Experience option is actually under User Interfaces and Infrastructure.
Secondly, VS2015 complaint that the Windows 8.1 Universal App couldn’t be activated by the Built-in Adminstrator.
“This app can’t be activated by the Built-in Adminstrator”
In order to use CanvasControl, I need to include Microsoft.Graphics.Canvas.UI.Xaml, as highlighted in green in the code above.
The Logic
The following is my Main method.
public MainPage()
{
    this.InitializeComponent();
    _width = (float)Window.Current.Bounds.Width;
    _height = (float)Window.Current.Bounds.Height;
    _timer.Tick += (s, e) => {
        Dictionary<CircleData, int> reference = _circles.ToDictionary(x => x.Key, x => x.Value);

        foreach (var circleKeyPair in reference)
        {
            var circle = circleKeyPair.Key;

            int circleRadiusChangingSpeed = circleKeyPair.Value;

            float posX = circle.Speed.X + circle.Center.X;
            float posY = circle.Speed.Y + circle.Center.Y;
            circle.Radius += circleRadiusChangingSpeed;

            if (circle.Radius > _height / 4 || circle.Radius <= 0)
            {
                _circles[circle] = -1 * circleKeyPair.Value;
            }

            var radius = circle.Radius;
            if (posX + radius > _width || posX - radius < 0)
            {
                circle.Speed = new Vector2() { X = -circle.Speed.X, Y = circle.Speed.Y };
            }
            else if (posY + radius > _height || posY - radius < 0)
            {
                circle.Speed = new Vector2 { X = circle.Speed.X, Y = -circle.Speed.Y };
            }
            circle.Center = new Vector2 { X = circle.Speed.X + circle.Center.X, Y = circle.Speed.Y + circle.Center.Y };
        }

        _canvas.Invalidate();
    };

    _timer.Start();
}
In the code, I first define the area to have the circles by declaring two variables _width and _height to be the width and height of the current window. I can’t use the width and height (or even actualWidth and actualHeight) of the grid because they are always 0.
Then same as Pavel, I also move the circles around by having the following code.
circle.Center = new Vector2 { X = circle.Speed.X + circle.Center.X, Y = circle.Speed.Y + circle.Center.Y };
Here, I can’t set X = posX and Y = posY because the circle.Speed here, which is used to define the moving speed and direction, can be already different as the circle.Speed when posX and posY were calculated.
In addition, I also add in the code to change the size of the circle every time it moves. The circle will grow until a certain size and then its radius will be decreased to 0. Once the radius is 0, it will start to increase again.
For the OnTapped and OnDraw, I am using the same codes as Pavel’s.
The following screenshot shows the colourful circles created by clicking on the app a few times.
Colourful circles created with DrawCircle.
That is done using DrawCircle. So, let’s see what will happen if I change to use FillCircle with an image, as taught in the second tutorial mentioned above.
The CircleInnerImageBrush is created in the following way.
CanvasBitmap image = await CanvasBitmap.LoadAsync(_canvas.Device,
    new Uri("<URL to the image here>"));
CanvasImageBrush imageBrush = new CanvasImageBrush(_canvas.Device, image)
{
     ExtendX = CanvasEdgeBehavior.Clamp,
     ExtendY = CanvasEdgeBehavior.Wrap,
     SourceRectangle = new Rect(0, 0, image.Bounds.Width, image.Bounds.Height)
};
Then I am able to get the following cool effects!
FillCircle + Image
Win2D is Open Source
That’s what I have learnt so far after listening to Riza’s 10-minute sharing on Win2D. I will probably try out the API more in the near future because Win2D looks very promising!
In case, you wonder how much I spent on running VS2015 on Azure, running an A4 (8 cores, 14GB memory) instance for about one week costed me about USD 90.
I first learnt about the term “Machine Learning” when I was taking the online Stanford AI course in 2011. The course basically taught us about the basics of Artificial Intelligence. So, I got the opportunity to learn about Game Theory, object recognition, robotic car, path planning, machine learning, etc.
We learnt stuff like Machine Leaning, Path Planning, AI in the online Stanford AI course.
Meetup in Microsoft
I was very excited to see the announcement from Azure Community Singapore saying that there would be a Big Data expert to talk about Azure Machine Learning in the community monthly meetup.
Doli was telling us story about Azure Machine Learning. (Photo Credit: Azure Community Singapore)
The speaker is Doli, Big Data engineer working in Malaysia iProperty Group. He gave us a good introduction to Azure Machine Learning, and then followed by Market Basket Analysis, Regression, and a recommendation system works on Azure Machine Learning.
I found the talk to be interesting, especially for those who want to know more about Big Data and Machine Learning but still new to them. I will try my best to share with you here what I have learned from Doli’s 2-hour presentation.
Ano… What is Machine Learning?
Could we make the computer to learn and behave more intelligently based on the data? For example, is it possible that from both the flight and weather data, we can know which scheduled flights are going to be delayed? Machine Learning makes it possible. Machine Learning takes historical data and make prediction about future trend.
This Sounds Similar to Data Mining
During the meetup, there was a question raised. What is the difference between Data Mining and Machine Learning?
Data Mining is normally carried out by a person to discover the pattern from a massive, complicated dataset. However, Machine Learning can be done without human guidance to predict based on previous patterns and data.
Gmail is also using supervised learning to find out which emails are spam or need to be prioritized. In the slides of Introduction to Apache Mahout, it uses YouTube Recommendation an example of supervised learning. This is because the recommendation given by YouTube has taken videos explicitly liked, added to favourites, rated by the user.
I love watching anime so YouTube recommended me some great anime videos. =P
Unlike supervised learning, unsupervised learning is trying to find structure in unlabeled data. Clustering, as one of the unsupervised learning techniques, is grouping data into small groups based on similarity such that data in the same group are as similar as possible and data in different groups are as different as possible. An example for unsupervised learning is called the k-means Clustering.
Clearly, the prediction of Machine Learning is not about perfect accuracy.
Azure Machine Learning: Experiment!
With Azure Machine Learning, we are now able to perform cloud-based predictive analysis.
Azure Machine Learning is a service that developer can use to build predictive analytic models with training datasets. Those models then can be deployed for consumption as web service in C#, Python, and R. Hence, the process can be summarized as follows.
Data Collection: Understanding the problem and collecting data
In fact, there are quite a number of sample datasets available in Azure Machine Learning Studio too. During the presentation, Doli also showed us how to use Reader to connect to a MS SQL server to get data.
Get data either from sample dataset or from reader (database, Azure Blob Storage, data feed reader, etc.).
To see the data of the dataset, we can click on the output port at the bottom of the box and then select “Visualize”.
Visualize the dataset.
After getting the data, we need to do pre-processing, i.e. cleaning up the data. For example, we need to remove rows which have missing data.
In addition, we will choose relevant columns from the dataset (aka features in machine learning) which will help in the prediction. Choosing columns requires a few rounds of experiments before finding a good set of features to use for a predictive model.
Let’s clean up the data and select only what we need.
Train and Analyze
As mentioned earlier, Machine Learning learns from a dataset and apply it to new data. Hence, in order to evaluate an algorithm in Machine Learning, the data collected will be split into two sets, the Training Set for Machine Learning to train the algorithm and Testing Set for prediction.
Doli said that the more data we use to train the model the better. However, they are many people having different opinions. For example, there is one online discussion about the optimal ratio between the Training Set and Testing Set. Some said 3:2, some said 1:1, and some said 3:1. I don’t know much about Statistical Analysis, so I will just make it 1:1, as shown in the tutorial in Machine Learning Studio.
Randomly split the dataset into two halves: a training set and a testing set.
So, what “algorithm” are we talking about here? In Machine Learning Studio, there are many learning algorithms to choose from. I won’t go into details about which algo to choose here. =)
Choose learning algorithm and specify the prediction target.
Finally, we just hit the “Run” button located at the command bar to train the model and make a prediction on the test dataset.
After the run is successfully completed, we can view the prediction results.
Visualize results.
Deploy
From here, we can improve the model by changing the features, properties of algorithm, or even algorithm itself.
When we are satisfied with the model, we can publish it as a web service so that we can directly use it for new data in the future. Alternatively, you can also download an Excel workbook from the Machine Learning Studio which has macro added to compute the predicted values.
Oh ya, in case you would like to know more about how-old.net which is using Machine Learning, please visit the homepage of Microsoft Project Oxford to find out more about the Face APIs, Speech APIs, Computer Vision APIs, and other cools APIs that you can use.
Please correct me if you spot any mistake in my post because I am still very, very new to Machine Learning. Please join our meetup too, if you would like to know more about Azure.