I like to explore interesting new technologies. I also love to learn more from the materials available on Microsoft Virtual Academy, Google Developers channel, and several other tech/dev events.
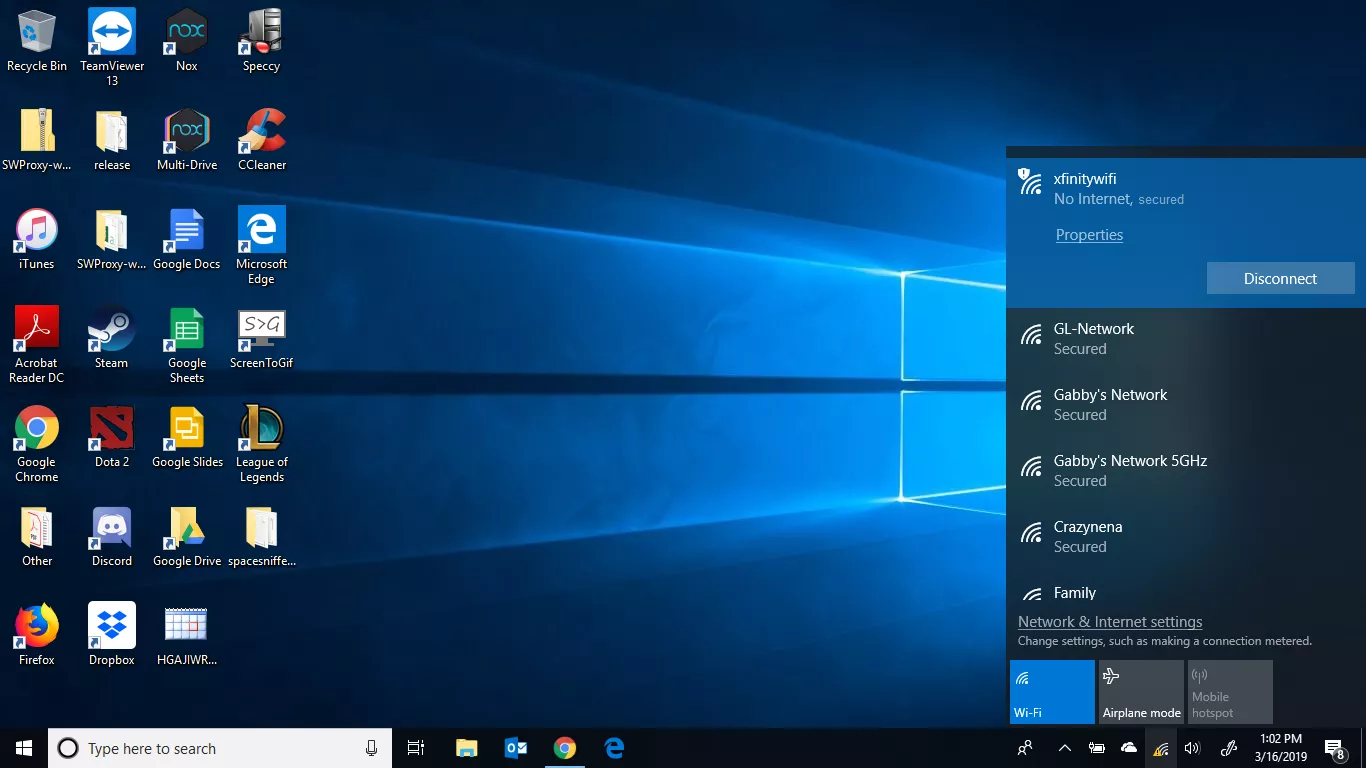
Today, when I was accessing corporate resources remotely from my personal laptop at home via Pulse Secure, I accidentally disconnected myself from the Internet. After that, I could no longer access the Internet with a message saying, “No Internet, secured”, as demonstrated in the screenshot below.
Suddenly losing my Wi-Fi connection with the message “No Internet, secured”. (Image Credit: lifewire.com)
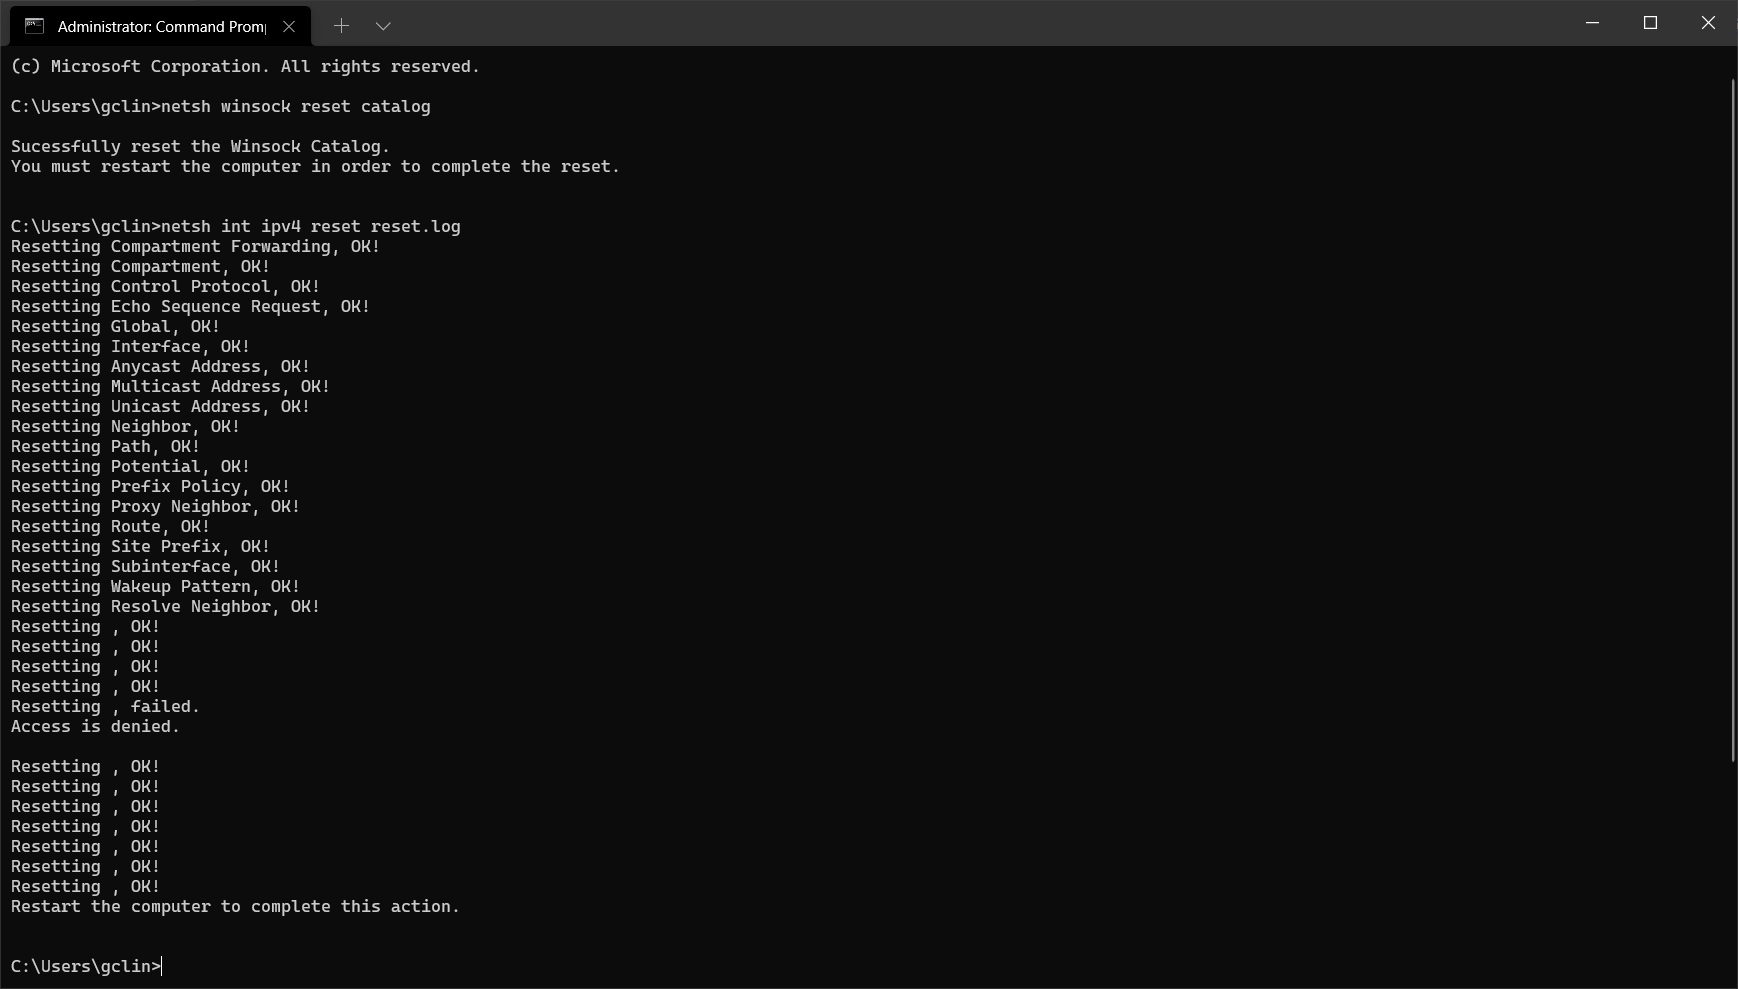
After restarting my laptop, the problem is still there. Hence, there is a chance that Wi-Fi adapter does detect available network, but it does not accept TCP/IP address.
Remember to run the two commands in the Administrator mode of the Command Prompt.
Next, we can proceed to restart our laptop.
Use Google Public DNS
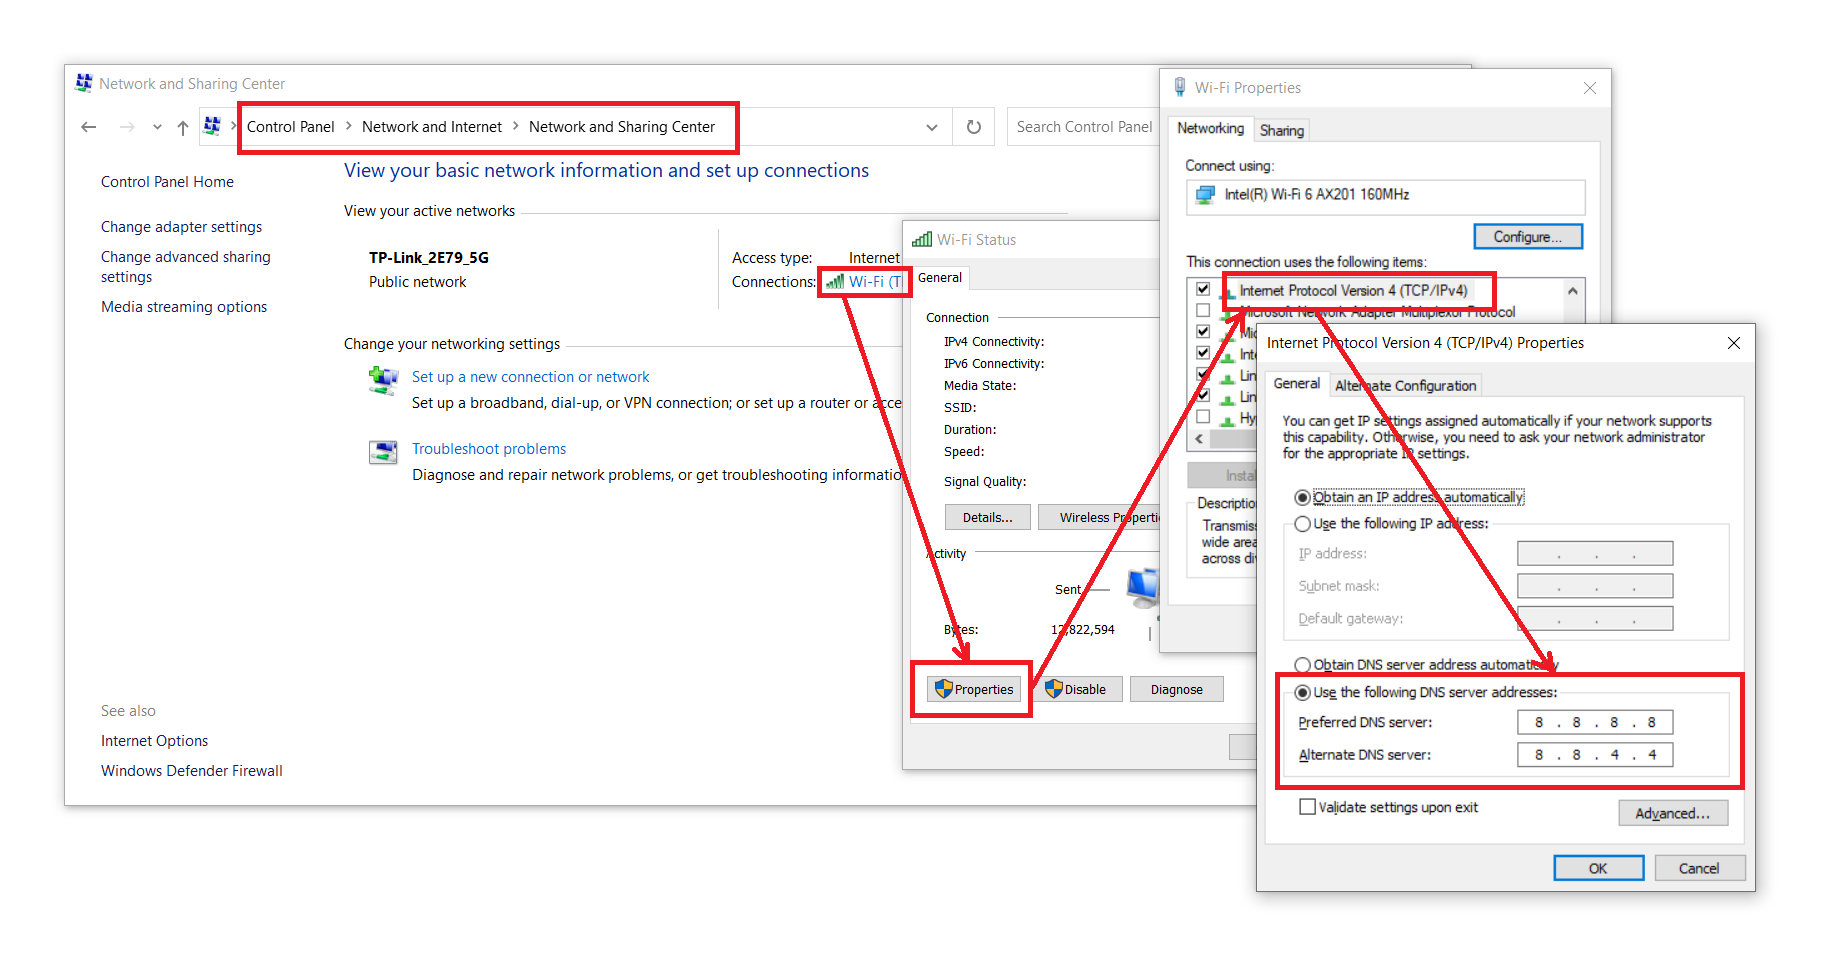
After restarting my laptop, I realised that the message “No Internet, secured” is gone but I still couldn’t surf the Internet. Hence, I decide to configure my network settings to use Google Public DNS, as shown in the screenshot below.
Configure network settings to use Google Public DNS.
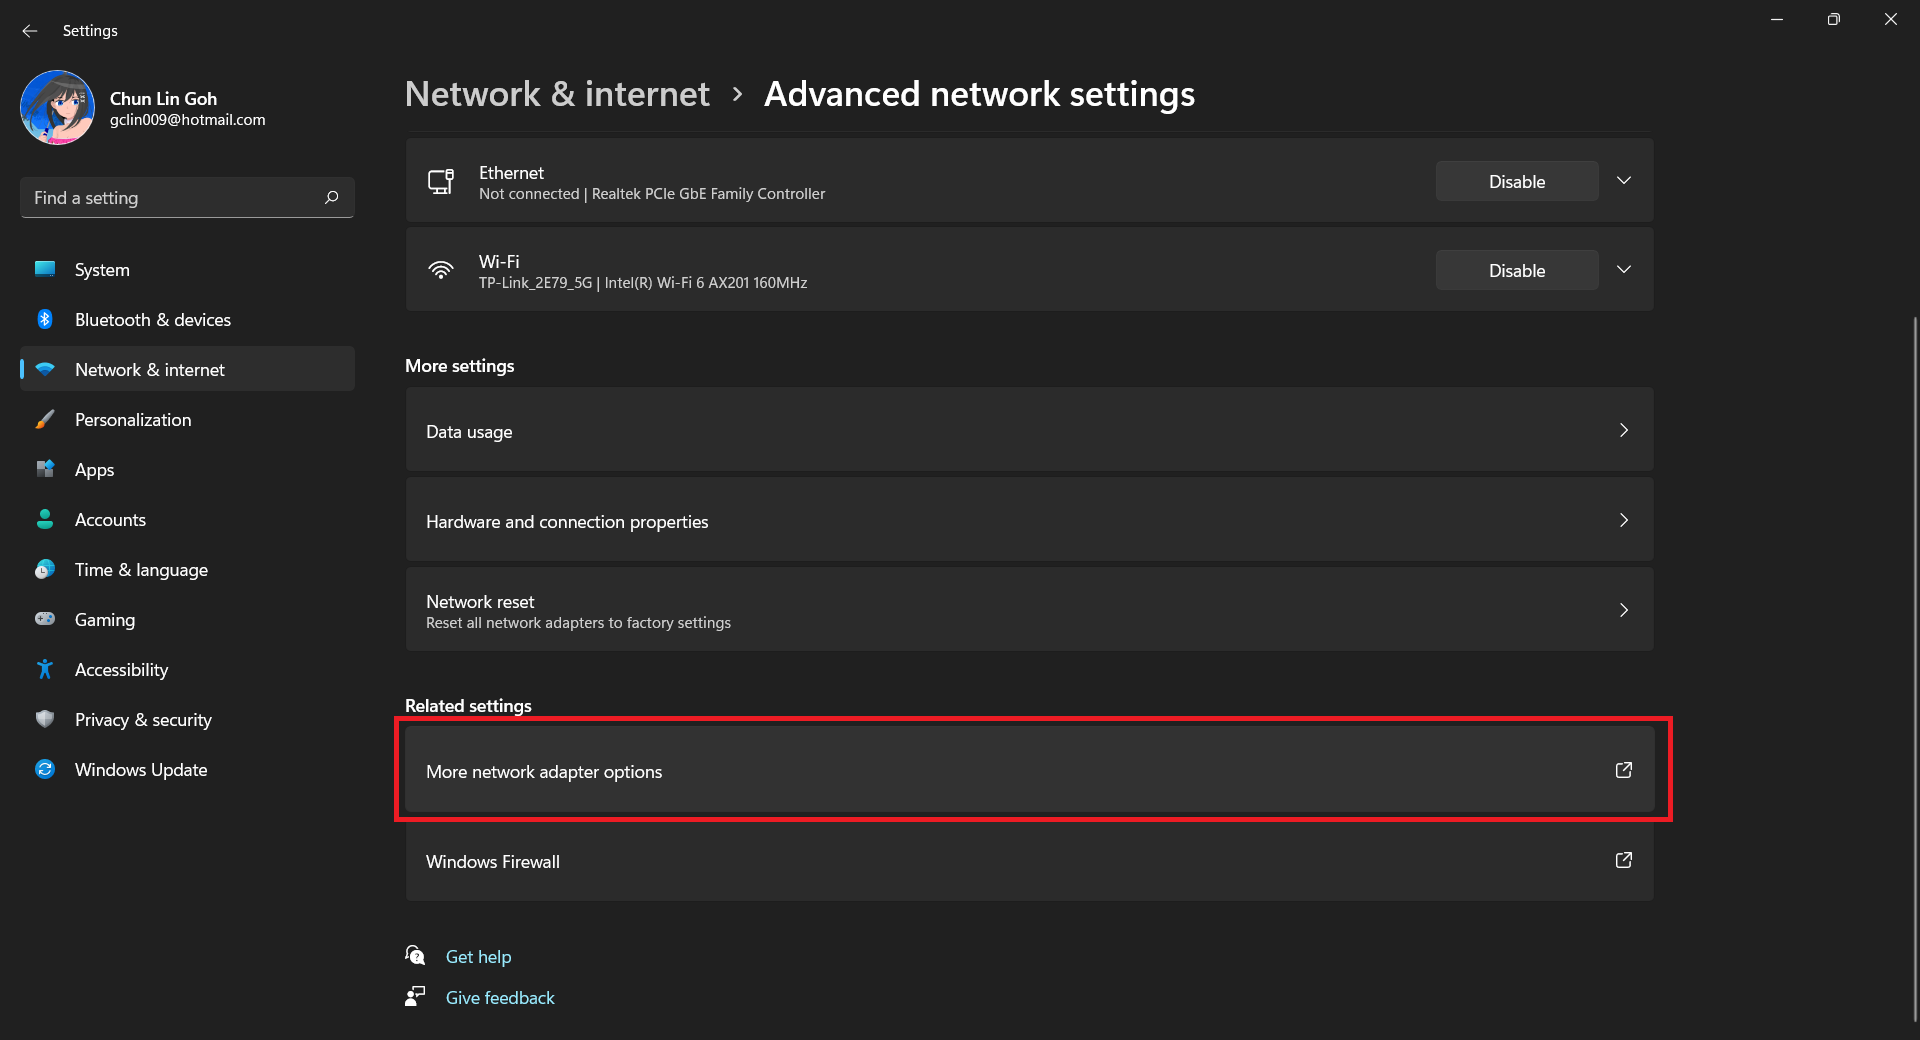
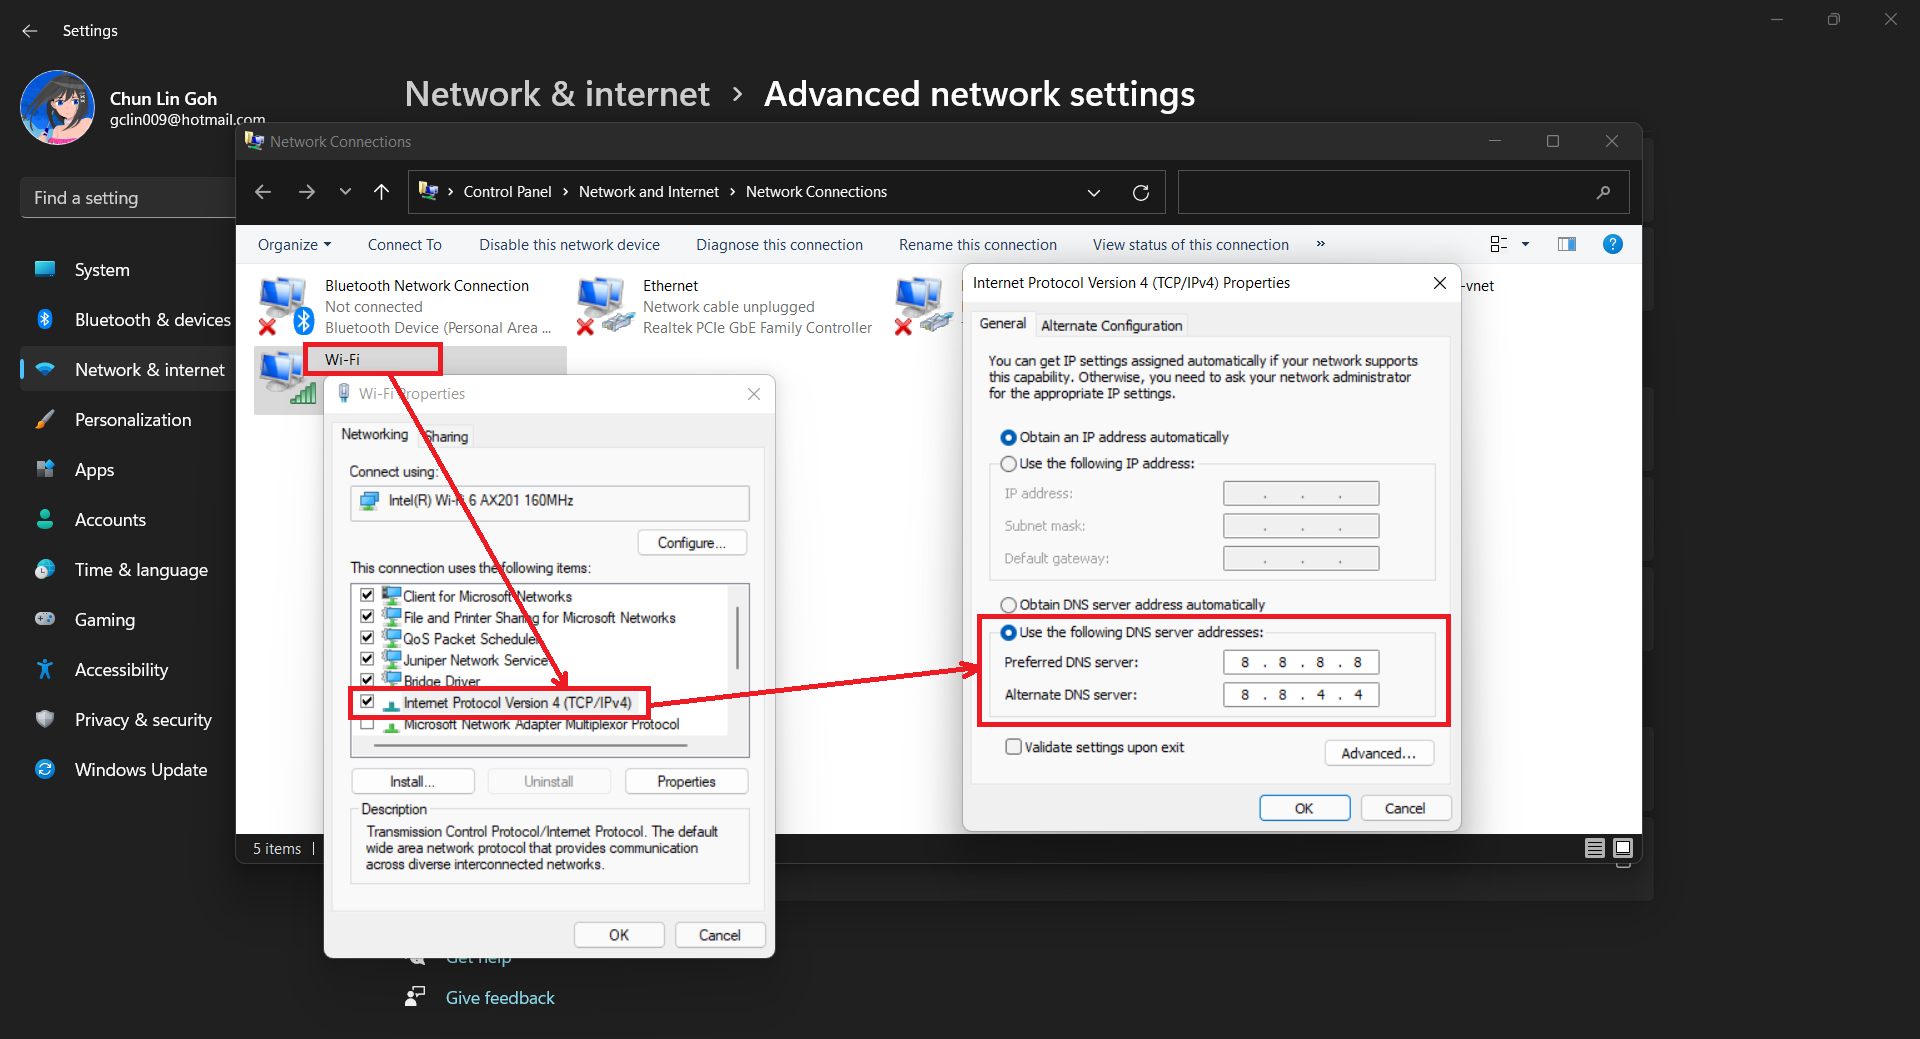
For Windows 11 which has a new UI design, we first need to visit the “Advance network settings” section under the “Network & internet”, as shown below.
Windows 11 Settings screen.
After that, we choose “More network adapter options”, as shown in the following screenshot.
Advanced network settings in Windows 11.
We then can proceed to use Google Public DNS, as shown below.
Configure network settings to use Google Public DNS in Windows 11.
Once this is done, I can surf the Internet again. Yay!
KOSD, or Kopi-O Siew Dai, is a type of Singapore coffee that I enjoy. It is basically a cup of coffee with a little bit of sugar. This series is meant to blog about technical knowledge that I gained while having a small cup of Kopi-O Siew Dai.
I had ended up in a hospital bed a few times because of pneumonia, which is an infection of the lungs. It’s not a great experience lying on the hospital bed for weeks to receive treatments. Meanwhile, the COVID-19 infection can also progress to our lungs and thus it’s possible to develop pneumonia because of COVID-19 infection. So before it’s too late, I shall have the vaccination done.
Nominated
As a staff working in National University of Singapore, I was nominated to received the COVID-19 vaccination in early June 2021. Hence, I don’t need to go through the registration process and can directly book the vaccination day.
We are allowed to choose a vaccination centre. Once it’s chosen, we cannot change the vaccination centre to another one after the 1st dose. The one I picked is located at Raffles City Convention Centre which offered Pfizer vaccines.
On the day of vaccination, I also brought my NRIC and a bag with a bottle of plain water inside. We will be receiving vaccination information sheet and other documents after the vaccination, so it’s better to bring a bag to keep them safe.
Receiving the Covid-19 vaccine at the Raffles City Convention Centre. (Photo Source: The Straits Times)
Vaccination
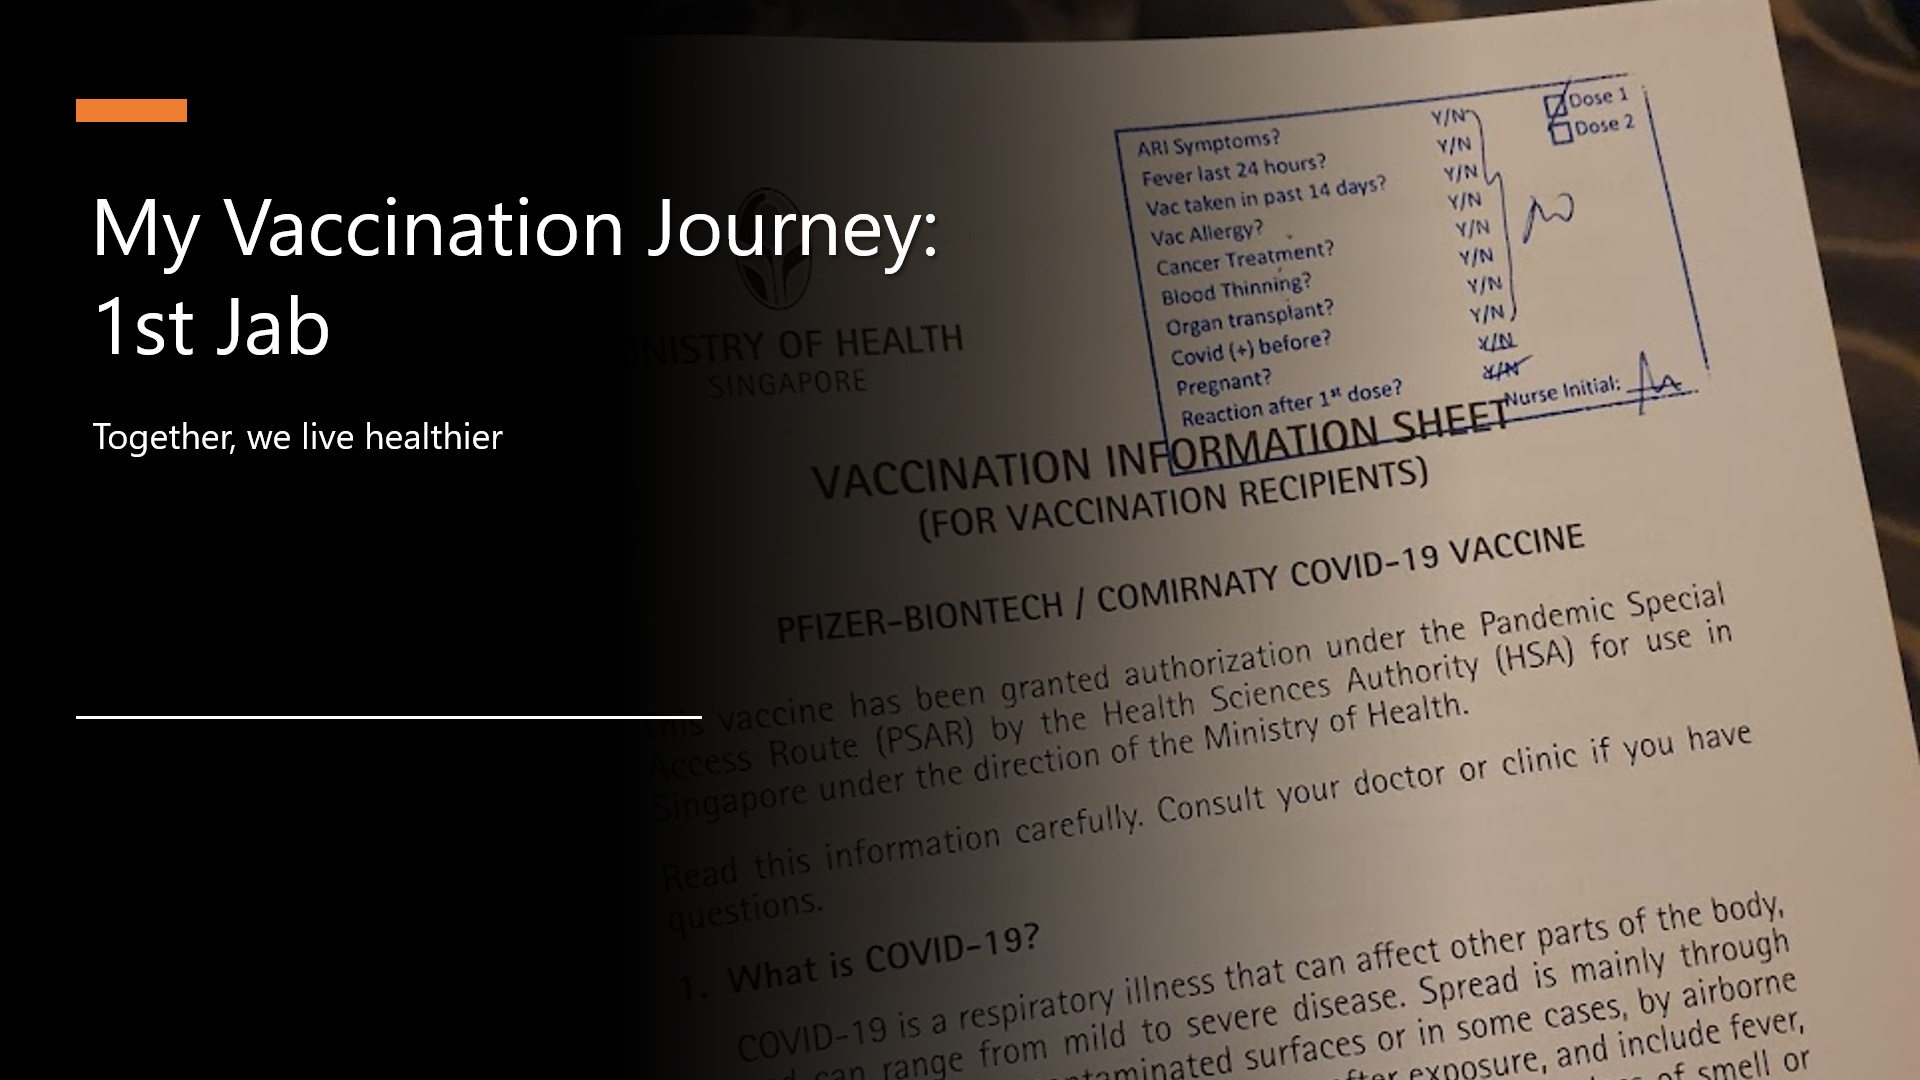
The timeslot I booked for the vaccination is at 3pm. The queue was rather short. I had only queued for 15 minutes. During this period of time, the staff in the vaccination centre checked with each of us, the vaccination recipients, about the health conditions to see whether we have following issues such as
ARI Symptoms;
Fever in the past 24 hours;
Other vaccines taken in past 14 days;
Cancer treatment;
Blood thinning;
Organ transplant;
Infected by COVID before;
Pregnant;
Reaction after 1st dose (for those who are taking 2nd dose).
If there are no serious issues, we will then be allowed to proceed to get vaccinated.
The vaccination information sheet.
The actual vaccination took less than one minute. After that, we are brought to the observation area.
Observation
The observation area is for us to sit on a chair and wait for 30 minutes to see whether any negative reaction occurs. There was also audio announcement in the observation area in four languages, i.e. English, Chinese, Bahasa Melayu, and Tamil. The announcement is important because it gives us advises on what to do after the vaccination and having severe allergic reaction.
The observation area in Raffles City Conference Centre. (Image Source: The Straits Times)
In order to kill time and destress, many of the vaccination recipients chose to read articles or watch videos on their smartphone. Hence, sometimes when the staff called their name to let them know the waiting time was over, they were still sitting there.
After 30 minutes of observation, the staff called my name and passed me a vaccination card. The vaccination card is the most important document throughout the vaccination journey because we need to bring the card for the 2nd dose.
After Vaccination
First of all, no fever.
I could feel a bit pain in the area of injection on my left arm when I lifted it upward in the first four days after the vaccination. I also avoided sleeping on left side because that would give pressure to my left arm and that would be a bit painful. Other than these minor issues, basically I had not encountered any side effect.
Yup, that’s all of my vaccination journey. Let’s discuss again when I have the 2nd dose.
Together, we live healthier.
During the observation period, I was playing Honkai Impact 3rd to not only kill time but also stop myself from thinking too much about the vaccination.
As we all know, a picture is worth 1,000 words. More and more, we see developers utilising images as the core of their app. Images play an important role in application navigation, usability, and branding. Hence, sharing images across all platforms, i.e. iOS, Android, and Windows 10, is often a task we need to work on. Today, I will share about how we do just that with Embedded Images.
Distributing images across different platforms with Embedded Images is recommended when identical images are used on each platform, and is particularly suited to creating components, as the image is bundled with the code. In this post, I will demo how we can do that in a new Xamarin.Forms blank project.
Let’s say we would like to show some images in the first screen of our app for each of the platforms. We will first have a folder called Images to store all those images. Then, we need to proceed to set the Build Action of the images to be “Embedded resource”.
Right-click the selected images and then select “Properties” to modify their Build Action.
[ContentProperty(nameof(Source))]
public class ImageResourceExtension : IMarkupExtension
{
    public string Source { get; set; }

    public object ProvideValue(IServiceProvider serviceProvider)
    {
        if (Source == null) return null;

        Assembly assembly = typeof(ImageResourceExtension).Assembly;
        var imageSource = ImageSource.FromResource(Source, assembly);

        return imageSource;
    }
}
Here we use the overload of ImageSource.FromResource that specifies the source assembly in which to search for the image so that it can work on the Release mode of UWP on Windows 10.
Now we can use this extension in the XAML, as shown below, in MainPage.xaml.
The highlighted sections are the parts newly added. At this point of time, we’re still not sure the name of the image. So our app now should not show any image at that part. To find out the actual image names, we can add a debugging code (which we should remove in production) in the ImageResourceExtension class as follows.
[ContentProperty(nameof(Source))]
public class ImageResourceExtension : IMarkupExtension
{
    ...

    public object ProvideValue(IServiceProvider serviceProvider)
    {
        ...

        foreach (var res in assembly.GetManifestResourceNames())
        {
            System.Diagnostics.Debug.WriteLine("found resource: " + res);
        }

        ...
    }
}
When we debug our app, the following should be shown in the Output window.
found resource: CPEI.Images.Genshin-Impact-Pic01.png
found resource: CPEI.Images.Genshin-Impact-Pic02.png
found resource: CPEI.Images.Genshin-Impact-Pic03.png
found resource: CPEI.Images.Genshin-Impact-Pic04.png
found resource: CPEI.Images.Genshin-Impact-Pic05.png
found resource: CPEI.Images.Genshin-Impact-Pic06.png
So now we know the name for each of the images. We simply update the Source in the XAML code above to correctly show the image, for example
Yay, the selected image is now displayed on our UWP app.
Access Embedded Images from Code Behind
Instead of XAML, we can access the embedded images from code behind too. For example, if we want to change the image above randomly through a click of button, we can have the following code in the click event of the button.
private void Button_Clicked(object sender, EventArgs e)
{
    Random rnd = new Random();
    int imageIndex = rnd.Next(1, 7);

    MainImage.Source = ImageSource.FromResource(
        $"CPEI.Images.Genshin-Impact-Pic{imageIndex:00}.png",
        typeof(MainPage).Assembly);
}
Yay, we now can choose embedded images to be displayed in frontend from code behind.
Android and iOS
Since embedded images are shipped with those images embedded in the assembly as a resource, the images can be also displayed on Android, as demonstrated below.
Debugging our Xamarin.Forms app on Android emulator.
In order to test our app on the iOS platform, it’s easier if we choose to build our iOS app project on a Mac machine directly. Visual Studio for Mac offers the support for debugging Xamarin.iOS applications both in the iOS simulator and on iOS devices.
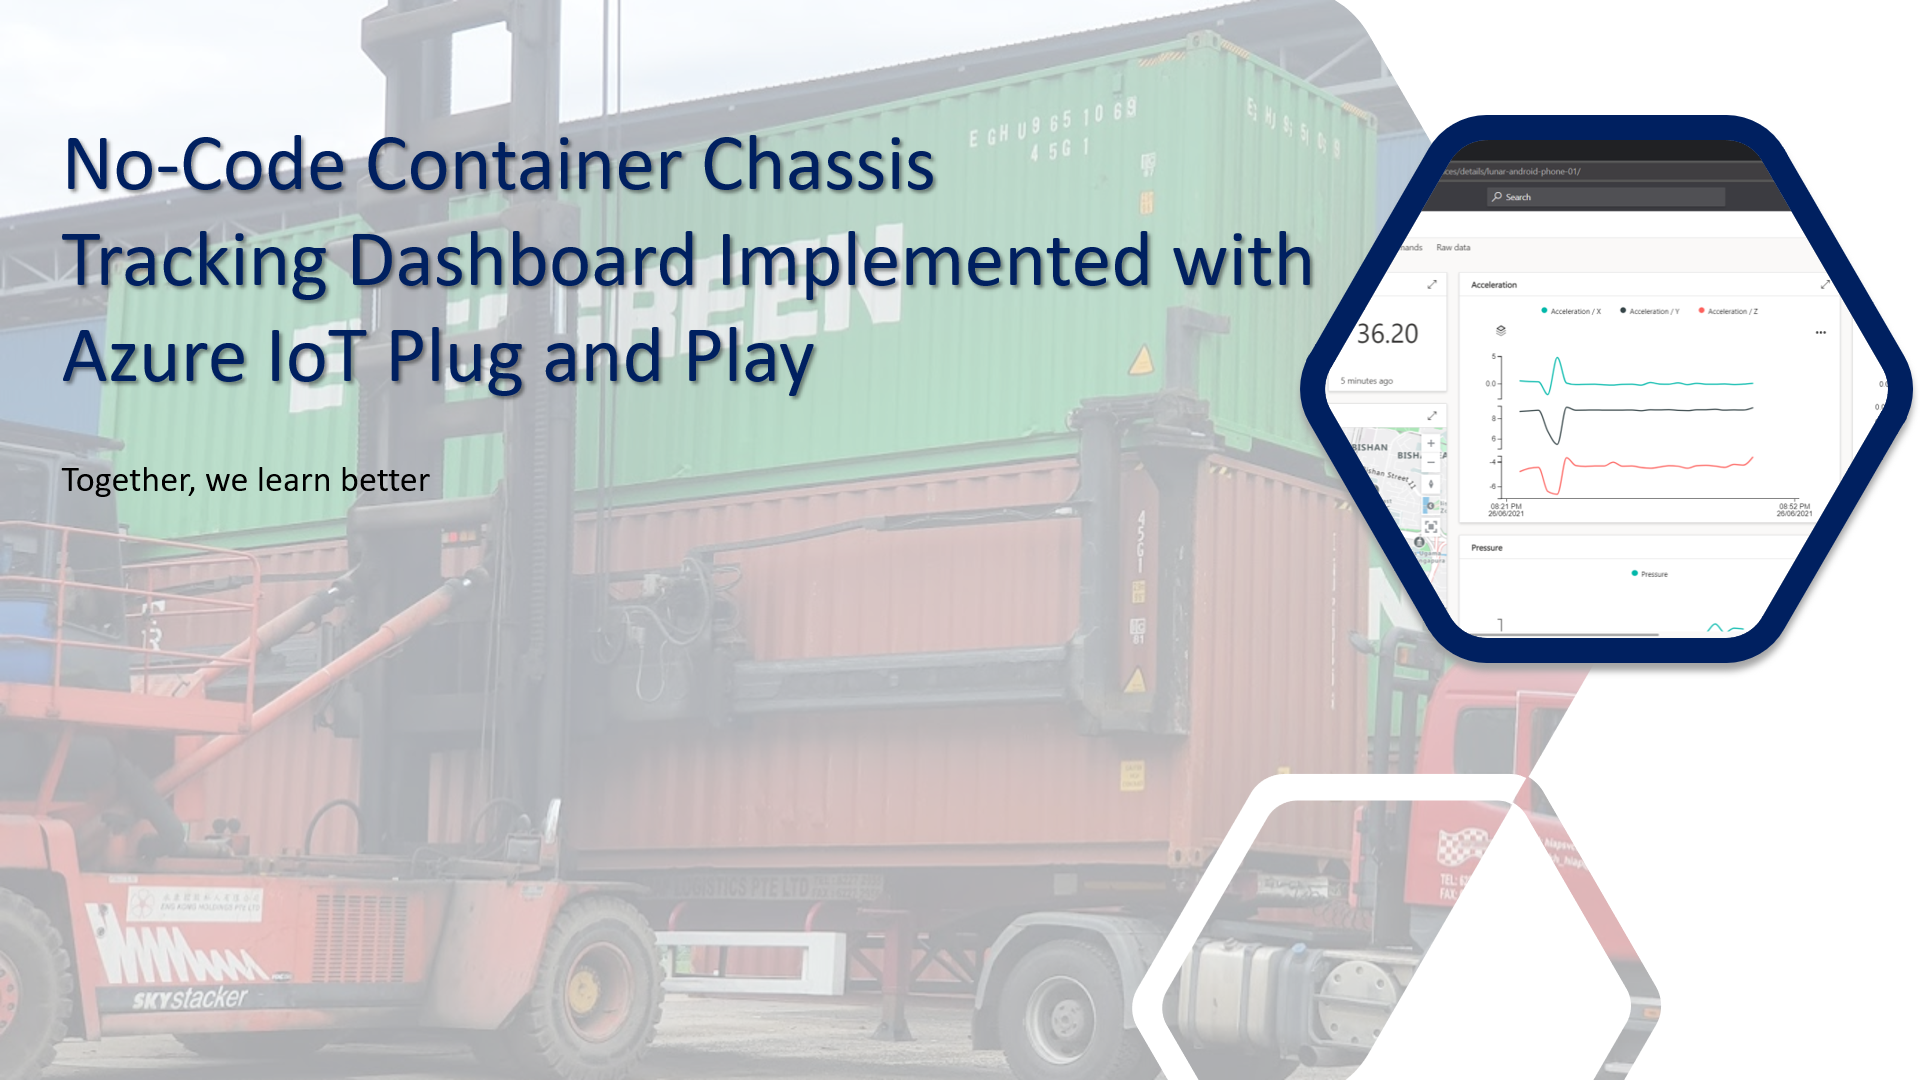
Normally on the roads, we will see trailer trucks, which are the combination of a prime mover and a container chassis to carry freight. Container chassis is an important asset of a trucking company. It is usually an unpowered vehicle towed by another. If you still have no idea what it is, please watch the video below.
Tracking container chassis is not a simple problem to solve. We do not only need to build trackers, which are IoT devices to send back telemetry and sensor data collected from the container chassis, but also need to have another system to store, process, and display the data. This does not sound like a system that can be easily built within, let’s say, 5 minutes.
Now what if we can turn our smart phones into trackers and then install one of them on the container chassis? Also, what if we can make use of Microsoft Azure to provide a IoT data dashboard for us in just a few clicks?
Few days ago, Microsoft release a mobile app called IoT Plug and Play on both Android and iOS.
So, you may ask, why is this IoT Plug and Play interesting? This is because it can turn our iOS or Android device into an IoT device without any coding or device modeling. Our phones can then seamlessly connect to Azure IoT Central or IoT Hub with telemetry and sensor data from the devices will be automatically uploaded to the Azure in a defined delivery interval.
In this post, I am just going to share what I have tried out so far. Hopefully it helps my friends who are looking for similar solutions.
Setup Azure IoT Central
Before we proceed further, we need to understand that even though the example I use here may sound simple to you, but the services, such as Azure IoT Central is actually meant for production use so that the industries can use it to build enterprise-grade IoT applications on a secure, reliable, and scalable infrastructure.
When we are setting up Azure IoT Central, we can have a quick start by directly applying templates which are all industry focused examples available for these industries today. For example, using the templates on Azure, logistics company can create an Azure IoT Central application to track shipments in real time across air, water, and land with location and condition monitoring. This will play an important role in the logistics industry because the technology can then provide total end-to-end supply chain enablement.
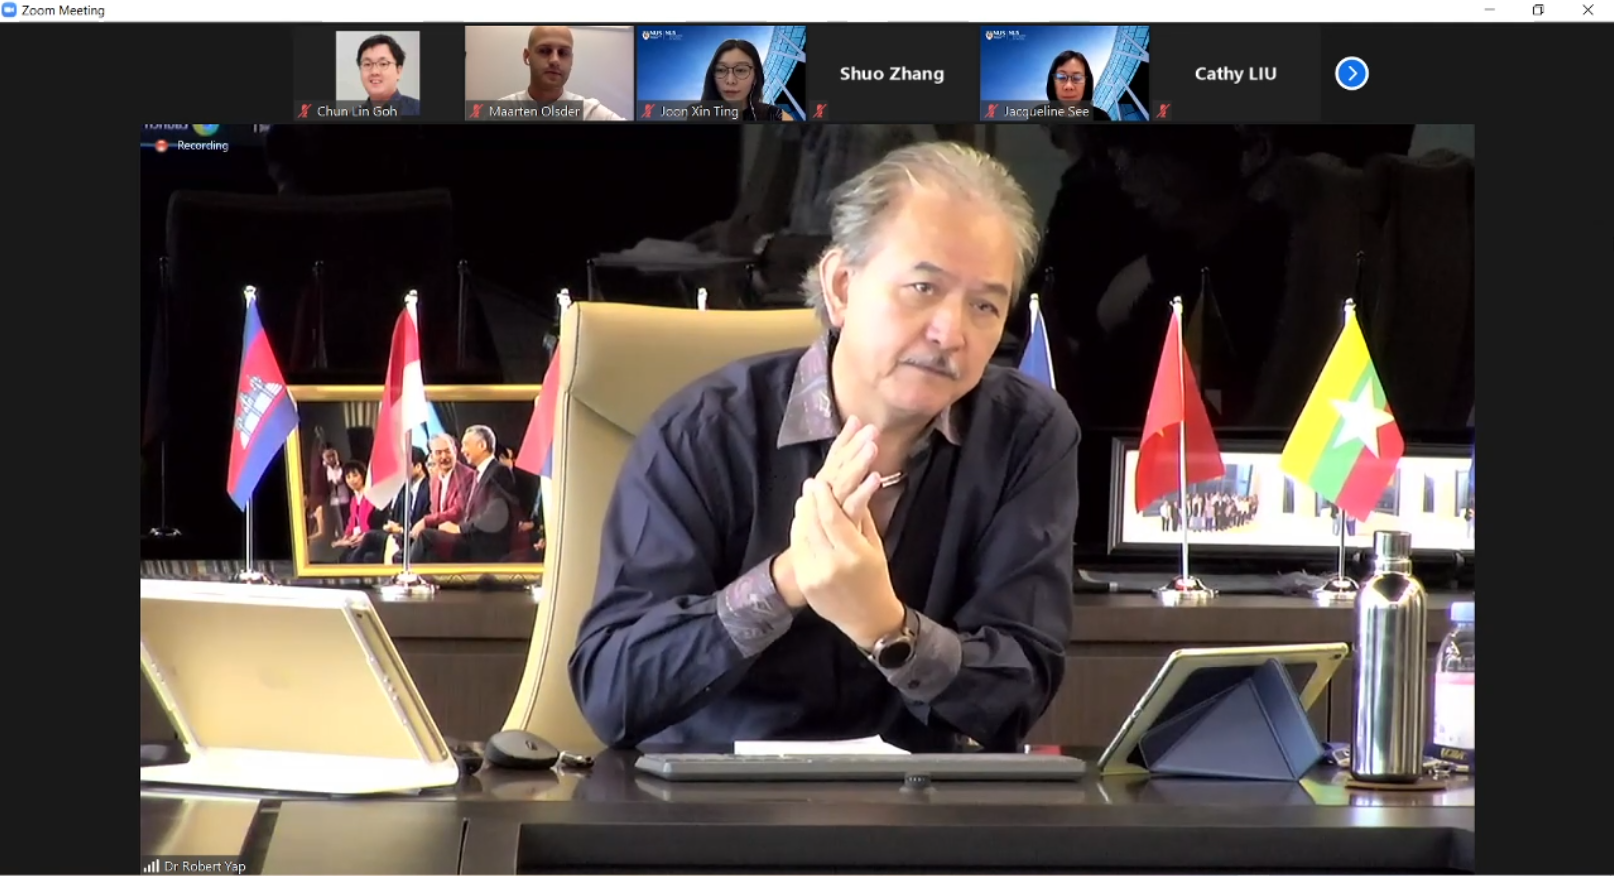
Dr Robert Yap, the Executive Chairman of YCH Group, shared about their vision of integrating the data flows in the supply chain with analytics capabilities.
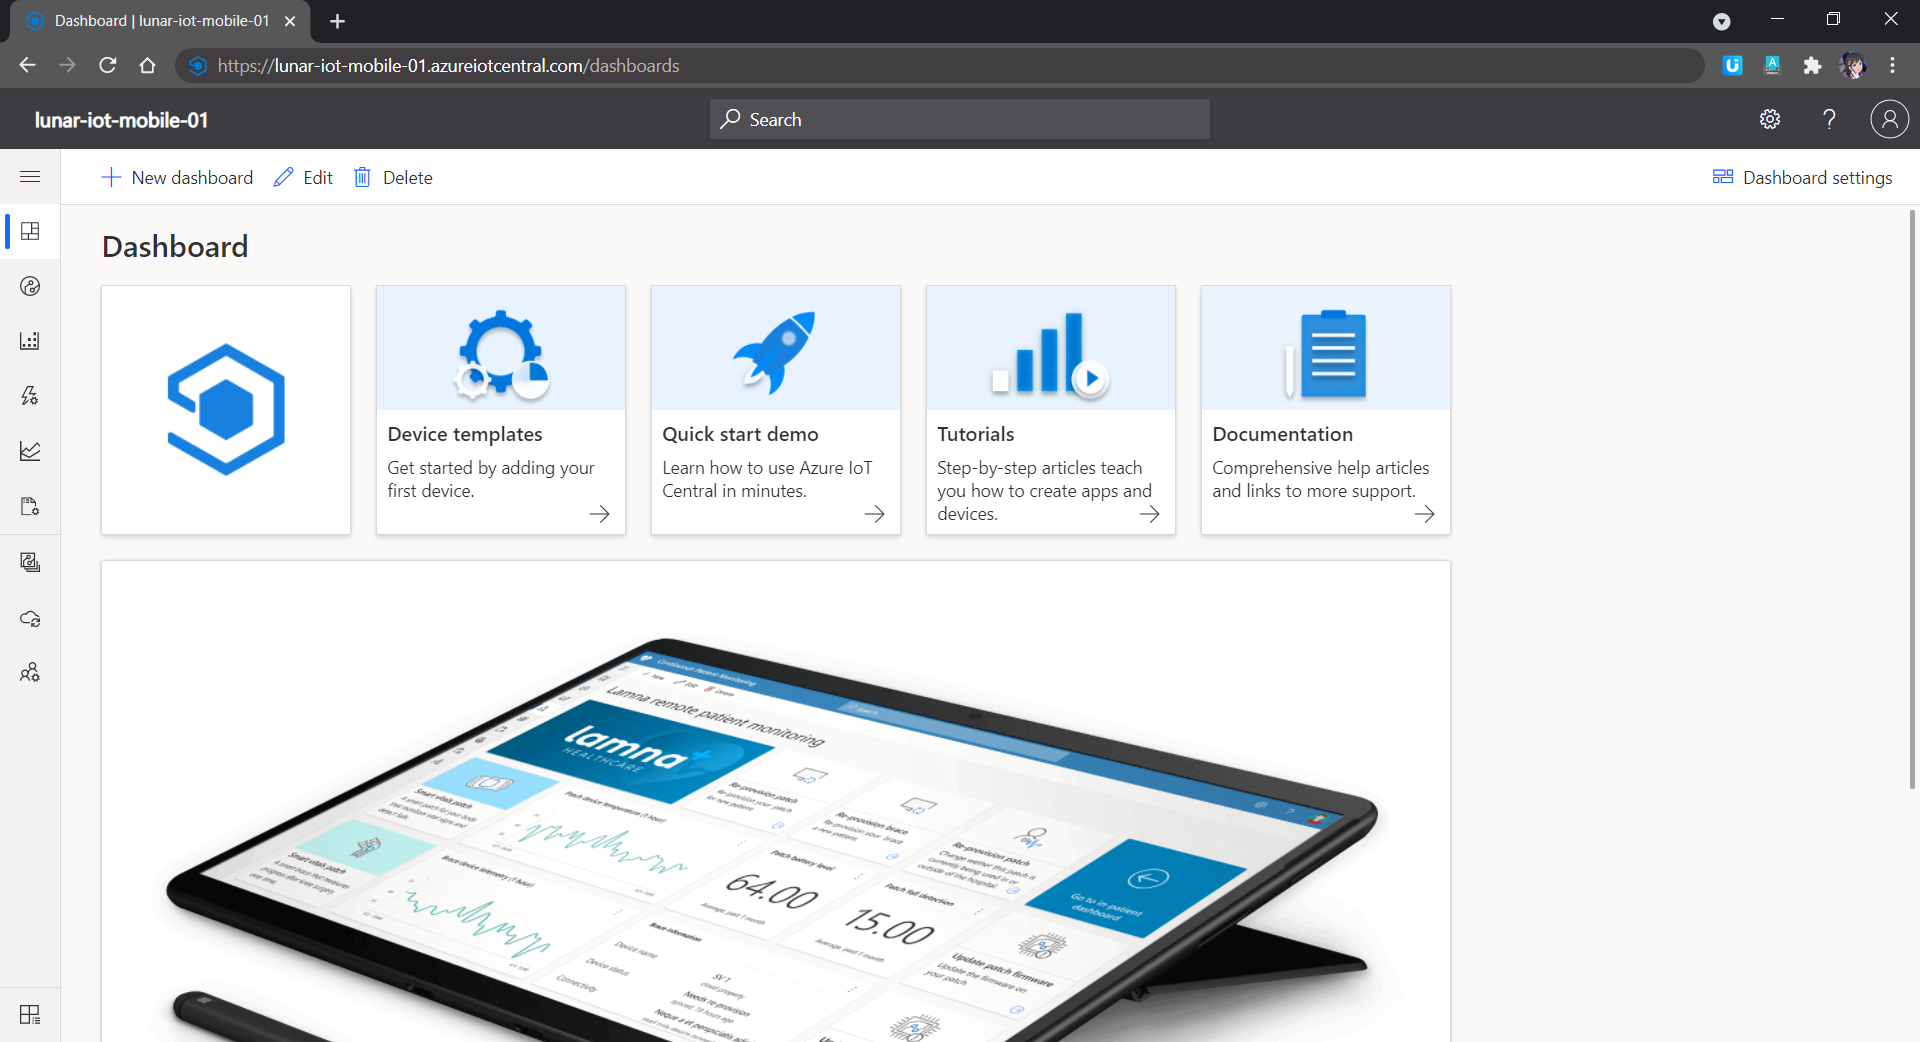
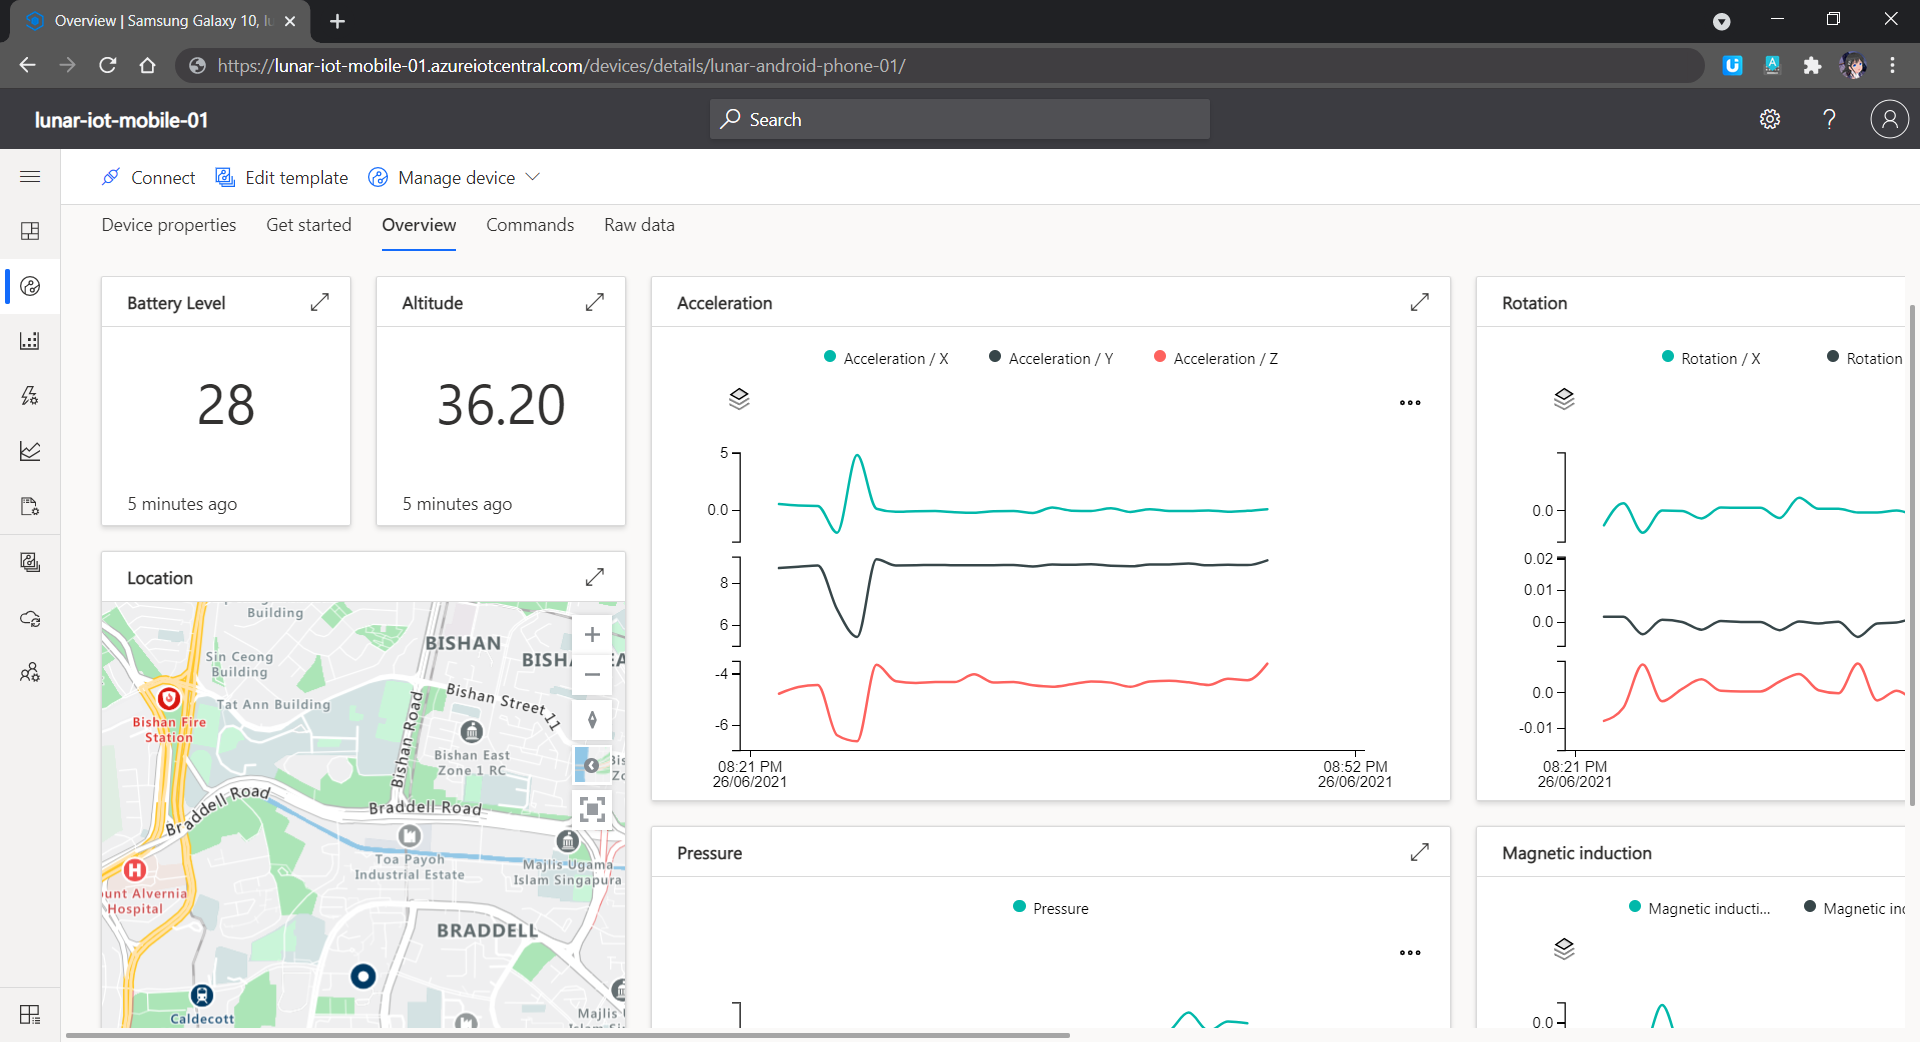
In my example, I will start with a customised template which has nothing inside. We then can proceed to the “Devices” page to add a devices for our phones.
Data collected from accelerometer, gyroscope, magnetometer, and barometer on my phone.
Rules and Triggers
We are also able to specify rules in the Azure IoT Central so that there will be an action triggered when the defined conditions are met. We can also integrate the rule with Power Automate and Azure Logic Apps to perform relevant automated workflows.
We can also have Azure IoT Central to send us an email when the device is running on low battery, for example.
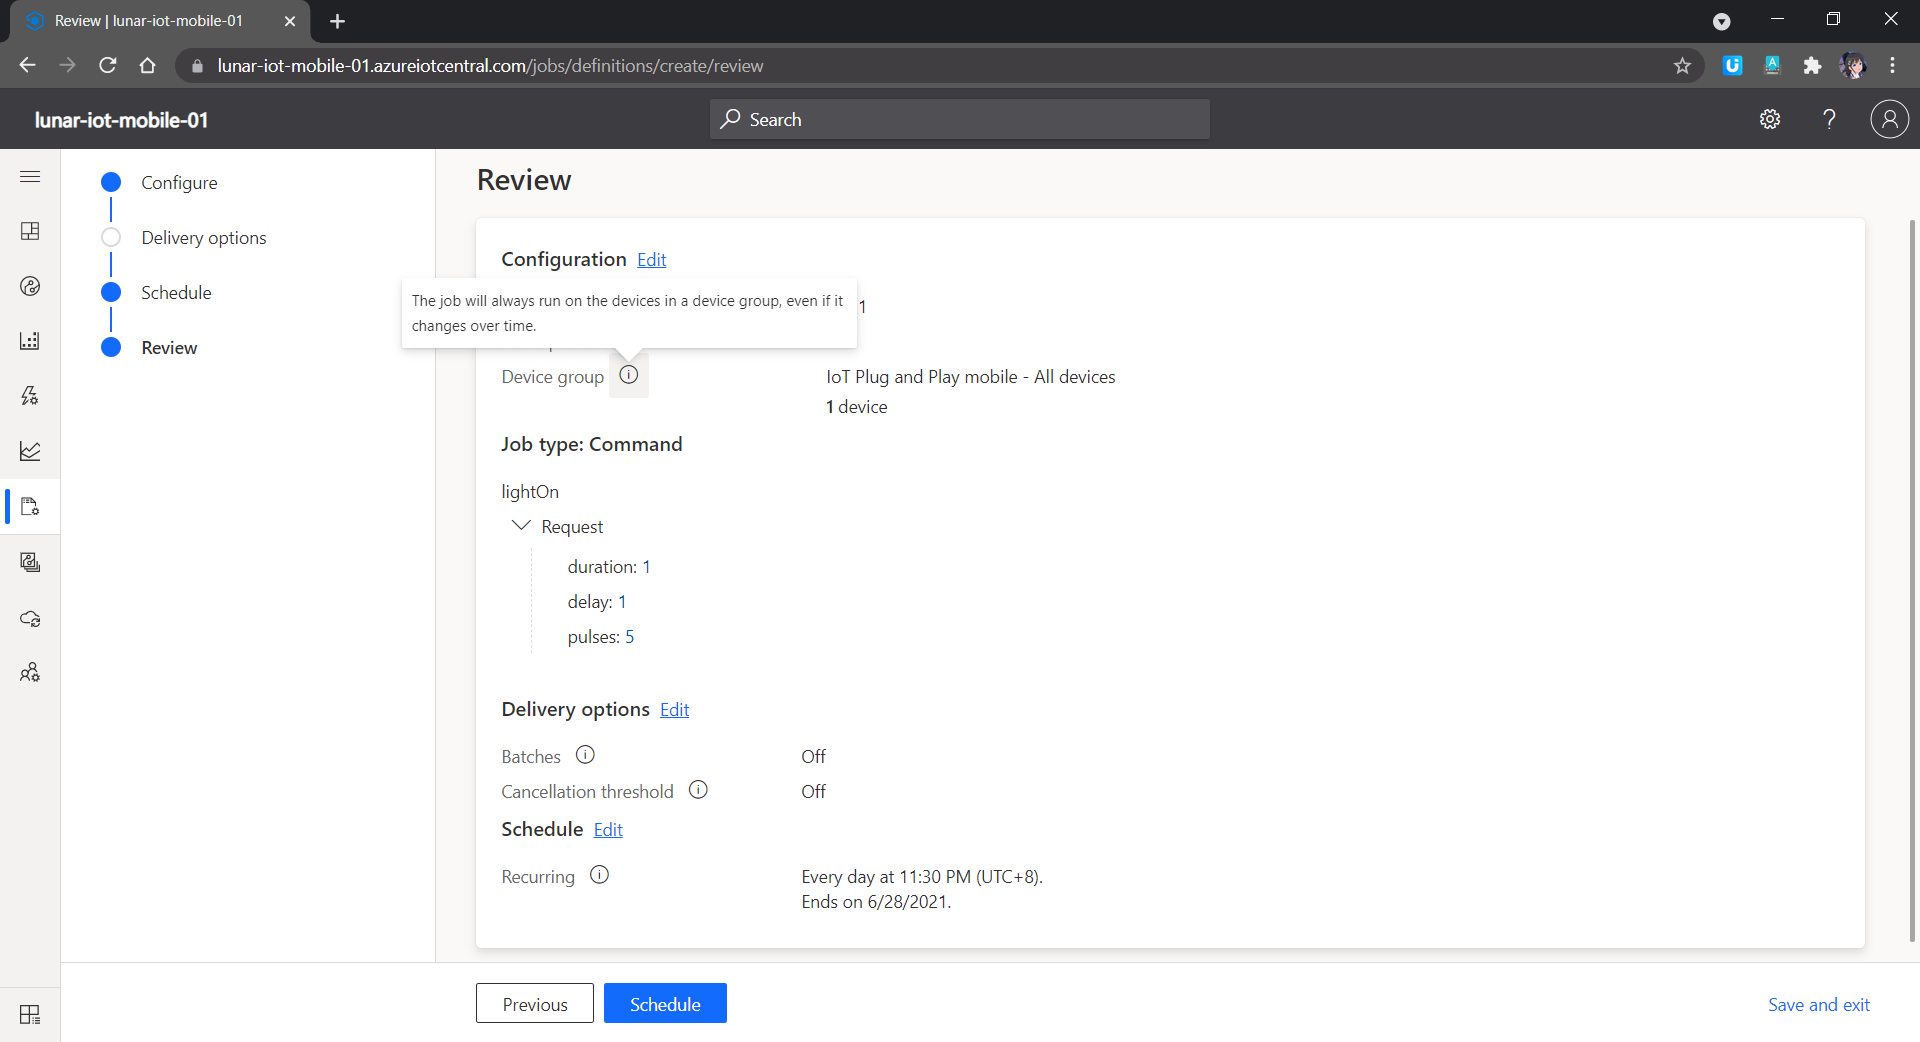
Scheduled Jobs
Another cool feature in Azure IoT Central is that we can send the commands back to the devices. In addition, we can send the commands in a scheduled manner. For example, in the following screenshot, the “lightOn” will be sent to all the devices in the Device Group and thus the connected phones in the Device Group will switch on their flashlight at 11.30pm in the midnight.
Don’t be scared if there is flashlight suddenly coming from chassis in midnight.
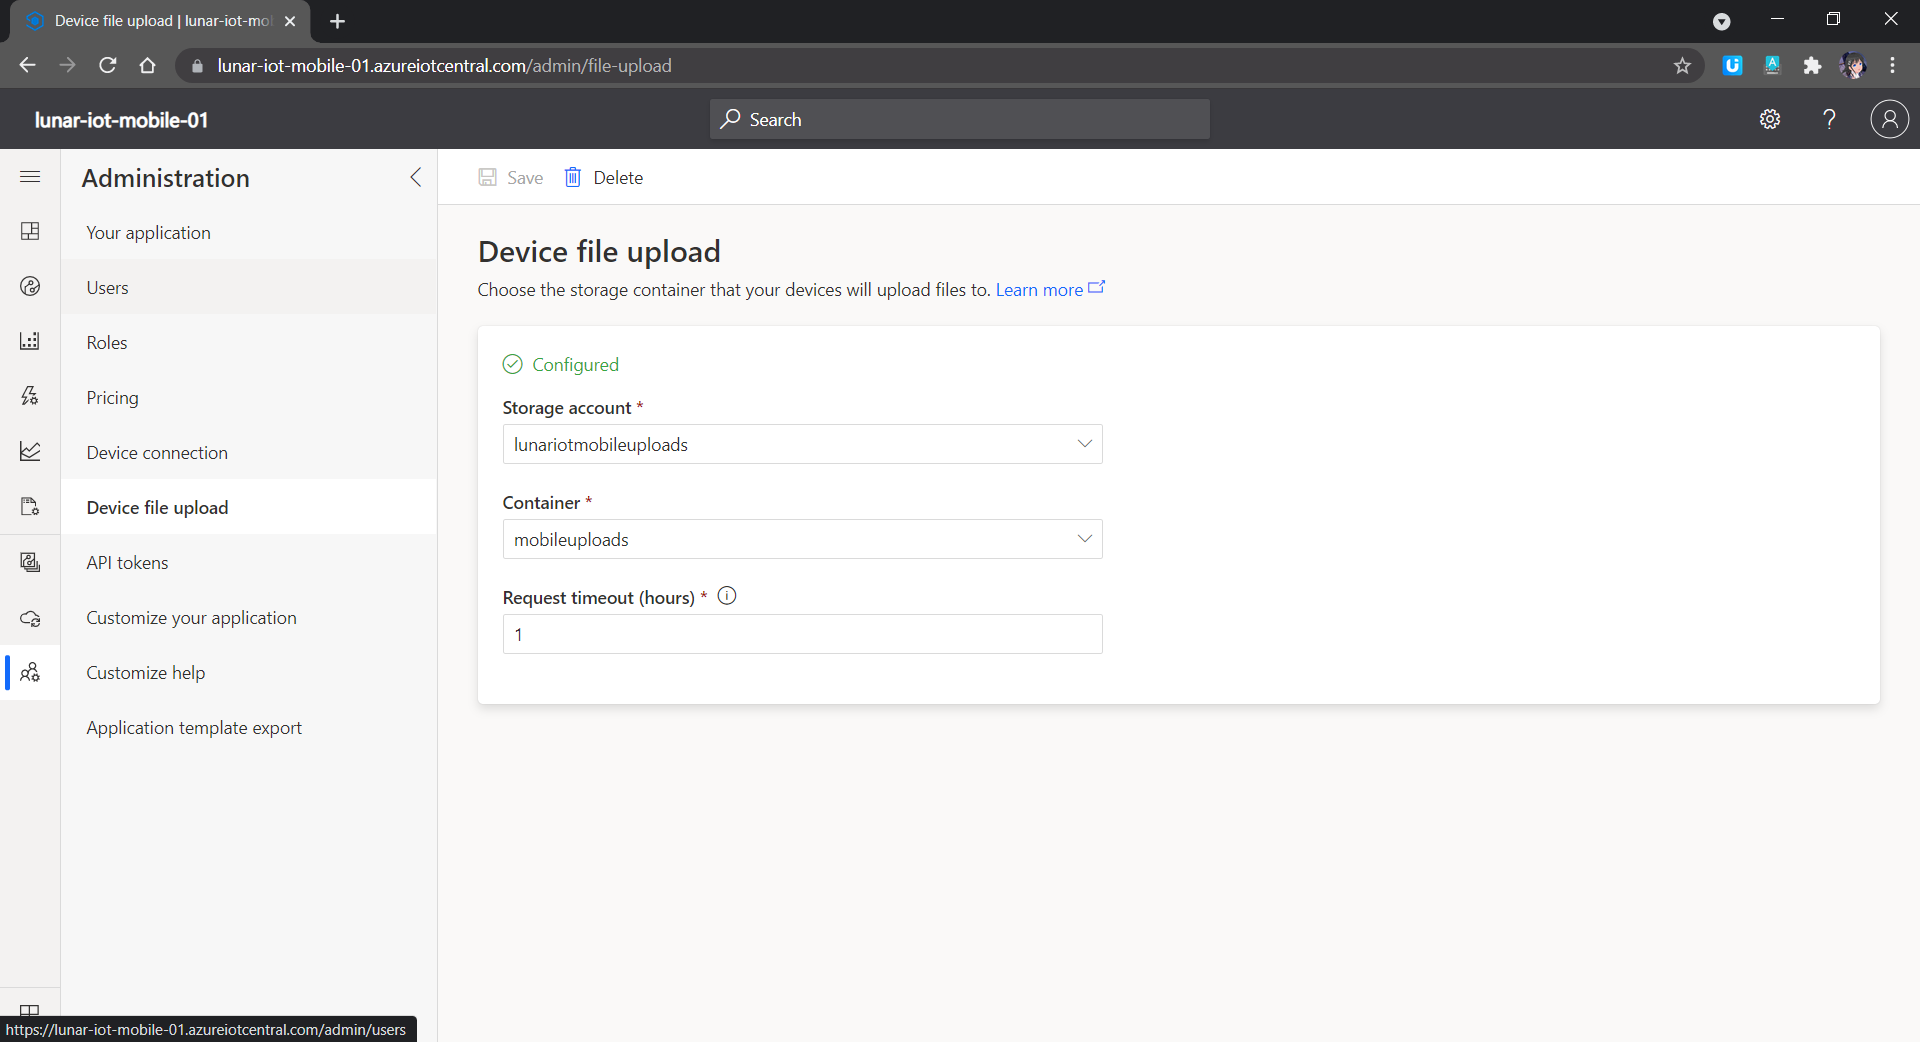
Image Upload
In the IoT Plug and Play app, we can also try out the image upload feature which allows us to submit images to the cloud from the IoT devices. As shown in the screenshot below, each IoT Central app can only link with one Azure Storage container. Hence, in the container, there will be folder for each of the registered IoT devices so that files uploaded will be categorised into their own folder accordingly.
We need to link Azure IoT Central to a container in the Azure Storage.
So with the phones setup as IoT devices, we can now install them on the container chassis to continuously send back the location data to the Azure IoT Central. The business owner can thus easily figure out where their container chassis is located at by looking at the dashboard.