After we have developed a GUI desktop application using PyQt5, we need to distribute it to the users to use it. Normally the users are not developers, so giving them the source code of our application is not a good idea. Hence, in this article, we will discuss how we can use PyInstaller to package the application into an exe file on Windows.
Step 0: Setup Hello World Project
Our life will be easy if we start packaging our application in the very beginning. This is because as we add more features and dependencies to the application, we can easily confirm the packaging is still working. If there is anything wrong during the packaging, we can easily debug by just checking the newly added codes instead of debugging the entire app.
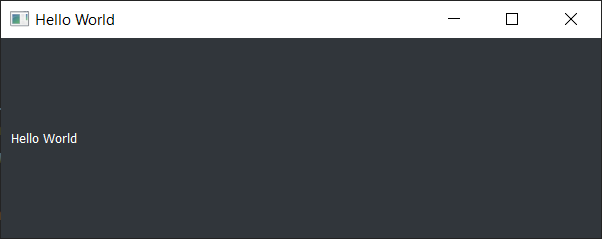
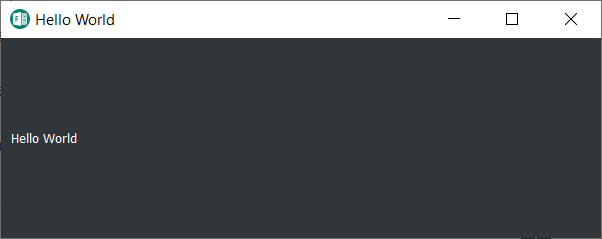
So, let’s start with a PyQt5 desktop application which has a label showing “Hello World”.
Currently PyInstaller works only up to Python 3.8. So, I will first create a virtual environment which uses Python 3.8 with the following command. Since I have many versions of Python installed on my machine, I simply use the path to the Python 3.8 in the command.
C:\Users\...\Python38\python.exe -m venv venv
After that, we can activate the virtual environment in VS Code by choosing the interpreter, as shown in the following screenshot.

After that, we will install PyQt5 5.15.4 and Qt-Material 2.8.8 packages for the GUI. Once the two packages are installed in the virtual environment, we can proceed to design our Hello World app with the following codes in a file called main.py.
import sys

from PyQt5.QtWidgets import *
from qt_material import apply_stylesheet

class Window(QMainWindow):
    def __init__(self, *args, **kwargs):
        super().__init__(*args, **kwargs)

        self.setWindowTitle("Hello World")
        label = QLabel("Hello World")
        label.setMargin(10)
        self.setCentralWidget(label)
        self.show()

if __name__ == "__main__":
    app = QApplication(sys.argv)
    win = Window()

    apply_stylesheet(app, theme='dark_blue.xml')

    win.show()
    sys.exit(app.exec_())
Now when we run the code above, we will be able to see a simple window with a label saying “Hello World”.
Step 1: Package the App
Before we can proceed further, we need to install the PyInstaller, which helps to bundle our Python app and all its dependencies into a single package. We can do so with the following command.
pip install pyinstaller==4.5.1
Once it is installed successfully, we can start the packaging of our app with the command below.
pyinstaller main,py
PyInstaller will now read and analyse our codes in main.py to discover every other module and library our script needs in order to execute. After that, PyInstaller will put all the files and Python interpreter in a single folder for distributing later. This is useful because the end users of our app do not need to have Python installed beforehand in order to run our app.
Hence, running the command above will generate two new folders, i.e. build and dist, as well as a main.spec file in the project directory.

It is important to take note that the PyInstaller output is specific to the active OS and the active version of Python. In this case, our distribution is for Windows under Python 3.8.
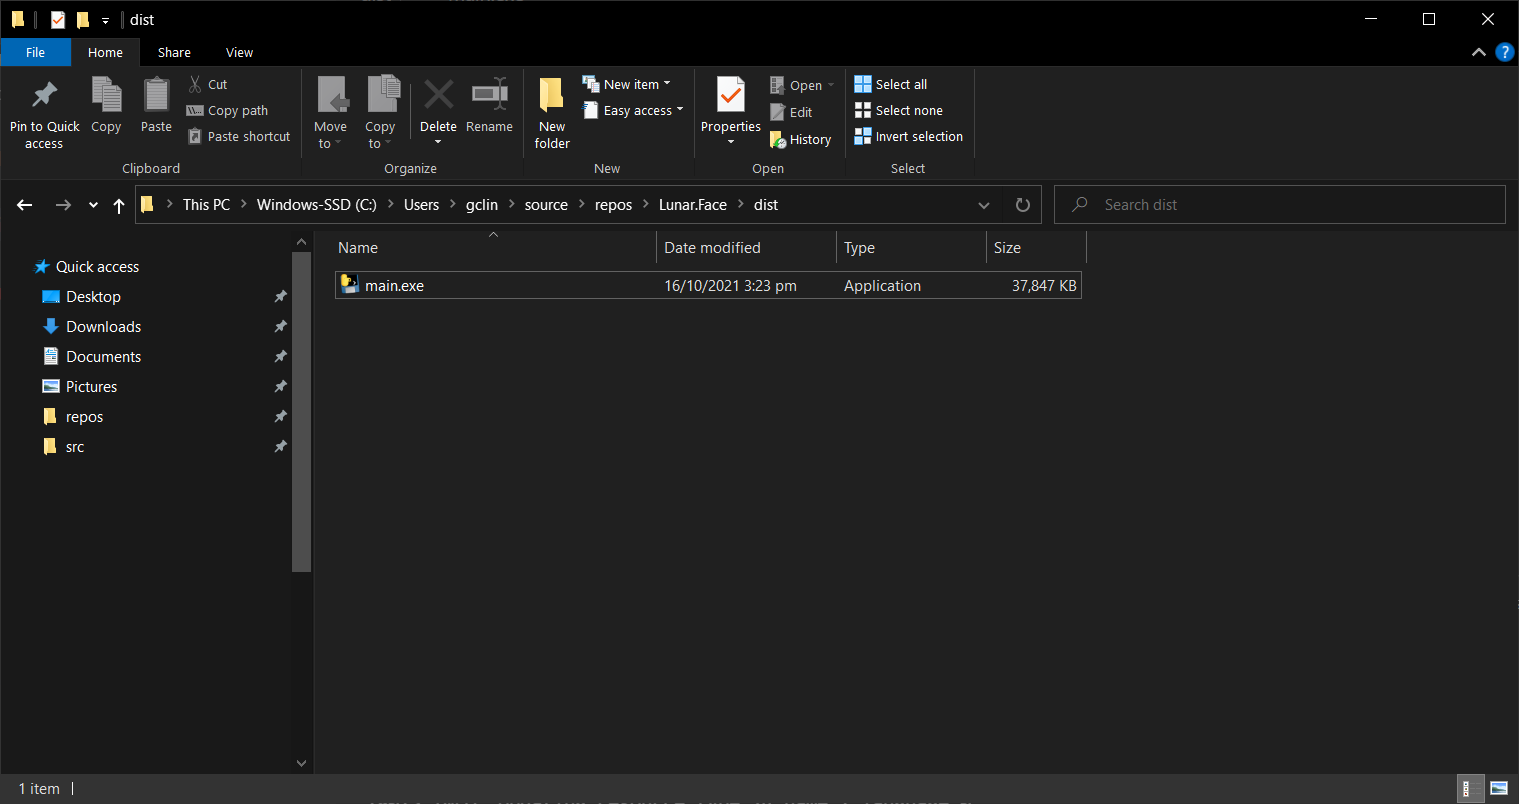
The dist folder will be the folder we can distribute to end users to use our app. The folder has our application, i.e. main.exe, together with other dlls.

Finally, the main.spec is a SPEC file which contains the PyInstaller packaging configuration and instructions. Hence, for future packaging operations, we shall execute the following command instead.
pyinstaller main.spec
Now, when we run the main.exe, we will be able to see our Hello World application. However, at the same time, there would be a console window shown together by default, as demonstrated below.
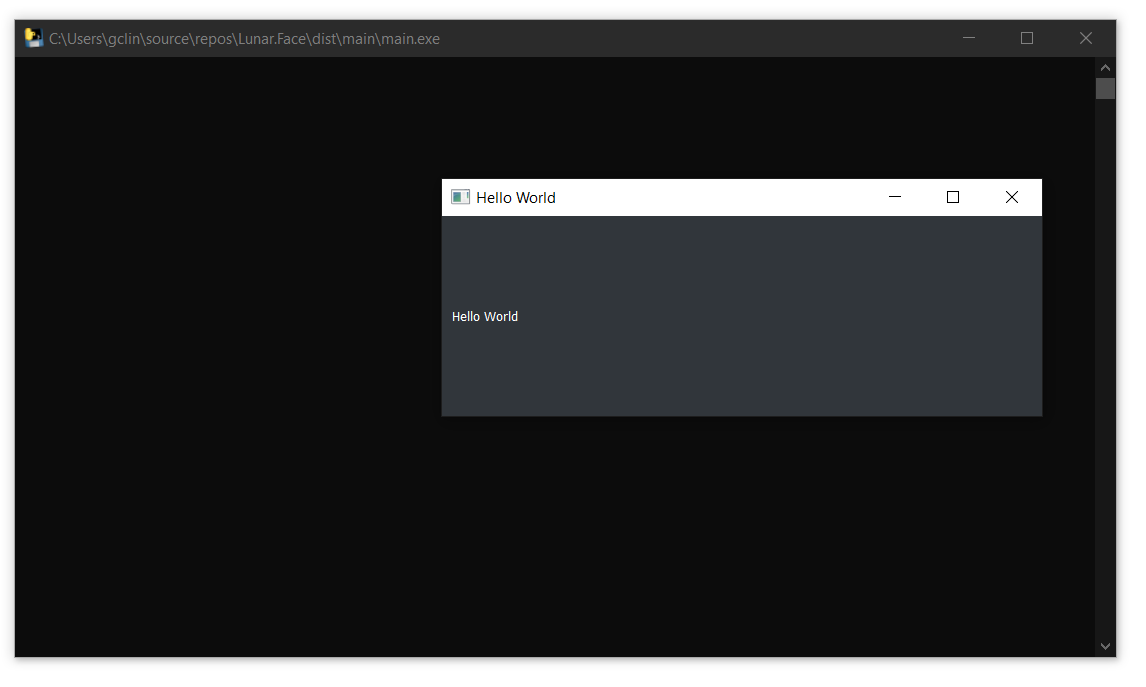
The console window by right should be hidden from the end users. So, in the following step, we will see how we can configure the PyInstaller packaging to hide the console window.
Step 2: Configure the SPEC File
When the “pyinstaller main.py” command is executed, the first thing PyInstaller does is to generate the SPEC file, i.e. main.spec. The file tells PyInstaller how to process our script. Hence, PyInstaller later can build our app by simply executing the content of the SPEC file.
The SPEC file is actually a Python code. It contains the following classes.
- Analysis: Takes a list of script file names as input and analyses the dependencies;
- PYZ: PYZ stands for Python Zipped Executable, contains all the Python modules needed by the script(s);
- EXE: Creates the executable file, i.e. main.exe in our example, based on Analysis and PYZ;
- COLLECT: Creates the output folder from all the other parts. This class is removed in the one-file mode.
Step 2.1 Setup one-file Build
As we can see earlier, the dist folder does not only contain the executable file, main.exe, but also a long list of DLLs. It’s normally not a good idea to give the end users a huge folder like this as the users may have a hard time figuring out how to launch our app. So, we can create a one-file build for our app instead.
To do so, we can execute the following command. To make things clearer, we can also choose to delete the dist folder generated earlier before running the command.
pyinstaller --onefile main.py
After it is executed successfully, in the dist folder, we can see that there is only one executable file, as shown in the following screenshot. Now, we can just send the end users only this one executable file to run our app.
So, where do all the DLLs that we see in the non-one-file build go? They are actually compressed into the executable. Hence, the one-file build has a side-effect. Every time our app runs, it must create a temporary folder to decompress the content of the executable. This means that one-file built app will have a slower startup.
Step 2.2: Remove Console Window
The first change that we can make to the SPEC file is to remove the default console window. To do so, we simply need to set console=False in the EXE, as shown in the screenshot below.
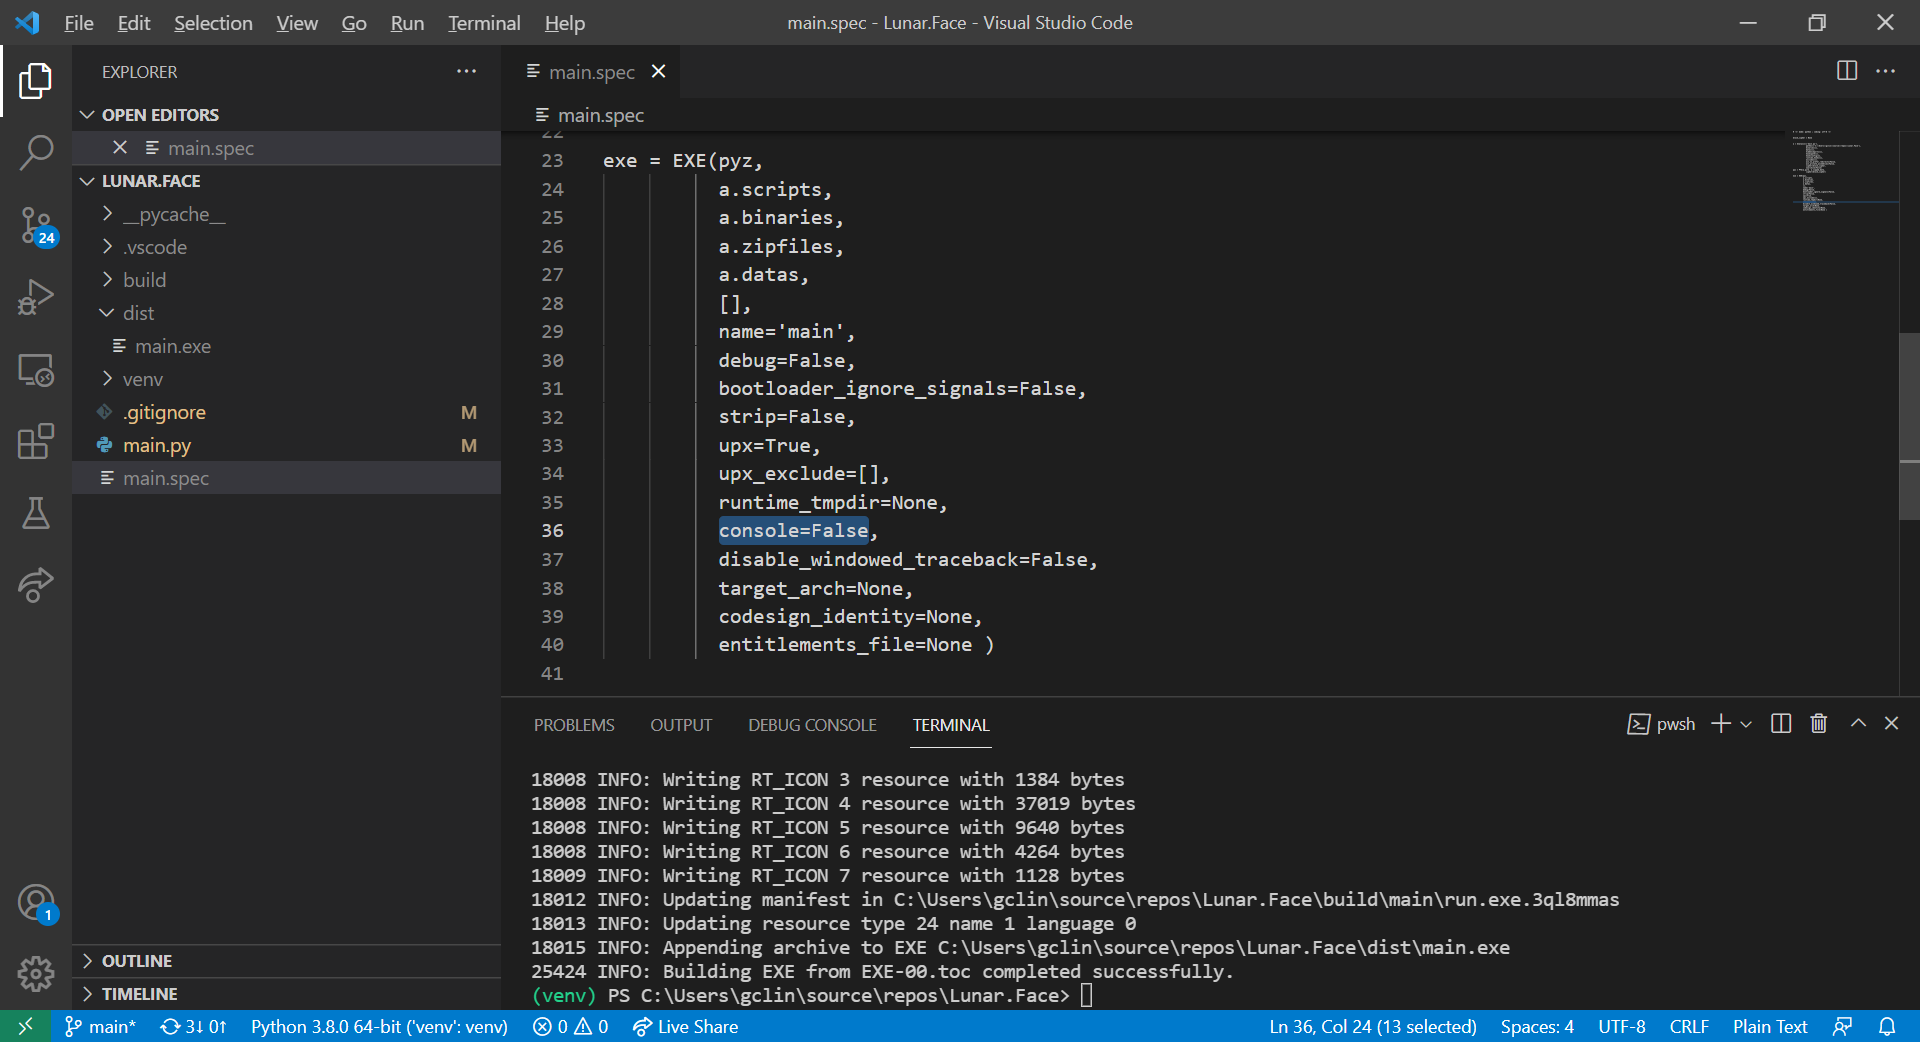
With this being set, the app will not be launched with a console window showing together.
Step 2.3 Bundle Data Files
Let’s say we would like to have an app icon for our app, we can have the following line added in our main.py.
self.setWindowIcon(QIcon('resources/images/logo.png'))
This will load the image file logo.png from the resources/images directory. In this scenario, we thus need to find a way to bundle image files in the build. To do so, we can first update our SPEC files as follows.

The list of data files is a list of tuples where each tuple has two strings.
- The first string specifies the file or files as they are in this system now;
- The second specifies the name of the folder to contain the files at run-time.
If we’re not using the one-file build, we will find out that the data files will be copied to the dist folder accordingly. However, if we are app is built with one-file mode, then we shall change our code accordingly to locate the data files at runtime.
Firstly, we need to check whether our app is running from the source directly or from the packaged executable with the following function.
def resource_path(relative_path):
    """ Get absolute path to resource, works for dev and for PyInstaller """
    if getattr(sys, 'frozen', False) and hasattr(sys, '_MEIPASS'):
        base_path = sys._MEIPASS
    else:
        base_path = os.path.abspath(".")

    return os.path.join(base_path, relative_path)
Secondly, we need to update the code getting the QIcon path to be something as follows.
self.setWindowIcon(QIcon(resource_path('resources/images/logo.png')))
Finally, we will be able to see our app icon displayed correctly, as shown in the following screenshot.
Step 2.4 Setup EXECUTABLE App Icon
Even though the app icon has been updated, however, the icon of our executable is still not yet updated.
Before we can proceed to update the exe icon, we need to know that, on Windows, only .ico file can be used as icon image. Since our logo is a png file, we shall convert it to an ico file first. To do the conversion, I’m using ICO Convert which is available online for free and mentioned in one of the PyInstaller GitHub issues.
After getting the ICO file, we shall put it in the same directory as the SPEC file. Next, we can customise the SPEC file by adding icon parameter to the EXE as shown below.

Once the build is successful, we can refresh our dist folder and will find that our main.exe now has a customised icon, as shown below.

Step 2.5 Name Our App
By default, the executable file generated has the name of our source file. Hence, in this example, the executable file is named as main.exe. By updating our SPEC file, we can also name the executable file with a more user friendly name.
What we need to do is just editing the name of EXE, as shown in the following screenshot.

Conclusion
That’s all for the quickstart steps to package our PyQt5 desktop GUI application with PyInstaller on Windows 10.
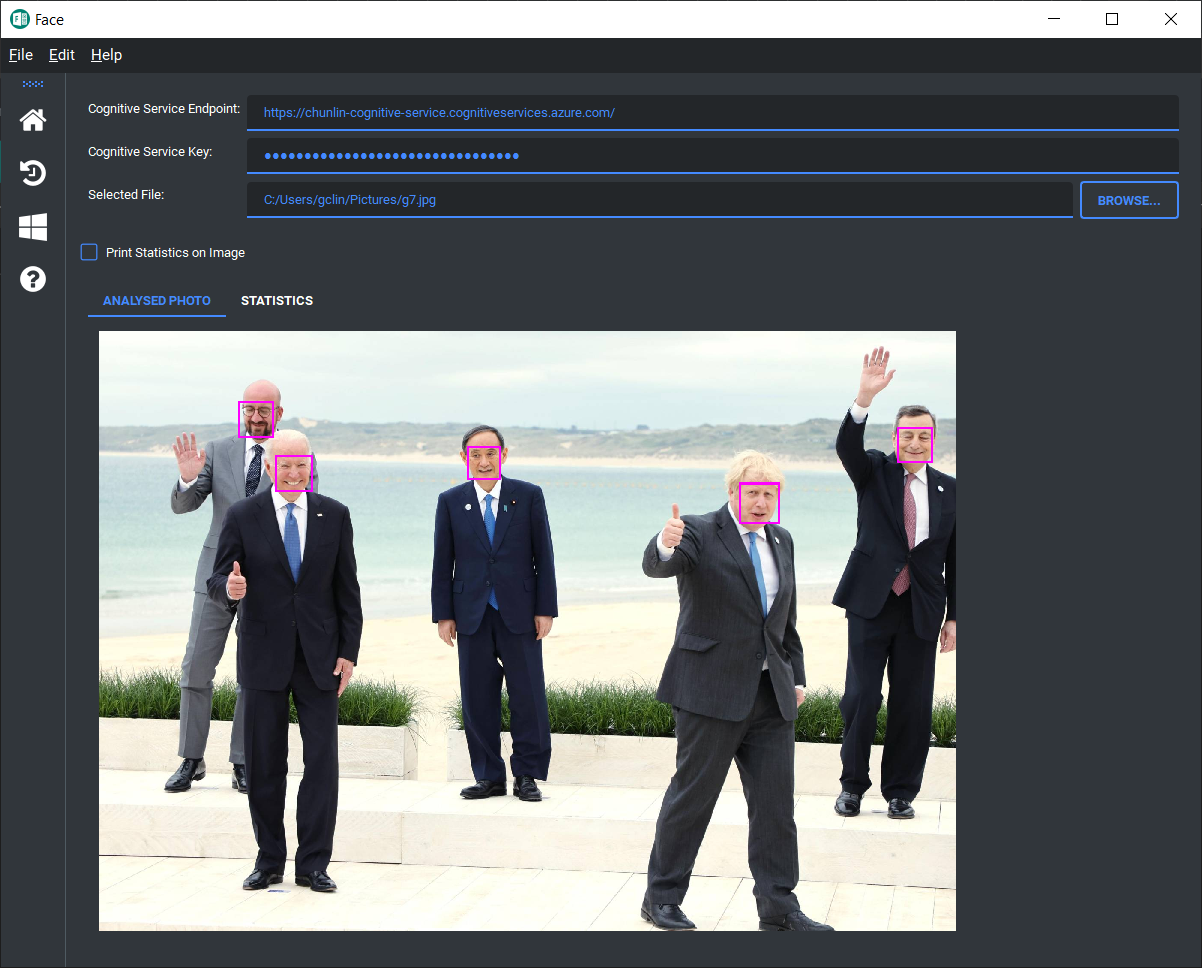
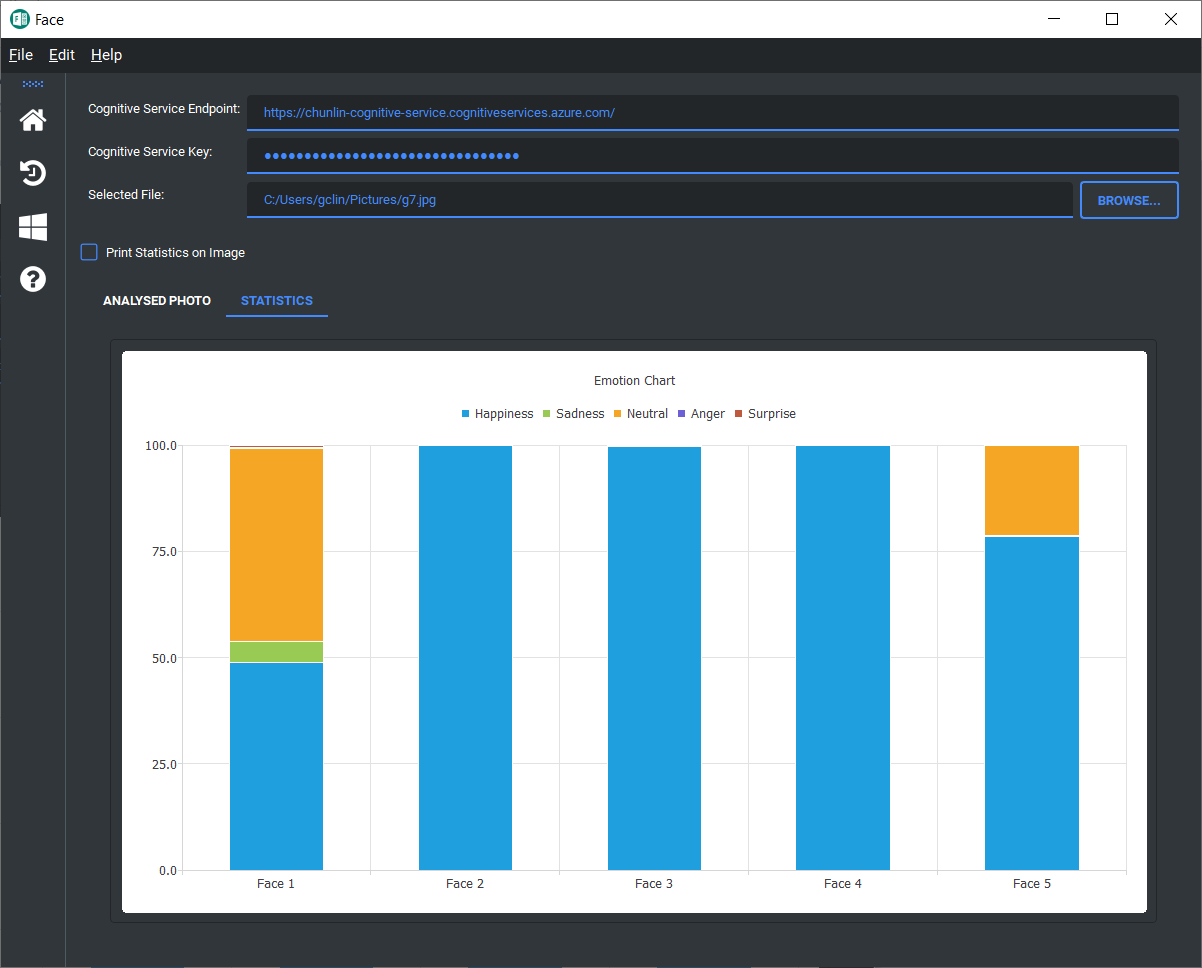
I have made the source code available on GitHub. You can also download the Face.exe under the Releases. After launching the app, you should be able to do facial recognition together with your personal Microsoft Azure Cognitive Services account, as shown in the following screenshot.