I like to explore interesting new technologies. I also love to learn more from the materials available on Microsoft Virtual Academy, Google Developers channel, and several other tech/dev events.
One of the ways to develop a desktop application for Windows 10/11 is UWP (Universal Windows Platform). UWP app has two fundamental sections, i.e. front-end and back-end. The front-end is developed using XAML (Extensible Markup Language) and back-end can be coded in C# (or even JavaScript back in the old time).
public static class EnumExtension
{
    public static string GetDescription(this Enum value)
    {
        FieldInfo fi = value.GetType().GetField(value.ToString());
        var attributes = (DescriptionAttribute[])fi.GetCustomAttributes(typeof(DescriptionAttribute), false);
        if (attributes.Length > 0) return attributes[0].Description;
        else return value.ToString();
    }
}
ViewModel
Next we will define the ViewModel of our MainPage.xaml which will contains the ComboBox control. We will bind the variable SelectorColor whose type is the enum to the ComboBox control, as shown below.
public class MainViewModel : ViewModelBase
{
    private MyColors _selectedColor = MyColors.Black;

    public MyColors SelectedColor
    {
        get => _selectedColor;
        set
        {
            if (_selectedColor != value)
            {
                SetProperty(ref _selectedColor, value);
            }
        }
    }
}
The data binding will be simple when the source and target properties are of the same type, or when one type can be converted to the other type through an implicit conversion, for example binding a string variable to the Text field of a TextBlock control. However, to bind enum to the dropdown value and text fields of a ComboBox, we will need the help of a value conversion.
Here, we will implement a converter, MyColorValueConverter, that takes an enum value and then return a string value to be used in ComboBox fields, as well as the other way around.
public class MyColorValueConverter : IValueConverter
{
    public object Convert(object value, Type targetType, object parameter, string language)
    {
        if (value is MyColors color) return color.GetDescription();

        return null;
    }

    public object ConvertBack(object value, Type targetType, object parameter, string language)
    {
        if (value is string s) return Enum.Parse(typeof(MyColors), s);

        return null;
    }

    ...

}
After this, in order to provide all available values in the enum as ItemsSource of the ComboBox control, we will need to have a Strings property in the MyColorValueConverter.
public string[] Strings => GetStrings();

public static string[] GetStrings()
{
    List<string> list = new List<string>();

    foreach (MyColors color in Enum.GetValues(typeof(MyColors)))
    {
        list.Add(color.GetDescription());
    }


    return list.ToArray();
}
View: The Front-end
Now in the MainPage.xaml which contains the ComboBox control, we first need to instantiate the value converter in the resource dictionary of the page.
That’s all for the quickstart steps to bind an enum to a ComboBox control in an UWP app.
I have made the source code available on GitHub. The code will have more features where the colour of text in a TextBlock will be based on the colour we pick from the ComboBox, as shown below.
The fast pace of change in today’s world means we must understand and quickly respond to changes. Hence, in order to survive and be successful in today’s VUCA world, we need to constantly scan for growth opportunities and be willing to learn new skills.
Working in software industry helps me to realise that with all the disruptions in the modern world, especially technology, ongoing skill acquisition is critical to persistent professional relevance. We shall always look for ways to stretch ourselves to get ahead.
Even though I have been dealing with cloud computing, especially Microsoft Azure, for more than 10 years in my career and study, I still would like to find out how well I compare with my peers instead of thinking that I’m already fine at this area. Hence, with that in mind, I focus on learning Microsoft Azure development related skills on Microsoft Learn during the holiday.
Make the Most of Our Limited Learning Time
So much to learn, so little time.
We all have very little time for learning outside of our work. Combine time we have for learning and the importance of the skills, we can get a simple 2×2 matrix with four quadrants.
2×2 matrix to help prioritizing skills to learn (Reference: Marc Zao-Sanders)
I don’t have much time to keep my cloud computing knowledge relevant because nowadays I focus more on desktop application development. Hence, I decided to give myself a one-week break from work and schedule 6-7 hours each day for learning in the holiday.
In order to make sure we’re investing our time wisely, we shall focus on learning what is needed. Unless we need the skill for our job or a future position, it’s better not to spend time and money for training on that skill because learning is an investment and we shall figure out what the return will be. This is why I choose to learn more about developing cloud apps on Microsoft Azure because that has been what I’m doing at work in the past decade.
To better achieve my goals in self learning, I’ve also identified the right learning materials before I get started. Since I already have the experience of developing modern cloud applications early in my career, I choose to focus only on going through all the 43 relevant modules available on the Microsoft Learn.
Make Learning a Lifelong Habit
No matter which technology era we are in, the world will always belong to people who are always keeping themselves up to date. Hence, lifelong learning is a habit many of us would like to emulate.
Before we start our learning journey, we need to set realistic goals, i.e. goals that are attainable, because there are limits to what we can learn. In addition, as we discussed earlier, we need to ask ourselves how much time and energy we can give to our self learning. We have to understand that learning a skill takes extreme commitment, so we can’t get very far on the journey of self learning if we don’t plan it properly.
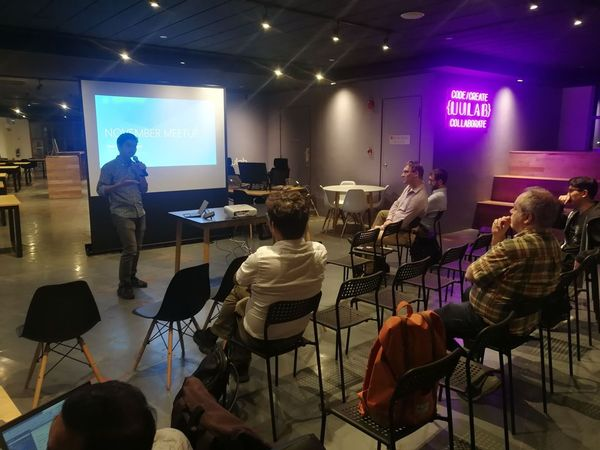
Learning is hard work but it also can be fun, especially when we are learning together with like-minded people. Don’t try to learn alone, otherwise self learning can feel over-whelming. For example, besides learning from online tutorials, I also join local software development groups where members are mostly developers who love to share and learn from each other.
Finally, to improve our ability to learn, we also have to unlearn, i.e. choose an alternative mental model or paradigm. We should acknowledge that old mental model is not always relevant or effective. When we fail, we also should avoid defending ourselves and capture the lessons we’ve learned.
Certification and Exam
I’m now a Microsoft certified Azure Developer Associate after I passed their exam AZ-204 in November 2021.
The exam is not difficult but it’s definitely not easy as well.
The exam tests not only our knowledge in developing cloud solutions with Azure services such as Azure Compute and Storage Account, but also our understanding of cloud security and Azure services troubleshooting.
Clearing all the relevant modules on Microsoft Learn does not guarantee that one will pass the exam easily. In fact, it’s the skills and knowledge I gain from work and personal projects help me a lot in the exam, for example the service bus implementation that I learnt last year when I was building a POC for a container trailer tracking system.
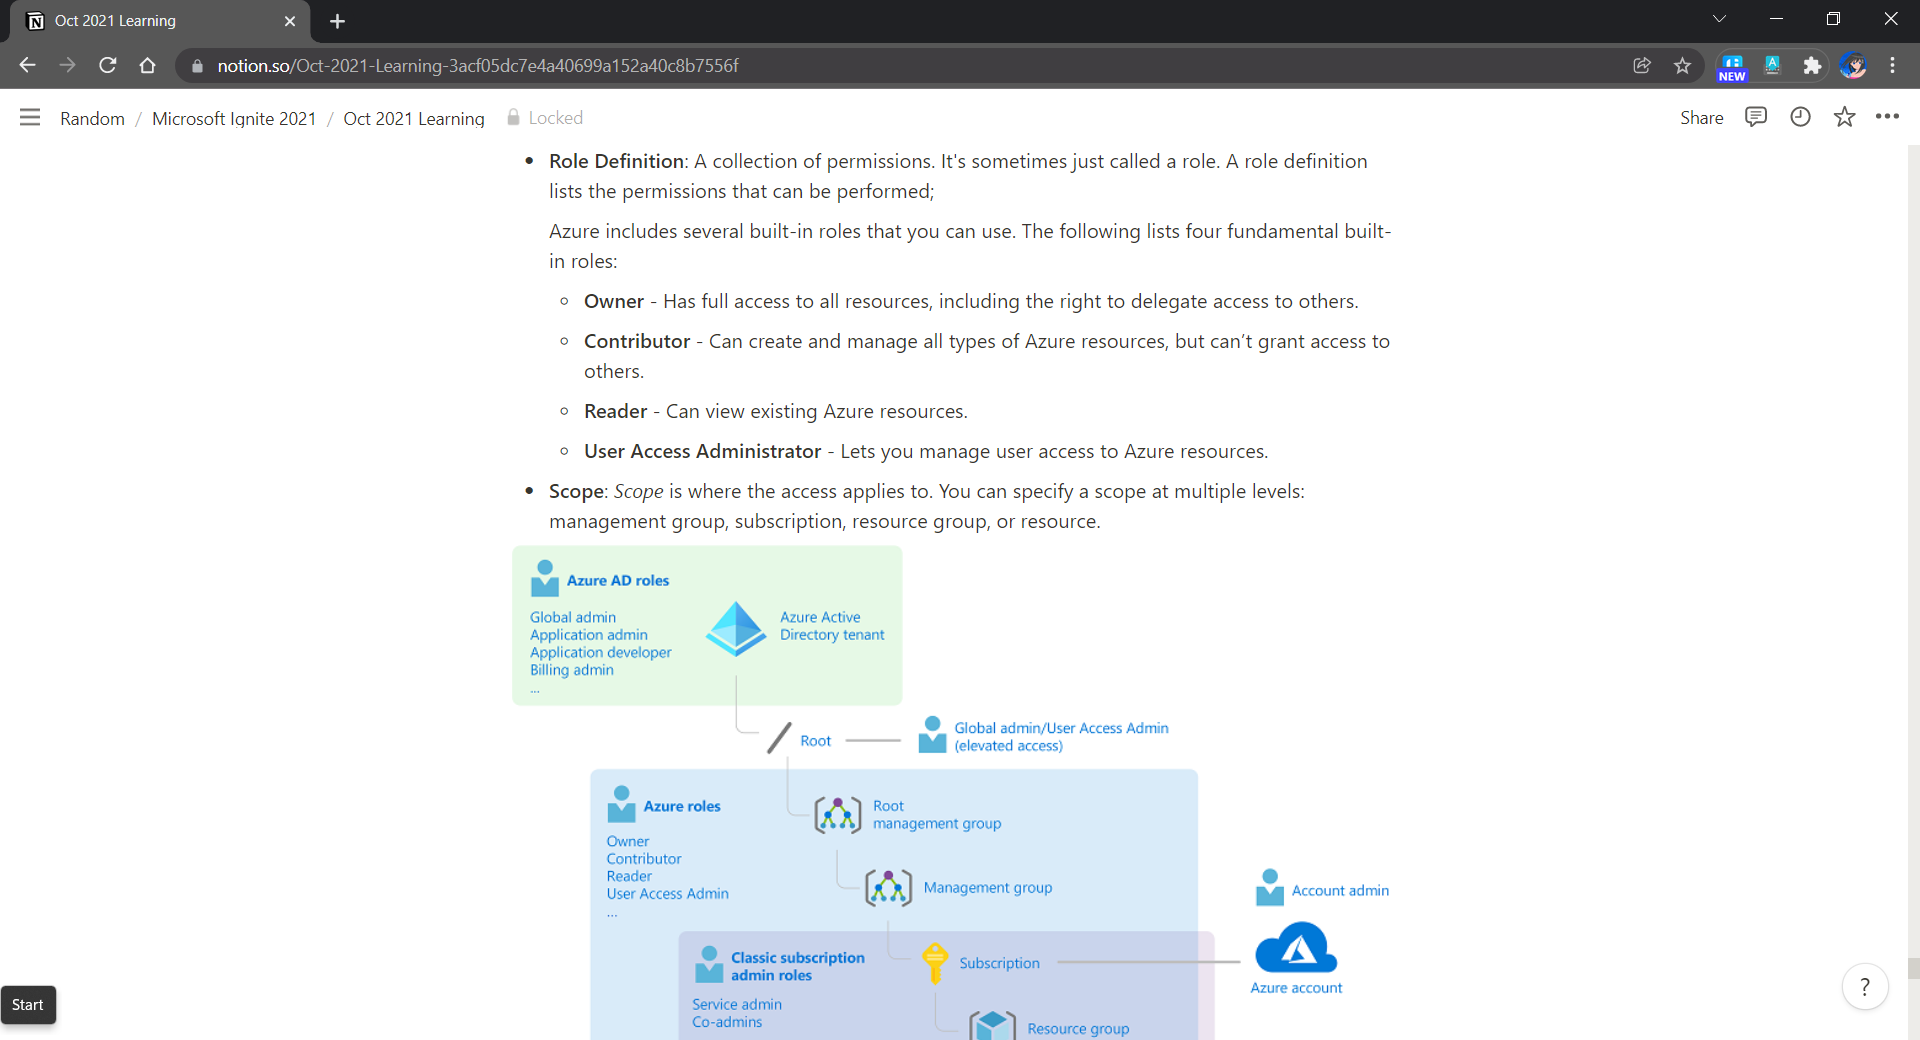
How Microsoft Learn helps in my self learning is that it provides an opportunity for me to learn in a free sandbox environment. In addition, the learning materials on the platform are normally best practices to follow. Hence, by learning on Microsoft Learn, I find out some of the mistakes I’ve made in the past and things that I can improve, for example resource management with tags, RBAC, VNet setup, etc.
Notes taken when I was going through the learning materials on Microsoft Learn.
I use Notion to take notes. Notion is a great tool to keep our notes clean and organised. Taking notes helps me to do a last-minute quick revision.
Conclusion
In a fast-moving world, being able to learn new skills helps in our life. There are many ways to learn continuously in our life. Earning certificates by going through challenging exams is just one of the methods. You know what works for yourself, do more of it.
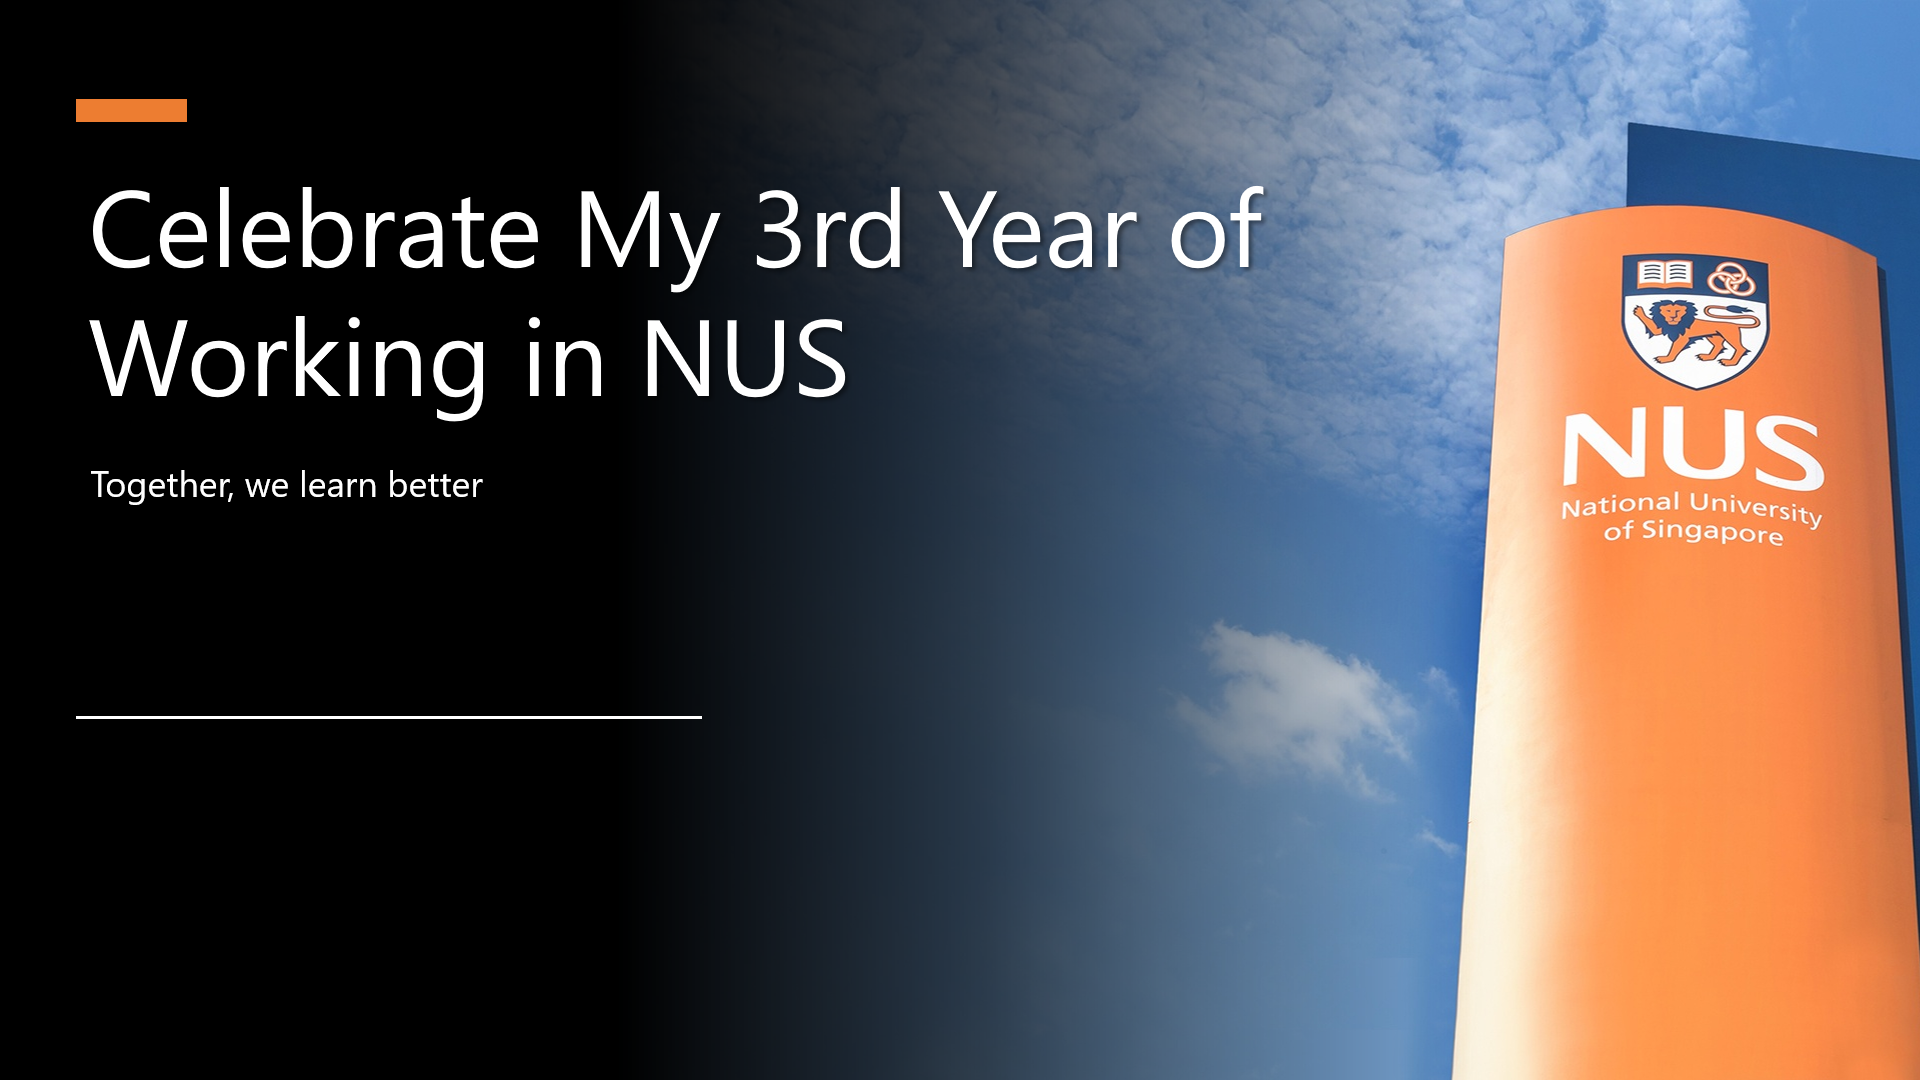
This month marks the beginning of my 3rd year of working as a software engineer in National University of Singapore (NUS). Hence, at this juncture, I would like to give myself an opportunity to broaden my horizon so that I can live up to the expectations of the team and continue to grow professionally.
Coincidentally, it’s NUS Well-Being Day in the beginning of the month. All the staff and students can have a long holiday to rest and re-energise.
7 PitStop Principles for Mental Wellbeing
In the beginning of Well-Being Day, NUS introduced the 7 PitStop Principles to aid everyone in the campus in stress management and self care. The seven principles are as listed below.
Personal Skills;
Interactions;
Time Out;
Sleep;
Thoughtful Eating;
On the Move;
Purpose.
In order to make my life better by enhancing my mental wellbeing, I have tried to adopt the principles as a part of my lifestyle during the long holiday.
Personal Skills
As Eduardo Briceño shared in his Ted talk, in our life, there are two key zones, i.e. the Performance Zone and the Learning Zone.
The Performance Zone is where we apply our knowledge and skills to carry out our tasks. The Learning Zone on the other hand is all about improving our current skills and learning new skills.
The problem why many people don’t improve much is that they spend all of their time in their performance zone. They simply do, do, do but seldom reflect on it. Hence, in his talk, Eduardo Briceño suggested that we should frequently switch between the two zones.
During the NUS Well-Being Day long holiday, it’s also coincidentally the launch of Visual Studio 2022 and .NET 6. Both of them are the key tools in my career. Hence, I took the opportunity to learn what’s new during the launch event.
Joining the Microsoft team for the launch of Visual Studio 2022 to learn about what’s new. (Image Source: Microsoft Visual Studio)
I have been focusing more on desktop and mobile app development in my past two years of working in NUS. Before that, I had always been working on web development projects which required skills in cloud computing.
Hence, in order to keep my skill relevant, I also took 6 to 7 hours per day to take some modules on Microsoft Learn to enhance my knowledge in designing, building, testing, and maintaining cloud applications and services on Microsoft Azure.
Interactions
Social isolation and loneliness can affect one’s physical and mental health. Hence, family and friends play an important role in our healthy life.
Having a cup of coffee with friend in a quiet evening is enjoyable. (Image Source: PxHere)
I’m glad to have the opportunity to have a talk with Riza Marhaban, my friend and my mentor, in one of the evenings. This is a type of happiness especially in the current situation of pandemic because meeting friends is not as easy as the good old days.
In addition, during the holiday, I attended Dato Yeo Kok Hwa’s session about Disrupting Negative Thoughts organised by NUSHeart. Dato Yeo shared with us the symptoms and causes of negative thoughts as well as how we can apply strategies to disrupt those negative thoughts.
Dato Yeo talked about how some of us have Automatic Negative Thoughts (ANTs). For example, it could be because some people over-generalise things in their life in such a way that they view a negative event as a never-ending pattern of defeat. It also could be because some people dwell on the negatives and ignore the positives. Hence, it’s important to have alternative thinking which helps us to change the way we think.
Dato Yeo Kok Hwa’s session about Disrupting Negative Thoughts.
Time Out
I’m not sure about the rest of NUS staff, but I find that the working life in NUS research centre is challenging. Hence, it’s important for me to take time out for myself.
Before the holiday, Riza was telling me that Queen’s Gambit is a must-watch miniseries on Netflix. So I took the chance to watch it during the holiday. I haven’t stopped thinking about the series since finishing it because it was just that good.
Besides watching movie, I also played Command and Conquer 3 which is one of my favourite RTS games during the holiday. This video game was released in 2007. After 14 years have passed, I finally got the time to play it.
When I was working in startups, I lost a night or two of sleep especially when there is a deadline to meet. This is normal because sleep is undervalued in a startup culture where being busy and working beyond capacity is celebrated. Now in my current work life, I decide to sleep more.
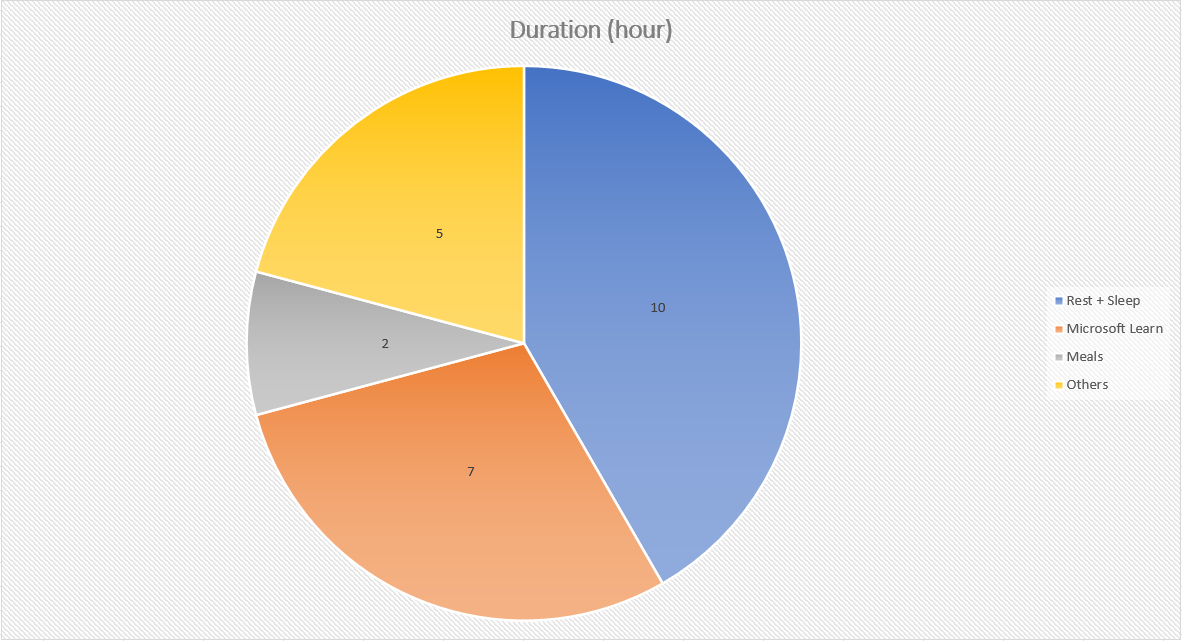
During the holiday, I had 10 hours of sleep/rest per day on average.
Thoughtful Eating
Even though I’m not allowed to cook in the place I rent, I still try my best to avoid unhealthy food. It has been more than one year I stop consuming fast food.
Currently, I am still trying to exercise for at least 20-minutes, 3 times a week.
My friend Jon introduced me a home workout video for beginner like me. You can refer to the video below if you are also finding ways to stay healthy during the lockdown period.
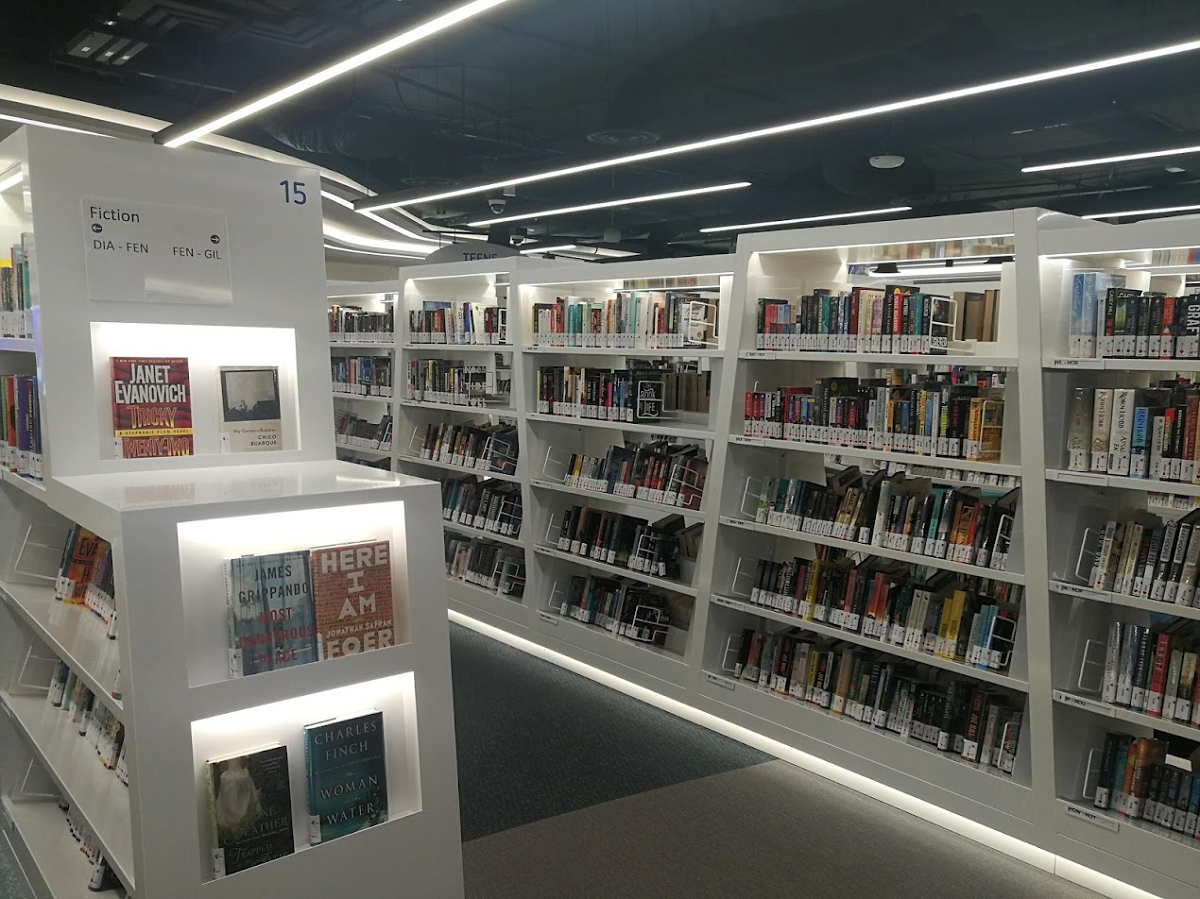
I have been volunteering in National Library Board until the volunteering opportunity was cancelled in May 2021 due to the Covid-19 situation. So, there is nothing much to share about this until the volunteering programme is back.
The new library at Harbour Front that I was always volunteering at.
That’s all for how I celebrate both my 3rd year of working in NUS and the NUS Well-Being Day. I hope reading this brought you some inspiration.
Hence, today in this article, we will see how we can publish our Android app which is newly built using Xamarin.Forms in AAB format to the Google Play Store.
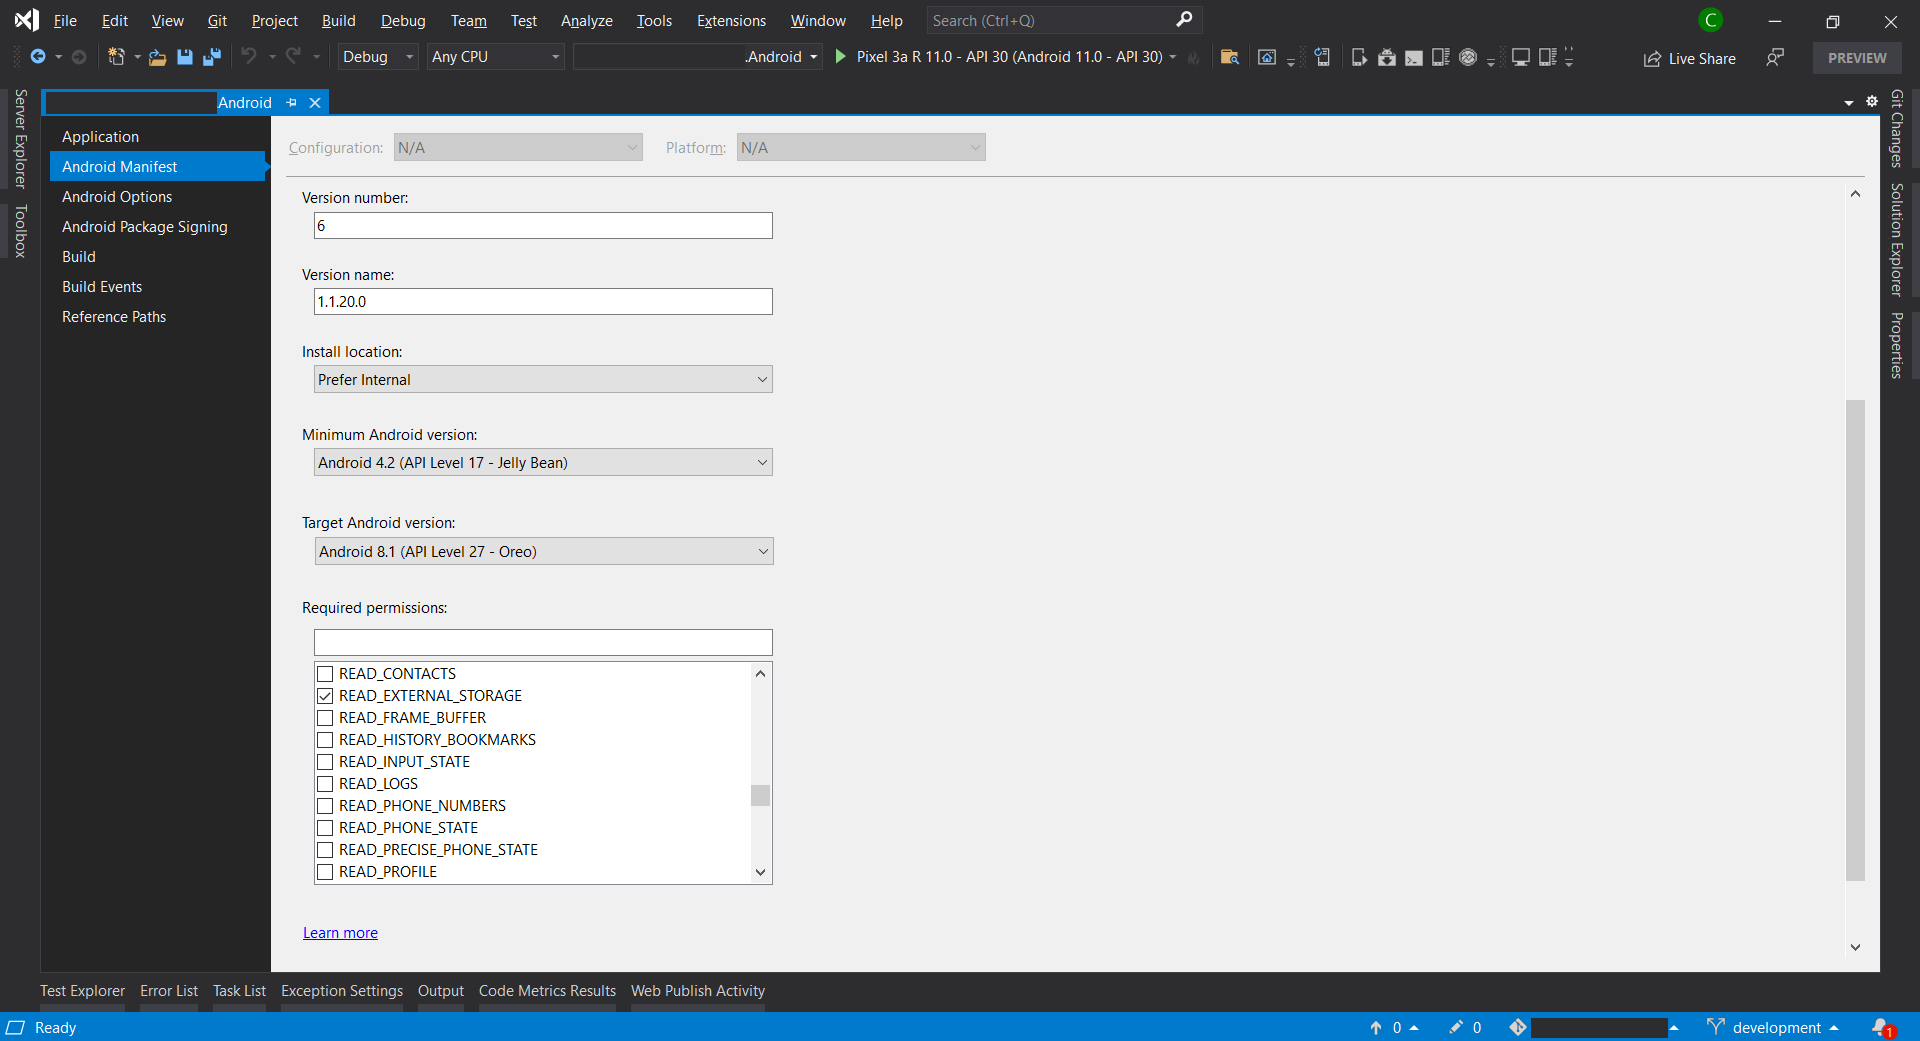
Step 0: Configure MainActivity And Android Manifest
In the manifest, we can specify the minimum and target Android versions.
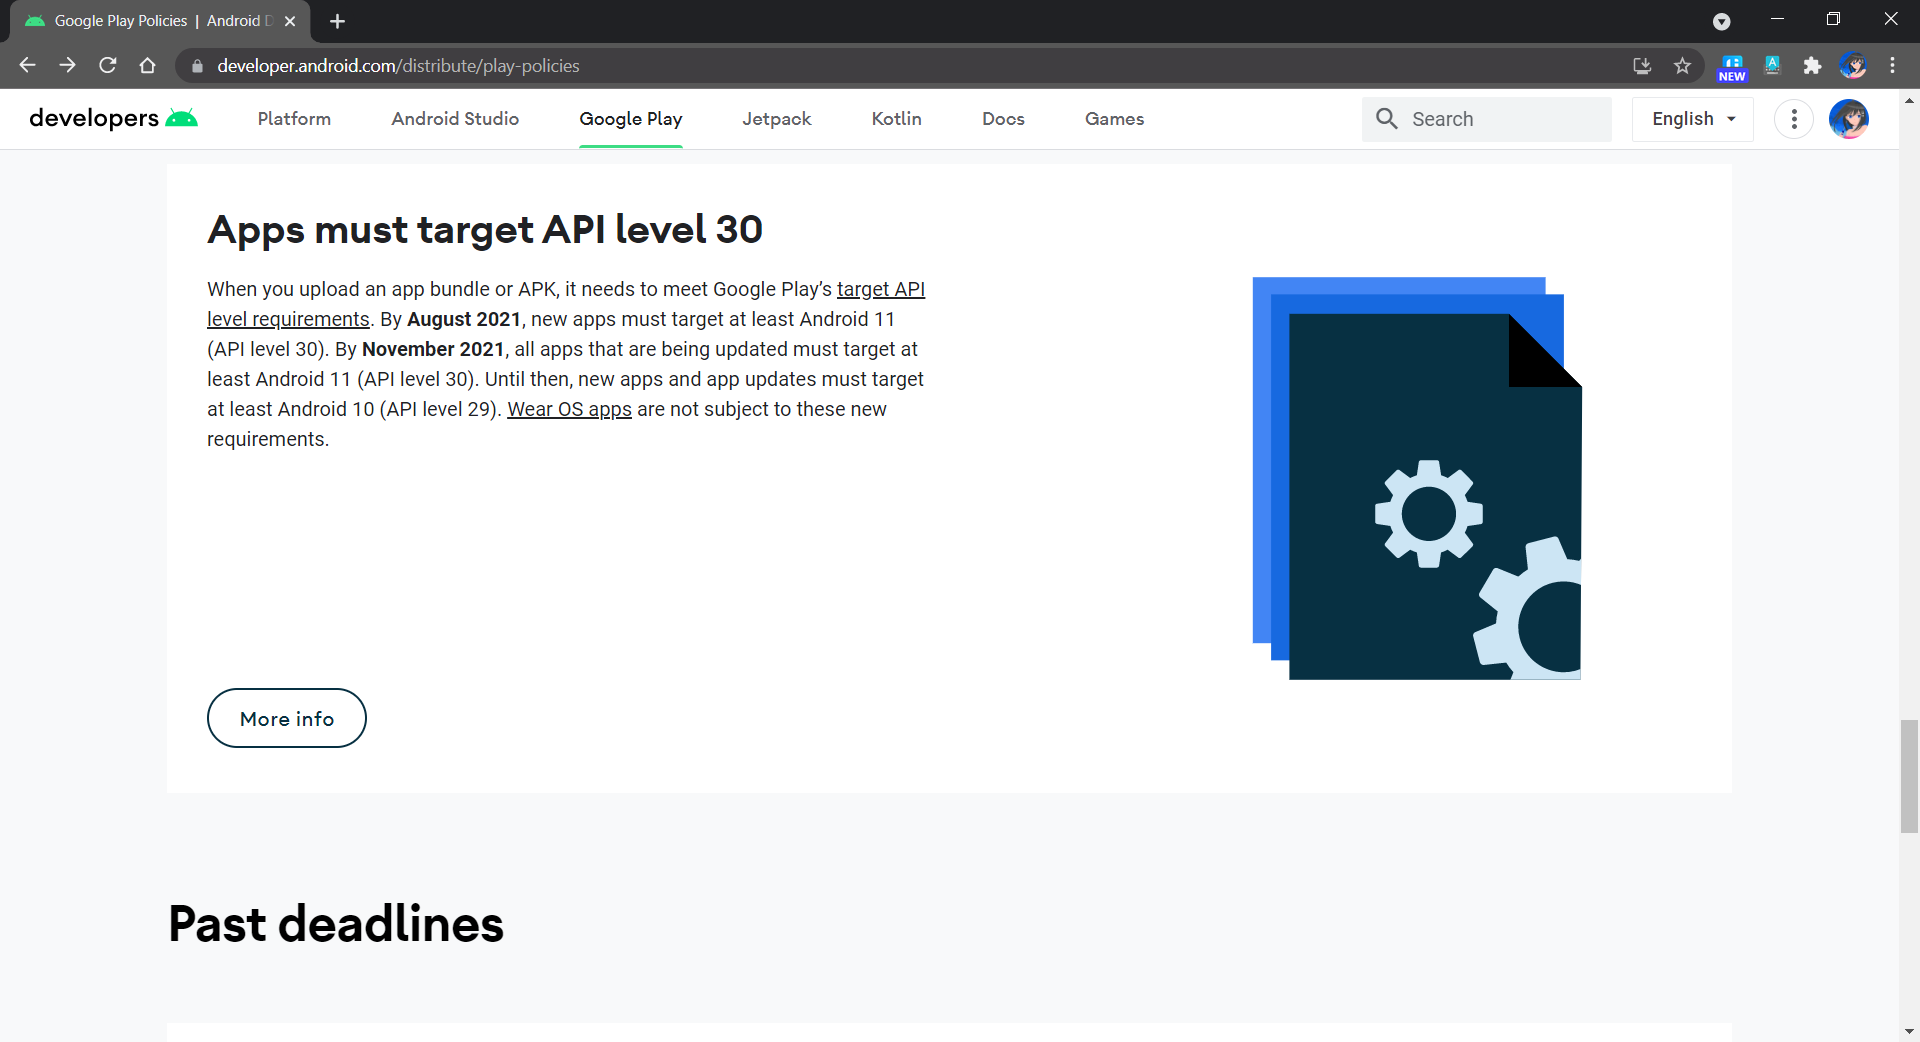
By November 2021, all apps that are being updated must target at least API Level 30, as shown in the announcement in Google Play Policies screenshot below.
Apps now must target API Level 30.
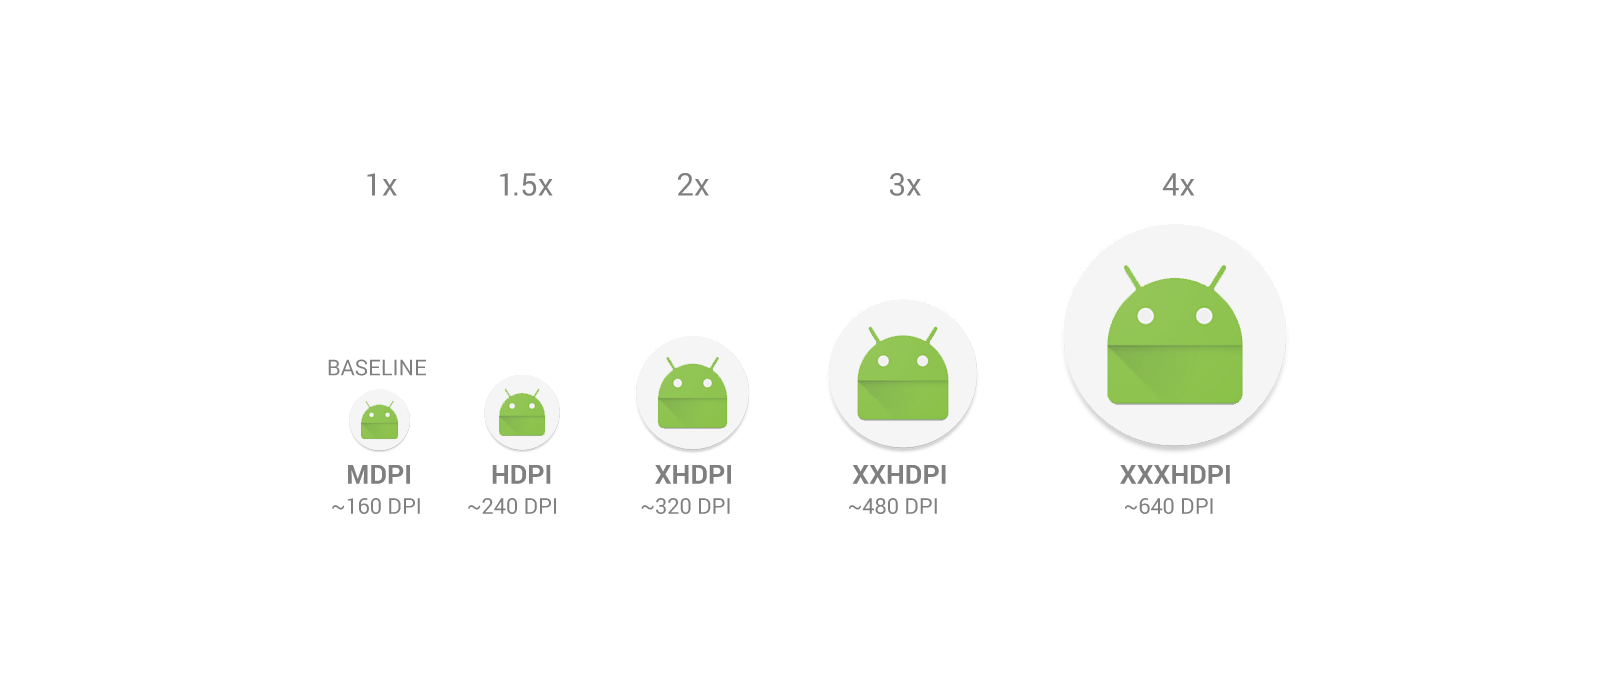
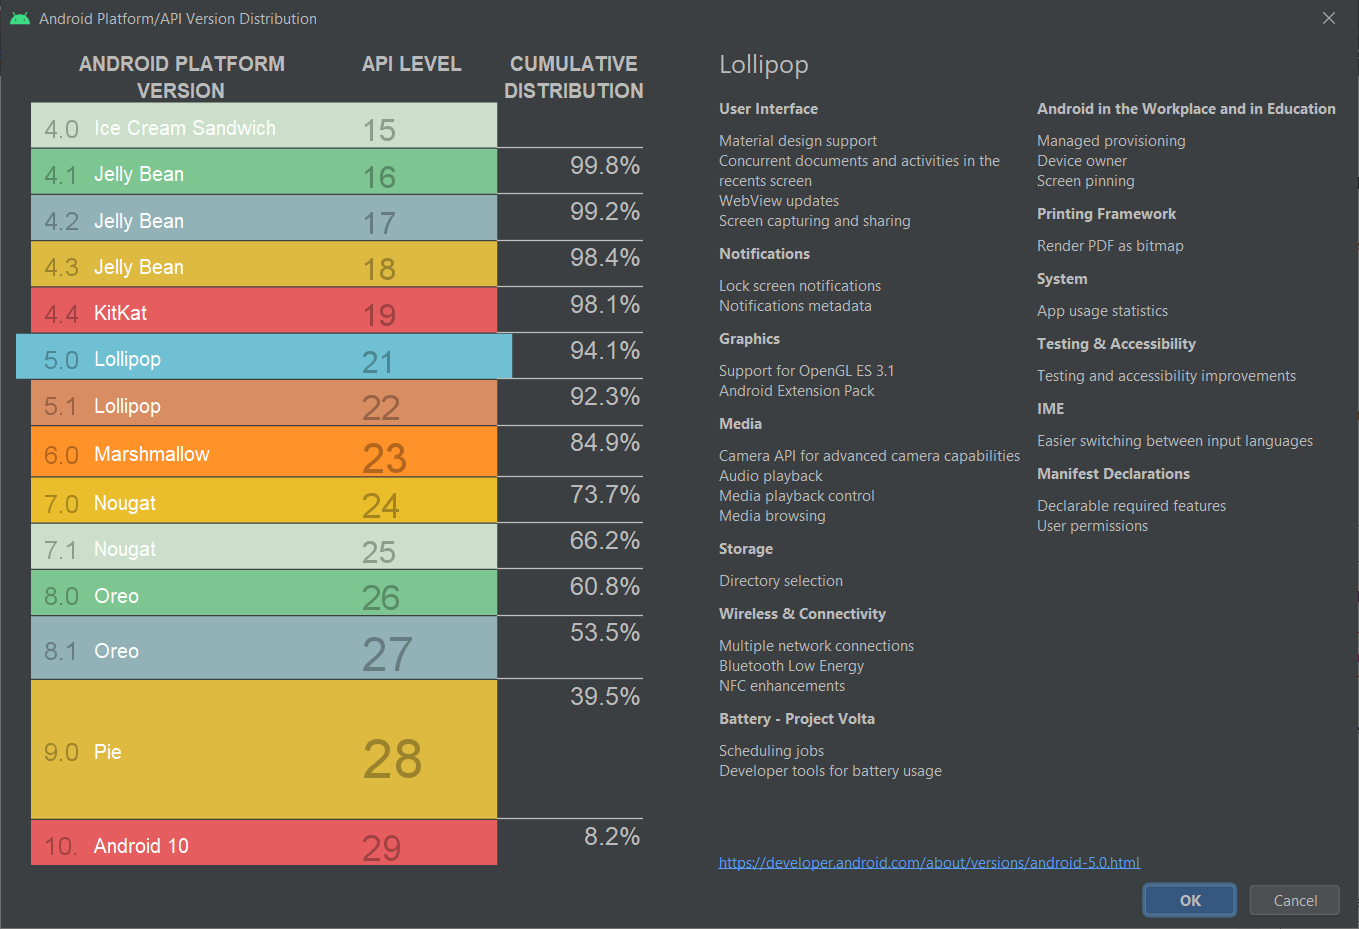
In addition, in order to not make our app to run on Android devices which are still using the discontinued Dalvik VM, we shall set minimum Android API Level to be 21 at least. According to the chart provided in Android Studio, we can see that 94.1% of the Android devices are already using API Level 21 and above as of October 2021. So it is safe to set the minimum Android API Level to be 21.
API Version distribution chart in Android Studio (as of October 2021).
Step 0.2.2: Permissions
In the manifest, we also need to specify the permissions our app requires to run. We should only request necessary permissions because users will be prompted to allow these permissions when they download our app from the Google Play Store.
Version Number: A positive integer value (used internally by Android and the application, and thus not displayed to users) that represents the version of the application. Normally it starts with 1;
Version Name: A string about the app version and it’s displayed to users in Google Play Store.
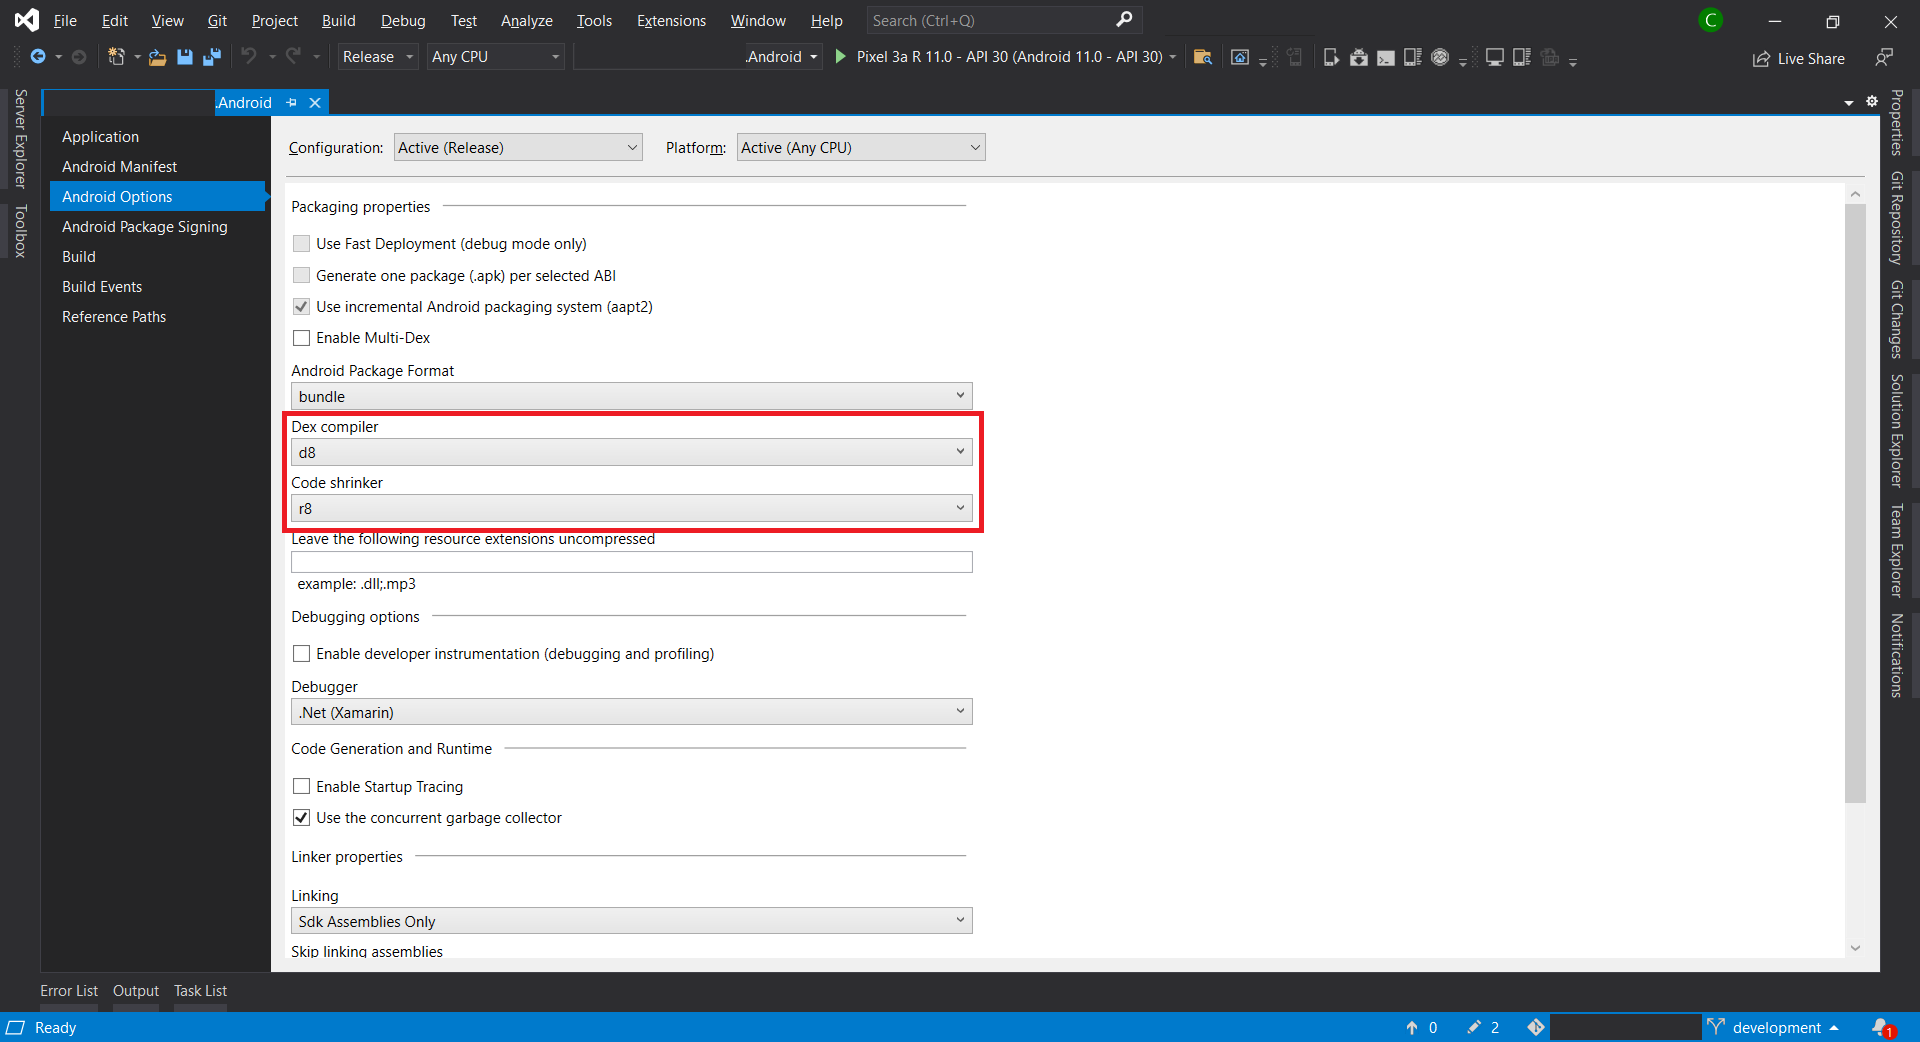
Step 1: Change To AAB
As mentioned earlier, Google requires us to publish our apps with the Android App Bundle (AAB). Hence, we need to first update the Android Package Format for our app in Android Options to use bundle instead of apk, as shown in the following screenshot.
Please take note that linking can produce some unintended side effects, so it is important that an application be re-tested in Release mode on a physical device.
In addition, we should disable the debug state in a released application as it is possible to gain full access to the Java process and execute arbitrary code in the context of the app via JDWP (Java Debug Wire Protocol, which is turned on by default) if this debug state is not disabled. To disable it, we need to add the following lines into AssemblyInfo.cs file.
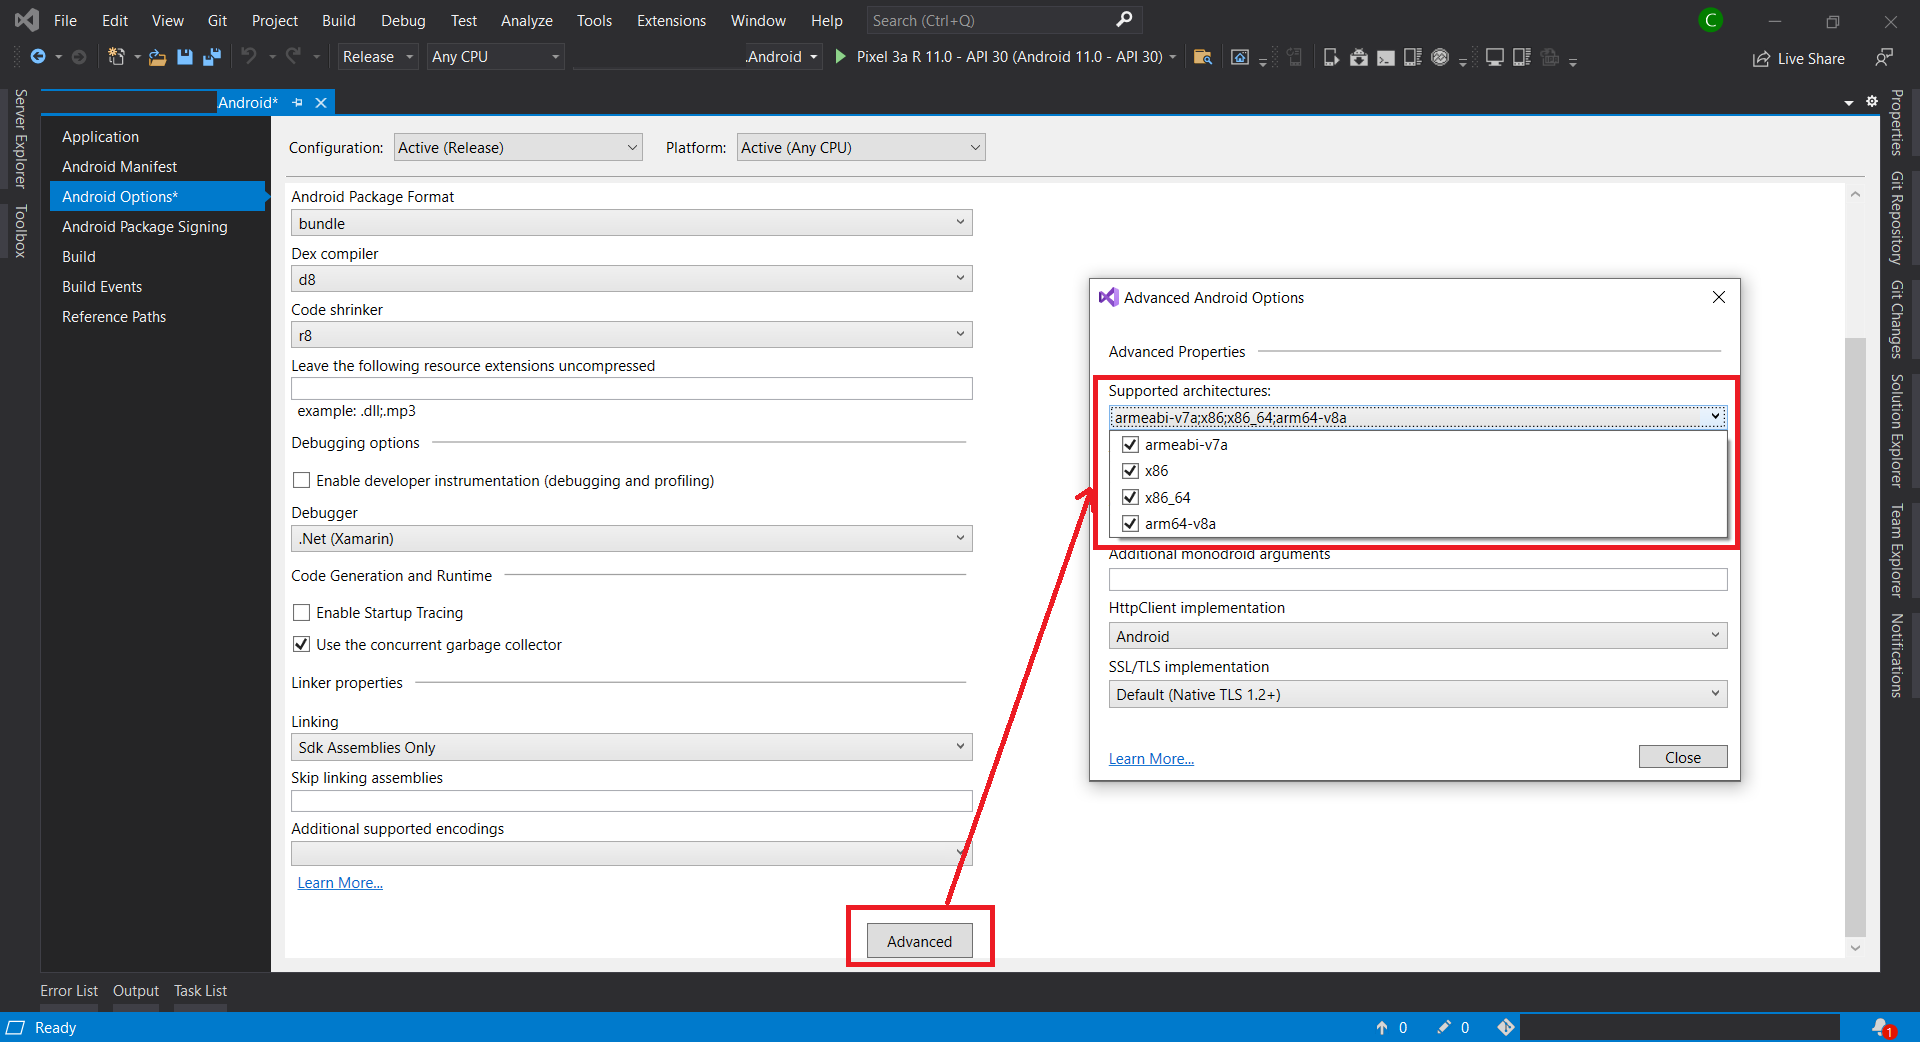
Currently, all our apps published on Google Play must support 64-bit architectures because starting from August 2021, Google Play stops serving non-64-bit capable devices. This means that apps with 32-bit native code will need to have an additional 64-bit version as well.
After all of the above steps are completed, we can now proceed to compile our app in Release mode. We need to make sure that our app can be built successfully in Release mode.
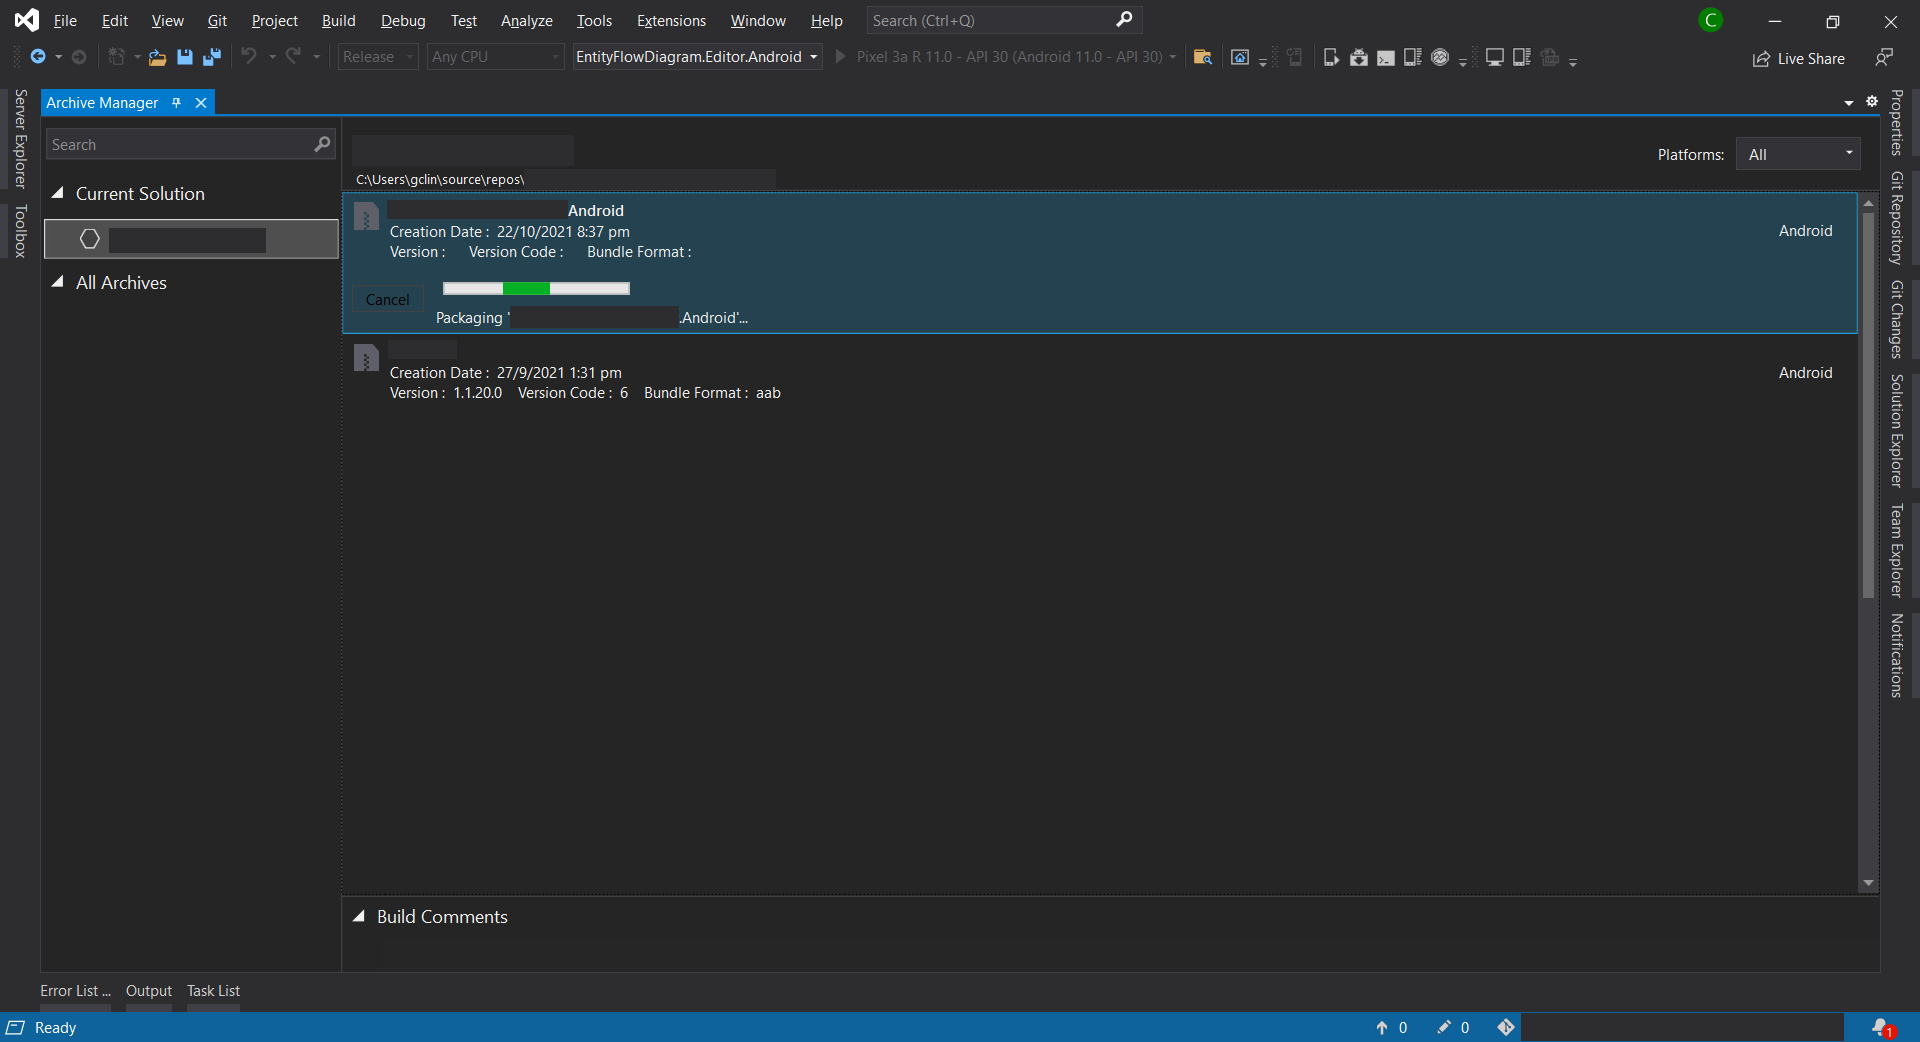
Next, we will right-click on the Android project and choose the “Archive…” option. Then the Archive Manager will be displayed, as shown below. We just need wait for the packaging process to finish.
The Archive Manager.
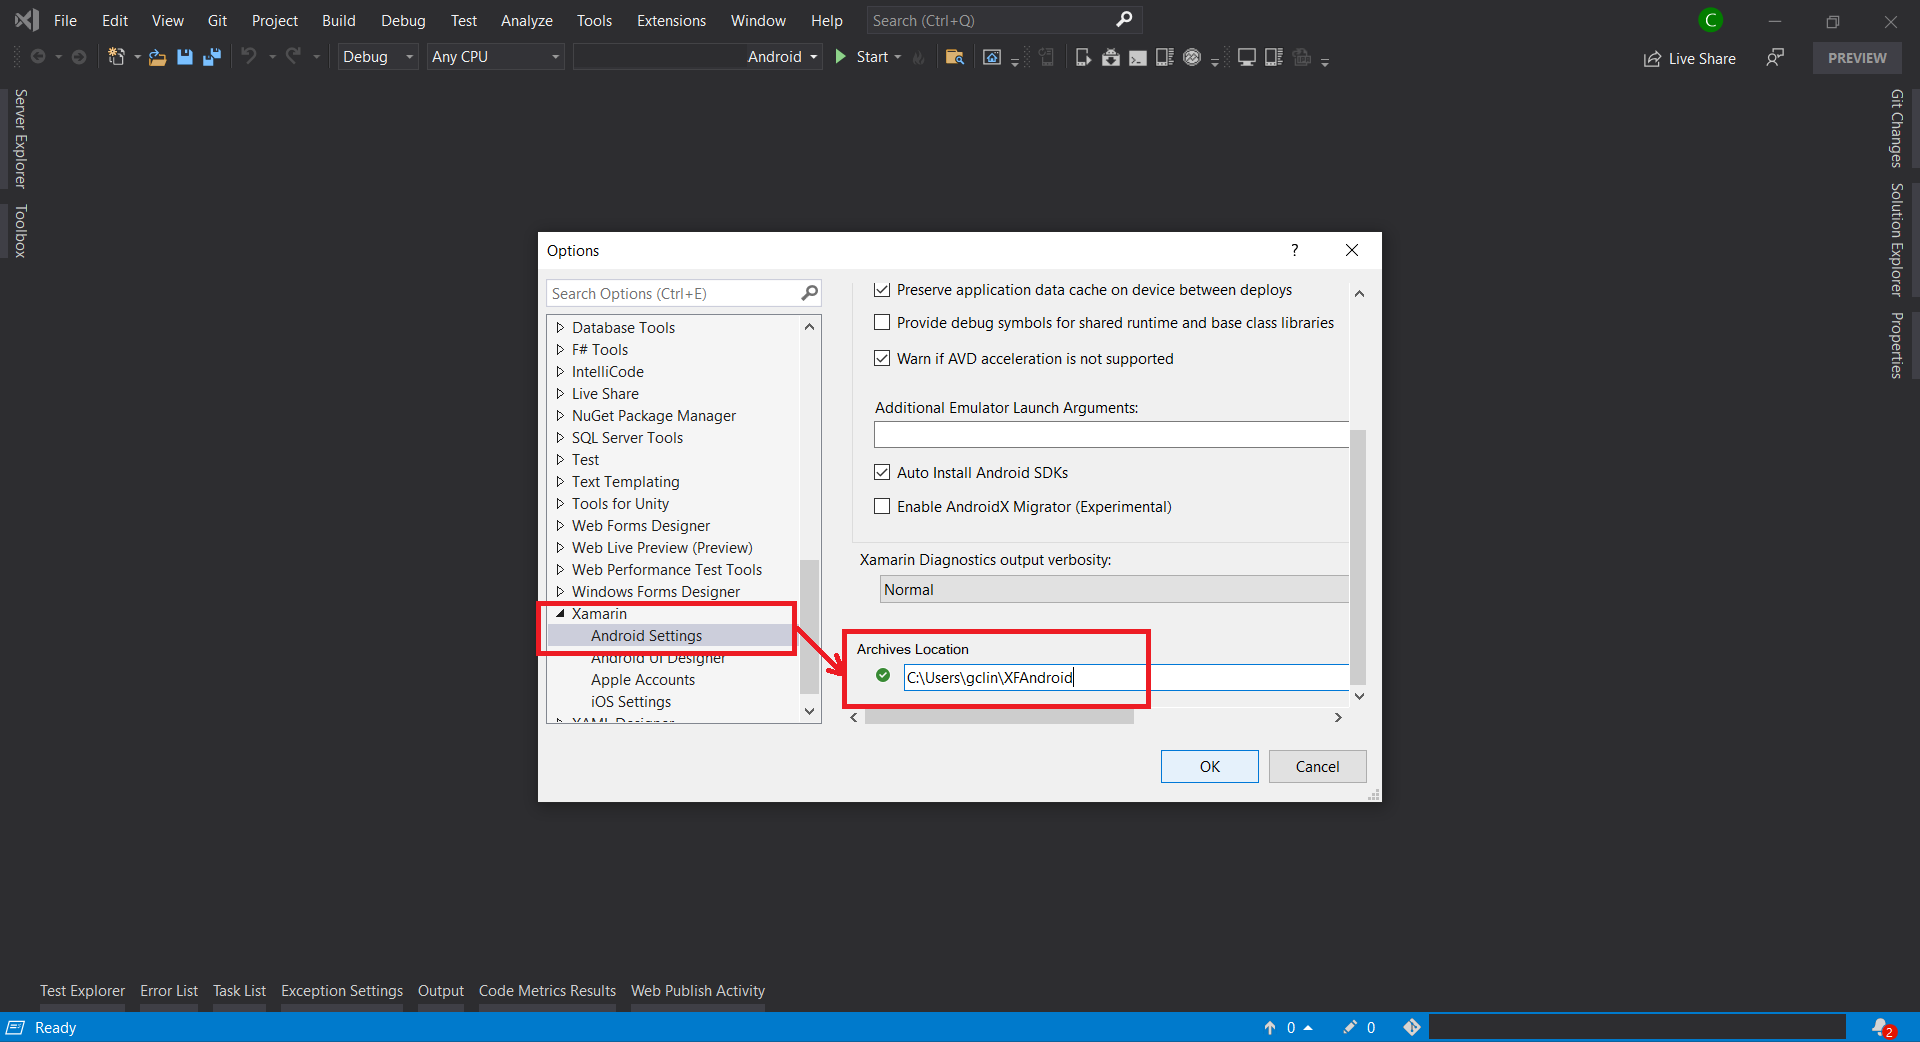
Sometimes, the archive process will fail with an error message saying “Cannot create the archive file because the copy of mdbs files failed.” or “Could not find part of the path”. According to the discussion on MSDN, this is because the Xamarin Android Archive Location path is too long. Hence, the solution is to update it to a shorter path under Tools -> Options in Visual Studio, as shown below.
Update Xamarin Android Archive Location in Visual Studio.
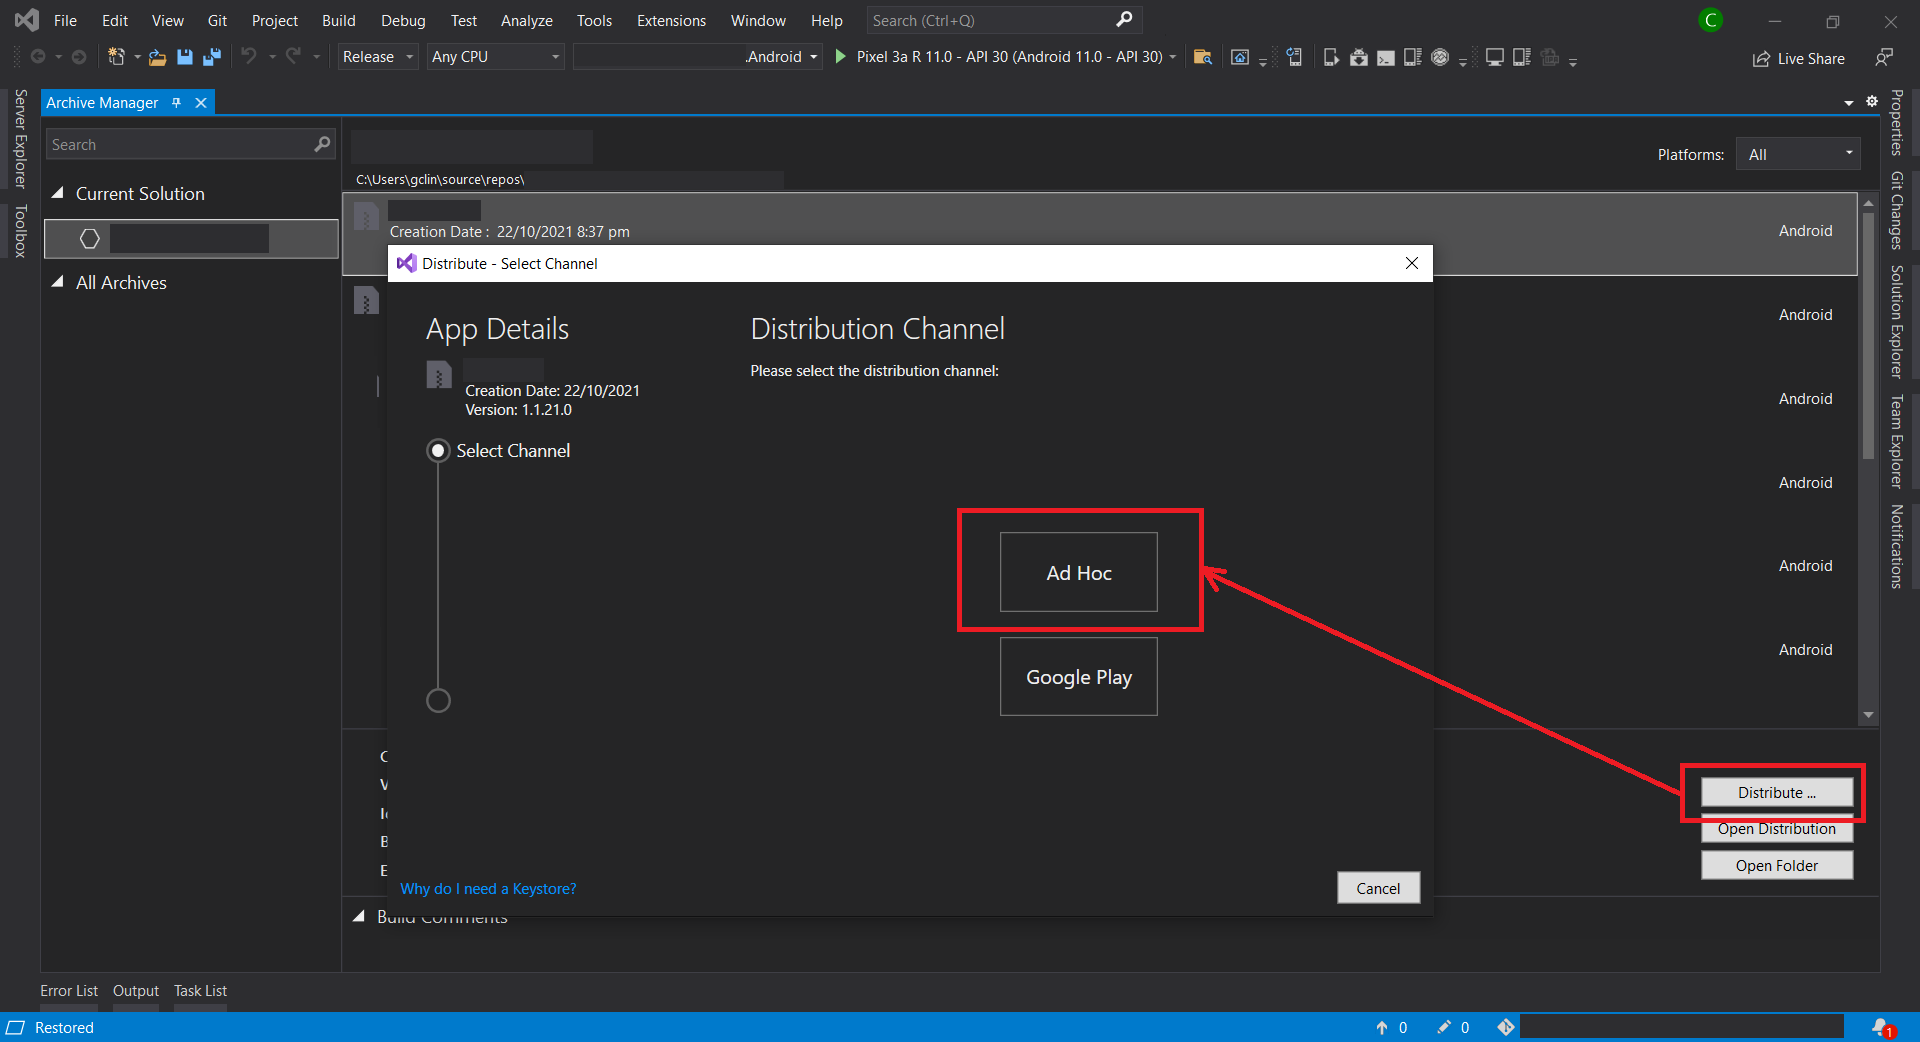
Step 7: Configure Distribution Channel
After the archive has been successfully built, we can proceed to choose the distribution channel. Here, we will choose Ad Hoc instead of Google Play as our distribution channel. This is because to Ad Hoc approach does not restrict our app to be published to Google Play only and thus gives us more freedom. In addition, to use Google Play as the channel, we will need to obtain OAuth 2.0 client credentials from the Google Cloud Console. So, to keep thing simple, we will use the Ad Hoc approach here.
Choosing Ad Hoc as the distribution channel of our aab.
Step 8: Generate Signed Bundle
Before we can publish our app on the Google Play, we need to sign our aab with a certificate (aka upload key). We sign our aab so users know the app is really from us. Hence, after Ad Hoc is selected, Visual Studio will display the Signing Identity page.
If we already have an existing certificate, we can simply import it (password is needed). Otherwise, we can choose to create a new signing certificate.
Created certificated will be saved and listed under Signing Identity.
We must back up the resulting keystore file and password in a safe place. To retrieve the keystore, we can simply double click on the certificate in the list shown in the screenshot above. From there we can choose to view the keystore file in the Windows Explorer.
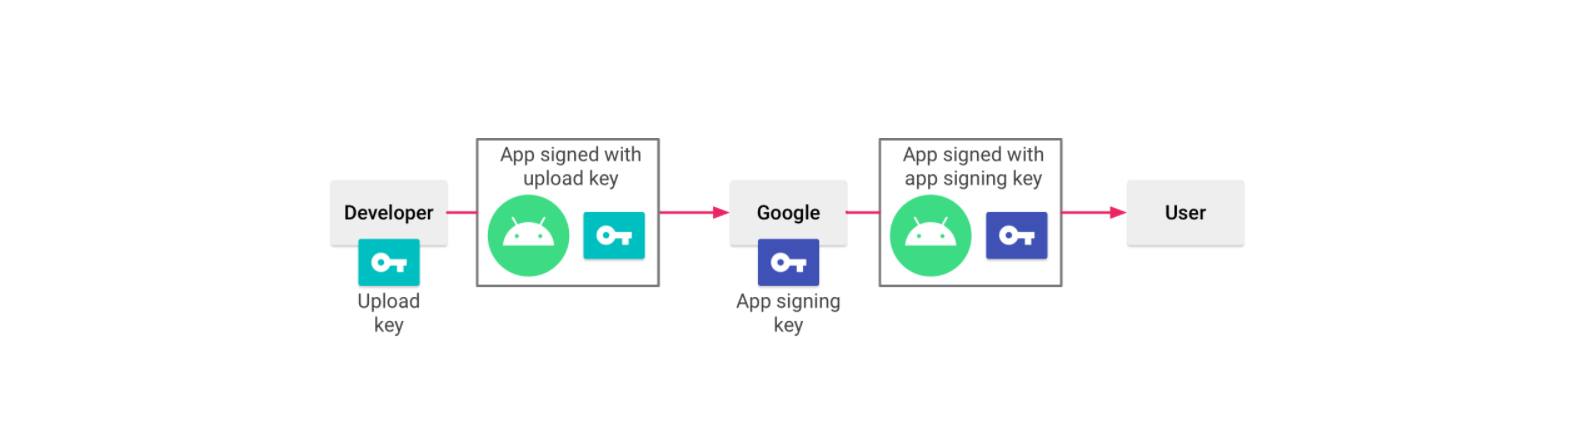
Signing an app with Play App Signing. (Image Source: Android Developers)
Currently, when our app is updated to a new version, Android will first makes sure the certificate of new version is same as the one in the previous version. Hence, when the app signing key expires, users will no longer be able to seamlessly upgrade to new versions of our app. Now, with Play App Signing, Google helps to keep our app signing key safe, and ensures our apps are correctly signed and able to receive updates throughout their lifespans.
In addition, when we use Play App Signing, if we lose our upload key, we can request for Upload Key Rest by contacting Play Store support. Since our app signing key is secured by Google, we can then continue to upload new versions of our app as updates to the original app, even if the upload keys have been changed.
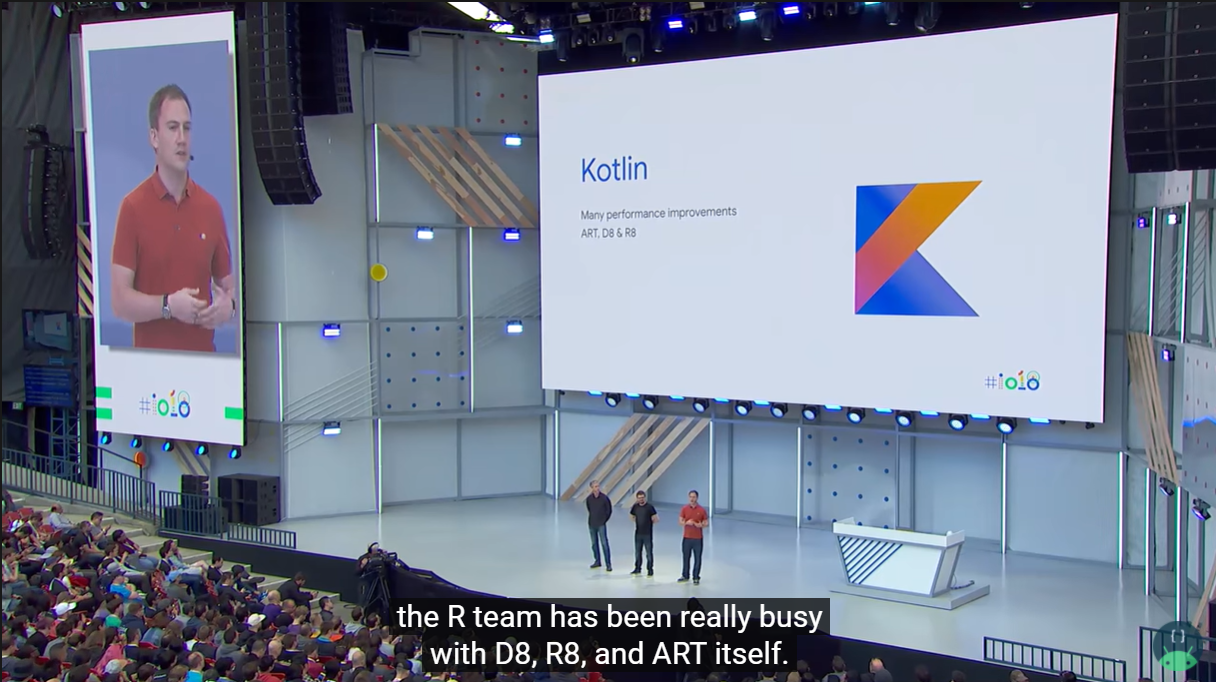
For more information about Play App Signing, please watch the video below.
There are many steps involved to setup our app on Google Play Console. Fortunately, there is a very good YouTube tutorial from MJSD Coding about how to create and setup a new app on the new Google Play Console. You can simply refer to the video below.
How to Publish an Android App to Google Play in 2021.
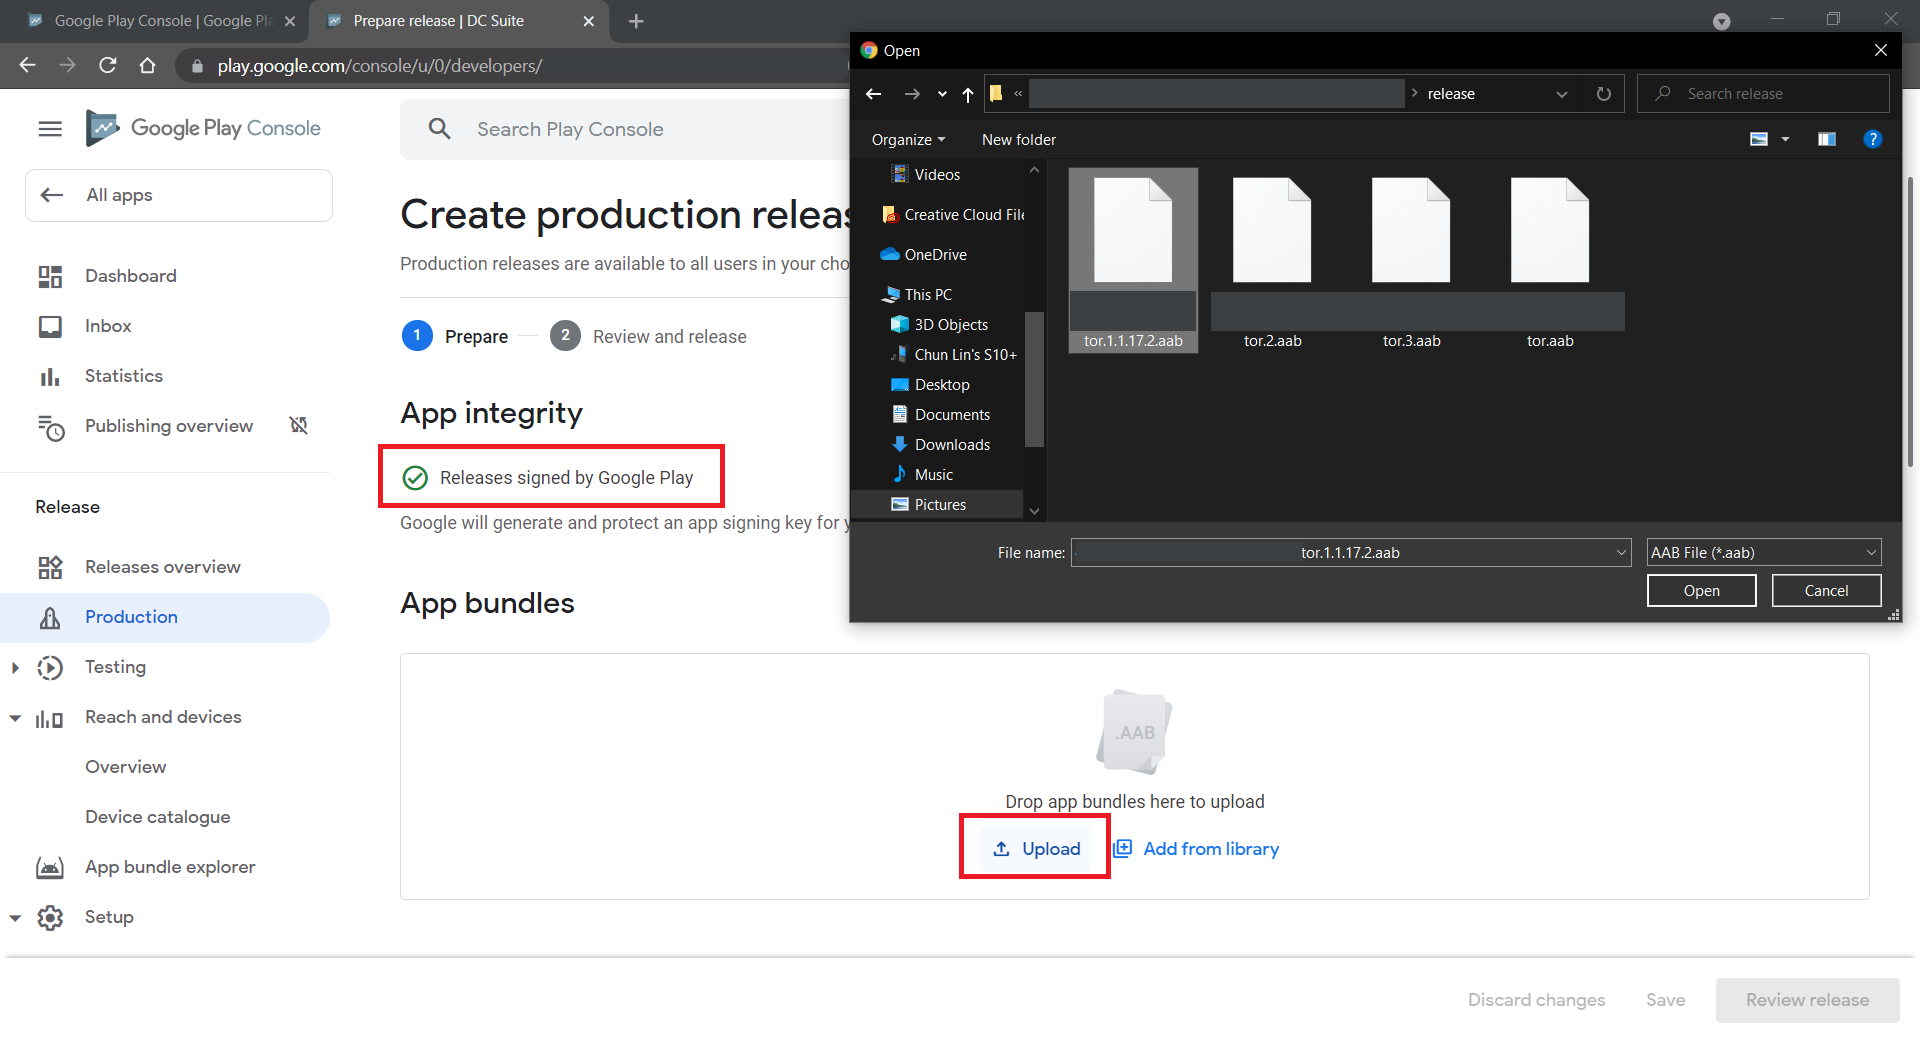
Step 10: Release our App
In the video above, we learnt about the step to create production release. After we have confirmed to use the Play App Signing, we can proceed to upload our aab file generated in Step 8, as shown in the screenshot below. Once it is successfully uploaded to the Google Play Console, we can proceed to rollout our app release.
Uploading our signed app bundle to Google Play Console.