Micro Frontend with Single-SPA

In order to build applications which utilise the scalability, flexibility, and resilience of cloud computing, the applications are nowadays normally developed with microservice architecture using containers. Microservice architecture enables our applications to be composed of small independent backend services that communicate with each other over the network.

Project GitHub Repository

The complete source code of this project can be found at https://github.com/goh-chunlin/Lunar.MicroFrontEnd.SingleSpa.

Why Micro Frontend?

In general, when applying a microservice architecture, while backend systems are split up into microservices, frontend is still often developed as a monolith. This is not a problem when our application is small and we have a strong frontend team working on its frontend. However when the application grows to a larger scale, a monolithic frontend will start to be inefficient and unmaintainable due to the following reasons.

Firstly, it is challenging to keep the frontend technologies used in a large application up-to-date. Hence, with micro frontend, we can upgrade the version of the frontend on a functional basis. It also allows developers to use different frontend technologies to different functions based on the needs.

Secondly, since the source code of the micro frontend is separated, the source code of the individual frontend component is not as much as the monolith version of it. This improves the maintainability of the frontend because smaller code is easy to understand and distribute.

Thirdly, with micro frontend, we can split the frontend development team into smaller teams so that each team only needs to focus on relevant business functions.

Introduction of single-spa

In micro frontend architecture, we need a framework to bring together muliple JavaScript micro frotnends in our application. The framework we’re going to discuss here is called the single-spa.

The reason why we choose single-spa is because it is a framework allowing the implementation of micro frontend by supporting many popular JavaScript UI frameworks such as Angular and Vue. By leveraging the single-spa framework, we are able to register micro frontends such that the micro frontends are mounted and unmounted correctly for different URLs.

In single-spa, each micro frontend needs to implement their lifecycle functions by defining the actual implementation for how to bootstrap/mount/unmount components to the DOM tree with JavaScript or a different flavour of the JavaScript framework.

In this article, single-spa will work as an orchestrator to handle the micro frontend switch so that individual micro frontend does not need to worry about the global routing.

The Orchestrator

The orchestrator is nothing but a project holding single-spa which is responsible for global routing, i.e. determining which micro frontends get loaded.

We will be loading different micro frontends into the two placeholders which consume the same custom styles.

Fortunately, there is a very convenient way for us to get started quickly, i.e. using the create-single-spa, a utility for generating starter code. This guide will cover creating the root-config and our first single-spa application.

We can install the create-single-spa tool globally with the following command.

npm install --global create-single-spa

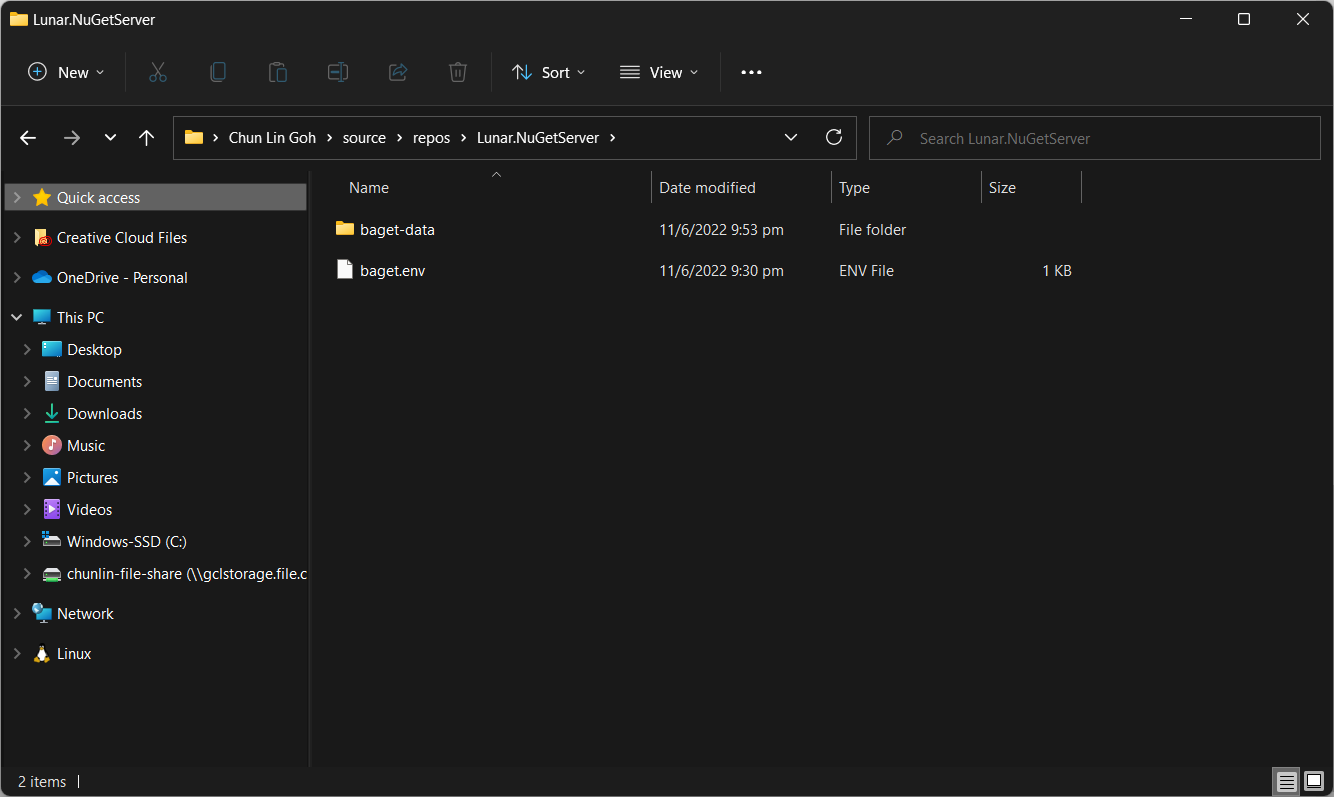
Once it is installed, we will create our project folder containing another empty called “orchestrator”, as shown in the following screenshot.

We have now initialised our project.

We will now create the single-spa root config, which is the core of our orchestrator, with the following command.

create-single-spa

Then we will need to answer a few questions, as shown in the screenshots below in order to generate our orchestrator.

We’re generating orchestrator using the single-spa root config type.

That’s all for now for our orchestrator. We will come back to it after we have created our micro frontends.

Micro Frontends

We will again use the create-single-spa to create the micro frontends. Instead of choosing root config as the type, this time we will choose to generate the parcel instead, as shown in the following screenshot.

We will be creating Vue 3.0 micro frontends.

To have our orchestrator import the micro frontends, the micro frontend app needs to be exposed as a System.register module, as shown below on how we edit the vue.config.js file with the following configuration.

const { defineConfig } = require('@vue/cli-service')
module.exports = defineConfig({
  transpileDependencies: true,
  configureWebpack: {
    output: {
      libraryTarget: "system",
      filename: "js/app.js"
    }
  }
})
Here we also force the generated output file name to be app.js for import convenience in the orchestrator.

Now, we can proceed to build this app with the following command so that the app.js file can be generated.

npm run build
The app.js file is generated after we run the build script that is defined in package.json file.

We then can serve this micro frontend app with http-server for local testing later. We will be running the following command in its dist directory to specify that we’re using port 8011 for the app1 micro frontend.

http-server . --port 8011 --cors
This is what we will be seeing if we navigate to the micro frontend app now.

Link Orchestrator with Micro Frontend AppS

Now, we can return to the index.ejs file to specify the URL of our micro frontend app as shown in the screenshot below.

Next, we need to define the place where we will display our micro frontend apps in the microfrontend-layout.js, as shown in the screenshot below.

<single-spa-router>
  <main>
    <route default>
      <div style="display: grid; column-gap: 50px; grid-template-columns: 30% auto; background-color: #2196F3; padding: 10px;">
        <div style="background-color: rgba(255, 255, 255, 0.8); padding: 20px;">
          <application name="@Lunar/app1"></application>
        </div>
        <div>

        </div>
      </div>
      
    </route>
  </main>
</single-spa-router>

We can now launch our orchestrator with the following command in the orchestrator directory.

npm start
Based on the package.json file, our orchestrator will be hosted at port 9000.

Now, if we repeat what we have done for app1 for another Vue 3.0 app called app2 (which we will deploy on port 8012), we can achieve something as follows.

Finally, to have the images shown properly, we simply need to update the Content-Security-Policy to be as follows.

<meta http-equiv="Content-Security-Policy" content="default-src 'self' https: localhost:*; img-src data:; script-src 'unsafe-inline' 'unsafe-eval' https: localhost:*; connect-src https: localhost:* ws://localhost:*; style-src 'unsafe-inline' https:; object-src 'none';">

Also, in order to make sure the orchestrator indeed loads two different micro frontends, we can edit the content of the two apps to look different, as shown below.

Design System

In a micro frontend architecture, every team builds its part of the frontend. With this drastic expansion of the frontend development work, there is a need for us to streamline the design work by having a complete set of frontend UI design standards.

In addition, in order to maintain the consistency of the look-and-feel of our application, it is important to make sure that all our relevant micro frontends are adopting the same design system which also enables developers to replicate designs quickly by utilising premade UI components.

Here in single-spa, we can host our CSS in one of the shared micro frontend app and then have it contains only the common CSS.

Both micro frontend apps are using the same design system Haneul (https://haneul-design.web.app/).

Closing

In 2016, Thoughtworks introduced the idea of micro frontend. Since then, the term micro frontend has been hyped.

However, micro frontend is not suitable for all projects, especially when the development team is small or when the project is just starting off. Micro frontend is only recommended when the backend is already on microservices and the team finds that scaling is getting more and more challenging. Hence, please plan carefully before migrating to micro frontend.

If you’d like to find out more about the single-spa framework that we are using in this article, please visit the following useful links.

Running Our Own NuGet Server on Azure Container Instance (ACI)

In software development, it is a common practice that developers from different teams create, share, and consume useful code which is bundled into packages. For .NET the way we share code is using NuGet package, a single ZIP file with the .nupkg extension that contains compiled code (DLLs).

Besides the public nuget.org host, which acts as the central repository of over 100,000 unique packages, NuGet also supports private hosts. Private host is useful for example it allows developers working in a team to produce NuGet packages and share them with other teams in the same organisation.

There are many open-source NuGet server available. BaGet is one of them. BaGet is built using .NET Core, thus it is able to run behind IIS or via Docker.

In this article, we will find out how to host our own NuGet server on Azure using BaGet.

Hosting Locally

Before we talk about hosting NuGet server on the cloud, let’s see how we could do it in our own machine with Docker.

Fortunately, there is an official image for BaGet on Docker Hub. Hence, we can pull it easily with the following command.

docker pull loicsharma/baget

Before we run a new container from the image, we need to create a file named baget.env to store BaGet’s configurations, as shown below.

# The following config is the API Key used to publish packages.
# We should change this to a secret value to secure our own server.
ApiKey=NUGET-SERVER-API-KEY

Storage__Type=FileSystem
Storage__Path=/var/baget/packages
Database__Type=Sqlite
Database__ConnectionString=Data Source=/var/baget/baget.db
Search__Type=Database

Then we also need to have a new folder named baget-data in the same directory as the baget.env file. This folder will be used by BaGet to persist its state.

The folder structure.

As shown in the screenshot above, we have the configuration file and baget-data at the C:\Users\gclin\source\repos\Lunar.NuGetServer directory. So, let’s execute the docker run command from there.

docker run --rm --name nuget-server -p 5000:80 --env-file baget.env -v "C:\Users\gclin\source\repos\Lunar.NuGetServer\baget-data:/var/baget" loicsharma/baget:latest

In the command, we also mount the baget-data folder on our host machine into the container. This is necessary so that data generated by and used by the container, such as package information, can be persisted.

We can browse our own local NuGet server by visiting the URL http://localhost:5000.

Now, let’s assume that we have our packages to publish in the folder named packages. We can publish it easily with dotnet nuget push command, as shown in the screenshot below.

Oops, we are not authorised to publish the package to own own NuGet server.

We will be rejected to do the publish, as shown in the screenshot above, if we do not provide the NUGET-SERVER-API-KEY that we defined earlier. Hence, the complete command is as follows.

dotnet nuget push -s http://localhost:5000/v3/index.json -k <NUGET-SERVER-API-KEY here> WordPressRssFeed.1.0.0.nupkg

Once we have done that, we should be able to see the first package on our own NuGet server, as shown below.

Yay, we have our first package in our own local NuGet server!

Moving on to the Cloud

Instead of hosting the NuGet server locally, we can also host it on the cloud so that other developers can access too. Here, we will be using Azure Cloud Instance (ACI).

ACI allows us to run Docker containers on-demand in a managed, serverless Azure environment. ACI is currently the fastest and simplest way to run a container in Azure, without having to manage any virtual machines and without having to adopt a higher-level service.

The first thing we need to have is to create a resource group (in this demo, we will be using a new resource group named resource-group-lunar-nuget) which will contain ACI, File Share, etc. for this project.

Secondly, we need to have a way to retrieve and persist state with ACI because by default, ACI is stateless. Hence, when the container is restarted all of its state will be lost and the packages we’ve uploaded to our NuGet server on the container will also be lost. Fortunately, we can make use of the Azure services, such as Azure SQL and Azure Blob Storage to store the metadata and packages.

For example, we can create a new Azure SQL database called lunar-nuget-db. Then we create an empty Container named nuget under the Storage Account lunar-nuget.

Created a new Container nuget under lunarnuget Storage Account.

Thirdly, we need to deploy our Docker container above on ACI using docker run. To do so, we first need to log into Azure with the following command.

docker login azure

Once we have logged in, we proceed to create a Docker context associated with ACI to deploy containers in ACI of our resource group, resource-group-lunar-nuget.

Creating a new ACI context called lunarnugetacicontext.

After the context is created, we can use the following command to see the current available contexts.

docker context ls
We should be able to see the context we just created in the list.

Next, we need to swich to use the new context with the following command because currently, as shown in the screenshot above, the context being used is default (the one with an asterisk).

docker context use lunarnugetacicontext

Fourthly, we can now proceed to create our ACI which connect to the Azure SQL and Azure Blob Storage above.

az container create \
    --resource-group resource-group-lunar-nuget \
    --name lunarnuget \
    --image loicsharma/baget \
    --environment-variables <Environment Variables here>
    --dns-name-label lunar-nuget-01 \
    --ports 80

The environment variables include the following

  • ApiKey=<NUGET-SERVER-API-KEY here>
  • Database__Type=SqlServer
  • Database__ConnectionString=”<Azure SQL connection string here>”
  • Storage__Type=AzureBlobStorage
  • Storage__AccountName=lunarnuget
  • Storage__AccessKey=<Azure Storage key here>
  • Storage__Container=nuget

If there is no issue, after 1 to 2 minutes, the ACI named lunarnuget will be created. Otherwise, we can always use docker ps to get the container ID first and then use the following command to find out the issues if any.

docker logs <Container ID here>
Printing the logs from one of our containers with docker logs.

Now, if we visit the given FQDN of the ACI, we shall be able to browse the packages on our NuGet server.

That’s all for a quick setup of our own NuGet server on Microsoft Azure. =)

References

Multi-Container ASP .NET Core Web App with Docker Compose

Previously, we have seen how we could containerise our ASP .NET Core 6.0 web app and manage it with docker commands. However, docker commands are mainly for only one image/container. If our solution has multiple containers, we need to use docker-compose to manage them instead.

docker-compose makes things easier because it encompasses all our parameters and workflow into a configuration file in YAML. In this article, I will share my first experience with docker-compose to build mutli-container environments as well as to manage them with simple docker-compose commands.

To help my learning, I will create a simple online message board where people can login with their GitHub account and post a message on the app.

PROJECT GITHUB REPOSITORY

The complete source code of this project can be found at https://github.com/goh-chunlin/Lunar.MessageWall.

Create Multi-container App

We will start with a solution in Visual Studio with two projects:

  • WebFrontEnd: A public-facing web application with Razor pages;
  • MessageWebAPI: A web API project.

By default, the web API project will have a simple GET method available, as shown in the Swagger UI below.

Default web API project created in Visual Studio will have this WeatherForecast API method available by default.

Now, we can make use of this method as a starting point. Let’s have the our client, WebFrontEnd, to call the API and output the result returned by the API to the web page.

var request = new System.Net.Http.HttpRequestMessage();
request.RequestUri = new Uri("http://messagewebapi/WeatherForecast");

var response = await client.SendAsync(request);

string output = await response.Content.ReadAsStringAsync();

In both projects, we will add Container Orchestrator Support with Linux as the target OS. Once we have the docker-compose YAML file ready, we can directly run our docker compose application by simply pressing F5 in Visual Studio.

The docker-compose YAML file for our solution.

Now, we shall be able to see the website output some random weather data returned by the web API.

Congratulations, we’re running a docker compose application.

Configure Authentication in Web App

Our next step is to allow users to login to our web app first before they can post a message on the app.

It’s usually a good idea not to build our own identity management module because we need to deal with a lot more than just building a form to allow users to create an account and type their credentials. One example will be managing and protecting our user’s personal data and passwords. Instead, we should rely on Identity-as-a-Service solutions such as Azure Active Directory B2C.

Firstly, we will register our web app in our Azure AD B2C tenant.

Normally for first-timers, we will need to create a Azure AD B2C tenant first. However, there may be an error message saying that our subscription is not registered to use namespace ‘Microsoft.AzureActiveDirectory’. If you encounter this issue, you can refer to Adam Storr’s article on how to solve this with Azure CLI.

Once we have our Azure AD B2C tenant ready (which is Lunar in my example here), we can proceed to register our web app, as shown below. For testing purposes, we set the Redirect URI to https://jwt.ms, a Microsoft-owned web application that displays the decoded contents of a token. We will update this Redirect URL in the next section below when we link our web app with Azure AD B2C.

Registering a new app “Lunar Message Wall” under the Lunar Tenant.

Secondly, once our web app is registered, we need to create a client secret, as shown below, for later use.

Secrets enable our web app to identify itself to the authentication service when receiving tokens. In addition, please take note that although certificate is recommended over client secret, currently certificates cannot be used to authenticate against Azure AD B2C.

Adding a new client secret which will expire after 6 months.

Thirdly, since we want to allow user authentication with GitHub, we need to create a GitHub OAuth app first.

The Homepage URL here is a temporary dummy data.

After we have registered the OAuth app on GitHub, we will be provided a client ID and client secret. These two information are needed when we configure GitHub as the social identity provider (IDP) on our Azure AD B2C, as shown below.

Configuring GitHub as an identity provider on Azure AD B2C.

Fourthly, we need to define how users interact with our web app for processes such as sign-up, sign-in, password reset, profile editing, etc. To keep thing simple, here we will be using the predefined user flows.

For simplicity, we allow only GitHub sign-in in our user flow.

We can also choose the attributes we want to collect from the user during sign-up and the claims we want returned in the token.

User attributes and token claims.

After we have created the user flow, we can proceed to test it.

In our example here, GitHub OAuth app will be displayed.

Since we specify in our user flow that we need to collect the user’s GitHub display name, there is a field here for the user to enter the display name.

The testing login page from running the user flow.

Setup the Authentication in Frontend and Web API Projects

Now, we can proceed to add Azure AD B2C authentication to our two ASP.NET Core projects.

We will be using the Microsoft Identity Web library, a set of ASP.NET Core libraries that simplify adding Azure AD B2C authentication and authorization support to our web apps.

dotnet add package Microsoft.Identity.Web

The library configures the authentication pipeline with cookie-based authentication. It takes care of sending and receiving HTTP authentication messages, token validation, claims extraction, etc.

For the frontend project, we will be using the following package to add GUI for the sign-in and an associated controller for web app.

dotnet add package Microsoft.Identity.Web.UI

After this, we need to add the configuration to sign in user with Azure AD B2C in our appsettings.json in both projects (The ClientSecret is not needed for the Web API project).

"AzureAdB2C": {
    "Instance": "https://lunarchunlin.b2clogin.com",
    "ClientId": "...",
    "ClientSecret": "...",
    "Domain": "lunarchunlin.onmicrosoft.com",
    "SignedOutCallbackPath": "/signout/B2C_1_LunarMessageWallSignupSignin",
    "SignUpSignInPolicyId": "B2C_1_LunarMessageWallSignupSignin"
}

We will use the configuration above to add the authentication service in Program.cs of both projects.

With the help of the Microsoft.Identity.Web.UI library, we can also easily build a sign-in button with the following code. Full code of it can be seen at _LoginPartial.cshtml.

<a class="nav-link text-dark" asp-area="MicrosoftIdentity" asp-controller="Account" asp-action="SignIn">Sign in</a>

Now, it is time to update the Redirect URI to the localhost. Thus, we need to make sure our WebFrontEnd container has a permanent host port. To do so, we first specify the ports we want to use in the launchsettings.json of the WebFrontEnd project.

"Docker": {
    ...
    "environmentVariables": {
      "ASPNETCORE_URLS": "https://+:443;http://+:80",
      "ASPNETCORE_HTTPS_PORT": "44360"
    },
    "httpPort": 51803,
    "sslPort": 44360
}

Then in the docker-compose, we will specify the same ports too.

services:
  webfrontend:
    image: ${DOCKER_REGISTRY-}webfrontend
    build:
      context: .
      dockerfile: WebFrontEnd/Dockerfile
    ports:
      - "51803:80"
      - "44360:443"

Finally, we will update the Redirect URI in Azure AD B2C according, as shown below.

Updated the Redirect URI to point to our WebFrontEnd container.

Now, right after we click on the Sign In button on our web app, we will be brought to a GitHub sign-in page, as shown below.

The GitHub sign-in page.

Currently, our Web API has only two methods which have different required scopes declared, as shown below.

[Authorize]
public class UserMessageController : ControllerBase
{
    ...
    [HttpGet]
    [RequiredScope("messages.read")]
    public async Task<IEnumerable<UserMessage>> GetAsync()
    {
        ...
    }

    [HttpPost]
    [RequiredScope("messages.write")]
    public async Task<IEnumerable<UserMessage>> PostAsync(...)
    {
        ...
    }
}

Hence, when the frontend needs to send the GET request to retrieve messages, we will first need to get a valid access token with the correct scope.

string accessToken = await _tokenAcquisition.GetAccessTokenForUserAsync(new[] { "https://lunarchunlin.onmicrosoft.com/message-api/messages.read" });

client.DefaultRequestHeaders.Authorization = new AuthenticationHeaderValue("Bearer", accessToken);

client.DefaultRequestHeaders.Accept.Add(new MediaTypeWithQualityHeaderValue("application/json"));

Database

Since we need to store the messages submitted by the users, we will need a database. Here, we use PostgresSQL, an open-source, standards-compliant, and object-relational database.

To run the PostgresSQL with docker-compose we will update our docker-compose.yml file with the following contents.

services:
  ...
  messagewebapi:
    ...
    depends_on:
     - db

  db:
    container_name: 'postgres'
    image: postgres
    environment:
      POSTGRES_PASSWORD: ...

In our case, only the Web API will interact with the database. Hence, we need to make sure that the db service is started before the messagewebapi. In order to specify this relationship, we will use the depends_on option.

User’s messages can now be stored and listed on the web page.

Next Step

This is just the very beginning of my learning journey of dockerising ASP .NET Core solution. In the future, I shall learn more in this area.

References

[KOSD] Dockerise an ASP .NET Core 6.0 Web App

Let’s assume now we want to dockerise a new ASP .NET Core 6.0 web app project that we have locally.

Now, when we build and run the project, we should be able to view it on localhost as shown below.

The default homepage of a new ASP .NET Core web app.

Before adding the .NET app to the Docker image, first it must be published with the following command.

dotnet publish --configuration Release
Build, run, and publish our ASP .NET Core web app.

Create the Dockerfile

Now, we will create a file named Dockerfile in directory containing the .csproj and open it in VS Code. The content of the Dockerfile is as follows.

FROM mcr.microsoft.com/dotnet/aspnet:6.0

COPY bin/Release/net6.0/publish/ App/
WORKDIR /App
ENTRYPOINT ["dotnet", "Lunar.Dashboard.dll"]

A Dockerfile must begin with a FROM instruction. It specifies the parent image from which we are building. Here, we are using mcr.microsoft.com/dotnet/aspnet:6.0, an image contains the ASP.NET Core 6.0 and .NET 6.0 runtimes for running ASP.NET Core web apps.

The COPY command tells Docker to copy the publish folder from our computer to the App folder in the container. Then the current directory inside of the container is changed to App with the WORKDIR command.

Finally, the ENTRYPOINT command tells Docker to configure the container to run as an executable.

Docker Build

Now that we have the Dockerfile, we can build an image from it.

In order to perform docker build, we first need to navigate the our project root folder and issue the docker build command, as shown below.

docker build -t lunar-dashboard -f Dockerfile .

We assign a tag lunar-dashboard to the image name using -t. We then specify the name of the Dockerfile using -f. The . in the command tells Docker to use the current folder, i.e. our project root folder, as the context.

Once the build is successful, we can locate the newly created image with the docker images command, as highlighted in the screenshot below.

The default docker images command will show all top level images.

Create a Container

Now that we have an image lunar-dashboard that contains our ASP .NET Core web app, we can create a container with the docker run command. 

docker run -d -p 8080:80 --name lunar-dashboard-app lunar-dashboard

When we start a container, we must decide if it should be run in a detached mode, i.e. background mode, or in a foreground mode. By default the container will be running in foreground.

In the foreground mode, the console that we are using to execute docker run will be attached to standard input, output and error. This is not what we want. What we want is after we start up the container, we can still use the console for other commands. Hence, the container needs to be in detached mode. To do so, we use the -d option which will start the container in detached mode.

We then publish a port of the container to the host with -p 8080:80, where 8080 is the host port and 80 is the container port.

Finally, we name our container lunar-dashboard-app with the --name option. If we do not assign a container name with the --name option, then the daemon will generate a random string name for us. Most of the time, the auto-generated name is quite hard to remember, so it’s better for us to give a meaningful name to the container so we can easily refer the container later.

After we run the docker run command, we should be able to find our newly created container lunar-dashboard with the docker ps command, as shown in the following screenshot. The option -a is to show all containers because by default docker ps will show only containers which are running.

Our container lunar-dashboard is now running.

Now, if we visit the localhost at port 8080, we shall be able to see our web app running smoothly.

This web app is hosting on our Docker container.

Running Docker on Windows 11 Home

You may notice that I am using WSL (Windows Subsystem for Linux). This is because to install Docker Desktop, which includes the Docker Engine that builds and containerise our apps, on Windows, we need to have Hyper-V feature enabled. However, Hyper-V is available only on Windows 10/11 Pro, Enterprise, and Education.

Hence, I have no choice but to use WSL, which runs a Linux kernel inside of a lightweight utility VM. WSL provides a mechanism for running Docker (with Linux containers) on the Windows machine.

For those who are interested to read more about this, please refer to a very detailed online tutorial about how to run Docker with WSL, written by Padok SRE Baptiste Guerin.

References

KOSD, or Kopi-O Siew Dai, is a type of Singapore coffee that I enjoy. It is basically a cup of coffee with a little bit of sugar. This series is meant to blog about technical knowledge that I gained while having a small cup of Kopi-O Siew Dai.