EDI or Electronic Data Interchange is a computer-to-computer exchange of business documents between companies in a standard electronic format. Even though EDI has been around since 1960s and there are alternatives such as API, EDI still remains a crucial business component in industries such as supply chain and logistics.
With EDI, there is no longer a need to manually enter data into the system or send paper documents through the mail. EDI replaces the traditional paper-based communication, which is often slow, error-prone, and inefficient.
EDI works by converting business documents into a standard electronic format that can be exchanged between different computer systems. The documents later can be transmitted securely over a network using a variety of protocols, such as SFTP. Upon receipt, the documents are automatically processed and integrated into the computer system of the recipient.
EDI and SFTP
There are many EDI software applications using SFTP as one of the methods for transmitting EDI files between two systems. This allows the EDI software to create EDI files, translate them into the appropriate format, and then transmit them securely via SFTP.
SFTP provides a secure and reliable method for transmitting EDI files between trading partners. It uses a combination of SSH (Secure Shell) encryption and SFTP protocol for secure file transfer. This helps to ensure that EDI files are transmitted securely and that sensitive business data is protected from unauthorized access.
In this blog post, we will take a look at how to setup simple SFTP on Kubernetes.
This allows the user “user1” to login to this SFTP server with the encrypted password “$6$Zax4…Me3Px” (The “:e” means the password is encrypted. Here we are using SHA512).
The directory name at the end of the command, i.e. “ftp-file-storage”, will be created under the user’s home directory with write permission. This allows the files uploaded by the user to be stored at the “ftp-file-storage” folder. Hence, we choose to mount it to our local Documents sub-directory “atmoz-sftp”.
The OpenSSH server runs by default on port 22. Here, we are forwarding the port 22 of the container to the host port 2224.
Yay, we have successfully created a SFTP server on Docker.
Moving to Kubernetes
Setting up SFTP on Kubernetes can be done using a Deployment object with a container running the SFTP server.
Firstly, we will use back the same image “atmoz/sftp” for our container. We will then create a Kubernetes Deployment object using a YAML file which defines a container specification including the SFTP server image, environment variables, and volume mounts for data storage;
In addition, in order to avoid our container to starve other processes, we will add resource limits to it. In the YAML definition above, our container will be defined with a request for 0.25 CPU and 64MiB of memory. Also, the container has a limit of 0.5 CPU and 128MiB of memory.
After doing all these, we can now access the SFTP server on our Kubernetes cluster as shown in the following screenshot.
We can also upload files to the SFTP server on Kubernetes.
Conclusion
Yup, that’s all for having a SFTP server running on our Kubernetes easily.
After we have configured our SFTP server to use secure authentication and encryption, we can then proceed to create an SFTP user account on the server and give each of the parties who are going to communicate with us using EDI the necessary permissions to access the directories where EDI files will be stored.
Finally, we also need to monitor file transfers for errors or issues and troubleshoot as needed. This may involve checking SFTP server logs, EDI software logs, or network connections.
Overall, this is the quick start of using SFTP for EDI to ensure the secure and reliable transfer of electronic business documents between different parties.
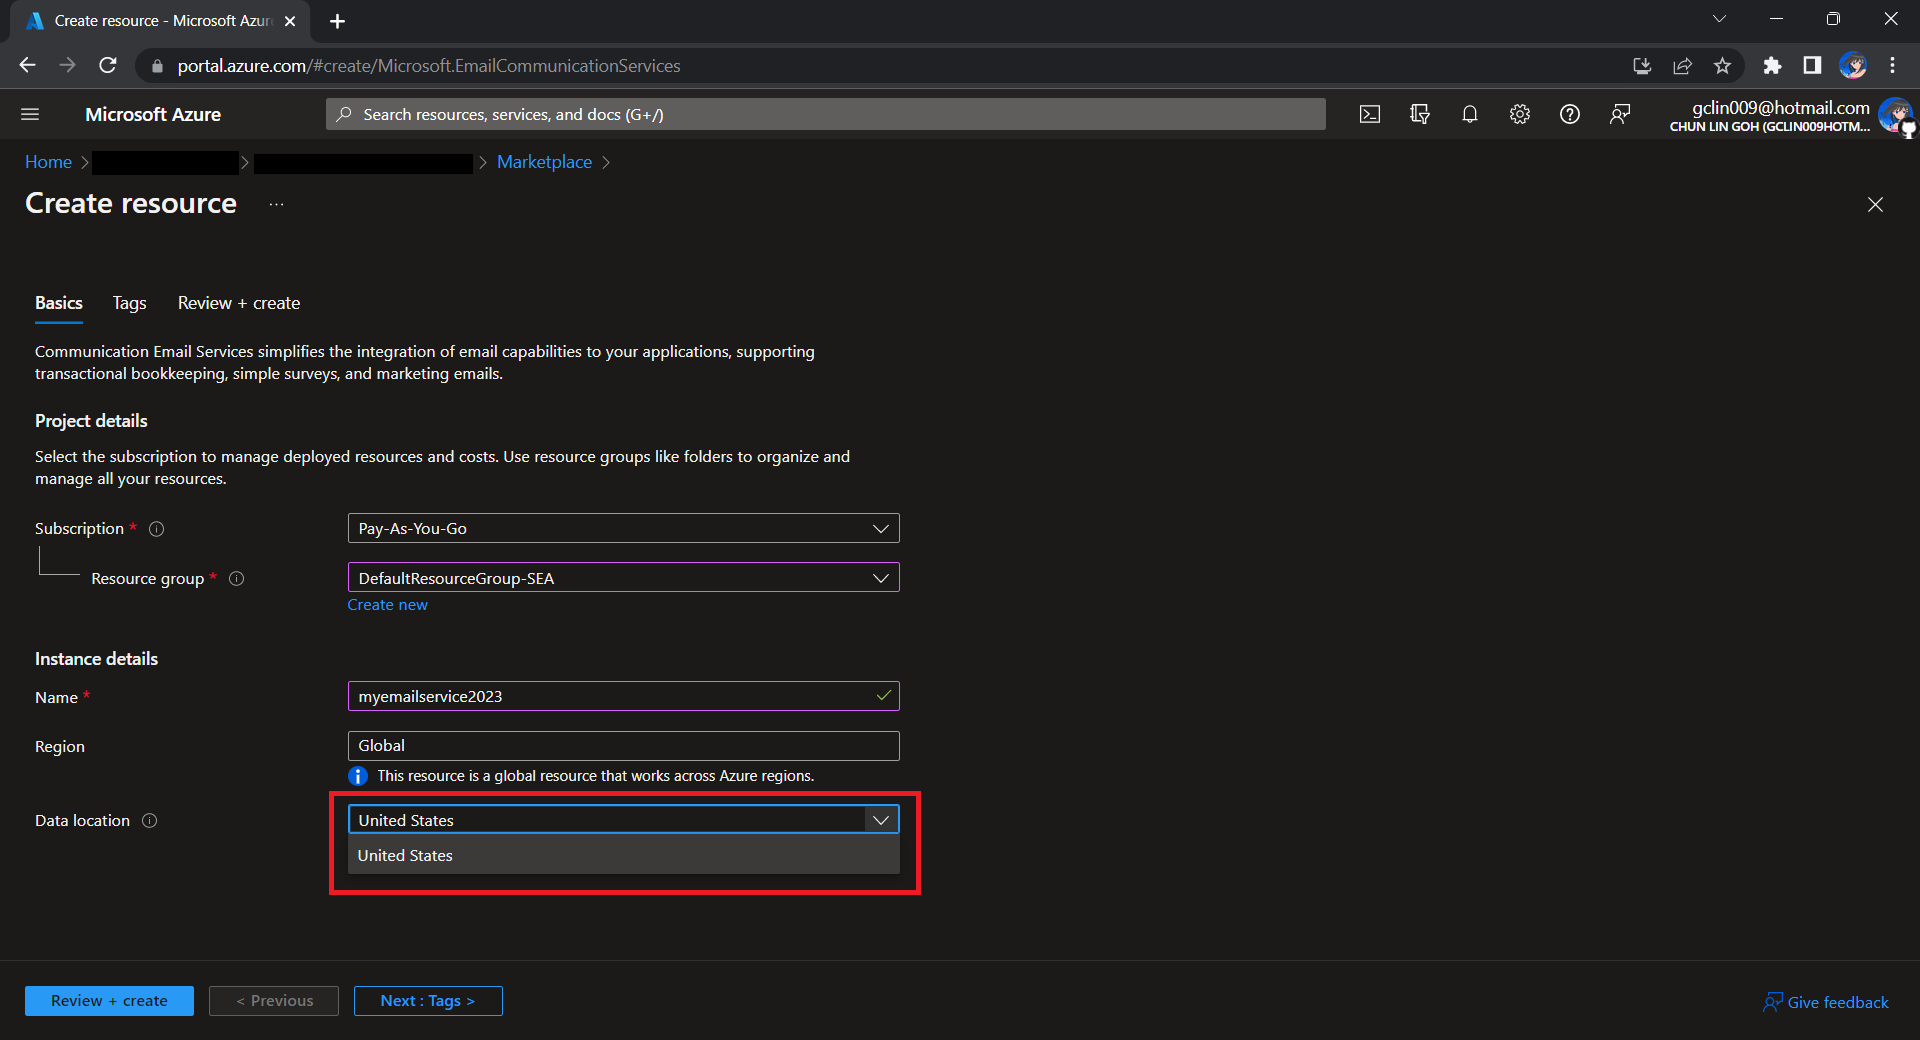
To begin, we need to createa a new Email Communication Services resource from the marketplace, as shown in the screenshot below.
US is the only option for the Data Location now in Email Communication Services.
Take note that currently we can only choose United States as the Data Location, which determines where the data will be stored at rest. This cannot be changed after the resource has been created. This thus make our Azure Communication Services which we need to configure next to store the data in United States as well. We will talk about this later.
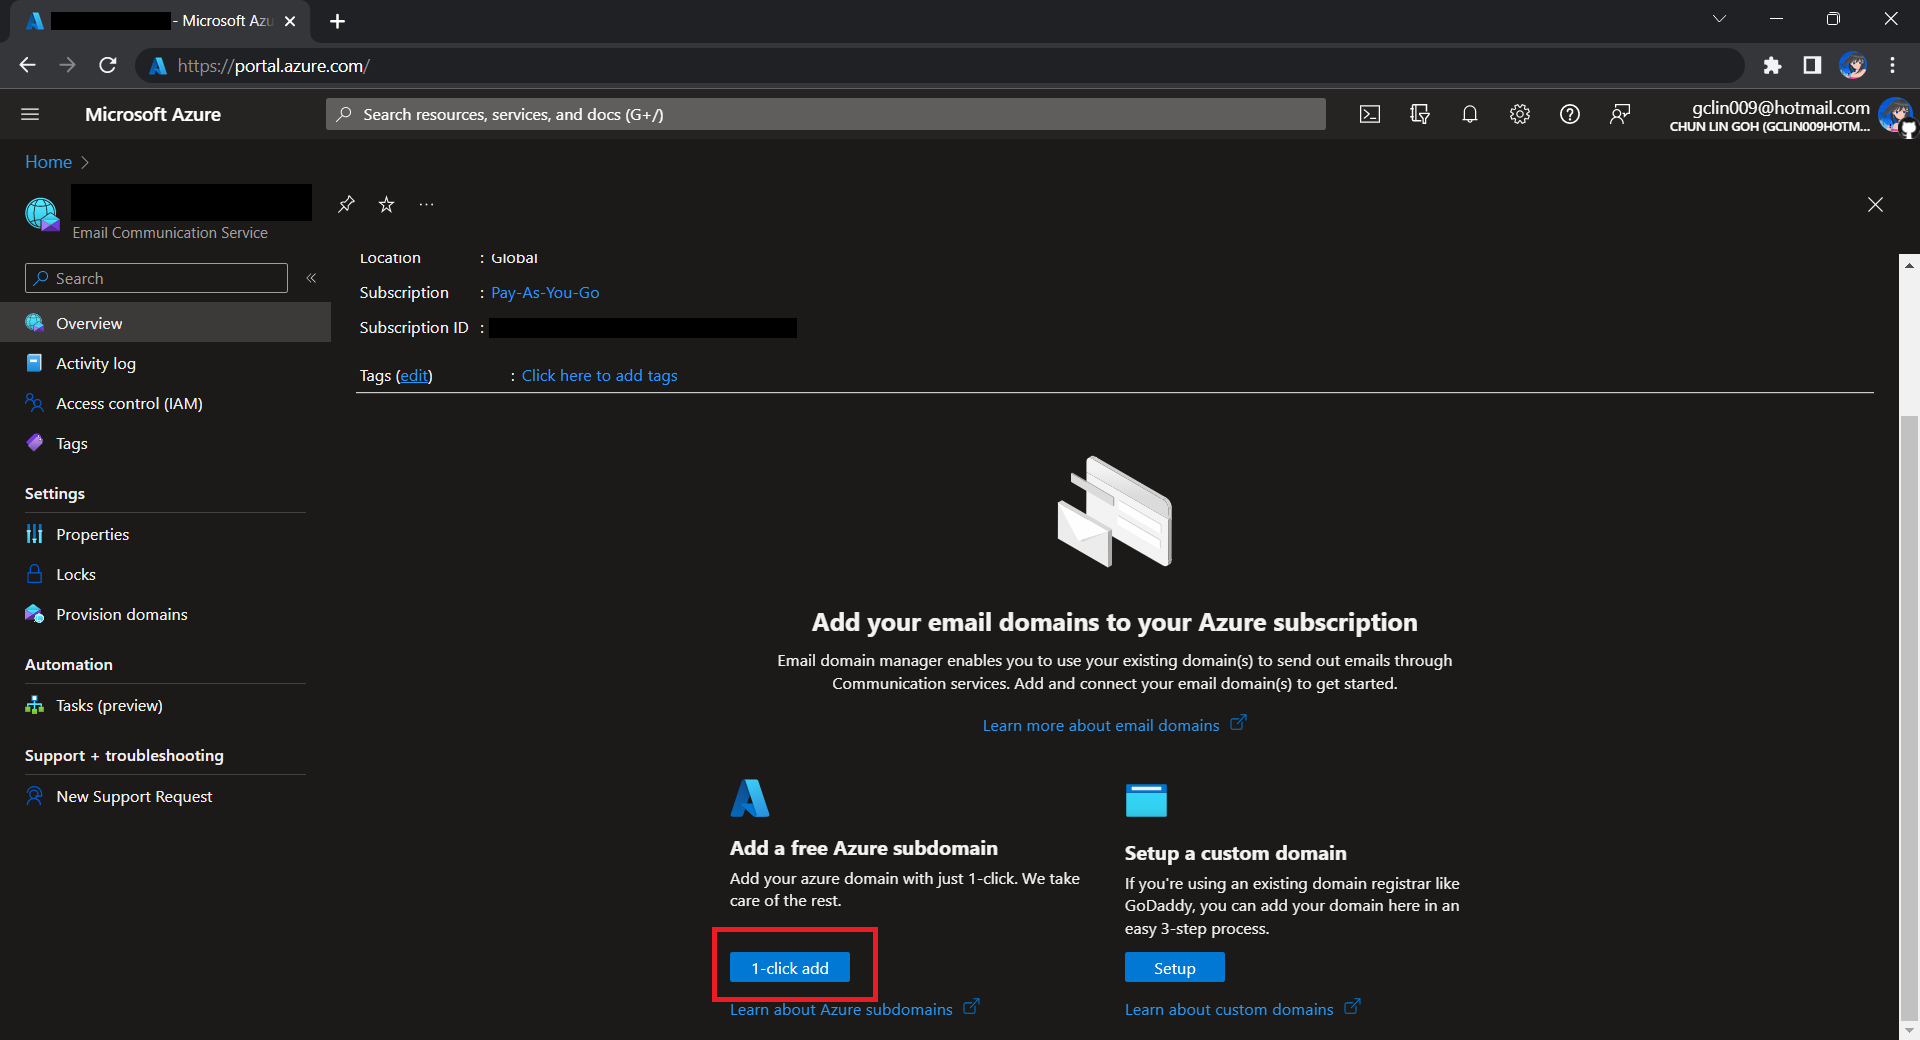
After getting the domain, we need to connect Azure Communication Services to it to send emails.
As we talked earlier, we need to make sure that the Azure Communication Services to have United States as its Data Location as well. Otherwise, we will not be able to link the email domain for email sending.
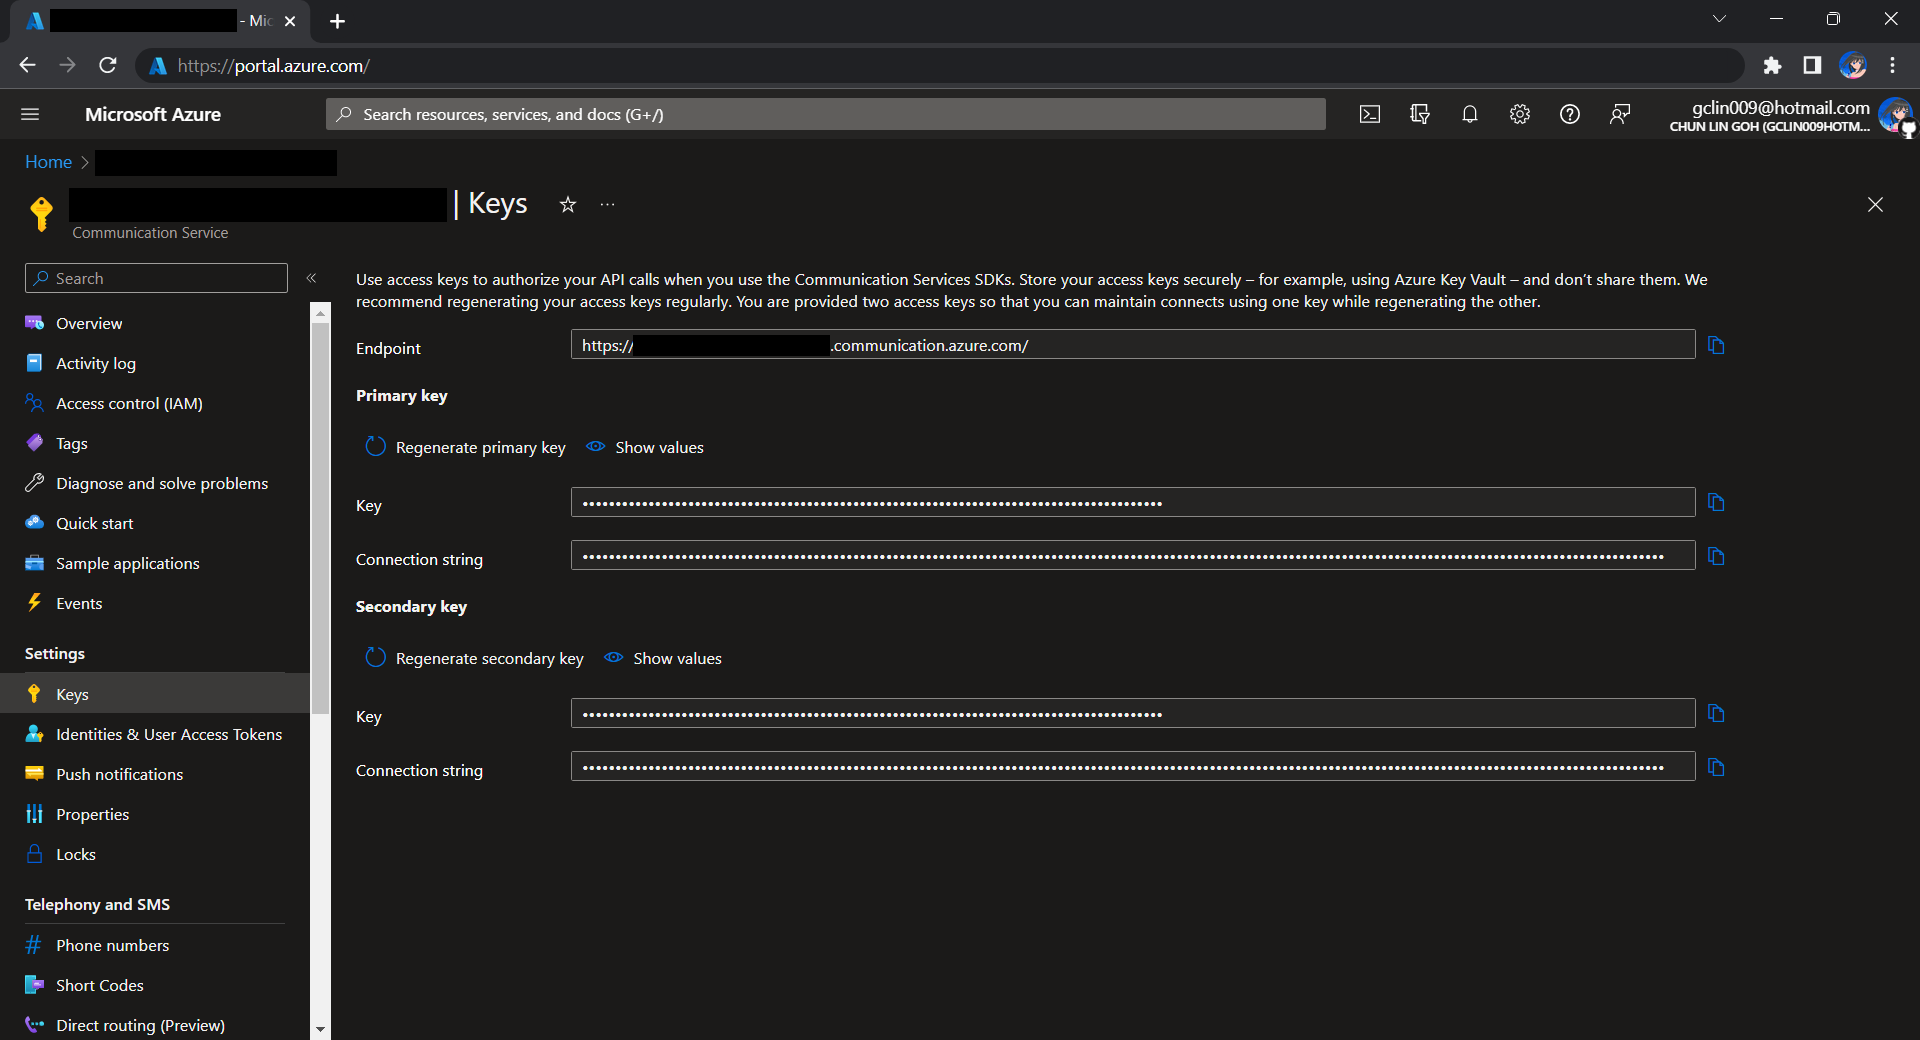
Before we begin, we have to get the connection string for the Azure Communication Service resource.
Getting connection string of the Azure Communication Service.
Here I have the following code to send a sample email to myself.
using Azure.Communication.Email.Models;
using Azure.Communication.Email;

string connectionString = Environment.GetEnvironmentVariable("COMMUNICATION_SERVICES_CONNECTION_STRING") ?? string.Empty;
string emailFrom = Environment.GetEnvironmentVariable("EMAIL_FROM") ?? string.Empty;

if (connectionString != string.Empty)
{
    EmailClient emailClient = new EmailClient(connectionString);

    EmailContent emailContent = new EmailContent("Welcome to Azure Communication Service Email APIs.");
    emailContent.PlainText = "This email message is sent from Azure Communication Service Email using .NET SDK.";
    List<EmailAddress> emailAddresses = new List<EmailAddress> {
            new EmailAddress("gclin009@hotmail.com") { DisplayName = "Goh Chun Lin" }
        };
    EmailRecipients emailRecipients = new EmailRecipients(emailAddresses);
    EmailMessage emailMessage = new EmailMessage(emailFrom, emailContent, emailRecipients);
    SendEmailResult emailResult = emailClient.Send(emailMessage, CancellationToken.None);
}
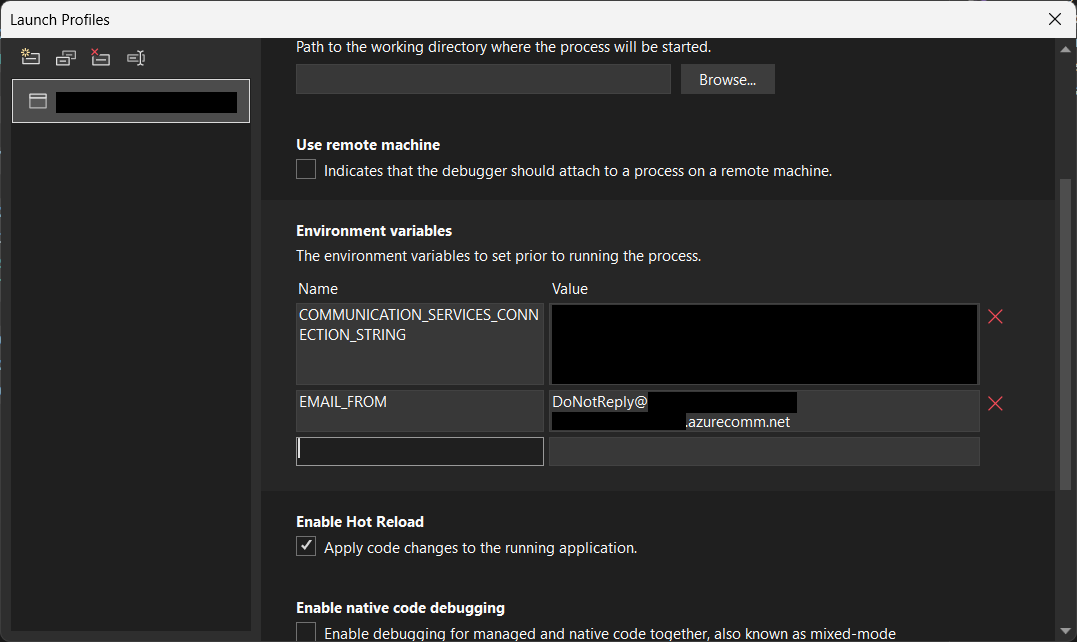
Setting environment variables for local debugging purpose.
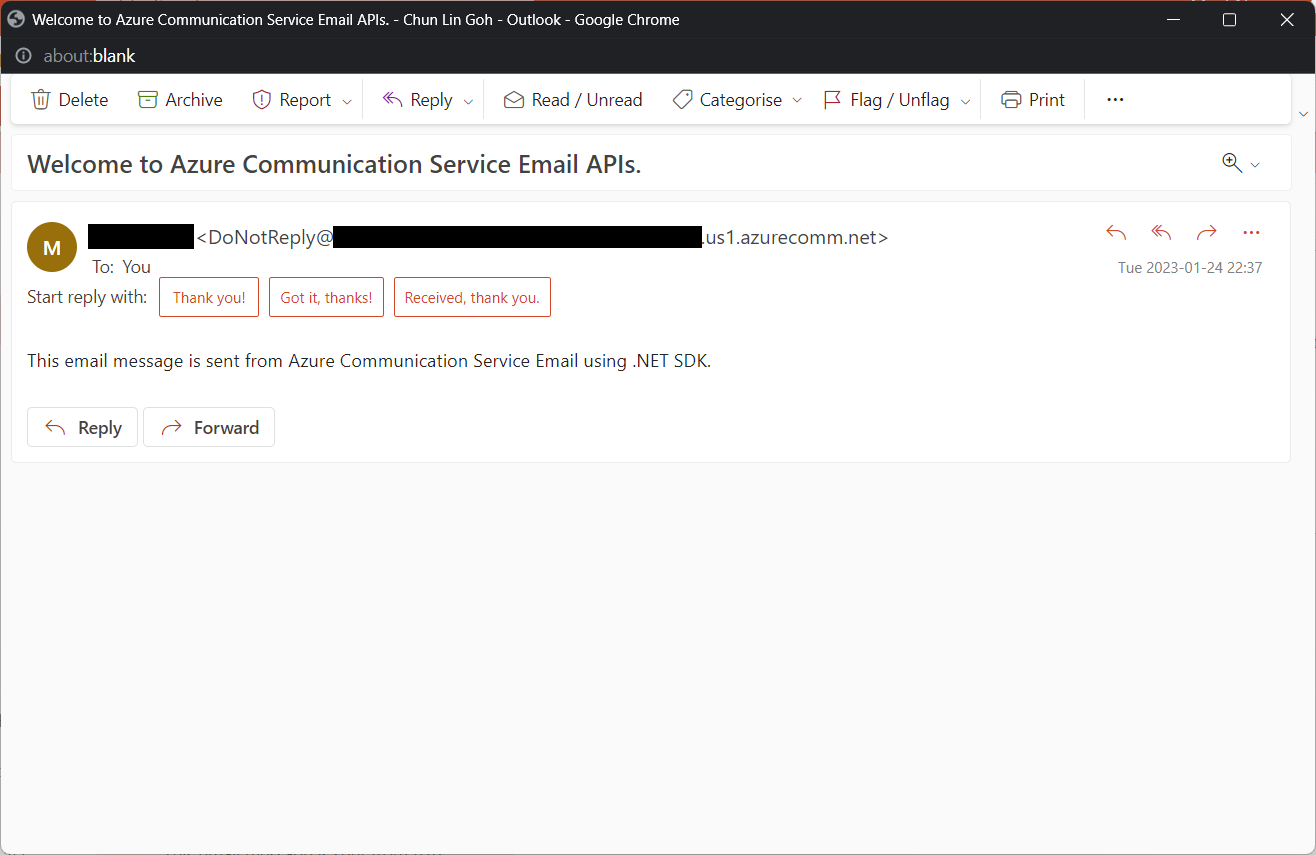
Tada, there should be an email successfully sent out as instructed.
Email is successfully sent and received. =)
Containerise the Console App
Next what we need to do is containerising our console app above.
Assume that our console app is called MyConsoleApp, then we will prepare a Dockerfile as follows.
FROM mcr.microsoft.com/dotnet/runtime:6.0 AS base
WORKDIR /app

FROM mcr.microsoft.com/dotnet/sdk:6.0 AS build
WORKDIR /src
COPY ["MyMedicalEmailSending.csproj", "."]
RUN dotnet restore "./MyConsoleApp.csproj"
COPY . .
WORKDIR "/src/."
RUN dotnet build "MyConsoleApp.csproj" -c Release -o /app/build

FROM build AS publish
RUN dotnet publish "MyConsoleApp.csproj" -c Release -o /app/publish /p:UseAppHost=false

FROM base AS final
WORKDIR /app
COPY --from=publish /app/publish .
ENTRYPOINT ["dotnet", "MyConsoleApp.dll"]
We then can publish it to Docker Hub for consumption later.
In Kubernetes, pods are the smallest deployable units of computing we can create and manage. A pod can have one or more relevant containers, with shared storage and network resources. Here, we will be scheduling a job so that it creates pods containing our container with the image we created above to operate the execution of the pods, which is in our case, to send emails.
Hence, if we would like to have the email scheduler to be triggered at 8am of every Friday, we can create a CronJob in the namespace my-namespace with the following YAML file.
After the CronJob is created, we can proceed to annotate it with the command below.
kubectl annotate cj email-scheduler jobtype=scheduler frequency=weekly
This helps us to query the cron jobs with jsonpath easily in the future. For example, we can list all cronjobs which are scheduled weekly, we can do it with the following command.
kubectl get cj -A -o=jsonpath="{range .items[?(@.metadata.annotations.jobtype)]}{.metadata.namespace},{.metadata.name},{.metadata.annotations.jobtype},{.metadata.annotations.frequency}{'\n'}{end}"
Create ConfigMap
In our email sending programme, we have two environment variables. Hence, we can create ConfigMap to store the data as key-value pair.
Then, the Pods created by the CronJob can thus consume the ConfigMap and Secret above as environment variables. So, we need to update the CronJob YAML file to be as follows.
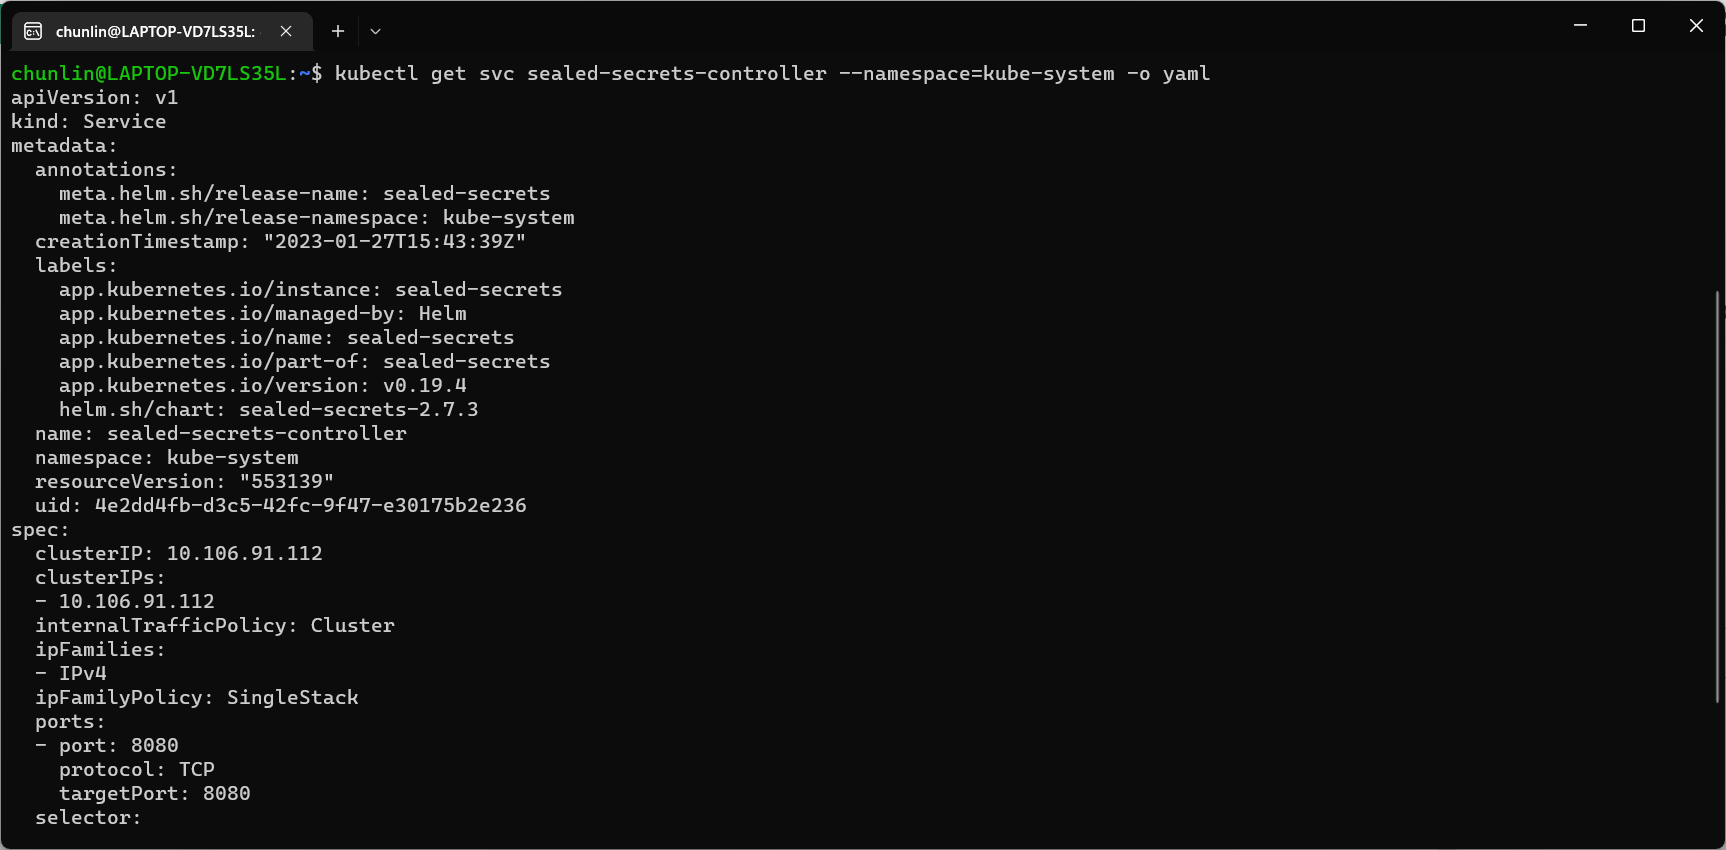
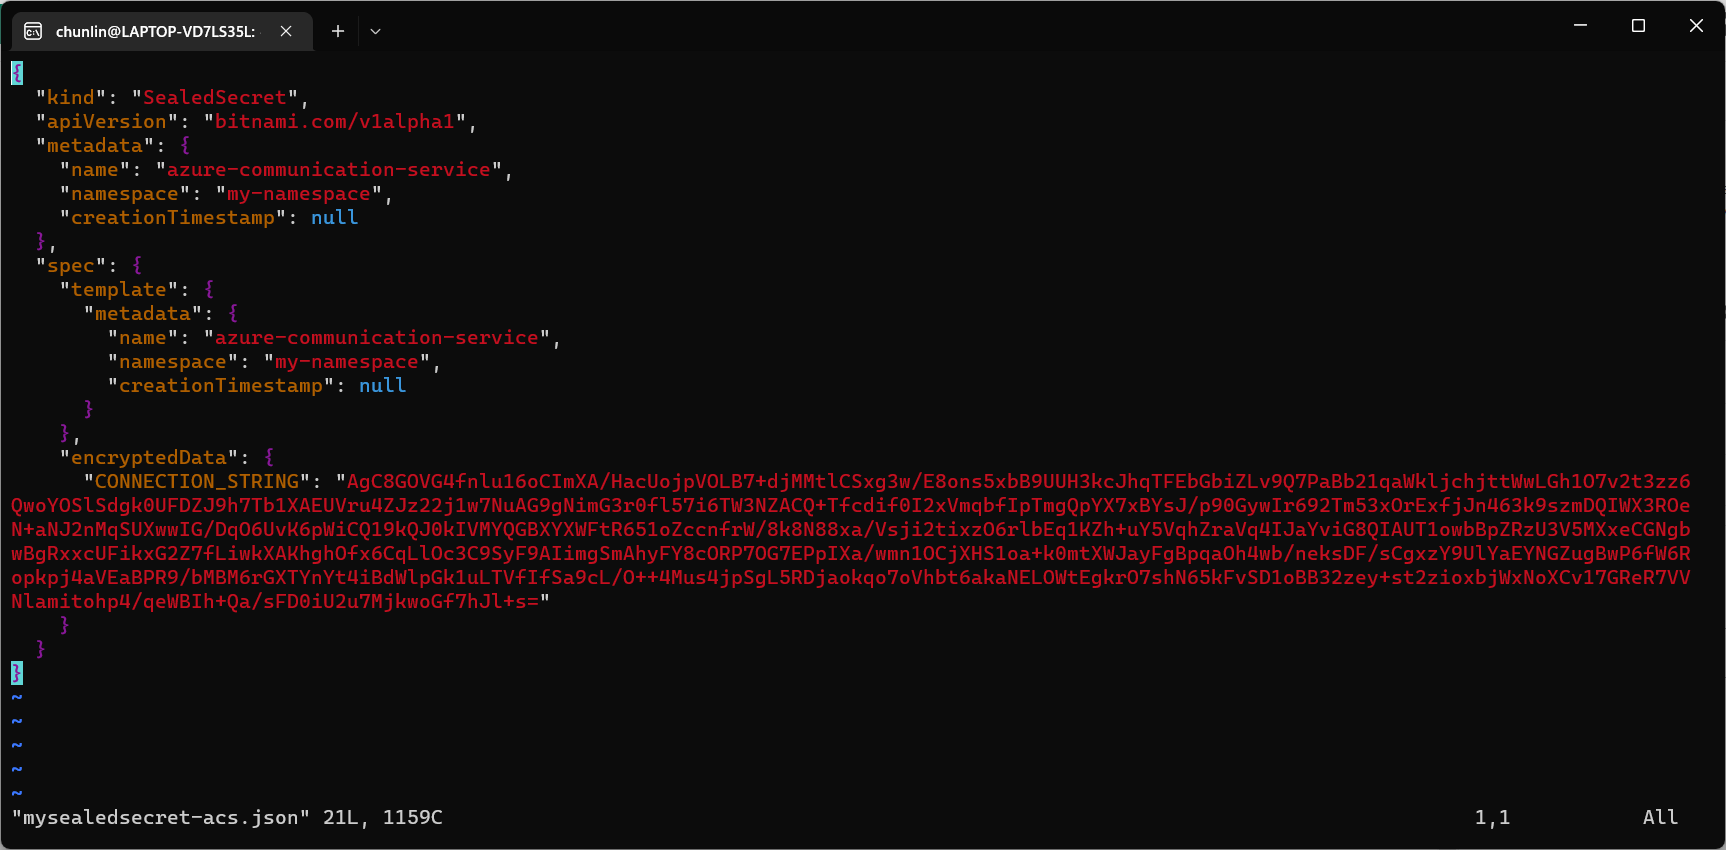
Problem with using Secrets is that we can’t really commit them to our code repository because the data are only encoded but not encrypted. Hence, in order to store our Secrets safely, we need to use SealedSecret which helps us to encrypt our Secret. The SealedSecret can only be decrypted by the controller running in the targer cluster.
Unpack it: tar -zxvf helm-v3.2.0-linux-amd64.tar.gz
Move the Helm binary to desired location: sudo mv linux-amd64/helm /usr/local/bin/helm
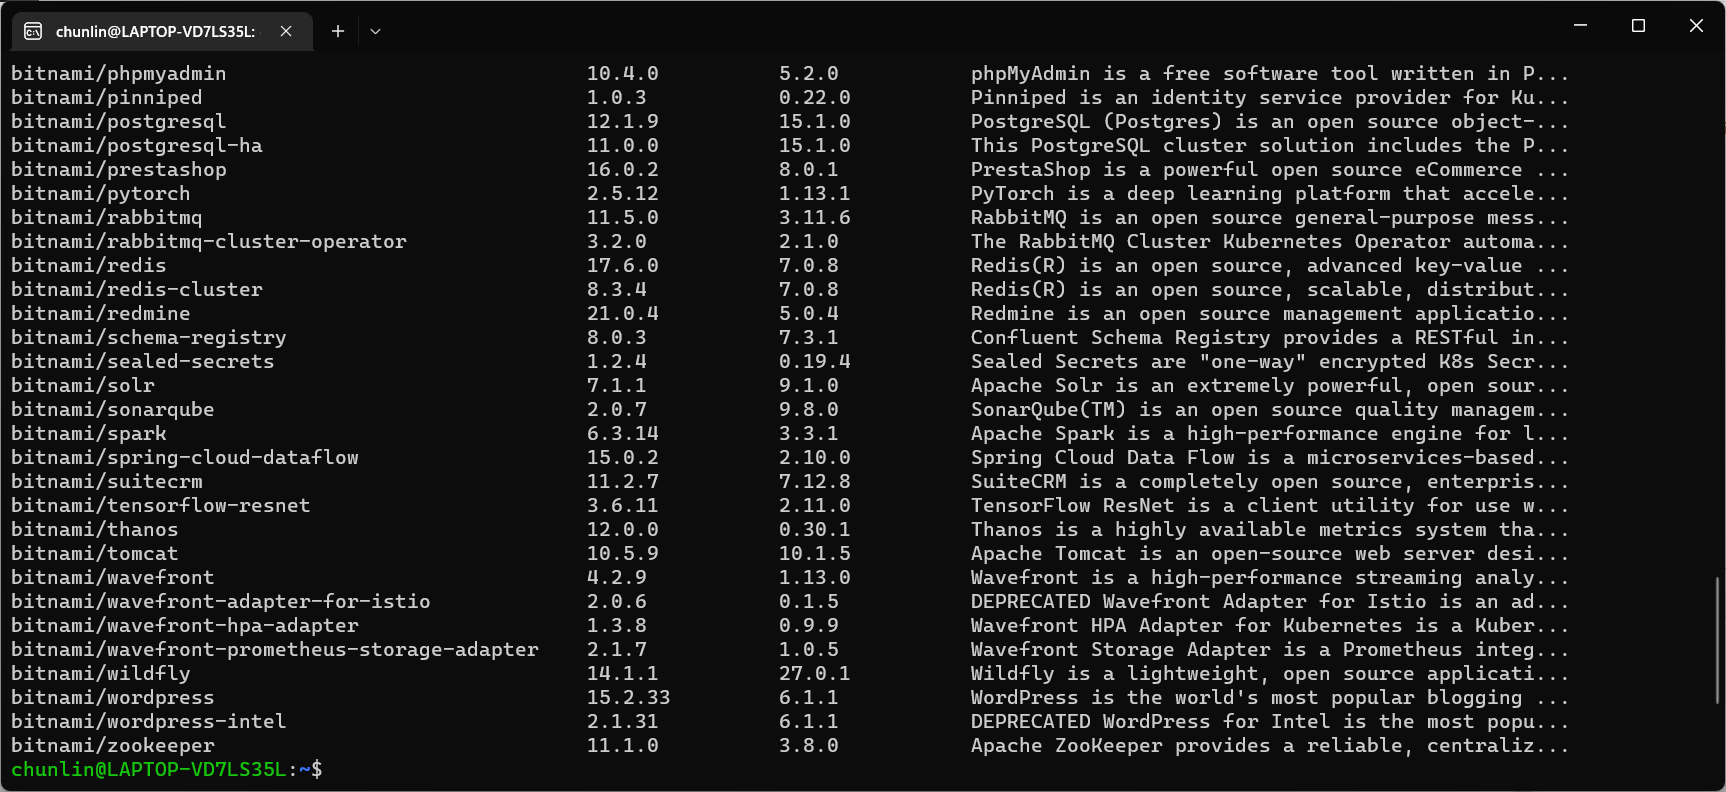
Once we have successfully downloaded Helm and have it ready, we can add a Chart repository. In our case, we need to add the repo of SealedSecret Helm Chart.
The Kamus URL could be found after we installed Kamus as shown in the screenshot below.
Kamus URL in localhost
We need to follow the instruction printed on the screen to get the Kamus URL. To do so, we need to forward local port to the pod, as shown in the following screenshot.
Successfully forward the port and thus can use the URL as the Kamus URL.
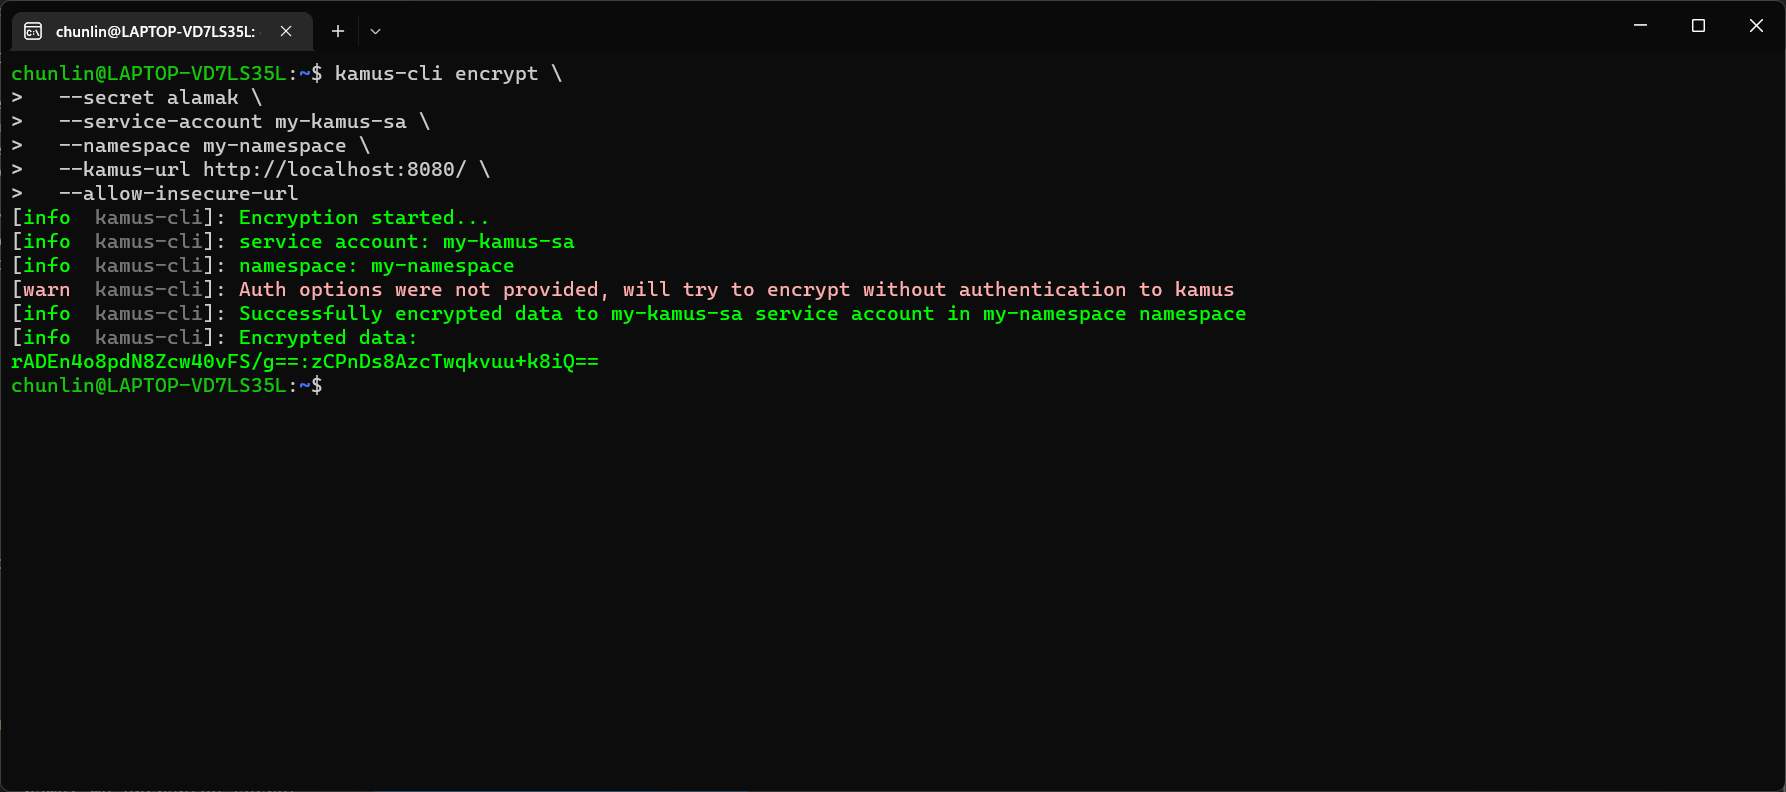
Hence, let’s say we want to encrypt a secret “alamak”, we can do so as follows.
Since our localhost Kamus URL is using HTTP, so we have to specify “–allow-insecure-url”.
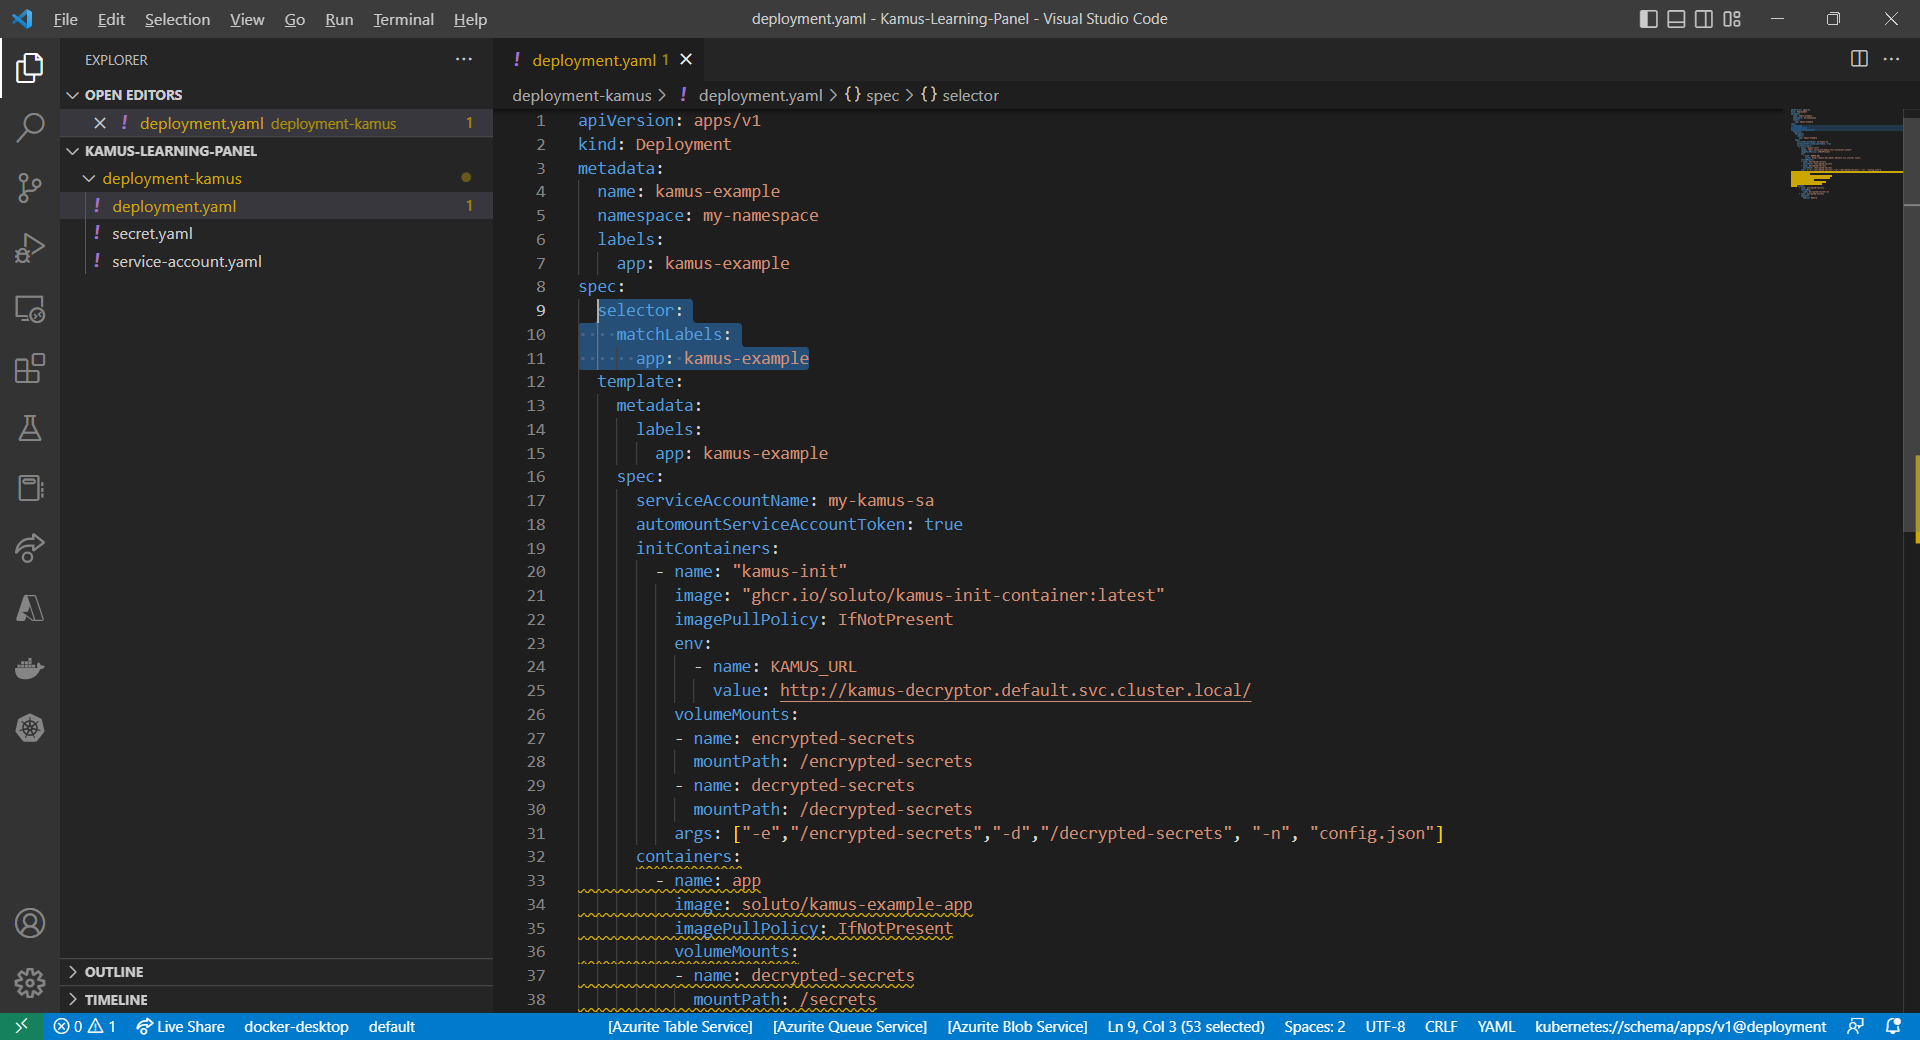
After we have encrypted our secret successfully, we need to configure our pod accordingly so that it can decrypt the value with Kamus Decrypt API. The simplest way will be storing our secret in a ConfigMap because it is already encrypted, so it’s safe to store it in ConfigMap.
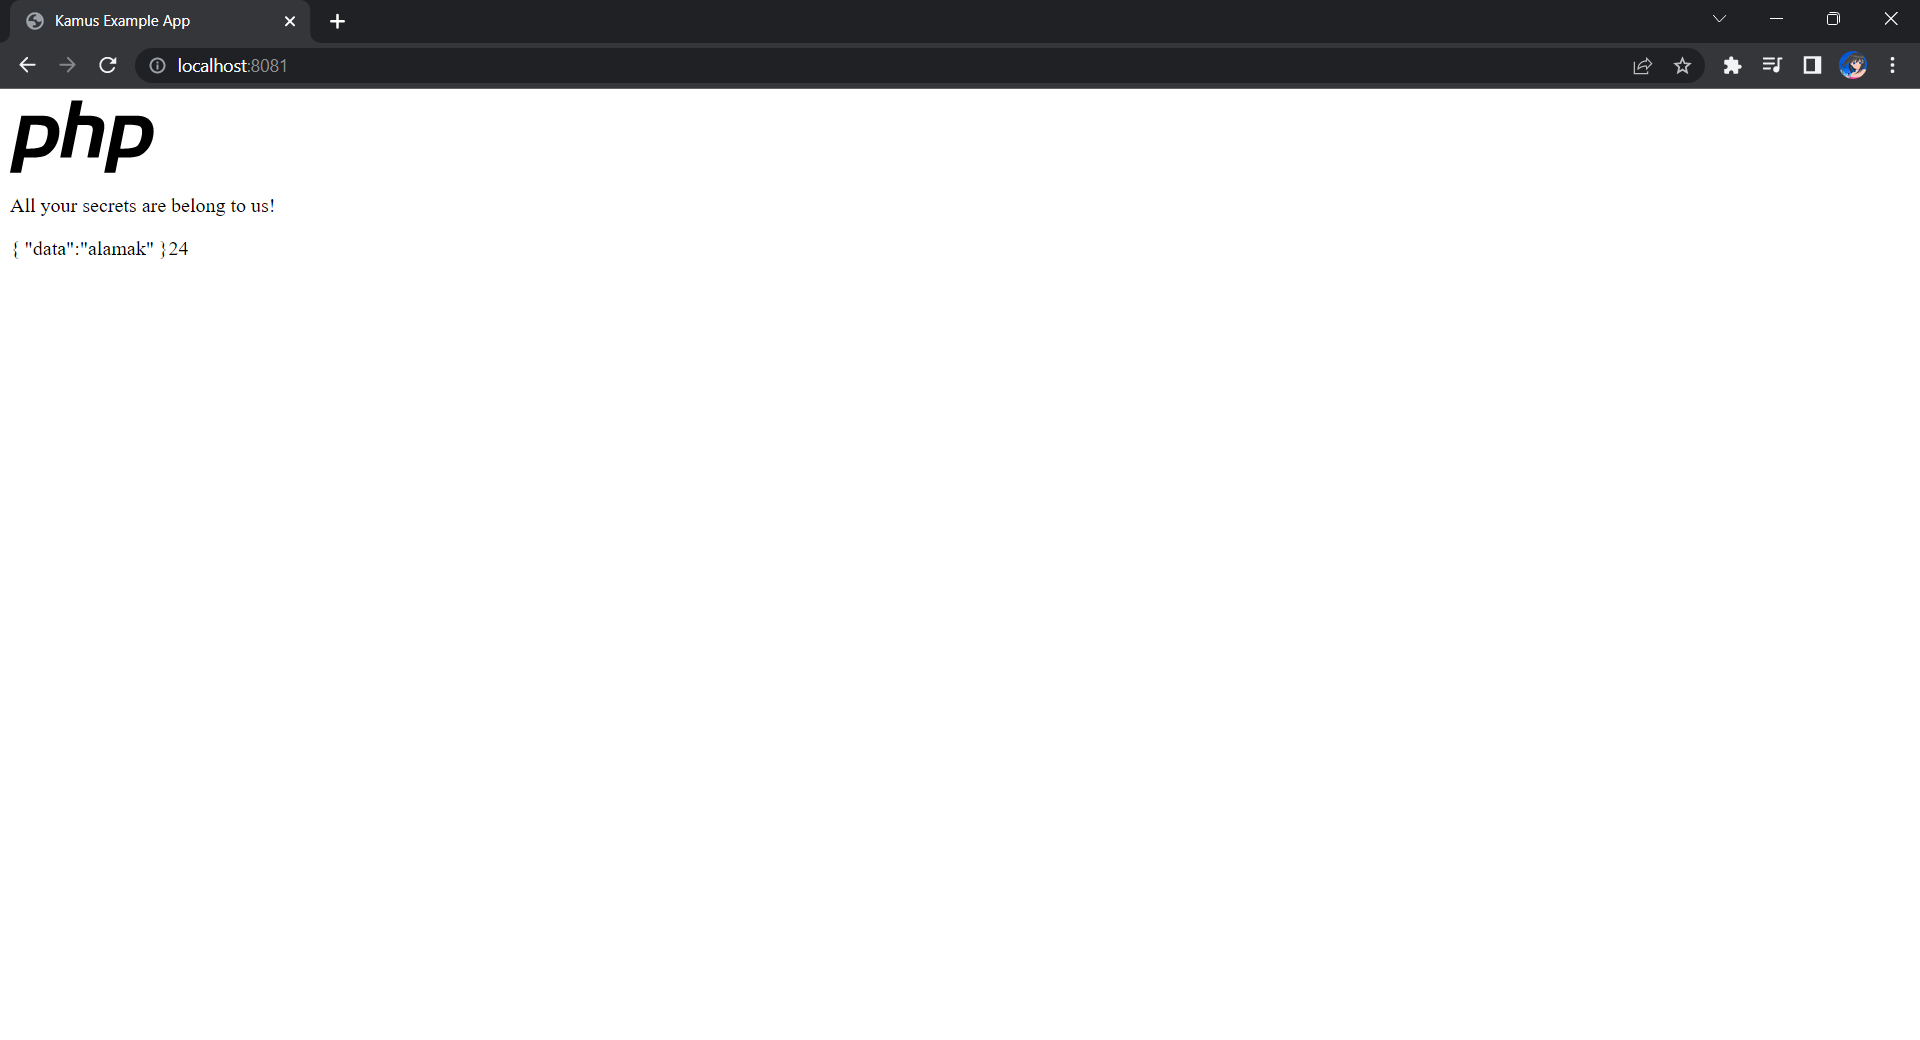
If the deployment is successful, we should be able to see the following when we visit localhost:8081 on our Internet browser, as shown in the following screenshot.
Yay, the original text “alamak” is successfully decrypted and displayed.
Deploy Our CronJob
Now, since we have everything setup, we can create our Kubernetes CronJob with the YAML file we have earlier. For local testing, I have edited the schedule to be “*/2 * * * *”. This means that an email will be sent to me every 2 minutes.
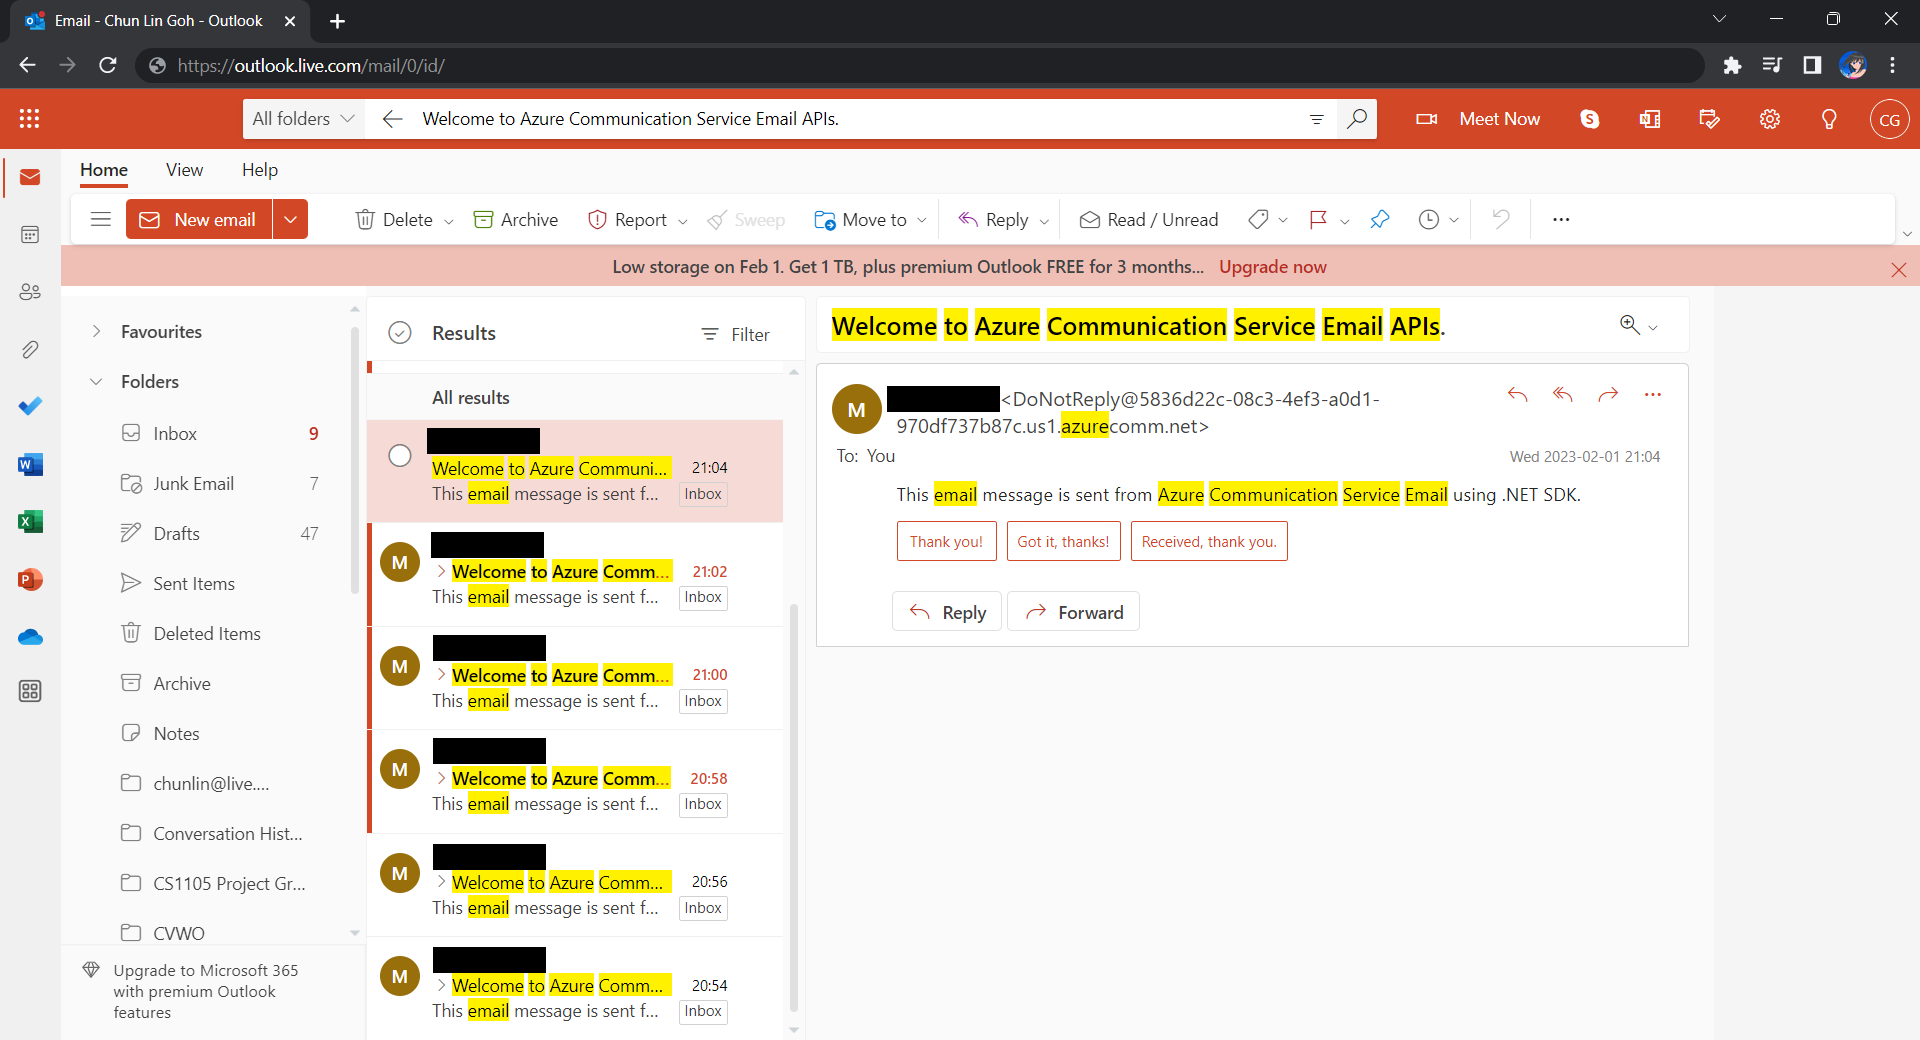
After waiting for a couple of minutes, I have received a few emails sent via the Azure Communication Services, as shown below.
Now the emails are received every 2 minutes. =)
Hoorey, this is how we build a simple Kubernetes CronJob and how we can send emails with the Azure Email Communication Services.