February Self-Learning: Let’s Take a Tour to Malaysia with HTML5

February is a short month so I have to plan my self-learning accordingly so that I can get myself more focused. Due to the fact that I can only spend on average one hour per day to work on my personal project and self-learning, I choose to learn not only something which is easier, faster to learn, but also a technology that is more interesting. So, the topic of February self-learning is HTML5! (Notice/Joke: ! is exclamation mark here. It doesn’t mean 5! which equals to 120).

Canvas

Canvas element is indeed an exciting addition to HTML5. Thanks to <canvas>, we can now draw graphics on the web page easily via, for example, JavaScript. I have seen many people trying to use CSS to do drawing. There are even people successfully using CSS to render Homer Simpson. Oh my tian. It’s a fun thing to draw stuff in CSS but it’s just a hack after all.

Draw in CSS? Come, I clap for you.

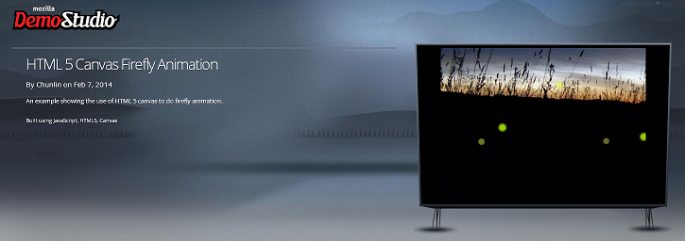
I do a firefly animation by using this new <canvas> element in a simple way. Firstly, I draw some fireflies on the canvas.

cxt.globalAlpha = 0.4;
cxt.beginPath();
cxt.arc(x, y, ((fireflyLightMaxDiameter - fireflyDiameter) * brightnessRatio) + fireflyDiameter, 0, Math.PI * 2, true);
cxt.closePath();
var grd = cxt.createRadialGradient(x, y, 1, x, y, 4);
grd.addColorStop(0, "#FFFFFF"); // white
grd.addColorStop(1, "#FFFF00"); // yellow
cxt.fillStyle = grd;
cxt.fill();
cxt.globalAlpha = brightnessRatio;
cxt.fillStyle = "#99FF00";
cxt.beginPath();
cxt.arc(x, y, fireflyDiameter, 0, Math.PI * 2, true);
cxt.closePath();
cxt.fill();

Secondly, I will redraw the whole canvas for every 60 milliseconds. Then in each redraw function, I randomly assign flying speed and direction to every single firefly. Also, there is a counter set so that the firefly won’t change its direction too often.

dx = Math.floor(Math.random() * fireflyMaxSpeed);
dy = Math.floor(Math.random() * fireflyMaxSpeed);
firefliesDx[i] = dx;
firefliesDy[i] = dy;
x += dx * directionX[i];
y += dy * directionY[i];
if (callCounter % 40 == 0) { // Don't change the flying direction too often
    directionX[i] = ((Math.floor(Math.random() * 10) < 5) ? 1 : -1);
    directionY[i] = ((Math.floor(Math.random() * 10) < 5) ? 1 : -1);
}

Thirdly, I set a counter to do the brightness changing of each firefly.

brightness[i] += fireflyBrightnessSpeed * brightnessDirection[i];
if (brightness[i] > fireflyMaxBrightness) {
    brightnessDirection[i] = -1;
} else if (brightness[i] < 0) {
    brightnessDirection[i] = 1;
}

So, yup, that’s the basic idea on how I  do firefly animation in <canvas>. Since this year is the tourism year in my country, I apply the firefly animation in a page about watching fireflies in Kuala Selangor, Malaysia. To get the source code, you can visit my page of this animation in the Mozilla Demo Studio. Don’t forget to click “Like It” button if you really like it. =P

Firefly HTML5 Animation
Firefly HTML5 Animation: The page is to promote Kuala Selangor, the world’s biggest firefly colony

Popcorn.js: Integrating Video and the Web Content

However, promoting just one attraction in my country is not enough. So, I am thinking of building a page which will guide the viewer through different places in Malaysia.

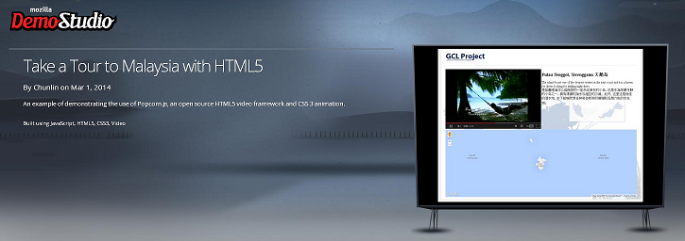
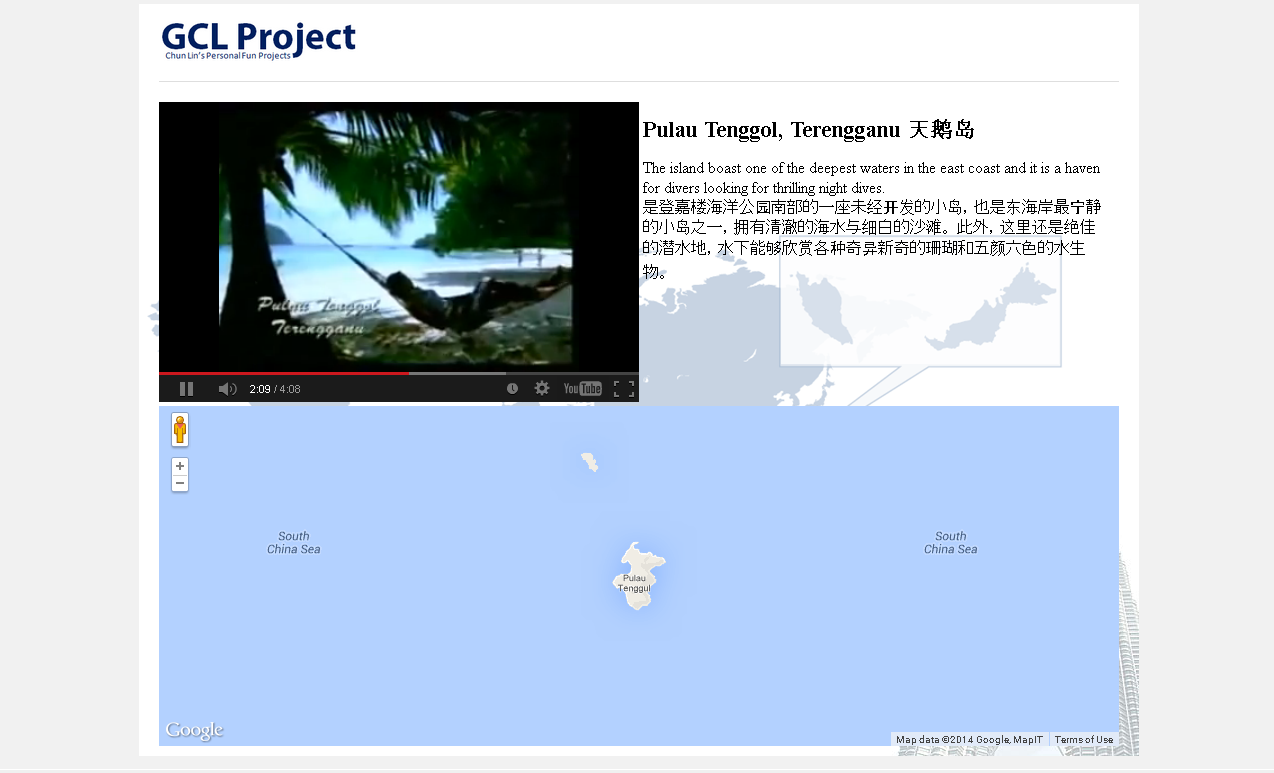
I get a promotional video about Malaysia tourism from YouTube. In the video, it shows several famous tourist attractions in Malaysia. I want to build a web page showing a short introduction as well as a map (or even street view) about those places. I thus chose Popcorn.js.

Popcorn.js is an open-source HTML5 video framework which allows us to create time-based interactive media on the web. So, we can now bring content in a web page into a video easily. People watching a video on the website now can also read a web page content which is relevant to the video content. So, this JavaScript library basically allows to add value to a video.

The following screenshot shows how the page looks when the video is displaying a picture of Pulau Tenggol.

Popcorn.js in action.

YouTube Plug-in Issue in Popcorn.js

There is a problem if we are using the YouTube plug-in offered in the Popcorn.js. After the video ends, the YouTube player will show a group of relevant videos. So it basically allows the viewer to change the content of the video player. Hence, to solve this problem, I added one value to the playerVars in popcorn.js.

playerVars = { wmode: "transparent", rel: 0 };

By default, rel is 1. The rel parameter in YouTube Player API indicated whether related videos should be shown in the player after the video finishes. So setting it to 0 fixes the problem.

CSS Animation

Although it’s not encouraged to use CSS to do complicated drawing on the web pages, thanks to the CSS3, we can now create animations with CSS by using @keyframes. For example, the following is part of my CSS which does the animation of the name of each attraction in the web page.

#footNote h1 {
    -webkit-animation:blurFadeIn 5s; 
    animation:blurFadeIn 5s; 
    font-family:KaiTi 隶书 Arial;
}
@-webkit-keyframes blurFadeIn{
    0%{
        opacity:0;
        text-shadow:0px 0px 40px #fff;
        -webkit-transform:scale(1.5);
    }
    100%{
        opacity:1;
        text-shadow:0px 0px 1px #fff;
        -webkit-transform:scale(1);
    }
}
@keyframes blurFadeIn{
    0%{
       opacity:0;
       text-shadow:0px 0px 40px #fff;
       transform:scale(1.5);
    }
    100%{
       opacity:1;
       text-shadow:0px 0px 1px #fff;
       transform:scale(1);
    }
}

What it does is basically just a simple fade-in animation of the text.

To view the finalized version of the web page, please visit to my page on Mozilla Demo Studio.

Visit Malaysia 2014

Both of the web pages mentioned above are all about Malaysia tourism. Why? This is because this year, Malaysians are having the nation’s largest tourism celebration. We had one back in 2007 when we were celebrating the 50th years anniversary of independent in Malaysia. Then Prime Minister, Abdullah Ahmad Badawi, even showed up in the Visit Malaysia 2007 promotional video.

So, if you haven’t visited Malaysia before, please bring your family and friends to this lovely country and join us in this grand tourism celebration. However, before that, kindly vote for my following two demos by clicking the “Like It” button. Thanks. =D

Enjoy the HTML5 firefly animation here.
Take a tour to Malaysia with HTML5 here.

January Self-Learning: Node.JS + Express + Jade + MongoDB

I am web developer. I do .NET stuff at work. However, it is always good to try something new and different. Thus, in December 2013, I planned a rough schedule for programming self-learning in the first two months of 2014. In January, I decided to spend one hour per day to learn about Node.js and MongoDB.

I only started to learn JavaScript when I was in the first year of my university life. It turns out that it’s a very useful skill that I have because JavaScript is used very widely in my current job. However, I never tried to use JavaScript in server environment before. Here I choose Node.js because it is a very well-known server-side JavaScript example.

For MongoDB, I decided to learn it because I was invited by my friend to join a local MongoDB user group last year. It’s a group formed by developers who are very keen on learning MongoDB and other related new web technologies. After reading through their posts online, I decided to spend sometime on learning MongoDB too. Plus, the first meet up of the group that I’m always looking forward to is going to be held in this coming month, so learning MongoDB will at least help me to communicate with other members better.

Getting Started: Installing Stuff

The web development tool that I use is WebMatrix 3. The reasons that I choose WebMatrix are free, easy-to-use, and Azure-connected. In addition, WebMatrix also comes with Node.js supports and templates. Thus, with the help of WebMatrix, a simple Node.js web application can be done without too much pain.

Node.JS Website Templates
Node.js Website Templates

There are three templates available for Node.js project. The Empty Site template gives a blank website setup with Node.js. This option threw me error saying “This product did not download successfully: The remote server returned an error: (404) Not Found”. According to the installer log, the error happened when downloading file ‘http://download.microsoft.com/download/6/F/4/6F439734-9589-4859-AADE-B88B0B84401E/NodeJsSite.zip‘ because the URL basically just returns error 404. Well done, Microsoft.

Hence, I’m left with two options. The Starter Site template provides a pre-built website setup with not only Node.js, but also the Express web framework. Besides Express, there are many other alternatives actually. In fact, there are reviews of different Node.js web framework available online also.

The good thing about Starter Site template is that without writing a single line of code, a beautiful web app is ready to use. Just click on the Run button in WebMatrix, the sample site will be launched in web browser. From there, you get to learn many new howtos. For example, how mobile-friendly web pages are made, how to design a web page layout with a template engine called Jade, how to enable Facebook and Twitter logins on a website, and also how to use client-side socket.io libraries to implement a chat feature in the website.

The Sample Website from NodeJS Starter Template

As a start, I don’t think it is a good idea to learn so many new knowledge in one month. Thus, I chose the third available template, which is the Express Site. It basically just provides a website setup with Node.js and Express without too many random stuff as what Starter Site offers.

For the modules that I use in my web app, such as Express, Jade, Mongoose, and Monk, they all can be easily installed in the NPM Gallery in WebMatrix. npm stands for Node Packaged Modules, an official package manager for Node.js and online repository for publishing packages. There is one thing that I would like to highlight is that when I didn’t run WebMatrix as administrator, the NPM Gallery seemed to have some problems. I only got to install the modules when I run WebMatrix as administrator.

Designing Web Pages

In the homepage, I would like to show a map of the place that I am currently at.

Firstly, I add the following lines in the layout.jade which is in charge of defining the general look-and-feel of each web page in my web app.

doctype html
html
  head
    title= title + "!"
    link(rel='stylesheet', href='/stylesheets/style.css')
  body
    div(style="background-color: orange; color: white; height: 40px;") 
        div(style="padding-top: 12px; padding-left: 5px; font-weight: bold;") #{title}
    block content

Secondly, I proceed to the content block for index.jade, the page displaying the map. The code below basically just loads the Google Maps API library and shows the map on the web page.

extends layout

block content
    div(style="padding: 50px;")
        h1= title
        span Welcome to #{title}! 
    div(id="map-canvas")
    script(type='text/javascript', src='https://maps.googleapis.com/maps/api/js?key=...&sensor=true')
    script(type='text/javascript', src='/javascripts/initGoogleMap.js')

With such simple codes, a page with Google Maps showing the neighbourhood of user’s current location is done.

Guess where I'm now? =)
Can you guess where I’m now? =)

Bringing Data Into The App

A map showing user’s current location is not interesting enough. The next step will be adding an ability for the user to add marker to the map by specifying latitude and longitude.

The database system that I choose here is MongoDB. Normally people will use Mongoose, the officially supported Object Document Mapper (ODM) for Node.js. However, as a beginner, I choose to use a simpler tool, Monk. Monk offers an easier and faster way for me to learn and start working with MongoDB in Node.js.

Firstly, I need to connect to the databases and to setup routes in the server.js.

var express = require('express')
  , routes = require('./routes')
  , newlocation = require('./routes/newlocation')
  , addlocation = require('./routes/addlocation')
  , http = require('http')
  , path = require('path');

...

var monk = require('monk');
var dbc = monk('localhost:27017/test');

app.get('/', routes.index(dbc));
app.get('/newlocation', newlocation.location);
app.post('/addlocation', addlocation.add(dbc));
...

After that, in the newlocation.jade, I create the form to submit the data to addlocation.js.

Interface to add new location.

In the addlocation.js, there will be code to add those user-entered data to the database. With Monk, it can be done easily as shown as follows.

exports.add = function (dbc) {
    return function (req, res) {
        ... 
        // Set our collection
        var collection = dbc.get('LocationInfo');

        // Submit to the DB
        collection.insert({
            "locationLatitude": locationLatitude,
            "locationLongitude": locationLongitude,
            "locationInfo": locationInfo
        }, function (err, doc) {
            if (err) {
                // If it failed, return error
                res.send("There was a problem adding the information to the database. Reason: " + err);
            }
            else {
                // If it worked, set the header so the address bar doesn't still say /addlocation
                res.location("");
                // And forward to the homepage
                res.redirect("");
            }
        });

    }
}

Finally, I just need to retrieve the value from the database and show it in the homepage.

var collection = dbc.get('LocationInfo');

collection.find({}, {}, function (e, locations) {
    res.render('index', {
         "title": "My Neighbourhood",
         "listOfLocations": locations
    });
});
Places that I frequently visit in the neighborhood.
Places that I frequently visit in Kluang.

So with the help of Monk, there is even no need to define a schema at all. Even the collection LocationInfo does not need to be defined.

There is a detailed step-by-step tutorial on setting up Node.js, Express, Jade, and MongoDB available online. I personally find it to be useful because there is where I start my self-learning. In addition, here is a list of online resources that I used in the self-learning.

Conclusion of January Self-Learning

Since I have only one hour per day to do this self-learning, so it’s quite challenging to learn all these new things in one month. In addition, there were days that I needed to work OT. So, I’m quite happy that I manage to complete this first monthly self-learning successfully. =)

Click here to read the following part of the learning: Deploying the website and MongoDB on Azure easily.

IE Is Being Mean to Me: Episode 2 – Uppercase HTML Tag

It’s my mistake again. It’s morning and I realized my little code as shown below did not work properly on IE 7 and IE8.

var i = $('#someStuff').html().indexOf("<a>");

It turns out that in IE 7 and IE 8, the HTML tags returned by .html() are all in uppercase. Thus the result is not as expected. Luckily, this is not the case anymore in the latest version, IE 10. So, in order to solve the problem, the code has to be modified to be as follows by converting the result to have lowercase.

var i = $('#someStuff').html().toLowerCase().indexOf("<a>");

Actually this is an known issue in older version of IE. It’s just that I forgot about it.

Meanwhile, I also found some interesting articles about this.

In the past, there were people having a debate on whether the weird behavior of innerHTML or html() in IE 7/8 is a feature or bug. For example, there is a discussion on this in 2008: Bug of Feature – Live .innerHTML in IE.

Currently, XHTML1.0 is still an implemented standard in most of the Internet browsers. In XHTML 1.0: The Extensible HyperText Markup Language (Second Edition), it points out that XHTML documents must use lower case for all HTML element and attribute names. This difference is necessary because XML is case-sensitive e.g. <li> and <LI> are different tags.

For CSS, even though its syntax is not case-sensitive, since element names are not under the control of CSS, the element names used in CSS are also case-sensitive in XHTML (but not HTML).

Anyway, I would like to thank Microsoft engineers for making IE 10 to do the right things. Here is a promo video of IE 10.

IE Is Being Mean to Me: Episode 1 – Trailing Comma

This post is about a mistake that I made in my JavaScript code.

I always thought trailing commas were standard in all browsers. I tested my code on IE 10, Firefox and Chrome and it just worked fine. However, my code is just not working at all when tested it on IE 7 and IE 8. It turns out that IE 7 & 8 have not implemented ECMAScript 5 correctly because, in fact, if an element is elided at the end of an array, that element does not contribute to the length of the Array.

So if I run the following code in different browsers, I will get different results.

var test = [,,,,];
alert("Length of the array: " + test.length);

In IE 10, Firefox and Chrome, the length of the array will be 4. However, in IE 7 and 8, the length of the array is 5, which in this case does not chop off the “undefined” item at the end of the array.

Here is a list of online discussions that I found when I was trying to fix the bug.

  1. Trailing commas in JavaScript
  2. The Curious Case of Trailing Commas in IE
  3. My IE9 is fine with trailing comma, user’s IE9 is not; why?
  4. Jquery autoselect not working on IE8

Yup, so this post is just to remind me to be careful and not to repeat the same mistake again.

Finally, a song “IE Is Being Mean to Me” by Scott Ward that I found on YouTube.