It has been about half a year since I started to learn ASP .NET MVC and Entity Framework (EF). In this period of time, I have learnt about not just MVC and EF, but also Azure PaaS, Google Maps API, web application security, cool jQuery plugins, Visual Studio Online, etc.
In the beginning of May, I started to note down useful things I’d learned in my learning journey. Months of bringing together information in this summer has helped me compile my notes about what I’ve learned in the past 6 months. I have currently completed compiling notes for 17 topics that I’ve learnt in this summer.
I listed down the title of the 17 posts below to give you a quick overview about all the 17 topics.
I’m working in Changi Airport. The office working hour is from 8:30am to 6pm. In addition, I am staying quite far from the airport which will take about one hour for me to travel from home to office. Hence, the only time that I can have sufficient time to work on personal projects is weekends.
This summer self-learning project is originally planned to be done by the end of May. Normally, it takes me about one day to finish writing a post. After that, if I find any new materials about the topics, I will then modify the post again. Sometimes, however, I am just too tired and I would not write anything even though it’s weekend. Hence, I end up finishing all the 17 topics three months later.
This summer learning project covers not only what I’ve learnt in my personal projects, but also new skills that I learn in my workplace. I always enjoy having a chat with my colleagues about the new .NET technology, app development, Azure hosting, and other interesting development tools. So yup, these 17 articles combine all the new knowledge I acquire.
I’m also very happy that that I am able to meet developers from both .NET Developers Community Singapore and Azure Community Singapore and share with them what I’ve learnt. That gives me a great opportunity to learn from those experienced .NET developers. =)
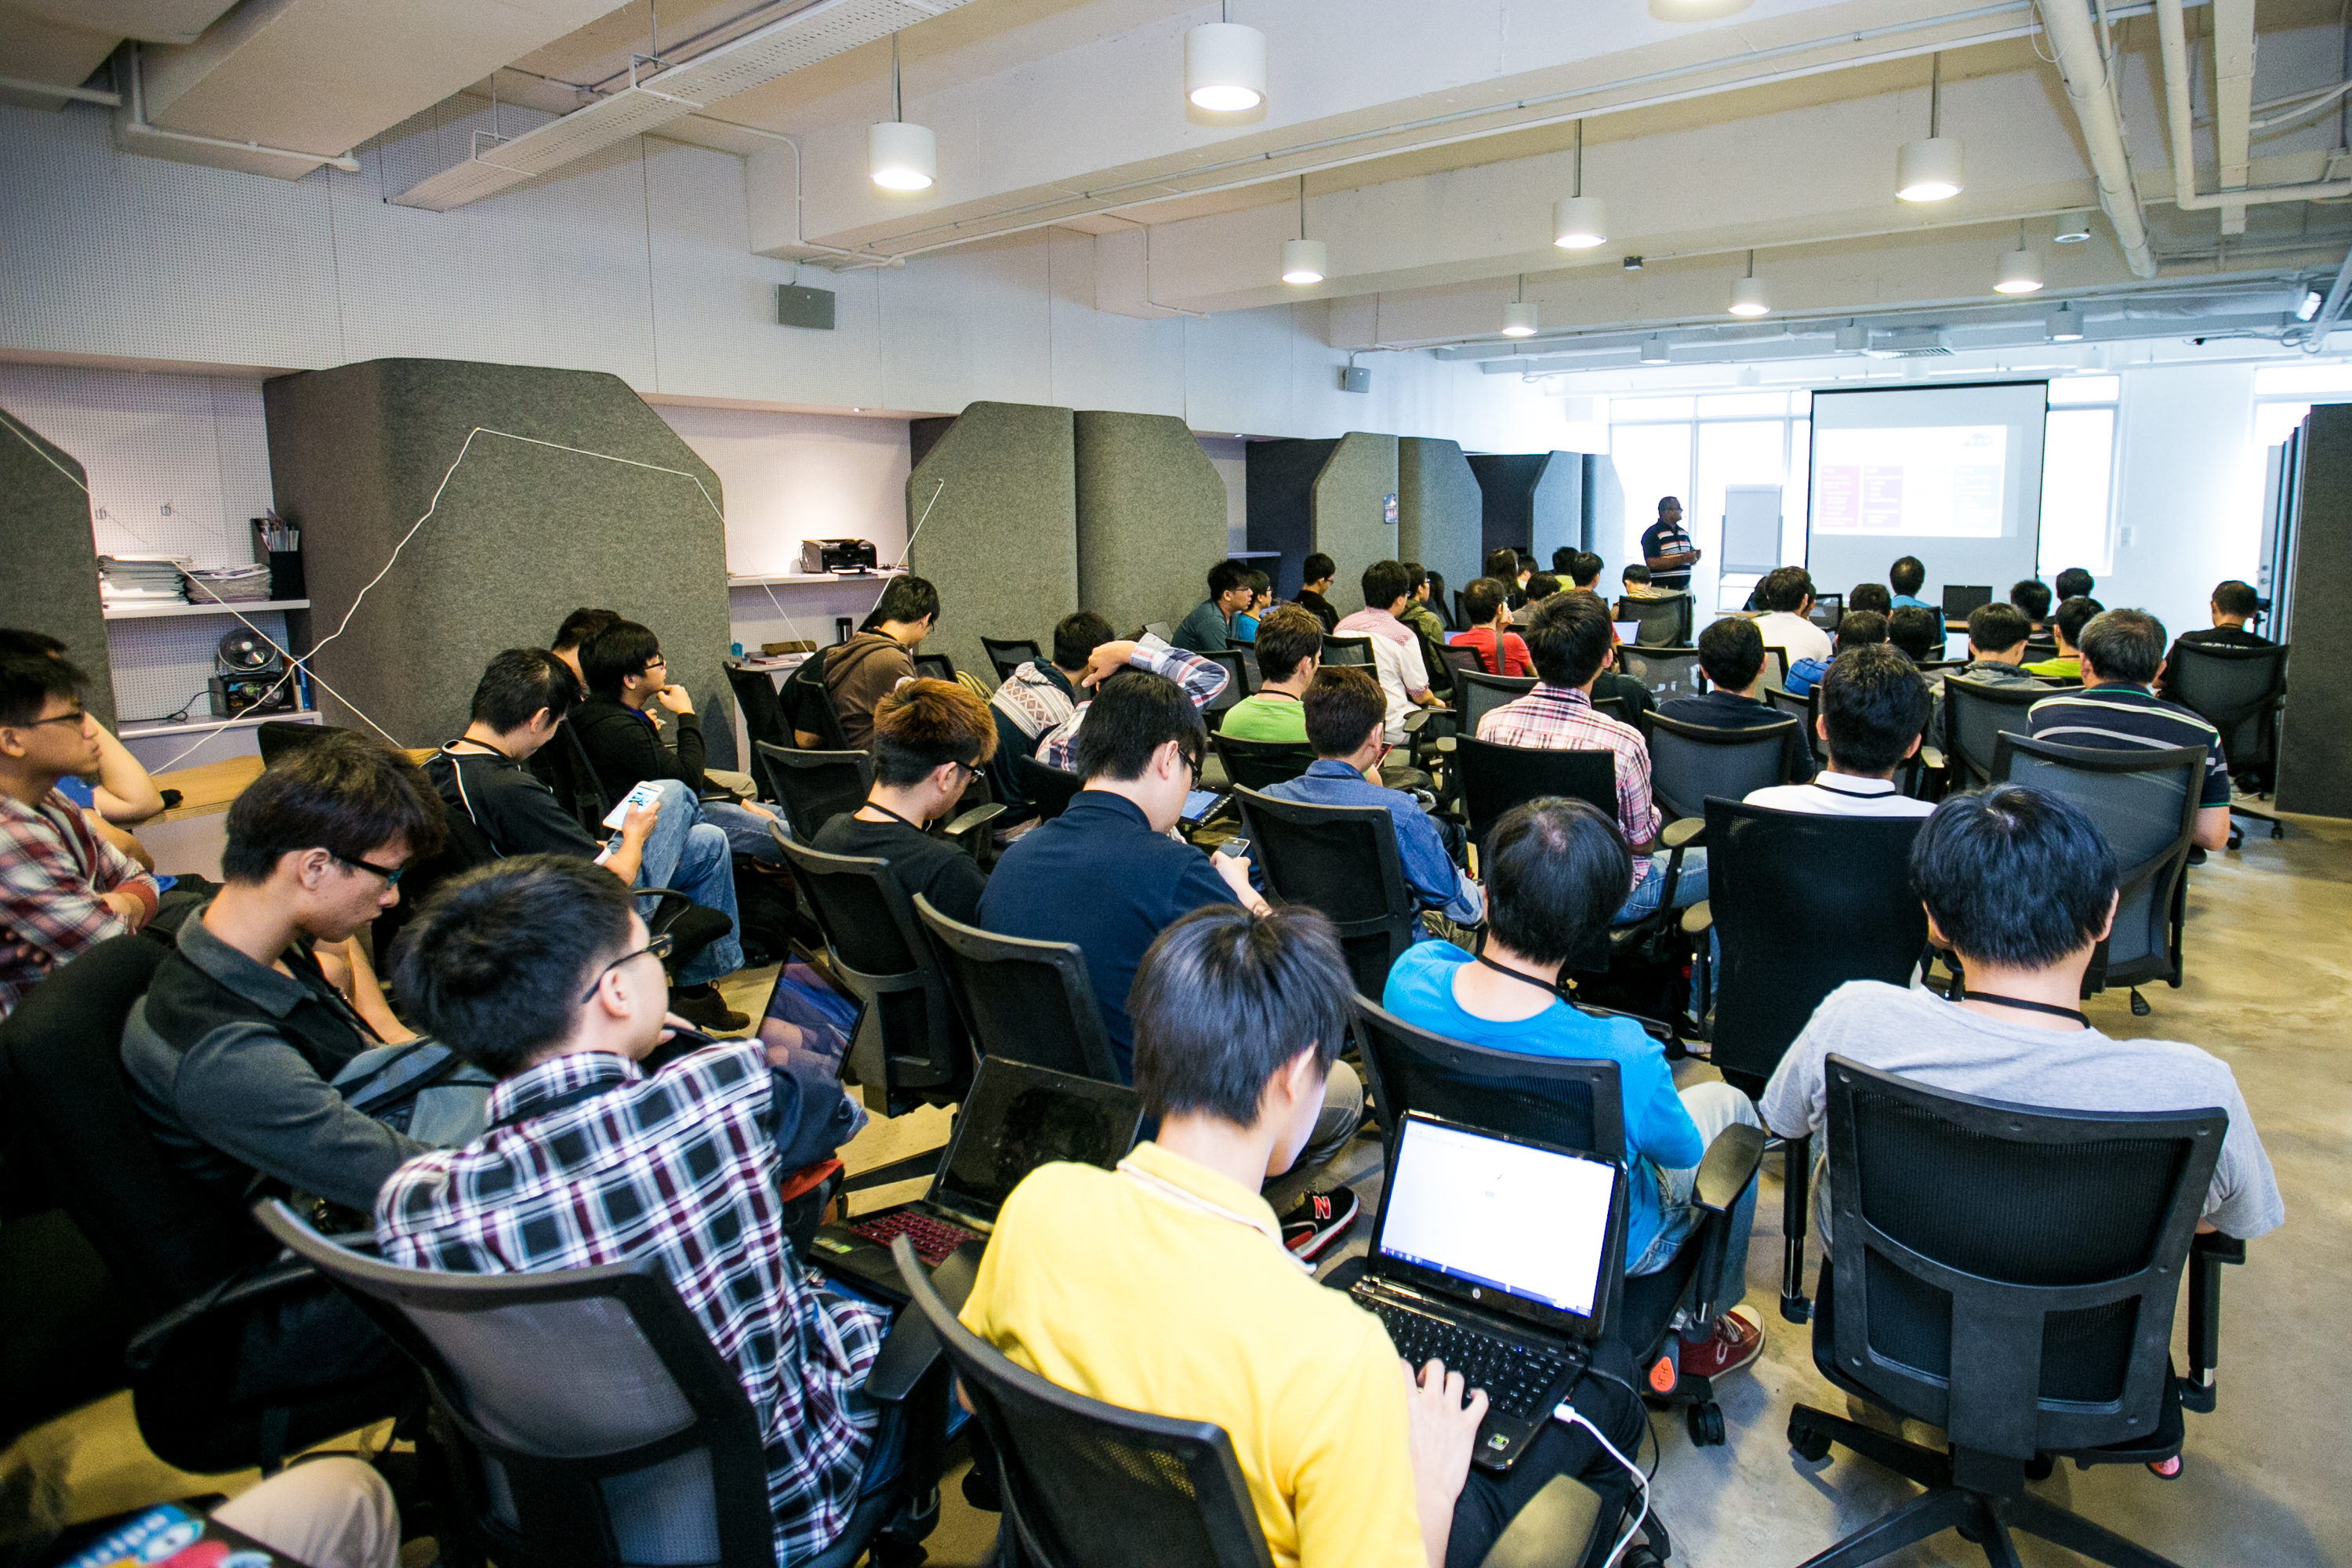
Azure Community March Meetup in Microsoft Singapore office.
I am not that hardworking to work on personal projects every day. Sometimes, I will visit family and friends. Sometimes, I will travel with friends to overseas. Sometimes, I will play computer games or simply just sleep at home. So ya, this self-learning project takes a longer time to complete. =D
Working on personal projects after work is stressful also. Yup, so here is a music that helps reducing my stress. =)
I already forgot how I got to know about Microsoft hackathon back in 2012, few months after I entered my first job.
Dream Build Launch, Wowzapp~
The first hackathon that I took part in is Dream Build Launch. I worked together with my C# guru, Desmond, to build our first Windows 8 app (which was called Metro App back then). We successfully published the app to Windows Store after two rounds of Microsoft Premier Field Engineer (PFE) consultation sessions. We named our first Windows 8 app “EsplanadeGo!”, which has 51 downloads today.
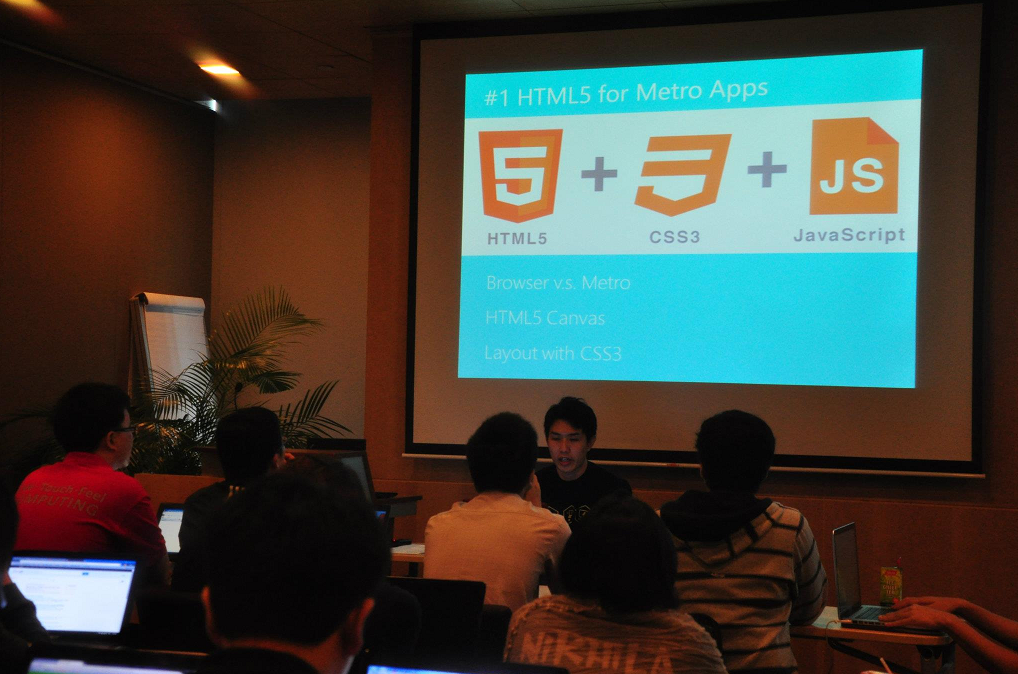
HTML5 for Metro Apps talk given by Alex Goh during Dream Build Launch event. Photo Credits: Spiffy
In December 2012, I participated in another Microsoft hackathon, Wowzapp. That was the first time I won the first prize in Microsoft competition after I graduated from university. The app that I built was called Entertainment Connect, also a Windows 8 app. User can use it to connect to his/her Dropbox account to retrieve media files and then play them in the app.
Near the end of the Wowzapp hackathon, one of the judges from Microsoft Singapore, Eugene, suggested me to build another app which connected to SkyDrive (which was later renamed to OneDrive) because he would love to use such an app and SkyDrive API was still quite new back then.
Because of Eugene’s idea of the app, I challenged myself again in the hackathon organized by Microsoft Singapore in 2014, //publish/. I decided to make Eugene’s dream come true.
//publish/
The special thing about //publish/ was that participants were allowed to bring their own existing Windows 8/8.1 projects. The focus of the event was more about publishing app to Windows Store. Hence, I took the opportunity to complete my second personal Windows 8 app, Entertainment Connect.
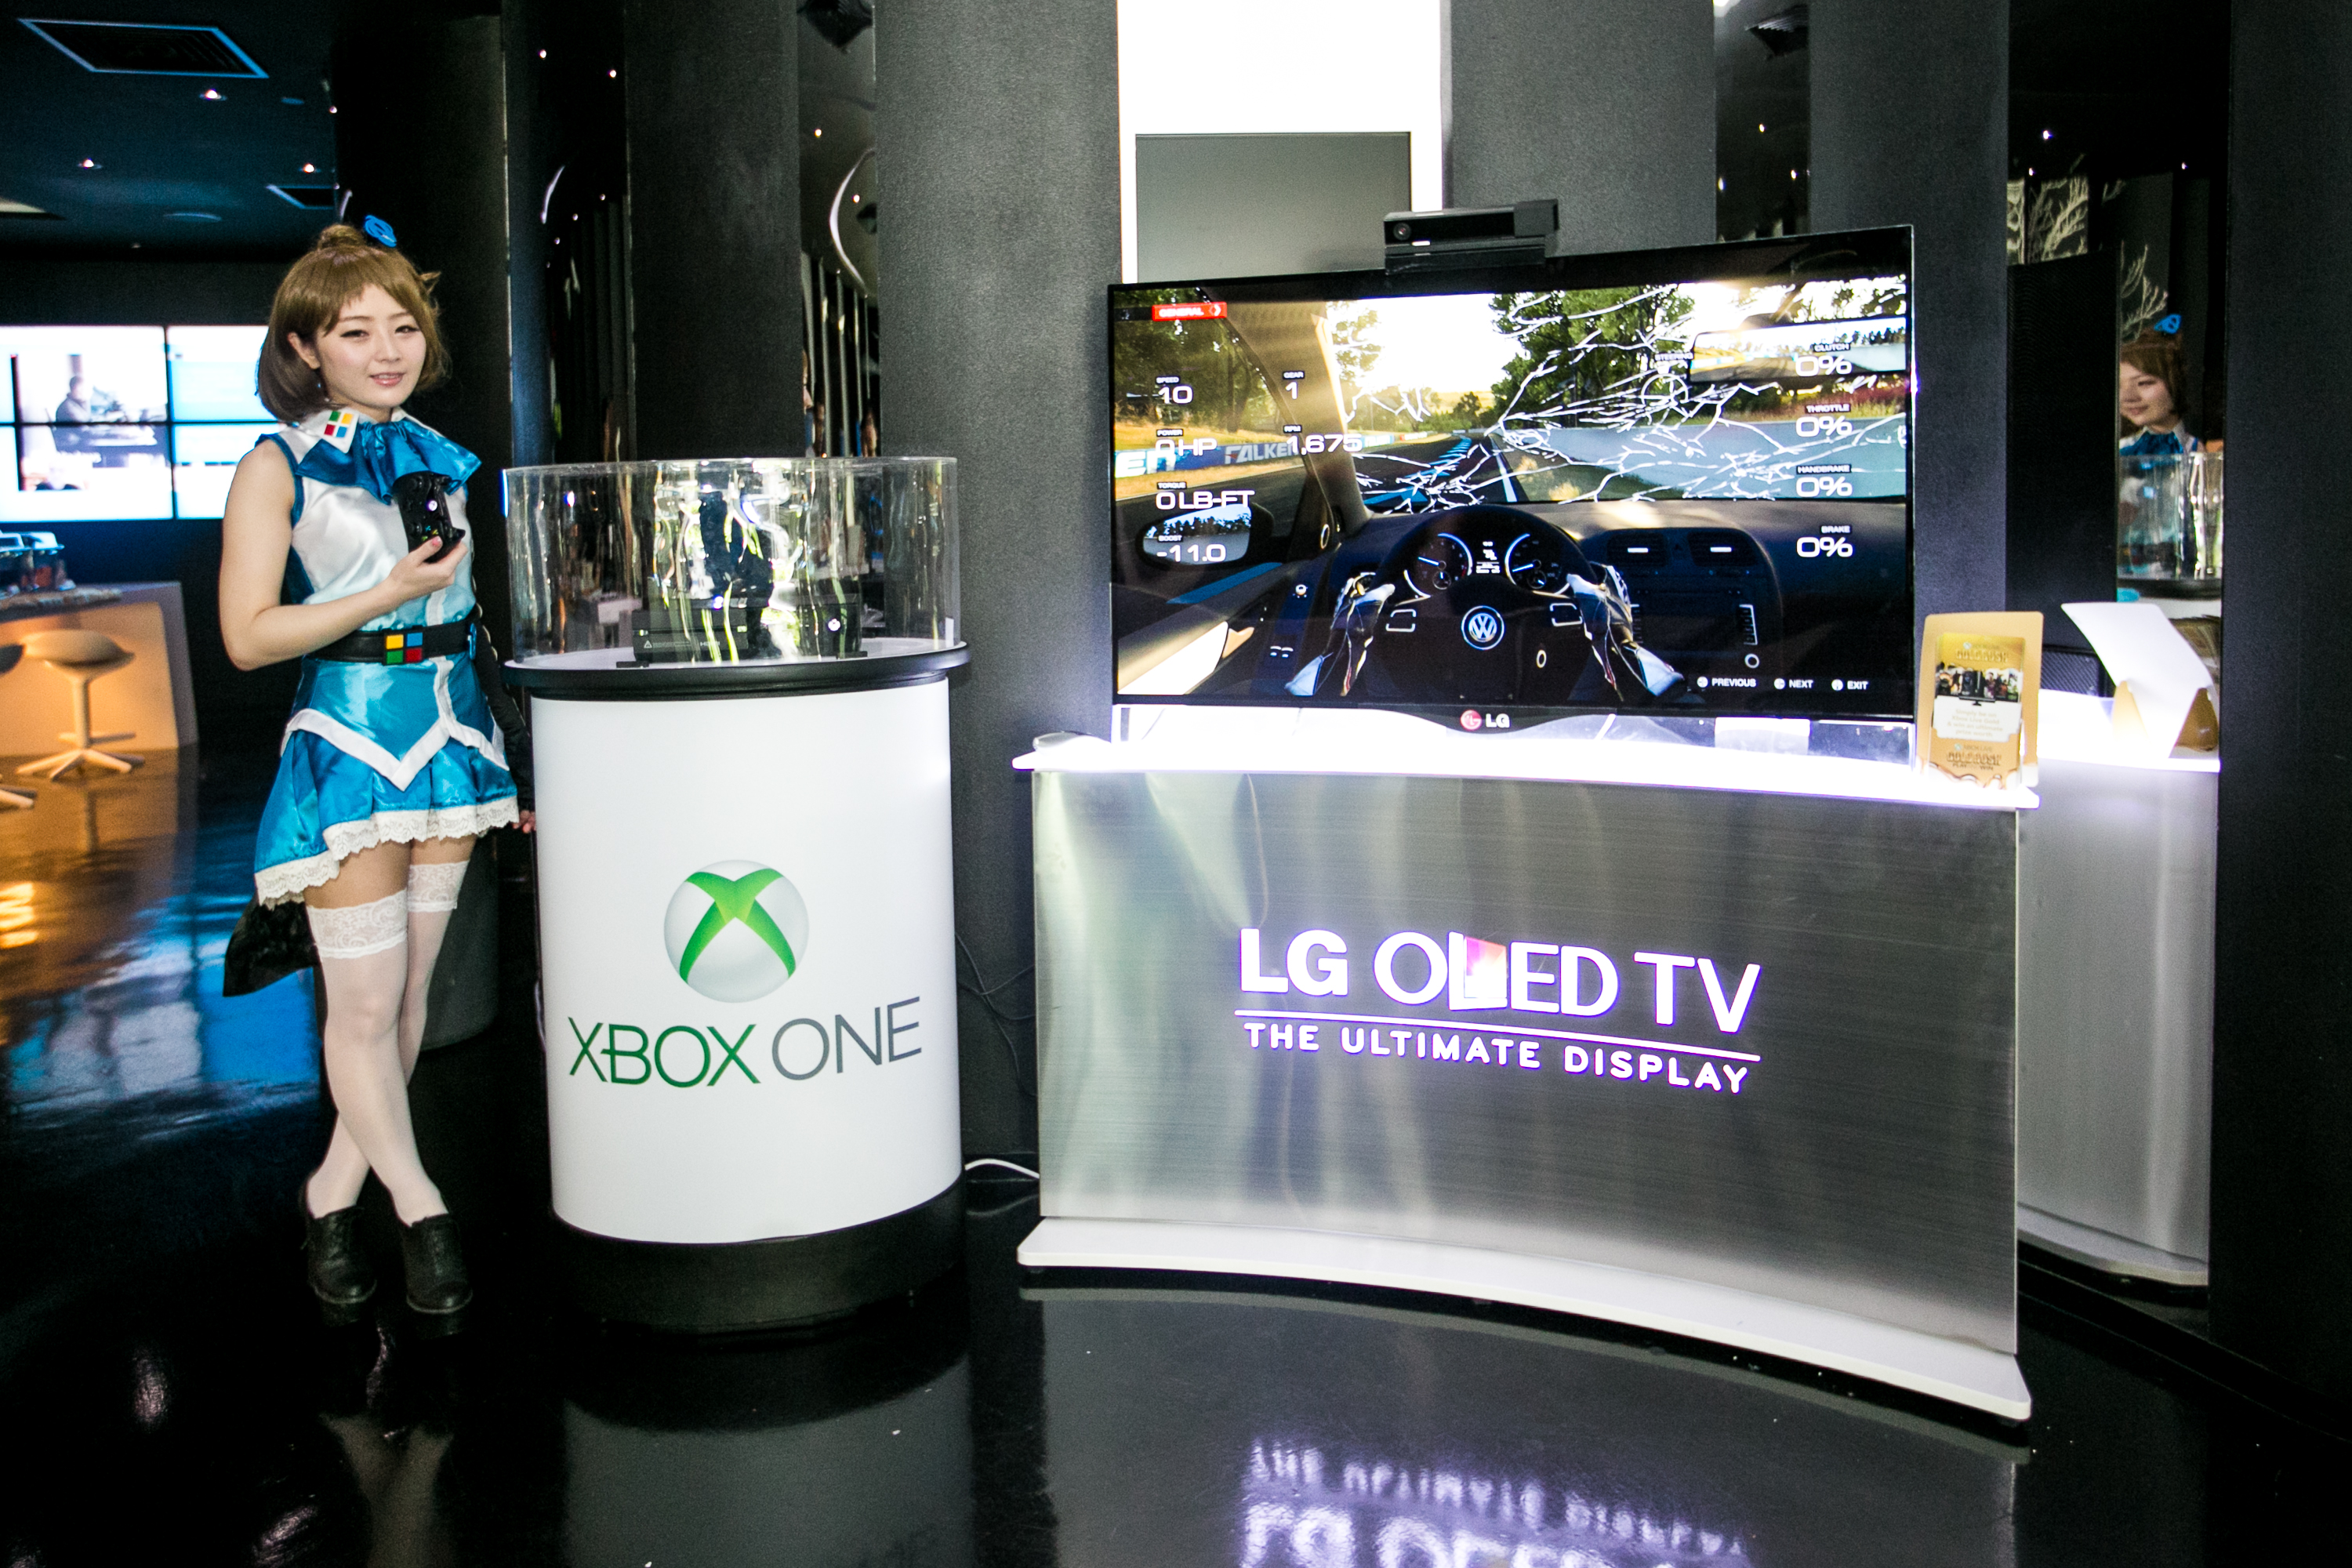
//publish/ hackathon was actually a 2D1N event happening worldwide. Personally, I thought the one in Singapore was the most special one because Inori Aizawa was invited as special guest to the event as well! Participants got the chance to take photo with her and won cute prizes. Also, we had the chance to try out Xbox One, the device that people were willing to queue up at Funan DigitaLife Mall for a few hours just to buy one.
Where else can you see Inori Aizawa playing Xbox One? Photo Credits: Microsoft Singapore//publish/ organized by Microsoft in Singapore. Photo Credits: Microsoft Singapore
The event took place at The Co., a very comfortable place just next to my office. So, I got to bring laptop external keyboard and mouse, which helped to improve my coding speed.
There were tech talks given in the first morning. One of them was about Push Notification with Microsoft Azure. This talk in fact helped me a lot in my work when our company decided to do a push notification to Android and iOS phone.
Tech talk about Cortana delivered by Chun Siong. Photo Credits: Microsoft Singapore
Meet People
One of the great things that I love about Microsoft hackathon is that I always can meet imba people here. By just having a chat with them, I get to learn more technologies out there, such as Arduino, Azure Media Services, iOS development, and so on.
Entertainment Connect is my submission for //publish/ in 2014.
Entertainment Connect (Available now at Windows Store)
What’s so special about Entertainment Connect? Isn’t it just a media player that can play videos and songs? What else?
Firstly, yes, it is a media player. However, it is not a normal media player which can only play the local media files. It connects to your OneDrive account and retrieves available media files from there.
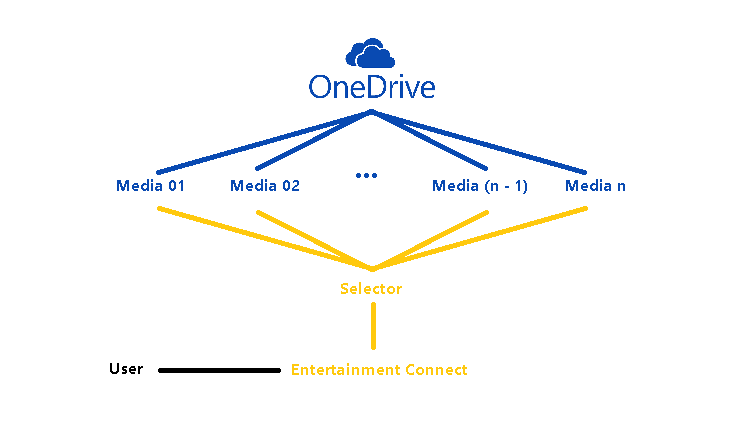
Secondly, I make it so that when you switch from one media file to another, the previous media file is paused and is hidden in the background. So, you can, let’s say, click on one video, play it halfway, then click on another song, then jump back to the same video again and continue from where you stop earlier. So this is actually similar to the “Parallel Video Downloading” feature that I introduced back then in YouTube Re-Player (Desktop) in 2009. The only difference is that now it does not limit the number of videos to be just 5.
Parallel Media Downloading from OneDrive to Entertainment Connect
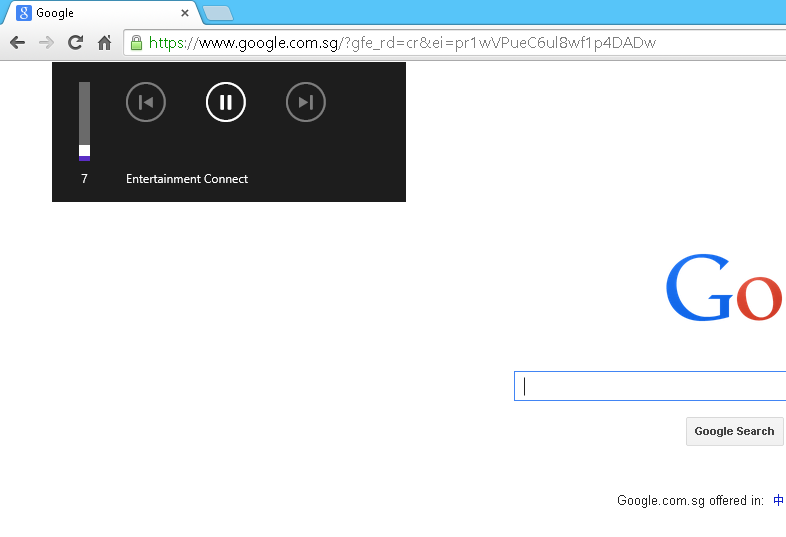
Thirdly, it supports playing audio in the background. This means that even though the app is running in the background, users can still continue listening to the music and at the same time they can also control the media player.
SystemMediaTransportControls
Finally, it can loop songs and videos. Yup, re-playing is always the must-have feature in the media player programs that I build. =)
Wait, It Was 6 Months Ago!
Some of the readers by now should have realized that //publish/ actually happened 6 months ago. Why do I only blog about it now? Well, the answer is that I choose to blog about it after I successfully publish Entertainment Connect to Windows Store. So, why does it take so long for me to publish an app? This is because I have little time to work on it after the event.
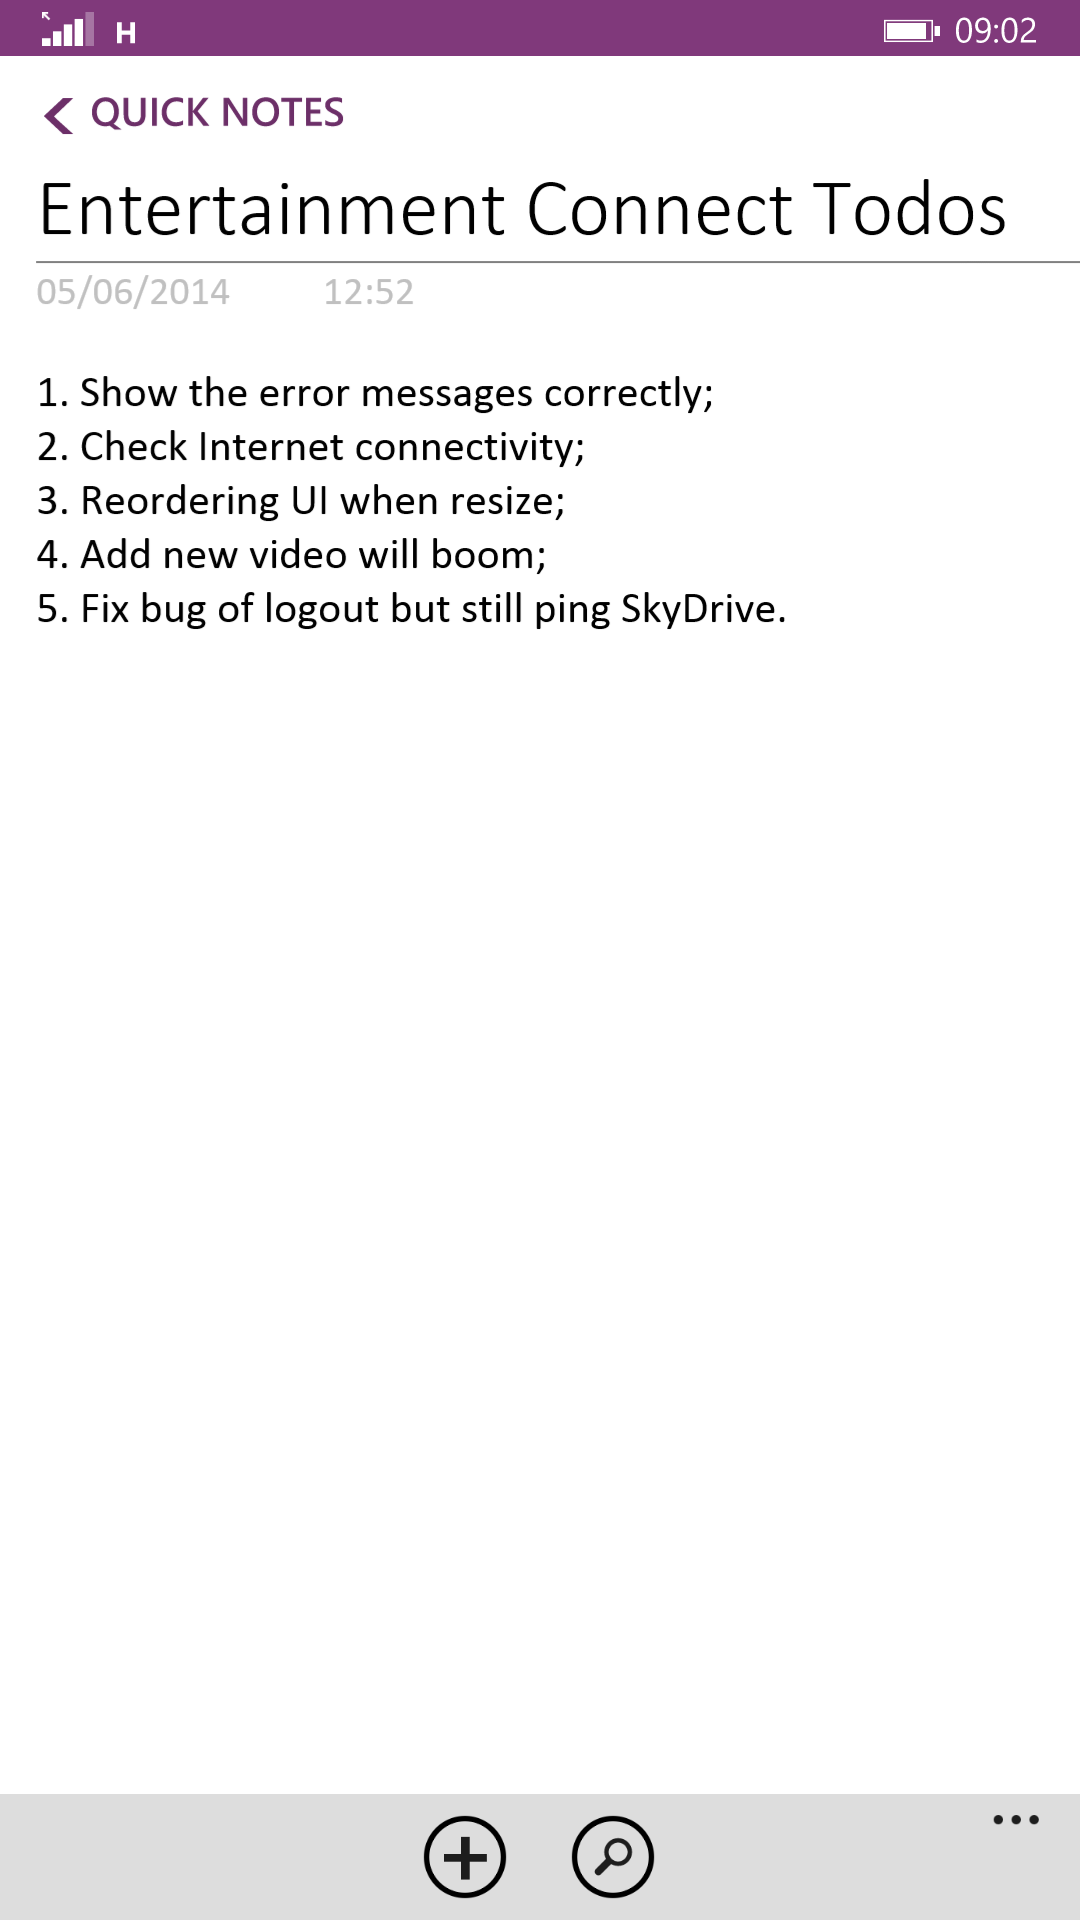
Simple to-do list kept in OneNote
I have learnt the key to finishing a personal project is to work on the project every day. However, I have a full-time work which requires me to OT always. Sleeping has thus become my top priority after work. However, I still try to at least work on the project by writing a few lines of code or just staring at Visual Studio for a few minutes. So, after 6 months of doing so, I am finally able to publish Entertainment Connect.
There is a saying, “Only do side projects you are absolutely crazy about.” Hence, I also installed Entertainment Connect on my laptop so I got to use it daily. The reason of doing so is to force me to remember about the project and to easily find out bugs in the app.
Today, I am happy that I successfully realize the dream of Eugene about a Windows 8 app that he can use to connect to play the media files stored in his OneDrive. In fact, I am very happy to have taken up this challenge and complete the app by myself even though the entire process is tiring.
Prize
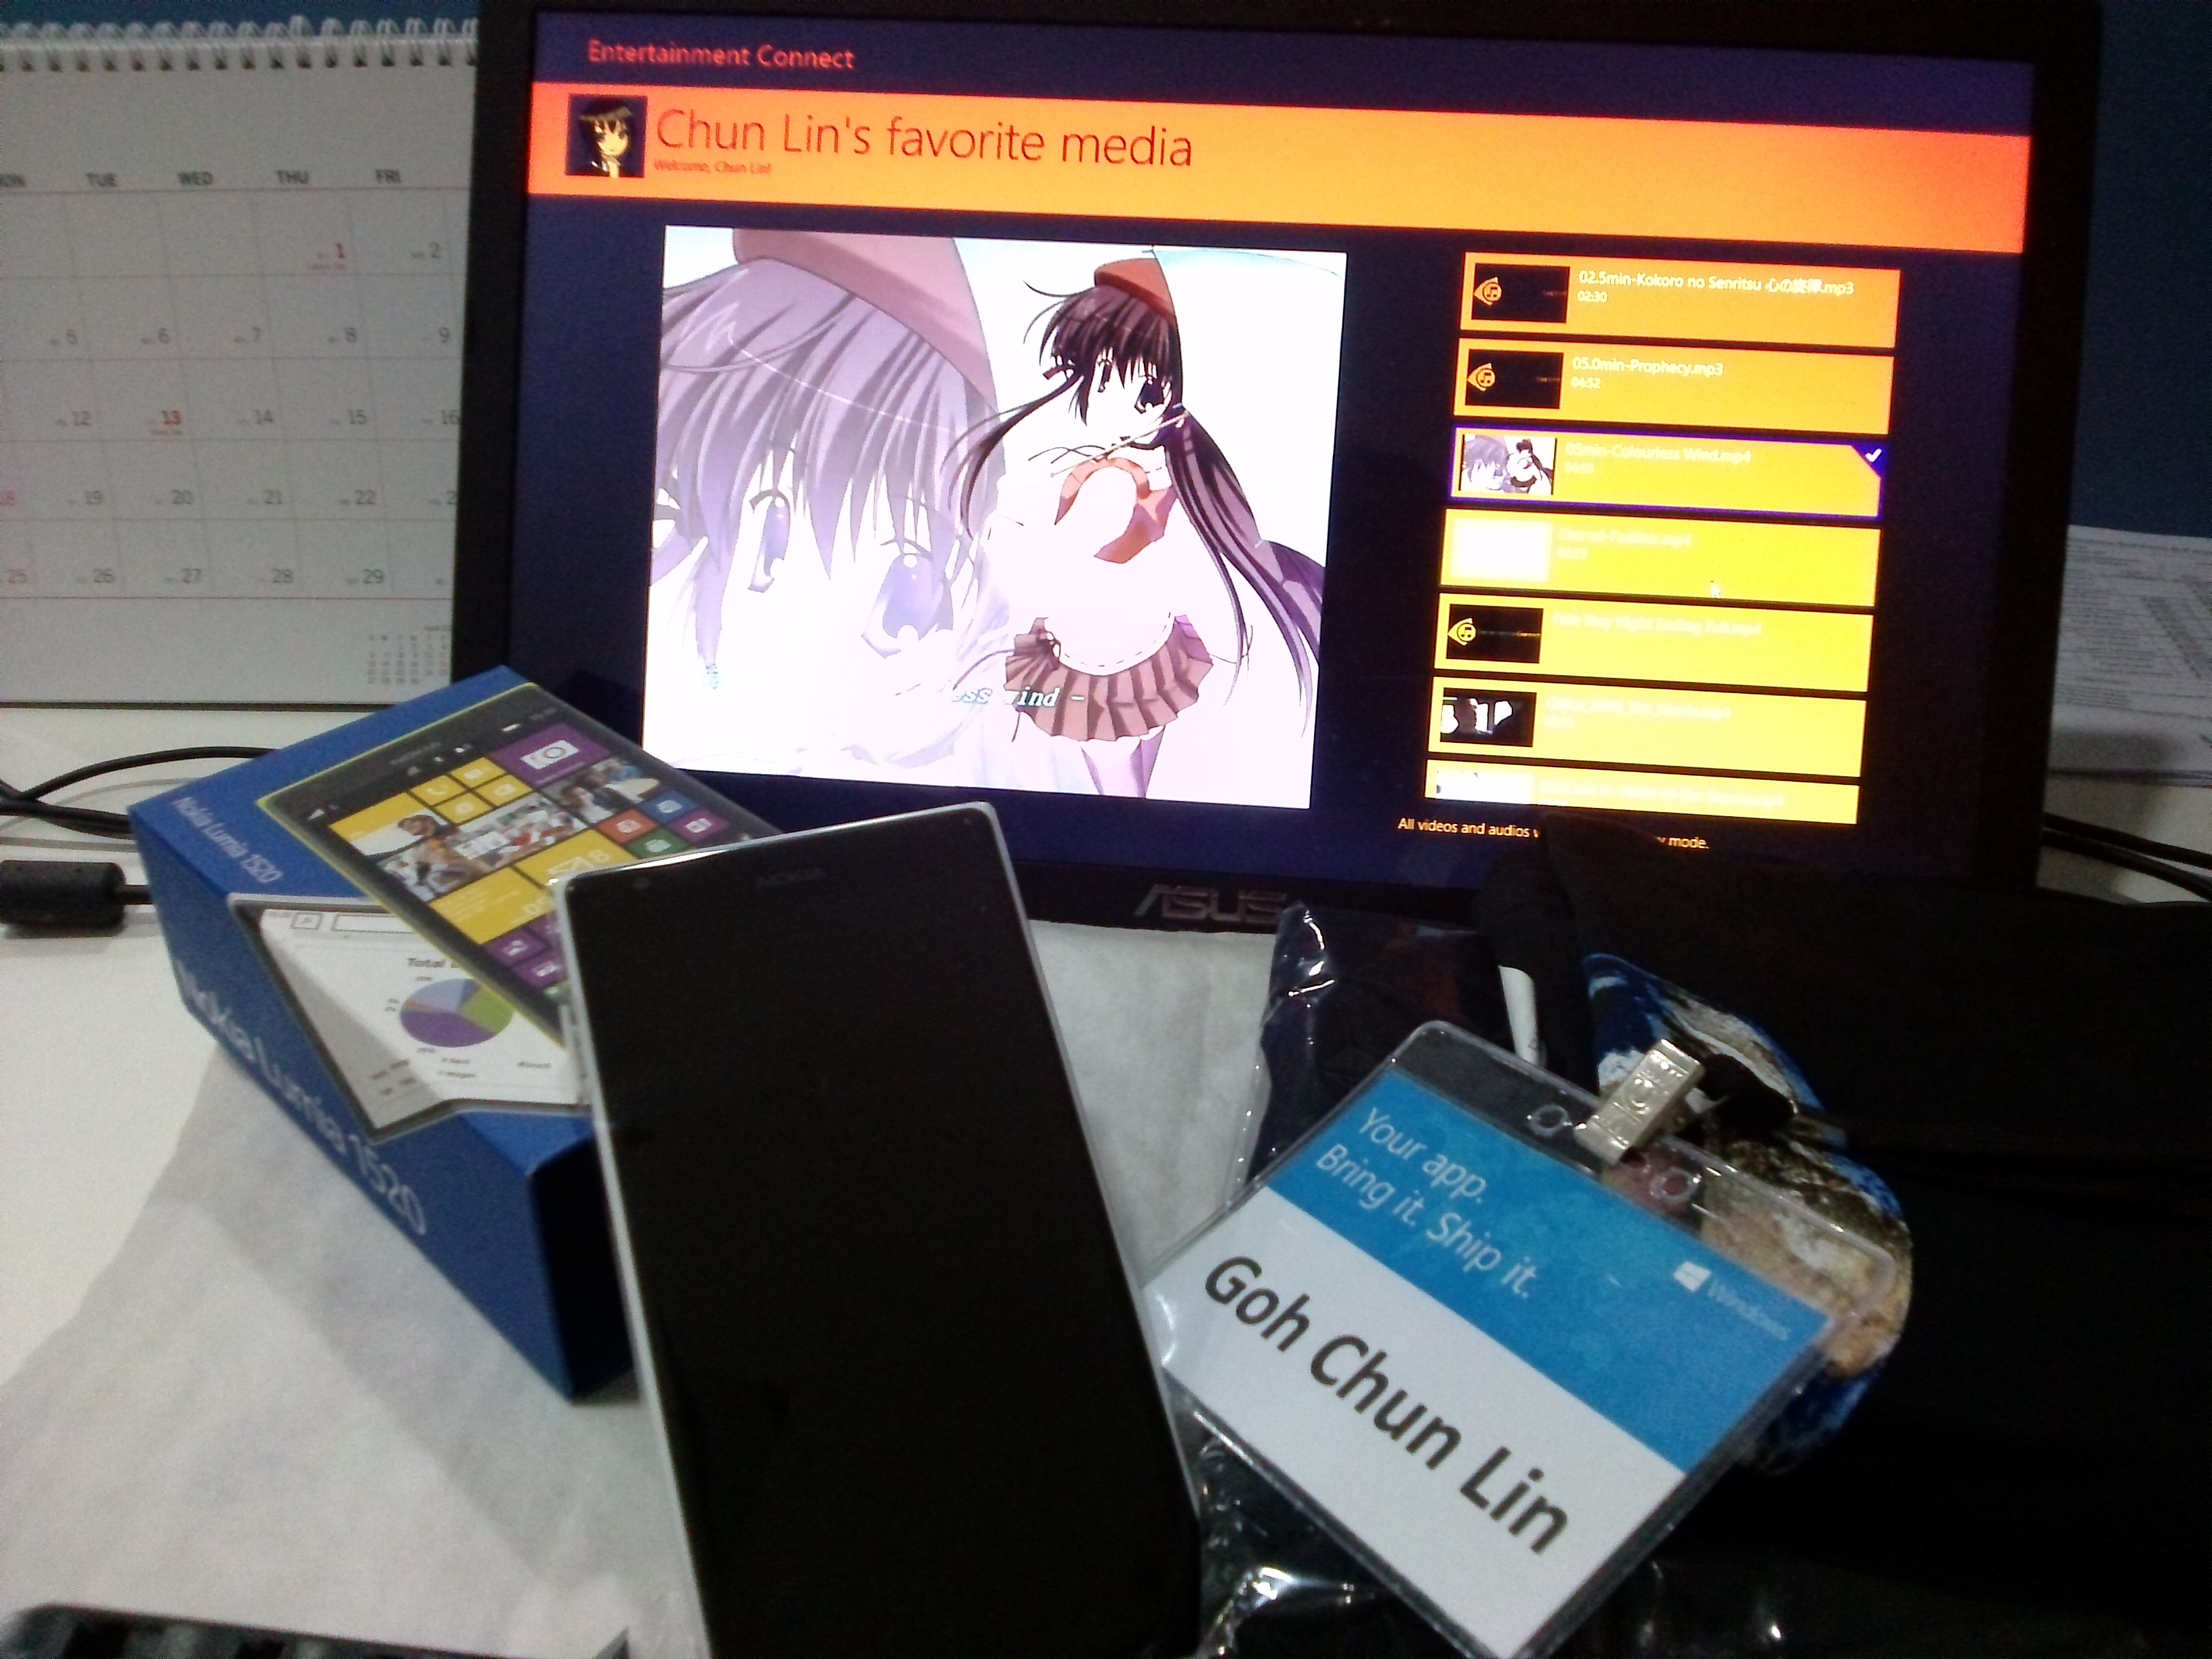
Prize is Nokia Lumia 1520!
I’d also like to take this chance to thank Microsoft Singapore team for giving me a special prize for Entertainment Connect during //publish/. It was a brand new Nokia Lumia 1520. Coincidentally, my Android phone stopped functioning few days before the event. So, I managed to get a new modern smart phone for free.
I should blog about the phone next time to show how good/bad Nokia Lumia 1520 is. =P
February is a short month so I have to plan my self-learning accordingly so that I can get myself more focused. Due to the fact that I can only spend on average one hour per day to work on my personal project and self-learning, I choose to learn not only something which is easier, faster to learn, but also a technology that is more interesting. So, the topic of February self-learning is HTML5! (Notice/Joke: ! is exclamation mark here. It doesn’t mean 5! which equals to 120).
I do a firefly animation by using this new <canvas> element in a simple way. Firstly, I draw some fireflies on the canvas.
cxt.globalAlpha = 0.4;
cxt.beginPath();
cxt.arc(x, y, ((fireflyLightMaxDiameter - fireflyDiameter) * brightnessRatio) + fireflyDiameter, 0, Math.PI * 2, true);
cxt.closePath();
var grd = cxt.createRadialGradient(x, y, 1, x, y, 4);
grd.addColorStop(0, "#FFFFFF"); // white
grd.addColorStop(1, "#FFFF00"); // yellow
cxt.fillStyle = grd;
cxt.fill();
cxt.globalAlpha = brightnessRatio;
cxt.fillStyle = "#99FF00";
cxt.beginPath();
cxt.arc(x, y, fireflyDiameter, 0, Math.PI * 2, true);
cxt.closePath();
cxt.fill();
Secondly, I will redraw the whole canvas for every 60 milliseconds. Then in each redraw function, I randomly assign flying speed and direction to every single firefly. Also, there is a counter set so that the firefly won’t change its direction too often.
dx = Math.floor(Math.random() * fireflyMaxSpeed);
dy = Math.floor(Math.random() * fireflyMaxSpeed);
firefliesDx[i] = dx;
firefliesDy[i] = dy;
x += dx * directionX[i];
y += dy * directionY[i];
if (callCounter % 40 == 0) { // Don't change the flying direction too often
    directionX[i] = ((Math.floor(Math.random() * 10) < 5) ? 1 : -1);
    directionY[i] = ((Math.floor(Math.random() * 10) < 5) ? 1 : -1);
}
Thirdly, I set a counter to do the brightness changing of each firefly.
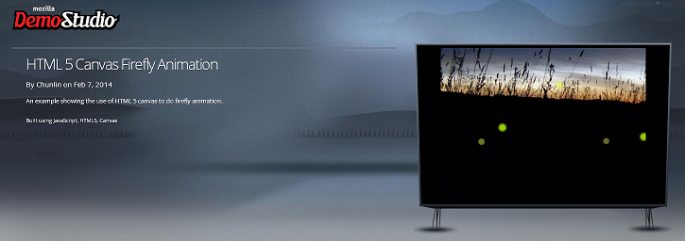
So, yup, that’s the basic idea on how I do firefly animation in <canvas>. Since this year is the tourism year in my country, I apply the firefly animation in a page about watching fireflies in Kuala Selangor, Malaysia. To get the source code, you can visit my page of this animation in the Mozilla Demo Studio. Don’t forget to click “Like It” button if you really like it. =P
Firefly HTML5 Animation: The page is to promote Kuala Selangor, the world’s biggest firefly colony
Popcorn.js: Integrating Video and the Web Content
However, promoting just one attraction in my country is not enough. So, I am thinking of building a page which will guide the viewer through different places in Malaysia.
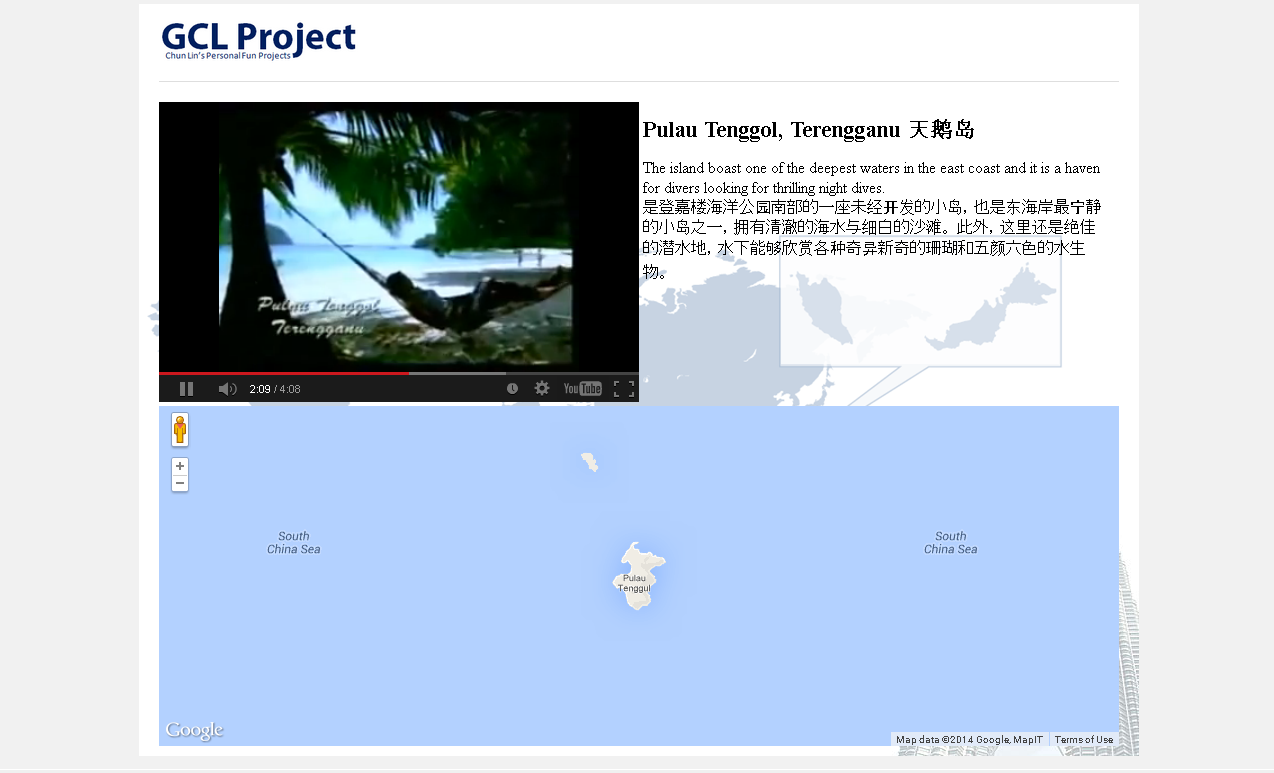
I get a promotional video about Malaysia tourism from YouTube. In the video, it shows several famous tourist attractions in Malaysia. I want to build a web page showing a short introduction as well as a map (or even street view) about those places. I thus chose Popcorn.js.
Popcorn.js is an open-source HTML5 video framework which allows us to create time-based interactive media on the web. So, we can now bring content in a web page into a video easily. People watching a video on the website now can also read a web page content which is relevant to the video content. So, this JavaScript library basically allows to add value to a video.
The following screenshot shows how the page looks when the video is displaying a picture of Pulau Tenggol.
Popcorn.js in action.
YouTube Plug-in Issue in Popcorn.js
There is a problem if we are using the YouTube plug-in offered in the Popcorn.js. After the video ends, the YouTube player will show a group of relevant videos. So it basically allows the viewer to change the content of the video player. Hence, to solve this problem, I added one value to the playerVars in popcorn.js.
Although it’s not encouraged to use CSS to do complicated drawing on the web pages, thanks to the CSS3, we can now create animations with CSS by using @keyframes. For example, the following is part of my CSS which does the animation of the name of each attraction in the web page.
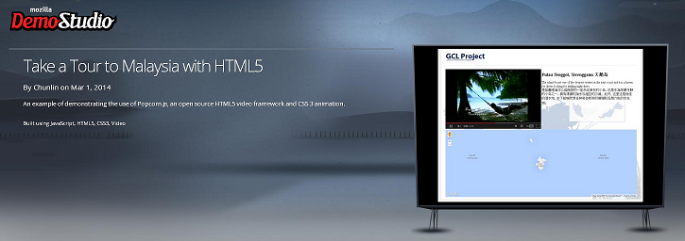
So, if you haven’t visited Malaysia before, please bring your family and friends to this lovely country and join us in this grand tourism celebration. However, before that, kindly vote for my following two demos by clicking the “Like It” button. Thanks. =D
Enjoy the HTML5 firefly animation here.Take a tour to Malaysia with HTML5 here.
I saw a Facebook post announcing the first JBoss workshop in Singapore. However, since I had meeting overseas at that time, I couldn’t attend the event. Fortunately, my good friend, Wai Hong, who is also interested in Java programming decided to attend the workshop as well. After the workshop, he shared with me the notes so that I could learn it myself also. Thus, here I’d like to thank Wai Hong for his kindness. =D
The first JBoss Workshop in Singapore!
In this post, I want to share my JBoss learning journey after going through the notes, online tutorials, and online forums. Meanwhile, I also developed a new app, My YouTube RePlayer, and then deployed it on OpenShift, the Red Hat cloud hosting service, during the long weekend.
Set Up JBoss Developer Studio
In order to build web applications and then to publish them easily to the OpenShift, I choose to use the recommended IDE in the workshop, the JBoss Developer Studio 6.0.0.GA (JBDS).
In the beginning of the installation, there are short introduction and the End User License Agreement. Please spend some time to read it.
Let’s get started with JBDS installation.
The next step will be selecting the installation path. I guess there is no need to put a screenshot for this?
After choosing the installation path, there will be an option to choose Java VM. So, the directory chosen will be the jre directory in the place Java is installed on the PC.
Select the Java Virtual Machine.
The next step will be “Select Platforms and Servers” which can be skipped because this part will be done in later stage.
At the end of the installation, if everything goes well, there will be a message saying “Installation has been completed successfully” in Step 9, which is also the last step. That means JBDS can be used now.
Launch JBoss Developer Studio
JBDS is almost like Eclipse. Well, this is because it includes not only the web development tools, but also Eclipse.
Hello, JBDS!
In the workshop, a quickstart project sample called kitchensink-html5-mobile is used. Due to the fact that I was following the workshop tutorial, I ended up using it to build my app, My YouTube RePlayer, eventually.
Choose the kitchensink-html5-mobile sample project as starting point.
Under the “Requirements” section, there are four items. On my PC, three of the plugins were found. Only the JBoss Enterprise Application Platoform 6 or JBoss Application Server 7.1 was missing. I thus installed the JBoss Application Server 7.1 which was given by Wai Hong together with his notes. I think it can also be downloaded in the “Download and Install…” section.
Download and install the JBoss Application Server 7.1.
After the runtime is added, just click on the “Finish” button and the project will be imported.
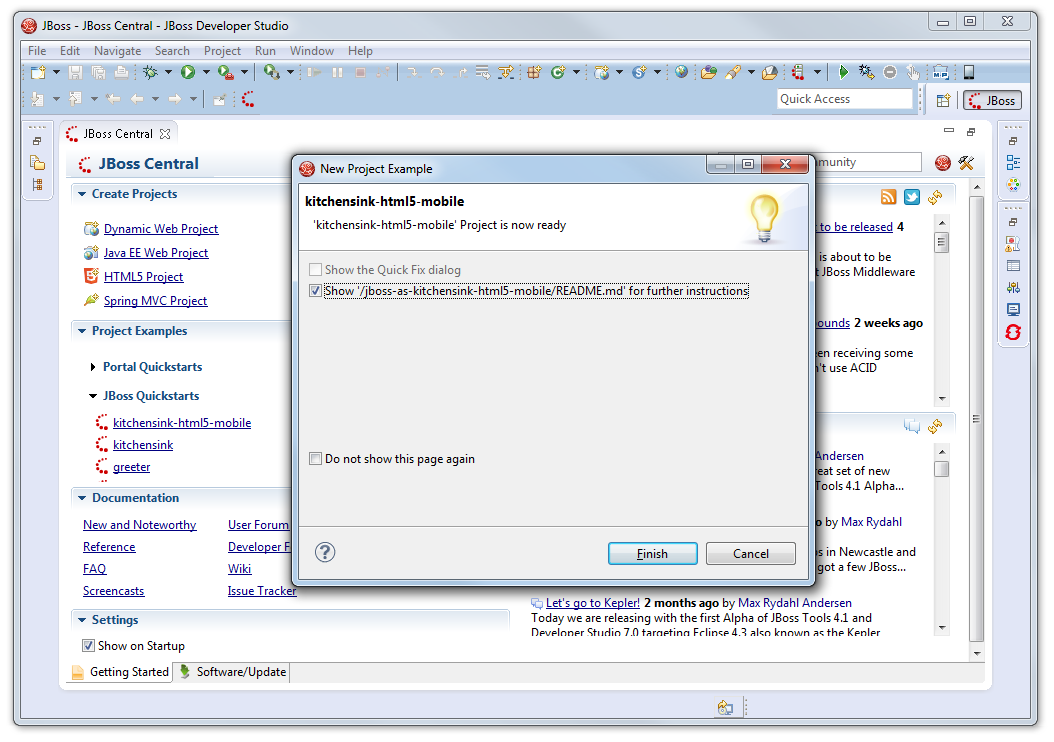
Once a message saying “‘kitchensink-html5-mobile’ Project is now ready” appears, that means everything has been done correctly so far. Yesh!
The project is now ready!
Deploy to OpenShift
I decided to use the sample project as a template to build my app, My YouTube RePlayer.
Before deploying to the cloud, I needed to test my app on local. To do that, firstly, right-click on the project folder in the “Project Explorer” window and then choose “Run As -> Maven Install” to build the project. Secondly, right-click on the project folder again and then choose “Run As -> Run on Server” to deploy on a local JBoss application server. Finally, the app will appears in the browser nicely.
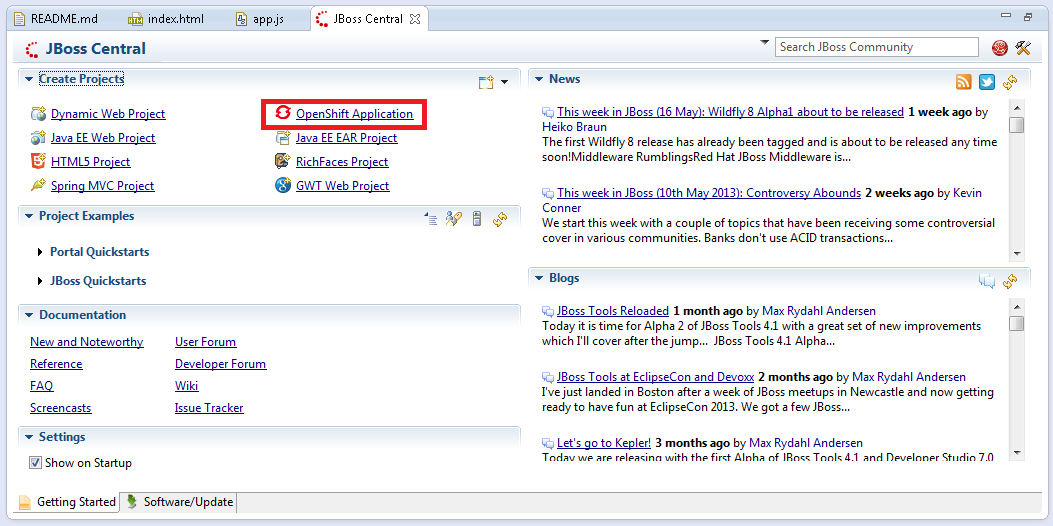
After testing on localhost, it is time to deploy the app to the cloud. First thing to do is to go back to the JBoss Central tab and click on the “OpenShift Application” button.
Click on the “OpenShift Application” button to start setting up the app on the cloud server.
The next step will be naming the application. The naming is very important because both the application name and OpenShift username will appear in the URL of the app on OpenShift in the following format: <application name>-<username>.rhcloud.com.
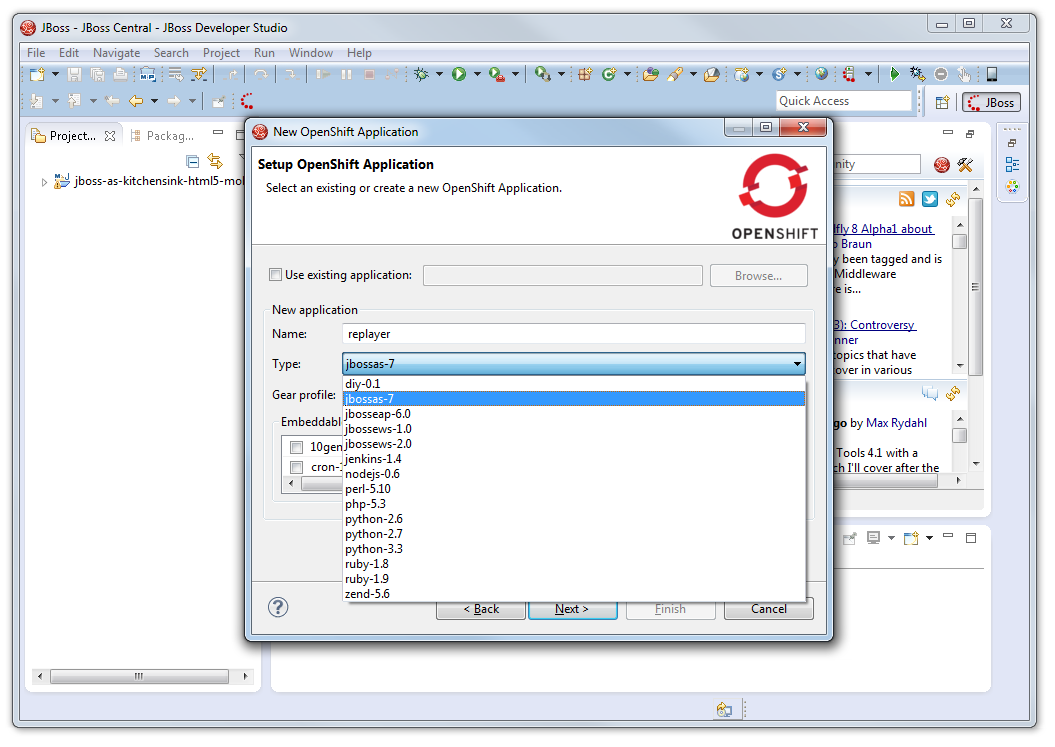
Choose jbossas-7 under the application type option.
For the “Type” drop-down list, I chose jbossas-7.
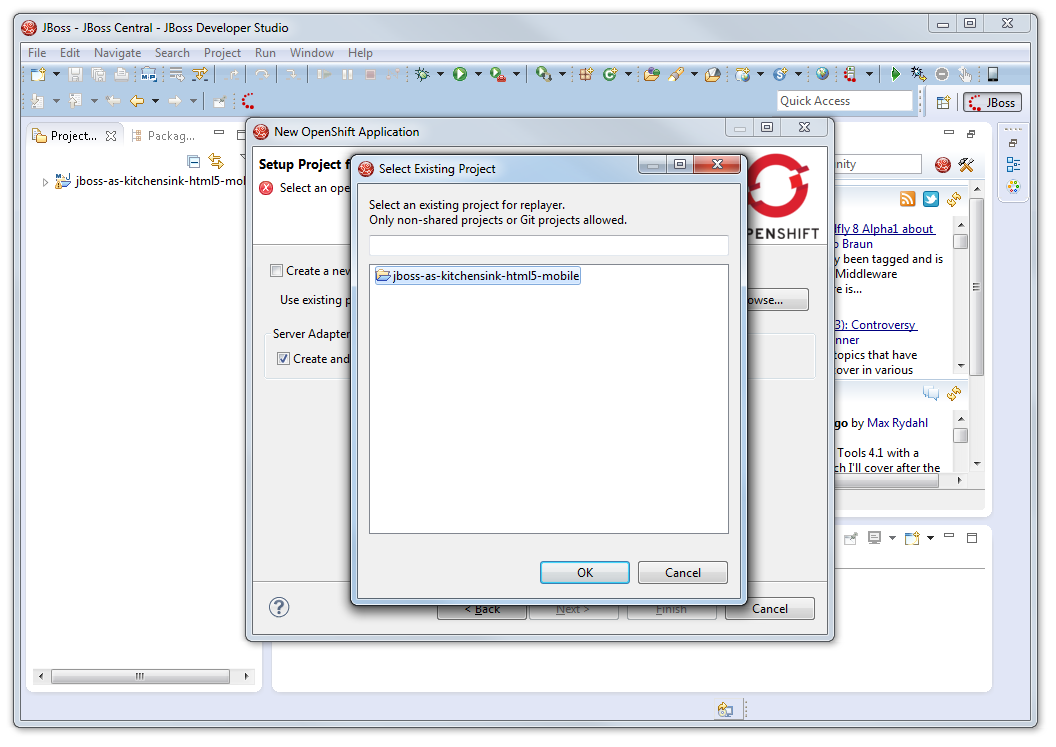
In the next window, I setup the project for the new OpenShift application. Due to the fact that I just would like to deploy my existing project, I unchecked the “Create a new project” checkbox and browsed to my modified sample project folder.
Choose to use existing project instead of create a new project on OpenShift.
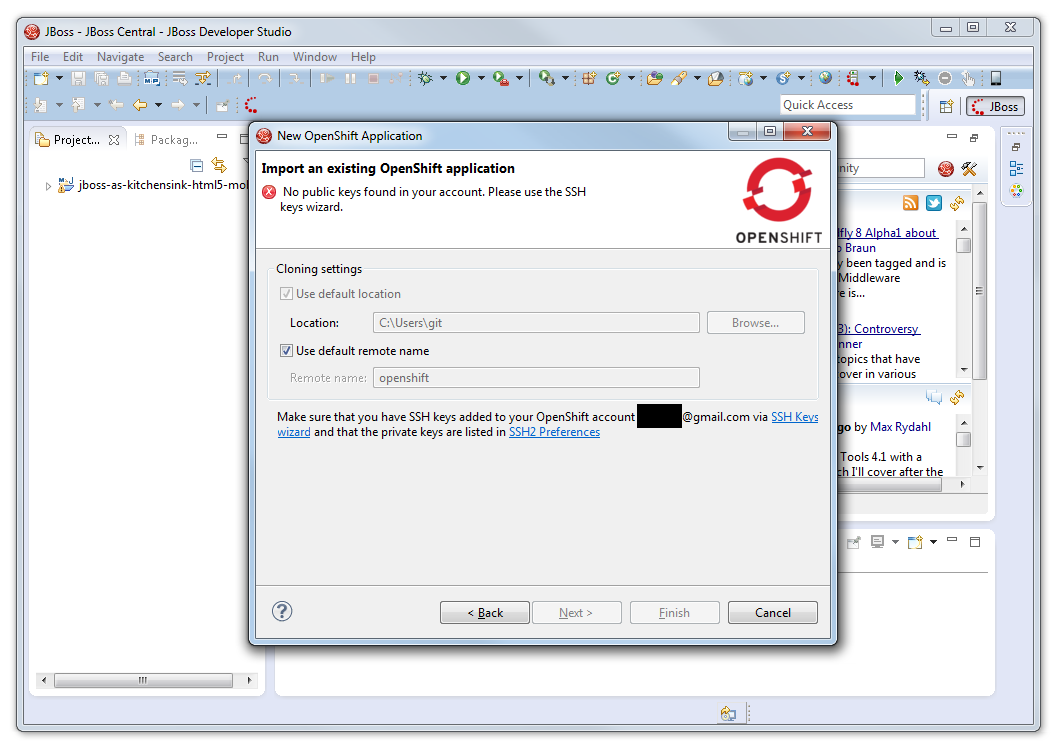
After having all these done, I reached the step where I needed to add SSH key to OpenShift account for authentication purpose. I first clicked on the “SSH2 Preferences” link.
Click on the SSH2 Preferences link.
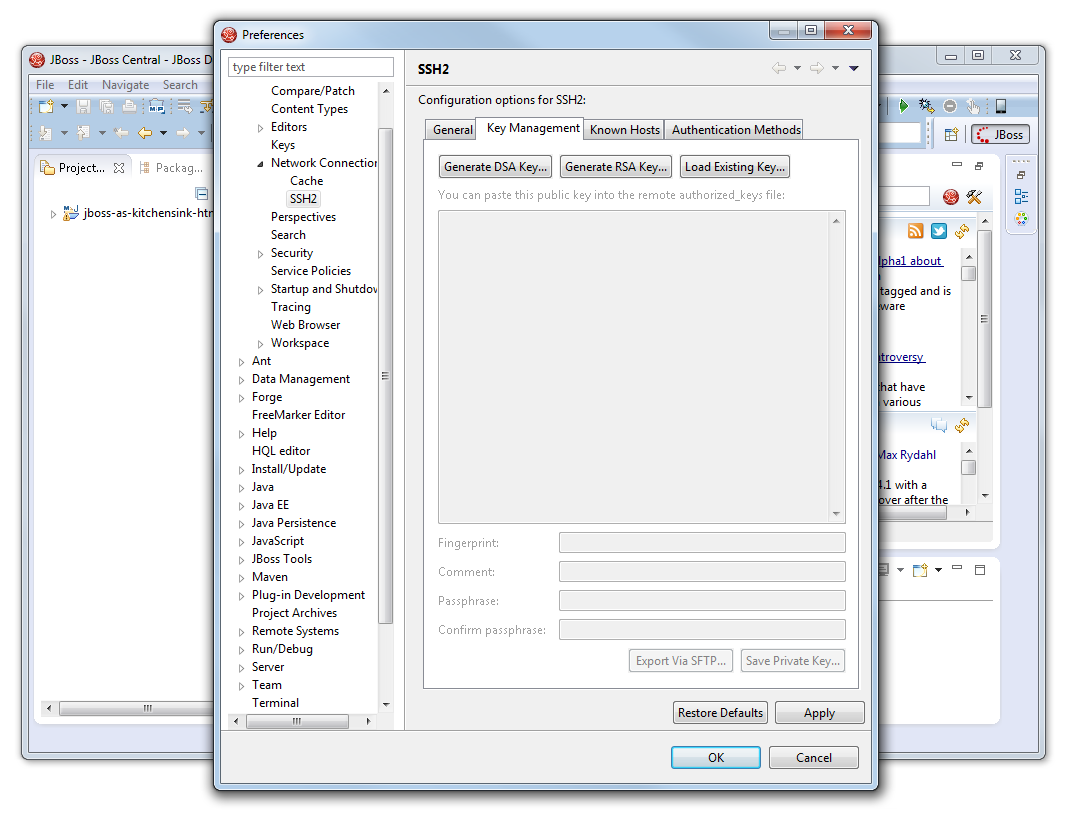
As I did not yet have an SSH key, I had to click on the “Generate RSA Key…” button to generate the key under the “Key Management” tab of the popped out window. After the key was generated, I clicked on the “Save Private Key…” button to save the private key for later use when publishing the app to OpenShift. It is recommended to have passphrase set, unless you also like to live dangerously.
The place to generate RSA key.Not enter any passphrase?
After the private key is saved, the public key also needs to be taken care of. The generated public key should be copied to clipboard (or paste it somewhere for later use). This is because after the keys are generated, the public key has to be added through the “SSH Keys wizard”. This is to setup the authentication between the local PC and the remote OpenShift server.
Click on the SSH Keys Wizard link.
Once everything is done, click on the “Finish” button.
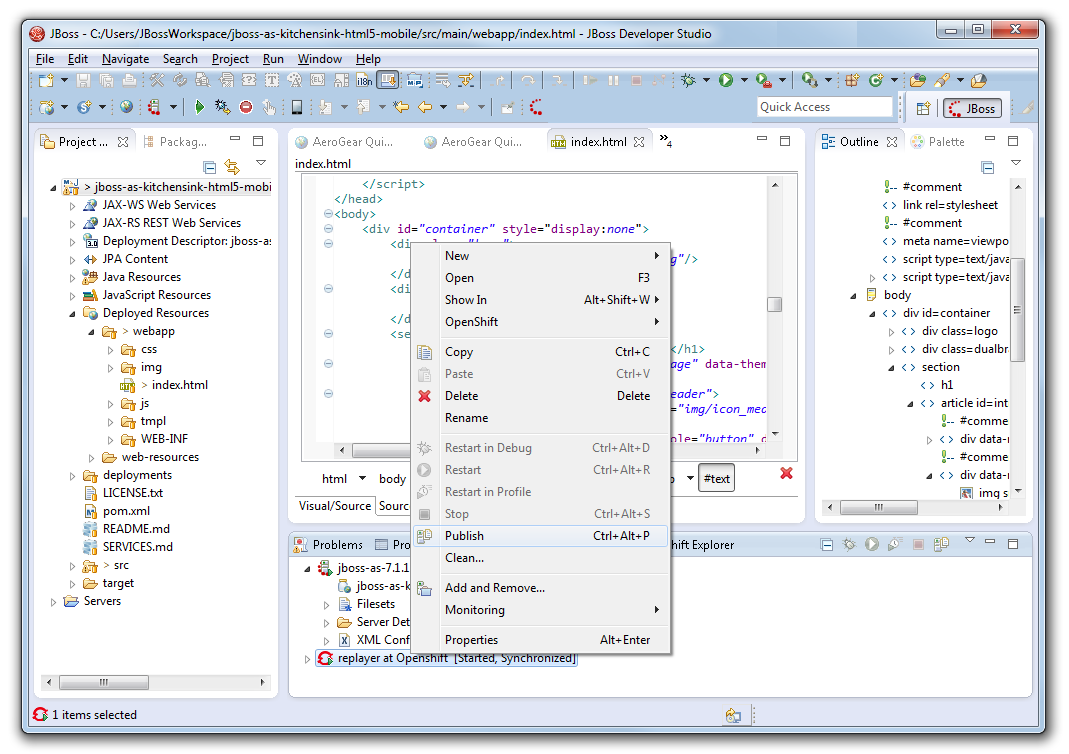
Now, it is time to publish the app. To do so, right-click on the OpenShift server item in the “Servers” tab and then choose “Publish”. That’s all.
This is how I published my new app My YouTube RePlayer.
Publish the project and deploy it on OpenShift.
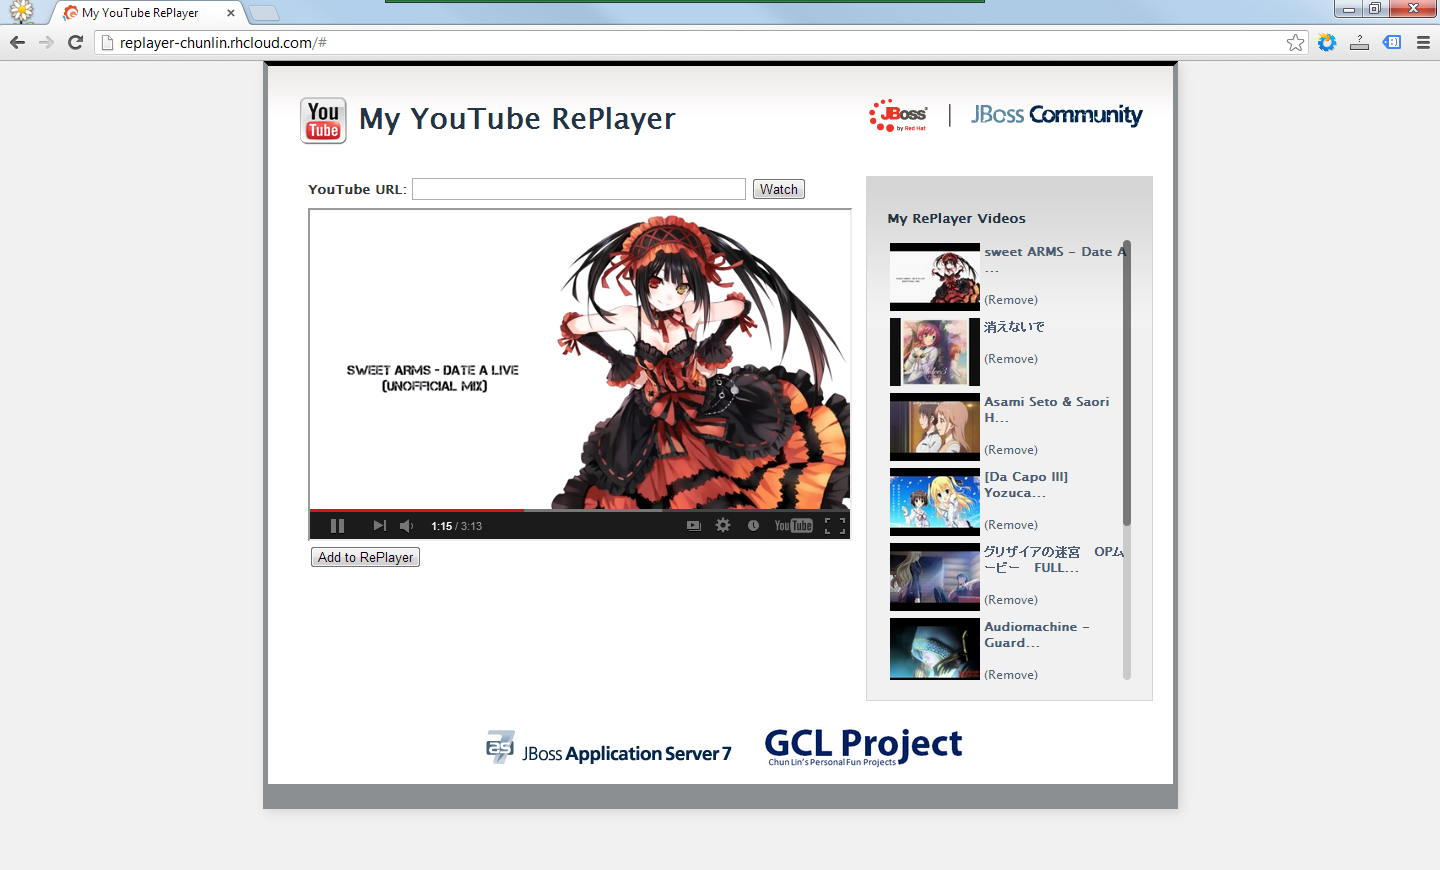
My YouTube RePlayer
So, what is My YouTube RePlayer that I built in the project above?
I love listening to music and thus I like YouTube as well. However, there is a feature that is still not yet found on YouTube website. The auto replay. To solve this problem, I have been working on several versions of YouTube Re-Player since 2009. Some are web applications and some are desktop applications.
Playing a well done unofficial mix of “Date a Live” done by DaRk5nAk3 on My YouTube RePlayer.
This time, I am using the HTML5 technology in my new YouTube Re-Player app. Instead of using database, I directly use the available web storage to store the video ids (YouTube has unique id assigned to each online YouTube video). However, I think it is still good to have a database so that the data won’t be just stored locally on user’s browser and thus can be synced over different PCs with the same login.
Thus, although the workshop is more on building a Java web application, I end up doing my own HTML 5 application. Haha. Oh well, see if I got time to continue this project next time.