It’s quite scary when managers suddenly said something like that. I migrated several web applications which were previously hosted on-premise to Microsoft Azure previously. In order to have least number of codes to change, we chose to use Azure IaaS Virtual Machines (VMs).
With PaaS, Azure handles most of the system administration work for us. One thing to take note is that even though the applications are still running in VMs, Cloud Service is PaaS, not IaaS. Hence, the developers can simply focus on the deployment of the applications. The platform management will be handled by Azure.
Using PaaS does sound easy. However, unlike IaaS, we need to modify our codes to turn the project into a scalable Azure Cloud Service project that runs on Azure. Also, the disks used in PaaS VMs are no longer persistent. So storage needs to be handled differently.
When Windows Azure was first announced in Singapore in 2009, I was still studying in NUS School of Computing. I thus had the opportunity to join the Azure student workshop to learn about this cool technology. At that time, publishing a web application to Azure PaaS took about 20 to 30 minutes.
Windows Azure Platform back in 2009
Today, the deployment speed has been shortened to around 6-10 minutes. The interface of Azure Management Portal has been greatly improved as well. Luckily, some good features, especially the Production and Staging Slots, are still around.
Production and Staging Slots are interesting feature in Azure PaaS. There is no such capability in IaaS because in IaaS, the slot will always be production.
Hence, in IaaS, if we want to upload a new version of codes, normally first we will just go to the live server and then replace the existing applications with the updated version. That normally will make the live web applications go down for a few minutes. This is because the affected websites in IIS may be restarted. In addition, when there is a need to rollback the latest upload on live server, there will be cause troubles for developers too.
In PaaS, we have two slots, Production and Staging. Both of them are given different Virtual IP. The new updates of our code can thus be deployed on the Staging Slot first. Once tested successfully, we simply perform a Virtual IP Swap. The staging environment takes over the VIP of the production environment and then the current production environment takes the staging VIP to become staging environment. The swap happens quickly because the only thing changed is the VIPs. What if we want to rollback the latest upload? Just swap again!
Zero-Downtime Deployment: Slot Swap
The Slot Swap is so interesting that I would like to demo it here.
When we publish the web application to Azure through Visual Studio, we can choose whether to publish it directly to Production Slot or just Staging Slot.
Choose to publish to Production or Staging environment.
After the code is successfully deployed to Staging Slot, an URL having GUID string will be created and shown in Microsoft Azure Activity Log window in Visual Studio. Click on the link to visit our web application deployed on Staging Slot.
After tested the web application successfully, we can now swap it with Production Slot.
Let’s swap Production and Staging Slots!
When I did a swap, the entire process took less than 1 minute to complete. This is very impressive.
Is There a Way to Use Different AppSetting and ConnectionString Based on Production or Staging Environment?
When I first started with Azure Cloud Service, I always thought the “Staging Slot” is meant for testing environment. However, later it turns out that the real purpose of having Production and Staging Slots is to achieve zero-downtime deployment. Hence, the word “staging” should be renamed to something like “Pre-Production”.
Hence, it’s clear that we should not change our web.config based on the environment. This is simply because Staging Slot is not designed for testing environment. So, for testing environment, we should not use the Staging Slot. Instead, we have to setup another Azure Cloud Service for testing purpose.
Many people have been discussing this issue on Stack Overflow.
For me, I will still use the Staging environment for QA. However, to do this, I have to re-configure the web.config in staging before and after VIP swapping. After a swap, I need to publish again the project to staging with testing configuration.
For those who are familiar with Azure PowerShell commands, there are actually two commands to make app settings and connection strings not to be swapped together with the slots.
Wait… This is for Azure Web App only! Yes, so we now (May 2015) still have no such convenience solution for Azure Cloud Service.
For Azure Web App only: We can now make App Settings and Connection Strings to be sticky to the slots.
Pricing
Cloud Service offers a lower rate as compared to Virtual Machine. Previously, when we were using just A1 instance VM in Standard Tier, we have to pay about USD 67 per month with a disk size of 40GB (in 2015). However, for Cloud Service, we pay only about USD 60 per month and the C drive comes with it is already 224GB (in 2015). Wow!
Even so, we need to keep the cost of hosting application on Azure PaaS low because it’s always challenging to answer manager’s questions like “how come we pay even more to host on cloud?”.
Another of my way to save money is to setup multiple website projects in one web role. By doing so, I don’t have to setup different instances for different website projects. There are many approaches to achieve the goal of multiple websites in one web role. Currently, I have only tried partitioning a domain by using virtual application.
To add a virtual web application to an existing web role, I right-click my solution in Solution Explorer in Visual Studio. After that, I create a new Web Application project.
Add new virtual web application to an existing web role.
After that, in the ServiceDefinition.csdef, there should be following lines under the <Sites> element.
To access the newly added virtual web application, I just need to append the value of the name attribute to the URI of the primary website. For example, if my primary website is http://www.mywebsite.com, then the virtual web application above will be accessed at http://www.mywebsite.com/admin.
Yup, so now we can have multiple websites in one web role even though we are using PaaS.
It has been about half a year since I started to learn ASP .NET MVC and Entity Framework (EF). In this period of time, I have learnt about not just MVC and EF, but also Azure PaaS, Google Maps API, web application security, cool jQuery plugins, Visual Studio Online, etc.
In the beginning of May, I started to note down useful things I’d learned in my learning journey. Months of bringing together information in this summer has helped me compile my notes about what I’ve learned in the past 6 months. I have currently completed compiling notes for 17 topics that I’ve learnt in this summer.
I listed down the title of the 17 posts below to give you a quick overview about all the 17 topics.
I’m working in Changi Airport. The office working hour is from 8:30am to 6pm. In addition, I am staying quite far from the airport which will take about one hour for me to travel from home to office. Hence, the only time that I can have sufficient time to work on personal projects is weekends.
This summer self-learning project is originally planned to be done by the end of May. Normally, it takes me about one day to finish writing a post. After that, if I find any new materials about the topics, I will then modify the post again. Sometimes, however, I am just too tired and I would not write anything even though it’s weekend. Hence, I end up finishing all the 17 topics three months later.
This summer learning project covers not only what I’ve learnt in my personal projects, but also new skills that I learn in my workplace. I always enjoy having a chat with my colleagues about the new .NET technology, app development, Azure hosting, and other interesting development tools. So yup, these 17 articles combine all the new knowledge I acquire.
I’m also very happy that that I am able to meet developers from both .NET Developers Community Singapore and Azure Community Singapore and share with them what I’ve learnt. That gives me a great opportunity to learn from those experienced .NET developers. =)
Azure Community March Meetup in Microsoft Singapore office.
I am not that hardworking to work on personal projects every day. Sometimes, I will visit family and friends. Sometimes, I will travel with friends to overseas. Sometimes, I will play computer games or simply just sleep at home. So ya, this self-learning project takes a longer time to complete. =D
Working on personal projects after work is stressful also. Yup, so here is a music that helps reducing my stress. =)
I first said hi to ASP .NET MVC in the beginning of this year. On 28th January, I attended the .NET Developers Singapore meetup and listened to Nguyen Quy Hy’s talk about ASP .NET MVC. After that, I have been learning ASP .NET MVC and applying this new knowledge in both my work and personal projects.
After 6 months of learning ASP .NET MVC, I decided to again write down some new things that I have learnt so far.
URL in ASP .NET MVC and Google Recommendation
According to Google recommendation on URLs, it’s good to have URLs to be as simple as possible and human-readable. This can be easily done with the default URL mapping in ASP .NET MVC. For example, the following code allows to have human-readable URL such as http://www.example.com/Ticket/Singapore-Airlines.
In addition, Google also encourages us to use hyphens instead of underscores in our URLs as punctuation to separate the words. However, by default, ASP .NET MVC doesn’t support hyphens. One of the easy solutions is to extend the MvcRouteHandler to automatically replace underscores with hyphens.
Then in the RouteConfig.cs, we will replace the default route map to the following mapping.
routes.Add(
    new Route("{controller}/{action}/{id}",
    new RouteValueDictionary(
        new { controller = "Home", action = "Index", id = UrlParameter.Optional }),
        new HyphenatedRouteHandler())
);
By doing this, we can name our controllers and actions using underscores and then we set all the hyperlinks and links in sitemap to use hyphens.
There are actually many discussions about this online. I have listed below some of the online discussions that I found to be interesting.
Previously when I was working on WPF projects, I learnt the MVVM design pattern. So, it confused me when there was also a “View Model” in MVC. I thought with the use of View Model in ASP .NET MVC, I would be using MVVM too. It later turns out to be not the case.
Why is ViewModel able to provide the V a single object? This is because ViewModel can shape multiple entities from different data models into a single object.
public class CartViewModel
{
    ...

    public List<CartItems> items { get; set; }

    public UserProfile user { get; set; }
}
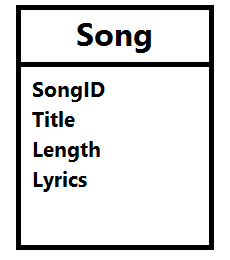
Besides, what I like about ViewModel is that it contains only fields that are needed in the V. Imagine the following model Song, we need to create a form to edit everything but the lyrics, what should we do?
The Song model.
Wait a minute. Why do we need to care about this? Can’t we just remove the Lyrics field from the edit form? Well, we can. However, generally we do not want to expose domain entities to the V.
If people manage to do a form post directly to your server, then they can add in the Lyrics field themselves and your server will happily accept the new Lyrics value. There will be a bigger problem if we are not talking about Lyrics, but something more critical, for example price, access rights, etc.
By using ViewModel, we need to having mapping code to map between the view model and the domain model. However, writing mapping code is very troublesome especially when there are many properties involved.
Luckily, there is AutoMapper. AutoMapper performs object-object mapping by transforming an input object of one type into an output object of another type.
Mapper.CreateMap<Location, LocationViewModel>();
AutoMapper has a smart way to map the properties from view model and the domain model. If there is a property called “LocationName” in the domain model, AutoMapper will automatically map to a property with the same name “LocationName” in the view model.
Session, ViewData, ViewBag, and TempData
In my first e-commerce project which is using ASP .NET, Session is widely used. From small things like referral URL to huge cart table, all are stored in Session. Everyone in the team was satisfied with using Session until the day we realized we had to do load balancing.
Another problem of using In-Process Session State is that once there is a restart on IIS or the server itself, the session variables stored on the server will be gone. Hence, for every deploy to the server, the customers will be automatically logged out from the e-commerce website.
Then you might wonder why we didn’t store session state in a database. Well, this won’t work because we store inserialisable objects in session variables, such as HtmlTable. Actually, there is another interesting mode for Session State, called StateServer. I will talk more about it in my another post about Azure load balancing.
This is to return an instance of the JsonResult class.
(4) success
If you are calling the GetAllMovies() through AJAX, probably you can do something as follows to check if there is any exception or error thrown.
$.ajax({
url:'/GetAllMovies',
success: function(data){
// No problem},
error: function(XMLHttpRequest, textStatus, errorThrown){
var obj = JSON.parse(jqXHR.responseText);
alert(obj.error);}});
The error callback above will only be triggered when the server returns non-200 status code. I thus introduced another status field to tell the caller more info, for example an exception raised in C# code or any invalid value being passed to GetAllMovies method through AJAX. Hence, in the AJAX call, we just need to update it to
$.ajax({
url:'/GetAllMovies',
success: function(data){
if (data.success) {
// No problem
} else {
alert(data.message);
}},
error: function(XMLHttpRequest, textStatus, errorThrown){
var obj = JSON.parse(jqXHR.responseText);
alert(obj.error);}});
To send email from my MVC project, I have the following code to help me out. It can accept multiple attachments too. So I also use it to send email with report generated using the code above attached. =)
public Task SendEmail(
    string sentTo, string sentCC, string sentBCC,  string subject, string body,
    string[] attachments = null)
{
    // Credentials:
    var credentialUserName = "<username provided by Amazon SES>;
    var sentFrom = "no-reply@mydomain.com";
    var pwd = "<password provided by Amazon SES>";

    // Configure the client:
    System.Net.Mail.SmtpClient client =
        new System.Net.Mail.SmtpClient("email-smtp.us-west-2.amazonaws.com");
    client.Port = 25;
    client.DeliveryMethod = System.Net.Mail.SmtpDeliveryMethod.Network;
    client.UseDefaultCredentials = false;

    // Create the credentials:
    System.Net.NetworkCredential credentials =
        new System.Net.NetworkCredential(credentialUserName, pwd);
    client.EnableSsl = true;
    client.Credentials = credentials;

    // Create the message:
    var mail = new System.Net.Mail.MailMessage(sentFrom, sentTo);
    string[] ccAccounts = sentCC.Split(new char[] { ';' }, StringSplitOptions.RemoveEmptyEntries);

    foreach (string ccEmail in additionalCcAccounts)
    {
        mail.CC.Add(ccEmail);
    }

    string[] bccAccounts = sentBCC.Split(new char[] { ';' }, StringSplitOptions.RemoveEmptyEntries);

    foreach (string bccEmail in additionalBccAccounts)
    {
        mail.Bcc.Add(bccEmail);
    }

    mail.Subject = subject;
    mail.Body = body;
    mail.IsBodyHtml = true;

    if (attachments != null)
    {
        for (int i = 0; i < attachments.Length; i++)
        {
            mail.Attachments.Add(new System.Net.Mail.Attachment(attachments[i]));
        }
    }

    client.SendComplete += (s, e) => client.Dispose();
    return client.SendMailAsync(mail);
}
To send an email without attachment, I just need to do the following in action method.
var emailClient = new Email();
await emailClient.SendEmail(
    "to@mydomain.com", "cc1@mydomain.com;cc2@domain.com", "bcc@mydomain.com",
    "Email Subject", "Email Body");
To send email with attachment, I will then use the following code.
string[] attachmentPaths = new string[1];

var reportServerPath = Server.MapPath("~/report");

attachmentPaths[0] = reportServerPath + "\\Report.xls";

var emailClient = new Email();
await emailClient.SendEmail(
    "admin@mydomain.com", "", "",
    "Email Subject", "Email Body", attachmentPaths);
Yup, that’s all what I have learnt so far in my MVC projects. I know this post is very, very long. However, I am still new to MVC and thus I am happy to be able to share with you what I learn in the projects. Please correct me if you find anything wrong in the post. Thanks! =)
I am very fortunate to be able to attend the Singapore .NET Developer meetup of this month. The topics of the meetup are MVVM, Windows 10, and Win2D. We are glad to have experienced developer, Riza, to be one of the speakers.
Riza’s sharing his thoughts about Win2D. (Image Credit: .NET Developer Singapore Community)
Retained Mode does not directly cause actual graphic rendering. Example: WPF.
Immediate Mode will directly cause actual graphic rendering. Example: Direct2D and System.Drawing library.
Last year, Microsoft proudly announced the Win2D which developers could use it to bring hardware accelerated Direct2D graphics to Windows 8.1 Universal Apps. This undoubtedly is a great news for game developers who would like to publish their games on Surface and Windows Phone in the future.
Let’s Start Coding!
I thus decided to read through some online tutorials to try out this new cool API. The following are two tutorials that I read.
The first app that I developed is an app similar to what is being shown in the first tutorial listed above.
Pavel’s code doesn’t work well when I am using the latest version of Win2D from Nuget (Version 0.0.20). For example, the way he sets the speed of the moving circle is as follows.
circle.Speed = new Vector2(-circle.Speed.X, circle.Speed.Y);
However, this won’t work in my project. So, I changed it to the code below.
circle.Speed = new Vector2() { X = -circle.Speed.X, Y = circle.Speed.Y };
Before doing the coding, there is a need to add Win2D to the Windows 8.1 Universal App project first.
The interface of Nuget Package Manager has changed in VS2015! Here, we can find Win2D package.
VS2015 and Azure
As you can see from the screenshot above, it’s actually VS2015 on Microsoft Azure! On Azure, we can easily create a VM with one of the following editions of VS2015 installed: Professional, Enterprise, and Community. Hence, I no longer need to download VS2015 to my own laptop. =)
However, when I first started the VS 2015 on the new VM, I encountered two problems once I tried to compile my Windows 8.1 Universal App.
Firstly, it said developer license couldn’t be approved because of having no Desktop Experience feature enabled.
“We couldn’t get your developer license for Windows Server 2012 R2”
This was easily solved by enabling the Desktop Experience feature. In the beginning, I was having a hard time finding where to enable the Desktop Experience. Thanks to a blog post written by Tamer Sherif Mahmoud, I found the option as shown in the following screenshot.
Desktop Experience option is actually under User Interfaces and Infrastructure.
Secondly, VS2015 complaint that the Windows 8.1 Universal App couldn’t be activated by the Built-in Adminstrator.
“This app can’t be activated by the Built-in Adminstrator”
In order to use CanvasControl, I need to include Microsoft.Graphics.Canvas.UI.Xaml, as highlighted in green in the code above.
The Logic
The following is my Main method.
public MainPage()
{
    this.InitializeComponent();
    _width = (float)Window.Current.Bounds.Width;
    _height = (float)Window.Current.Bounds.Height;
    _timer.Tick += (s, e) => {
        Dictionary<CircleData, int> reference = _circles.ToDictionary(x => x.Key, x => x.Value);

        foreach (var circleKeyPair in reference)
        {
            var circle = circleKeyPair.Key;

            int circleRadiusChangingSpeed = circleKeyPair.Value;

            float posX = circle.Speed.X + circle.Center.X;
            float posY = circle.Speed.Y + circle.Center.Y;
            circle.Radius += circleRadiusChangingSpeed;

            if (circle.Radius > _height / 4 || circle.Radius <= 0)
            {
                _circles[circle] = -1 * circleKeyPair.Value;
            }

            var radius = circle.Radius;
            if (posX + radius > _width || posX - radius < 0)
            {
                circle.Speed = new Vector2() { X = -circle.Speed.X, Y = circle.Speed.Y };
            }
            else if (posY + radius > _height || posY - radius < 0)
            {
                circle.Speed = new Vector2 { X = circle.Speed.X, Y = -circle.Speed.Y };
            }
            circle.Center = new Vector2 { X = circle.Speed.X + circle.Center.X, Y = circle.Speed.Y + circle.Center.Y };
        }

        _canvas.Invalidate();
    };

    _timer.Start();
}
In the code, I first define the area to have the circles by declaring two variables _width and _height to be the width and height of the current window. I can’t use the width and height (or even actualWidth and actualHeight) of the grid because they are always 0.
Then same as Pavel, I also move the circles around by having the following code.
circle.Center = new Vector2 { X = circle.Speed.X + circle.Center.X, Y = circle.Speed.Y + circle.Center.Y };
Here, I can’t set X = posX and Y = posY because the circle.Speed here, which is used to define the moving speed and direction, can be already different as the circle.Speed when posX and posY were calculated.
In addition, I also add in the code to change the size of the circle every time it moves. The circle will grow until a certain size and then its radius will be decreased to 0. Once the radius is 0, it will start to increase again.
For the OnTapped and OnDraw, I am using the same codes as Pavel’s.
The following screenshot shows the colourful circles created by clicking on the app a few times.
Colourful circles created with DrawCircle.
That is done using DrawCircle. So, let’s see what will happen if I change to use FillCircle with an image, as taught in the second tutorial mentioned above.
The CircleInnerImageBrush is created in the following way.
CanvasBitmap image = await CanvasBitmap.LoadAsync(_canvas.Device,
    new Uri("<URL to the image here>"));
CanvasImageBrush imageBrush = new CanvasImageBrush(_canvas.Device, image)
{
     ExtendX = CanvasEdgeBehavior.Clamp,
     ExtendY = CanvasEdgeBehavior.Wrap,
     SourceRectangle = new Rect(0, 0, image.Bounds.Width, image.Bounds.Height)
};
Then I am able to get the following cool effects!
FillCircle + Image
Win2D is Open Source
That’s what I have learnt so far after listening to Riza’s 10-minute sharing on Win2D. I will probably try out the API more in the near future because Win2D looks very promising!
In case, you wonder how much I spent on running VS2015 on Azure, running an A4 (8 cores, 14GB memory) instance for about one week costed me about USD 90.