As a software engineer, it’s always fun when trying out to build some new technology and new tool. It all started with a question from my colleagues, “Is it possible to build an app for Samsung Gear?” The answer is yes, but how? I had never built an app for Android Wear and I didn’t even own any smart watch. Hence I decided to give it a try.
First View
I built the app using Android Studio.
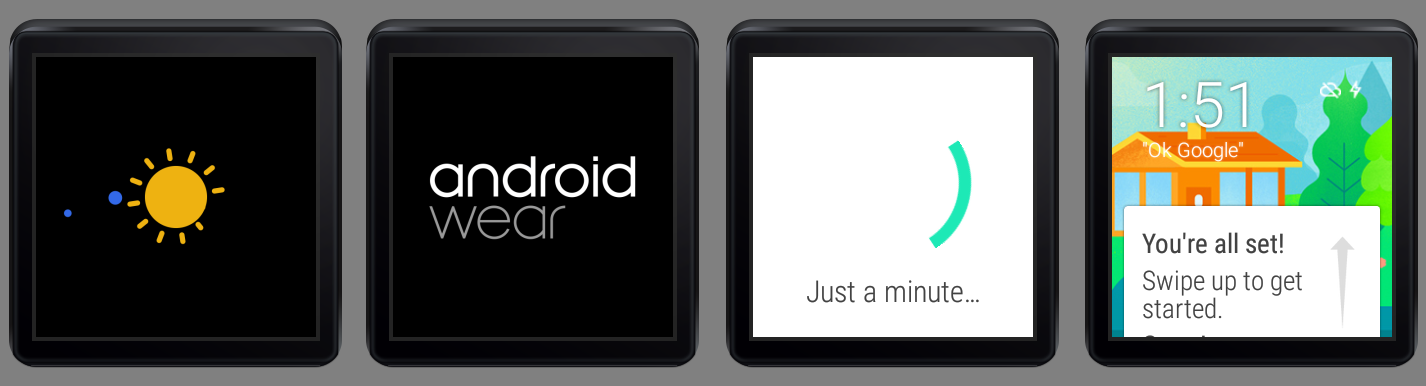
I like the launching animation on the Android Wear emulator. Below are some amazing screenshots taken.
Android Wear Emulator launched!
In fact, I could not get the emulator in the first place. When I tried to launch the Android Wear Square emulator, it threw the following error messages on Android Studio.
emulator: ERROR: x86 emulation currently requires hardware acceleration!
Please ensure Intel HAXM is properly installed and usable.
CPU acceleration status: HAX kernel module is not installed!
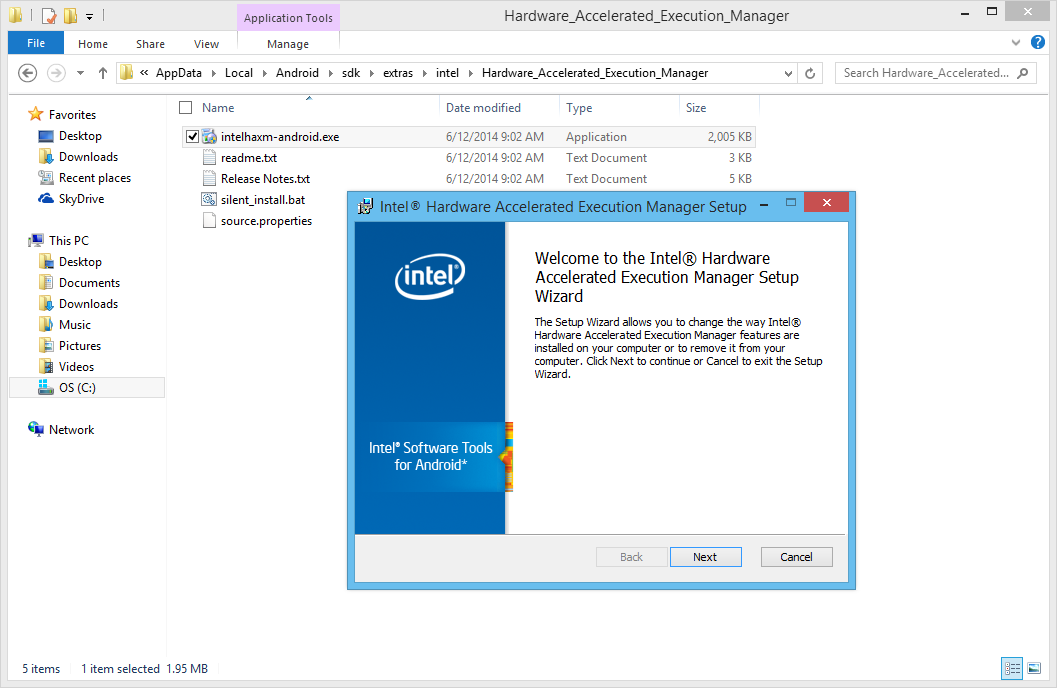
Hence, what needed to be done was just installing the Intel x86 Emulator Accelerator (HAXM) installer under the Extras folder in Android SDK Manager.
After the installation is done, there is also a need to run the installer located in the Hardware_Accelerated_Execution_Manager folder. Once it is installed on the computer, the Android Wear emulator should be able to be launched!
The Intel Hardware Accelerated Execution Manager Setup
First Draft
Currently, I haven’t finished my first app for Android Wear, Gym Challenge. However, there are already some screenshots available for it which demonstrates the look-and-feel of the application on the Android Wear Square emulator.
Gym Challenge homepage
One of the features in Gym Challenge is to keep track of the user’s time spent on gym.
Meanwhile, I still have no idea on how to try out the functionality to get the heart rate of the user without connecting the emulator to the real smart watch. So, things like SensorManager mSensorManager = ((SensorManager)getSystemService(SENSOR_SERVICE)); is never tested on my app. =P
Anyway, this is just a beginning of my Android Wear app development journey. Feel free to comment or correct me if you spot anything wrong in this post. Thanks! =)
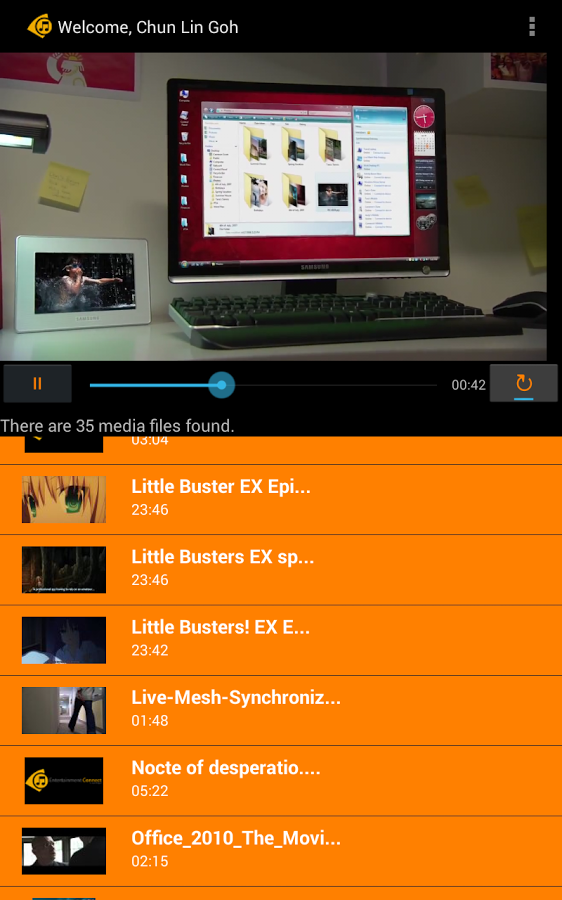
It turns out that both VideoView and ListView are put in linear layout with vertical orientation. So, I just need to assign some nonzero values to the layout weight of them and the video now looks very nice on Android tablet.
Entertainment Connect on Galaxy Tab 4
Log Out and Go Back
Entertainment Connect retrieves media files from the user’s OneDrive. Hence, there is a need to handle user login and logout activities correctly. Android devices all have this Back button. Hence, in the first version of Entertainment Connect, user can log out from the app and then click the Back button to view the media list again. To prevent that, I added following two lines in the logout method.
intent.setFlags(Intent.FLAG_ACTIVITY_CLEAR_TOP);// To clean up all activities
finish();
Calling finish() because the current activity (Player Activity) is done and should be closed after logout. Interestingly, without calling it, the user can still go back to the Player Activity after logging out even though FLAG_ACTIVITY_CLEAR_TOP is used.
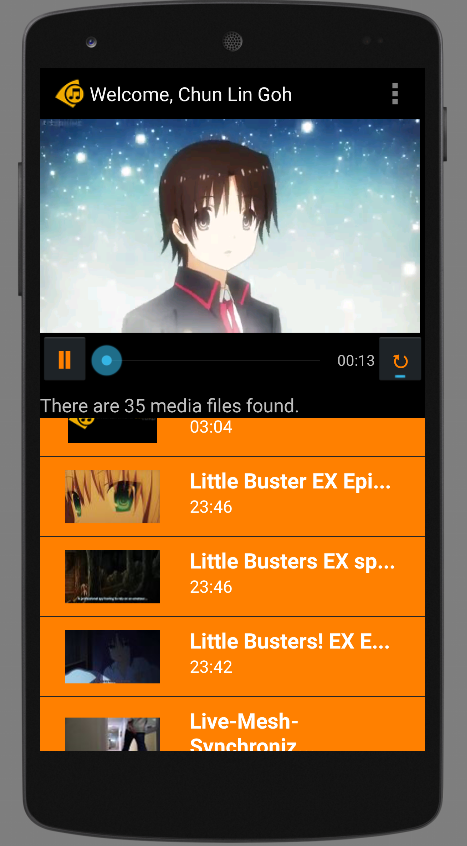
Soon after I completed the application for Windows, I found out that more and more of my family and friends were buying Android phones. Thus, I decided to build another version of Entertainment Connect for Android.
Entertainment Connect is now available on Android devices!
Today, I would like to share what I had learnt in developing my first personal Android app which makes use of Microsoft Live SDK for Android.
New IDE: Android Studio
I have been using Eclipse for Android app development in my work. Coding with Eclipse is not easy. Luckily, Google just released Android Studio, an official IDE built specifically for Android with much powerful GUI designer. In addition, due to the fact that Google encourages developers to migrate to Android Studio, I decided to try it out.
Android Studio with the login page of Entertainment Connect.
Working with Microsoft Live SDK
Yesterday, I just received notifications from Live SDK Github saying that the team was going to support and migrate to Android Studio. Finally. When I started this project, the Live SDK only supports Eclipse ADT.
It is very easy to include Live SDK to the project in Android Studio. Firstly, I need to download the Live SDK. Just download the whole project via ZIP is enough. The project consists of some useful samples which teach us how to properly use the SDK.
Secondly, I need to add new module under Project Structure.
Add new module in Project Structure.
Thirdly, I just choose the “Import Existing Project” option which will import the Eclipse project (Live SDK) as a module.
Import existing Eclipse project as module.
Finally, to make my application being able to use the Live SDK, I need to create introduce a module dependency to my app module, as shown in the screenshot below.
Introduce module dependency between app and src (Live SDK).
With these few lines of code, I can already get a working media player with all the controls, such as play, pause, progress bar, etc.
However, this is not the case in Android app development. I am using VideoView. Hence, I also need to build my own play/pause functions and progress bar.
Also, I realized there was a bug if I switched from playing video file to audio file on VideoView. The image part of the previous video will stay even though the audio starts playing already. Hence, I added the following few lines of code to reset the background image of the VideoView so that the image of previous video will be “erased”.
videoPlayer.setBackgroundColor(Color.TRANSPARENT);
if (availableMedia.get(position).getmMediaFileName().toLowerCase().endsWith(".mp3")) {
    videoPlayer.setBackgroundColor(Color.BLACK);
}
Loading the thumbnail of media from OneDrive is also a headache in Android.
In Windows 8 app, after adding the items returned from Live SDK to a collection, I can easily bind the items to the template easily. After that, the thumbnails will be automatically shown on the screen smoothly.
<!-- Template of the list items to show available music/videos -->
<div id="mediumListIconTextTemplate" data-win-control="WinJS.Binding.Template" style="display: none">
    <div class="mediumListIconTextItem">
        <img onerror="this.src='/images/default-video-preview.png';" class="mediumListIconTextItem-Image" data-win-bind="src : picture" />
        <div class="mediumListIconTextItem-Detail">
            <h4 data-win-bind="innerText: name"></h4>
            <h6 data-win-bind="innerText: duration"></h6>
        </div>
    </div>
</div>
Yes, it is fun. However, it’s slower than Windows 8 app development. It’s just too bad that not a lot of my friends really go Windows Store to download desktop apps. So I have no choice but to build Android version of my app also.
I will try to publish Entertainment Connect to Google Play soon after I have fixed my debit card issue. Currently, I still encounter problems on paying developer registration fee with Google Wallet. Oh well.