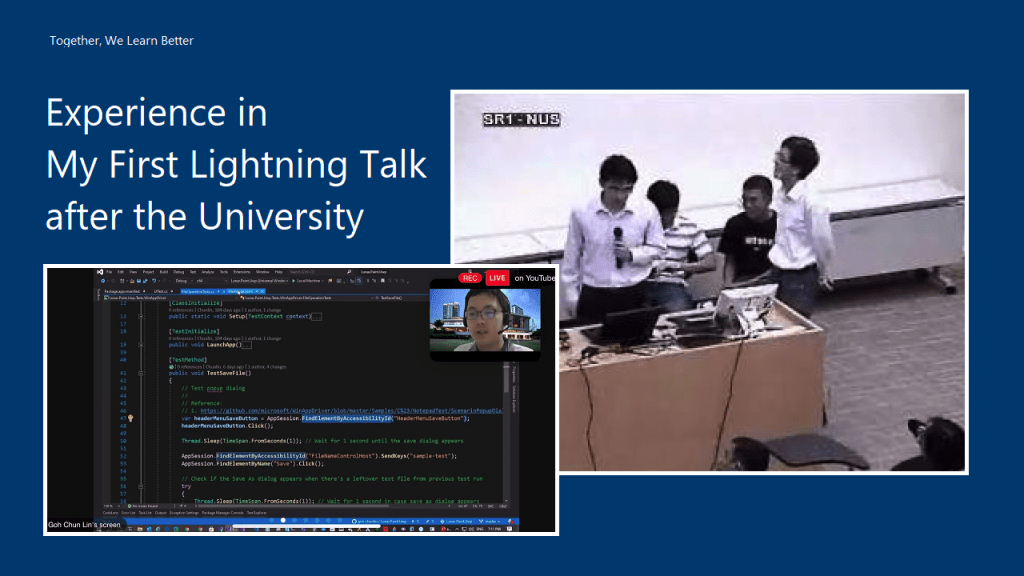
[Image Caption: Giving lightning talk about SOA in NUS with friends when I was a student there.]
After graduation from the NUS, I always gave talks in several .NET and Microsoft Azure related events. I was always given the time which is more than enough to cover the entire topic. For example, last year, I was giving a one-hour talk in the Sarawak university. Hence, giving a lightning talk which I’m only allocated a 10-minute slot is very challenging to me.
In order to help me to better prepare for future talks, I thus would like to note down some of the key things in my preparation journey for this 10-min lightning talk. I hope my notes here will help those who are new to giving talks as well.
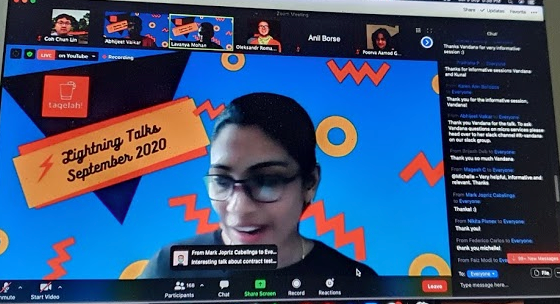
[Image Caption: In the past, TAQELAH meetup was hosted offline. After the COVID-19, all meetups have to move to online but that does not stop more than 500 people signing up for their online meetup event. (Image Source: Glen Fey’s Twitter)]
Content Preparation
Normally, as a speaker, we can choose the topic that we’d like to talk about ourselves. Hence, it’s very important to choose a relevant topic which is going to be useful to the audience.
On top of that, it’s better to share something that we are already quite familiar with or we have been using for quite a while. So I’d never shared anything about Kubernetes, Blockchain, or any other cool technologies in the public talk because I totally have no experience with them even though there are the “hot” topics that will excite the audience.
The topic I choose for TAQELAH sharing session is about doing GUI test automation for UWP apps with Appium and WinAppDriver. I am actually using the same tools in my work. Besides, I have also blogged about it and shared the knowledge with my teammates earlier. So I know at least I don’t make any huge mistake in my blog post. Thus, the content that I use for the talk is mostly from the blog post. This saves me a lot of time on preparing it and I am sure that it’s helpful to other people who are facing the same issues as me in UWP GUI testing.
Another good thing for having a blog post for our topic is that audience can refer to it for more details after the event because to cover all details in a lightning talk is impossible. So that is one way to keep in touch with the audience as well.
Rehearsal and Dry Run
The actual event was on Saturday and I had started prepared for it since Sunday, i.e. 6 days before the event. Everyday I took about one hour to practice it.
Fortunately, TAQELAH team is very friendly that they specially arrange a section for me to do a dry run on Friday evening, which is one day before the event. Not only that, the organising team has also grouped all the speakers in both Telegram and Slack. So we are all always kept updated with the latest arrangement or other news about the event.
So I really must thank the team for putting so much effort to make this event a successfuly one.
[Image Caption: TAQELAH team specially organised a dry run session for speakers before the event.]
Notion and OBS
I have the speech transcript prepared so that I know what to say. Here I am using an app called Notion because it comes with both desktop and app versions for free.
Few days before the talk, I started to work on my speech. After that I used OBS to record down my rehearsals. This helps me to easily time my speech and listen to my voice over the microphone.
So after changing the script for about 10 times, I came up with the final version that I will be using for the talk. In fact, I keep on changing the script until the day itself. Finally I managed to cut down my talk to be less than 8 minutes.
Another thing that I like about Notion is that I can lock the document on the app and prevent me to accidentally edit it while scrolling through it on the phone. So I can easily refer to the script during my talk. Even though I don’t entirely follow the script because it will be quite difficult to look at two screens at the same time, the script helps keeping my talk within the time limit.
[Image Caption: How Notion looks like. (Image Source: The Verge)]
Noted down Required Programs
If we have demos in our presentation. It’s also important to note down the programs that are needed. In addition, it is better if those programs are launched before the presentation so we don’t have to spend the time opening the programs one by one.
One hour before my presentation, I realised that the Test Explorer in my Visual Studio suddenly couldn’t run the tests. I had no time to find out the reasons. Instead, I chose to restart the computer. Luckily, the restart helped to fix the issue. Also, since I have the list of programs that are needed, after the restart, I easily setup all the programs for demo in less than one minute.
Mute the Notification
It’s important to make sure that all programs that can show notifications, such as Microsoft Teams, Outlook, Whatsapp, etc are muted or closed during the presentation so that there won’t be any interruption happened during the talk.
Easter Egg
Before it’s my turn, I was listening to the sharing done by other speakers in the session. Interestingly, there are speakers talking tools and concepts which are important in my sharing. Hence, I decided to refer to their talk during my sharing to show that the entire session is related to each other. Hopefully this helps the audience to better learn in the session by combining different pieces of information.
Conclusion
Congratulations and thank you to the TAQELAH team for the awesome event. Good job for the speakers and audience for participating in this sharing session on a rainy Saturday as well.
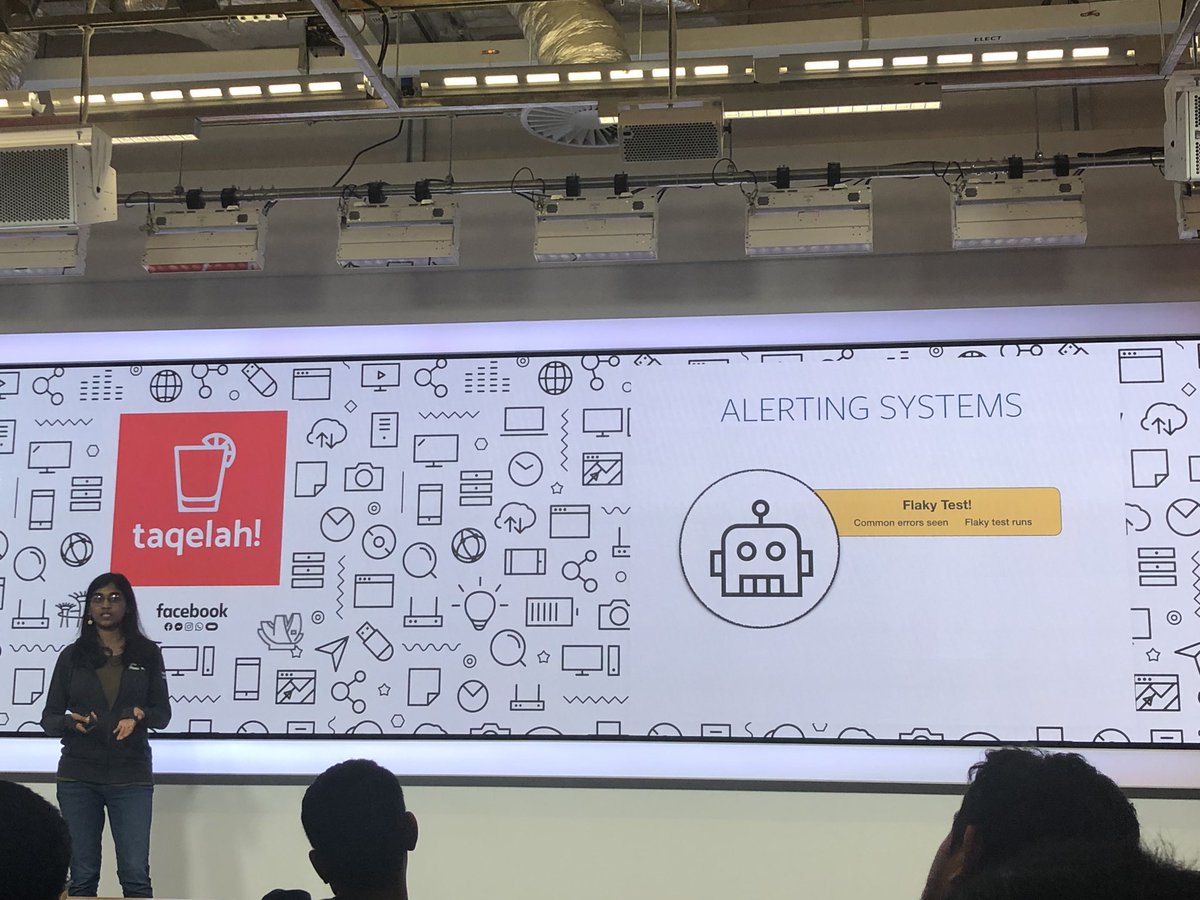
[Image Caption: Lavanya Mohan from TAQELAH team introducing about the event.]
For personal learning and knowledge sharing purposes, I decide to note down what I have tried out with O2DES.NET so far.
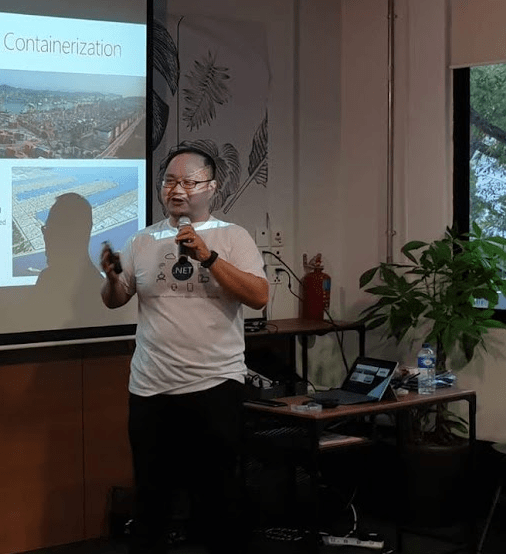
Professor Li Haobin is talking about Docker and containerisation in .NET Conf SG 2019. (Photo Credit: Singapore .NET Developers Community)
What is O2DES?
O2DES.NET is a simulation framework. It is a project started in 2014 by the team and later is used for simulation modelling of mega container port in 2016. Now the team is still actively working on this open-source framework.
O2 stands for Object Oriented and DES stands for Discrete-Event Simulation. I think most of you should have already known about object oriented programming, so I won’t talk about it here.
In the real world, a queue in a restaurant can be modelled for DES. Both the customer queue and the staff can be the system entities. The system events can then be CustomerArrival, FoodOrder, and CustomerDeparture. The random variables characterised to model this system are food ordering time and the customer inter-arrival time.
This actually brings up another interesting point is that, in order to find out the best time to finish the food ordering for the restaurant, we need to use simulation instead of AI.
Modelling and Simulation
So how do we exactly define modelling and simulation?
Simulation of a system is the process of using the model to analyse the performance of the system.
Hence with these two techniques, we can easily understand how the system actually operates. From there, we can then can test and diagnose problems in the system.
Getting Started: Our Basic Model
As a quick start, what we will do is to create a console demo app. Here, we will be using .NET Core 3.0.
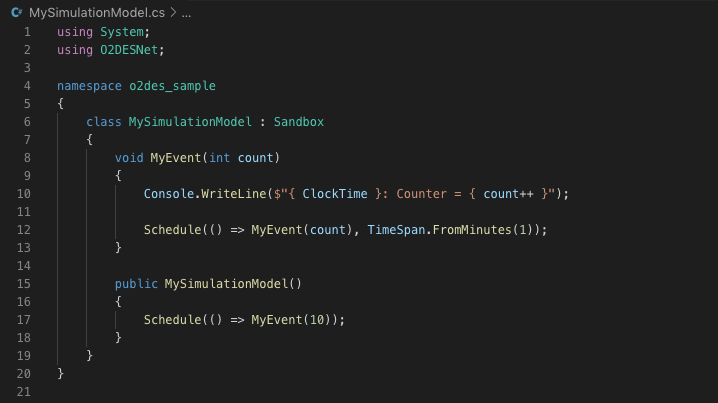
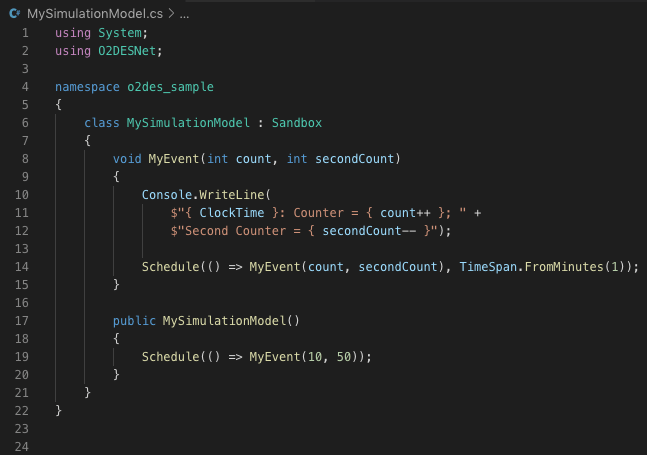
Now we can proceed with our Hello World model which is extended from the abstract class Sandbox from the O2DES.NET library. The following screenshot shows how we do it.
Simple model.
Here we have only one event which is called MyEvent. When this event happens, it will print a line to the console. After that it will schedule next MyEvent in one minute later.
In the simulator constructor, we will schedule our first event which will be executed immediately without any delay.
What is ClockTime? ClockTime is a DateTime variable in Sandbox and its initiate value is DateTime.MinValue. With the Schedule function defined in Sandbox class, the ClockTime will increase by the number of minute based on what we have input.
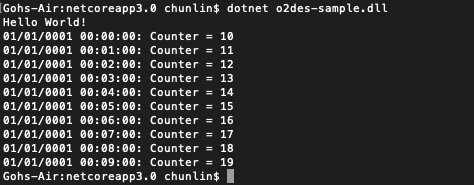
Here, our sample code says TimeSpan.FromMinutes(1), so the console will print the following.
Each line is printed based on the 1-minute schedule.
There are 10 lines above. So does that mean we need to wait 10 minutes to get all of the lines printed? Nope. Since the Sandbox is stimulating time by doing the time ticking, so the time is not our real time. Hence, if we change to print DateTime.Now instead of ClockTime, we will see multiple lines of the same time.
So, why there are only 10 lines printed? It is not because we put in 10 in the MyEvent method. That one is the initial integer for the counter. We need to move on to see how we actually run the model.
stimulation.Run(10) is the reason why only 10 lines printed.
So from this sample code, what we can know is that events can be declared with any number of input parameters because it’s just a normal C# method. However, the return type of the events must always be void. Hence, a void member method of the model class is indifferent from an event.
Also, Professor Li pointed out that all events have to be declared in a model class which it belongs to.
Updated the event to have two parameters.
In addition, with multiple events in a model, one event can also trigger an immediate execution of another event just simply by invoking it as a method.
MyEvent calls MyEventTwo. Can you tell what the outcome is? (Answer below)
Running the model above will have the following results.
Outcome.
What we have seen so far are events in atomic model, i.e. all the events are in a single class. However, what if we have a more complicated system with multiple sub-systems? Luckily, O2DES.NET supports modularisation as well.
For example, we can add the “public” access specifier to the event method, so it can be called from outside of the module.
MyEventTwo now can be accessed from other classes.
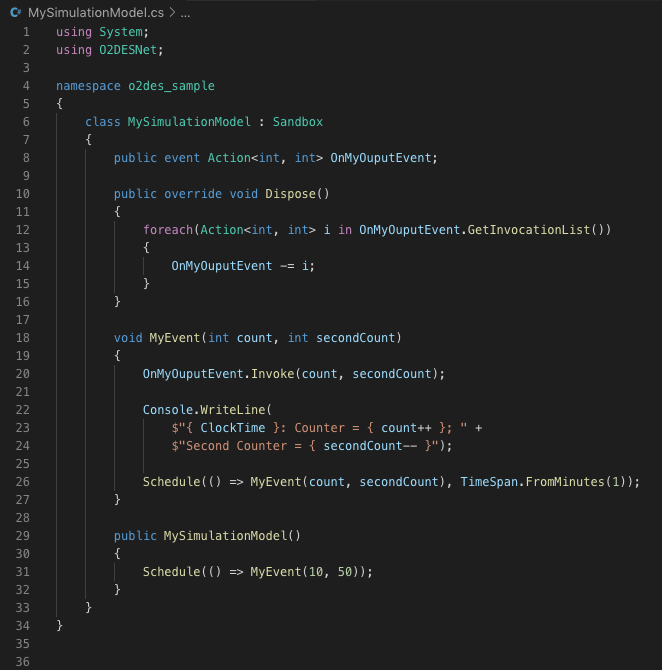
We can also further introduce publisher-subscriber pattern into our model so that we can invite subscribers to subscribe our events.
Declared a publisher method OnMyOutputEvent which can be subscribed.
With the event keyword, it means the OnMyOutputEvent can only be triggered from inside the module, which is through Invoke().
We also added Dispose() method to remove subscribers from the event so that there will be no memory leak.
Now, as an Action type, the event can be subscribed by any external parties which can handle the same parameters.
Scheduling
As we can see in our sample, we have two types of scheduling. First is we call schedule without any parameter, as shown below.
Schedule(() => MyEvent(10, 50));
This means the event will be triggered immediately at the current clock time.
We have also scheduled the event to be called in one minute later by specifying a timespan of one minute.
The first line will thus print “01/01/0001 00:15:00” instead of “01/01/0001 00:00:00”.
Interestingly, the O2DES.NET library also offers methods to generate random time delay based on various statistical distribution. For example, we can have the following.
Using O2DESNet.Distributions to generate random time delay.
Another interesting stuff to take note is the DefaultRS which stands for default random stream. For those who are familiar with MATLAB, random stream should sound familiar to you. The streams can be thought of as a list of pseudo-random numbers that are generated. A stream of random numbers is used to generate samples from the various distributions defined in our model. We are allowed to initiate it with various seed in O2DES.NET.
So running the program above which now has random time delay, we will get something quite similar to the following outcome.
The timespans are different now.
Conclusion
That’s all what I have learned so far. The half-an-hour talk delivered by Profession Li is indeed very interesting and what I have covered here is only the O2DES.NET library part. If you are interested to know more, please refer to the links in References below for more details about this open-source project.
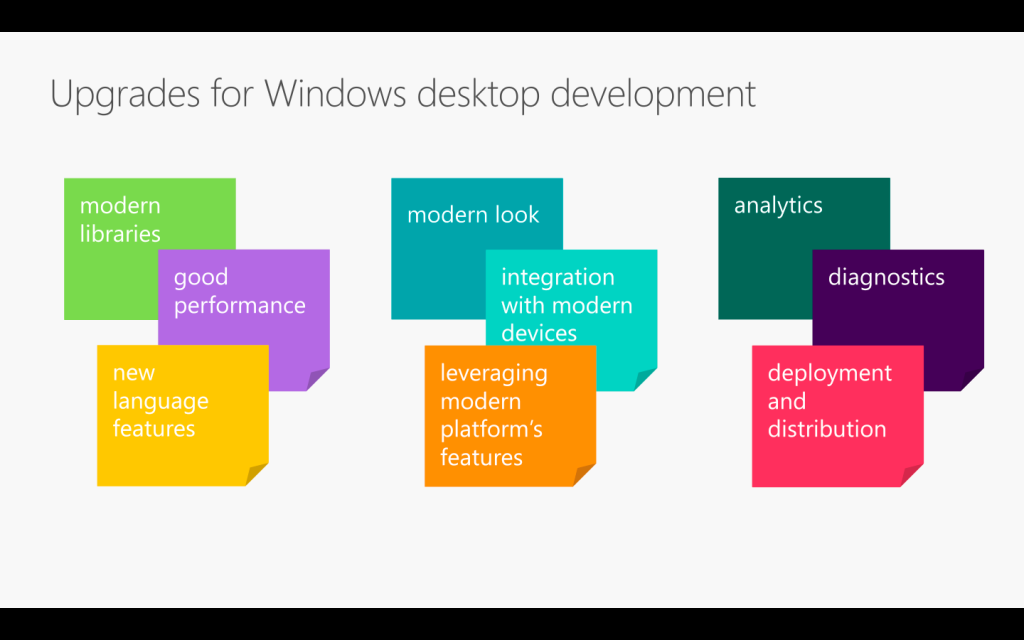
The topic that I delivered in the event is “Development and DevOps of Desktop Apps with .NET Core 3.0”. It is a 45-minute talk combining the content from the following three talks.
From coding, converting, to deploying. (Image Credit: .NET Conf 2019)
If you watch the videos above, the total length is about 70 minutes. So covering three of them in a 45-minute talk is a challenge to me. Luckily, I have Sabrina to help me out by co-speaking with me.
If you have watched our session, you will realise it’s quite different from the official .NET Conf. In this post, I am going to brief you through about my thoughts and development process of our talk content.
Let’s Hashtag Together!
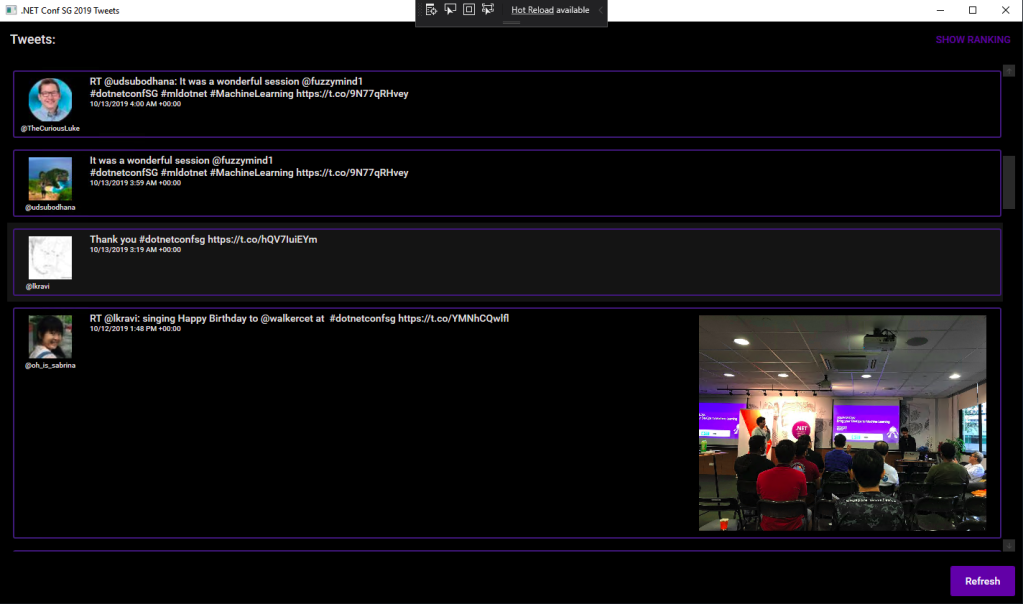
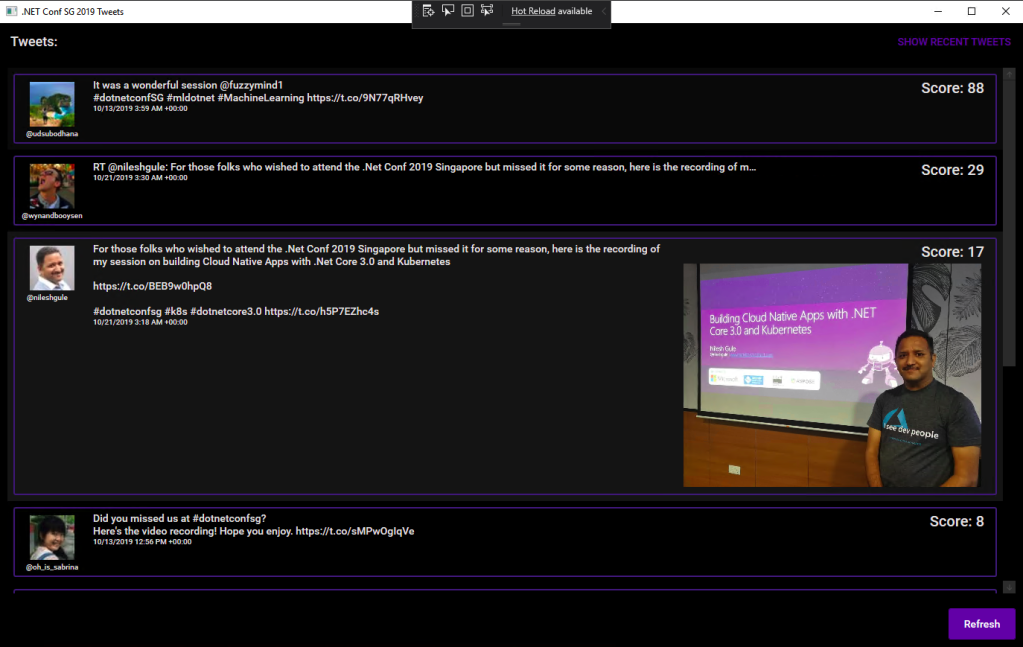
In order to make the conference to be more engaging, after discussing with Sabrina, I came out with a desktop app which will shows the recent tweets having #dotnetconfsg hashtag, which looks like the following.
Participants tweeting about our sessions.
To make this “game” more interesting, I announced that the top four participants who earn the highest scores would receive prizes from me. The formula to calculate the score is basically
+1 point for one tweet;
+5 point for one retweet of the tweet;
+5 point for one like of the tweet.
Throughout the conference, we thus had seen a huge number of tweets about our event and speakers. Some of them even tweeted with great photos (I should have given 5 points for great photos too).
In our talk, we used this desktop app as our sample. The app is built in .NET Framework 4.7. Sabrina started the demo with showing how we can modernise it to a .NET Core desktop app. I then covered a bit about Hot Reload, the runtime tools (the small little black bar on top of locally launched WPF app), and DevOps part of desktop app.
I am using the Tweetinvi library to retrieve the tweets easily. I originally tried calling the Tweeter APIs directly from C# and it’s a painful experience. Instead of wasting resources on researching the Tweeter APIs, I change to use Tweetinvi because it allows me to easily get the tweets in just two lines of codes.
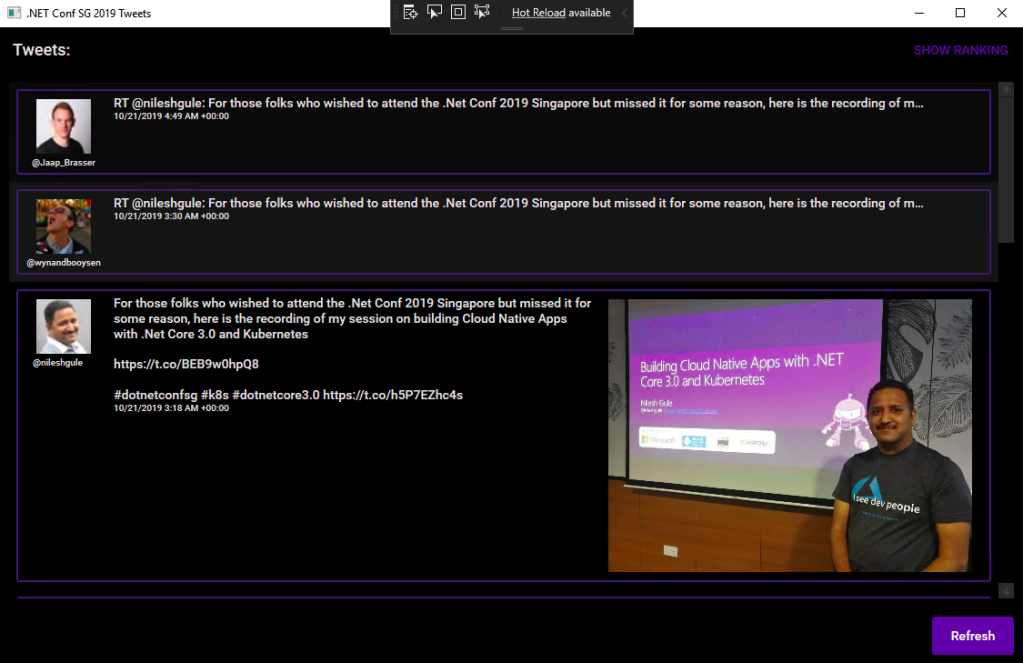
To improve the GUI, I use the Material Design in XAML Toolkit. So, I can easily change the WPF application to have dark mode. This is very important to me because I realise light mode isn’t displayed well on the projected screen during the event. So, it now looks as shown in the following screenshot.
New look with Material Design.
By clicking on the “Show Ranking” button at the top-right corner, we can easily tell the scores received by the participants.
The participants are sorted according to the score they receive.
Migrating to .NET Core 3.0
Now with many third-party libraries used in our WPF application, is the desktop app still compatible with .NET Core? Well, to answer this question, there is a tool from Microsoft called Portability Analyzer can give us a detail report on the set of APIs referenced in our apps that are not yet available in NET Core 3.0.
After downloading it and using it to check our application above, we received the following report.
This says that our WPF application is 100% portable to the .NET Core.
The Excel report comes with three tabs, i.e. Portability Summary (the one shown above), Details (empty), and Missing assemblies. There is one item in the report Missing assemblies though, as shown below.
However, if we proceed to use try-convert to migrate our WPF application from .NET Framework to .NET Core, it will be a successful conversion, as shown in the screenshot below.
Converted a .NET Framework project to .NET Core 3.0.
The following screenshot shows how the app looks like after being migrated to .NET Core 3.0. Nothing significant is changed. If you would like to find out what have been changed, please visit the commit of this project on GitHub.
This is a WPF app in .NET Core 3.0.
XAML Islands
There is another thing that I shared in my talk is about XAML Islands. In fact, I talked about XAML Islands in Microsoft Insider Dev Tour too when I was sharing about WinUI.
Microsoft Insider Dev Tour (Image Credit: Microsoft Malaysia – Insider Dev Tour Kuala Lumpur)
XAML Islands is a feature that allows us to host UWP controls in non-UWP desktop applications. The reason of having it is to improve the UX of existing Win32 apps by leveraging UWP controls.
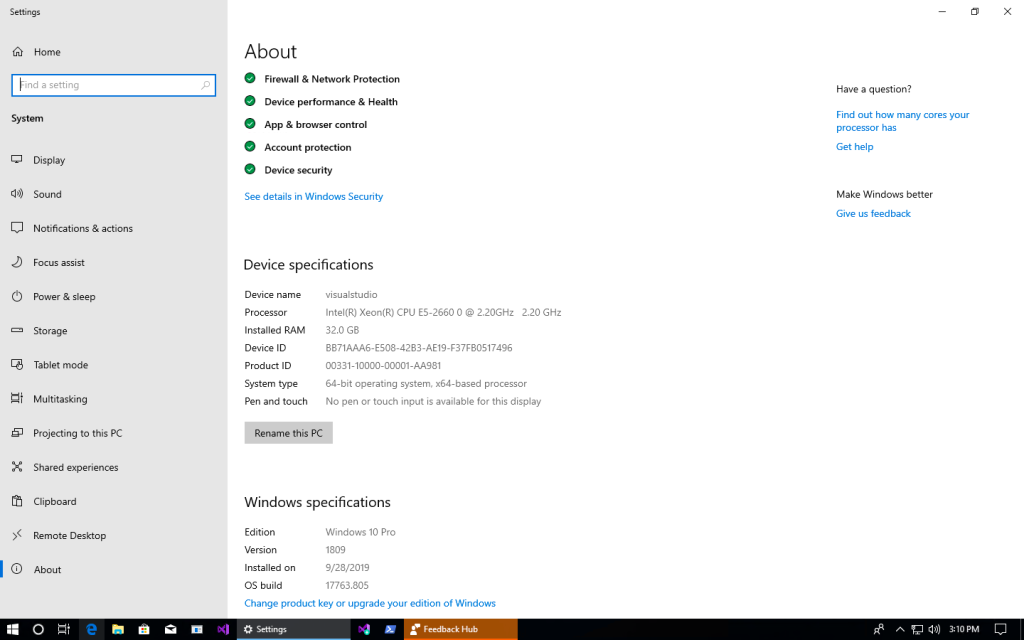
Although the documentation says it is enabled only starting from Windows 10, version 1903. However, if you are using version 1809, XAML Islands feature is also available already, just that not yet stable. So, the best choice is still using version 1903 and above.
In my presentation, since I was using the Windows 10 image hosted on Microsoft Azure VM, the best version I could get is 1809.
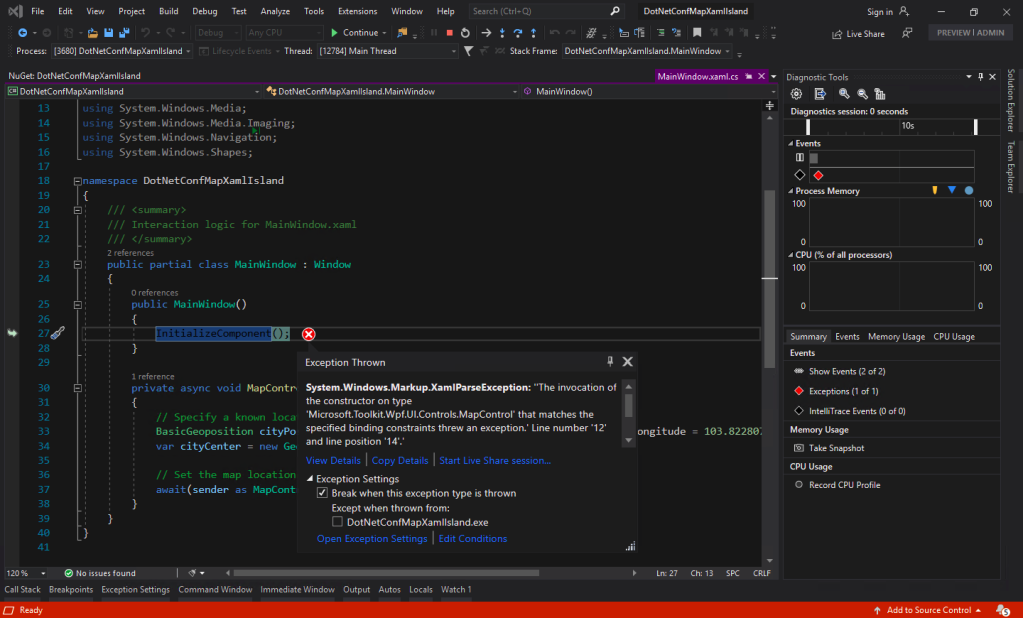
You may ask why I am using version 5.1.1 of the Microsoft.Toolkit.Wpf.UI.Controls. On the day of .NET Conf Singapore, the version 6.0 (Preview 9.1) of it is already out. However, when I try to use the library, it threw the exception, as shown in the screenshot below.
Oops, app crashes with Microsoft.Toolkit.Wpf.UI.Controls 6.0 (Preview 9.1).
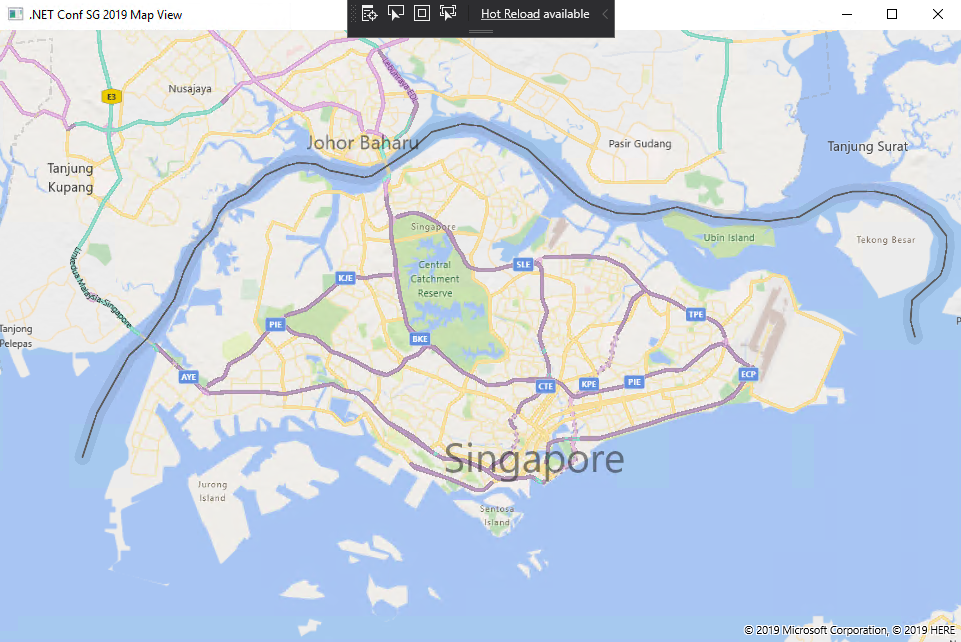
I could only demonstrated how I used the MapControl in a WPF app with XAML Islands.
Such a beautiful map displayed on WPF app!
Creating Build Pipeline in Azure DevOps
Now, with the codes of our WPF application on GitHub, we can create a Build pipeline for the app on Azure DevOps. This is not a new feature but it is nice to see how we can now build a .NET Core WPF app on Azure DevOps.
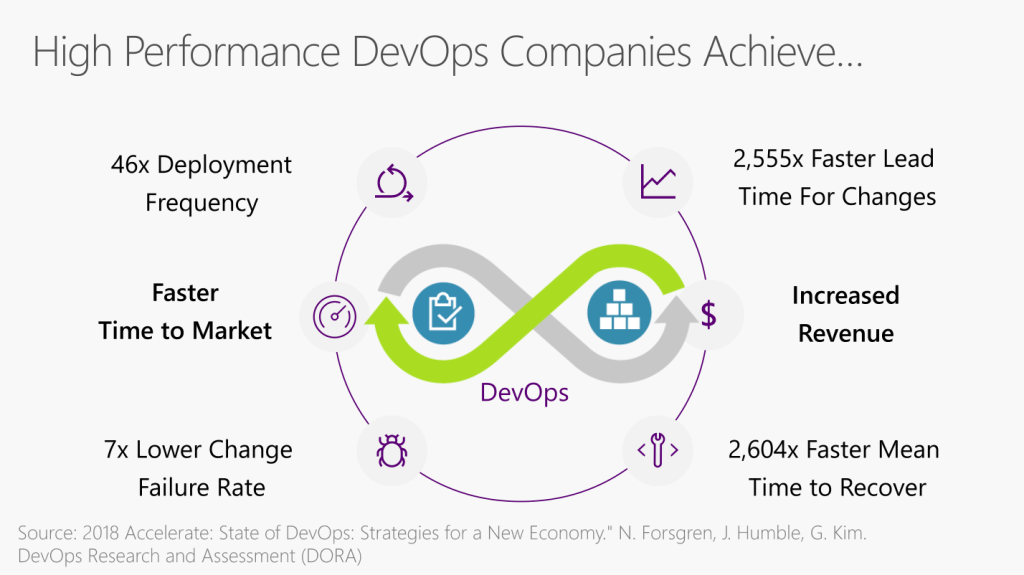
Benefits of DevOps (Image Credit: .NET Conf 2019)
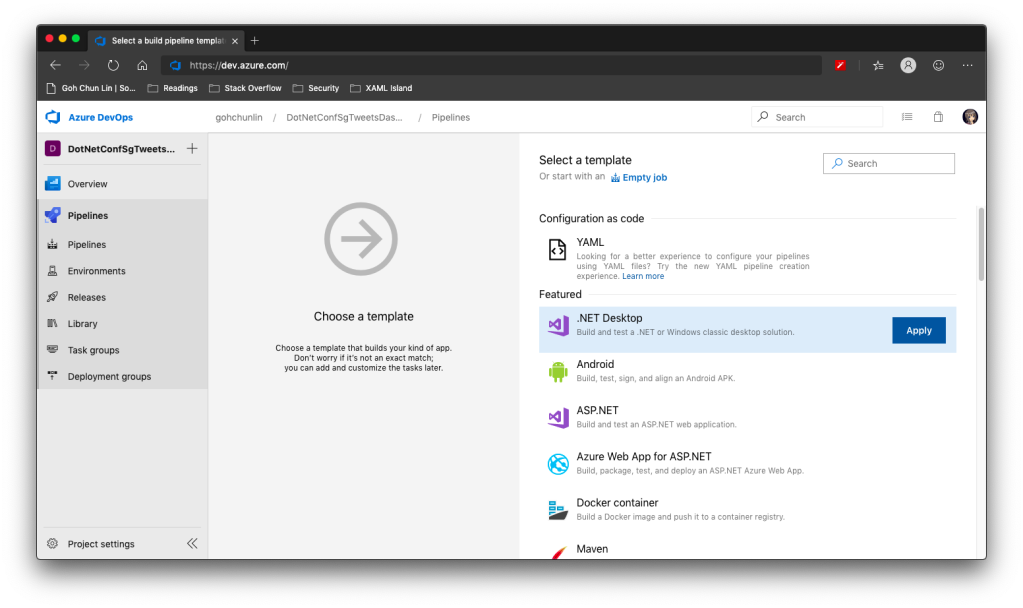
There is a template available on Azure DevOps to build .NET Desktop app.
We can apply this template to build .NET Desktop app on Azure DevOps.
However, before we proceed to start the build, we need to make a few changes to it.
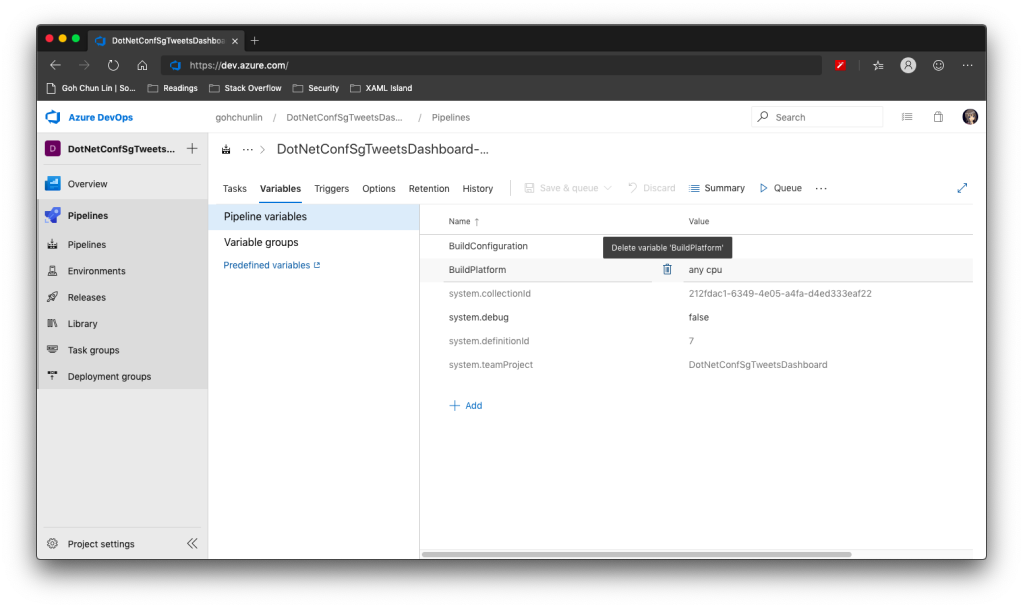
Since we will be using dotnet publish later, so the BuildPlatform variable is not necessary and can be removed.
Removing BuildPlatform variable from the pipeline.
Instead, we need to add a new variable called DOTNET_SKIP_FIRST_TIME_EXPERIENCE and set it to true. This is to speed up the build process because by default when we run any .NET Core SDK command on Azure DevOps, it does some caching. However, now we are running this on a hosted build agent, so this caching will never be useful because the agent will be discarded right after the build is completed. Thanks Daniel Jacobson for highlighting this in his video.
Daniel Jacobson (right) explains about Azure DevOps and .NET Core SDK commands. (Image source: YouTube video)
After that, we need to remove all the default steps because we need to start from scratch for .NET Core.
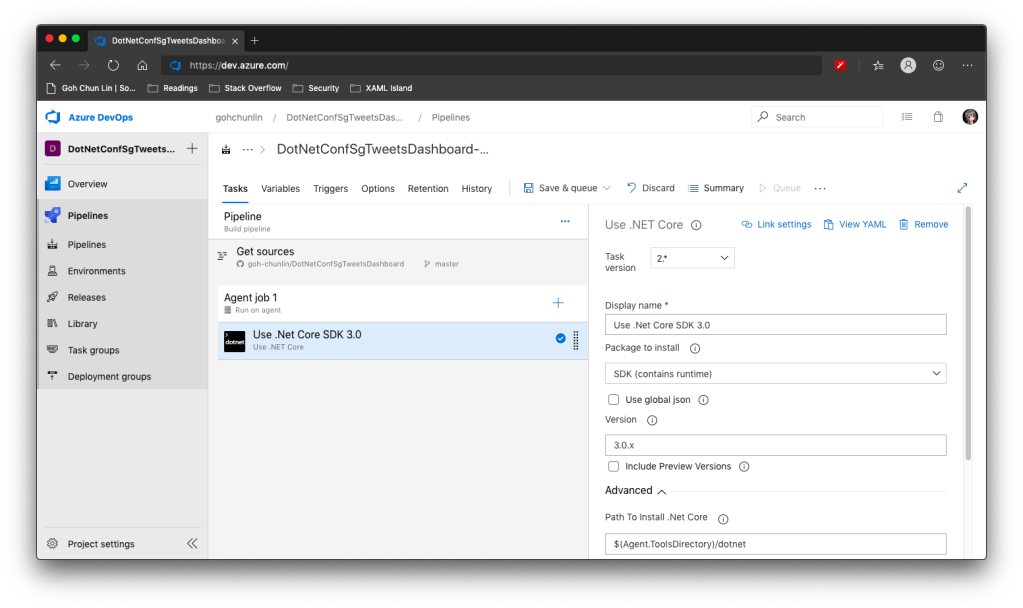
The first step is to install .NET Core SDK 3.0. Remember to state “3.0.x” as the version otherwise if there is a minor update to .NET Core 3.0, we will still be using the outdated one to build.
Step 1: Use .NET Core SDK 3.0
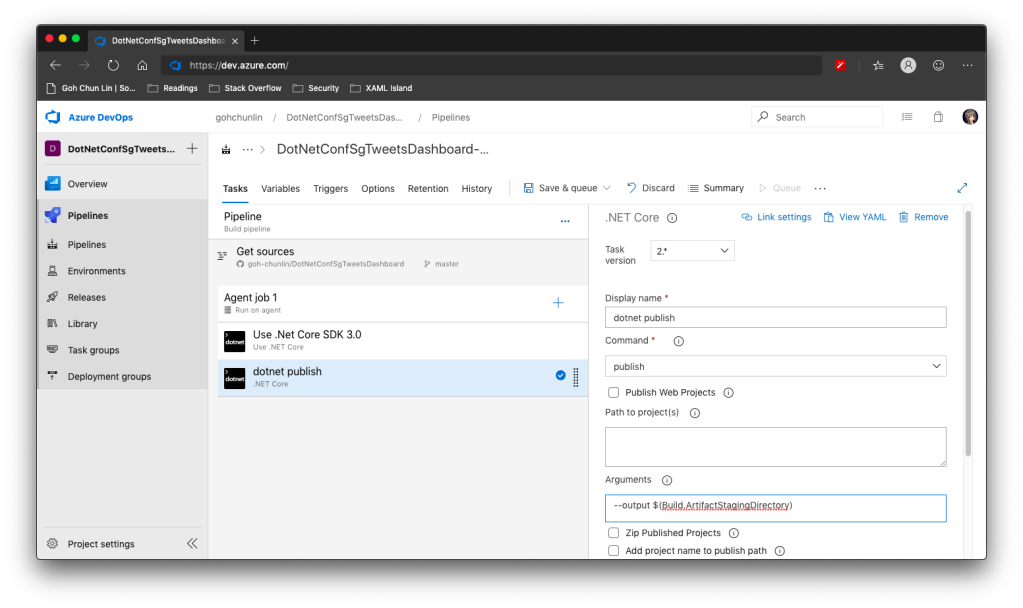
After that, we are going to do dotnet publish.
Starting with .NET Core 2.0, we don’t have to run dotnet restore because it’s run implicitly by all commands that require a restore to occur. Also dotnet publish will build the project, so we do not need to run dotnet build.
Since this is a WPF project, so we have to uncheck the “Publish Web Projects” checkbox, together with the other two checkboxes “Zip Published Projects” and “Add project name to publish path”, as shown in the screenshot below.
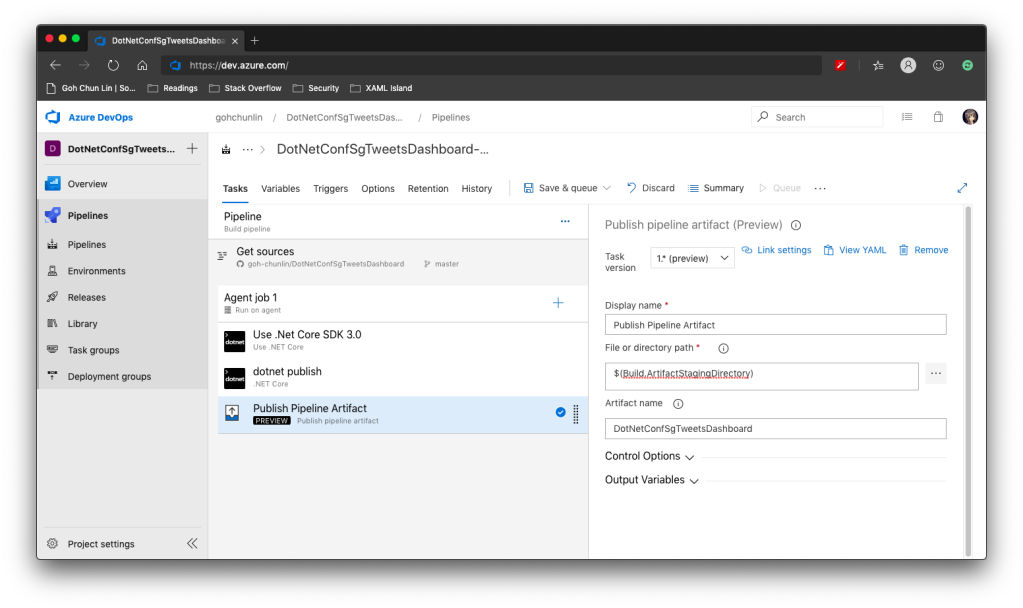
Now we proceed to add the next step, which is to publish the artifact. Here we specify $(Build.ArtifactStagingDirectory) as the path of the directory to publish. Then we also specify a user friendly name for the artifact.
Step 3: Publish Pipeline Artifact
Now we can click the “Save & queue” to run this pipeline.
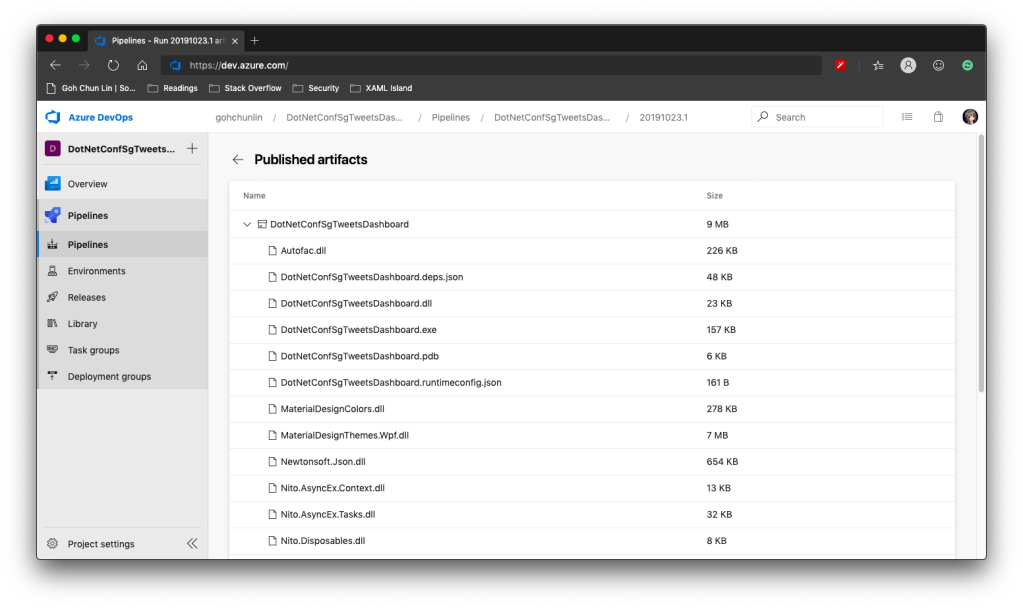
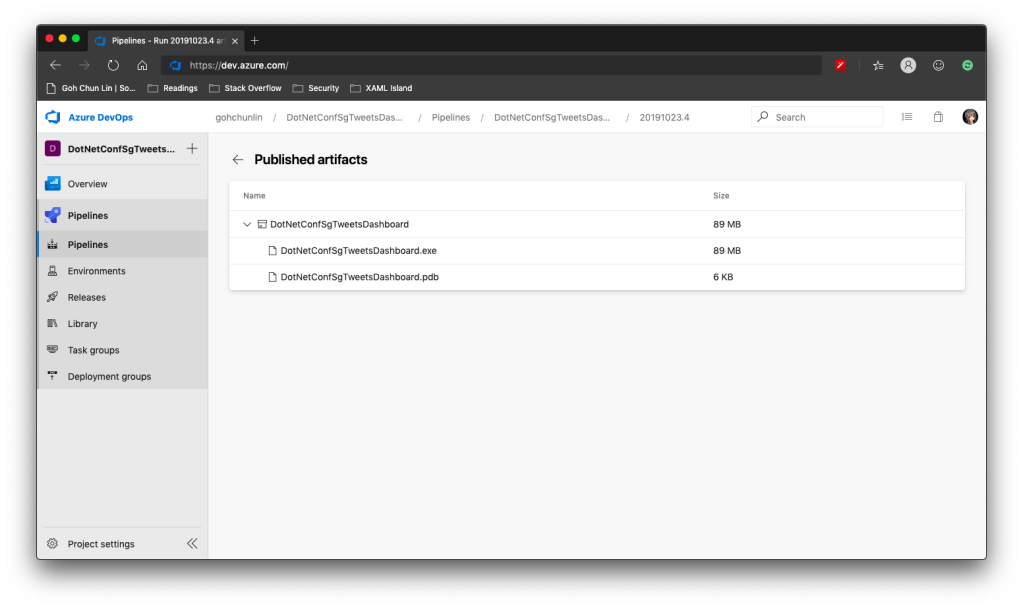
In the published artifact, we will see the following.
Published artifact in our first attempt.
Wow, there are a lot of DLLs! The .exe file alone is only 157KB.
Fortunately, starting from .NET Core 3.0, as long as we specify the following in our csproj file, it will produce a single .exe file.
<PublishSingleFile>true</PublishSingleFile>
However, there is one more thing to take note is that if we miss out the <RuntimeIdentifier>, there will be an error NETSDK1097 which says, “It is not supported to publish an application to a single-file without specifying a RuntimeIdentifier. Please either specify a RuntimeIdentifier or set PublishSingleFile to false.”
<RuntimeIdentifier>win-x86</RuntimeIdentifier>
With this change, when we run the Build pipeline again, we get the following.
Published artifact with <PublishSingleFile>.
We now only have one .exe file but its size has grown from 157KB to 145MB!
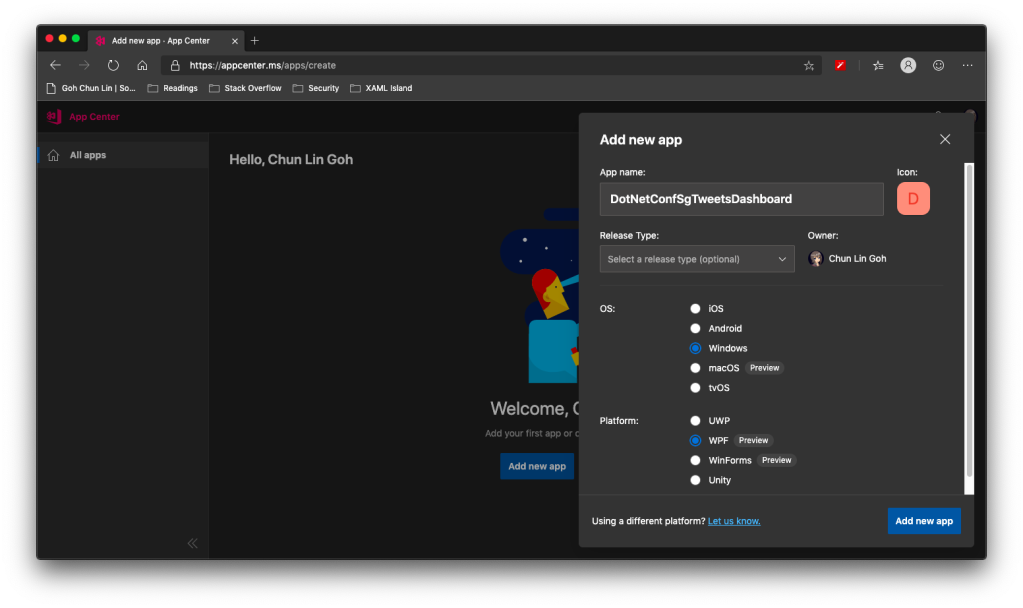
WinForms and WPF are now available on VS App Center but still in preview.
So, the artifact generated in Azure DevOps Build pipeline cannot be automatically delivered to VS App Center even after .NET Conf 2019. We now have to do it manually.
Firstly, we need to download the actifact as a zipped file in Azure DevOps.
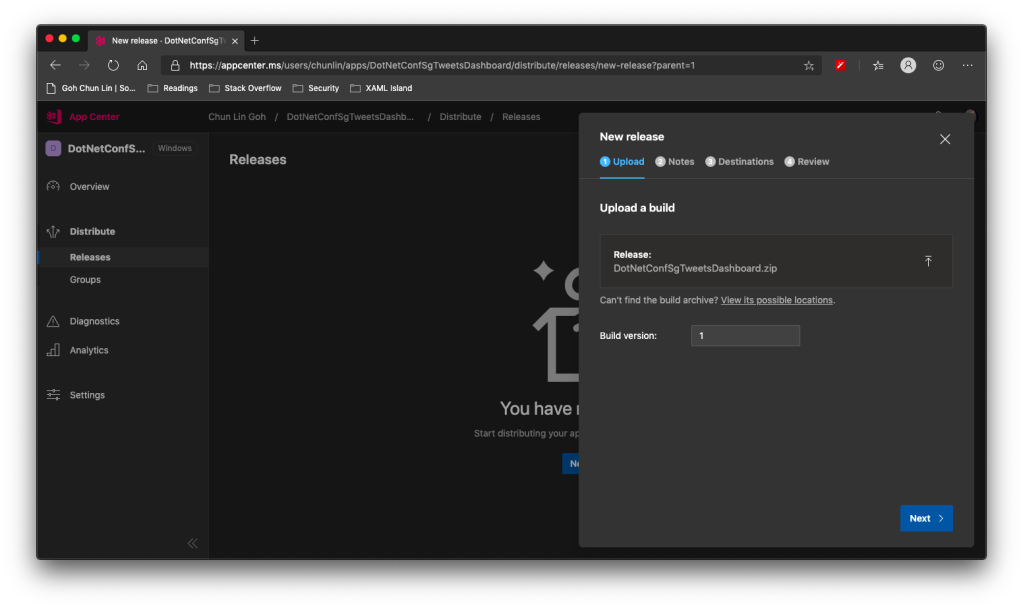
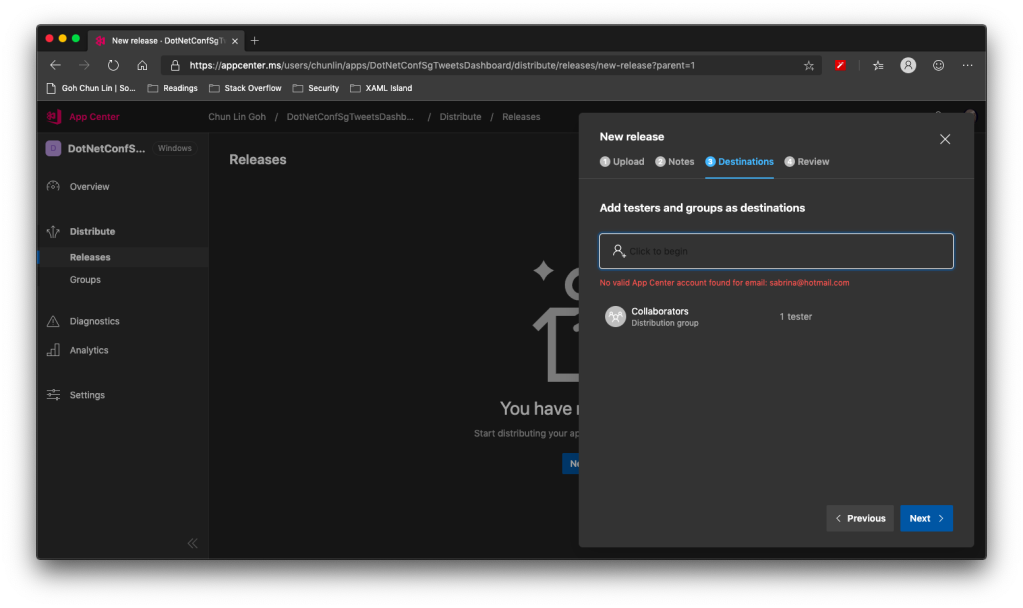
Secondly, we need to upload the zipped file to the VS App Center in its Releases tab, as shown in the following screenshot.
Setting Build version to 1 because this is our first release of the app.
After keying the release notes, we will be landed on a page to choose who we should distribute the app to. Normally they are our developers, business analysts, and testers. Here, in my example, I only have one group called Collaborator and I am the only one in the group.
We are not allowed to add those who are not in our App Center as testers.
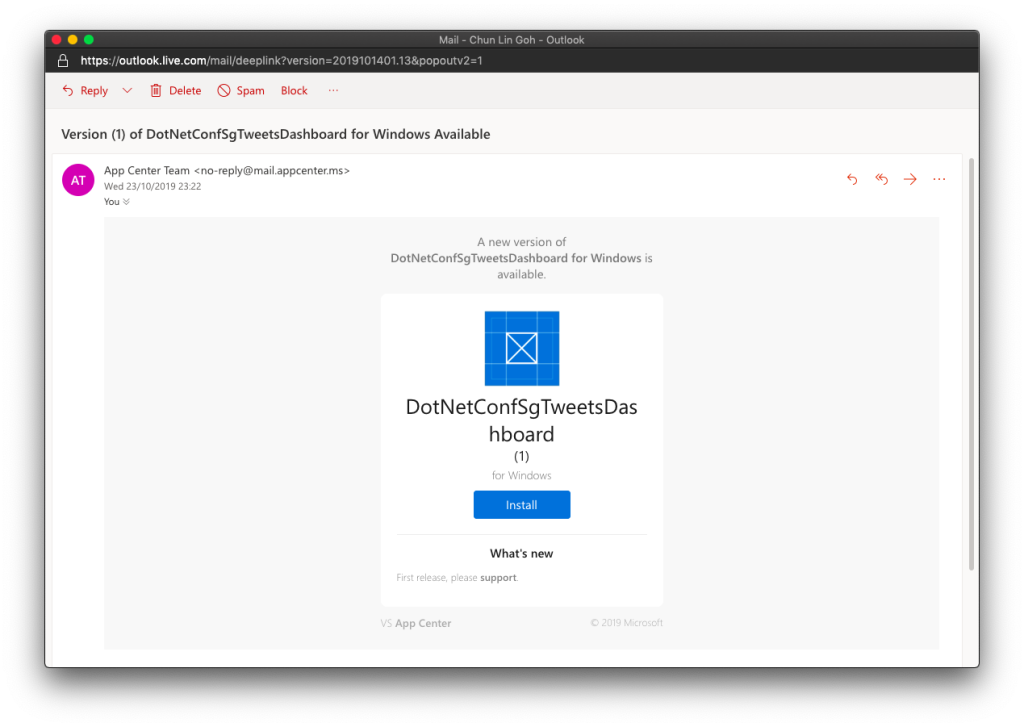
Finally, we will hit the “Distribute” button to release our app to testers. As tester, I will receive the email notifying about the new release.
Yay, new release available for in-house testing.
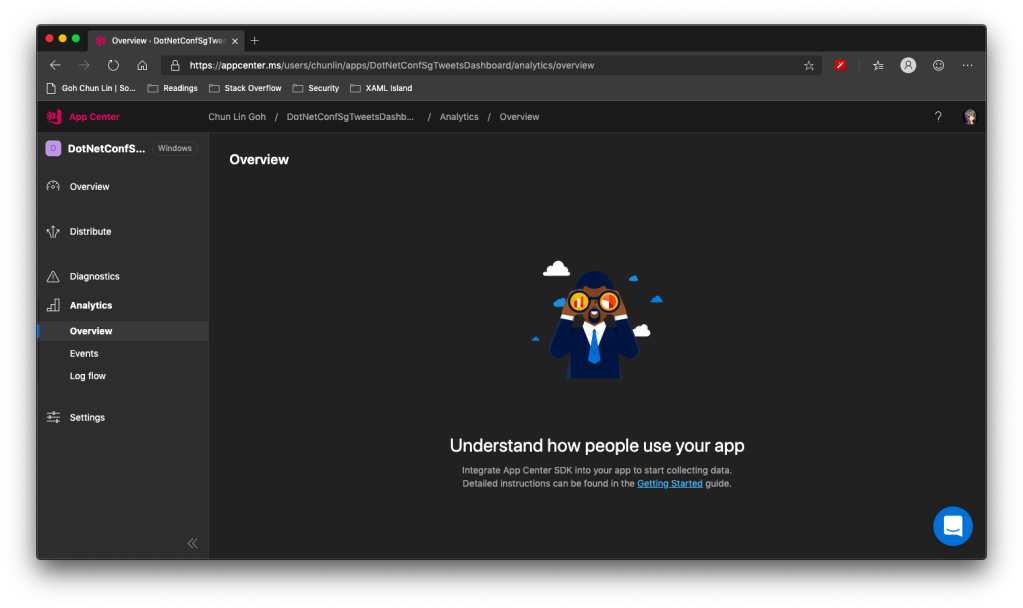
Analytics with App Center SDK
We can also integrate our WPF desktop app with App Center SDK to further collect data to find out how people use our app as well as the crashes in our app.
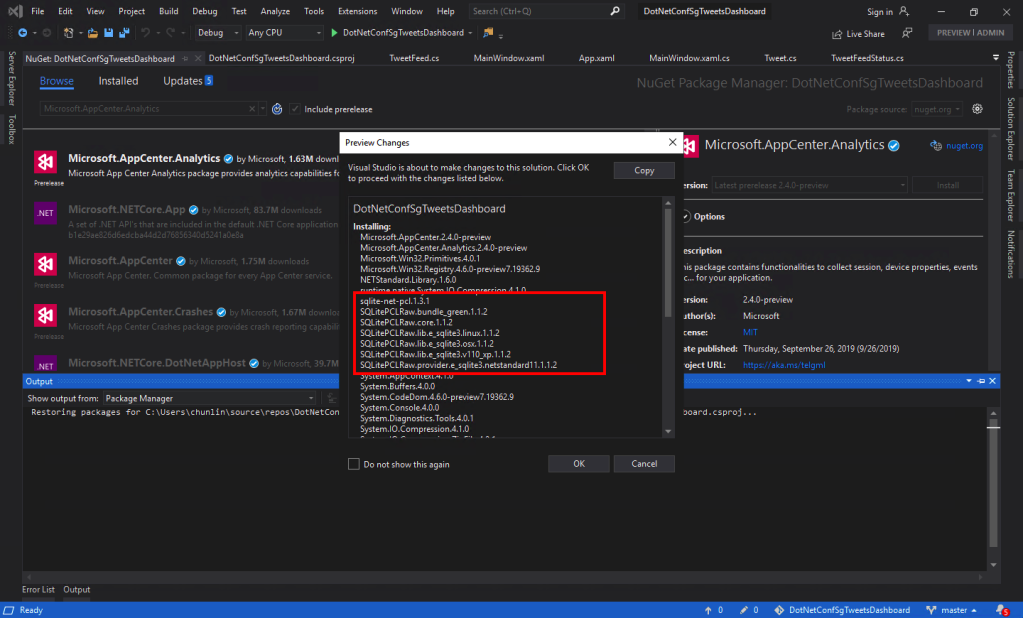
To do so, firstly, we need to install the following two Nuget packages. As the support for WPF SDK is still in preview, please remember to check the “Include prerelease” checkbox.
Microsoft.AppCenter.Analytics;
Microsoft.AppCenter.Crashes.
SQLitePLCRaw is being installed when we install the App Center SDK.
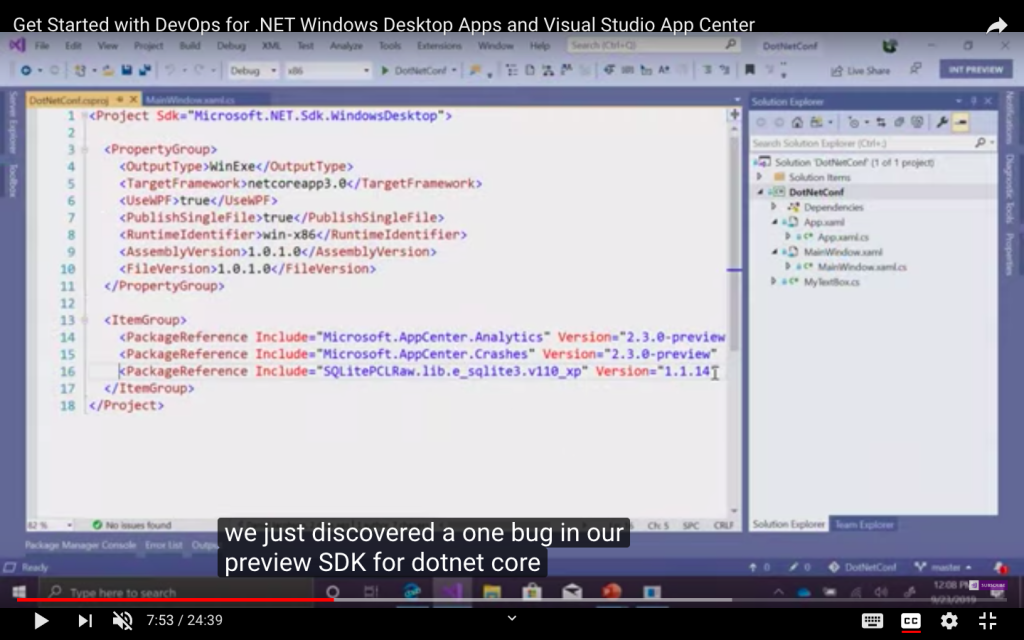
Now we can proceed to put the following code in the first window that will be launched in our app. In my case, it is the MainWindow. So, right after the InitializeComponent() is called, the following codes will be executed.
Yup, if you have noticed earlier when we’re installing the App Center SDK, SQLitePCLRaw was being installed also. Just because of the bug in the SDK, this line was not added to the project file and thus we have to manually reference it. Hopefully this bug gets fixed soon.
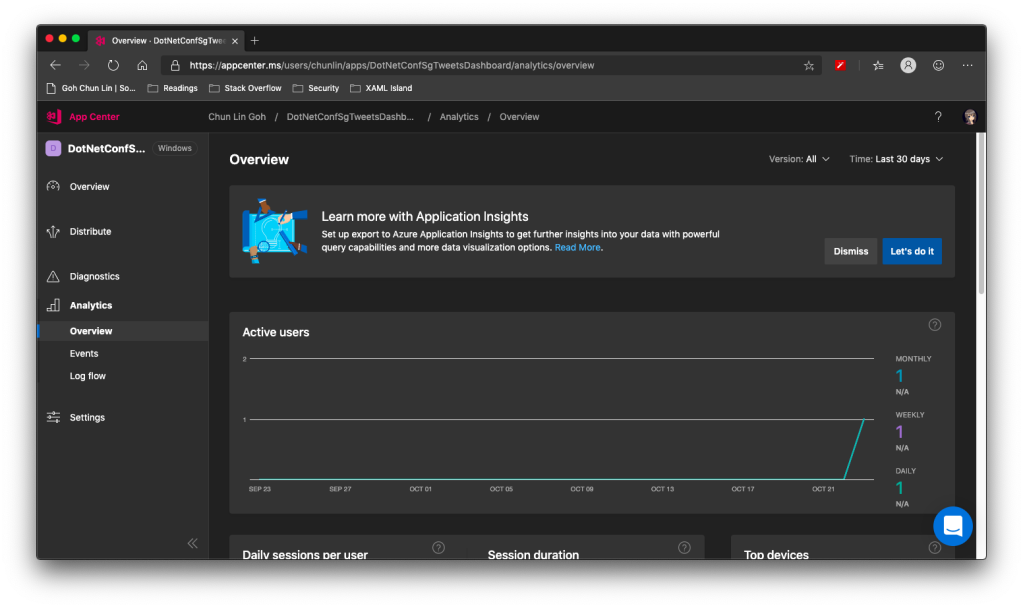
Now when we launch our WPF app again, the nice dashboard will show there is 1 user. Yay!
+1 active user in our app!
Conclusion
That’s all so far for what I’d like to share in addition to what I have shared in .NET Conf Singapore 2019.
As a web developer, I don’t have many chances to play with mobile app projects. So rather than limit myself to just one field, I love to explore other technologies, especially mobile app development.
Burger Project: My First Xamarin App
Last month, I attended a Xamarin talk at Microsoft Singapore office with my colleague. The talk was about authentication and authorization with social networks such as Facebook and Twitter via Azure App Service: Mobile App.
Ben Ishiyama-Levy is talking about how Xamarin and Microsoft Azure works together.
The speaker is Ben Ishiyama-Levy, a Xamarin evangelist. His talk inspired me to further explore how I could retrieve user info from social network after authenticating the users.
Because I am geek-first and I really want to find out more, so I continue to read more about this topic. With the help from my colleague, I developed a simple Xamarin.Android app to demonstrate the Authentication and logged-in user’s info retrieval.
In this project, it’s also the first time I apply Reflection in my personal project. It helps me easily get the according social network login class with a neat and organized code.
The day is the first time Microsoft CEO Satya Nadella comes to Singapore. It’s also my first time learn about the powerful Cognitive Services and LUIS (Language Understanding Intelligence Service) in Microsoft Azure in Riza’s talk.
Riza’s presentation about Microsoft Cognitive APIs during Microsoft Developer Day.
Challenges in Cheese Project
Everyday, it takes about one hour for me to reach home from office. Hence, I will only have two to three hours every night to work on personal projects and learning. During weekends, when people are having fun out there, I will spend time on researching about some exciting new technologies.
There are many advance topics in LUIS. I still remember that when I was learning how LUIS works, my friend was actually playing the Rise of the Tomb Raider beside me. So while he was there phew-phew-phew, I was doing data training on LUIS web interface.
Microsoft LUIS (Language Understanding Intelligence Service) and Intents
Currently, I only worked on some simple intents, such as returning me current date and time as well as understanding which language I want to translate to.
My first idea in Cheese project is to build an Android app such that if I say “Please translate blah-blah to xxx language”, the app will understand and do the translation accordingly. This can be quite easily done with the help of both LUIS and Google Translate.
After showing this app to my colleagues, we realized one problem in the app. It’s too troublesome for users to keep saying “Please translate blah-blah to xxx language” every time they need to translate something. Hence, recently I have changed it to use GUI to provide language selection. This, however, reduces the role played by LUIS in this project.
VoiceText provides a range of speakers and voices with emotions!
To make the project even more fun, I implemented the VoiceText Web API from Japanese in the Android app. The cool thing about this TTS (Text-To-Speech) API is that it allows developers to specify the mood and characteristic of the voice. The challenge, of course, is to read the API written in Japanese. =P
Oh ya, this is the link to my Cheese repository on Github: https://github.com/goh-chunlin/Cheese. I will continue to work on this project while exploring more about LUIS. Stay tuned.
After-Work Personal Projects
There are still more things in mobile app development for me to learn. Even though most of the time I feel exhausted after long work day, working on new and exciting technologies helps me getting energized again in the evening.
I’m not as hardworking as my friends who are willing to sacrifice their sleep for their hobby projects and learning, hence the progress of my personal project development is kind of slow. Oh well, at least now I have my little app to help me talking to people when I travel to Hong Kong and Japan next year!


:no_upscale()/cdn.vox-cdn.com/uploads/chorus_image/image/65263805/notion.0.png)