
Beginning with Windows 2000, Microsoft Windows operating systems have been shipped with a data protection interface known as DPAPI (Data Protection Application Programming Interface). DPAPI is a simple cryptographic API. It doesn’t store any persistent data for itself; instead, it simply receives plaintext and returns cyphertext.
Windows DPAPI isn’t intended for use in web applications. Fortunately, ASP.NET Core offers data protection APIs which include also key management and rotation. With the APIs, we are able to store security-sensitive data for our ASP .NET Web apps.
Configure Service Container and Register Data Protection Stack
In ASP.NET Core project, we have to first configure a data protection system and then add it to the service container for dependency injection.
public void ConfigureServices(IServiceCollection services)
{
    // …

    services.AddDataProtection()
            .PersistKeysToFileSystem(new DirectoryInfo(@"\server\shared\directory\"))
            .SetApplicationName("<sharedApplicationName>");
}
In the code above, instead of storing key at the default location, which is %LOCALAPPDATA%, we store it on a network drive by specifying the path to the UNC Share.
By default, the Data Protection system isolates apps from one another based on their content root paths, even if they share the same physical key repository. This isolation prevents the apps from understanding each other’s protected payloads. Just in case we may need to share protected payloads among apps, we can configure SetApplicationName first so that other apps with the same value later can share the protected payloads.
Key Protection with Azure Key Vault
The code above shows how we can store keys on a UNC share. If we head to the directory \server\shared\directory\, we will be seeing an XML file with content similar as what is shown below.
<?xml version="1.0" encoding="utf-8"?>
<key id="..." version="1">
  <creationDate>2022-08-31T02:50:40.14912Z</creationDate>
  <activationDate>2022-08-31T02:50:40.0801042Z</activationDate>
  <expirationDate>2022-11-29T02:50:40.0801042Z</expirationDate>
  <descriptor deserializerType="Microsoft.AspNetCore.DataProtection.AuthenticatedEncryption.ConfigurationModel.AuthenticatedEncryptorDescriptorDeserializer, Microsoft.AspNetCore.DataProtection, Version=7.0.0.0, Culture=neutral, PublicKeyToken=adb9793829ddae60">
    <descriptor>
      <encryption algorithm="AES_256_CBC" />
      <validation algorithm="HMACSHA256" />
      <masterKey p4:requiresEncryption="true" xmlns:p4="http://schemas.asp.net/2015/03/dataProtection">
        <!-- Warning: the key below is in an unencrypted form. -->
        <value>au962I...kpMYA==</value>
      </masterKey>
    </descriptor>
  </descriptor>
</key>
As we can see, the key <masterKey> itself is in an unencrypted form.
Hence, in order to protect the data protection key ring, we need to make sure that the storage location should be protected as well. Normally, we can use file system permissions to ensure only the identity under which our web app runs has access to the storage directory. Now with Azure, we can also protect our keys using Azure Key Vault, a cloud service for securely storing and accessing secrets.
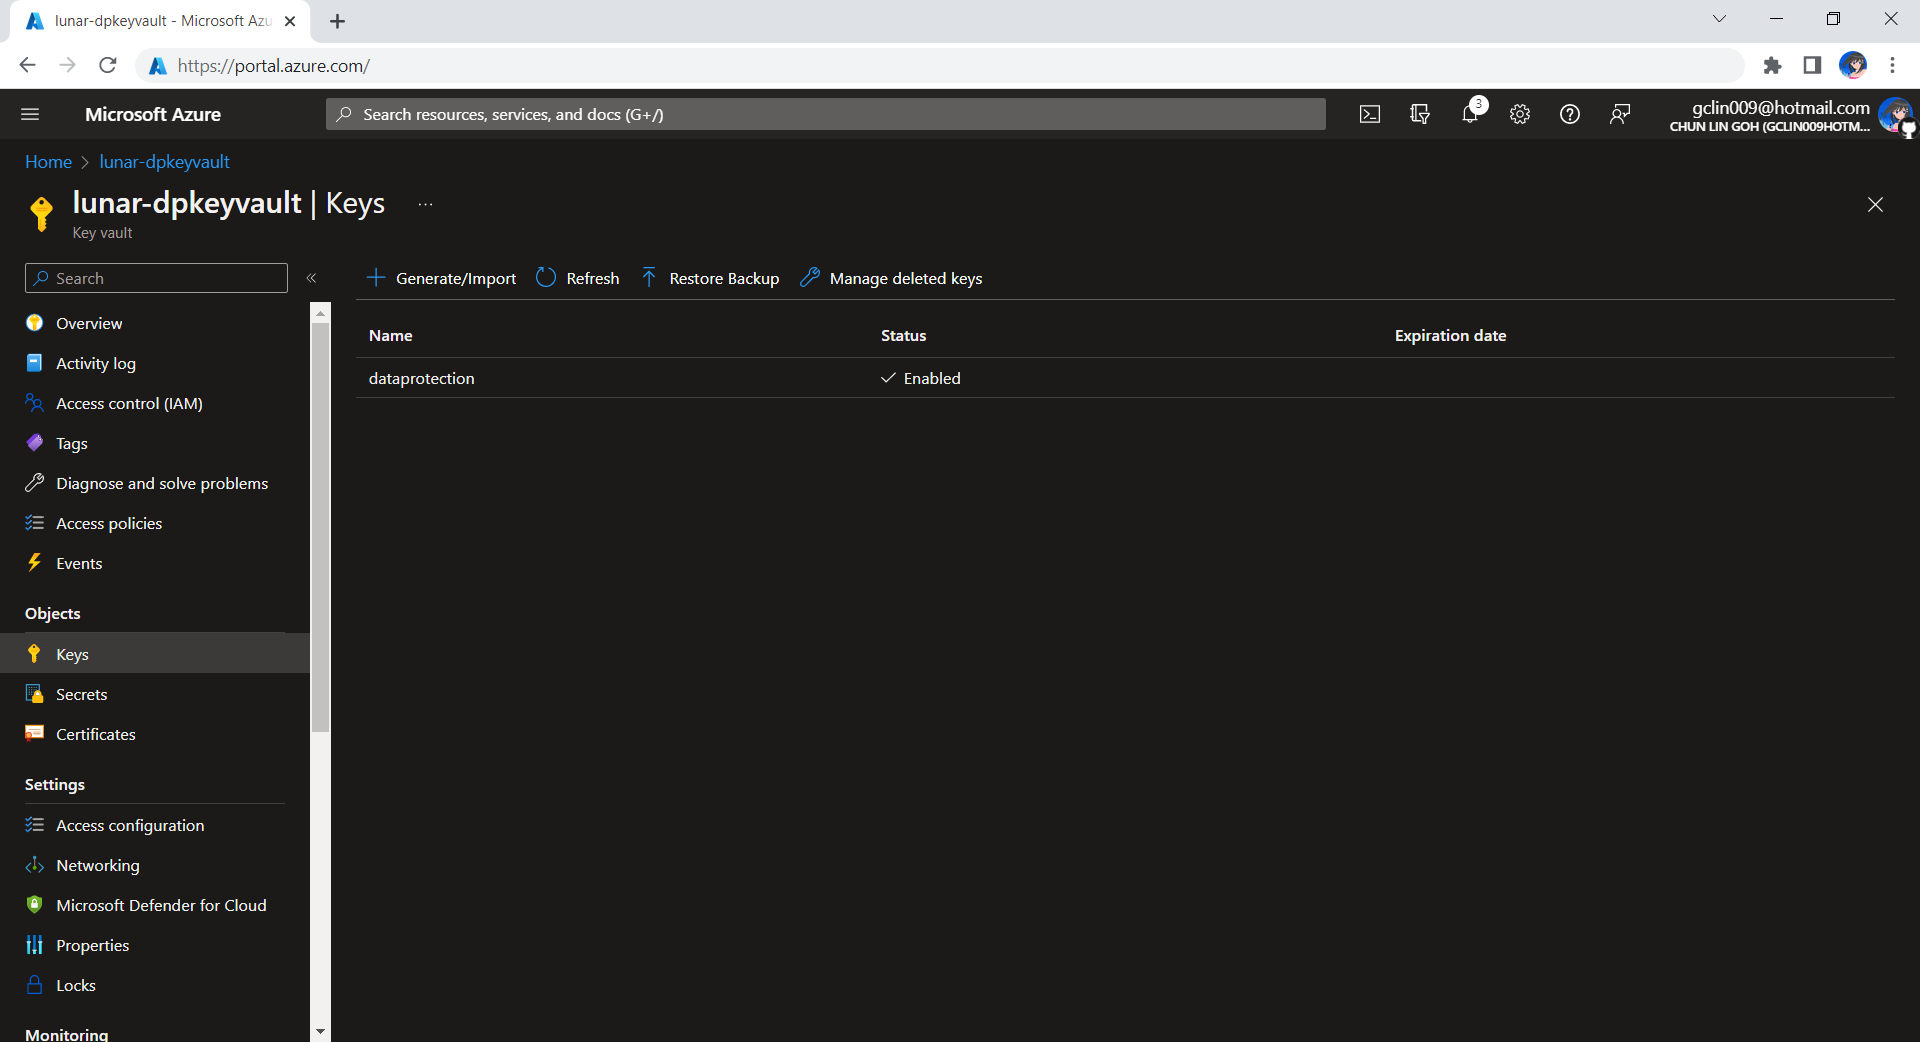
The approach we will take is to first create an Azure Key Vault called lunar-dpkeyvault with a key named dataprotection, as shown in the screenshot below.
Hence, the key identifier that we will be using to connect to the Azure Key Vault from our application will be new Uri(“https://lunar-dpkeyvault.vault.azure.net/keys/dataprotection/”).
Now, we can use Azure Key Vault to protect our key by updating our codes earlier to be as follows.
services.AddDataProtection()
        .PersistKeysToFileSystem(new DirectoryInfo(@"\server\shared\directory\"))
        .SetApplicationName("<sharedApplicationName>");
        .ProtectKeysWithAzureKeyVault(new Uri("https://lunar-dpkeyvault.vault.azure.net/keys/dataprotection/"), credential);
The credential can be a ClientSecretCredential object or DefaultAzureCredential object.
Now, if we check again the newly generated XML file, we shall see there won’t be <masterKey> element anymore. Instead, it is replaced with the content shown below.
<encryptedKey xmlns="">
    <!-- This key is encrypted with Azure Key Vault. -->
    <kid>https://lunar-dpkeyvault.vault.azure.net/keys/dataprotection/...</kid>
    <key>HSCJsnAtAmf...RHXeeA==</key>
    <iv>...</iv>
    <value>...</value>
</encryptedKey>
Key Lifetime
We shall remember that, by default, the generated key will have a 90-day lifetime. This means that the app will automatically generate a new active key when the current active key expires. However, the retired keys can still be used to decrypt any data protected with them.
Hence, we know that the data protection APIs above are not primarily designed for indefinite persistence of confidential payload.
Create a Protector
To create a protector, we need to specify Purpose Strings. A Purpose String provides isolation between consumers so that a protector cannot decrypt cyphertext encrypted by another protector with different purpose.
_protector = provider.CreateProtector("Lunar.DataProtection.v1");
Encrypt Text AND THEN DECRYPT IT
Once we have the data protector, we can encrypt the text with the Protect method as shown below.
string protectedPayload = _protector.Protect("<text to be encrypted>");
If we would like to turn the protectedPayload back to the original plain text, we can use the Unprotect method.
try
{
    string originalText = _protector.Unprotect(protectedPayload);
    ...
}
catch (CryptographicException ex)
{
    ...
}
Yup, that’s all for quick starting of encrypting and decrypting texts in ASP .NET Core.
