In software development, it is a common practice that developers from different teams create, share, and consume useful code which is bundled into packages. For .NET the way we share code is using NuGet package, a single ZIP file with the .nupkg extension that contains compiled code (DLLs).
Besides the public nuget.org host, which acts as the central repository of over 100,000 unique packages, NuGet also supports private hosts. Private host is useful for example it allows developers working in a team to produce NuGet packages and share them with other teams in the same organisation.
There are many open-source NuGet server available. BaGet is one of them. BaGet is built using .NET Core, thus it is able to run behind IIS or via Docker.
In this article, we will find out how to host our own NuGet server on Azure using BaGet.
Hosting Locally
Before we talk about hosting NuGet server on the cloud, let’s see how we could do it in our own machine with Docker.
Fortunately, there is an official image for BaGet on Docker Hub. Hence, we can pull it easily with the following command.
docker pull loicsharma/baget
Before we run a new container from the image, we need to create a file named baget.env to store BaGet’s configurations, as shown below.
# The following config is the API Key used to publish packages.
# We should change this to a secret value to secure our own server.
ApiKey=NUGET-SERVER-API-KEY

Storage__Type=FileSystem
Storage__Path=/var/baget/packages
Database__Type=Sqlite
Database__ConnectionString=Data Source=/var/baget/baget.db
Search__Type=Database
Then we also need to have a new folder named baget-data in the same directory as the baget.env file. This folder will be used by BaGet to persist its state.
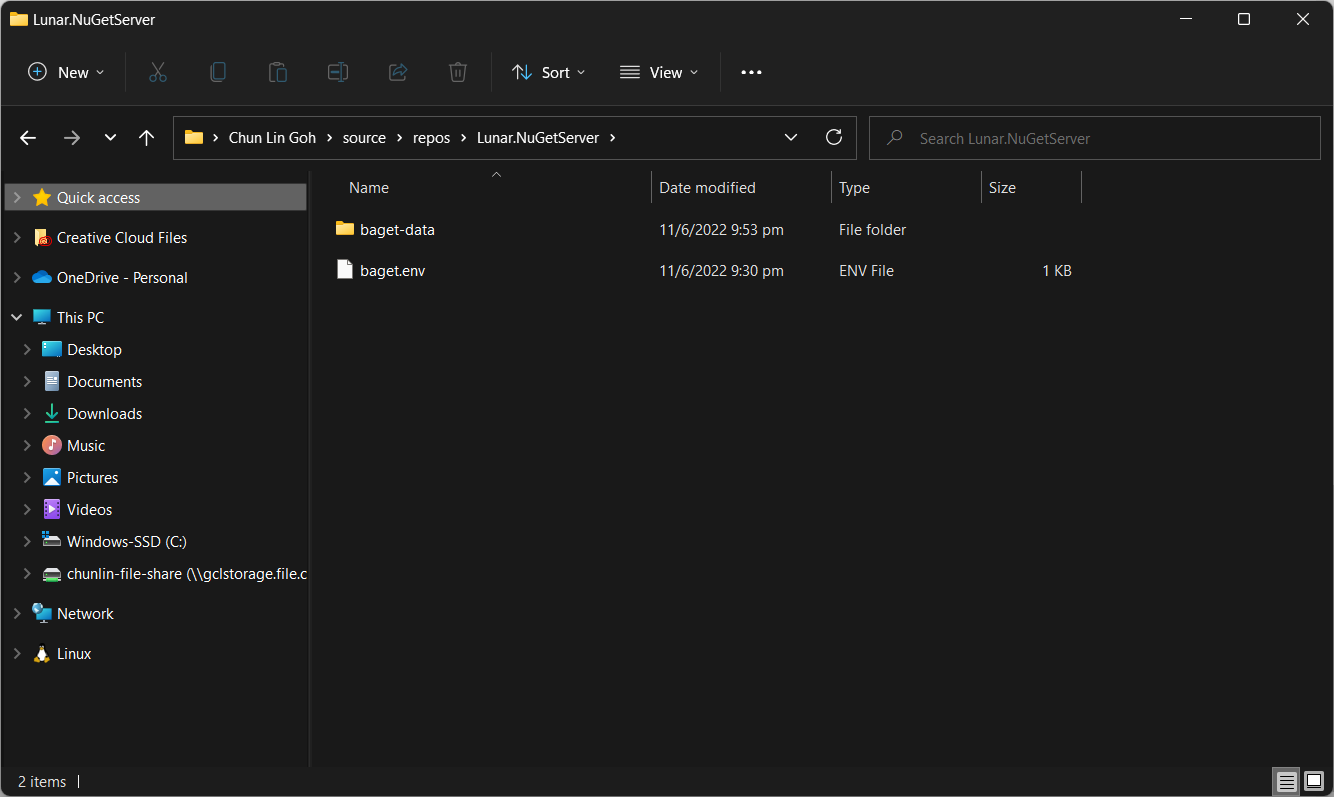
As shown in the screenshot above, we have the configuration file and baget-data at the C:\Users\gclin\source\repos\Lunar.NuGetServer directory. So, let’s execute the docker run command from there.
docker run --rm --name nuget-server -p 5000:80 --env-file baget.env -v "C:\Users\gclin\source\repos\Lunar.NuGetServer\baget-data:/var/baget" loicsharma/baget:latest
In the command, we also mount the baget-data folder on our host machine into the container. This is necessary so that data generated by and used by the container, such as package information, can be persisted.
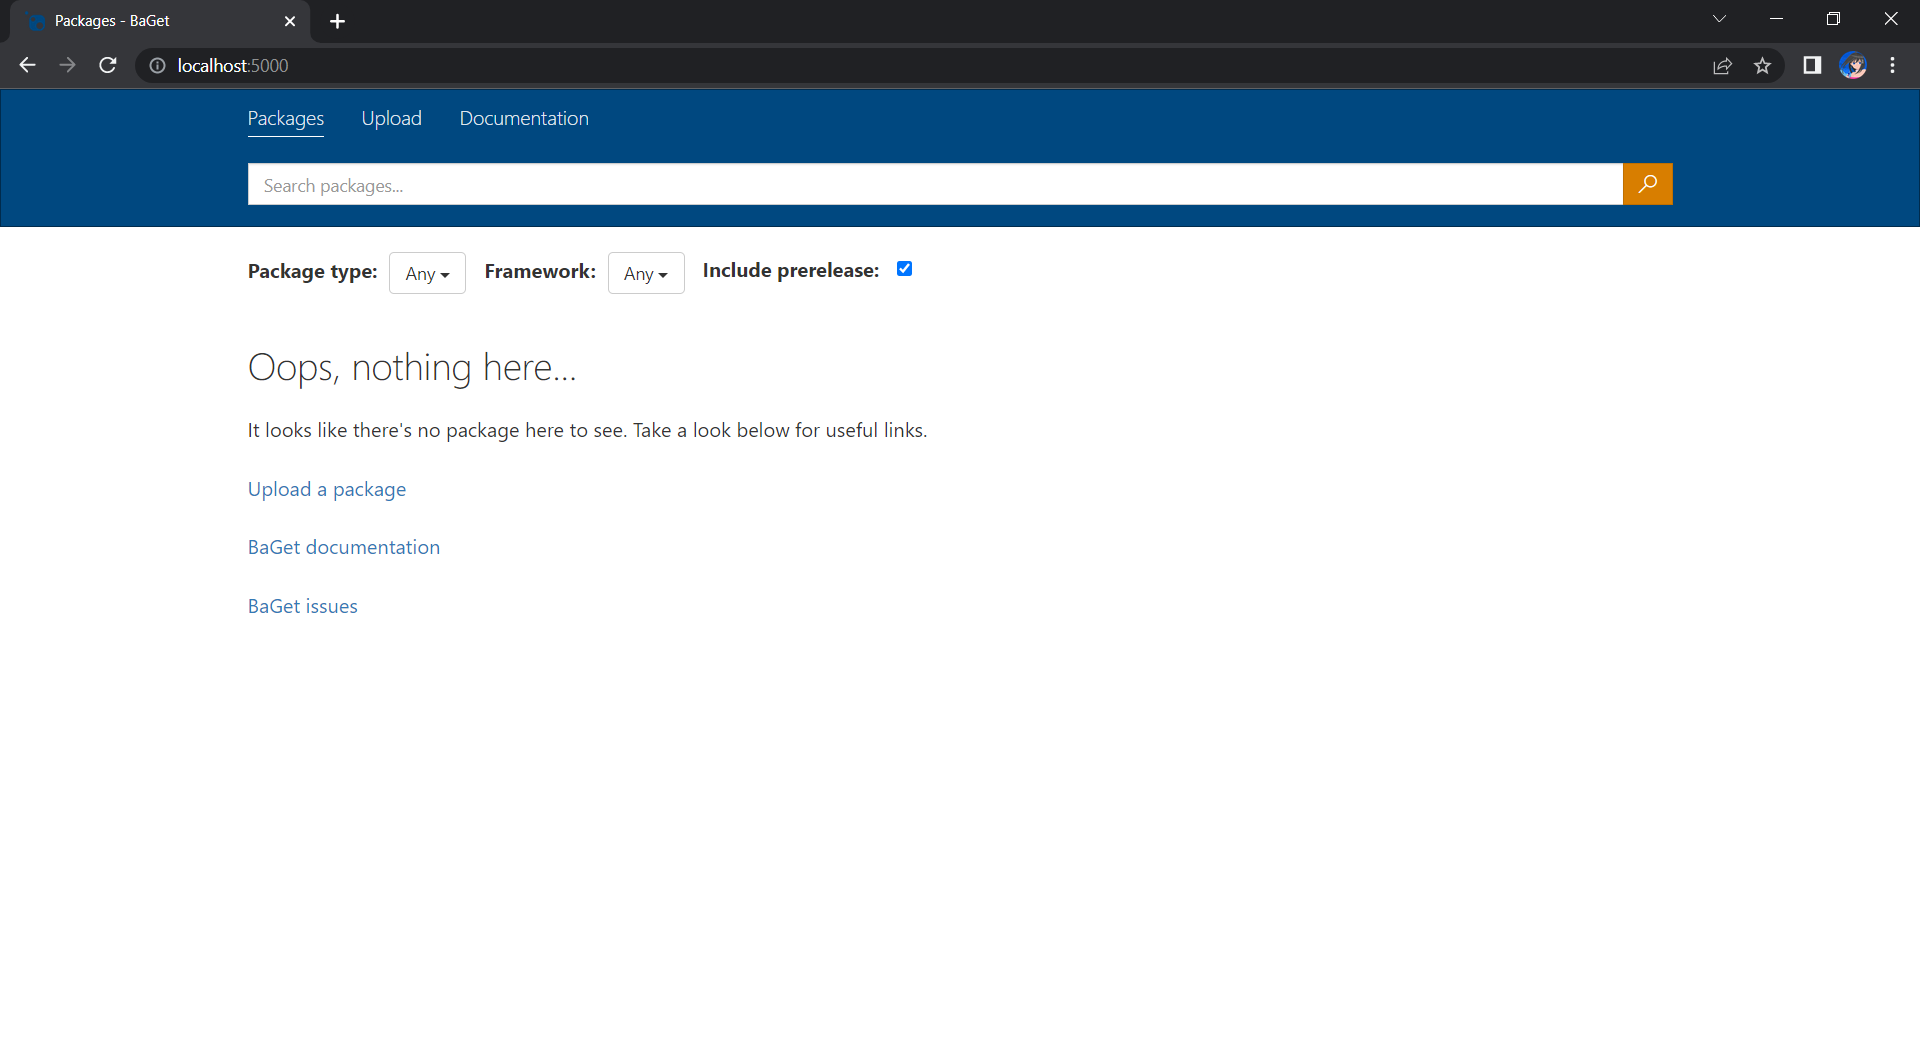
http://localhost:5000.Now, let’s assume that we have our packages to publish in the folder named packages. We can publish it easily with dotnet nuget push command, as shown in the screenshot below.
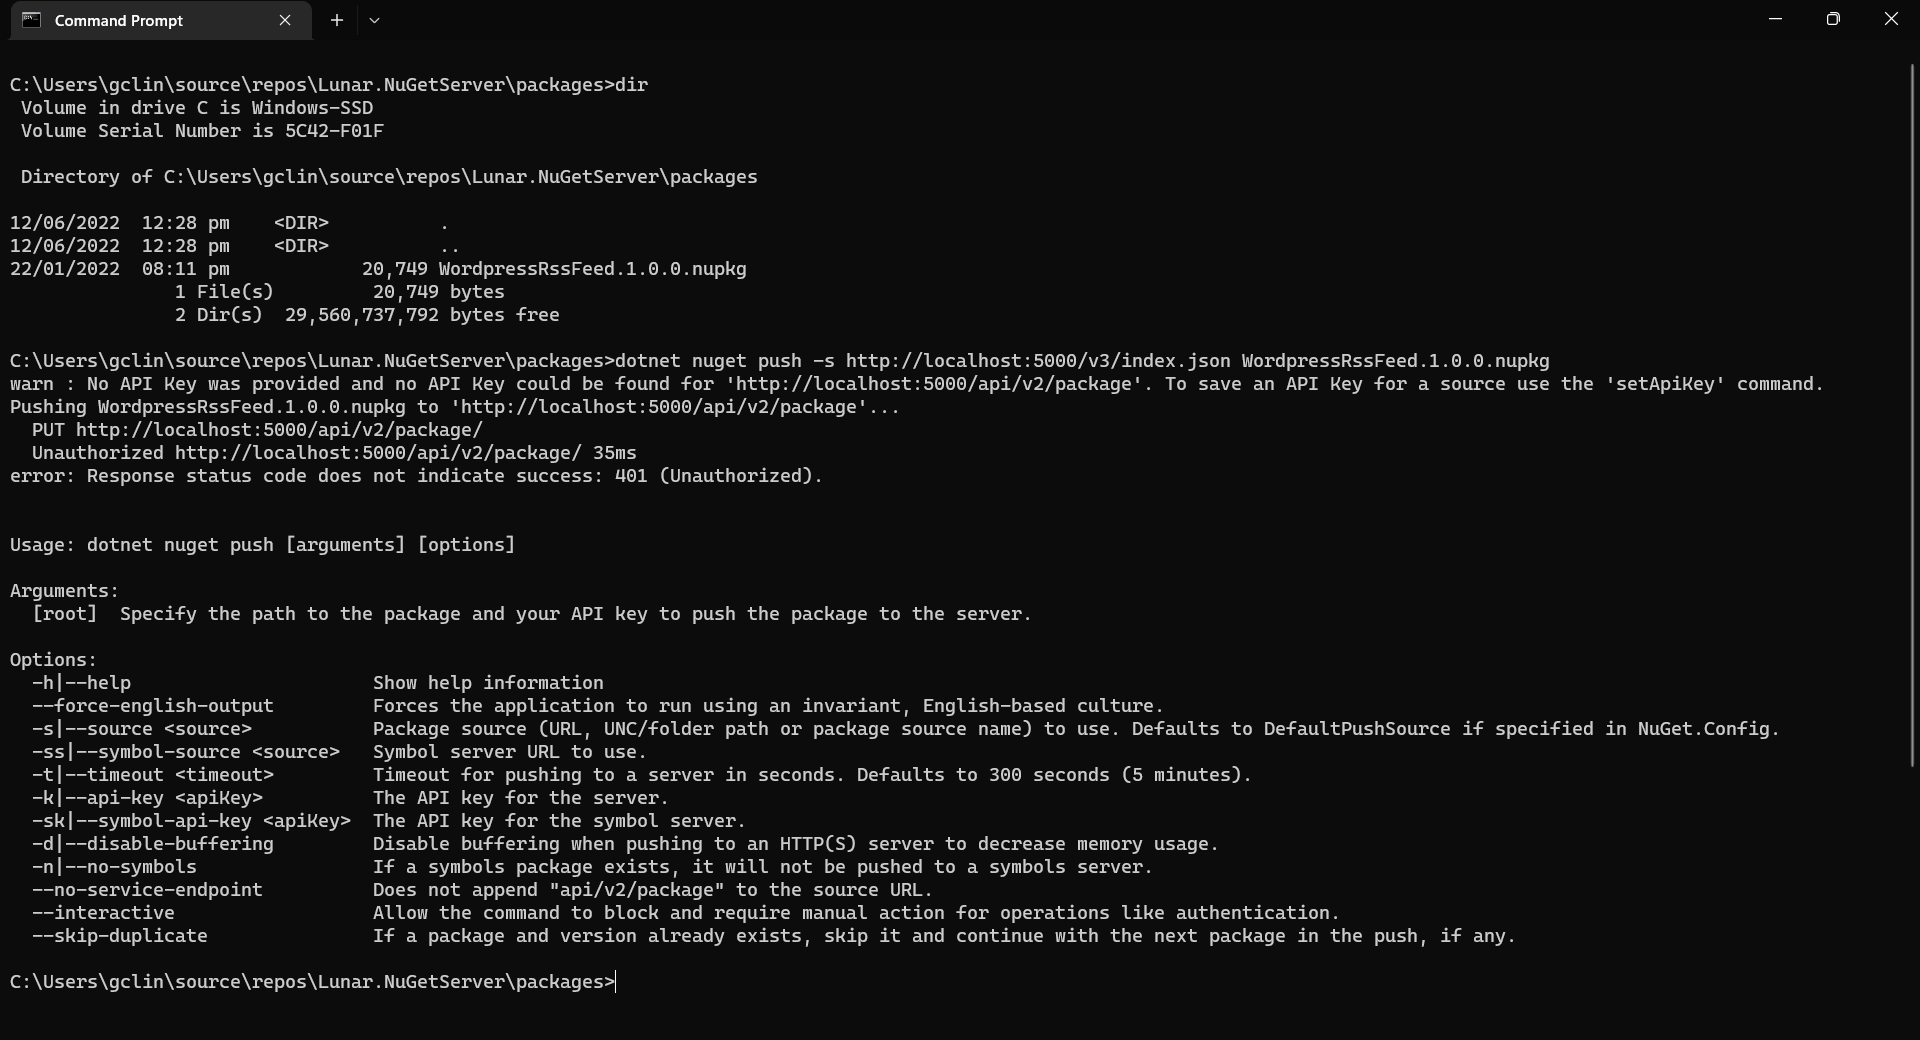
We will be rejected to do the publish, as shown in the screenshot above, if we do not provide the NUGET-SERVER-API-KEY that we defined earlier. Hence, the complete command is as follows.
dotnet nuget push -s http://localhost:5000/v3/index.json -k <NUGET-SERVER-API-KEY here> WordPressRssFeed.1.0.0.nupkg
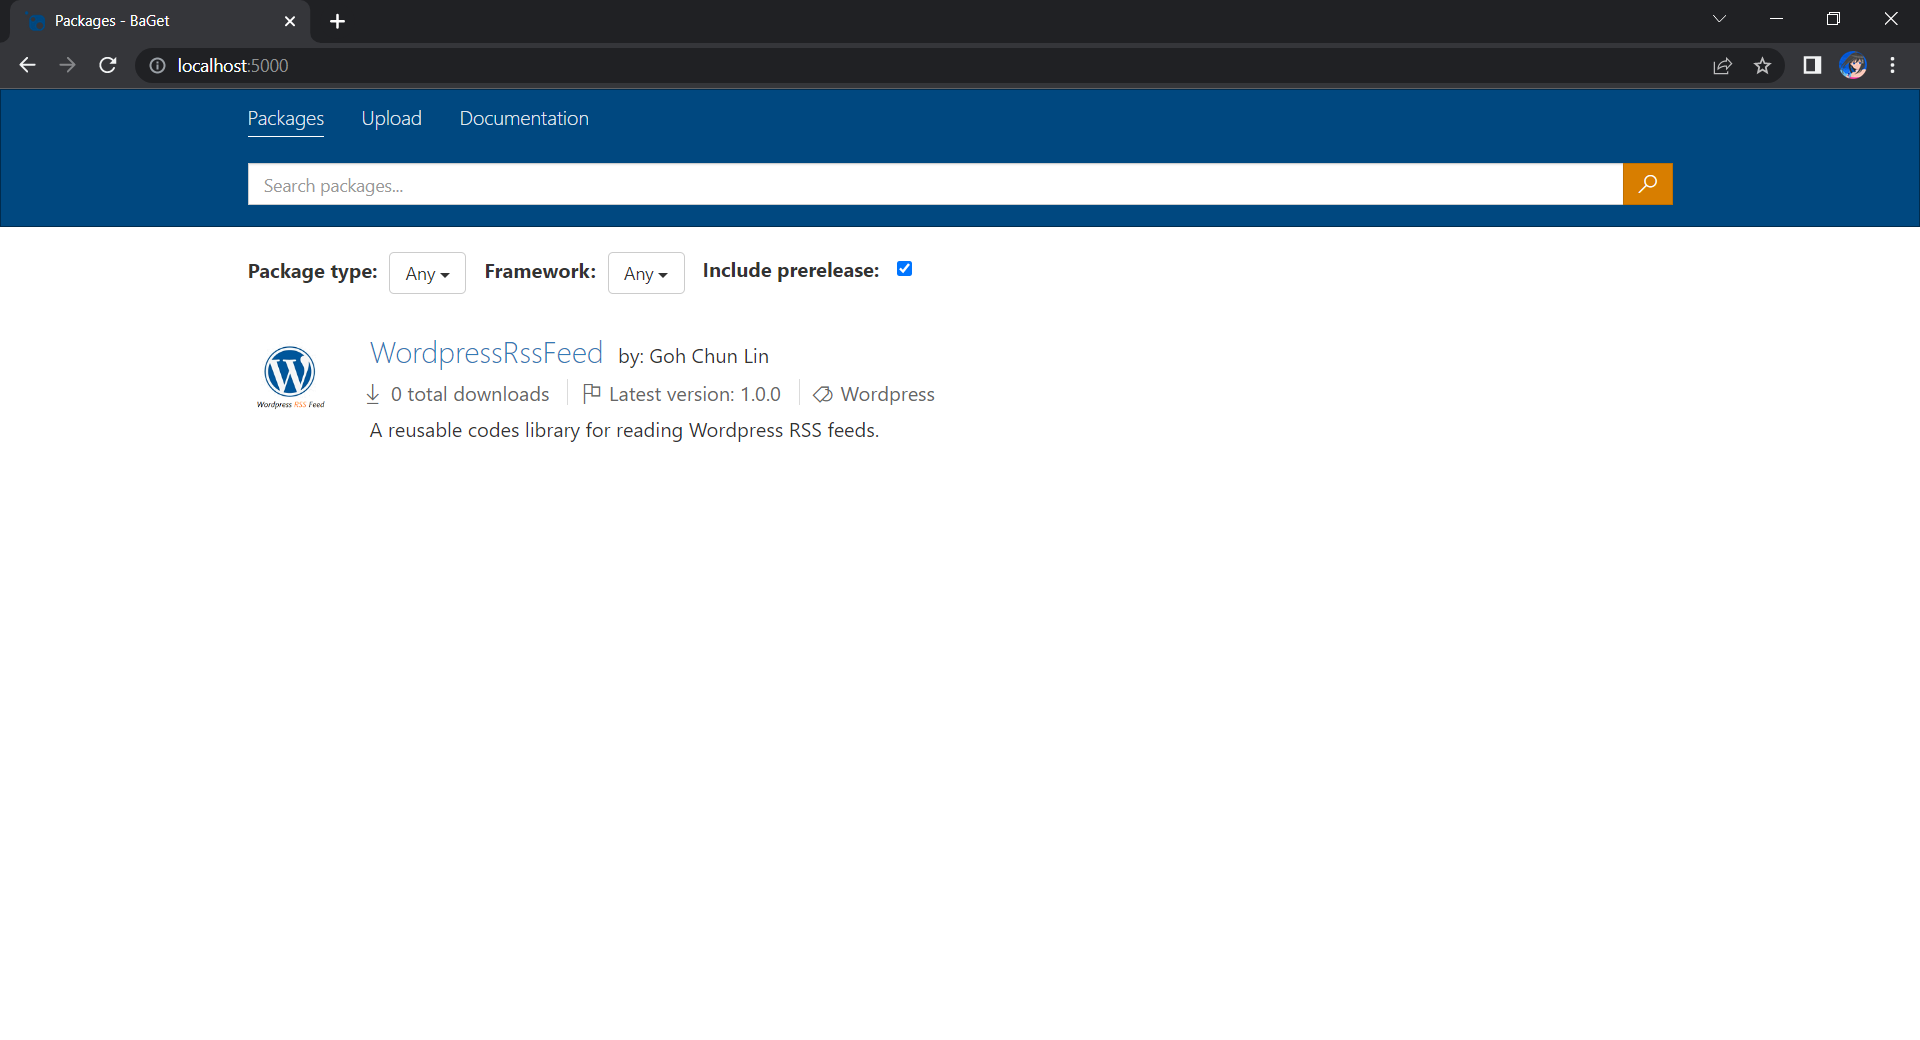
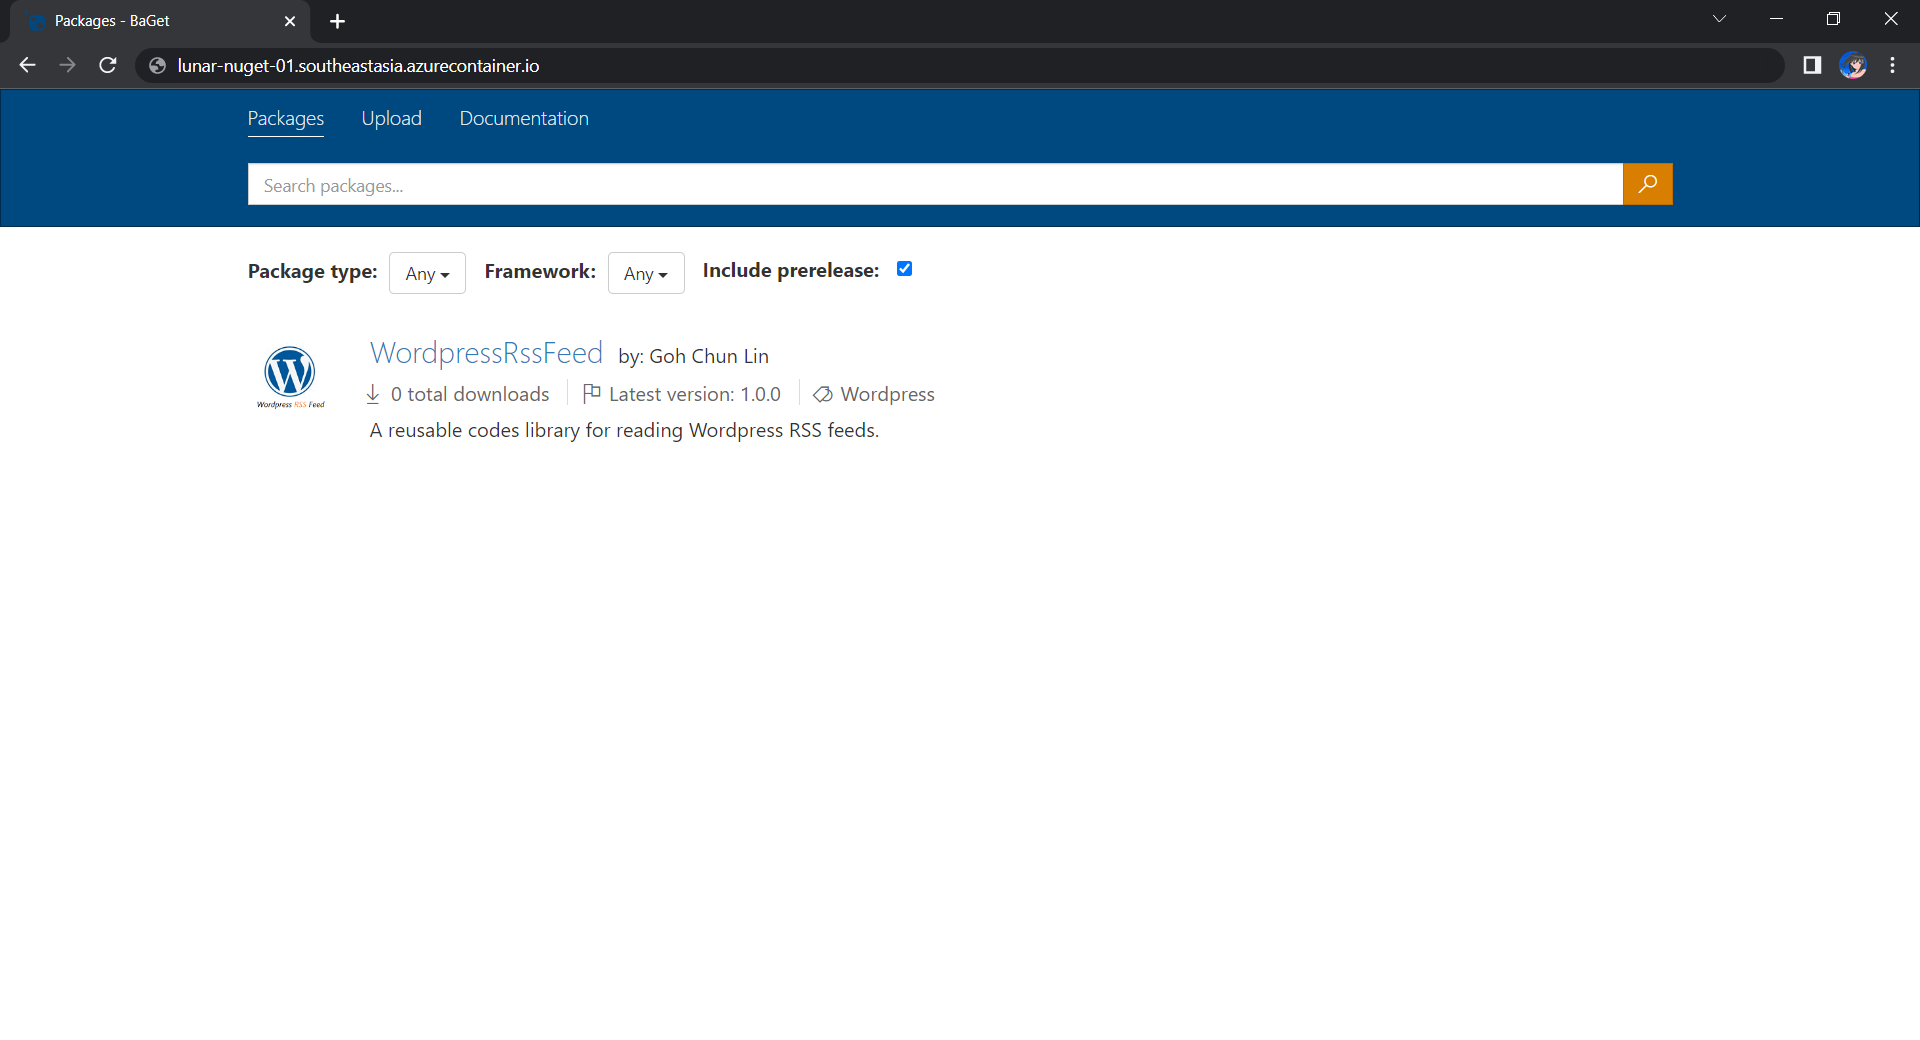
Once we have done that, we should be able to see the first package on our own NuGet server, as shown below.
Moving on to the Cloud
Instead of hosting the NuGet server locally, we can also host it on the cloud so that other developers can access too. Here, we will be using Azure Cloud Instance (ACI).
ACI allows us to run Docker containers on-demand in a managed, serverless Azure environment. ACI is currently the fastest and simplest way to run a container in Azure, without having to manage any virtual machines and without having to adopt a higher-level service.
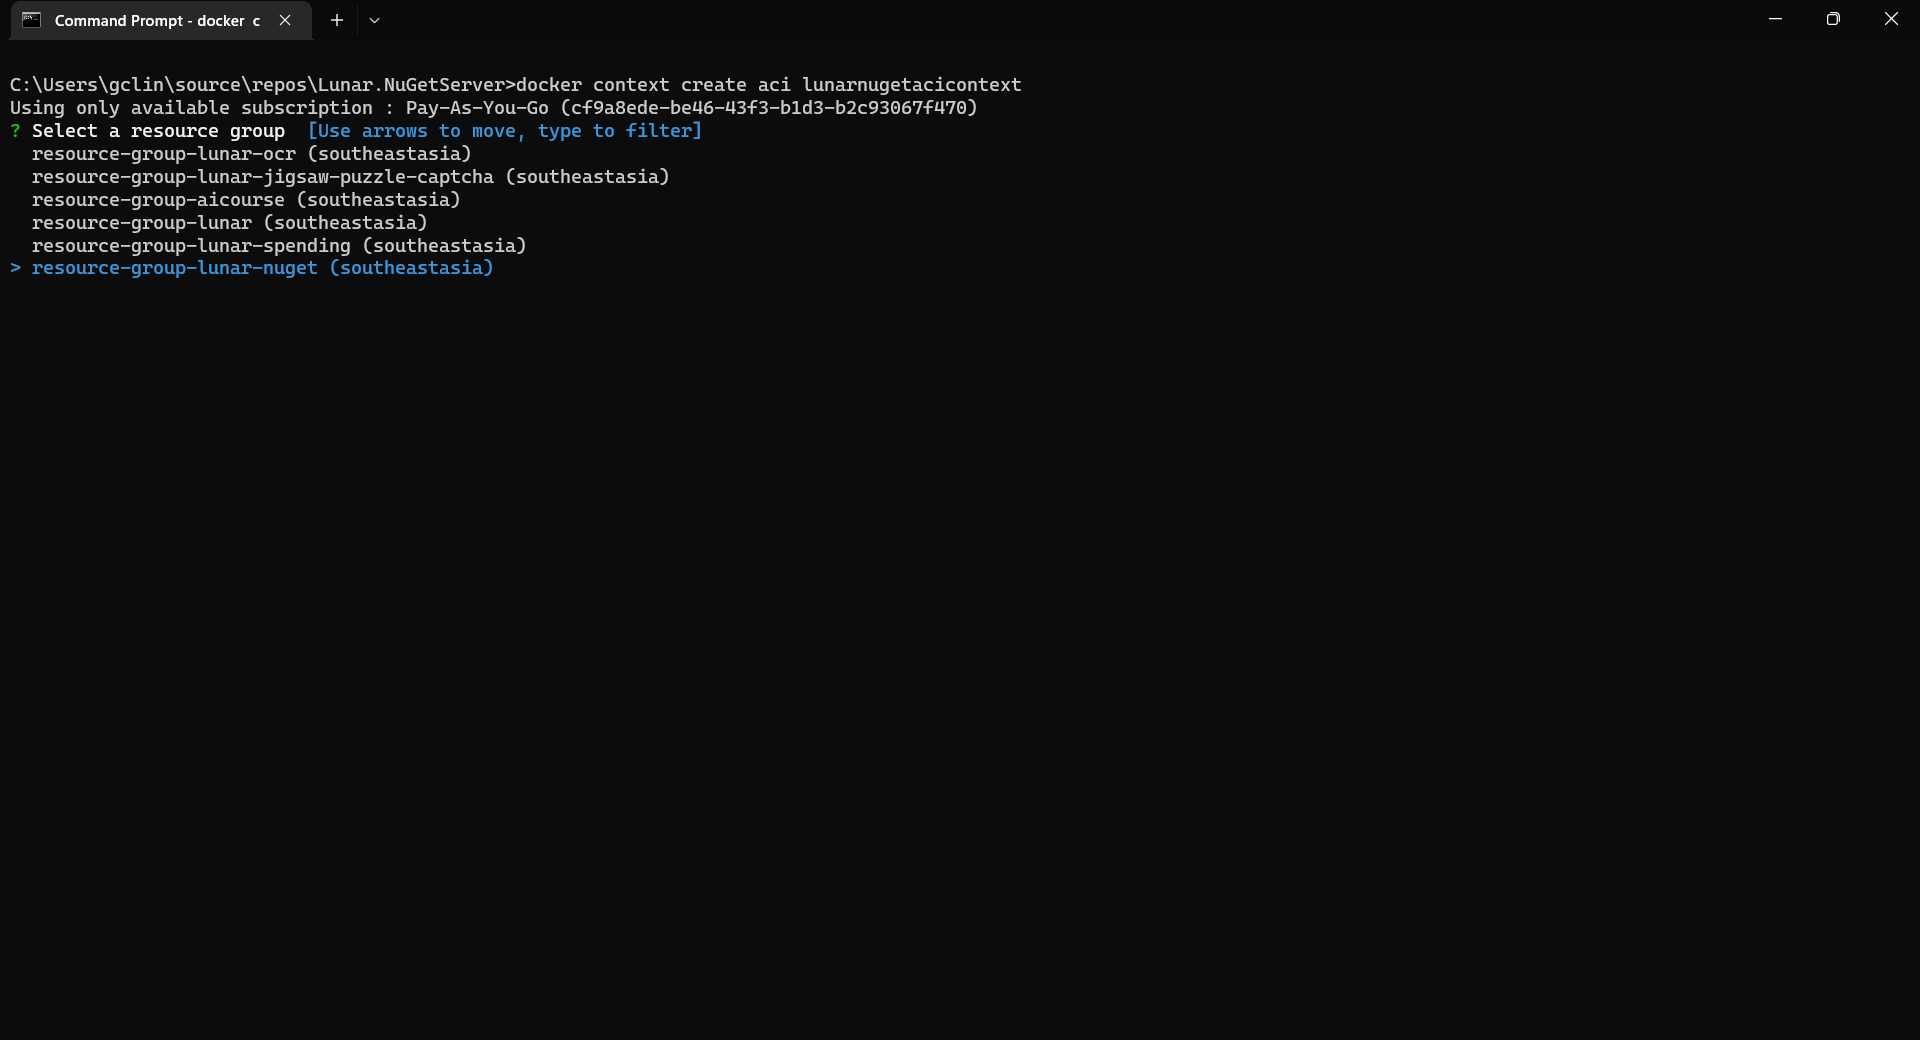
The first thing we need to have is to create a resource group (in this demo, we will be using a new resource group named resource-group-lunar-nuget) which will contain ACI, File Share, etc. for this project.
Secondly, we need to have a way to retrieve and persist state with ACI because by default, ACI is stateless. Hence, when the container is restarted all of its state will be lost and the packages we’ve uploaded to our NuGet server on the container will also be lost. Fortunately, we can make use of the Azure services, such as Azure SQL and Azure Blob Storage to store the metadata and packages.
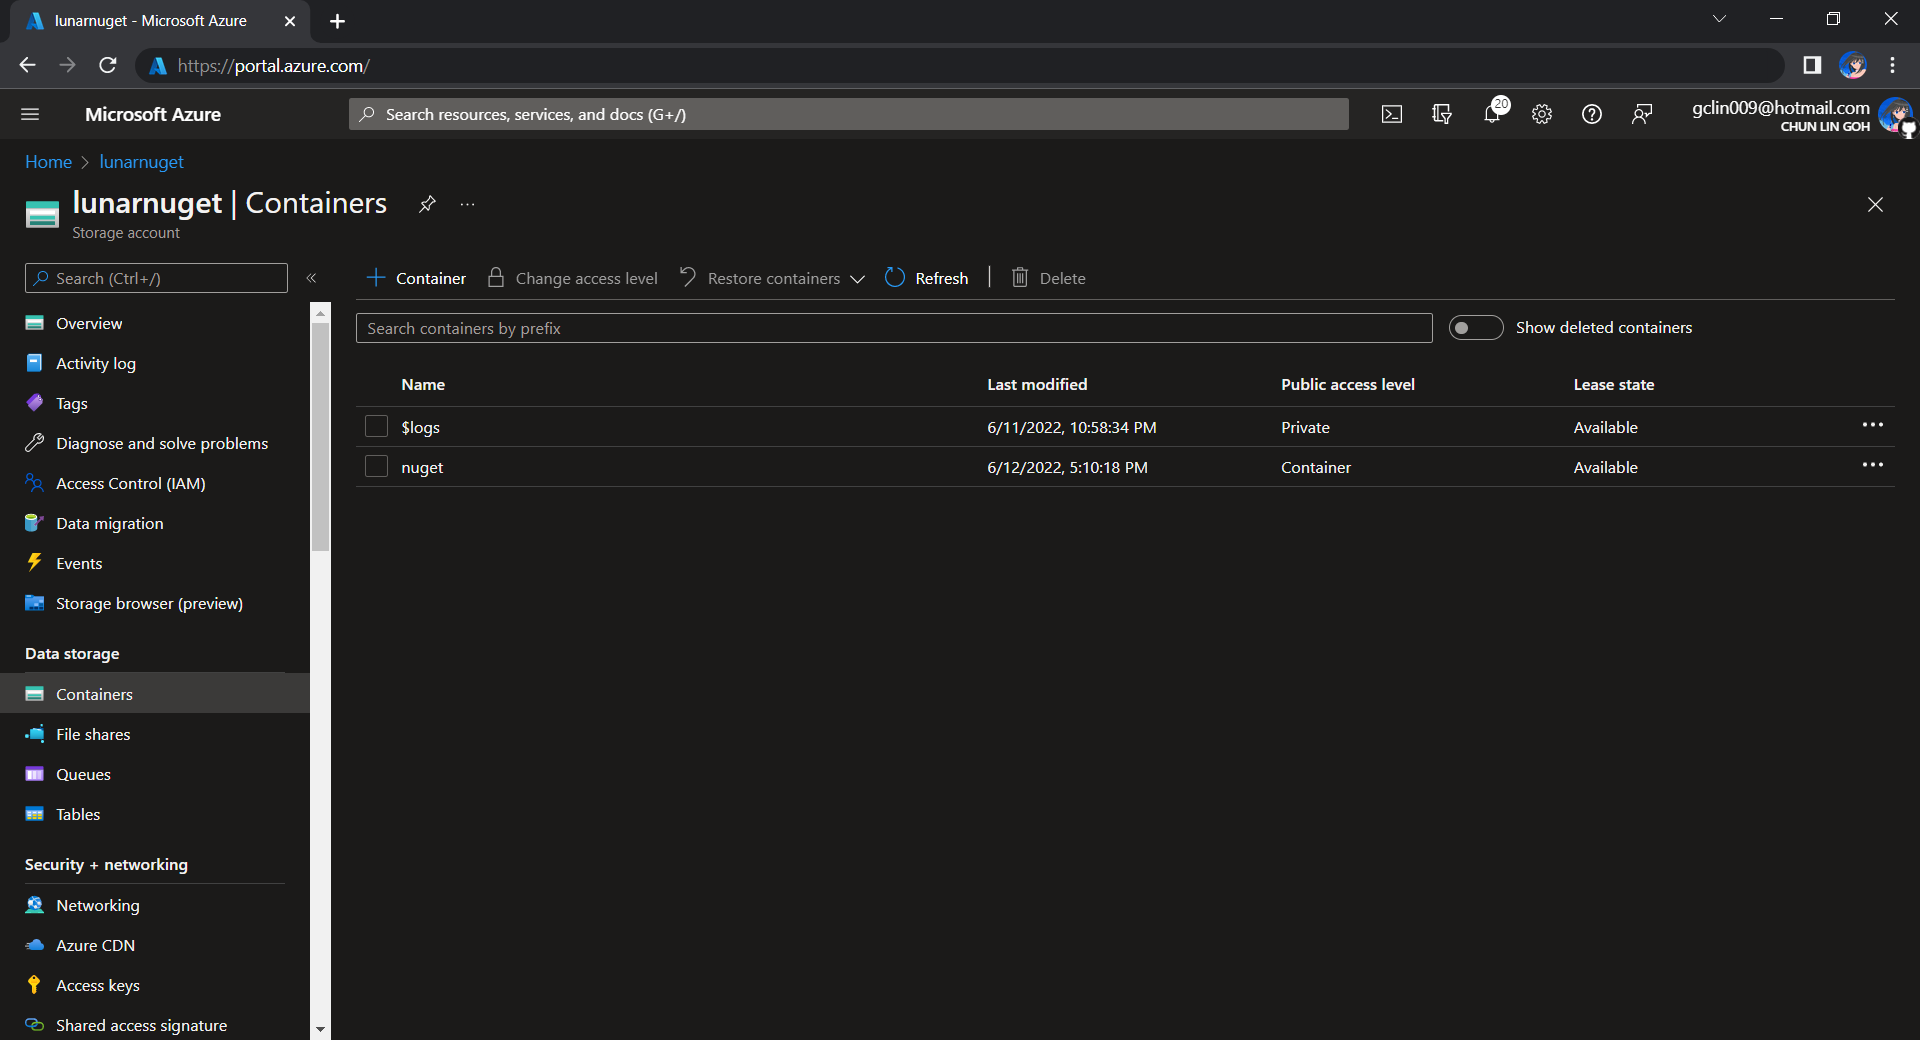
For example, we can create a new Azure SQL database called lunar-nuget-db. Then we create an empty Container named nuget under the Storage Account lunar-nuget.
Thirdly, we need to deploy our Docker container above on ACI using docker run. To do so, we first need to log into Azure with the following command.
docker login azure
Once we have logged in, we proceed to create a Docker context associated with ACI to deploy containers in ACI of our resource group, resource-group-lunar-nuget.
After the context is created, we can use the following command to see the current available contexts.
docker context ls

Next, we need to swich to use the new context with the following command because currently, as shown in the screenshot above, the context being used is default (the one with an asterisk).
docker context use lunarnugetacicontext
Fourthly, we can now proceed to create our ACI which connect to the Azure SQL and Azure Blob Storage above.
az container create \
    --resource-group resource-group-lunar-nuget \
    --name lunarnuget \
    --image loicsharma/baget \
    --environment-variables <Environment Variables here>
    --dns-name-label lunar-nuget-01 \
    --ports 80
The environment variables include the following
- ApiKey=<
NUGET-SERVER-API-KEYhere> - Database__Type=SqlServer
- Database__ConnectionString=”<Azure SQL connection string here>”
- Storage__Type=AzureBlobStorage
- Storage__AccountName=lunarnuget
- Storage__AccessKey=<Azure Storage key here>
- Storage__Container=nuget
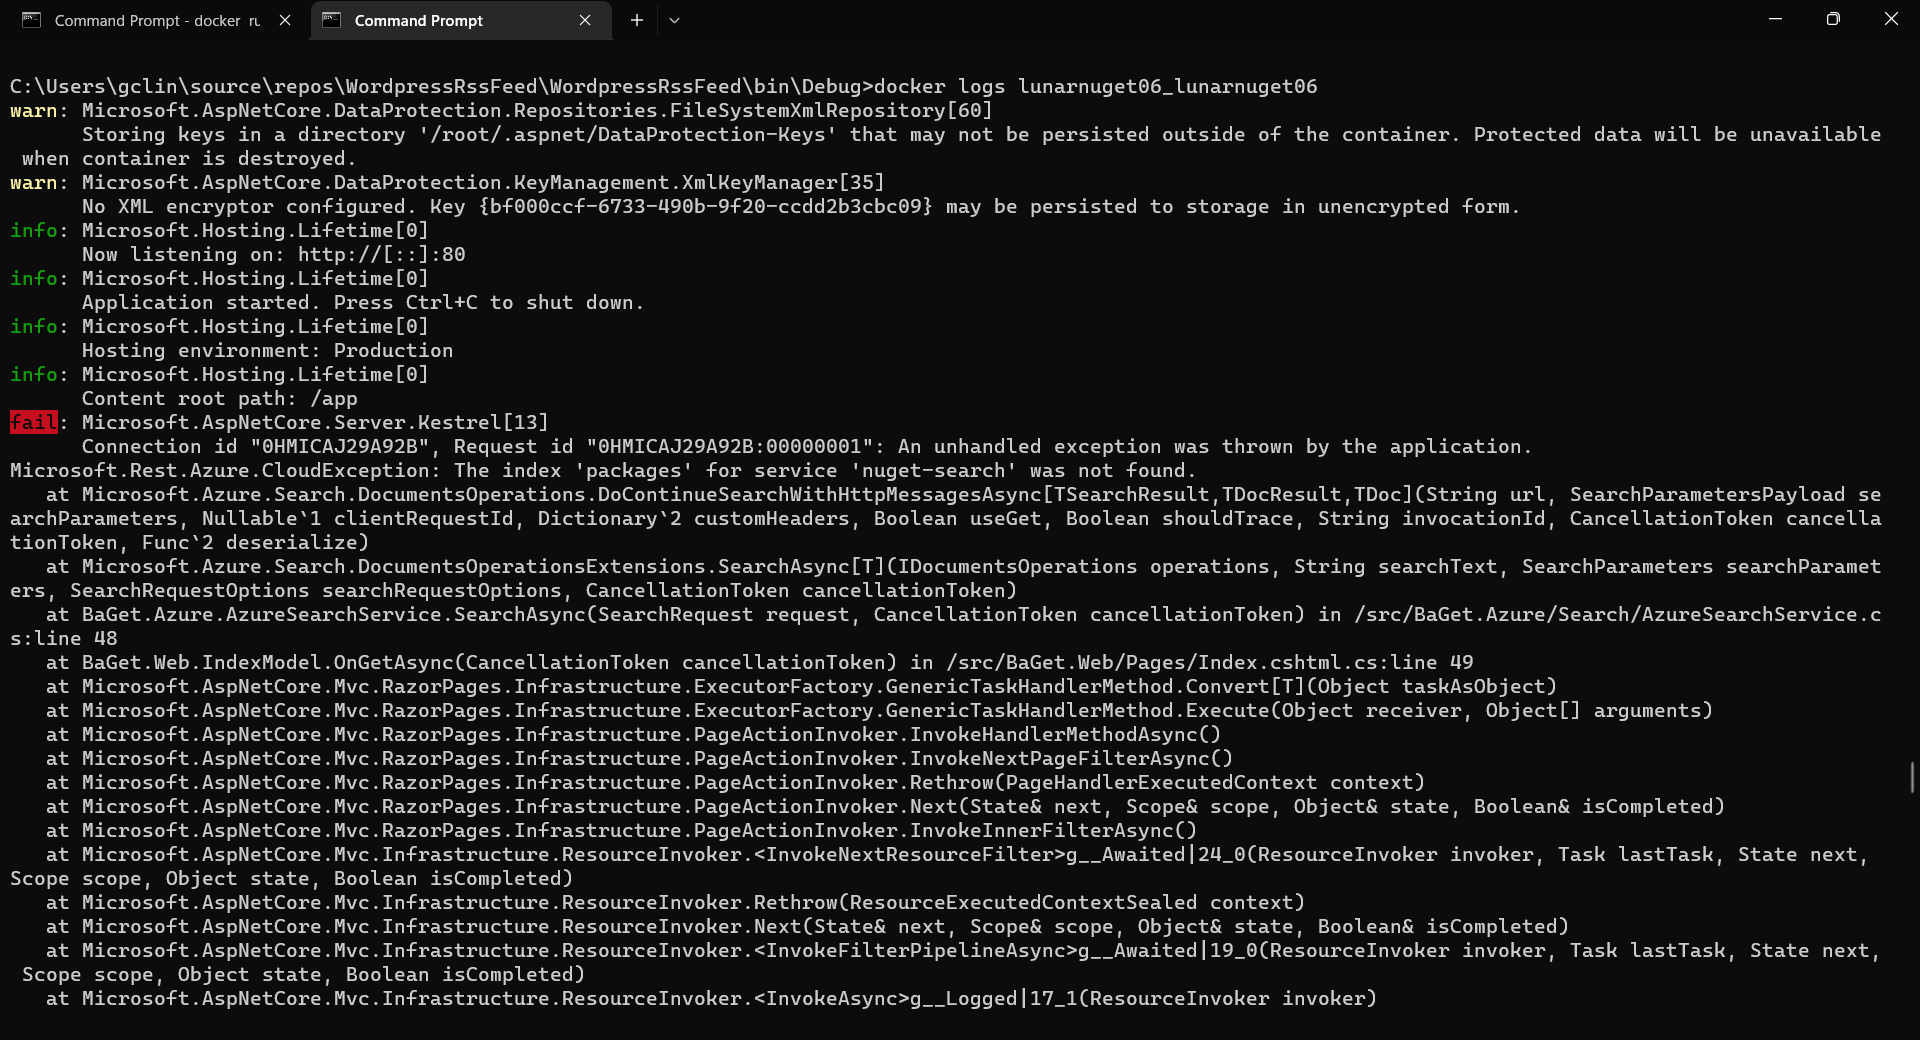
If there is no issue, after 1 to 2 minutes, the ACI named lunarnuget will be created. Otherwise, we can always use docker ps to get the container ID first and then use the following command to find out the issues if any.
docker logs <Container ID here>
docker logs.Now, if we visit the given FQDN of the ACI, we shall be able to browse the packages on our NuGet server.
That’s all for a quick setup of our own NuGet server on Microsoft Azure. =)
