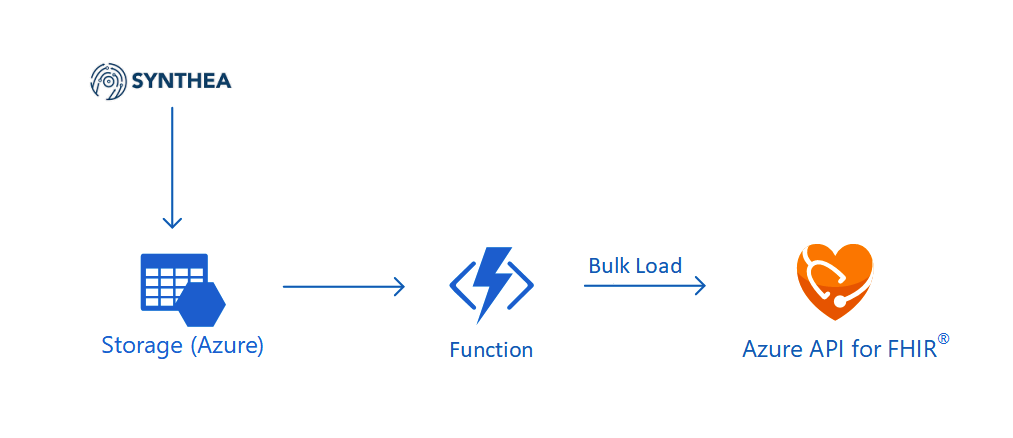
In the previous article, we talked about how to generate realistic but not real patient data using Synthea(TM) and then also how to store them securely in Azure Storage.
Setup Azure API for FHIR®
Today, we will continue the journey. The first step we need to do is to setup the Azure API for FHIR®.
The Azure API for FHIR® is a managed, standards-based, and healthcare data platform available on Azure. It enables organisations to bring their clinical health data into the cloud based on the interoperable data standard FHIR®. The reason why we choose to use it is because security and privacy features are embedded into the service. As customers, we own and control the patient data, knowing how it is stored and accessed. Hence, it’s a PaaS that enables us build healthcare data solution easily.
When we are setting up the Azure API for FHIR®, we need to specify the version of FHIR® we are going to use. Currently there are only four milestone releases of FHIR®. The latest version, R4, was released in December 2018. On Azure, we can only choose either R4 or STU3 (which is the third release). We will go for R4.
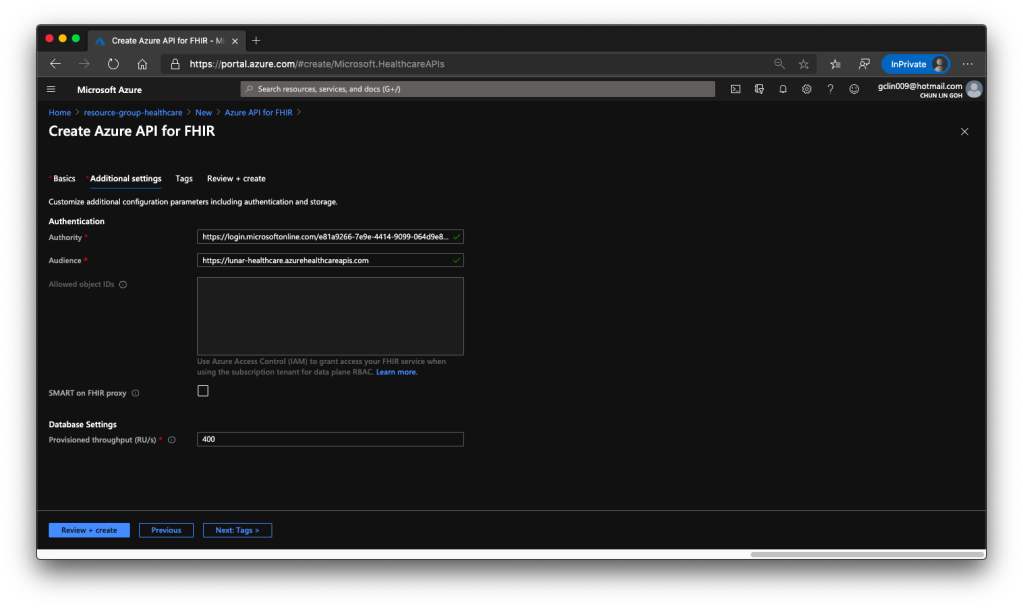
For the Authentication of the API service, we will be using Azure Access Control (IAM) which is the default option. Hence, we will use the Authority and Audience default values.
When we are setting up this API service, we also need to specify the throughput of the database which will be used to store the imported patient data later.
After we click on the button to create the API service, it will take about 5 minutes to successfully deploy it on Azure.
After we have our Azure API for FHIR® deployed, we need to configure the CORS settings as specified on the Azure Healthcare APIs documentation. The update will take about 8 minutes to complete.
Register Client Application
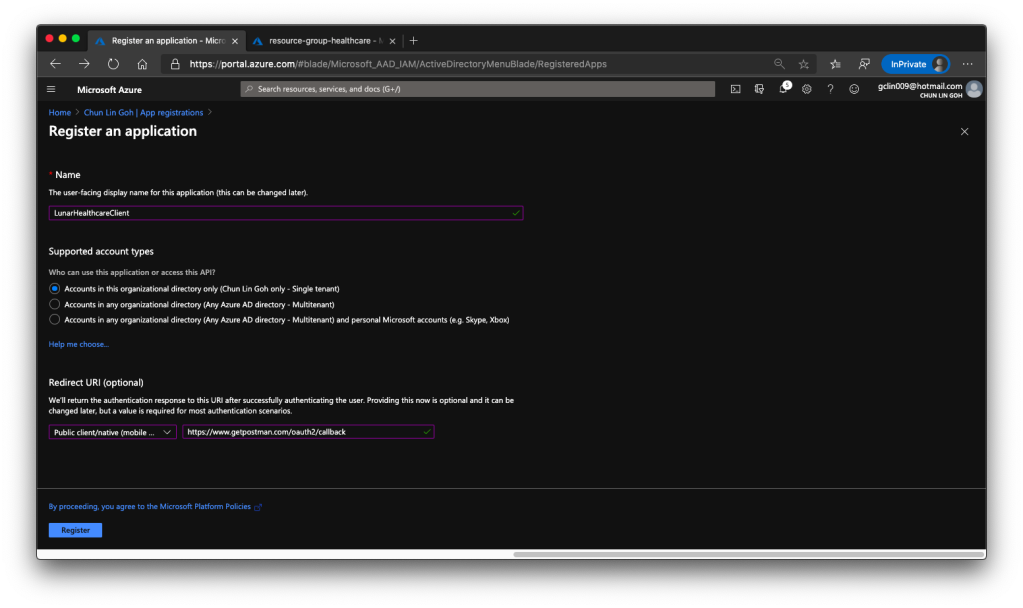
Before we continue to develop our applications which integrate with Azure API for FHIR®, we will need to have a public client application. Client application registrations are Azure Active Directory representations of applications that can authenticate and ask for API permissions on behalf of a user.
The following screenshot shows how we register the client application with a redirect URI pointing to https://www.getpostman.com/oauth2/callback which will help us to test the connectivity via Postman later.
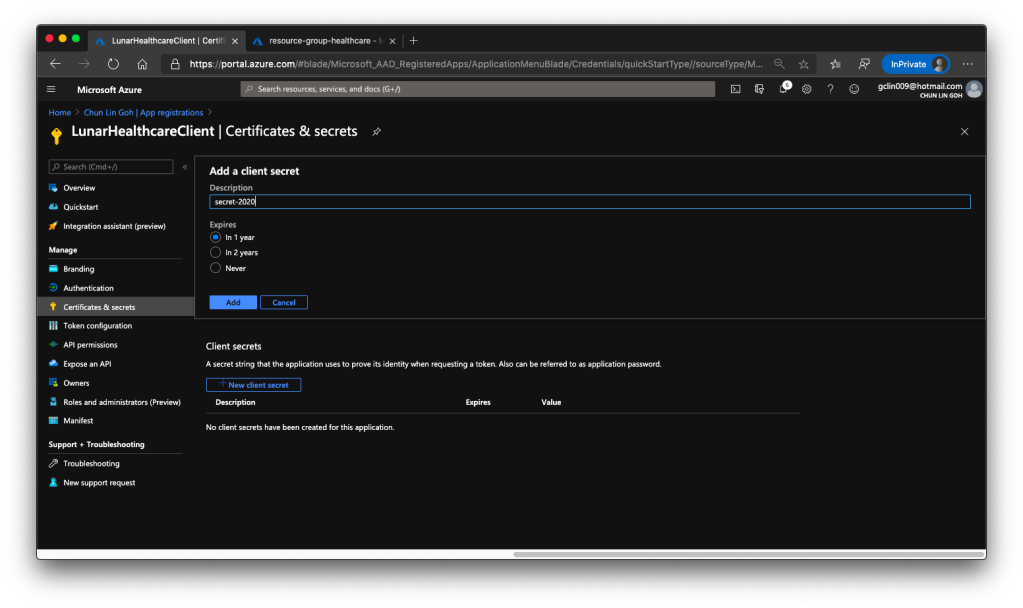
Once the client application is created we need to proceed to create a client secret, as shown in the following screenshot, so that later we can use it to request a token.
Then we have to allow this client application to access our Azure API for FHIR®. There are two things we need to do.
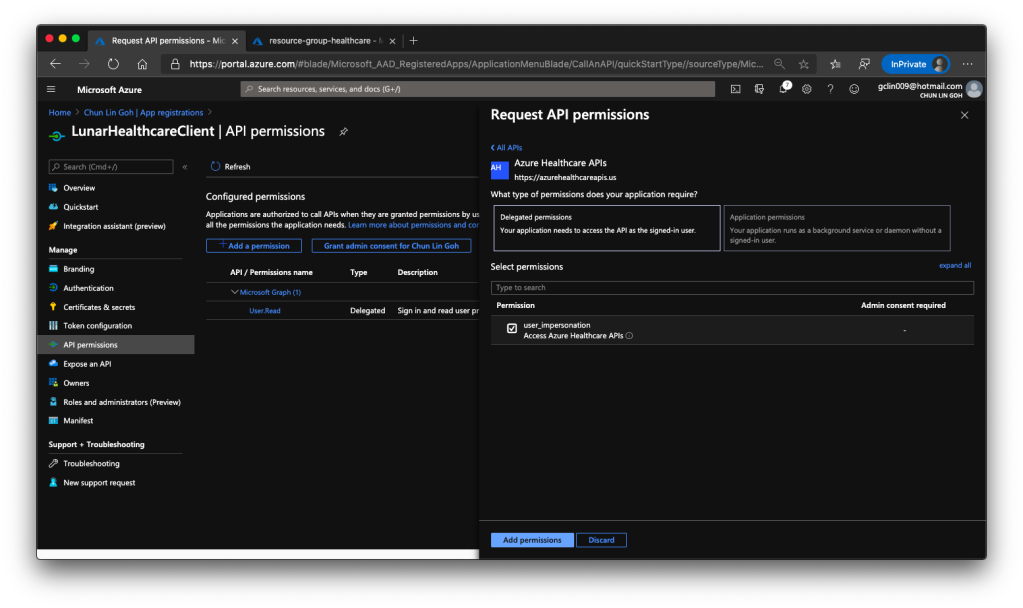
Firstly, we need to grant the client application a permission called user_impersonation from the Azure Healthcare APIs, as shown in the screenshot below.
Secondly, we need to head back to our Azure API for FHIR® to enable this client application to access it, as shown in the following screenshot.
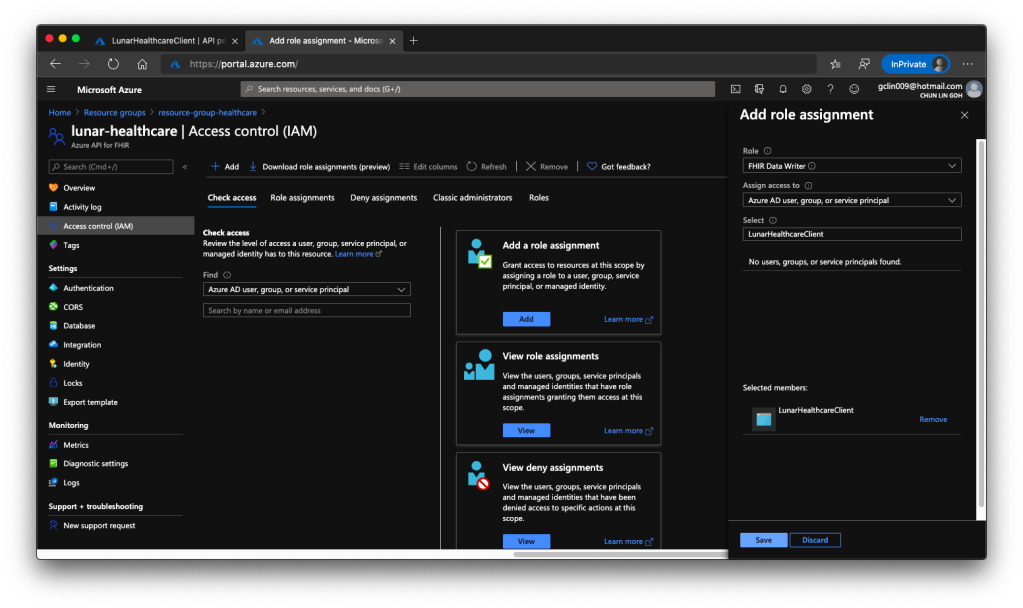
The reason we choose only “FHIR Data Writer” role is because this roles enable both read and write access to the API. Once the role is successfully added, we shall see something similar as shown in the screenshot below.

Test the API with Postman
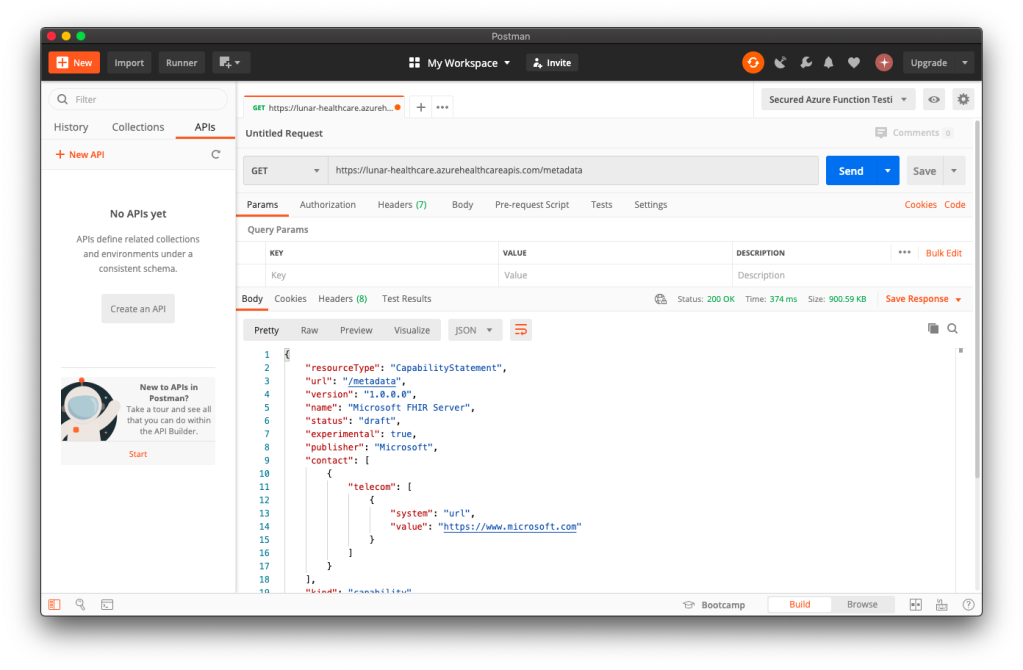
To make sure our Azure API for FHIR® is running well, we can visit its metadata link without any authentication. If it is running smoothly, we shall see something as shown in the following screenshot.
To access the patient data, we need to authenticate ourselves. In order to do so, we first need to get an access token from the client application in Azure Active Directory. We do so by making a POST request to the following URL https://login.microsoftonline.com/<tenant-id>/oauth2/token.
As shown in the following screenshot, the Tenant ID (and also Client ID) can be found at the Overview page of the client application. The resource is basically the URL of the Azure API for FHIR®.
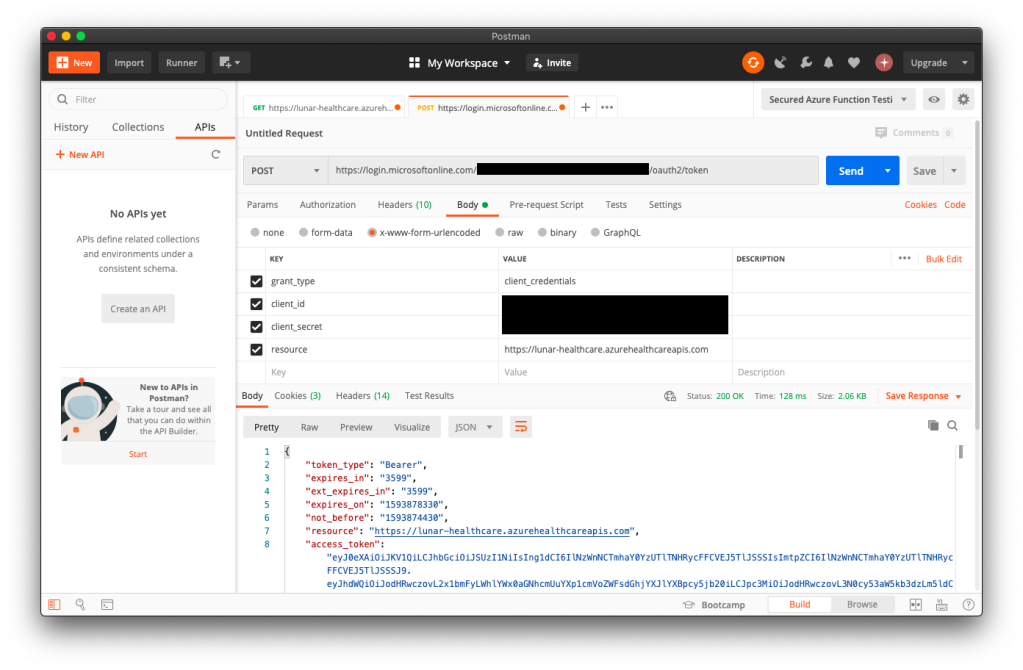
Once we have the access token, we then can access the Patient endpoint, as shown in the following screenshot.

The official Azure documentation is not clear on the steps above. Luckily, with the help from Michael Hansen, the Principal Program Manager in Microsoft Healthcare NExT, I managed to understand how this works. You can refer to our discussion on GitHub to understand more.

Import Data from Azure Storage
Now that we have the realistic but real patient data in the Azure Storage and we have the Azure API for FHIR® with a SQL database. So the next step that we need to do is pump the data into the SQL database so that other clients can consume the data through the Azure API for FHIR®. In order to do so, we will need a data importer.
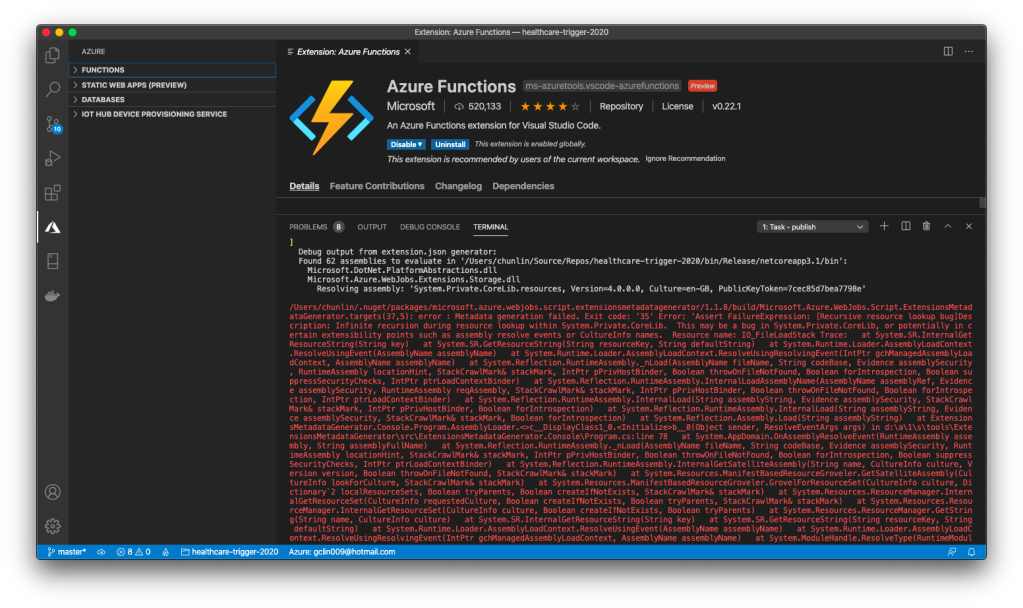
Firstly, we will create an Azure Function which will do the data import. There is an official sample on how to write this Function. I didn’t really follow the deployment steps given in the README of the project. Instead, I created a new Azure Function project in the Visual Studio and published it to the Azure. Interestingly, if I use VS Code, the deployment will fail.
In Visual Studio, we will be creating a C# function which will run whenever a new patient data is uploaded to the container. Then the same function will remove the patient data from the Azure Storage once the data is fully updated.
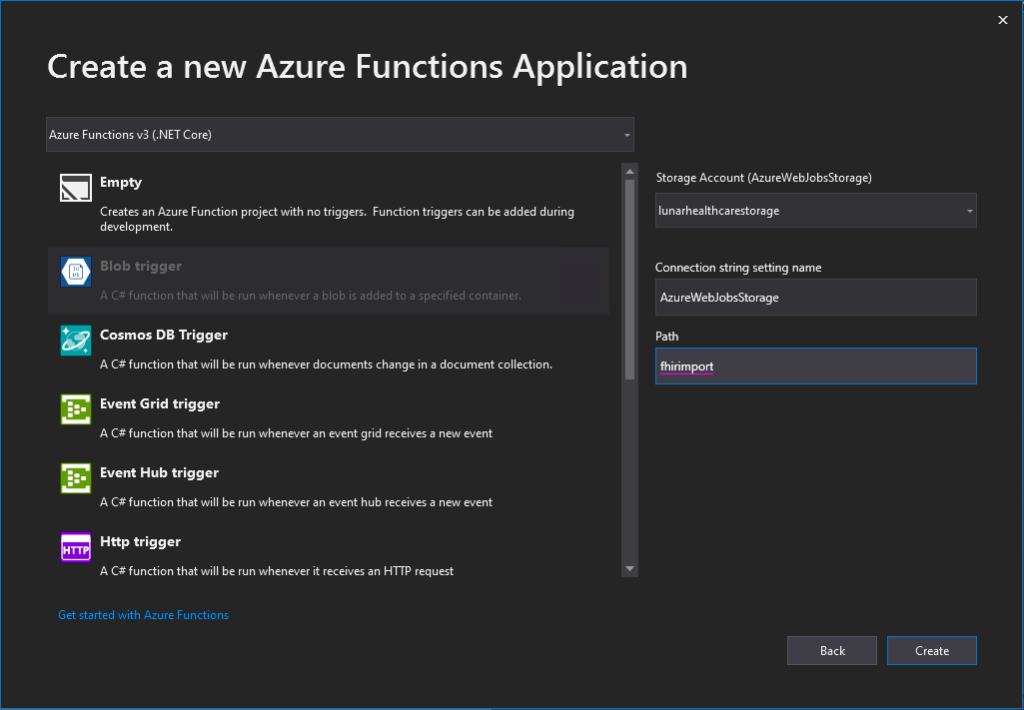
When we are creating a new Azure Function project on Visual Studio, for the convenience later, it’s better we use back the Azure Storage that we use for storing the realistic but not real patient data for our Azure Function app storage as well, as shown in the following screenshot. Thus, the Connection Setting Name will be AzureWebJobsStorage and the Path will point to the container storing our patient data (I recreated the container from syntheadata used in previous article to fhirimport in this article).
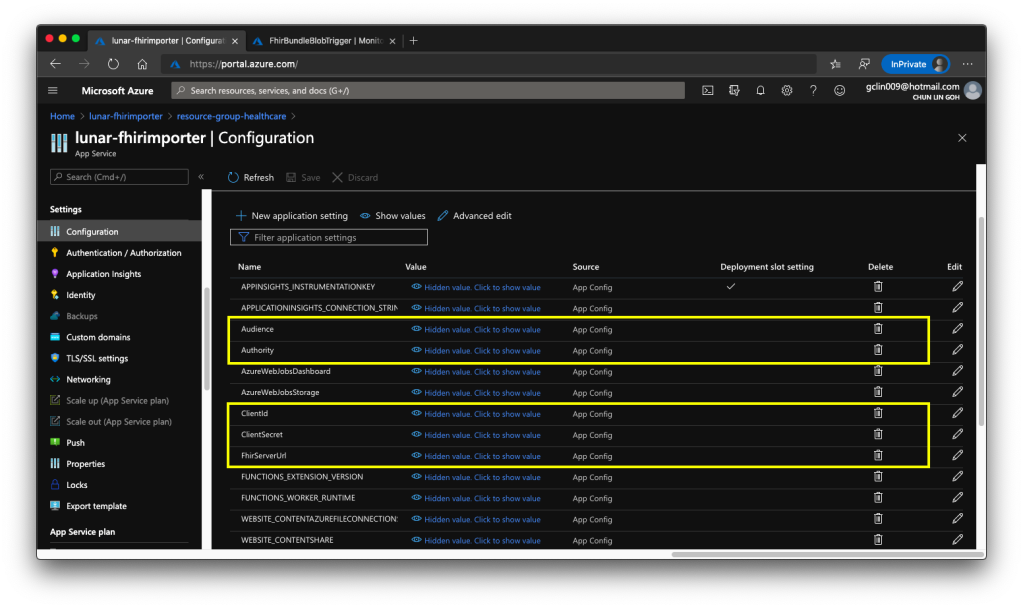
After the deployment is successful, we need to add the following application settings to the Azure Function.
- Audience: <found in Authentication of Azure API for FHIR®>
- Authority: <found in Authentication of Azure API for FHIR®>
- ClientId: <found in the Overview of the Client App registered>
- ClientSecret: <found in the Certificates & secrets of the Client App>
- FhirServerUrl: <found in the Overview of Azure API for FHIR®>
After that, in order to help us diagnose problems happening in each data import, it’s recommended to integrate Application Insights to our Azure Function. After that, we can use ILogger to log information, warnings, or errors in our Azure Function, for example
log.LogWarning($"Request failed for {resource_type} (id: {id}) with {result.Result.StatusCode}.");
Then with Application Insights, we can easily get the log information from the Azure Function in its Monitor section.

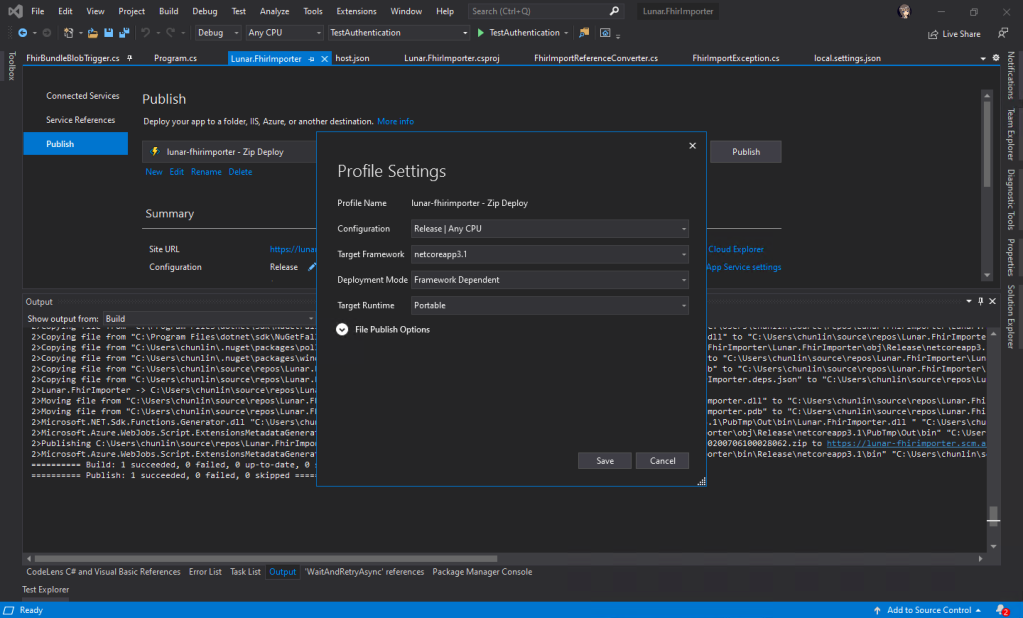
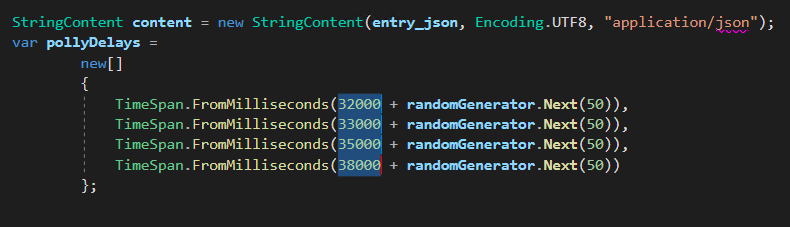
From the official sample code, I made a small change to the waiting time between each try of the request to the Azure API for FHIR®, as shown in the following screenshot.
In the FhirBundleBlobTrigger.cs, I increased the waiting time to have extra 30 seconds because the original waiting time is short that sometimes the data import will fail.
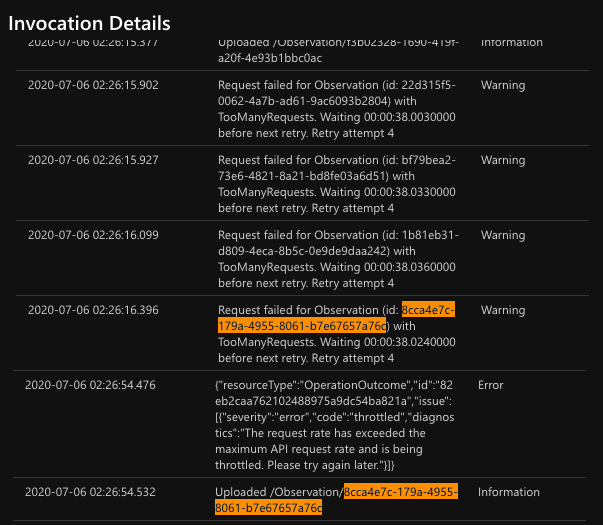
In the following screenshot, the Observation data can only be uploaded after 5 attempts. In the mean time, our request rate has exceeded the maximum API request rate and thus has been throttled too. So we cannot make calls to Azure API for FHIR® too frequent.
Now, when we make a GET request to the Patient endpoint of Azure API for FHIR® with a certain ID, we will be able to get the corresponding patient data back on Postman.
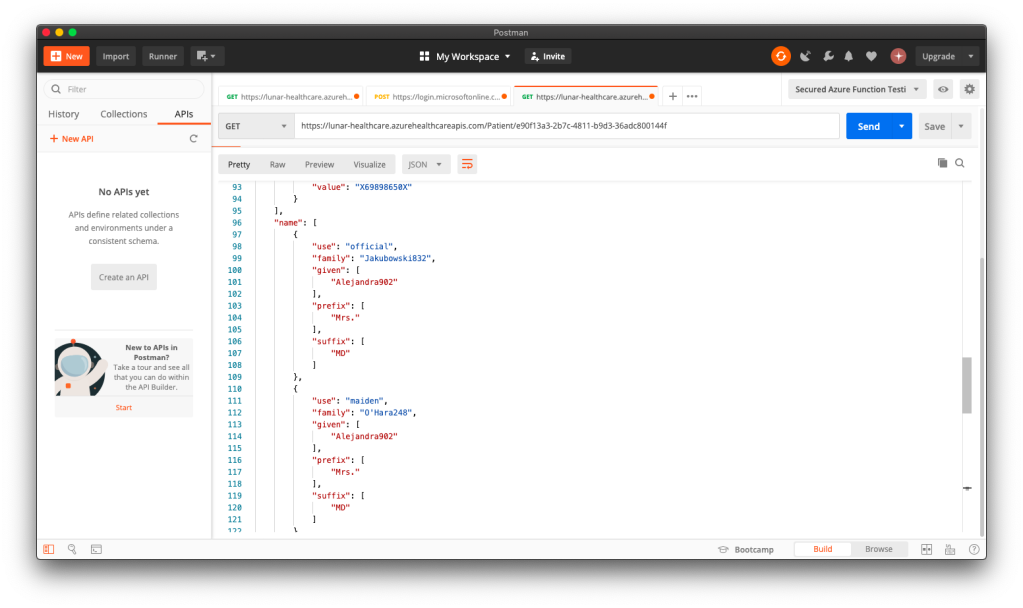
Yup, so at this stage, we have successfully imported data generated by Synthea(TM) to the Azure API for FHIR® database.

Thanks for this. Can you also write a tutorial on the ingest methods of azure FHIR. They have an HL7 converter I am not sure how to connect it to the server
Hi Prolasis,
I’m not sure about this but let me take a look. Would you mind sharing more what you would like to achieve?
Regards,
Chun Lin