
During the Labour Day holiday, I had a great evening chat with Marvin, my friend who had researched a lot about Artificial Intelligence and Machine Learning (ML). He guided me through steps setting up a simple ML experiment. Hence, I decided to note down what I had learned on that day.
The tool that we’re using is Azure Machine Learning Studio. What I had learned from Marvin is basically creating a ML experiment through drag-and-dropping modules and connecting them together. It may sound simple but for a beginner like me, it is still important to understand some key concepts and steps before continuing further in the ML field.
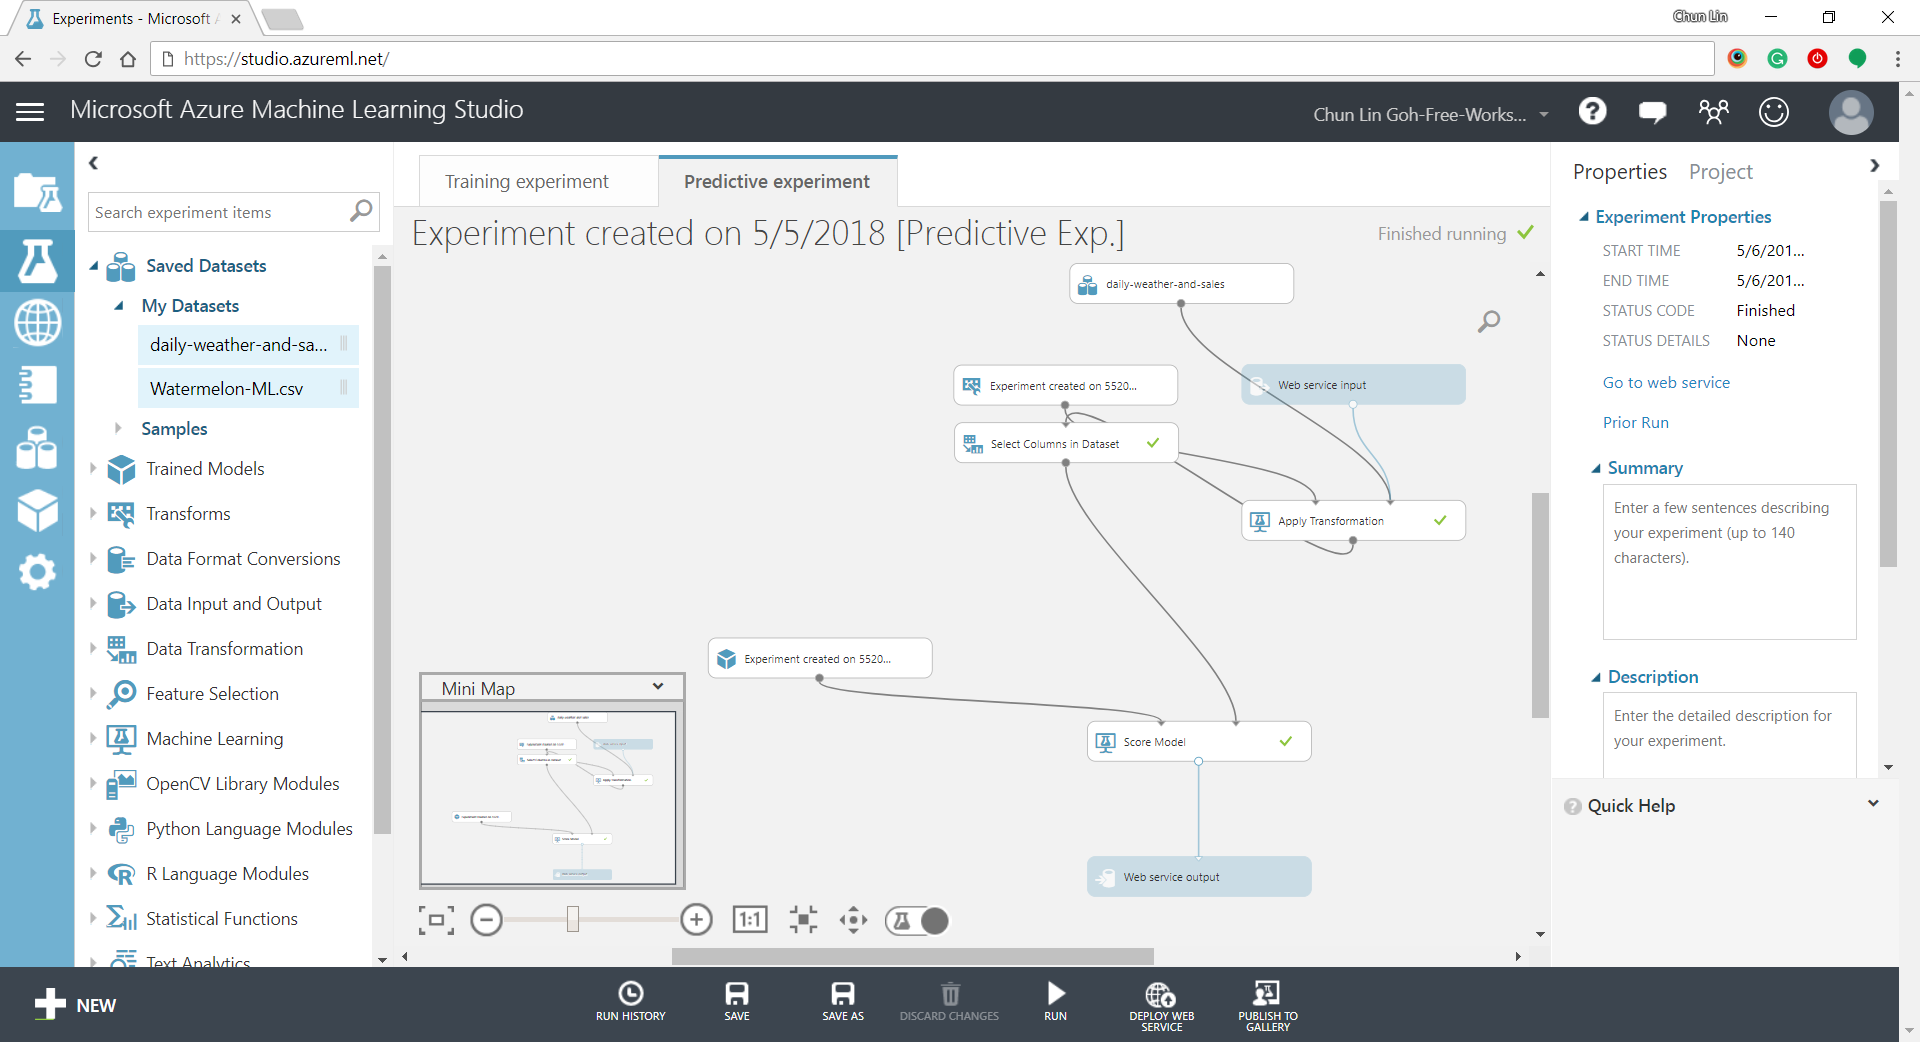
Azure ML Studio
Azure ML Studio is a tool for us to build, test, and deploy predictive analytics on our data. There is a detailed diagram about the capability of the tool, which can be downloaded here.

Step 0: Defining Problem
Before we began, we need to understand why we are using ML for?
Here, I’m helping a watermelon stall to predict how many watermelon they can sell this year based on last year sales data.
Step 1: Preparing Data
As shown in the diagram above, the first step is to import the data into the experiment. So, before we can even start, we need to make sure that we have at least a handful of data points.

Step 2: Importing Data to ML Studio
With the data points we now have, we then can import them to ML Studio as a Dataset.

Step 3: Preprocessing Data
Firstly, we need to perform a cleaning operation so that missing data can be handled properly without affecting our results later.
Secondly, we need to “Select Columns in Dataset” so that only selected columns will be used in the subsequent operations.
Step 4: Splitting Data
This step is to help us to separate data into training and testing sets.
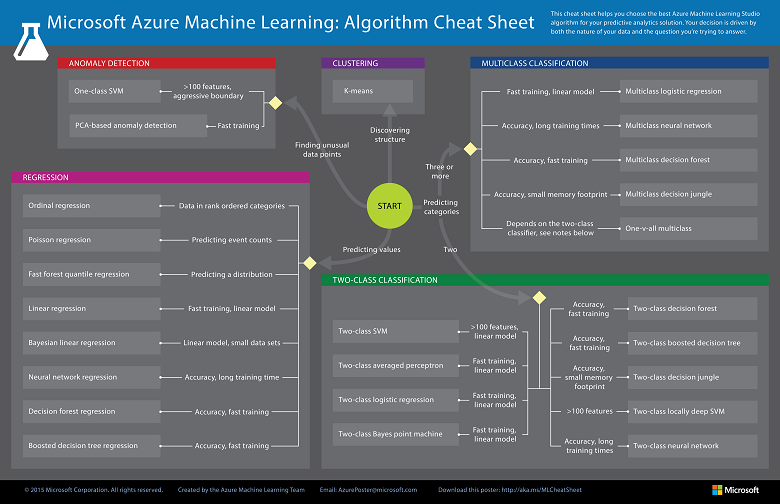
Step 5: Choosing Learning Algorithm
Since we are now using the model to predict number of watermelons the stall can sell, which is a number, we’ll use Linear Regression algorithm, as recommended. There is a cheat sheet from Microsoft telling us which algorithm we need to choose based on different scenarios. You can also download it here.
Step 6: Partitioning and Sampling
Sampling is an important tool in machine learning because it reduces the size of a dataset while maintaining the same ratio of values. If we have a lot of data, we might want to use only the first n rows while setting up the experiment, and then switch to using the full dataset when you build our model.
Step 7: Training
After choosing the learning algorithm, it’s time for us to train the data.
Since we are going to predict the number of watermelons sold, we will select the column, as shown in the following screenshot.

Step 8: Scoring
Do you still remember that we split our data into two sets in Step 4 above? Now, we need to connect output from Split Data module and output from Train Data module to the Score module as inputs. Doing this step is to score prediction for our regression model.
Step 9: Evaluating
We finally have to generate scores over our training data, and evaluate the model based on the scores.
Step 10: Deploying
Now that we’ve completed the experiment set up, we can deploy it as a predictive web service.
With that deployed, we then can easily predict how many watermelons can be sold on a future date, as shown in the screenshot below.

Conclusion
This is just the very beginning of setting up a ML experiment on Azure ML Studio. I am still very new to this AI and ML stuff. If you spot any problem in my notes above, please let me know. Thanks in advance!
References:
- Marvin Heng
- Machine learning tutorial: Create your first data science experiment in Azure Machine Learning Studio
KOSD, or Kopi-O Siew Dai, is a type of Singapore coffee that I enjoy. It is basically a cup of coffee with a little bit of sugar. This series is meant to blog about technical knowledge that I gained while having a small cup of Kopi-O Siew Dai.
