
This morning, my friend messaged me a Chinese article about how to do clustering with Linux + .NET Core + Nginx. As we are geek first, we are going to try it out with different approaches. While my friend was going to set up on RaspberryPi, as a developer who loves playing with Microsoft Azure, I proceed to do load balancing of Azure Web Apps in different regions with Nginx.
Setup Two Azure Web Apps
Firstly, I deployed the same ASP .NET Core 2 web app to two different Azure App Services. One of them is deployed at Australia East; another one is deployed at South India (Huuray, Microsoft opens Azure India to the world in April 2017!).
The homepage of my web app, Index.cshtml, is as follows to display the information in Request.Headers.
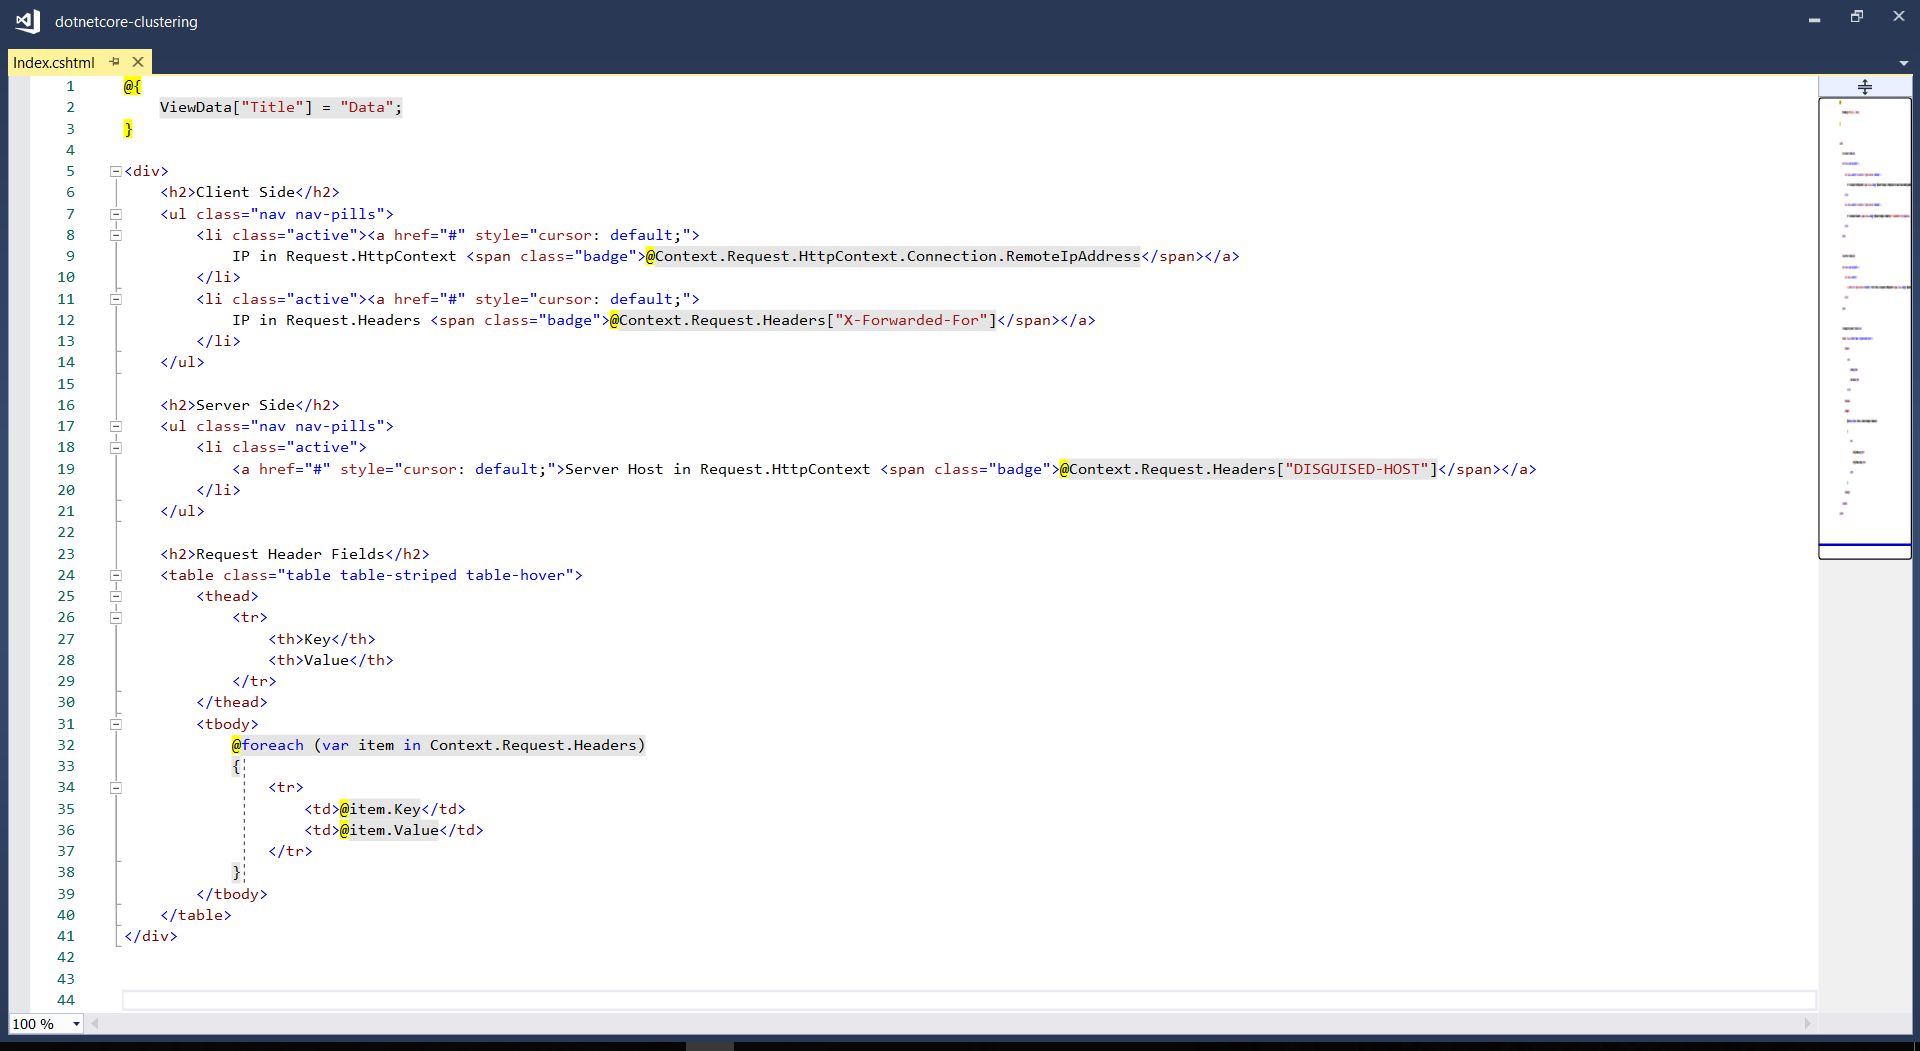
In the code above, Request.Headers[“X-Forwarded-For”] is used to get the actual visitor’s IP address instead of the IP address of the Nginx load balancer. To allow this to work, we need to have the following codes added in Startup.cs.
app.UseForwardedHeaders(new ForwardedHeadersOptions
{
    ForwardedHeaders =
        ForwardedHeaders.XForwardedFor | ForwardedHeaders.XForwardedProto
});

Configure Linux Virtual Machine on Azure
Secondly, as described in the Chinese article mentioned above, the Nginx needs to be set up on a Linux server. The OS used in my case is Ubuntu 17.04.

The Authentication Type that was chosen is the SSH Public Key option. Hence, we need to create public and private keys using OpenSSL tool. There is a tutorial from Microsoft showing steps on how to generate the keys using Git Bash and Putty.
Installing Nginx
After that, I installed Nginx by using the following command.
sudo apt-get install nginx
After installing it, in order to test whether Nginx is installed properly, I visited the public IP address of the virtual machine. However, it turns out that I couldn’t visit the server because the port 80 by default is not opened on the virtual machine.
Hence, the next step I need to do is opening port using Azure Portal by adding a new inbound security rule for the port 80 and then associate it to the subnet of the virtual network of the virtual machine.
Then when I revisited the public IP of the server, I could finally see the “Welcome to Nginx” success page.

Mission: Load Balancing Azure Web Apps with Nginx
As the success page mentioned, further configuration is required. So, we need to edit the configuration file by first opening it up with the following command.
sudo nano /etc/nginx/sites-available/default
The first section that I added is the Cache Configuration.
# Cache configuration
proxy_temp_path /var/www/proxy_tmp;
proxy_cache_path /var/www/proxy_cache levels=1:2 keys_zone=my_cache:20m inactive=60m max_size=500m;
The proxy_temp_path is the path to the directory where the temporary files should be stored at when the response from the upstream server cannot fit into the configured buffers.
The proxy_cache_path is about in which directory the cache should be stored at. The levels=1:2 means that the cache will be stored in a single-character directory with a two-character subdirectory. The keys_zone parameter defines a my_cache cache zone which can store 20MB of keys at most but with the maximum size of the actual data to be 500MB. The inactive=60m means the maximum inactive time cache can be stored, which is 60 minutes in this case.
Next, upstream needs to be defined as follows.
# Cluster sites configuration
upstream backend {
    server dotnetcore-clustering-web01.azurewebsites.net fail_timeout=30s;
    server dotnetcore-clustering-web02.azurewebsites.net fail_timeout=30s;
}
For the default server configuration, we need to make a few modifications to it.
# Default server configuration
#
server {
    listen 80 default_server;
    listen [::]:80 default_server;
    server_name localhost;

    ...

    location / {
        proxy_pass http://backend;
        proxy_set_header X-Forwarded-For $proxy_add_x_forwarded_for;
        try_files $uri $uri/ =404;
    }
}
Now, we just need to restart the Nginx with the following command.
sudo service nginx restart
Then when we visit the Ubuntu server again, we will realize that we sort of able to reach Azure Web Apps but not really so because it says 404!

Troubleshooting 404 Error
According to another article which is written by Issac Lázaro, he said this was due to the fact that Azure App Service uses cookies to do ARR (Application Request Routing), hence we need to have the Ubuntu server to pass the header to the web apps by modifying our Nginx configuration to the following.
# Cluster sites configuration
upstream backend {
    server localhost:8001 fail_timeout=30s;
    server localhost:8002 fail_timeout=30s;
}
...

server {
    listen 8001;
    server_name web01;

    location / {
        proxy_set_header Host dotnetcore-clustering-web01.azurewebsites.net;
        proxy_pass http://dotnetcore-clustering-web01.azurewebsites.net;
    }
}

server {
    listen 8002;
    server_name web02;

    location / {
        proxy_set_header Host dotnetcore-clustering-web02.azurewebsites.net;
        proxy_pass http://dotnetcore-clustering-web02.azurewebsites.net;
    }
}
Then when we refresh the page, we shall see the website is loaded correctly with the content will be delivered from either web01 or web02.

Yup, that’s all about setting up a simple Nginx to load balance multiple Azure Web Apps. You can refer to the following articles for more information about Nginx and load balancing.
References
- How to open ports to a virtual machine with the Azure portal
- Can’t start Nginx – Job for nginx.service failed
- Linux+.NetCore+Nginx搭建集群
- Understanding Nginx HTTP Proxying, Load Balancing, Buffering, and Caching
- Module ngx_http_upstream_module
- How To Set Up Nginx Load Balancing with SSL Termination
